I’m so excited to share these photos with you guys! I’m publishing this just under the wire of the One Room Challenge deadline! You better believe I needed every last second of these six weeks. The kitchen is central to every home and this challenge really got me to dive in and finish so many projects I’d started. This space really is the heart of the house with the main bathroom, backyard, and stairs all located off of this room. It’s the main thoroughfare and the most used space!
And it’s looking really good now, y’all!

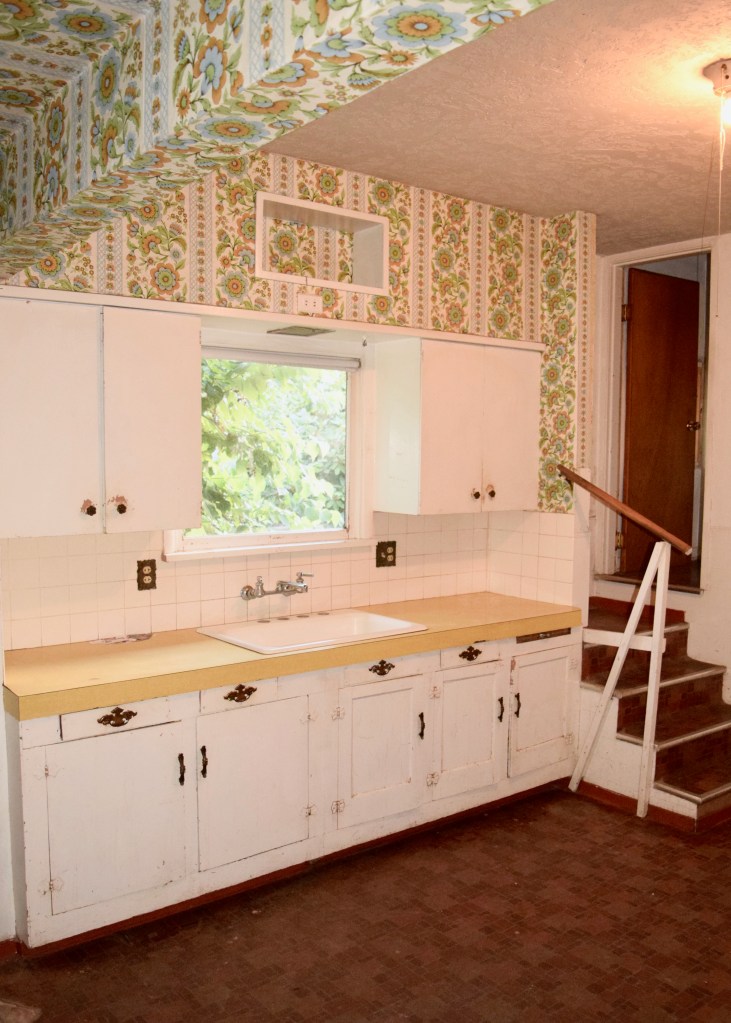
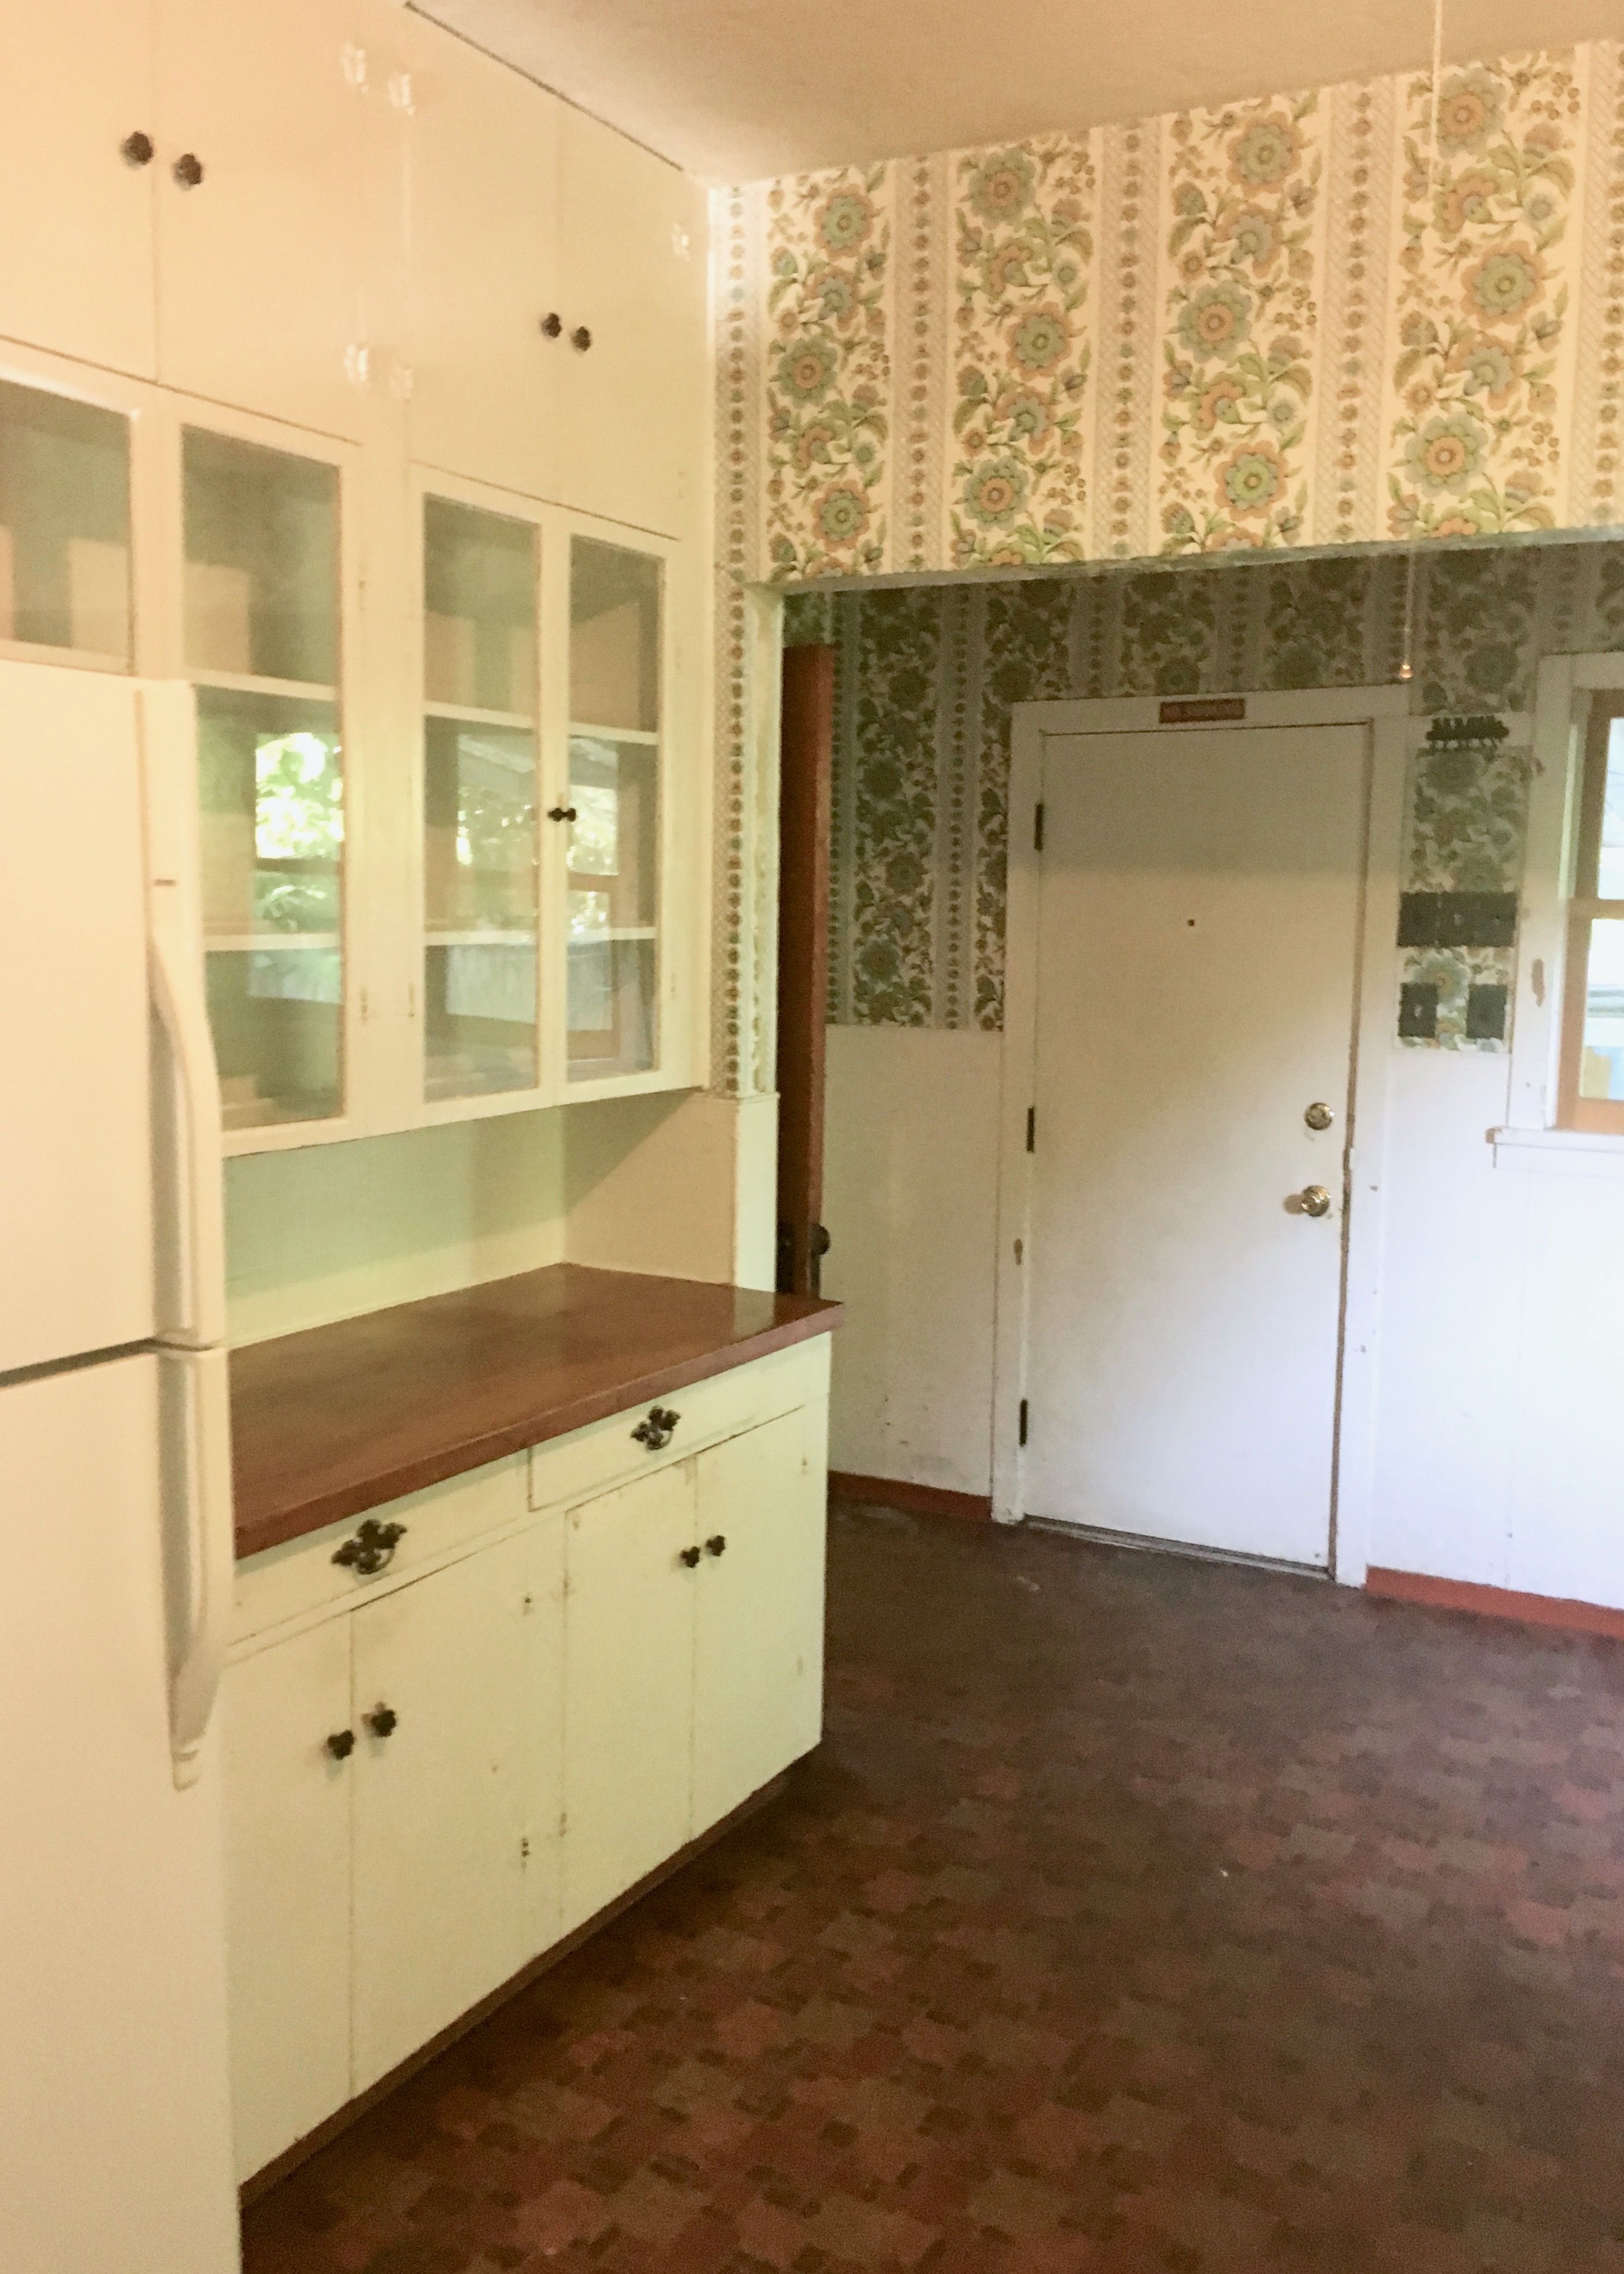
Before we dive too far into the afters, though, let’s talk about where this whole kitchen thing started! You may have seen some pictures of the space in my One Room Challenge kick off post, but you can also see where the whole house began here or check out the before and afters on my house tour page. The kitchen was all 70’s wallpaper and 1930/40s cabinets cobbled together with various additions. The lay out was weird and it was obvious that various “improvements” had been made over the last hundred years, but no one had truly renovated the kitchen! So this is a real 1930s/40s kitchen. I hope someone googles that and finds this picture in all its 70s wallpaper glory.
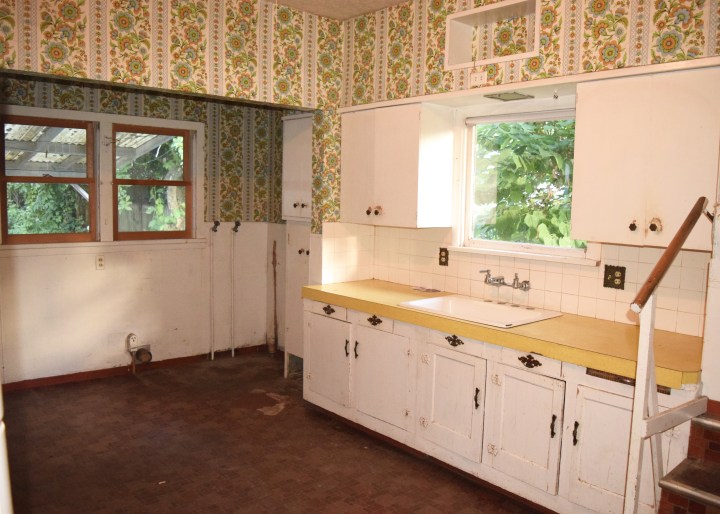
I like how this picture shows the whole view of the room. I took it standing on top of the second stair landing (yes there are two, no it does not make any sense). There is so much grime and grunge here! The floors were horrible but after a lot of trial and error, I got the sheet vinyl off and sanded them before finally refinishing the 100 year old fir floors below!
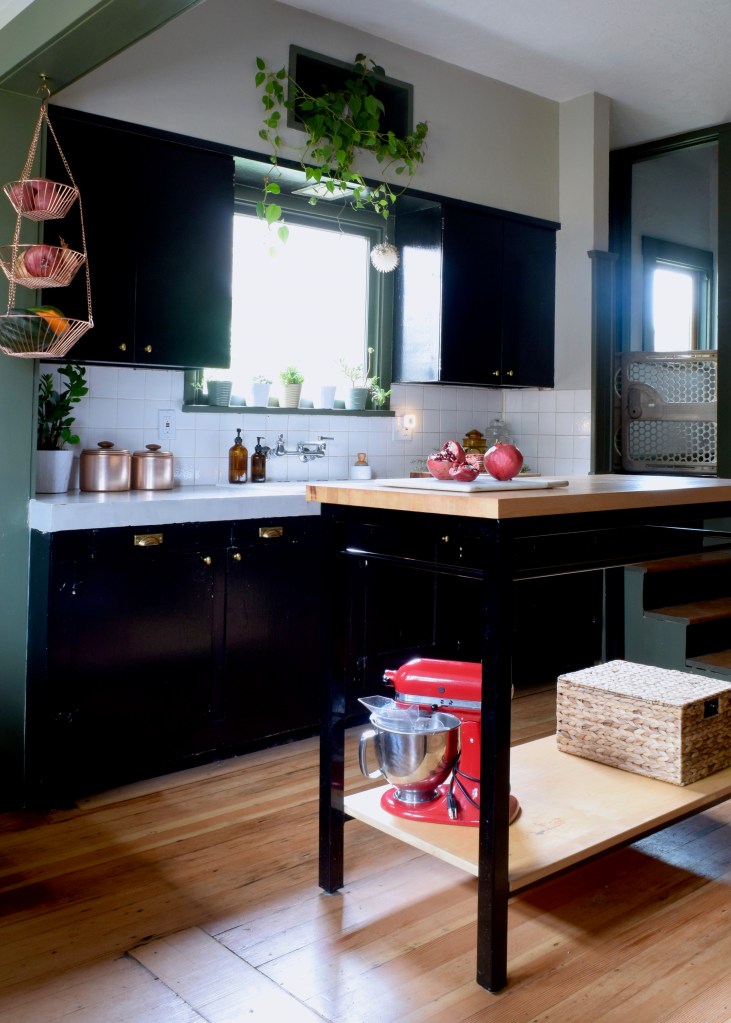
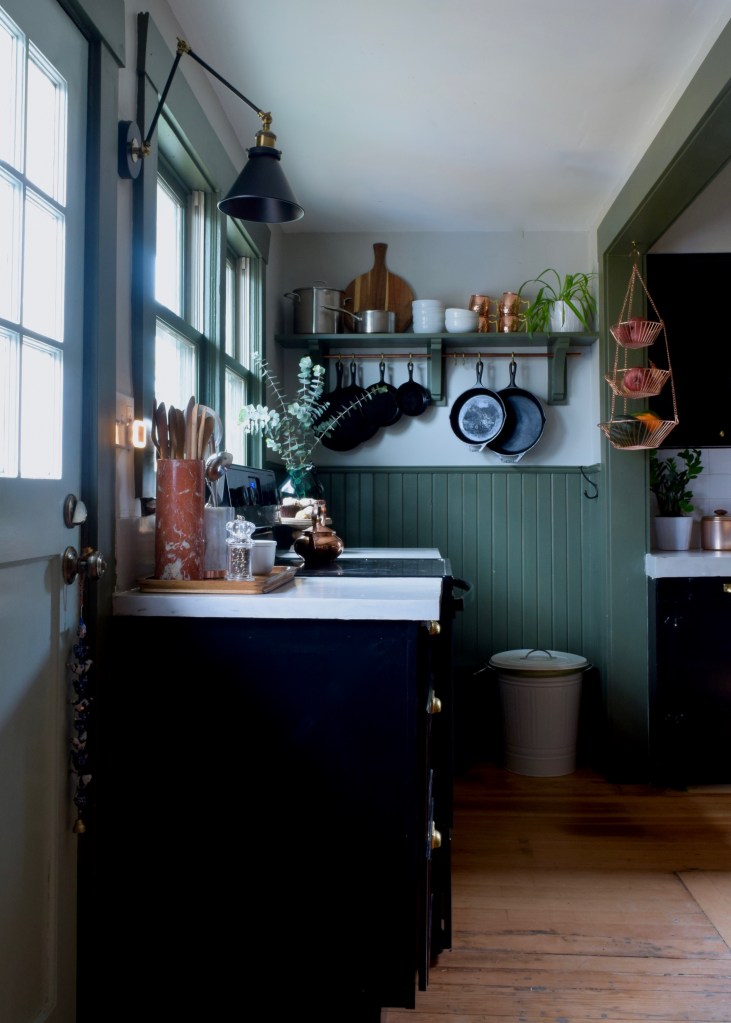
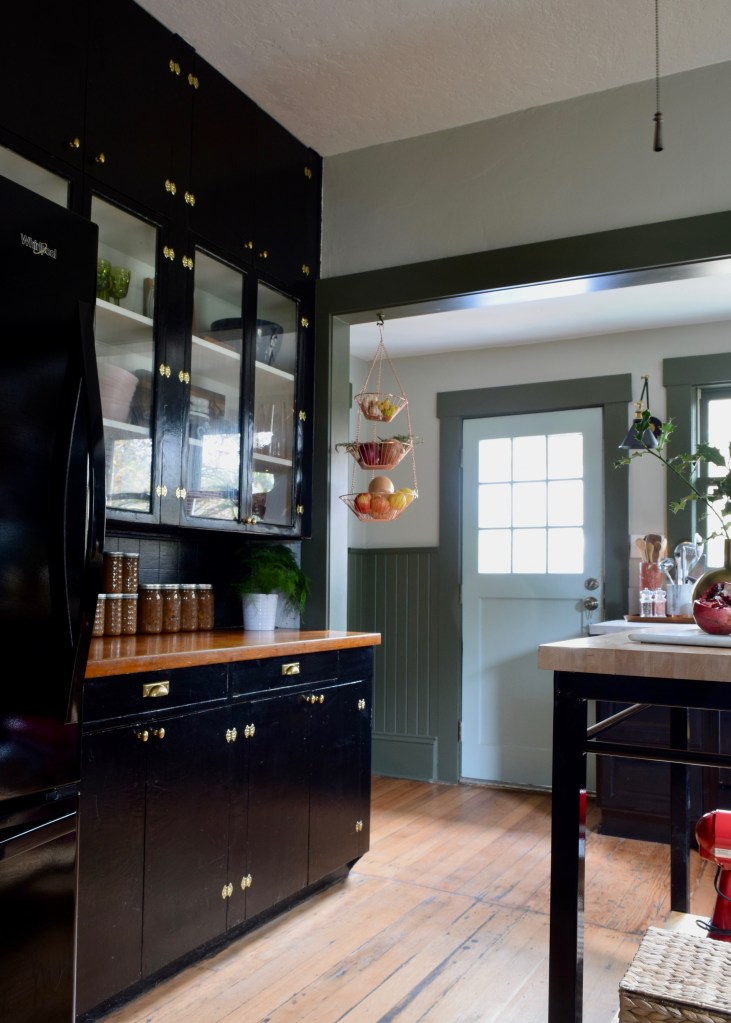
It’s looking pretty different in here now, y’all! I love my salvaged floors and the contrasting black cabinets! These are Benjamin Moore’s OC-190 Black which is the blackest black there is. I wanted it really crisp in this room so the black appliances would blend in and read almost the same color even though they’re not paneled! My trick totally worked and I think it makes them look more expensive. Does anyone else have all black appliances? I’m giving it a whirl (literally! They’re all Whirlpool!) and I’m really digging the look!

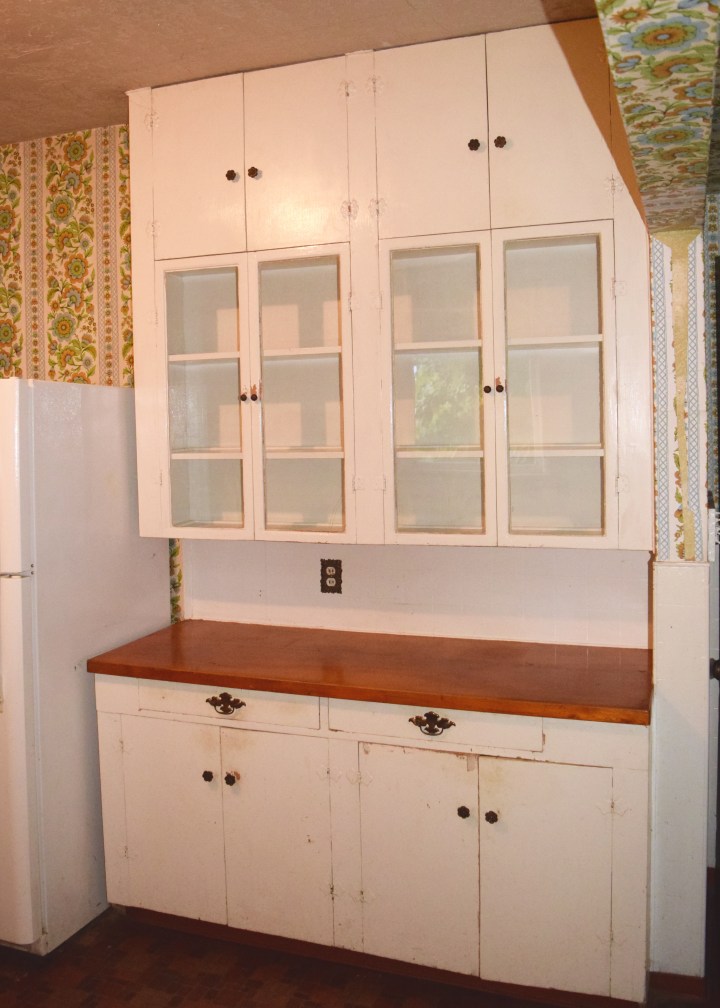
Even though there were so many things wrong with the kitchen at the start, these glass cabinets doors still stole my heart. I fell hard and fast for them. I knew that with a good coat of paint, they could be beautiful!
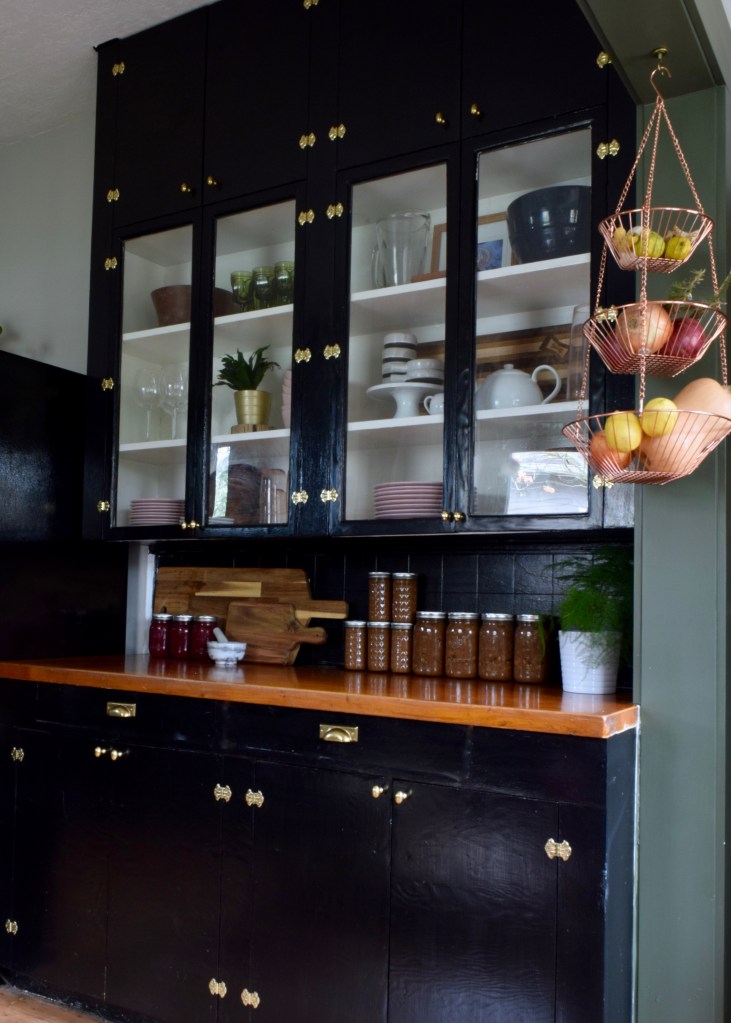
A whole lot of work later I got this new view! I painted and put a sealer on these cabinets, cased the opening between the original house and porch addition, added awesome unlacquered brass hardware from Rejuvenation and Hardware Hut, and styled this girl out!
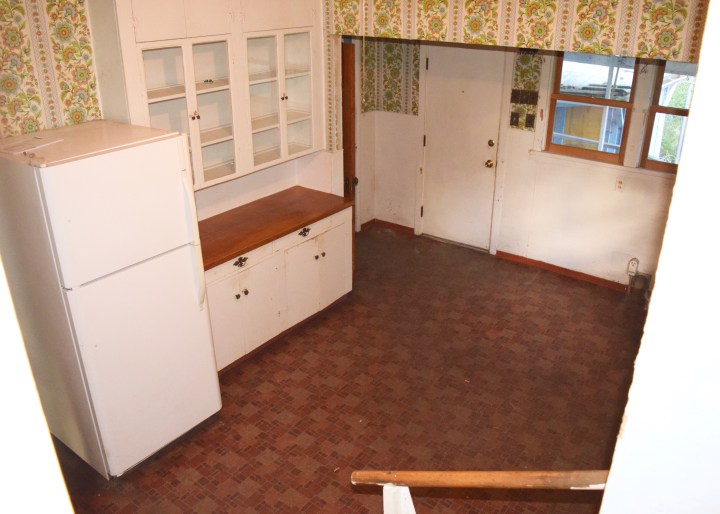
The entire kitchen was rough. Things just didn’t make much sense and a constant stream of bad DIYs just kept making things worse! Please discuss that stair railing in the comments. I need to hear your thoughts! and that door? Just leads up the stairs. Why does it exist? I don’t know. It came down real quick!
Hanging fun copper fruit baskets from the cased opening gives me extra storage and a vining plant makes the odd shelf above the sink more functional. The island is technically my sisters! She left it here when she moved. My dad made it for her as a baking island. It’s just about the right size for this room, so I jumped on the free option here! I may eventually upgrade to something without shelves so I can slip a stool or two under here… but it’s already a tight fit so I really don’t see guests sitting here while anyone cooks.
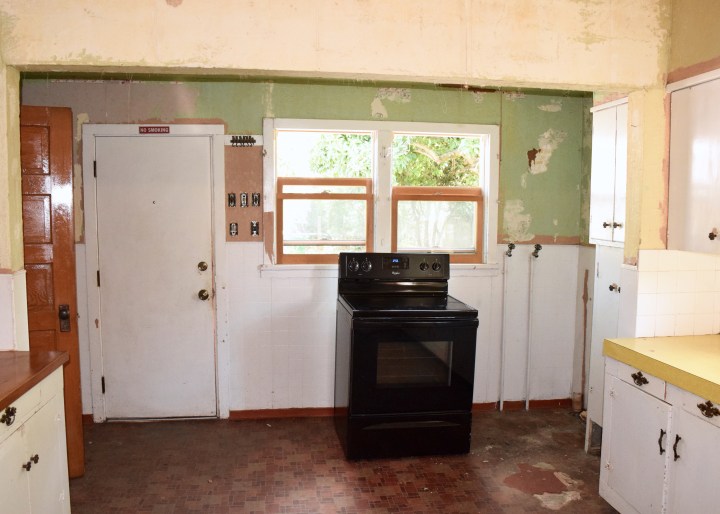
After moving in and making short work of removing the wallpaper, this room looked crazy, but hey, I’d bought a stove – so that counted for something right?
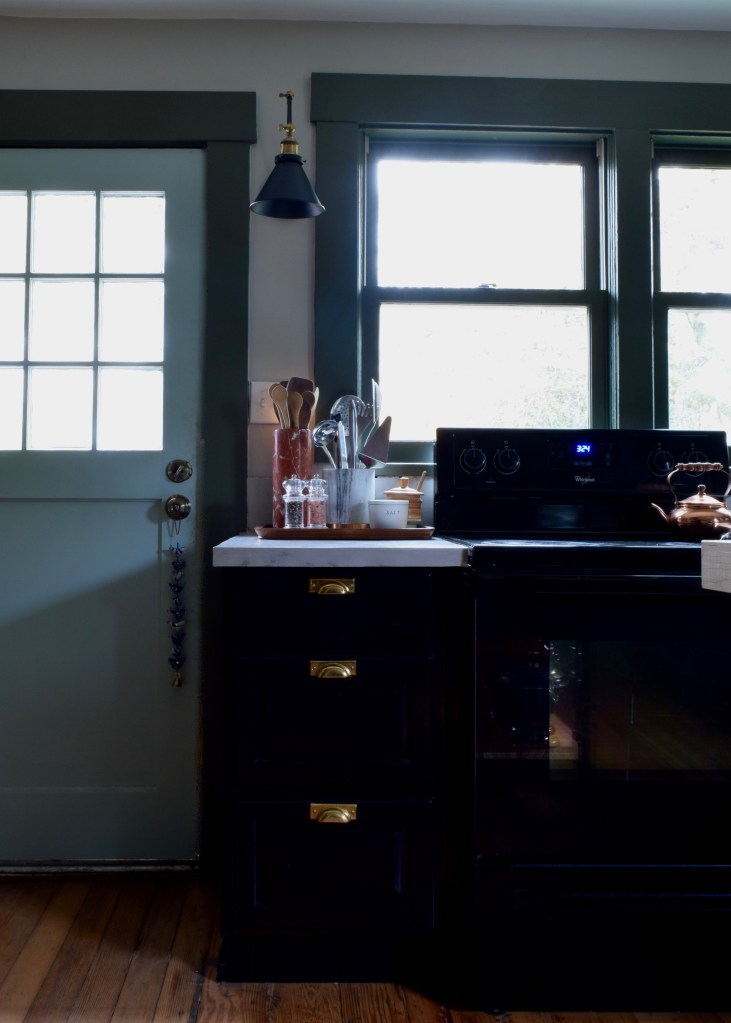
The off centered stove is my biggest regret of this renovation and comes down to a decision I made about the dishwasher placement about a year ago when I first hooked one in the space. But! If you can ignore that, the view towards the back of the house is looking a million times better.
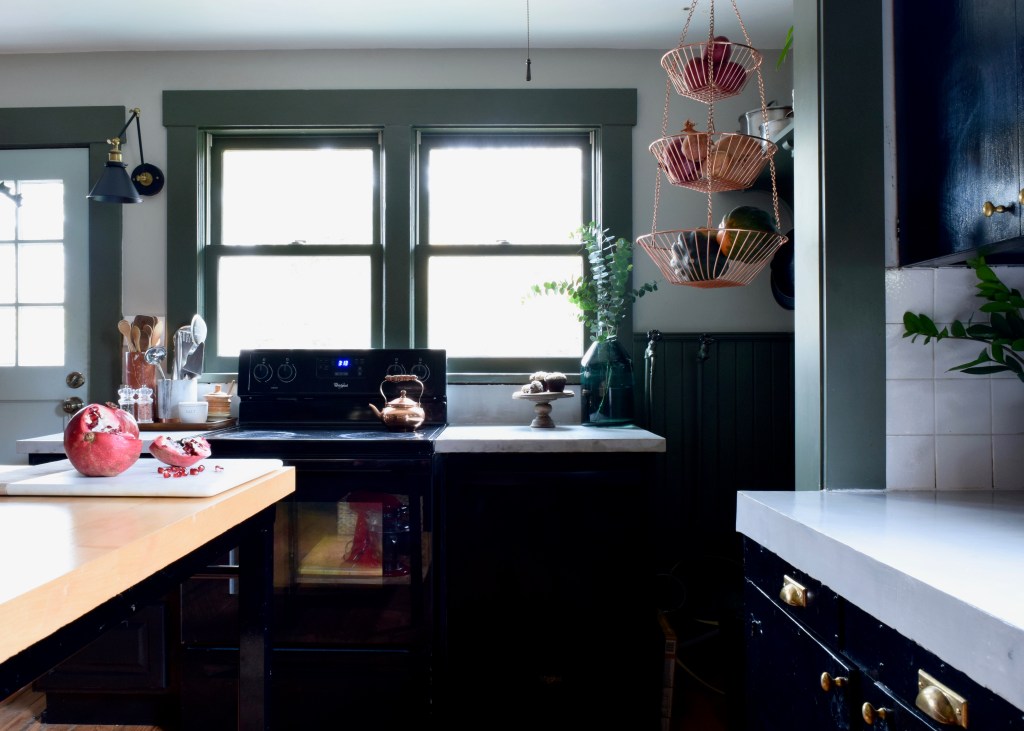
Switching from a solid door to a reclaimed half-lite door was the best choice I made in the entire renovation, because, oh. my. god. that. light. It is so much brighter in here than ever before. In the morning when the eastern light is streaming in through these windows, it makes me smile and sigh contentedly. It’s become the perfect morning room.
One of the other biggest changes is this kitchen view. Guys, that’s a lot of wallpaper. And every bit of it was grimy and greasy. And I don’t even want to know what happened to the vinyl floors there. Acid?!

Now, it’s lovely and super functional. This wall holds both the stove and the dishwasher as well as my newly build pot rack with it’s copper accent and the always practical trash and recycling cans.
The cabinet I added on this wall came from the local Portland Rebuilding Center, which I absolutely love to stroll through. It doesn’t match the original cabinets… but the old cabinets don’t match each other either… so I went for it. Added storage by the stove is so nice anyways!
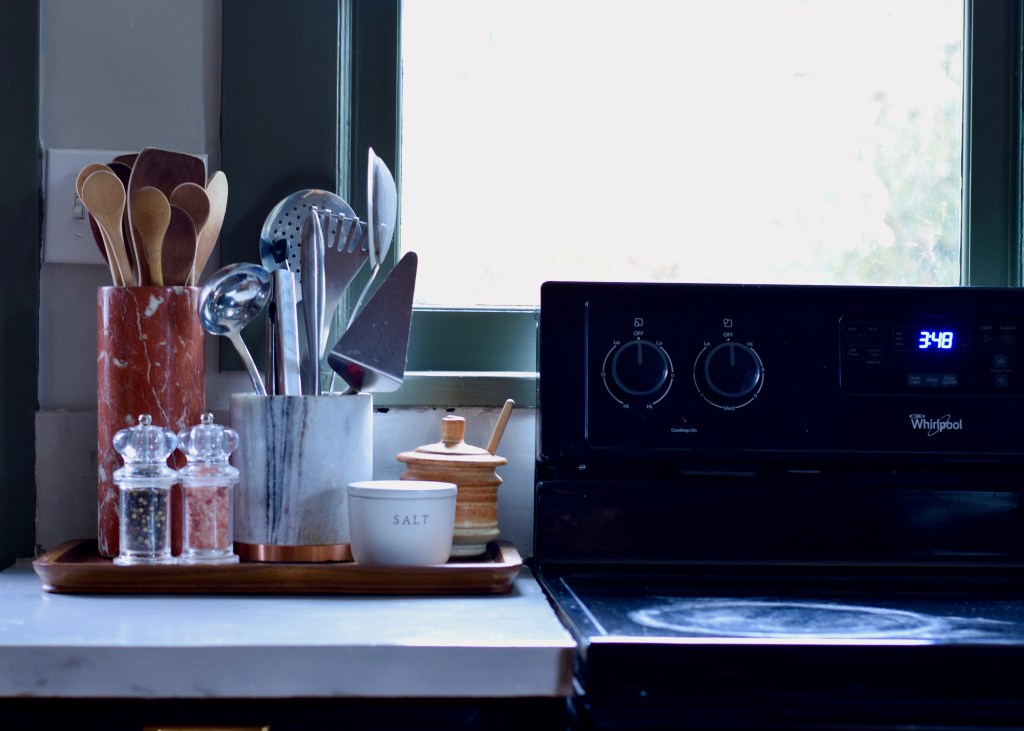
Especially since the added counter is the perfect place to store utensils and salts and other things you need while cooking!
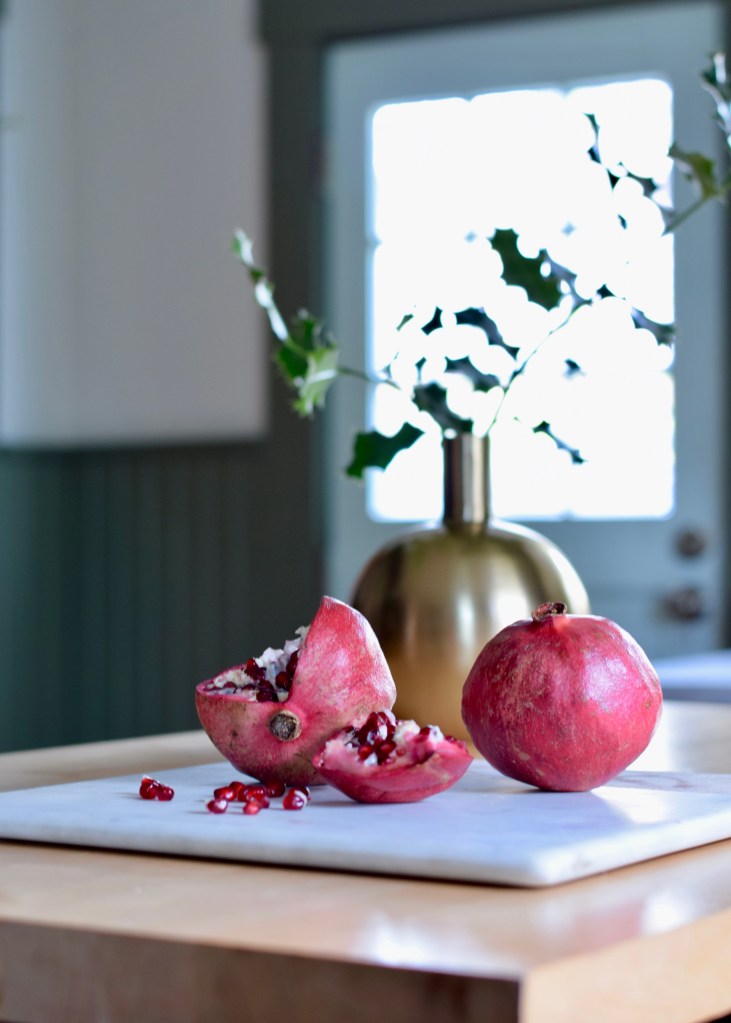
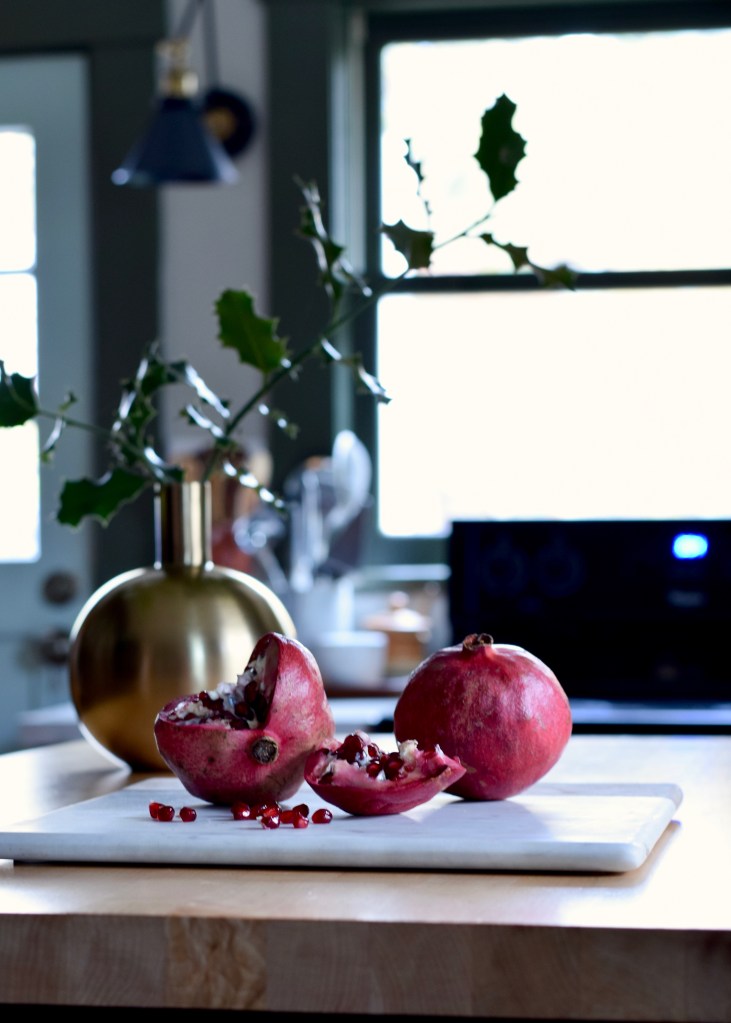
Also, since it’s November and — according to the internet — basically Christmas, I have to talk about pomegranates. You’ll notice they’re heavily featured in the photography here. That’s because pomegranates are literally the best thing about winter! I loove pomegranates. They make me feel all Christmasy on the inside. I ate an entire one today. Why wait?!
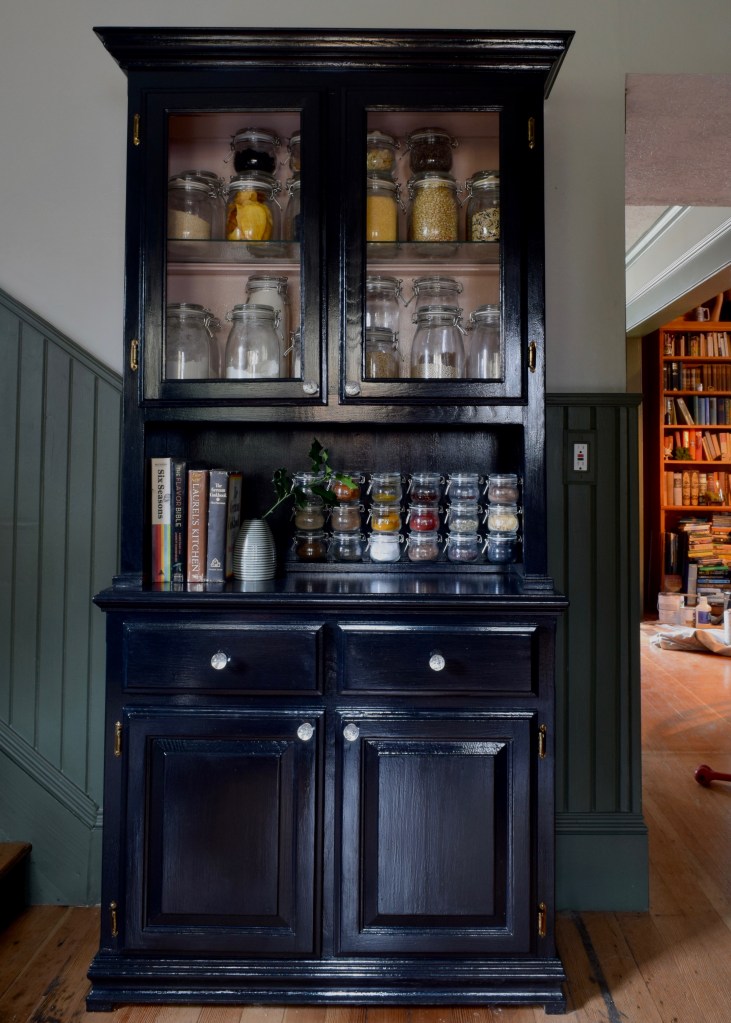
On the other hand, we can talk non-produce. I store all of my drygoods in this china cabinet! It used to be 1980s and awful and now it’s black and pink and brass. This photo isn’t doing it any favors, but it still looks pretty good! I need to learn how to photograph dark shiny objects though. Anyone have any tips?
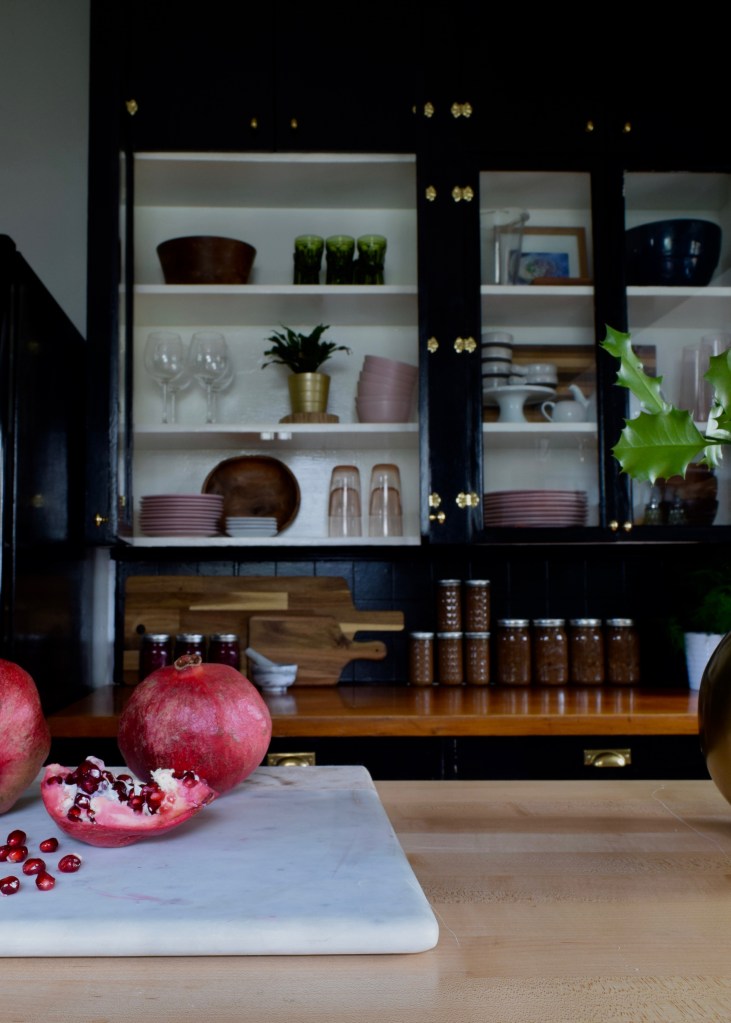
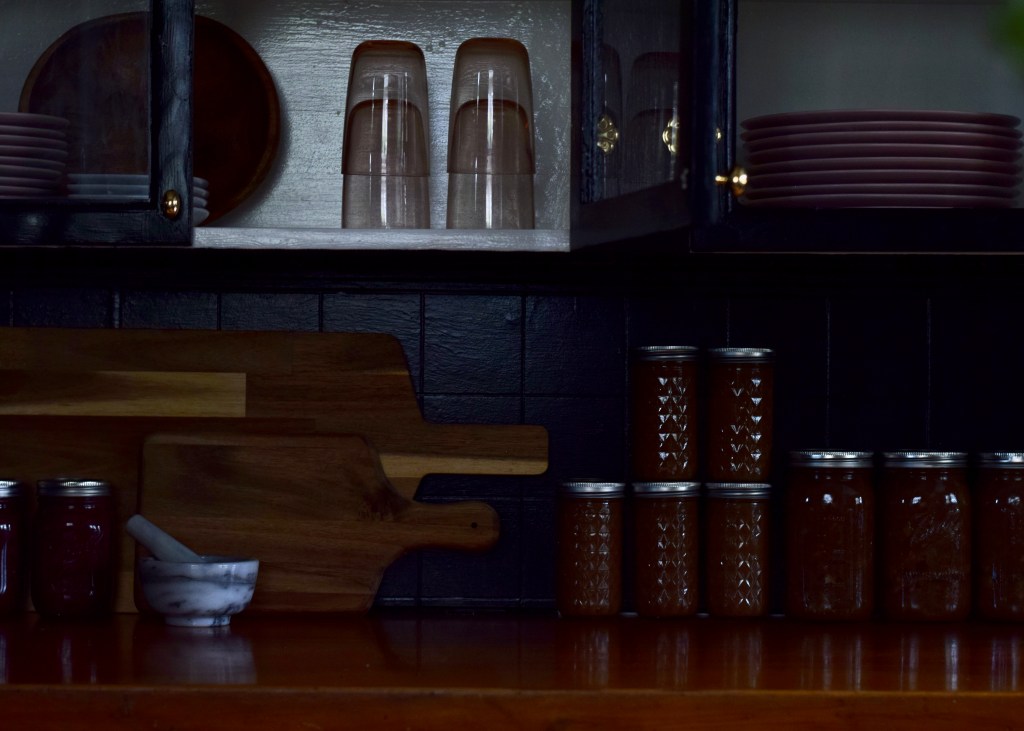
Back to pomegranates while you’re percolating on how to give me photography tips via the interwebs, they look good in here on the island with the open glass cabinet doors in the background too. Basically, pomegranates look good and taste good and we should all be eating more of them and can you tell that I am writing this post really late after shooting these photos all day? Also featured: my canned apple sauce, pear sauce, and raspberry jam.
Let’s take a closer look at those canned goods, but make it moodier. Because who doesn’t love a little drama in the kitchen?
Okay, let’s get back to our regularly scheduled program of before and afters. Here is a truly terrible photo I shot on my iPhone 6s the very first time I laid eyes on Berrybrier. Sidenote: I am still using that same iPhone. Someone please buy me a the 11 for Christmas? Or Thanksgiving. I am definitely accepting any and all Thanksgiving gifts you’re offering. Anyways, try to ignore the horrific photo quality and instead focus on the insanity of the kitchen. Mind you, I fell in love with this kitchen when I first toured. There is clearly something very wrong with me.
Now that I’m living in that post renovation glow though, I kinda get that deep and hard love this kitchen drew out of me. It certainly is a new woman these days. Even the pull string on the lights got a refresh and you know, the cabinets and appliances and doors and hardware and floors and I added an island, but whatever, brain, let’s focus on the pull strings.
My god, I can’t leave this post with that, can I?
Here, have a pomegranate.
And of course, don’t forget to check out all the other One Room Challenge participants! There is some awesome inspiration to be found in these archives!

If you’re just chiming in you can see my other posts about this kitchen renovation here!
Week 2: Adding Wainscotting, Wall Prep, and a New Door
Week 3: Painting 1930’s Cabinets
Week 4: Skim Coating Counters with Concrete
Week 5: A Bit of This and That
And if you want to know what I did for the spring One Room Challenge, you can check out the reveal of my teeny tiny master powder room here!
Please let me know what you think of this Phase I project in the comments! Sometimes I think I’m spending way too much of my life photographing and writing this little blog. Your comments are what make me keep going!

oooh that pantry area is amazing and love the colors!! great work!
Thank you! I love my little pantry cabinet so much! -xo, LO
Great transformation, Laurel! And, I’ve never cut a pomegranate like that before- was that just for photogenic purposes? I usually just peel (underwater) and start destroying/ consuming. Real Q!!
Thank you! I *did indeed* cut that pomegranate in an unusual manner just for pictures! I learned in Turkey though that if you cut it in half and beat the outside with a wooden spoon you can dislodge all the food seeds (and leave the bad ones) in less than 30 seconds! So that’s what I typically do now. -xo, LO
Love it! You did an impressionable job! Keep going , I am enjoying watching the process.
Thank you so much! -xo, LO
So worth the wait! it feels like a warm home kitchen now.
Awww thanks so much! It does feel so much cozier! -xo, LO
It looks so so so good! Do you think I could do that to my countertops???
Thank you! And yes it’s easy – but I’m not sure how well it will hold up… -xo, LO
Hey you, it is beautiful!! Luuuvvv the black cabinetry. You did an amazing job!
Thanks so much!! The black is so dramatic I love it so much!
Elegant and welcoming! This kitchen is the pomegranate of kitchens and I am so impressed! Love the detail work and those glass panes look amazing. Brava!
We should just start referring to everything as “the pomegranate of ________” 🤣 -xo, LO
“So this is a real 1930s/40s kitchen. I hope someone googles that and finds this picture in all its 70s wallpaper glory.” Omg, you’re evil.
I don’t blame you one bit for falling in love with that kitchen. I’m a little in love with the befores, too! But I would definitely have emphasized the 1970s glory more than the ’30s glory that you did. 😉 I still want that yellow countertop… but I can see why concrete skim coating it works better for your style, lol.
AMAZING afters. You’re such a hard, hard worker. So impressed by everything in this. You made such smart changes to have a big impact without having to completely reconfigure the space… very clever work. The areas you chose to go light on (door, floors, island) are perfectly positioned. And the photography looks great to me… but who am I to talk, I use an iPhone 5s. 😉 Can’t believe you got all this done in six weeks. Woohoo! Go have a delicious pomegranate pie in that nice kitchen of yours. (I think an island with shelves is the smart idea, honestly… you can’t turn down more storage)
You’re rapidly becoming my favorite blogger. Your style is almost the exact opposite of mine but you’re living the dream. It’s been my dream since I was 8 to buy a falling down, mid century brick ranch and remodel it so it would stand for 200 years, hah! But unfortunately, I’m still on my last year of college. After those student loans get paid off and I save for a 20% down payment, my dream will be almost two decades in the making, but it’ll be all the sweeter. 😉 In the meantime, I’ll just keep reading remodeling books and blogs like yours!
Awww thank you so much Zovesta! This is the sweetest comment! Isn’t it funny how styles can be completely opposite, but reading about the process can still be so fun? To clarify – I definitely didn’t do this all in 6 weeks alone, I has help and lots of the big parts were done already. But just trying to get that done nearly killed me! Good luck with your goal! I’d love to see your mid century ranch come to life! You can do it!
First I have to say, I tip my hat to you! You saw the beauty in this kitchen and brought it back to life. The hutch has a crowning new look and I’m so glad you kept it. The black gives the room a more sultry yet vintage charm. I love all of it. and can’t wait to see more of your makeovers.
Thanks girl! You’re so sweet! I love how you phrased this: “sultry yet vintage” just what I wanted it to be!
and btw.. i love the pomegranate shot!!
Ohhh good!! I took waaaaayy too many photos of it! Haha -xo, LO
OMG this is wonderful. Those black cabinets look GORGEOUS. I can’t believe it’s the same space! And that 80s cabinet transformation is crazy-good. Great work!
Thank you so much! It’s hard to believe right?! -xo, LO
So, so good! Worth the wait, I’m sure. Also love your writing style!
Oh my gosh, I’m glad you enjoyed my sleep starved writing! I was really down to the wire! -xo, LO
I love it! I agree with you on the exterior door, and that whole wall, complete with off-center stove and green paint, reminds me of Doc Martin’s kitchen. What a great vision you had, with the grit to implement it. It is a beautiful transformation.
Awww thank you! Now I’m off to google Doc Martin’s kitchen! -xo, LO
GORGEOUS! What a beautiful transformation!! This is a fantastic kitchen. Here’s to many delicious meals prepared and enjoyed!
Thanks so much Angela!! -xo, LO
Love how it is the same palette as your other rooms. Green and black is one of my favorite combinations and you are lucky to have a lot of light to pull it off. I think your photography is really good, too. So proud of you!
Thanks so much Lisa! This space definitely feels like part of the house now! -xo, LO
I really enjoyed this kitchen transformation, and it’s crazy how much better the cabinets look with some new paint! Also enjoyed reading your thought process… ha!
So glad you enjoyed it! I truly am always astounded by the power of paintb
Wow, this is cool! We want to do something similar in our kitchen (1900 farmhouse), so this is very inspiring! Would you mind sharing roughly how much you spent on the transformation? We have just started a “kitchen remodel fund” so I’m trying to get an idea of how much to save up.
Wow! This is so cool! My husband and I are planning to remodel our kitchen (1900 farmhouse) in a similar style and just started our “kitchen remodel fund” but unsure how much we need to save. Do you mind sharing roughly how much it cost in total?
I am planning a whole post on this and haven’t crunched all the numbers yet, but I believe it was about $4000 for the whole space, DIYing the entire thing and keeping all the original cabinets, plumbing, and electrical.
Wow! Thats close to the range we were going to aim for, so glad to hear – thank you!
It’s tight, but possible!
Wow! I found you through Chris Love Julia blog and I’m so impressed with your kitchen reno. It’s so refreshing to see some real DIY on a blog. I love how everything came out and I can’t wait to go through all your older posts and be inspired!
Awww thank you so much! Definitely a lot of DIYs on a budget here. Thanks for reading along Lisa!!
Hi Laurel, I’m in love with your kitchen and maybe a little bit with you. I found you from the Today blog. Yes, that stove is a bummer,but trade it for one that has the controls on the front and your stove will blend in with the counter. Stoves with the high control panel on the back is a pet peeve of mine. When they cover a backsplash, I want to say “why.
I totally agree!! I hate freestanding stoves – one of my biggest pet peeves too. This one came as a $50 hand me down from my neighbor when I first bought this house. I’m hoping it will stick it out until I can do a true full gut kitchen renovation in a few years, though!
Why would you do that? What i like about what you did is that it looks great but virtually the same. Any body can bring in contractors and tear everything out and put in all new modern stuff but why would you in a house like this ? Nothing cute or charming with character about doing that . We have seen those over the top renovations a million times. This is much better. Good job!
Eventually I’d like to fix up the part of the kitchen that have been cobbled together to make a more cohesive space. It will still have to feel very old world! But the lower cabinets by the sink don’t really close and I’d like to switch the locations of the sink and stove. I’d like to bring all the cabinets to the ceiling to capture as much height as possible too. It won’t be for years and years though. This renovation has been great
wow this is really nice do over. what i really like about this they did not GUT!!! it
Dark painted cabinets look so elegant and classy.
Thank you!