THE FLOORS ARE REFINISHED!! THE FLOORS ARE REFINISHED!!!! FOR THE FIRST TIME SINCE PURCHASING THE HOUSE IN AUGUST 2017 I CAN WALK AROUND THE ENTIRE HOUSE WITHOUT WEARING SHOES!
To say I am excited is an understatement. I am ecstatic! I am overthemoon. I am a proud mother with a new born floor and this baby has been long anticipated. Remember back in September 2017 when I ripped off the two layers of vinyl on the kitchen floors and thought refinishing the floors would take a couple weekends? Bahahahahaha. Boy, I am an idiot sometimes. Because, in realityland it took about ten thousand weekends to finish these floors. So I finished in March 2018 about 6 months after I started.
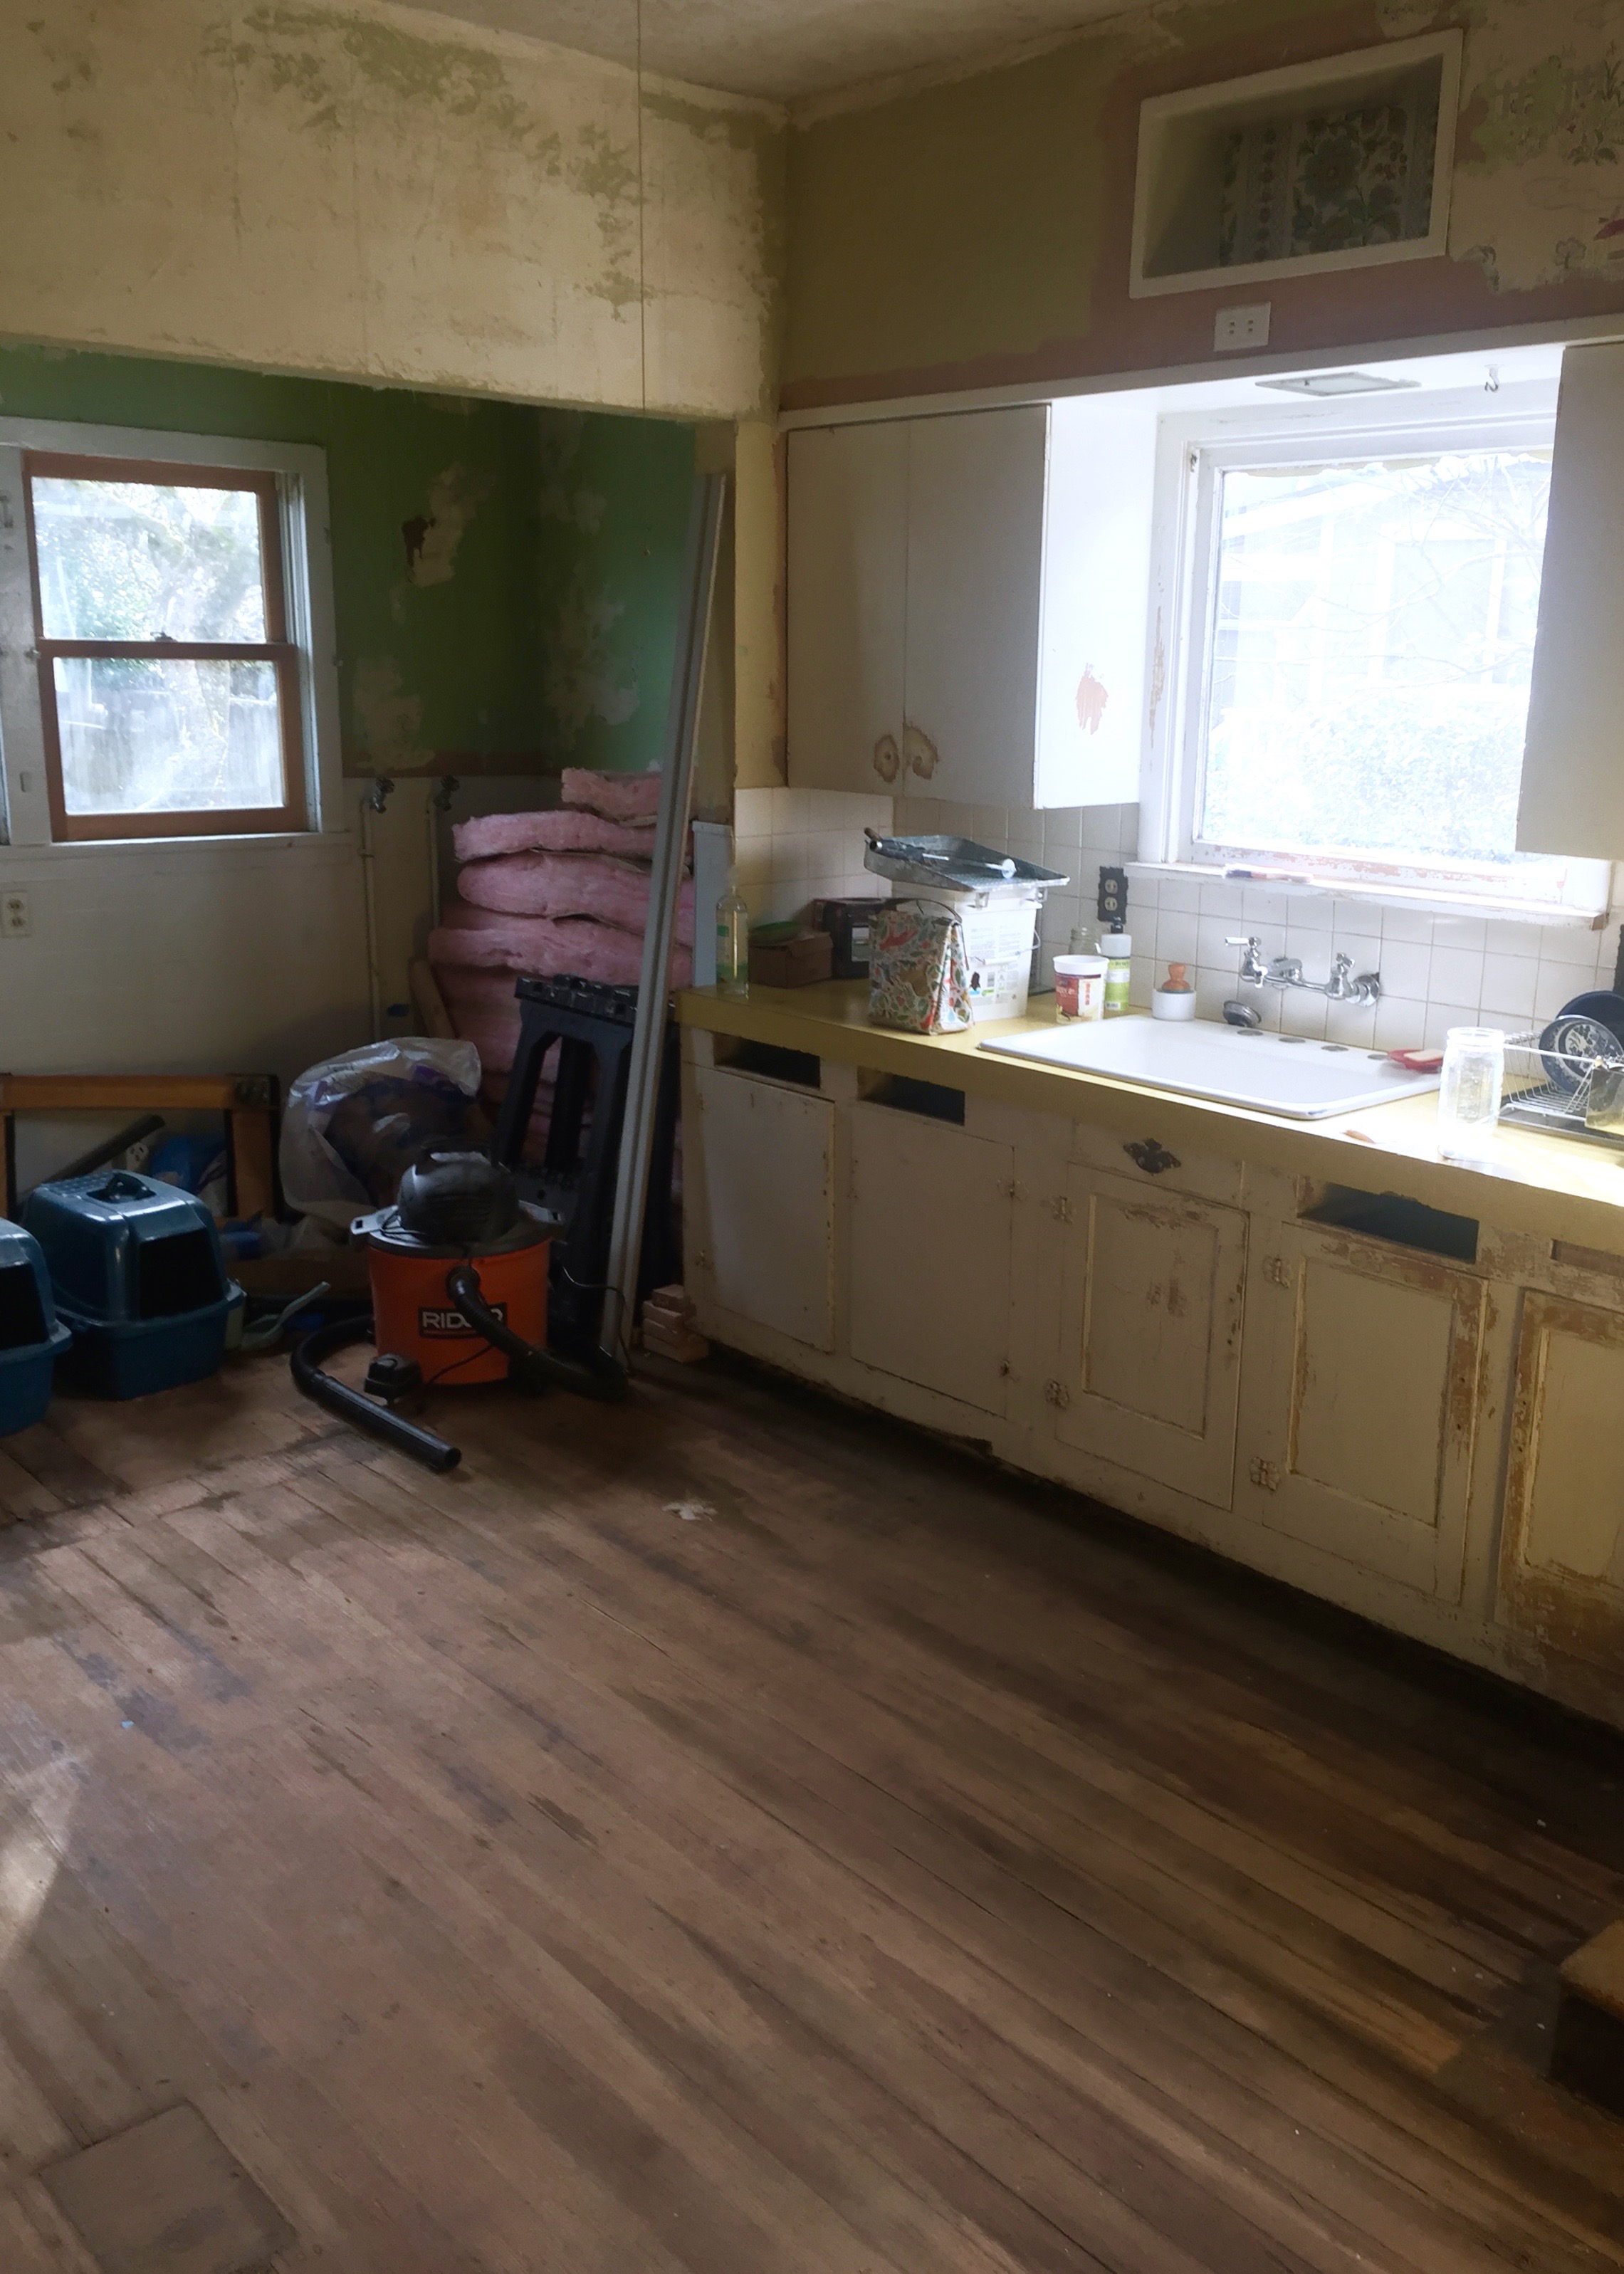
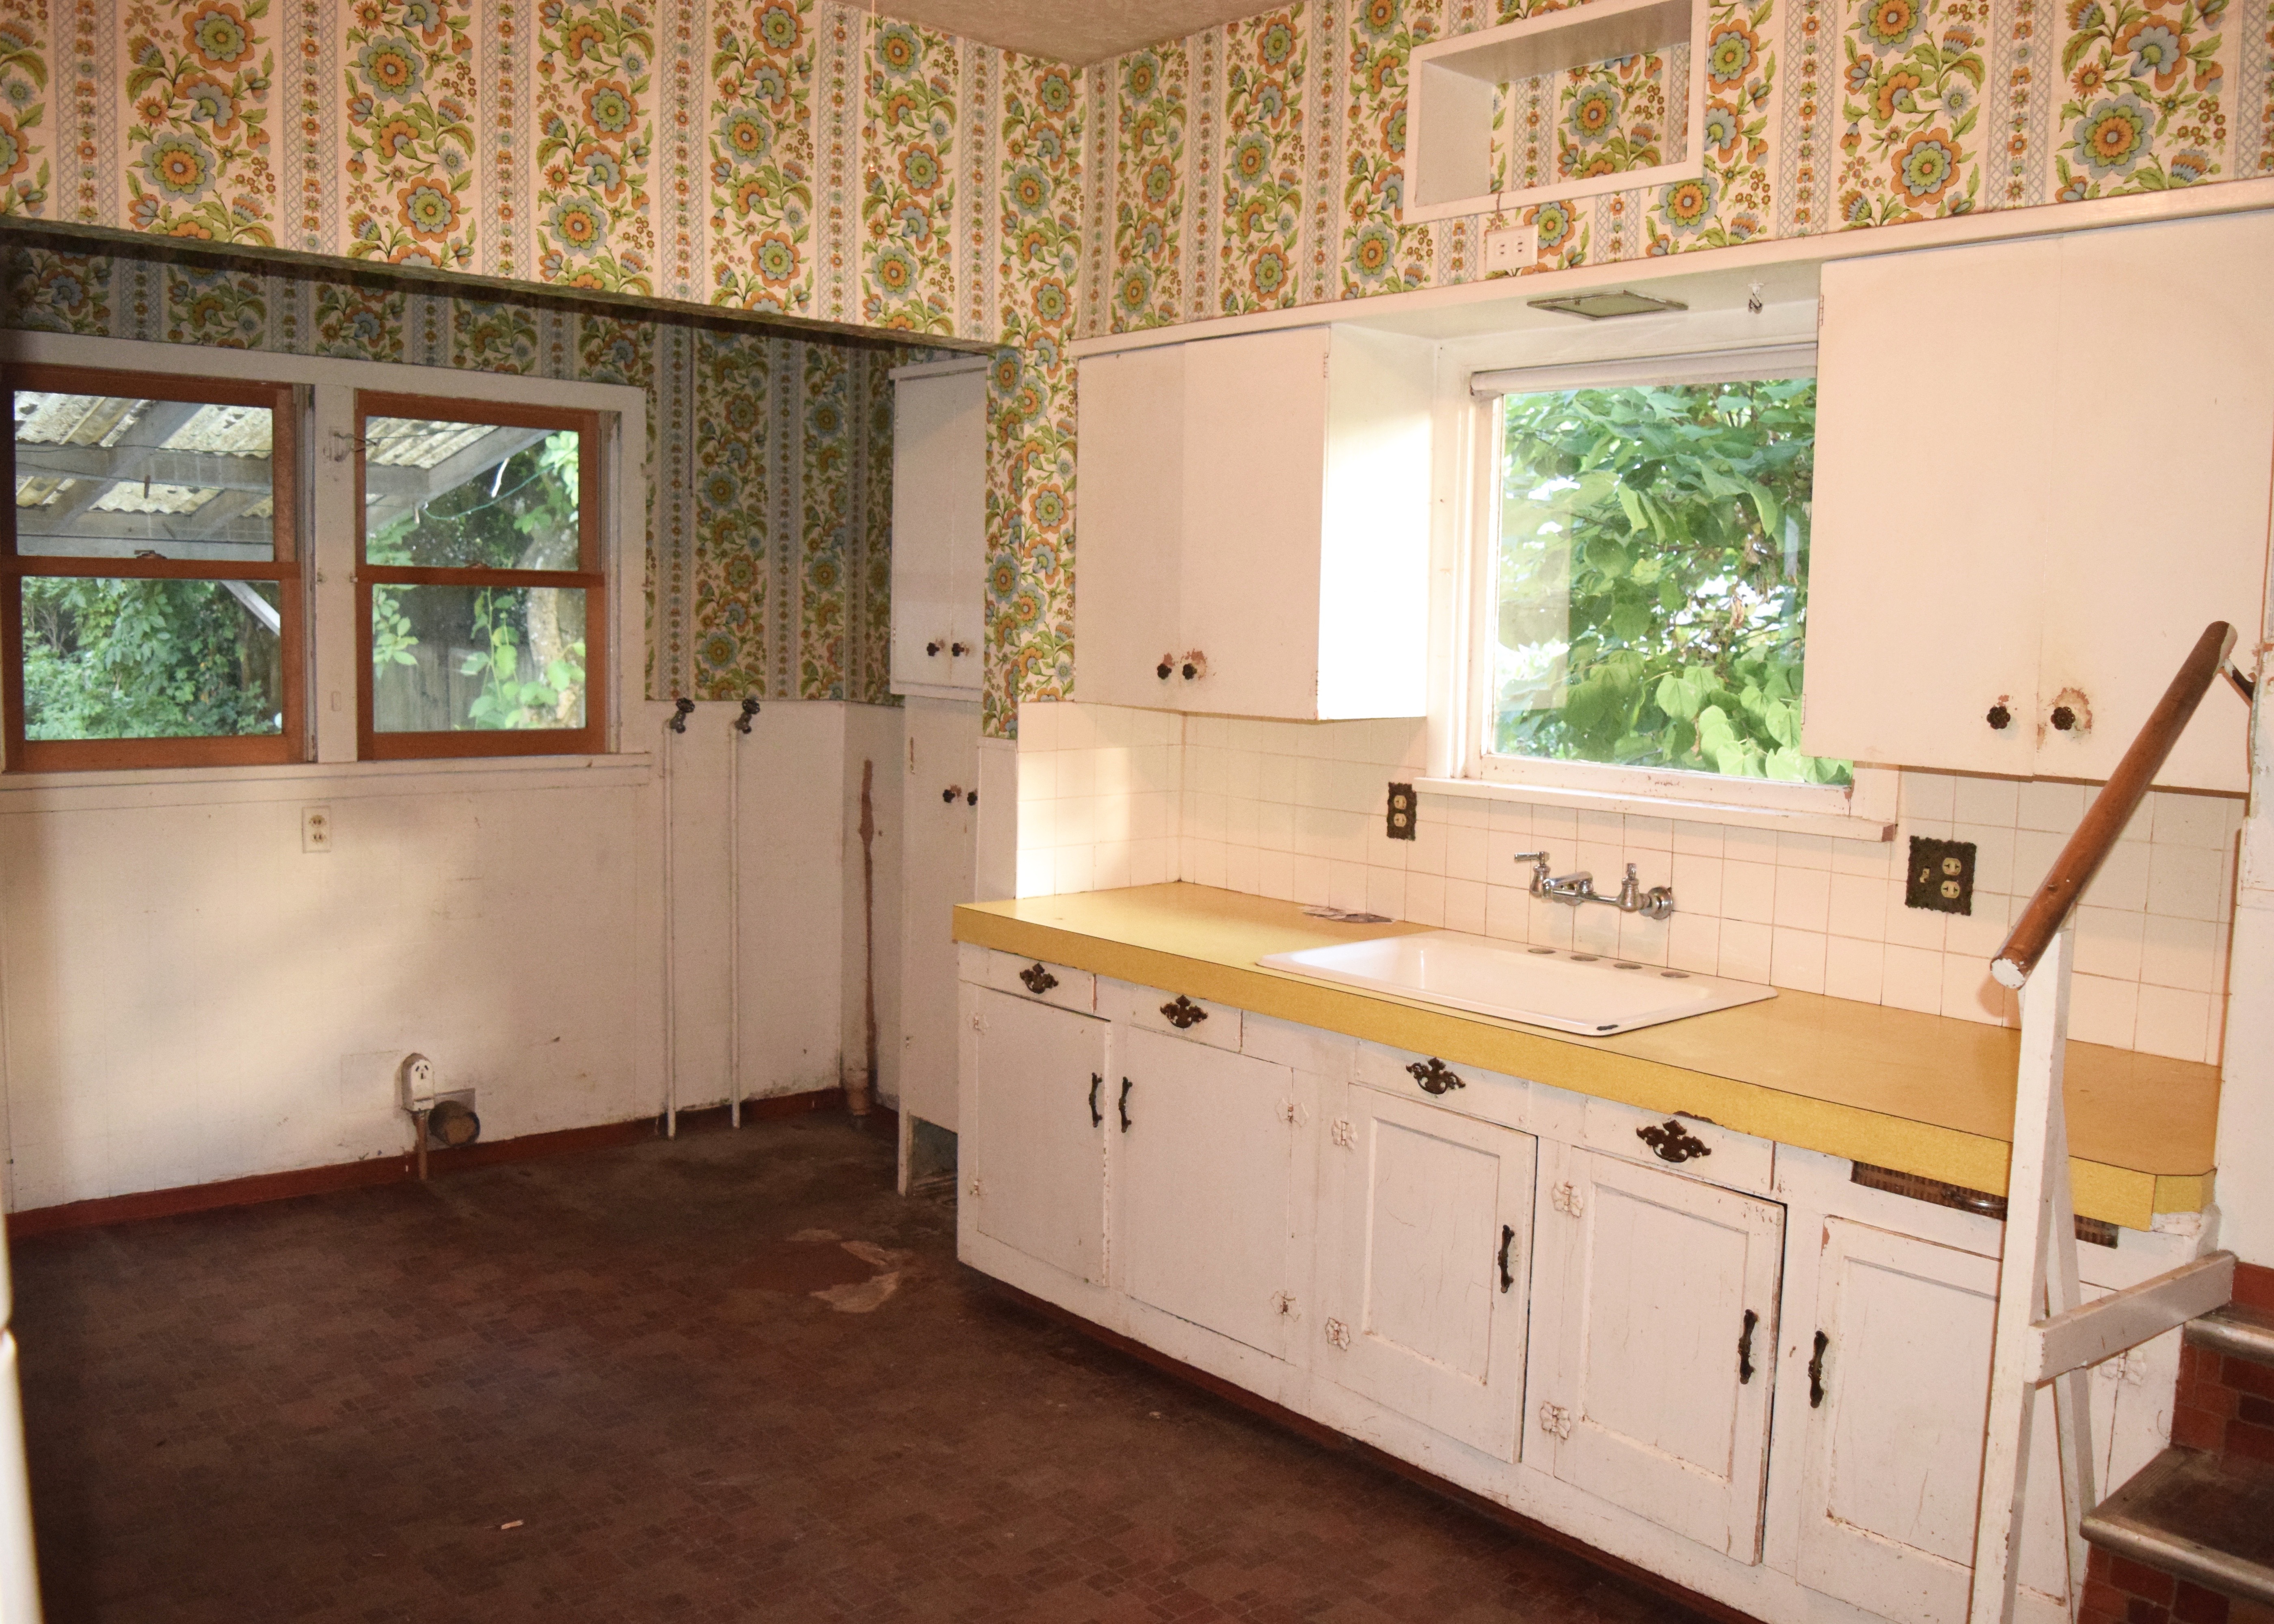
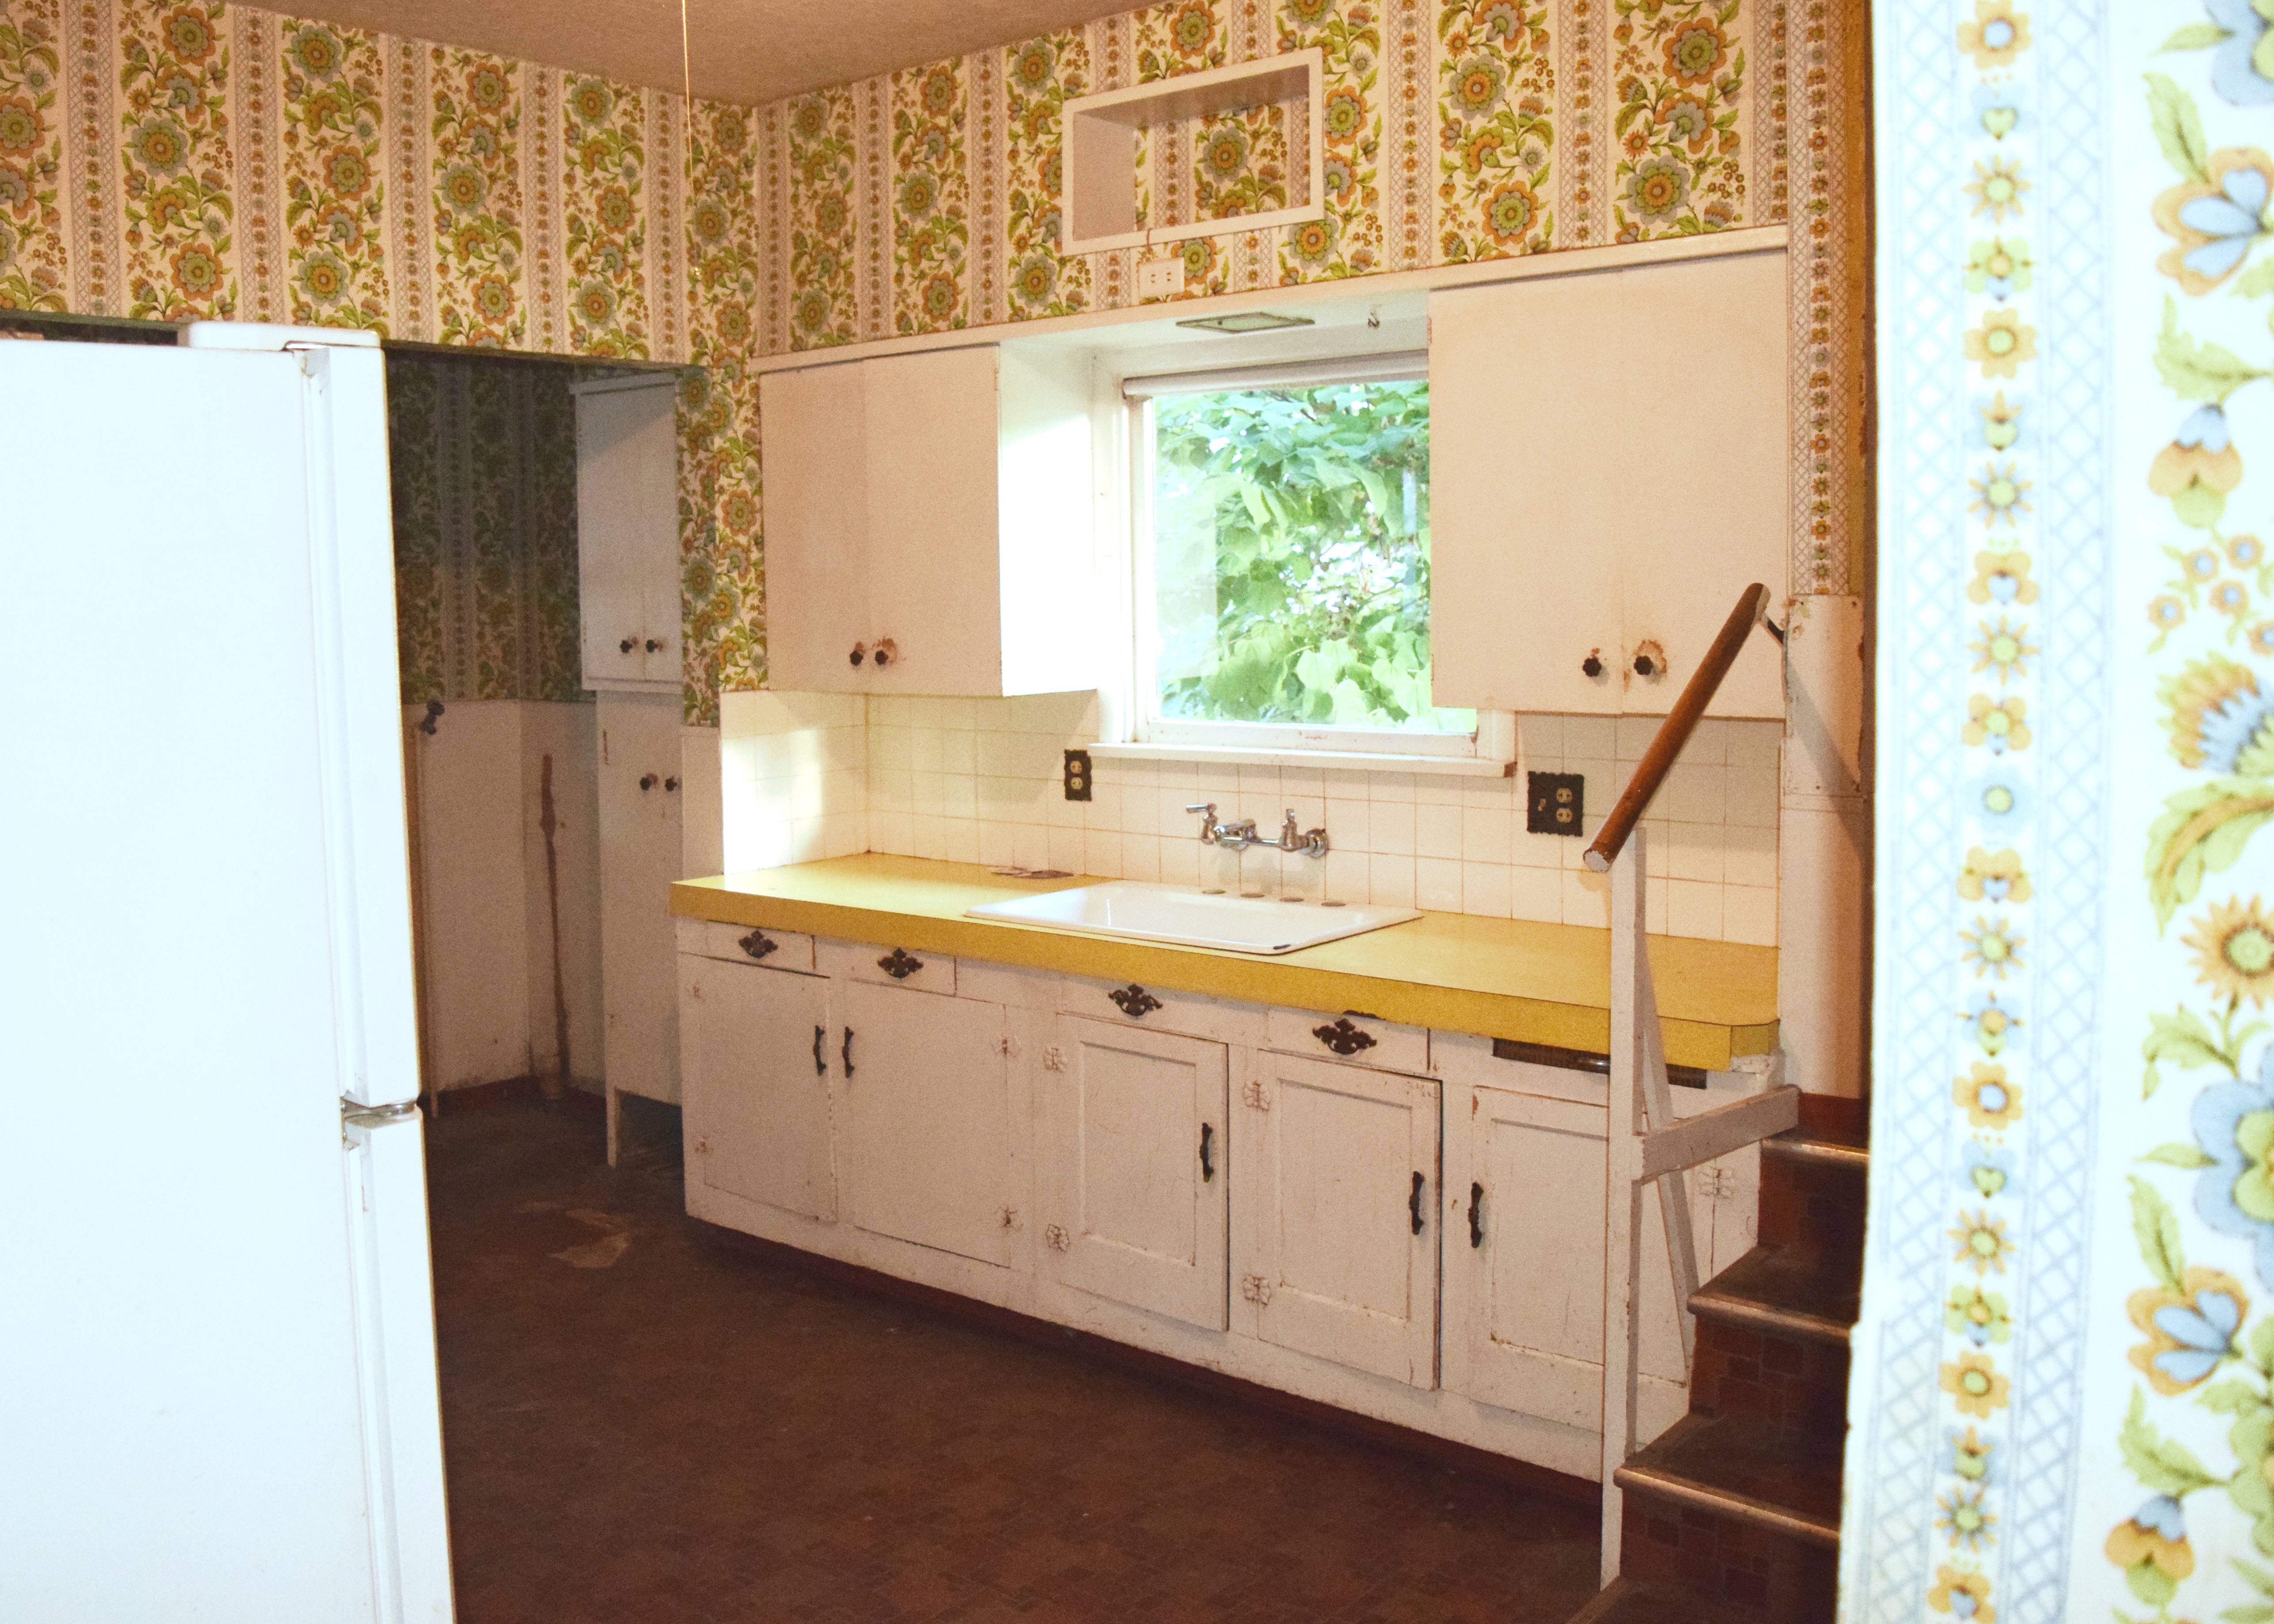
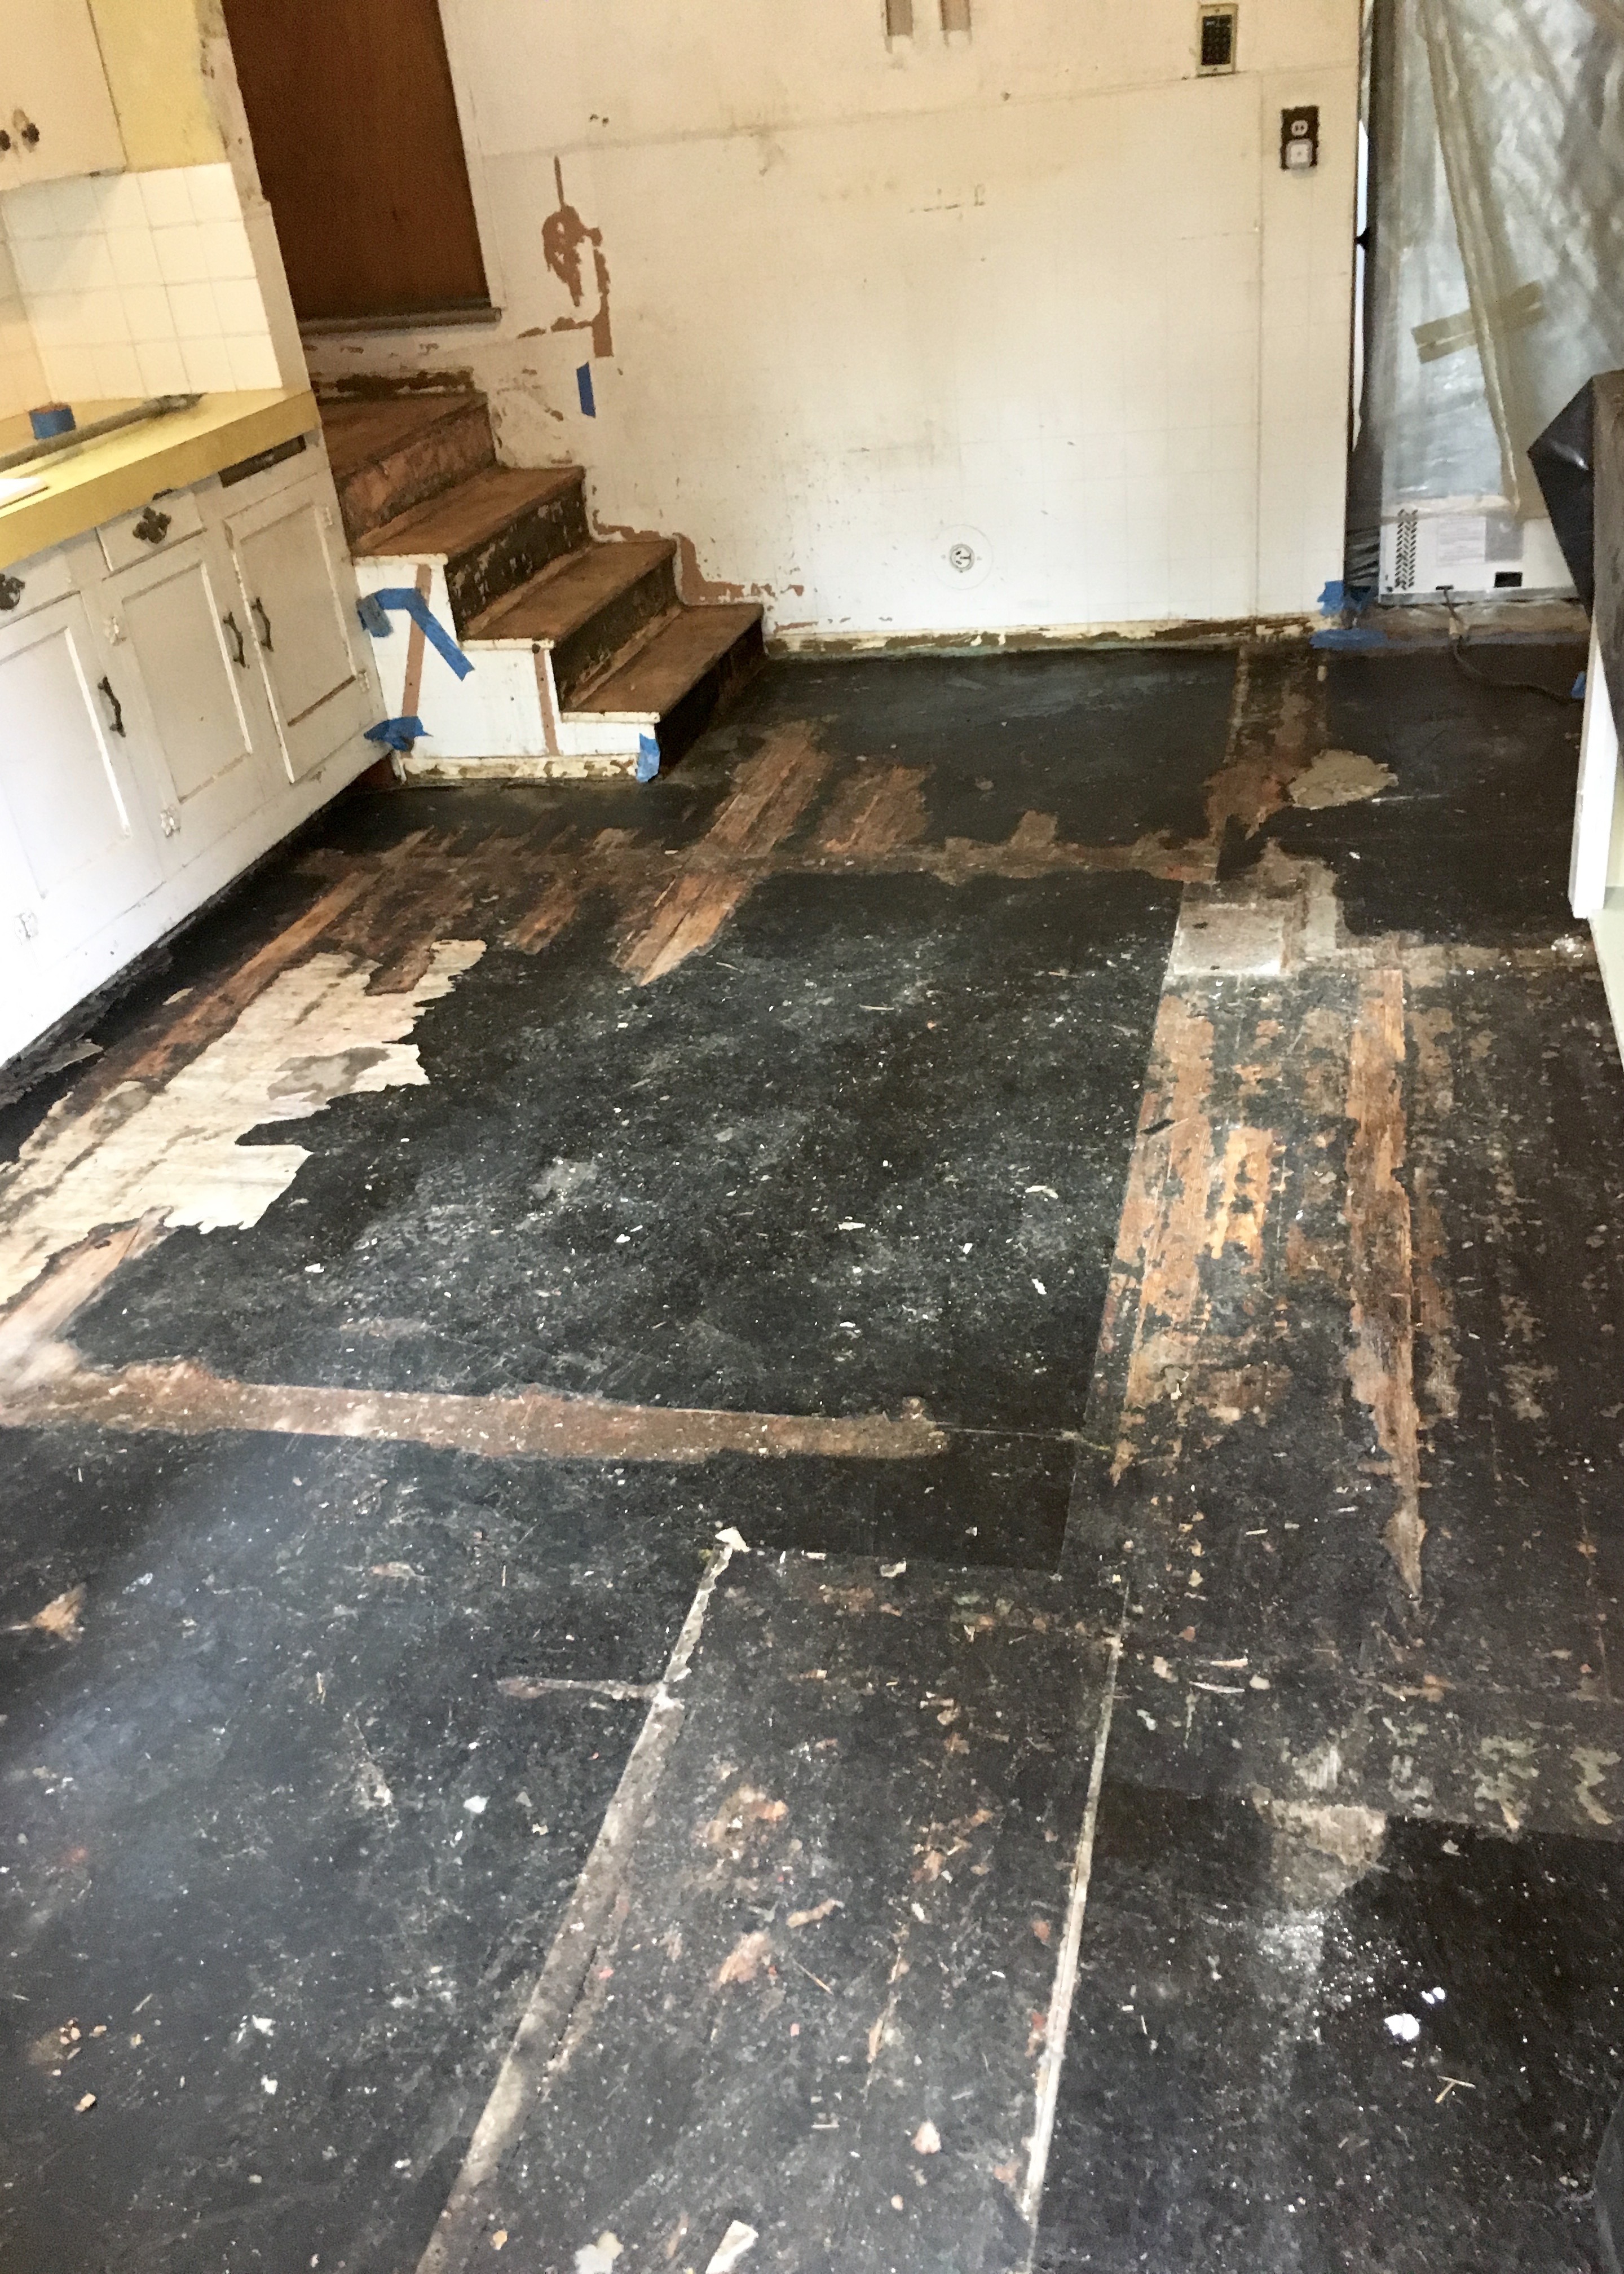
At least I never lose my enthusiasm, because this house really whips my butt sometimes. I’d show you the welts, but, well… better not. Remember when I moved in and the kitchen looked like this?

The floors were gross old sheet vinyl and in TERRIBLE shape. No amount of cleaning was going to fix this mess. So I spent WAY TOO MUCH TIME removing all that disgustingness to get ready to refinish the floors.

Anyways, after I finally got about 90% of the tar based (non-asbestos!) adhesive off the floors, it was time to work on the bathroom. Since having a place to bathe is basically essential for living a normal & accepted lifestyle, the bathroom was the priority. As I finally finished the installing the necessary plumbing fixtures in the bathroom it was time to turn my attention back to the floors. But before I could finish the floors… there was prep work. Grr… no one likes prep work!
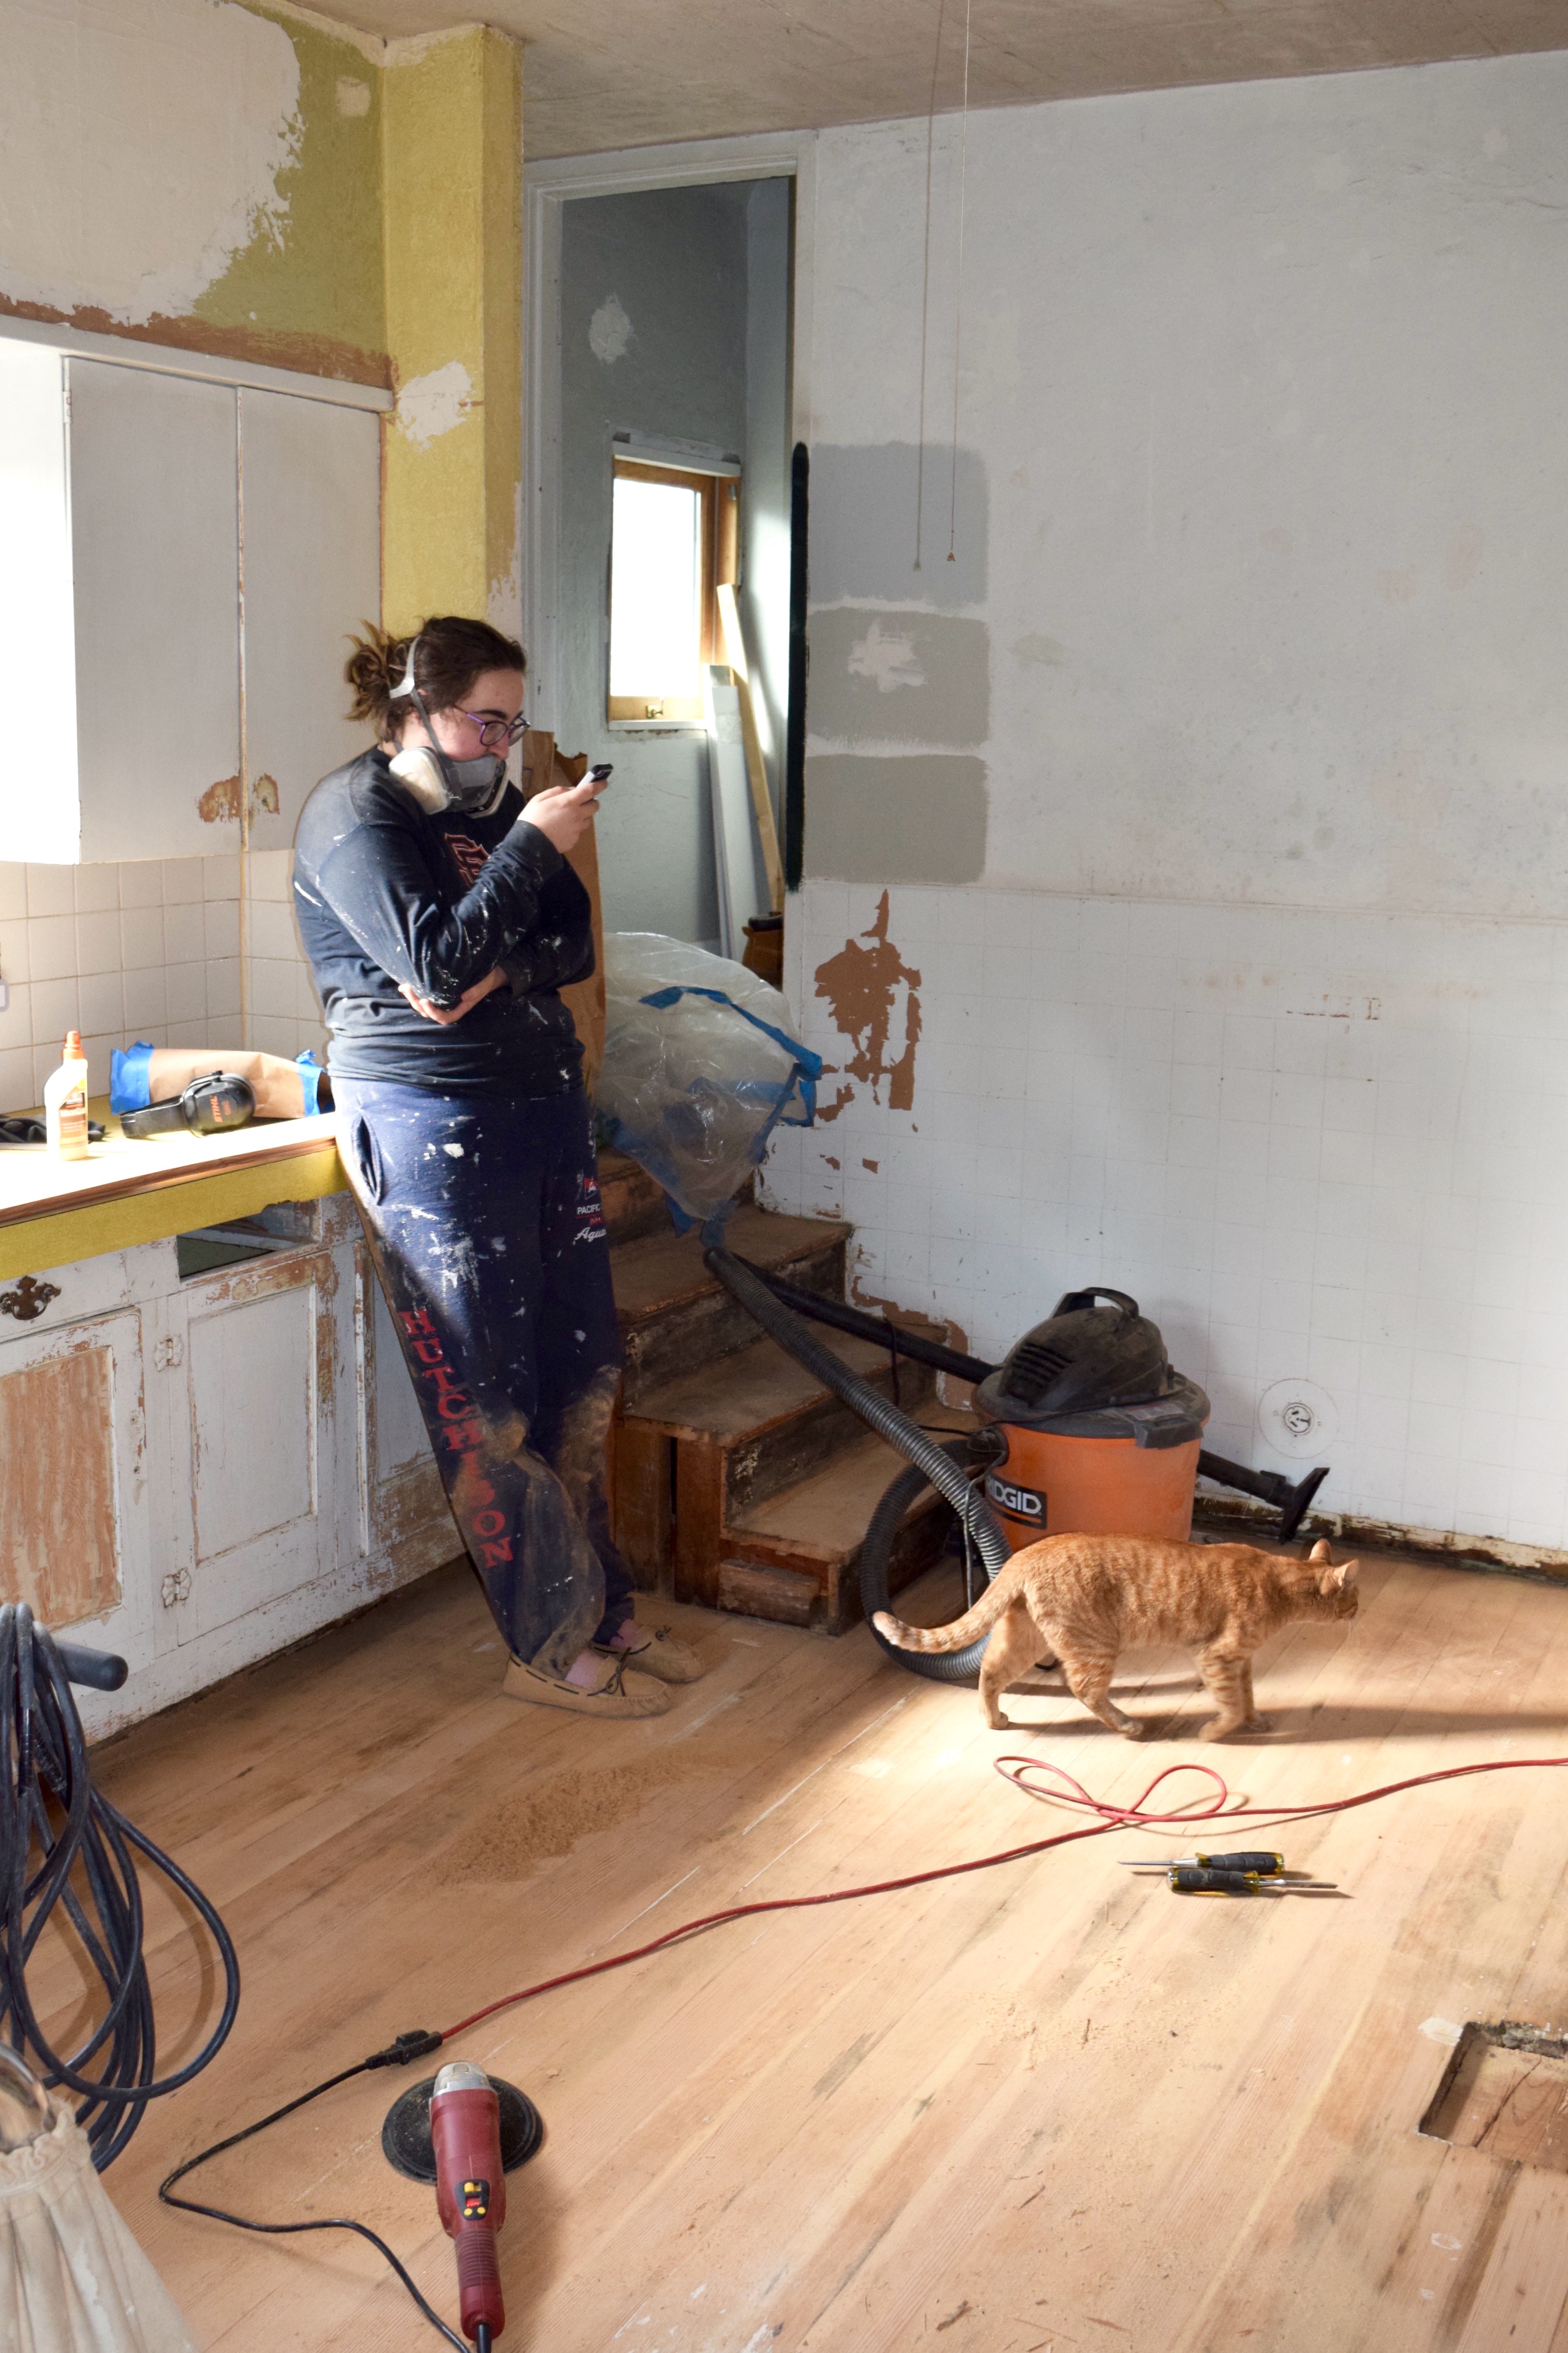
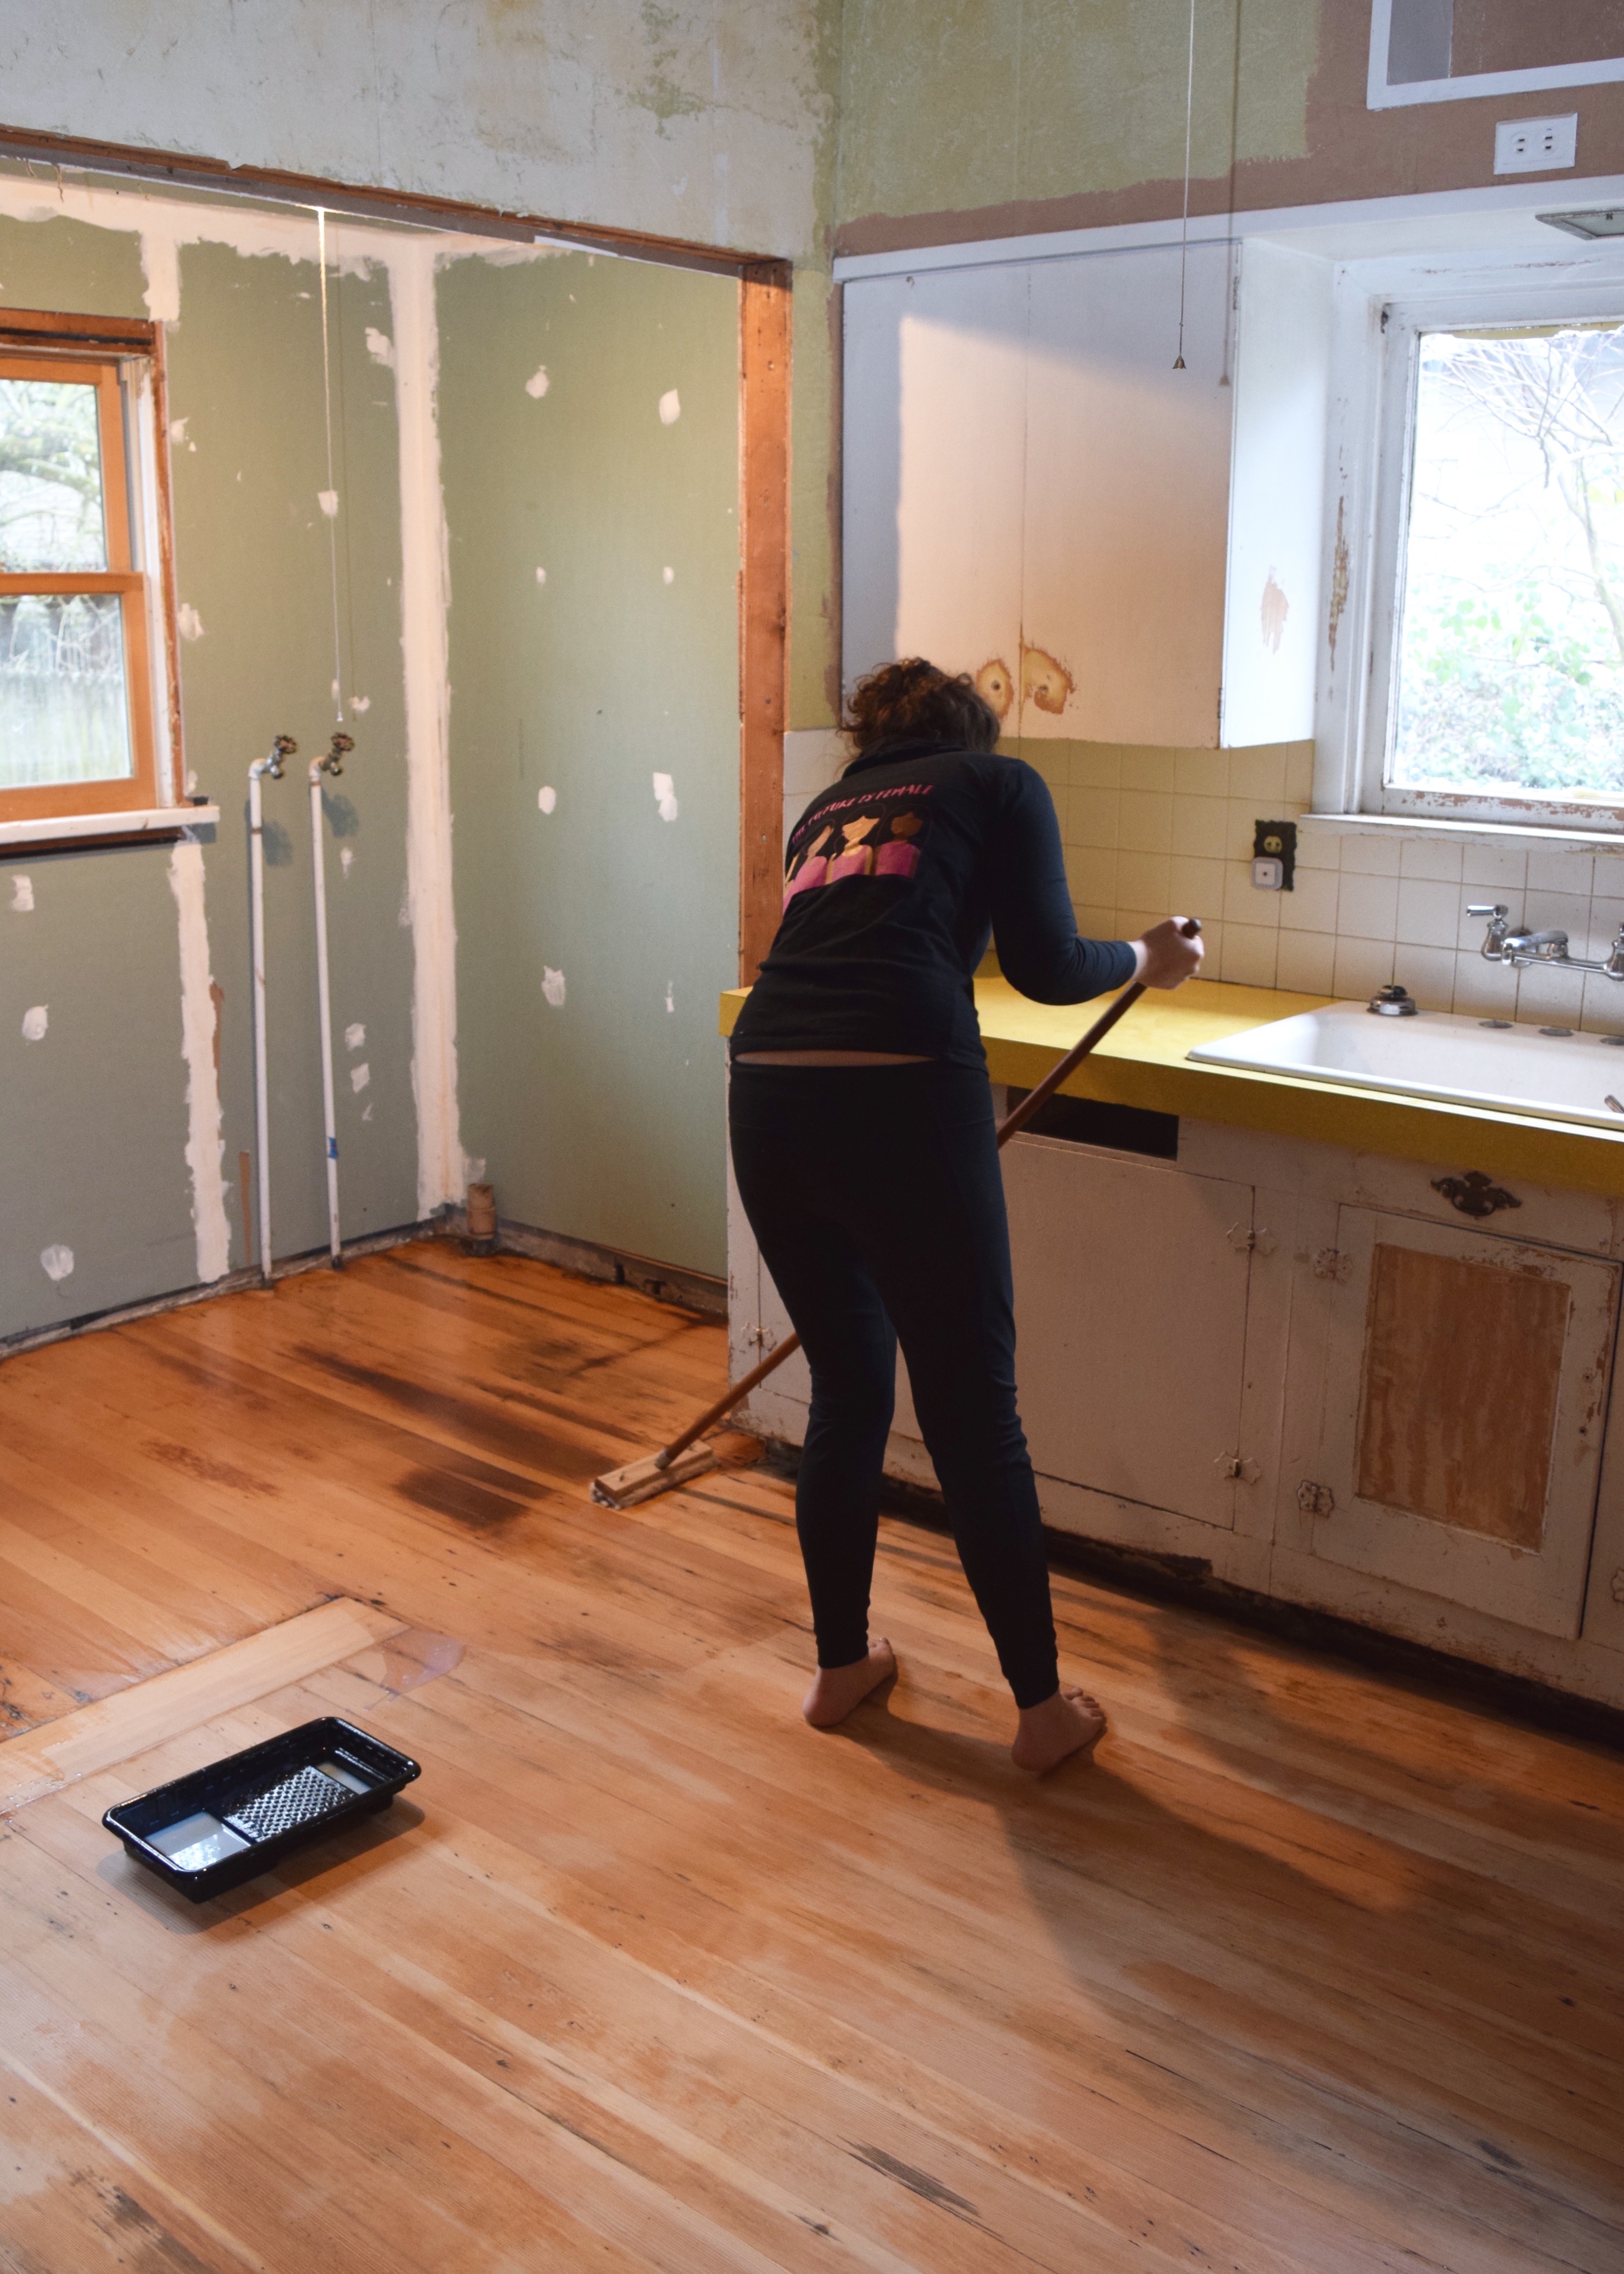
The kitchen had been used as a storage / staging ground for the bathroom renovation and looked absolutely horrendous. My Aunt Steph snapped this shot when she came to visit in early February 2018 and helped to clean the space up. Yes, this is the kitchen I’d been using for the last five months in it’s most “clean” state. Yes, I realize that’s insane. But, hey, at least the bathtub wasn’t in there any more. Progress right?!
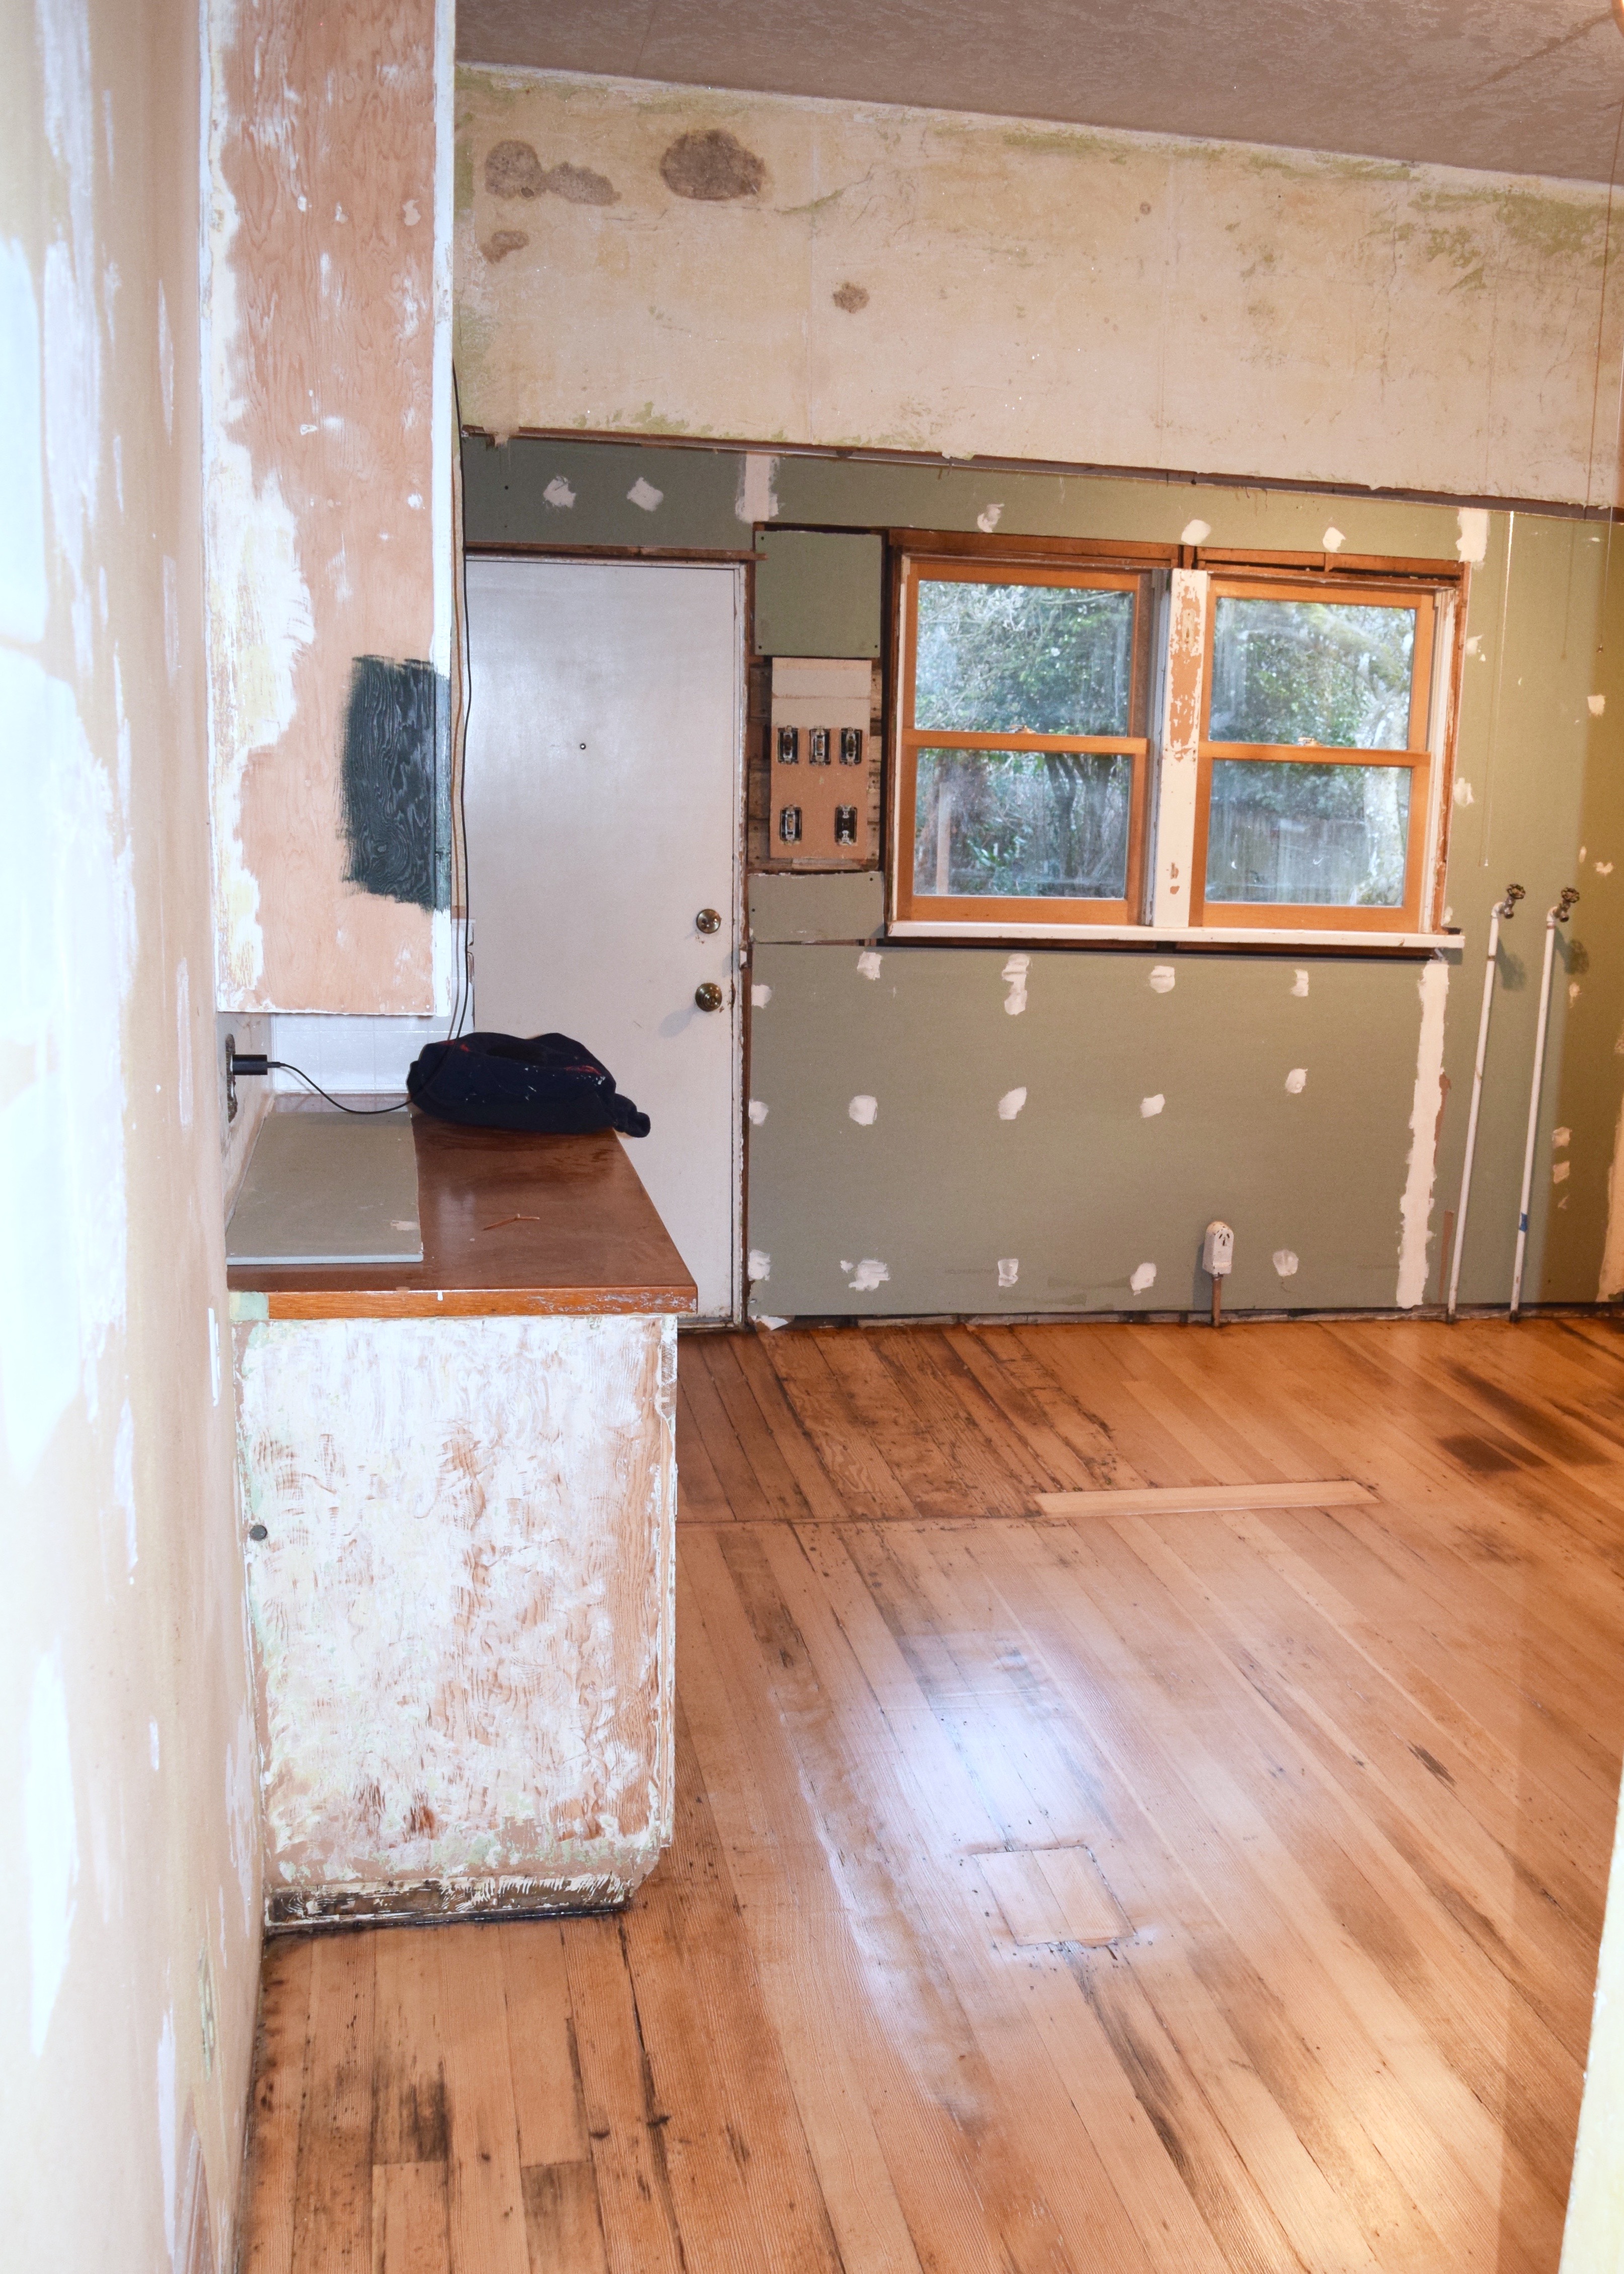
My kitchen is weirdly sectioned into two spaces: the main kitchen in the main house and the back part of the kitchen which is in what I assumed was originally a porch when the house was build in 1909. Well, after taking a closer look at the walls in the space I realized the back portion of the room was in really, really rough shape. Far worse than the main part of the kitchen and a couple coats of paint wasn’t going to hide it. So, I decided to just demo that area back down to the studs and throw some drywall up before refinishing the floors. Bronwyn and I went to work pulling off the homosote (a drywall precursor) and exposed some unexpected results…
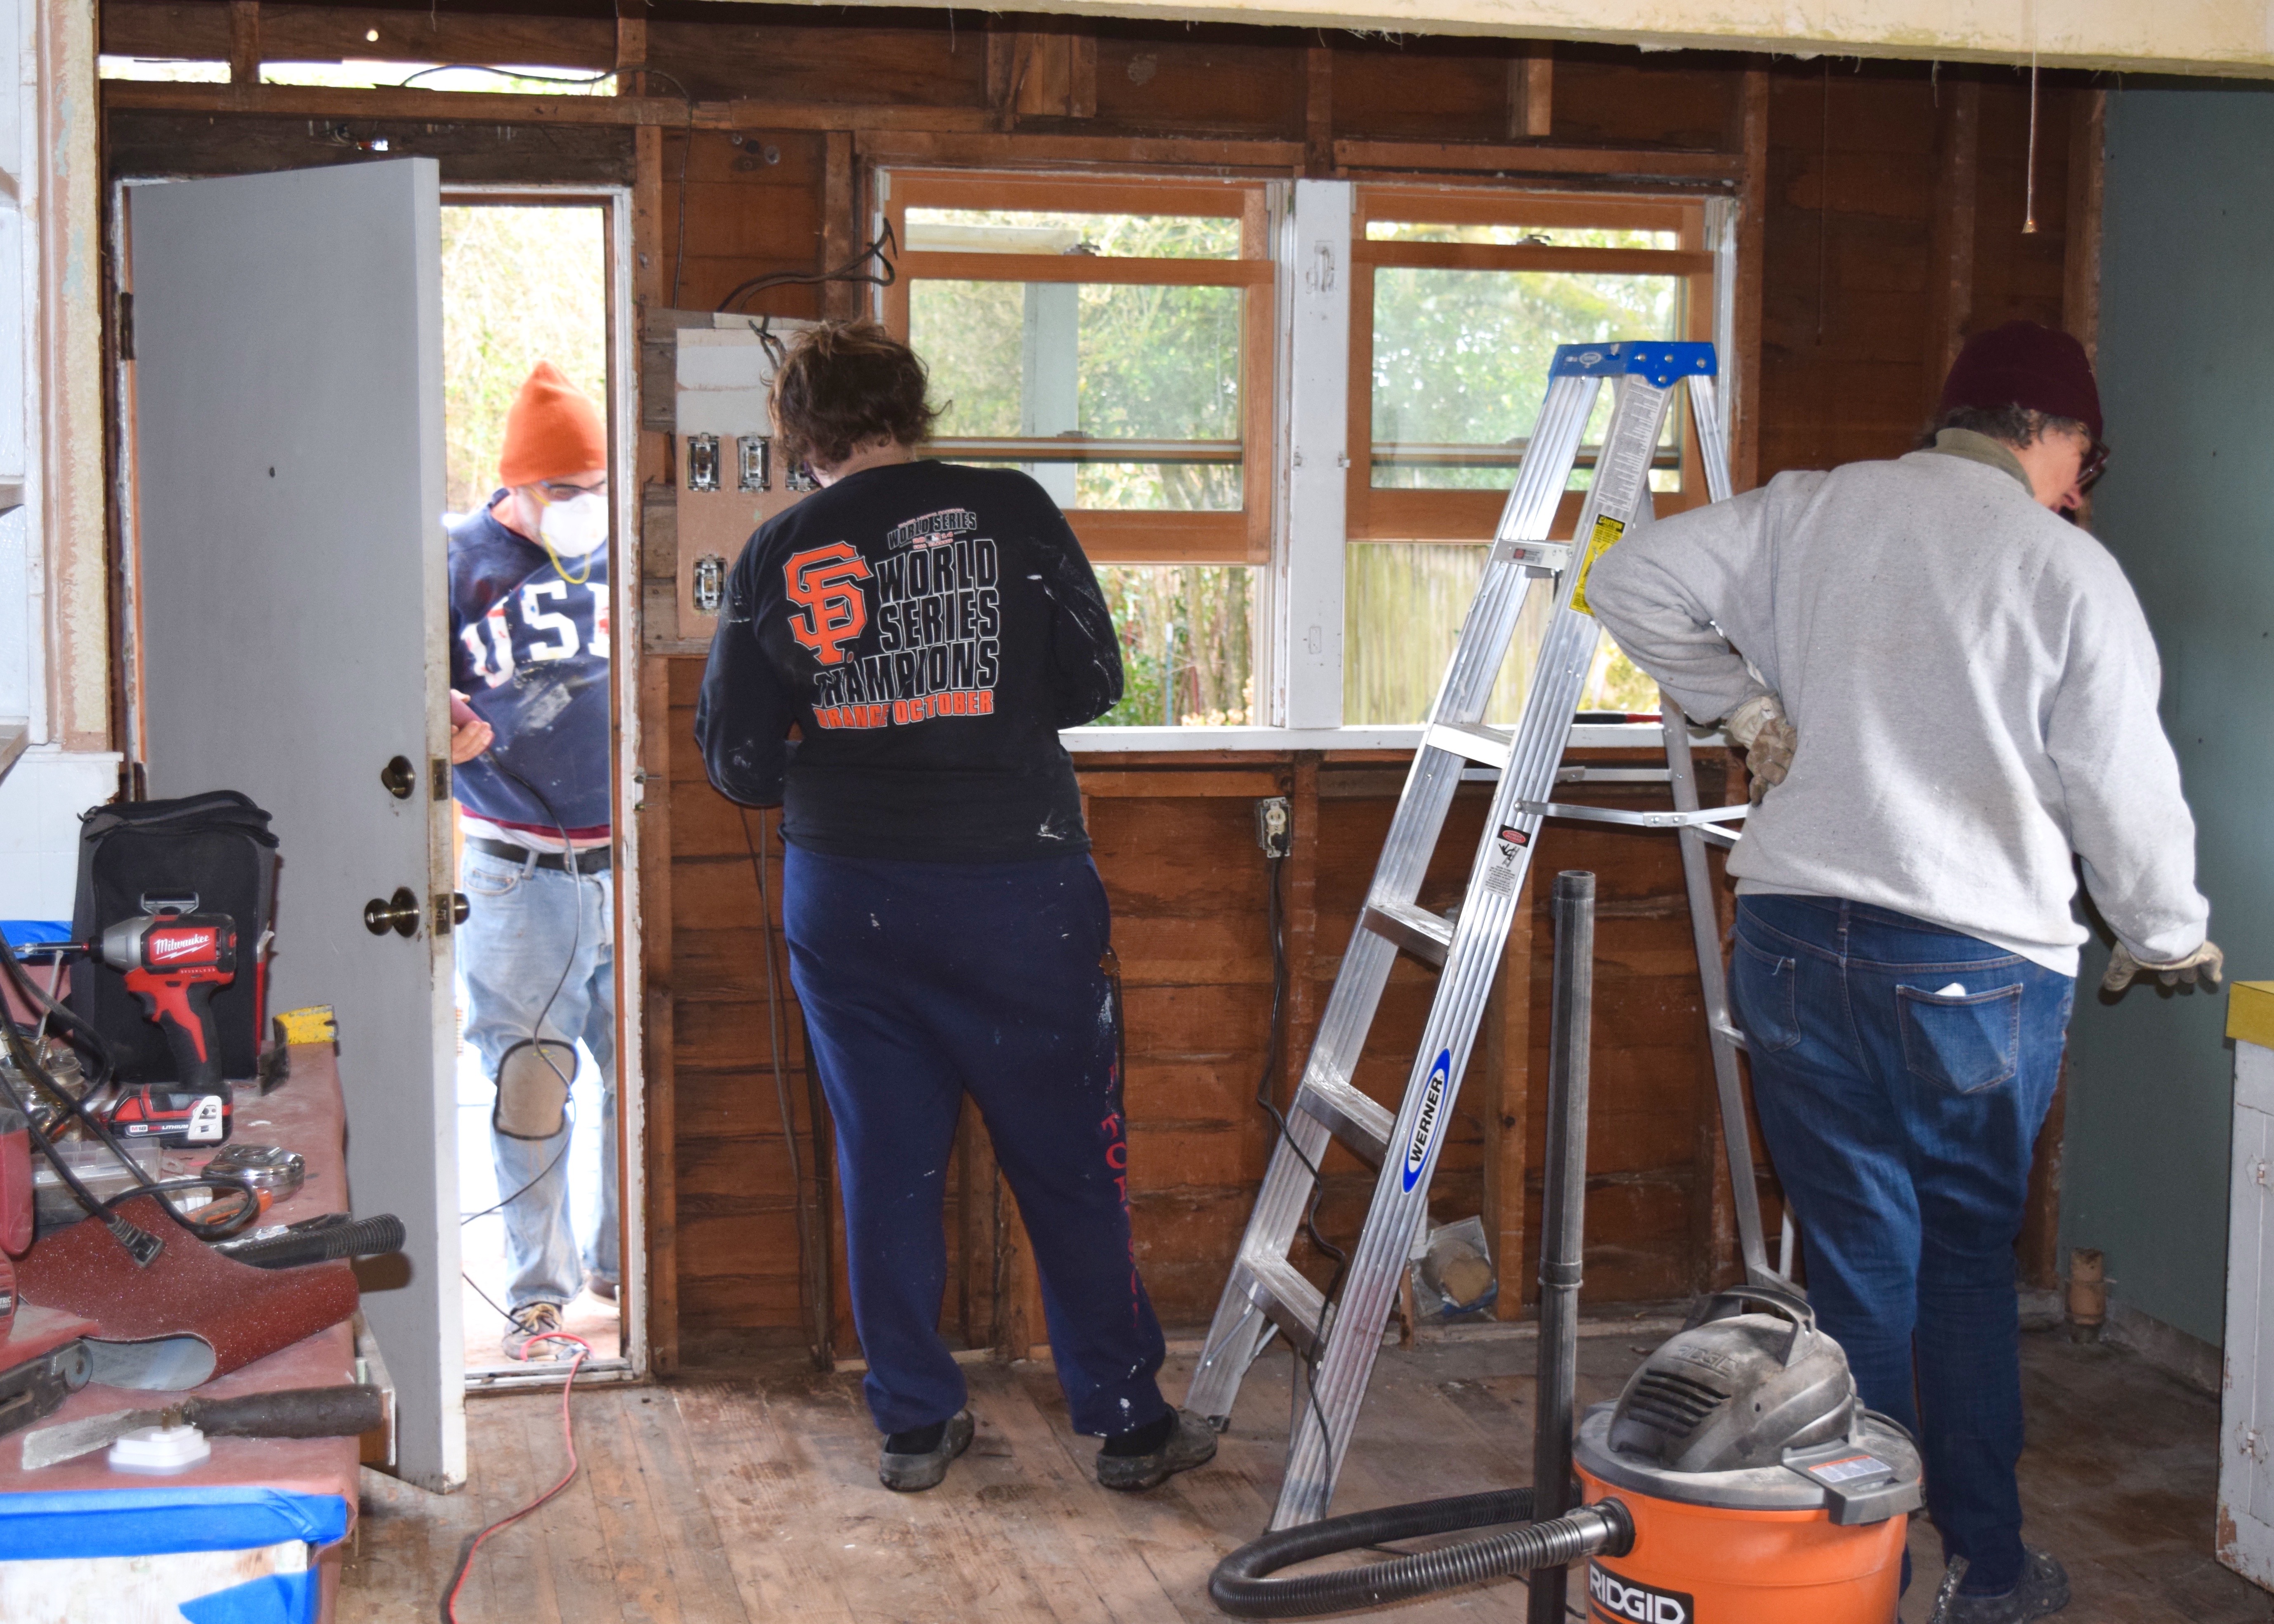
Demo is easy, but messy and we suited up with masks, goggles, and gloves. You can easily use a couple of mini crowbars and hammers to remove most of the homosote (or lathe and plaster, or drywall!). Once we pulled off that first layer we found a whole bunch of things. First, I was really not expecting to find siding AND lathe and plaster behind those homosote panels!
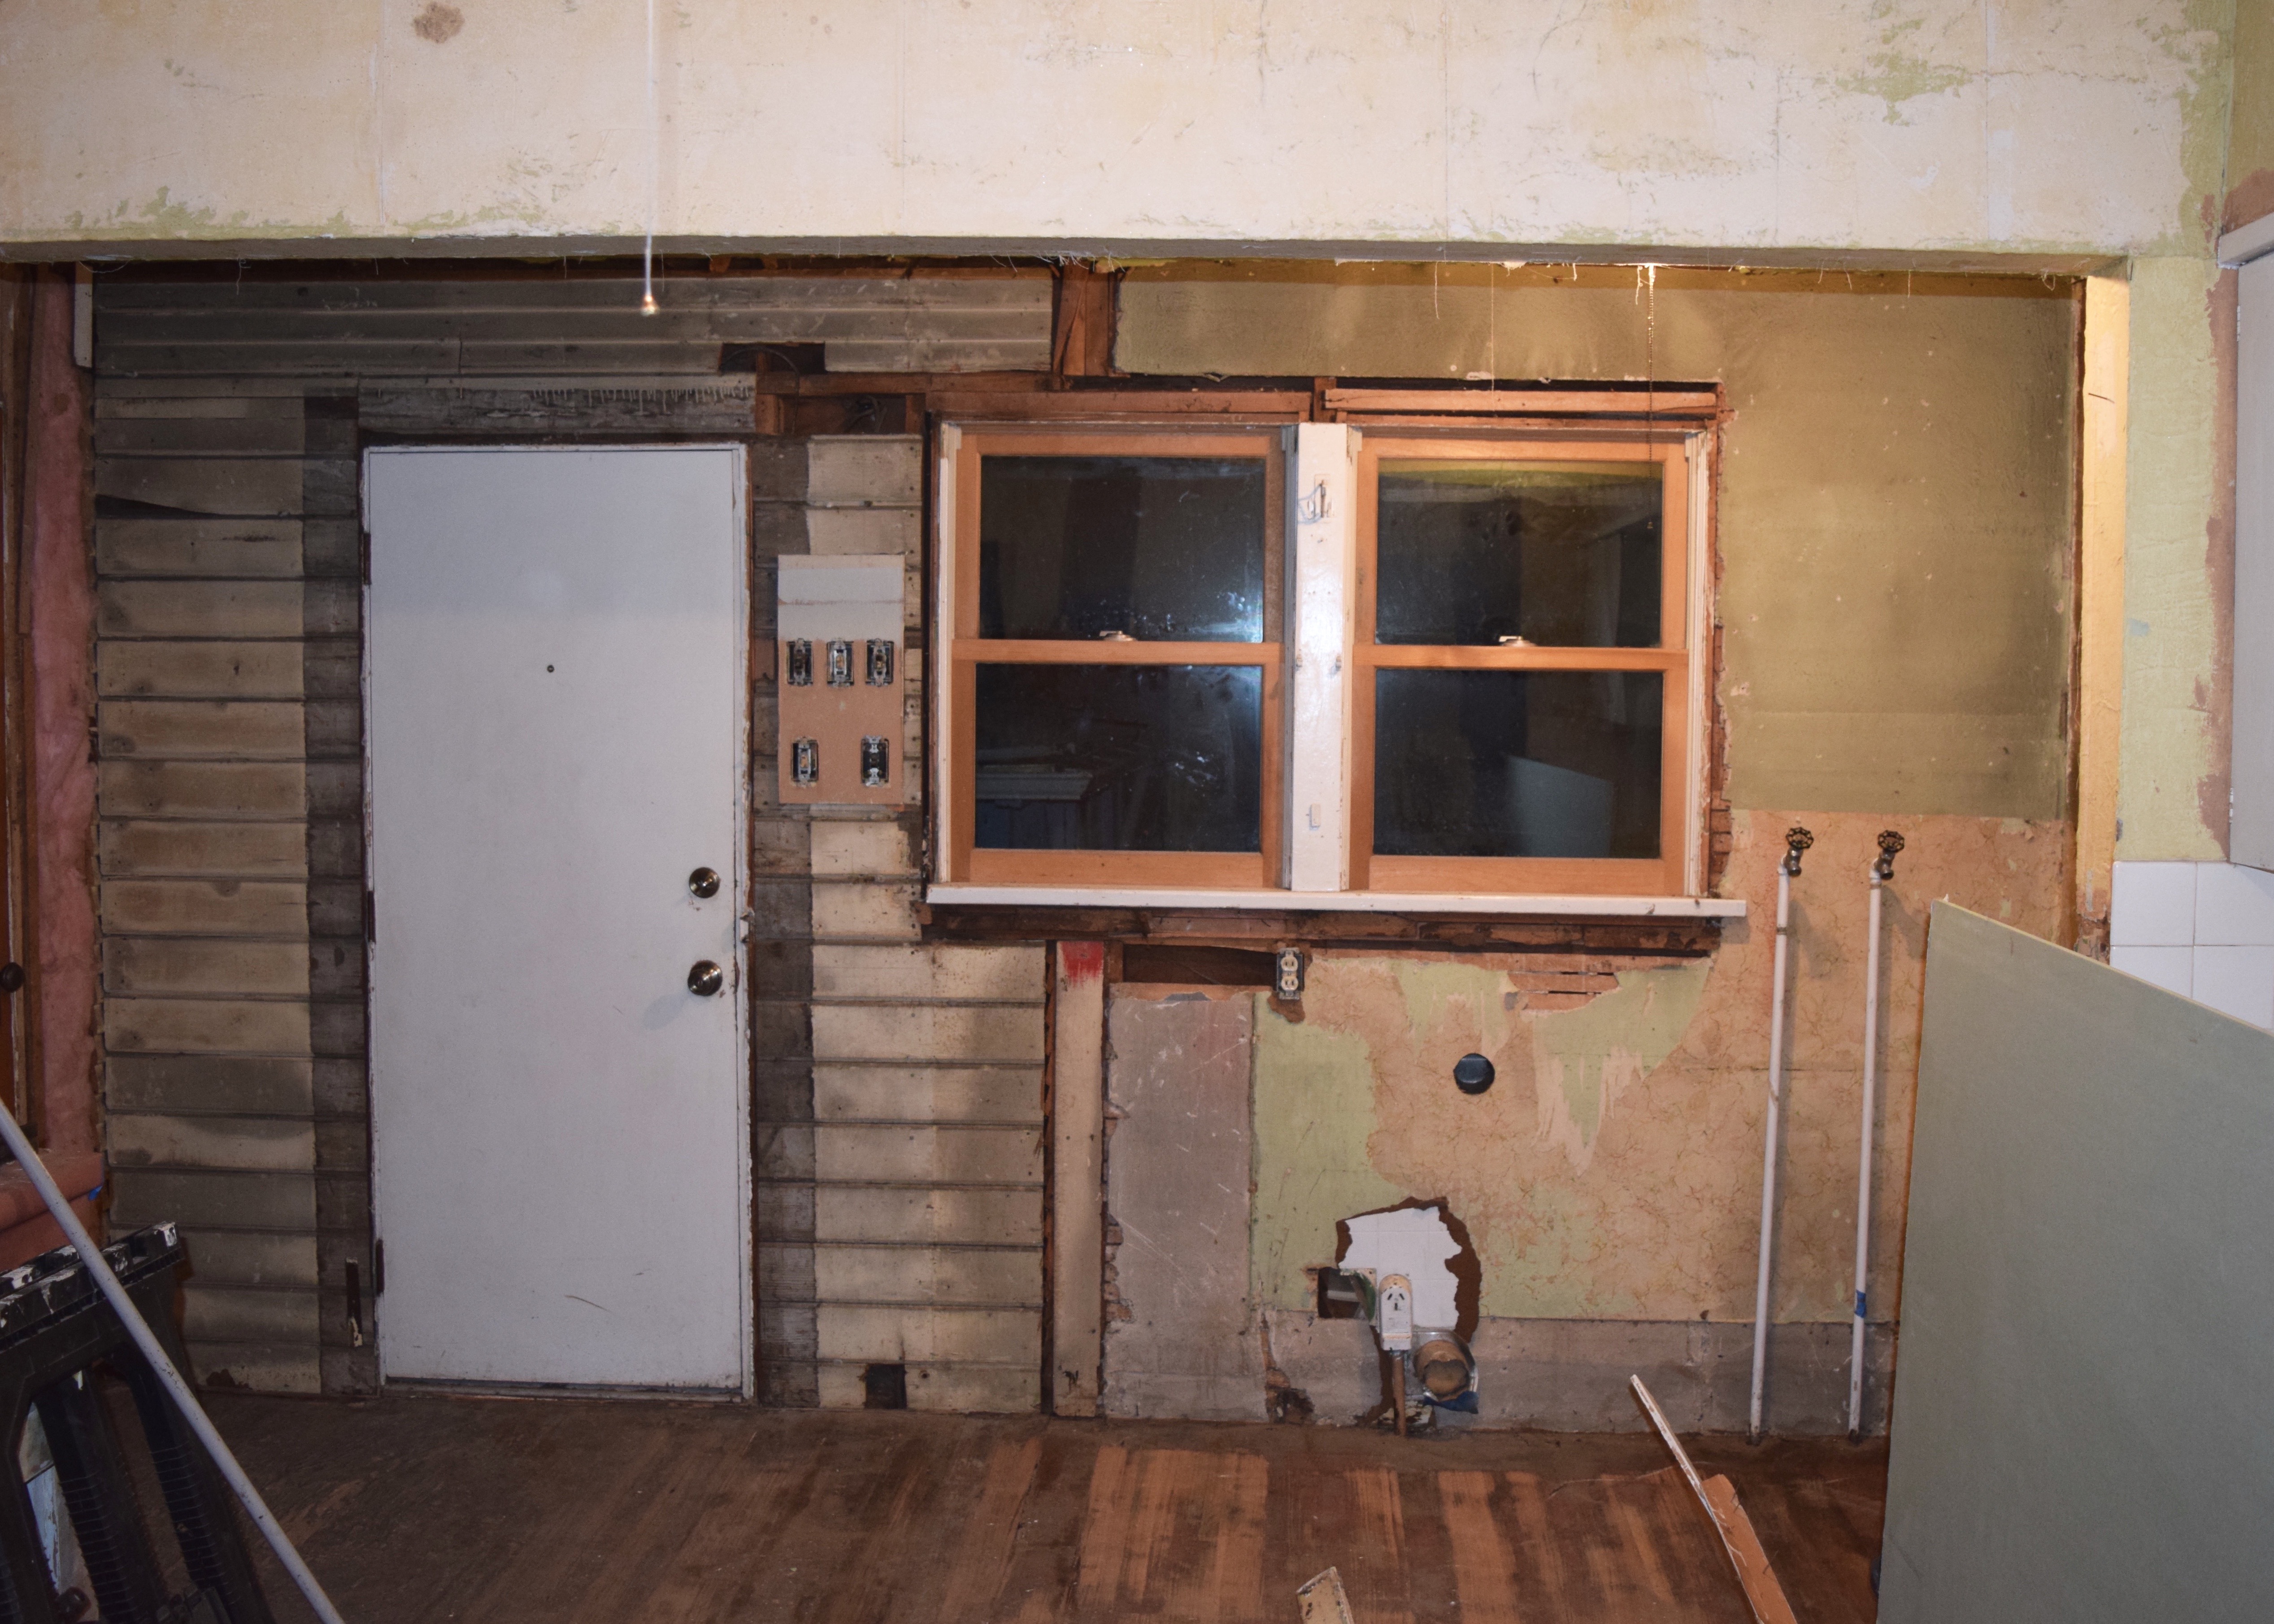
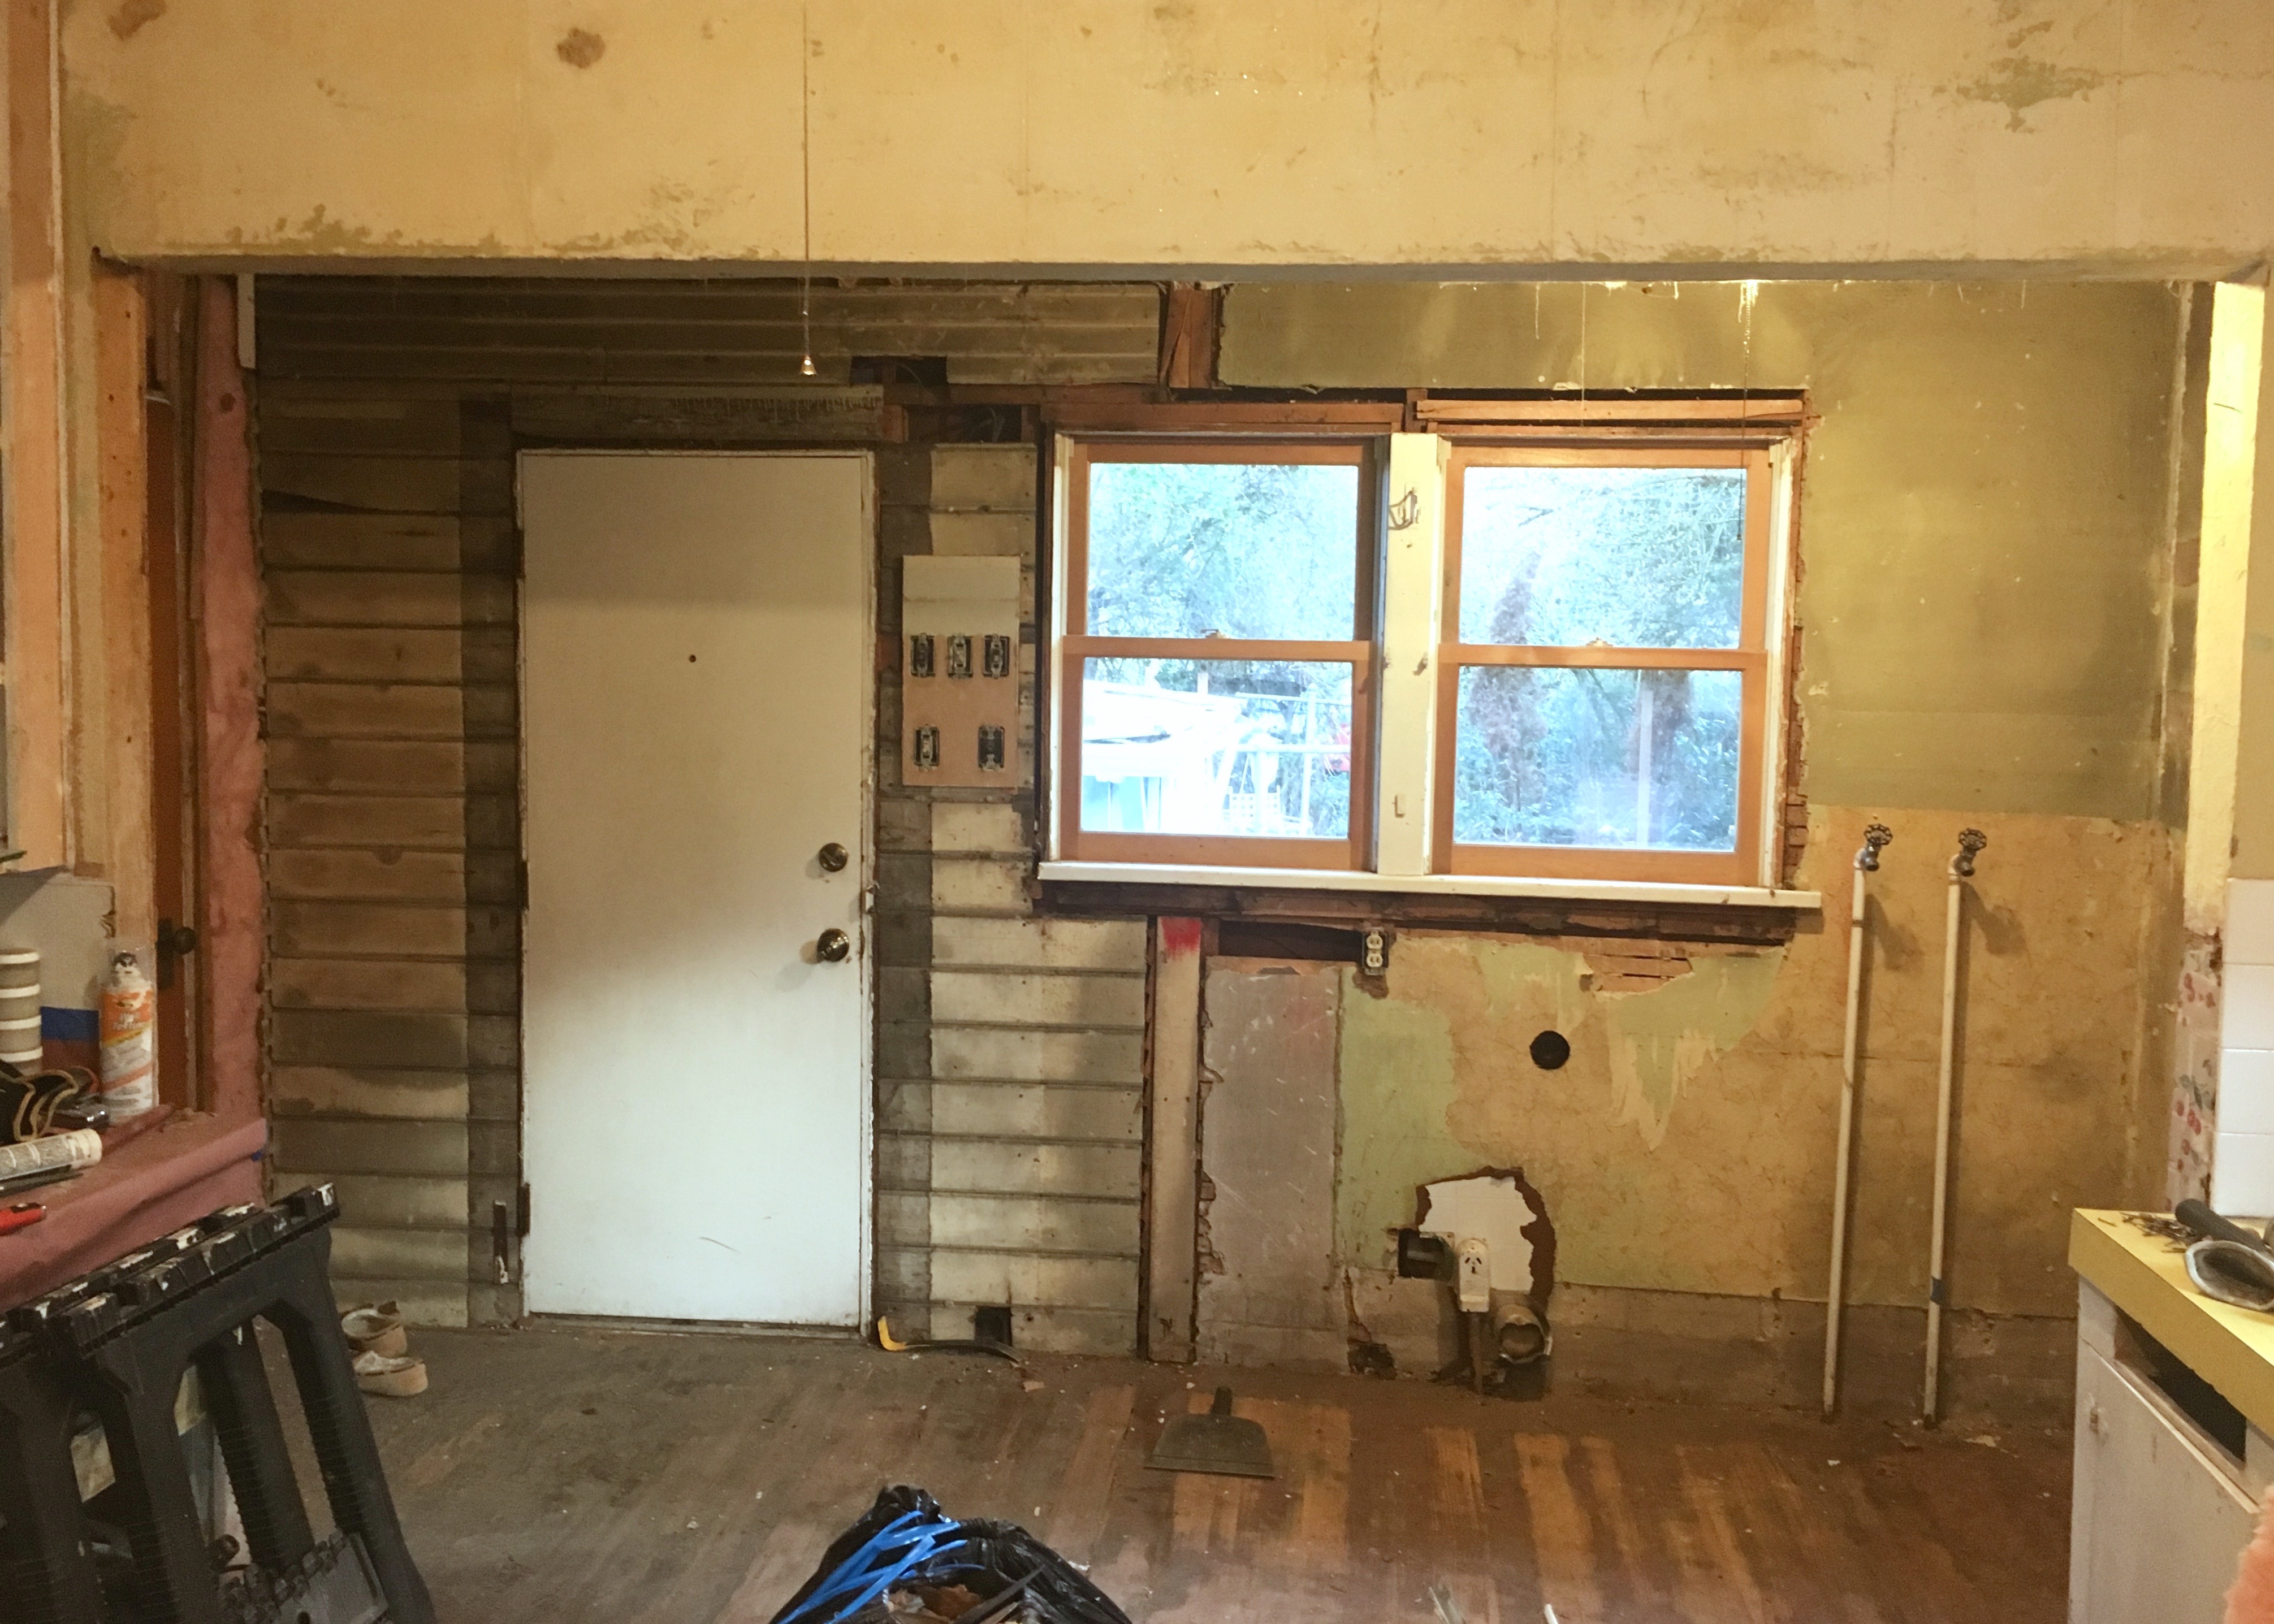
Second, apparently there used to be another window in here! It had been boarded up and hidden underneath the lathe and plaster and the siding had been patched on the outside of the house, so it hadn’t been obvious from either side. The kitchen is pretty dark in general though so a window west facing like this one could have let in a ton of extra light. I was tempted to see if it would be possible to restore it… but that would have been a whole ton of extra work and would have taken up valuable wallspace.
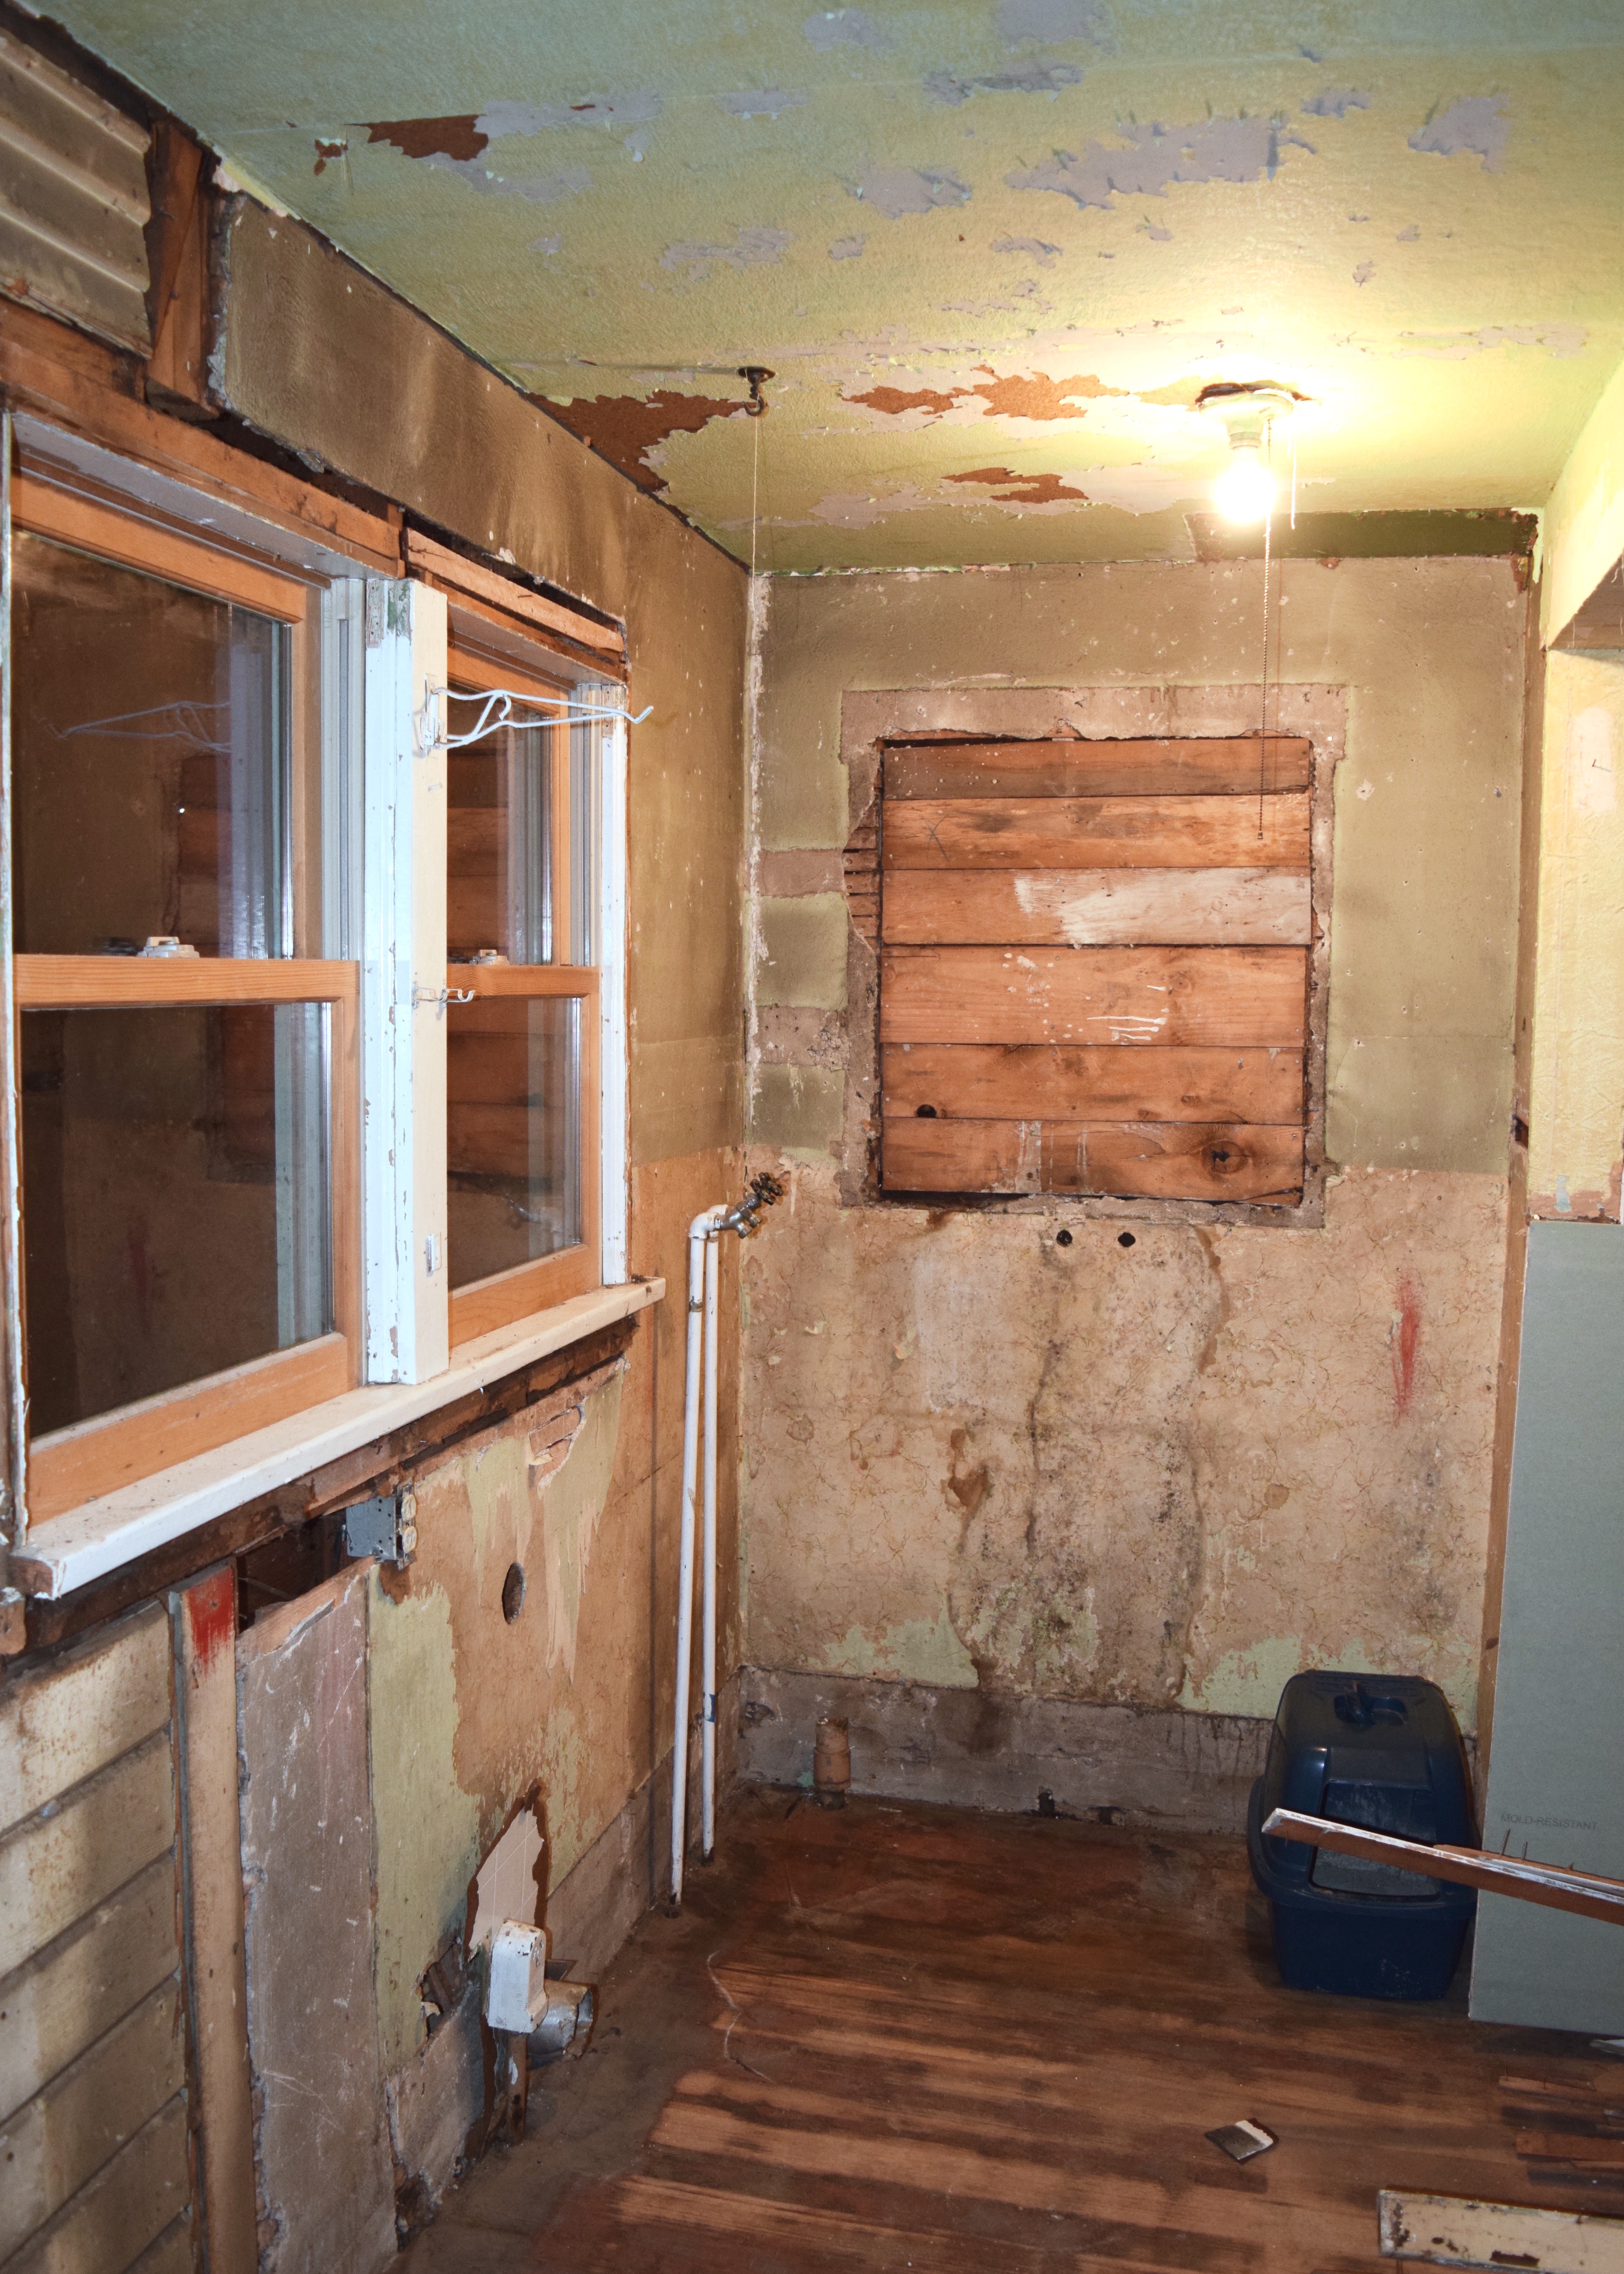
We paused and I debated just stopping demo here, I could still drywall over this mess. But seriously, what was going on here? What clues did this provide to explain the history of the house? A whole lot it turned out.
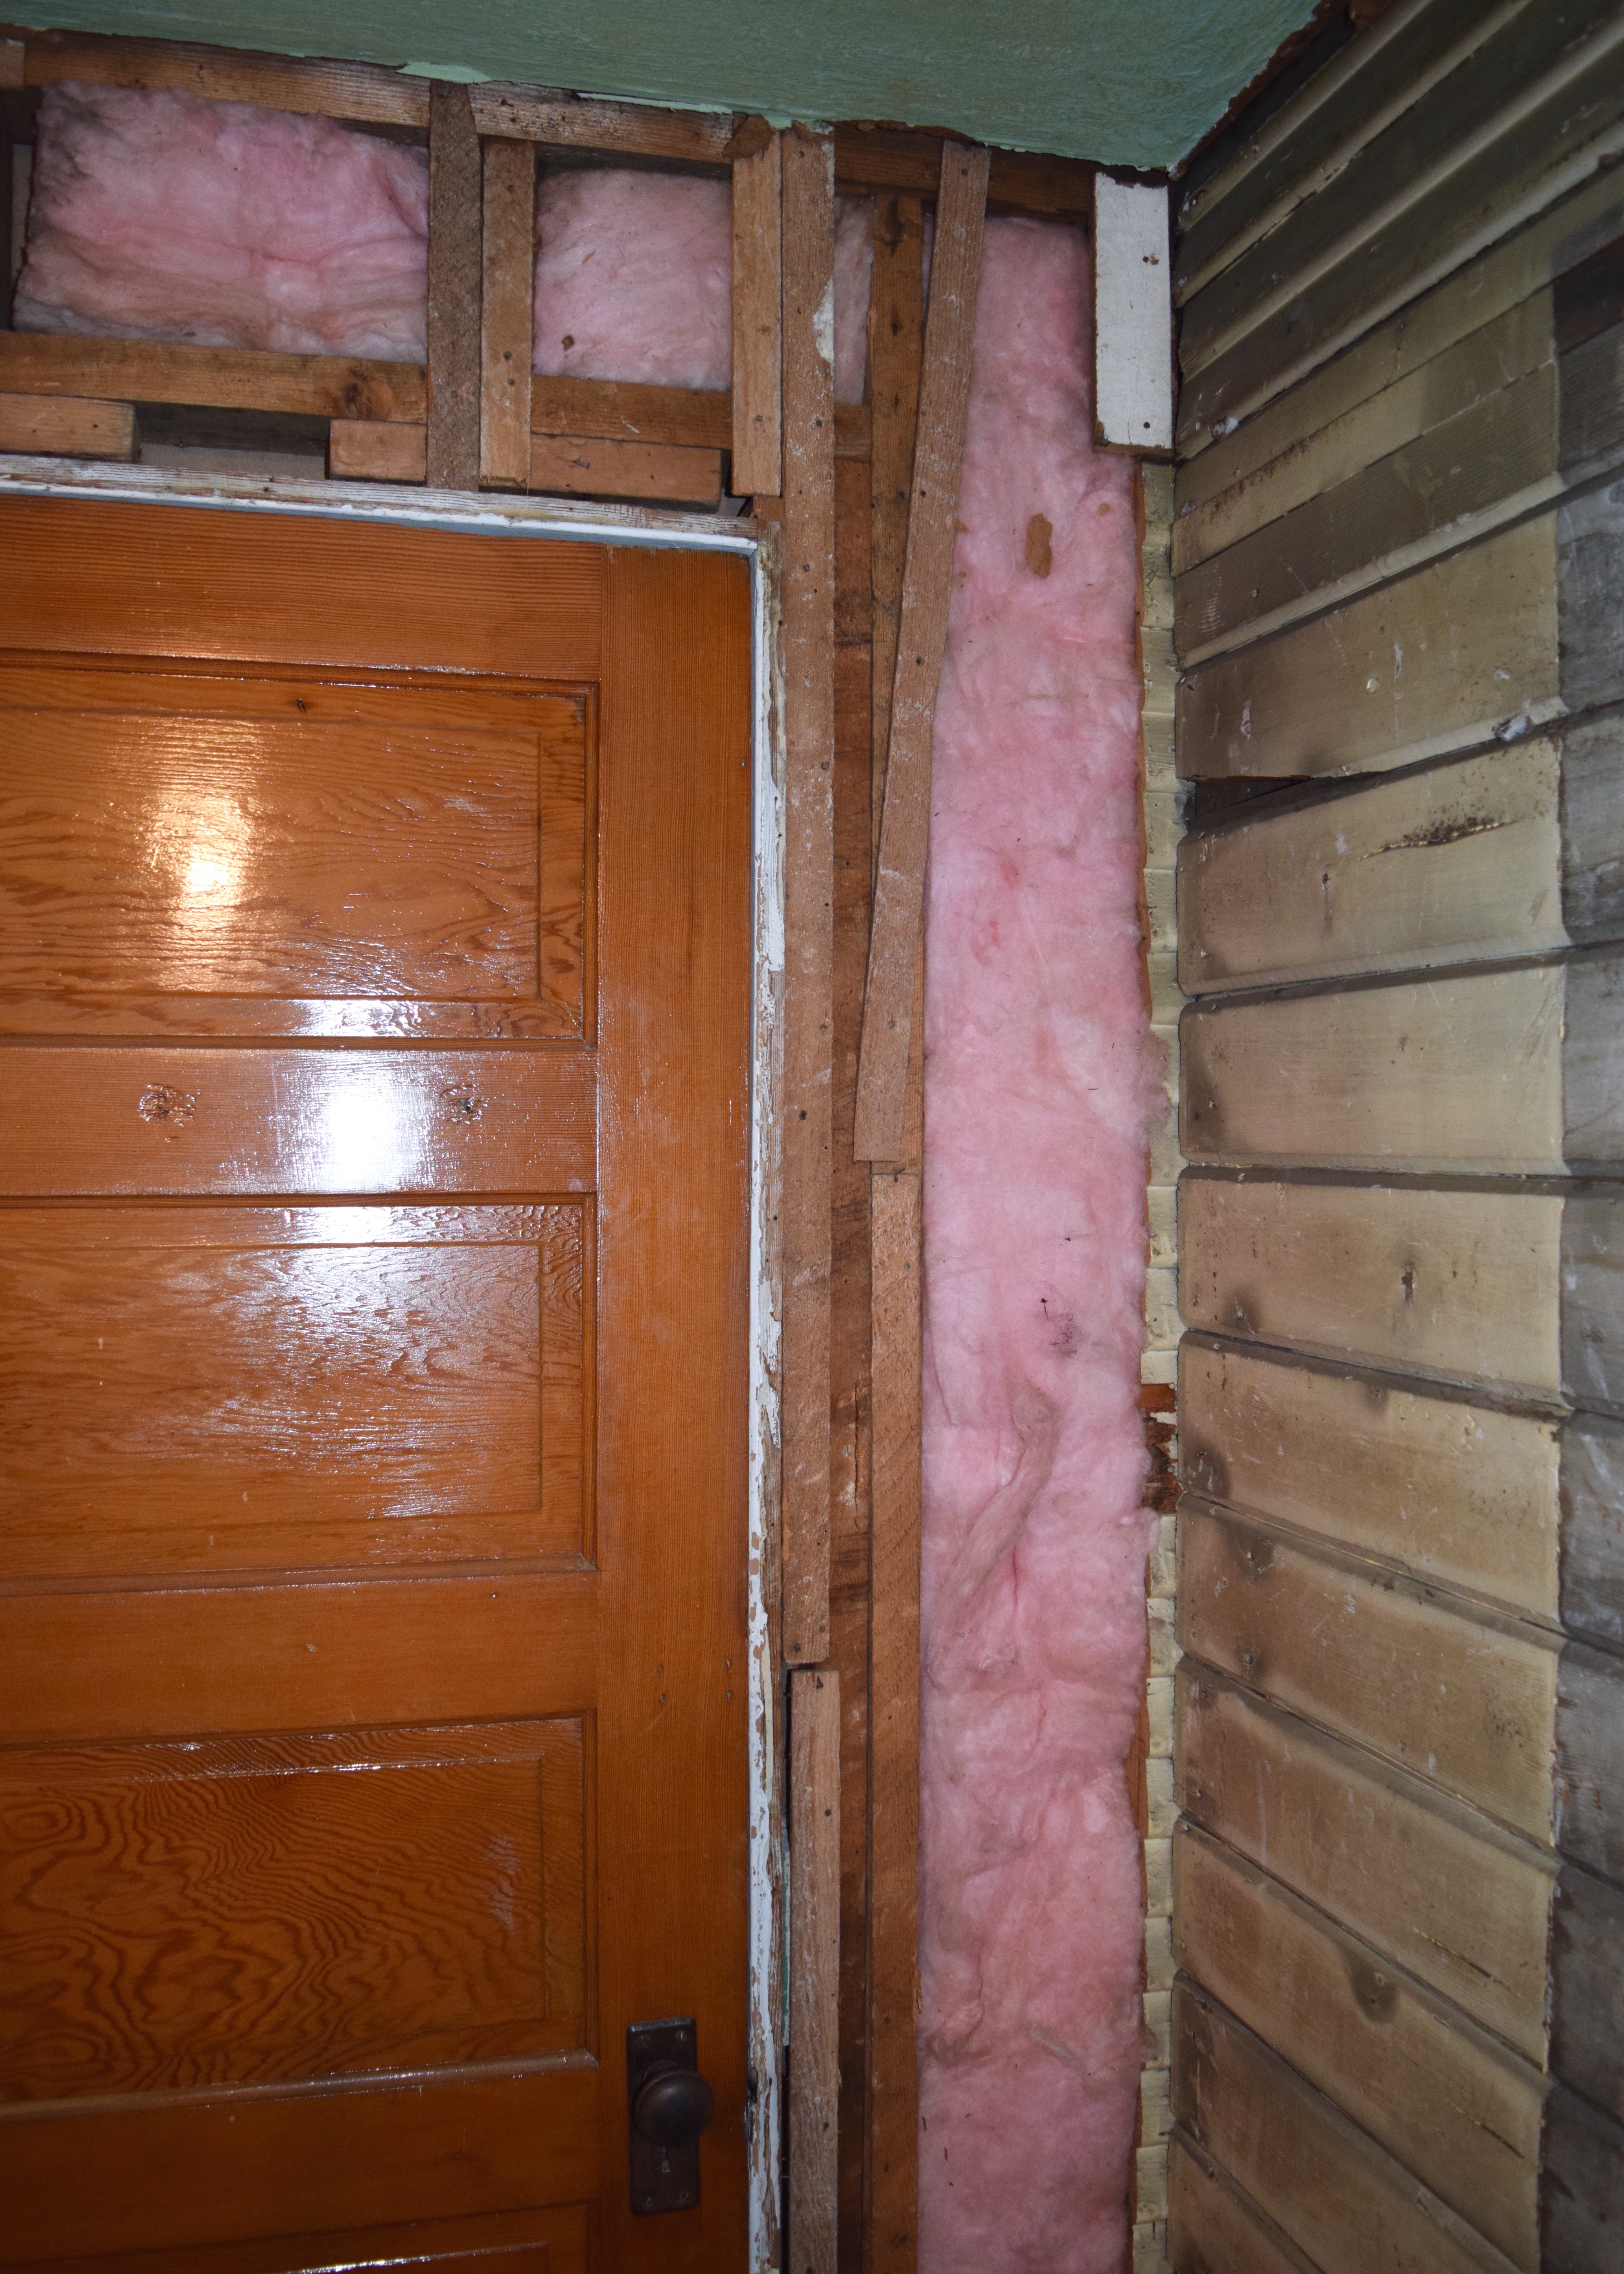
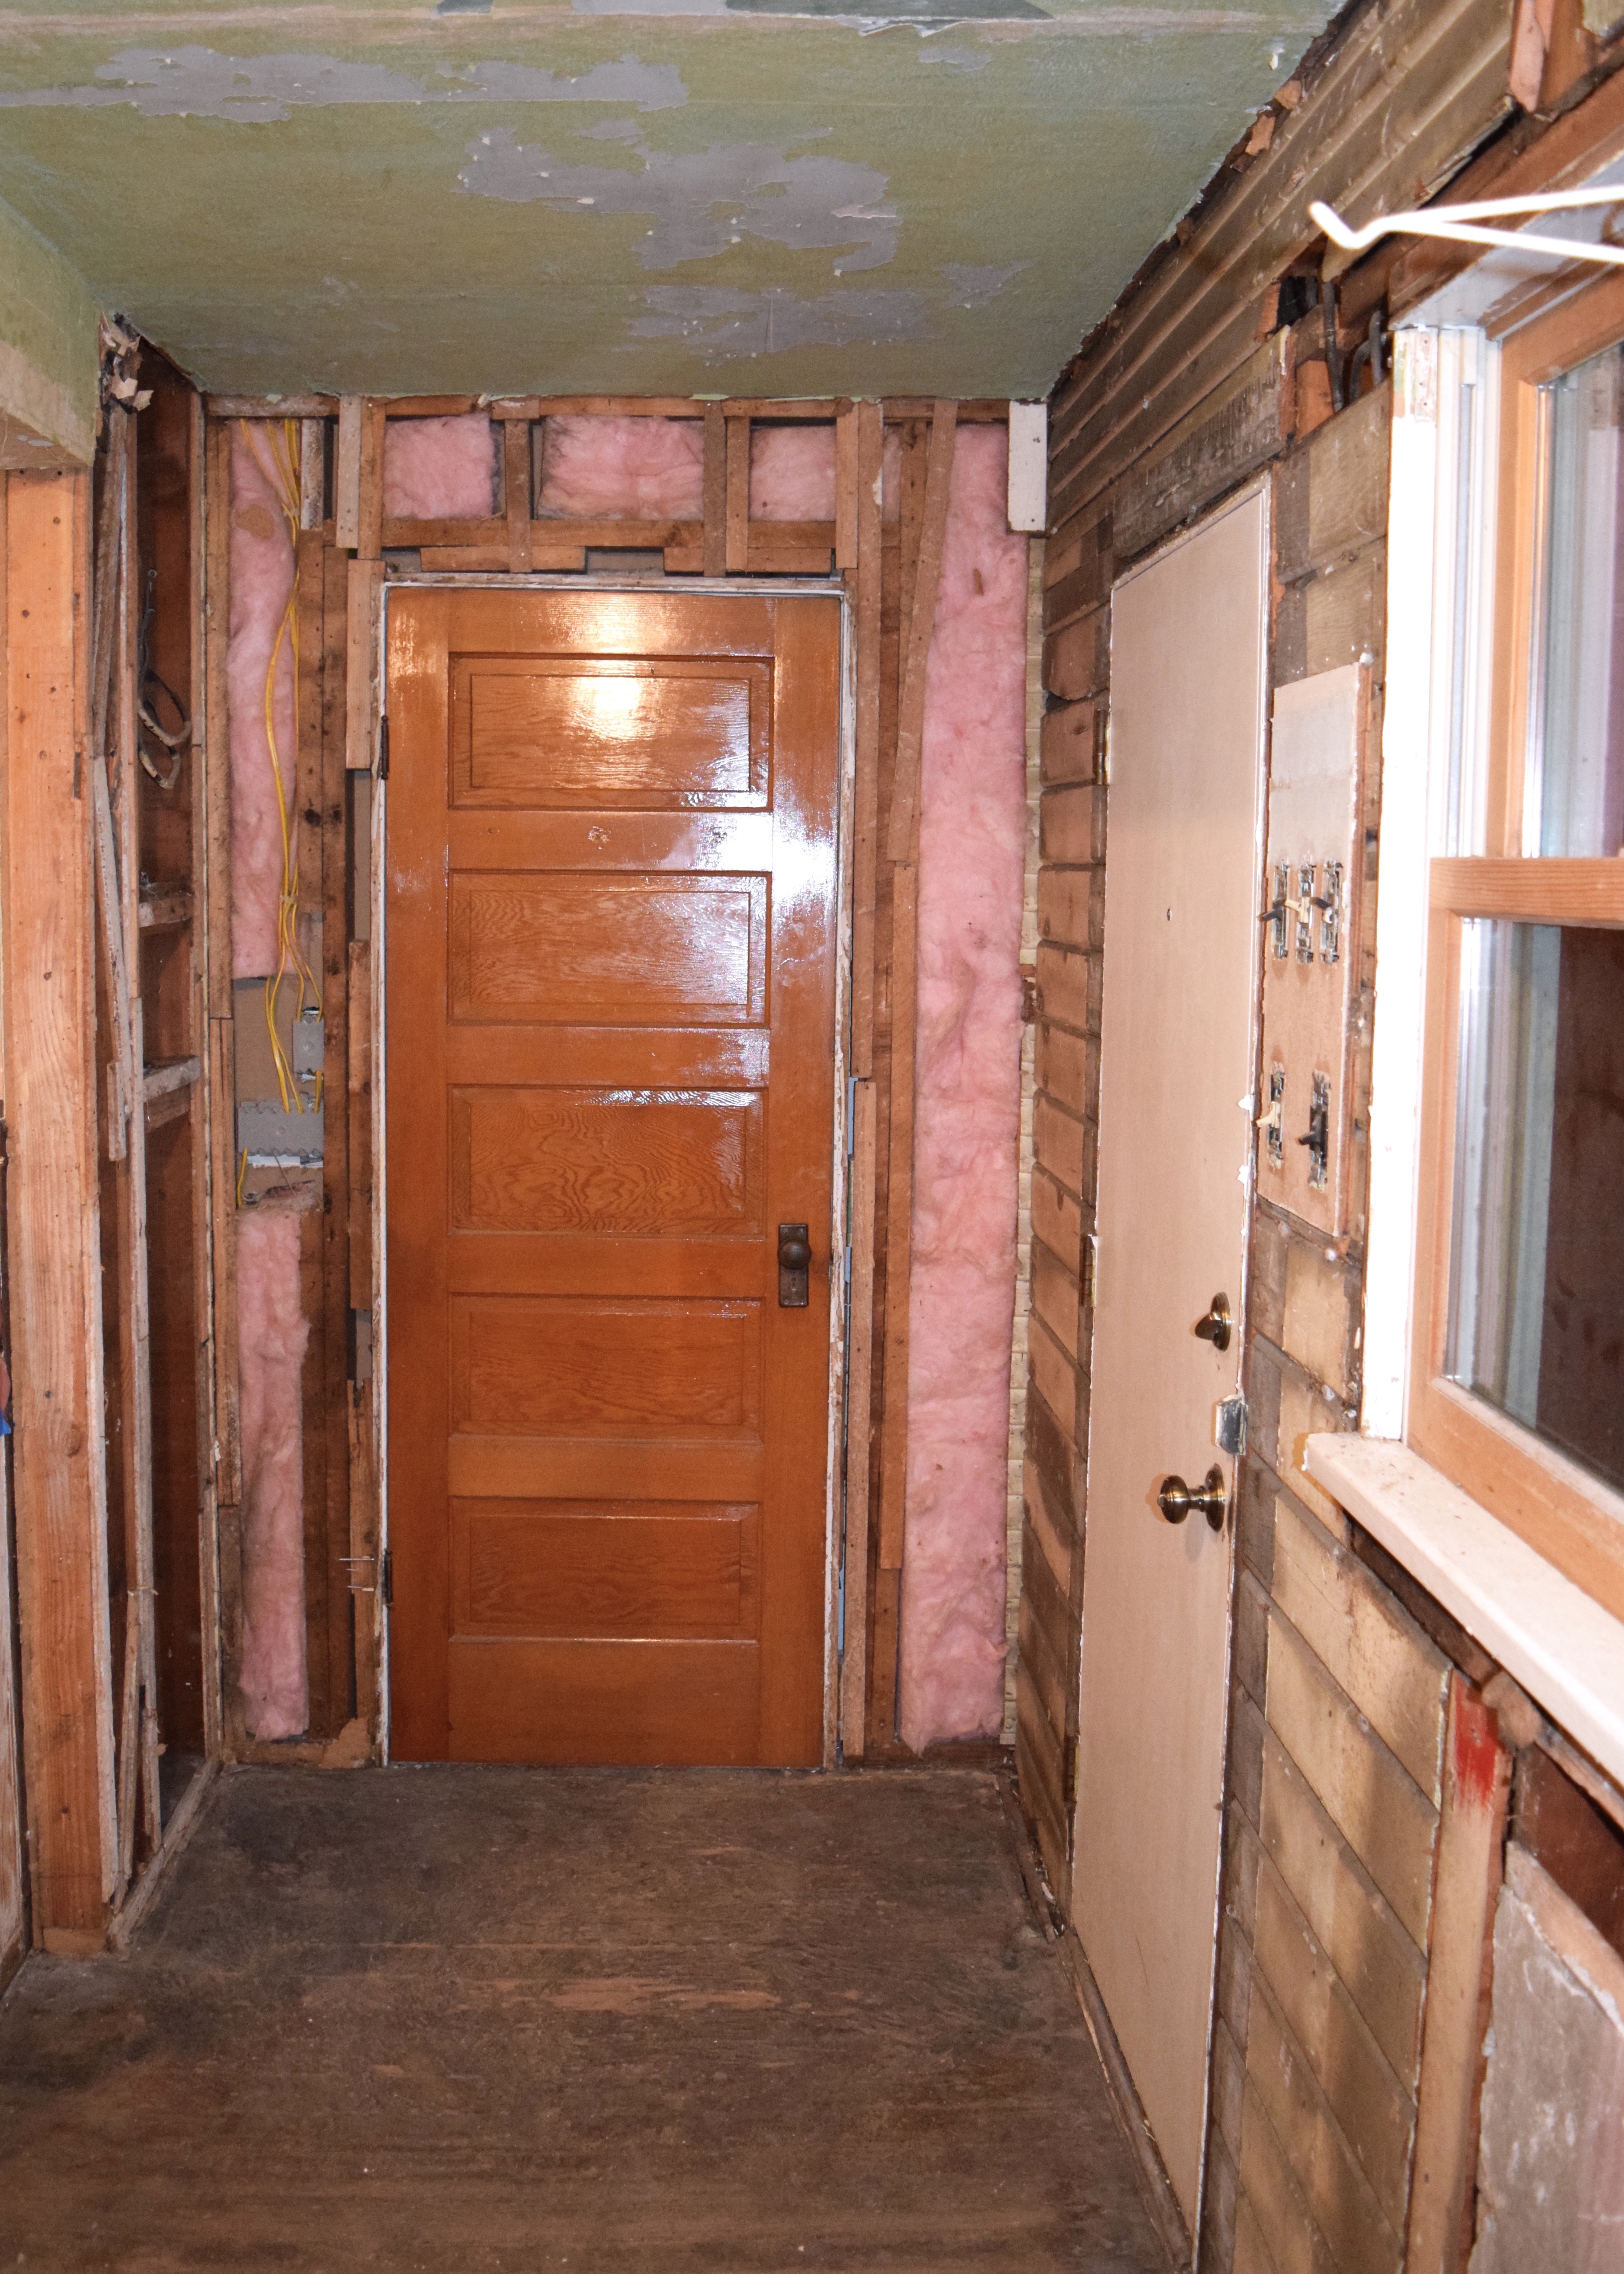
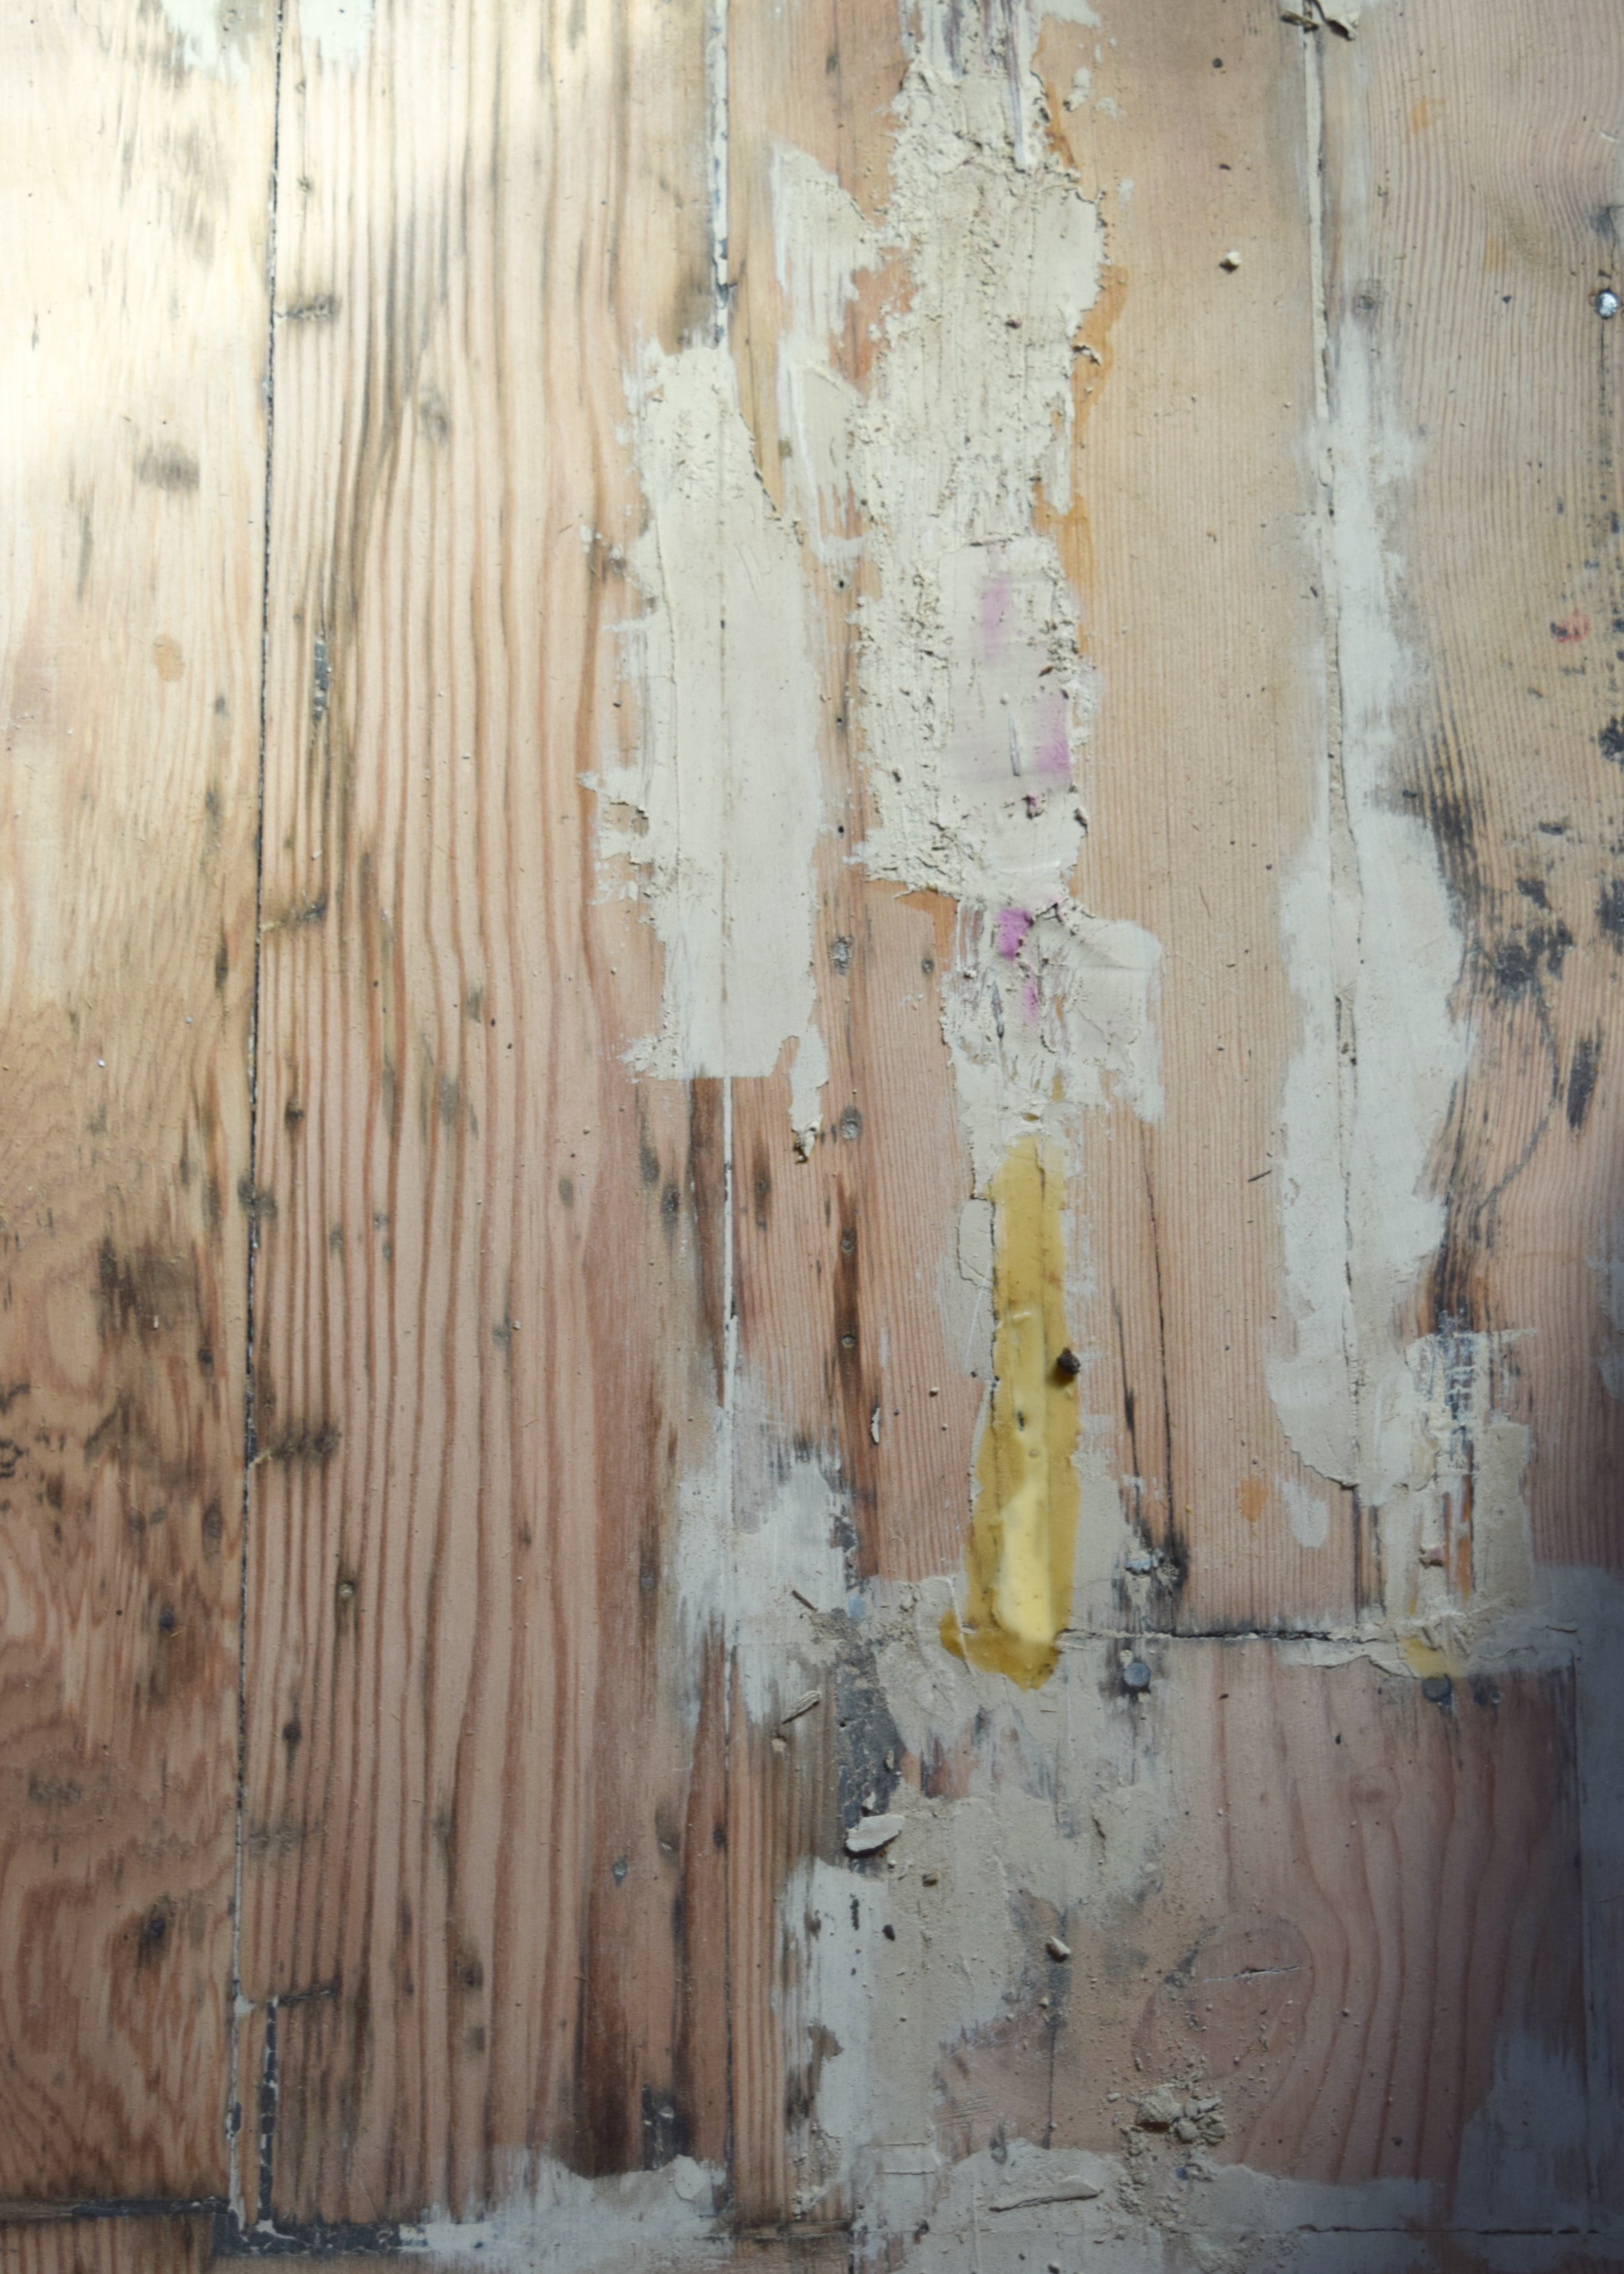
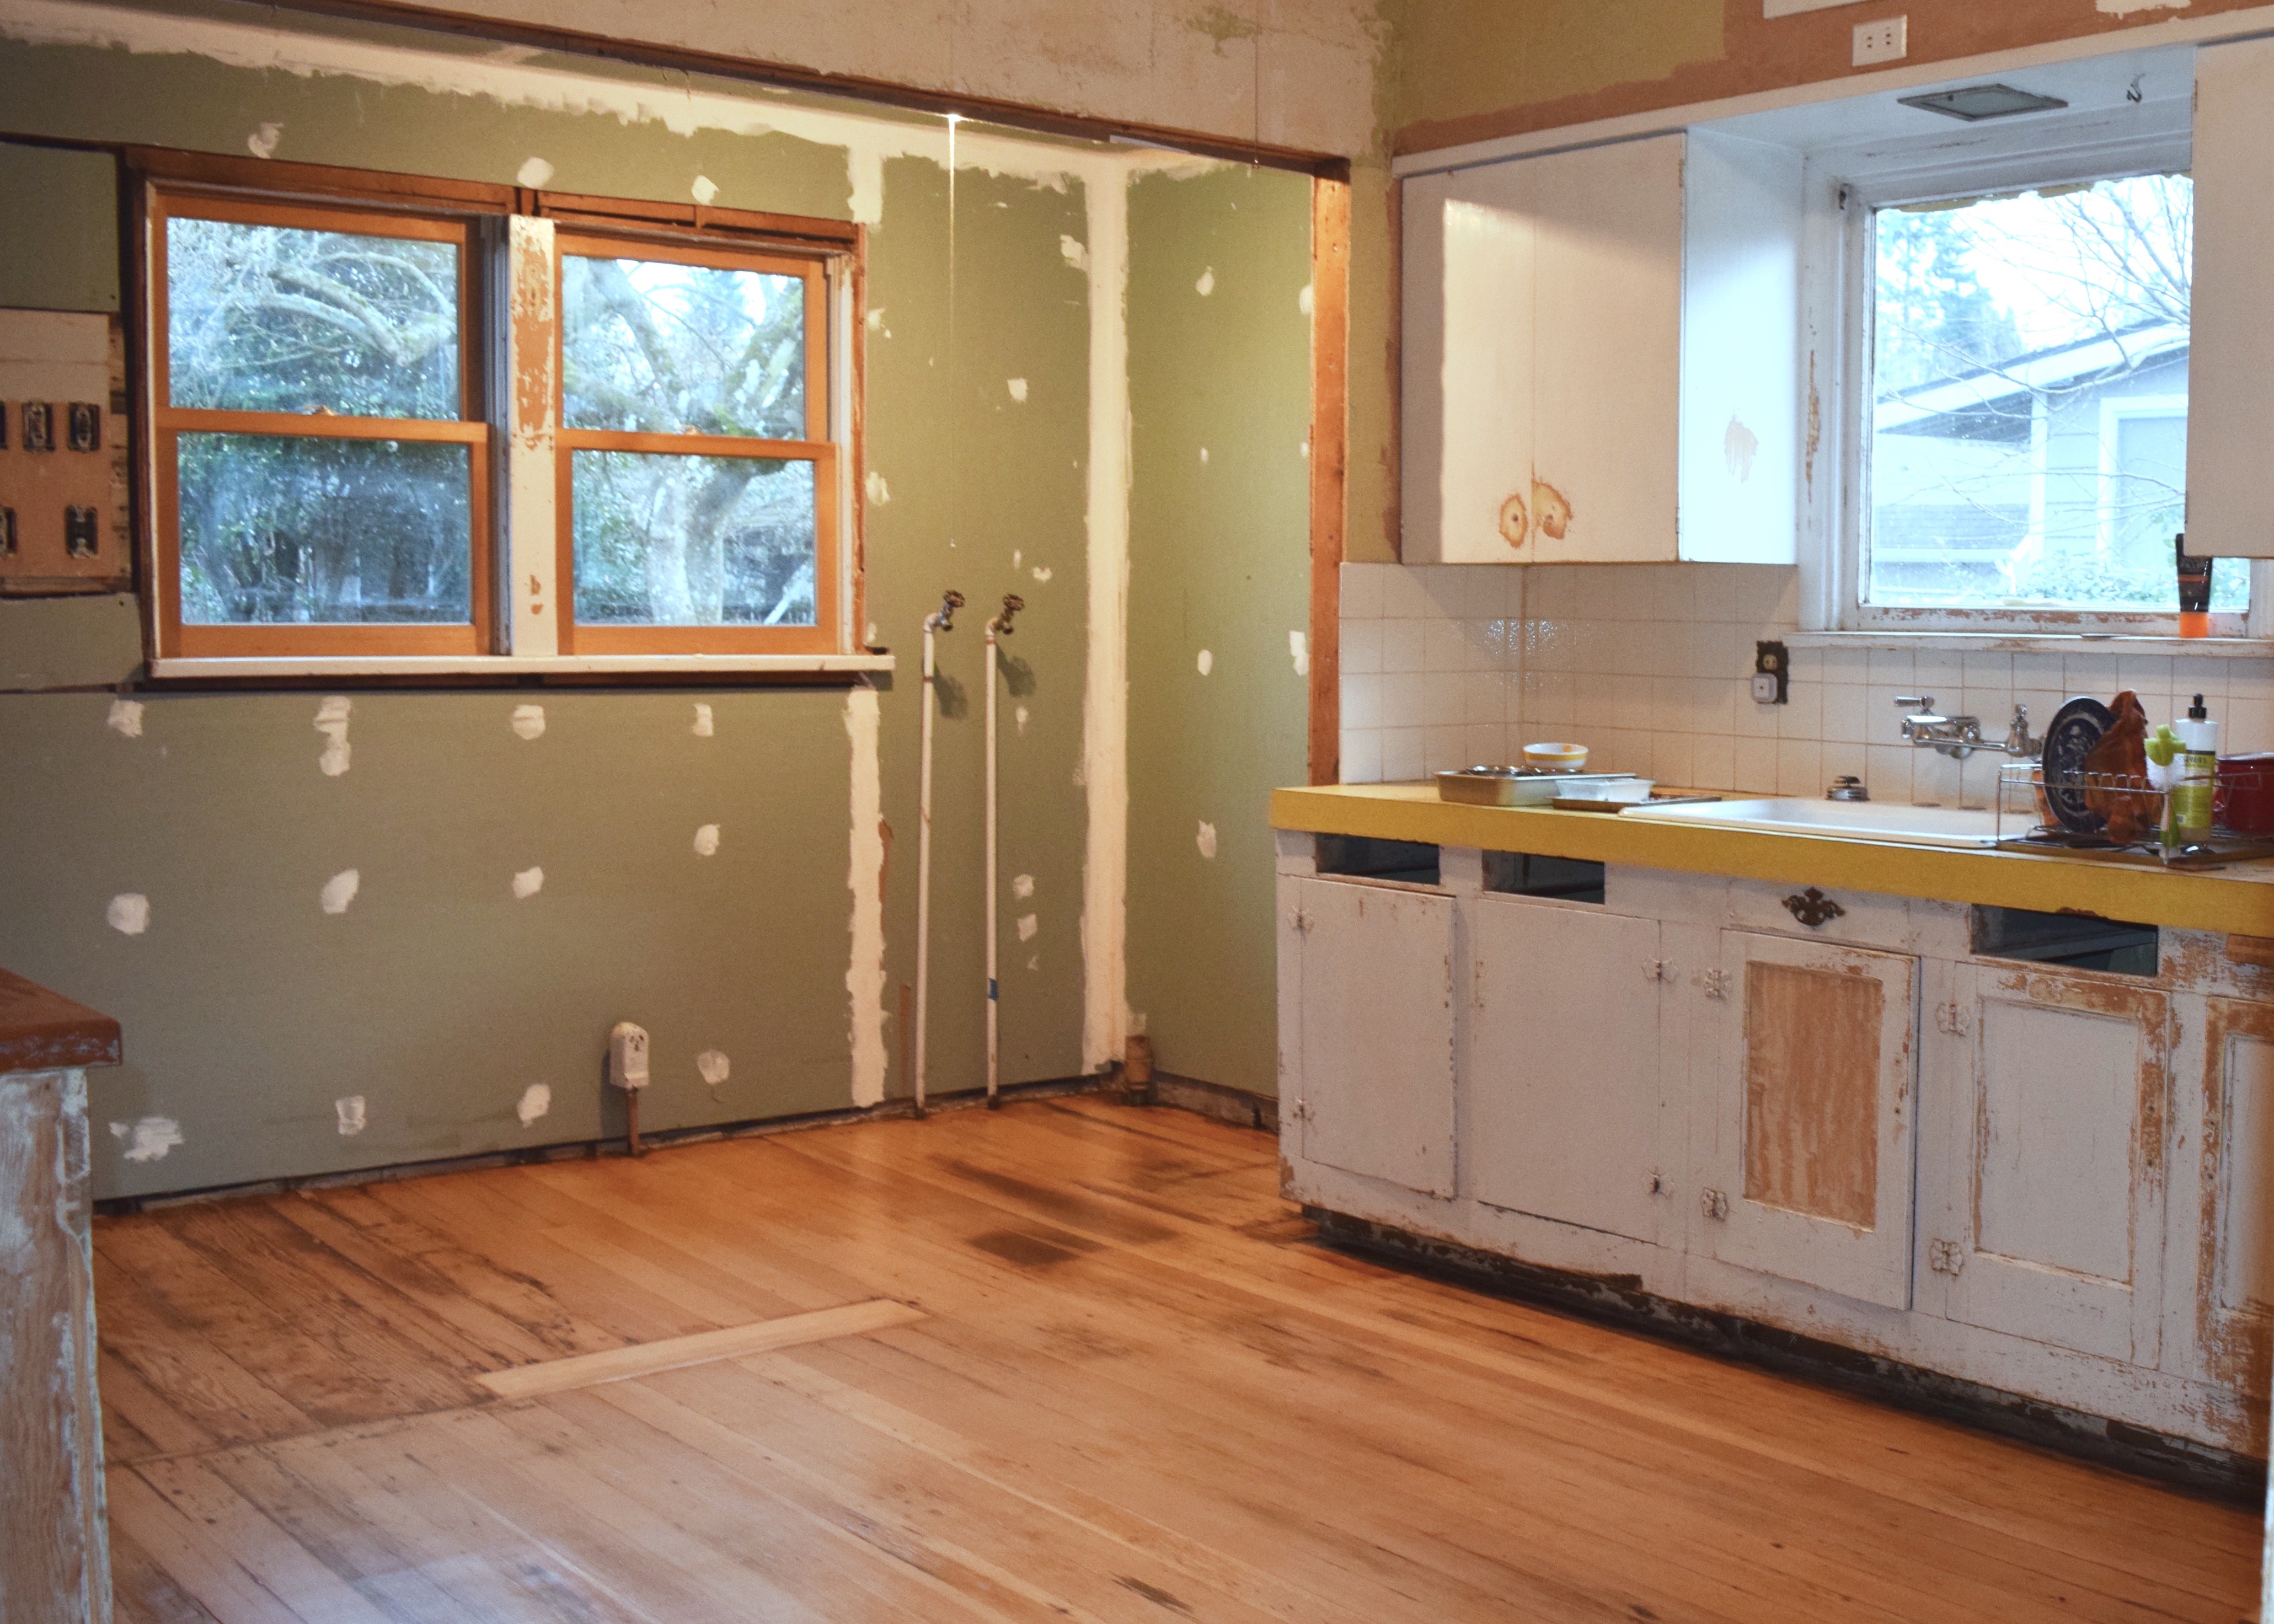
The bathroom door was probably not originally located here. It may have been off the master bedroom actually and maybe used as a sleeping porch? Or… I’m not sure what the use of the room was, but it was clear that there was an exterior wall separating this section of the kitchen from the current bathroom at one point in time. See the corner where the bathroom pink insulation meets the perpendicular wall of horizontal V-groove siding? There about an inch and a half of exterior siding that matches the rest of my house, sawed off roughly. It’s that slightly lighter / yellower color. Maybe the exterior of the house was light yellow at first?
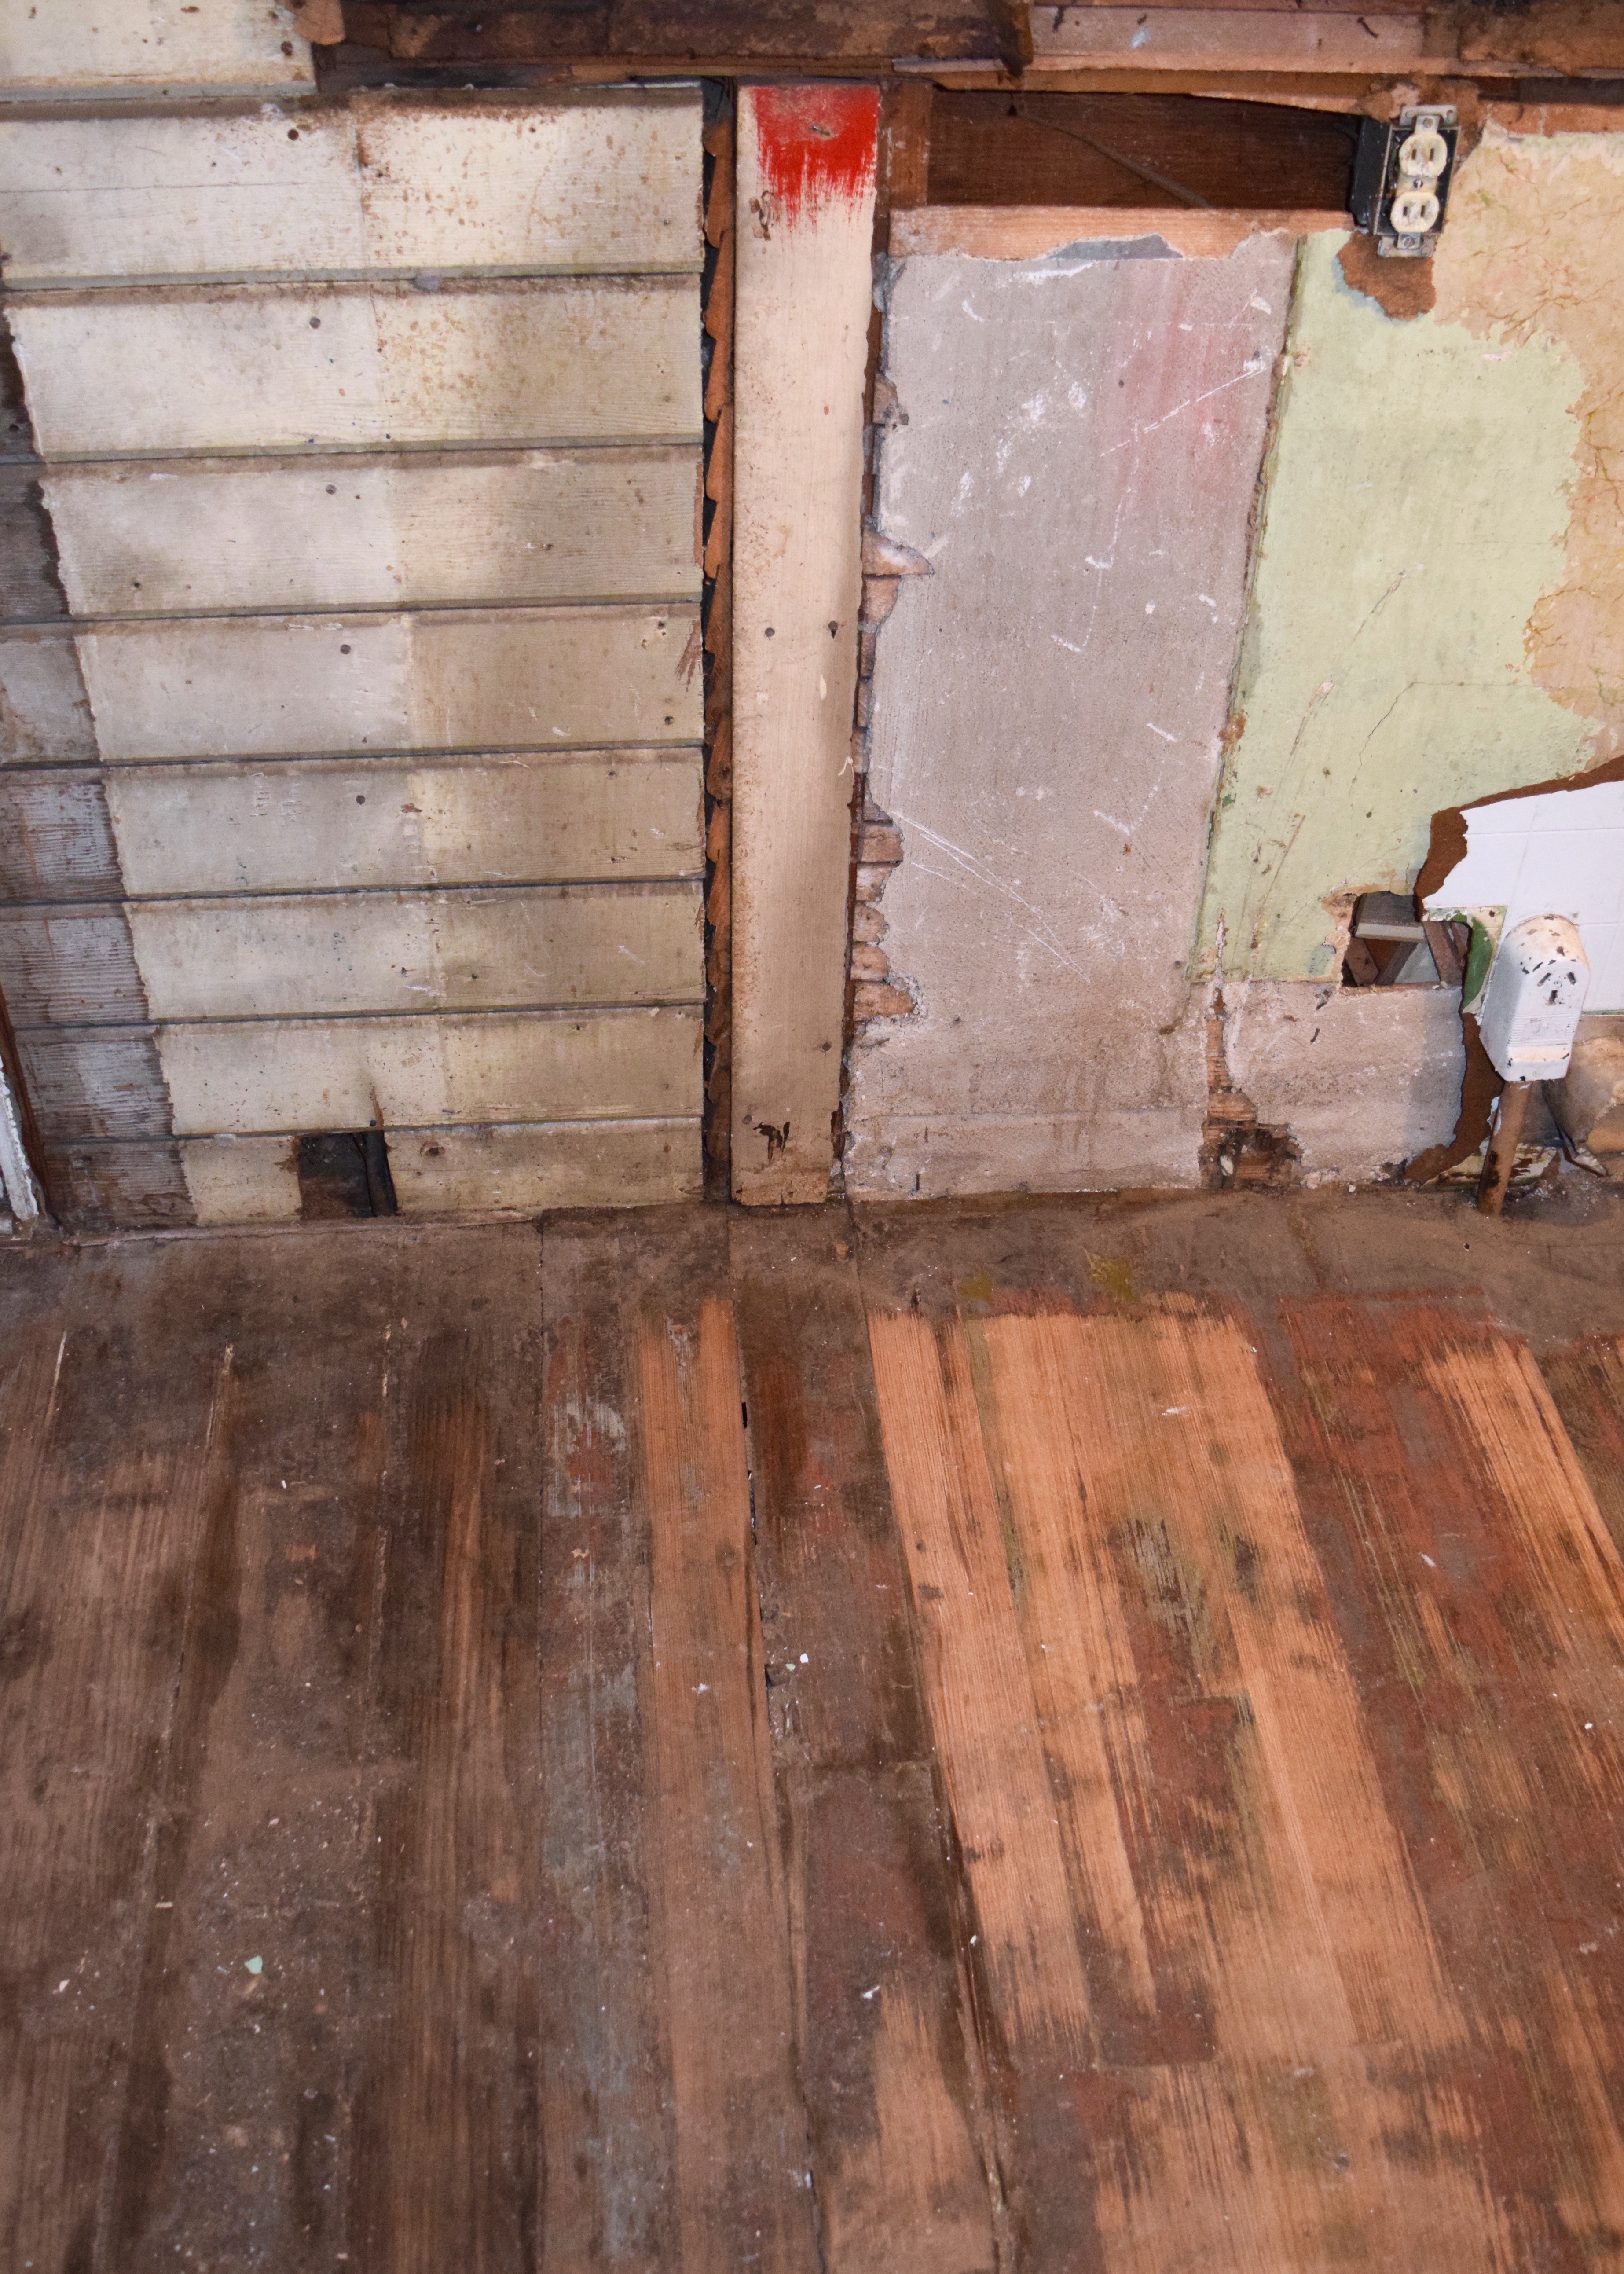
Over here under the windows was another big clue. The horizontal V-groove siding is on the left. Then there a vertical plank of wood with that red mark on top and to the right of that, lathe and plaster. Look closely at the red topped vertical board, just to the left of it, there’s more exterior siding that matches my house, again cut off. This implies that the space where my current exterior door is was “outdoor space” sandwiched at one point between two exterior walls. The floors alluded to a couple more clues here too. Very difficult to see in this unsanded state but, in front of the lather and plaster, the original wood floor planks were continuous from the main part of the kitchen. Then right where the vertical plank is, the flooring breaks and in front of the horizontal V-groove the flooring planks are wider, cheaper, and possibly not fir, AND they stop at the opening to the main part of the kitchen.
I didn’t get a good picture of it at this stage, but the partially sanded floors also showed an outline of a wall dividing the main part of the kitchen from the lathe and plaster area of the back of the kitchen, stopping just short enough for a door opening. So here’s what I am now thinking: the house originally had a cold room and/or pantry attached to the main kitchen. The two big windows on the rear wall didn’t exist, but the room got light from the boarded up west window. The room was accessed on the right side of the main kitchen where the flooring continues into the space without interruption. Eventually the two waterlines and vent were added in there and the room was used as a laundry room in the mid-1900s. I have no idea how the space that now holds the master half bathroom and the main bathroom were utilized, but they may have been porch space that was converted to indoor bathrooms when those became typical indoors in the 1930s. I think the space in front of the current back door was exterior porch space the longest, and then eventually converted to indoor space. Though I don’t know why the exterior V-groove siding was used… perhaps it was a mudroom?
Ohhh the mysteries of old houses! What I wouldn’t give to have original plans! A hidden treasure trove in the walls would also be nice. But, to address this mess and what to do next was the current issue. Eventually after a couple weeks of looking at this I decided, the best course would be to demo all the siding and lathe and plaster and insulate this back wall. My parents came into town the last weekend of February and we did a big push of work in the kitchen. Within a quick half hour we had the remainder of the wall all knocked down to the studs.
The structure beneath was questionable without proper headers over the doors or window, but they’d been standing fine this long, so I ignored it and tried to forget about it and remembered that the whole house would probably fall down if the BIG earthquake hits anyways. Sometimes it works to be pessimistic?
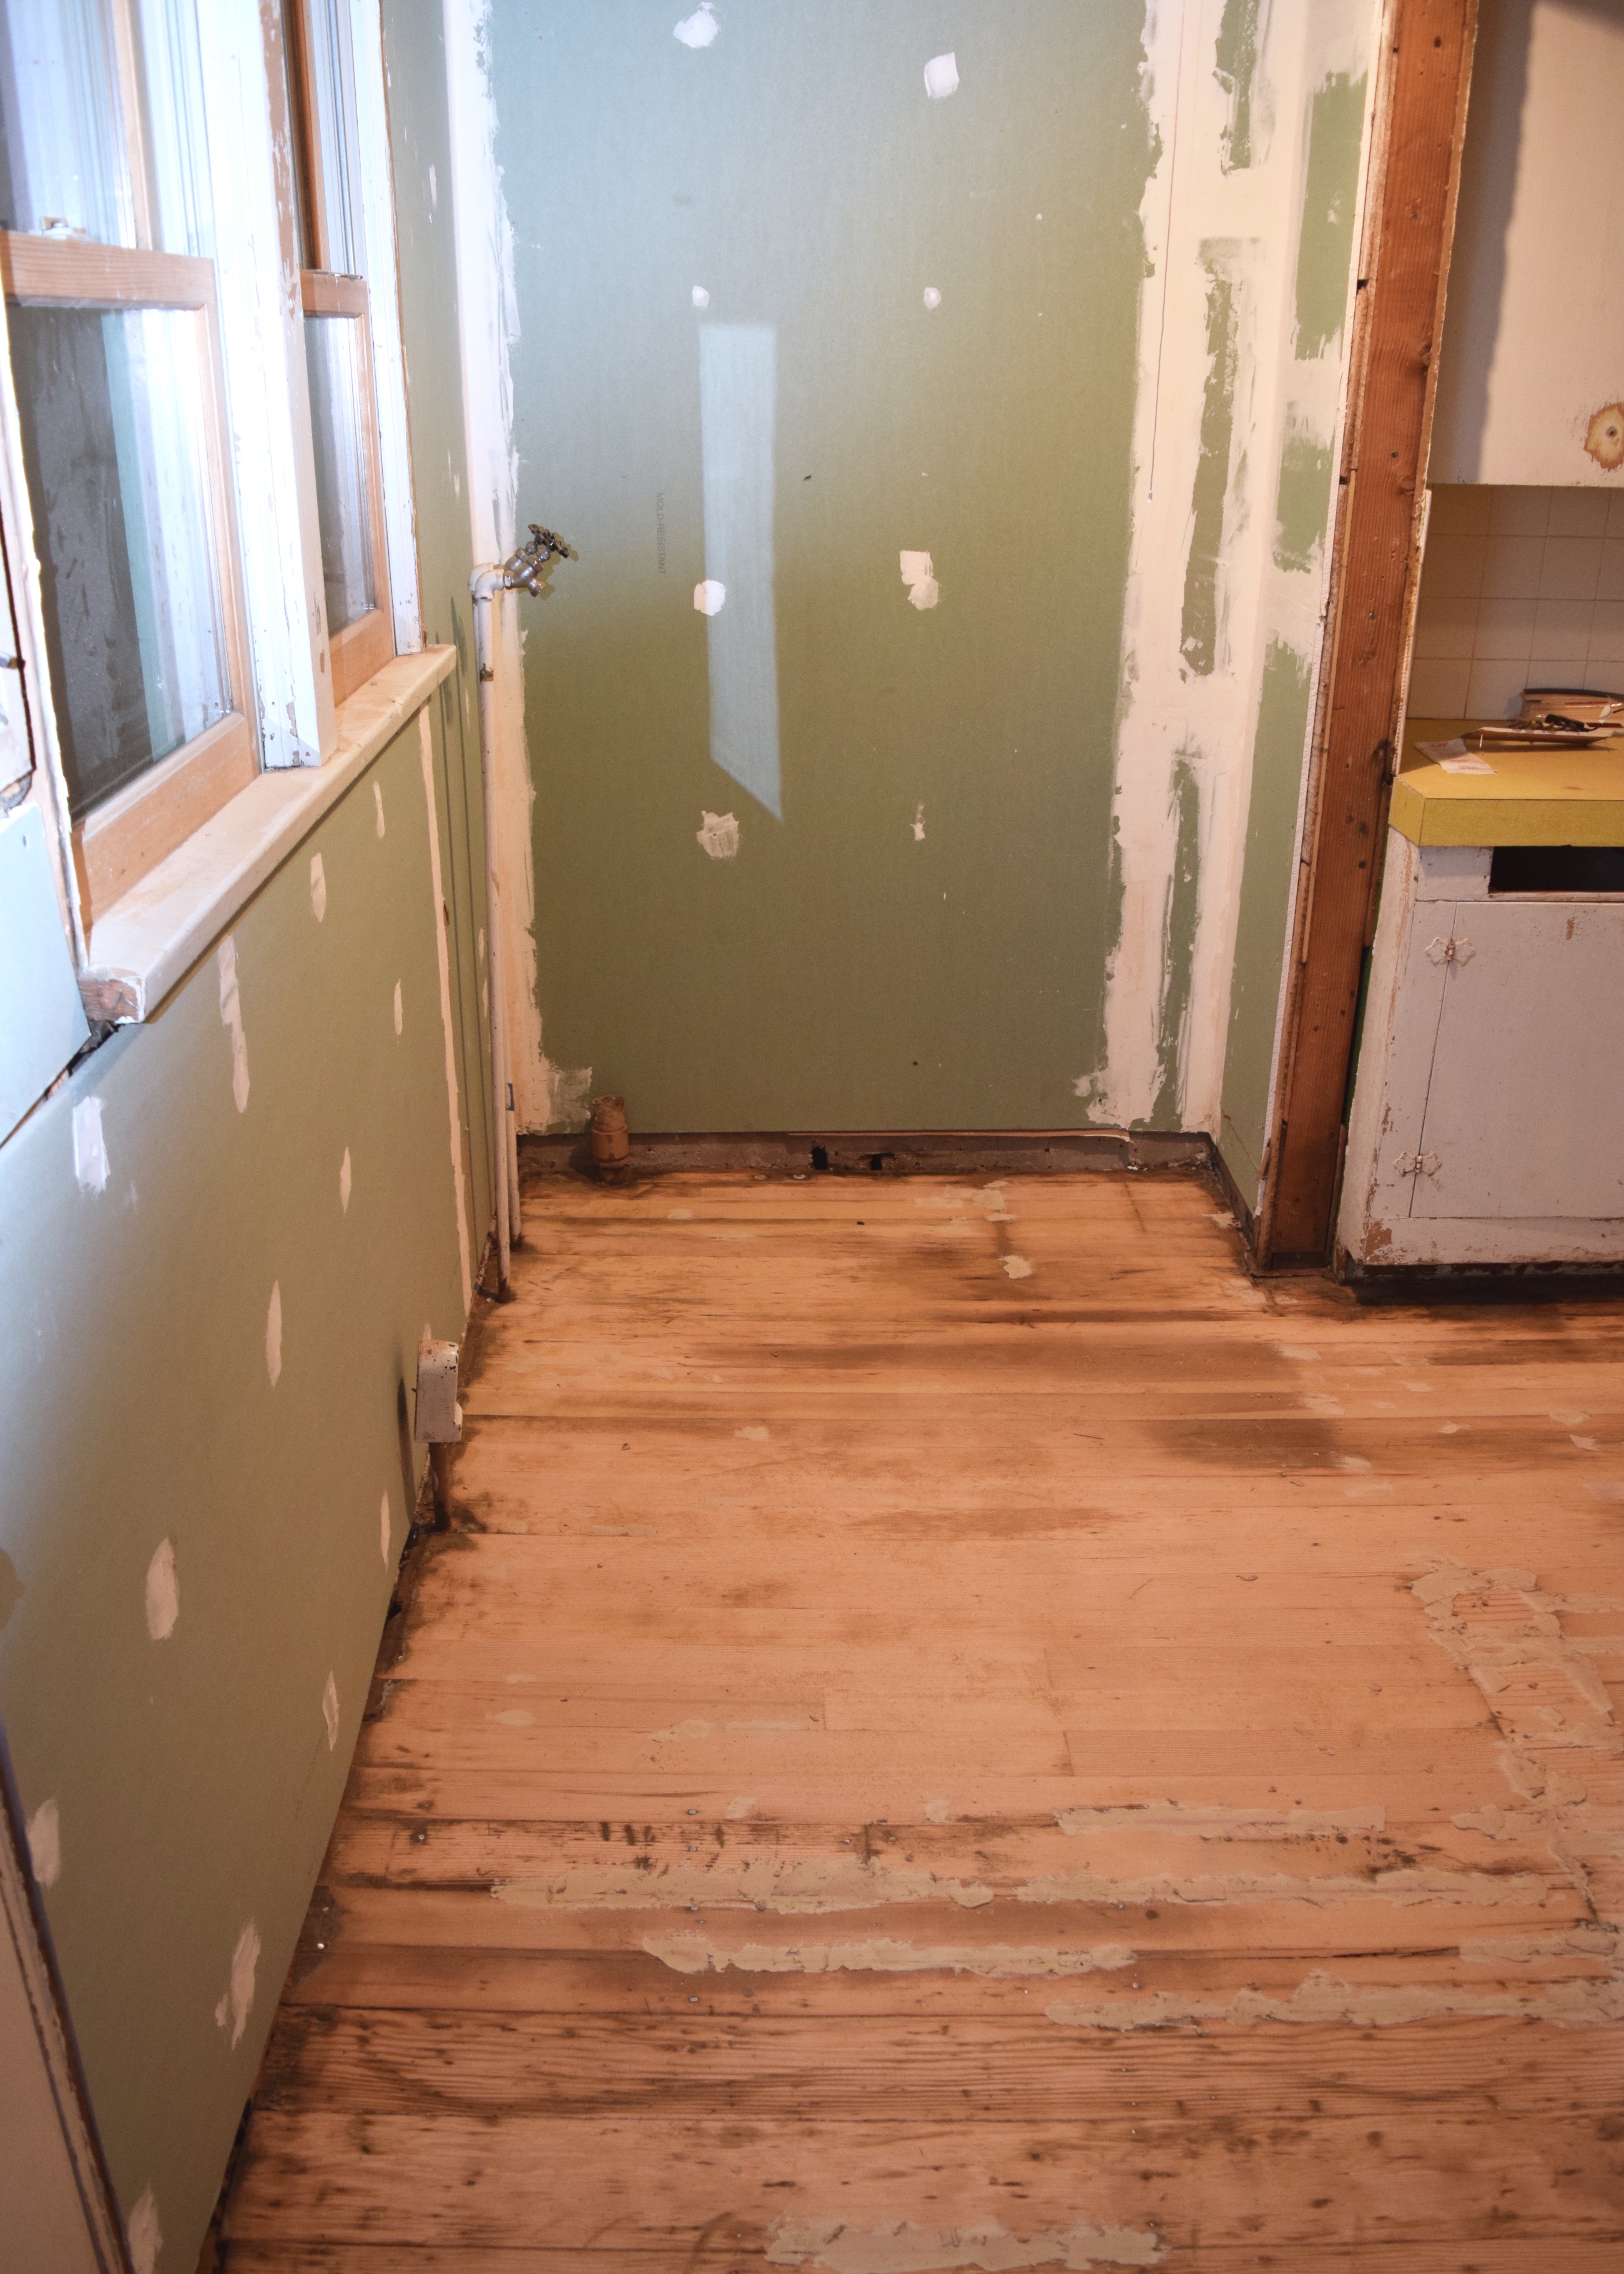
I threw some insulation in the cavities and my mom and sister started hanging drywall and rough taping and mudding. It looked much better like this. Almost like a real house again.

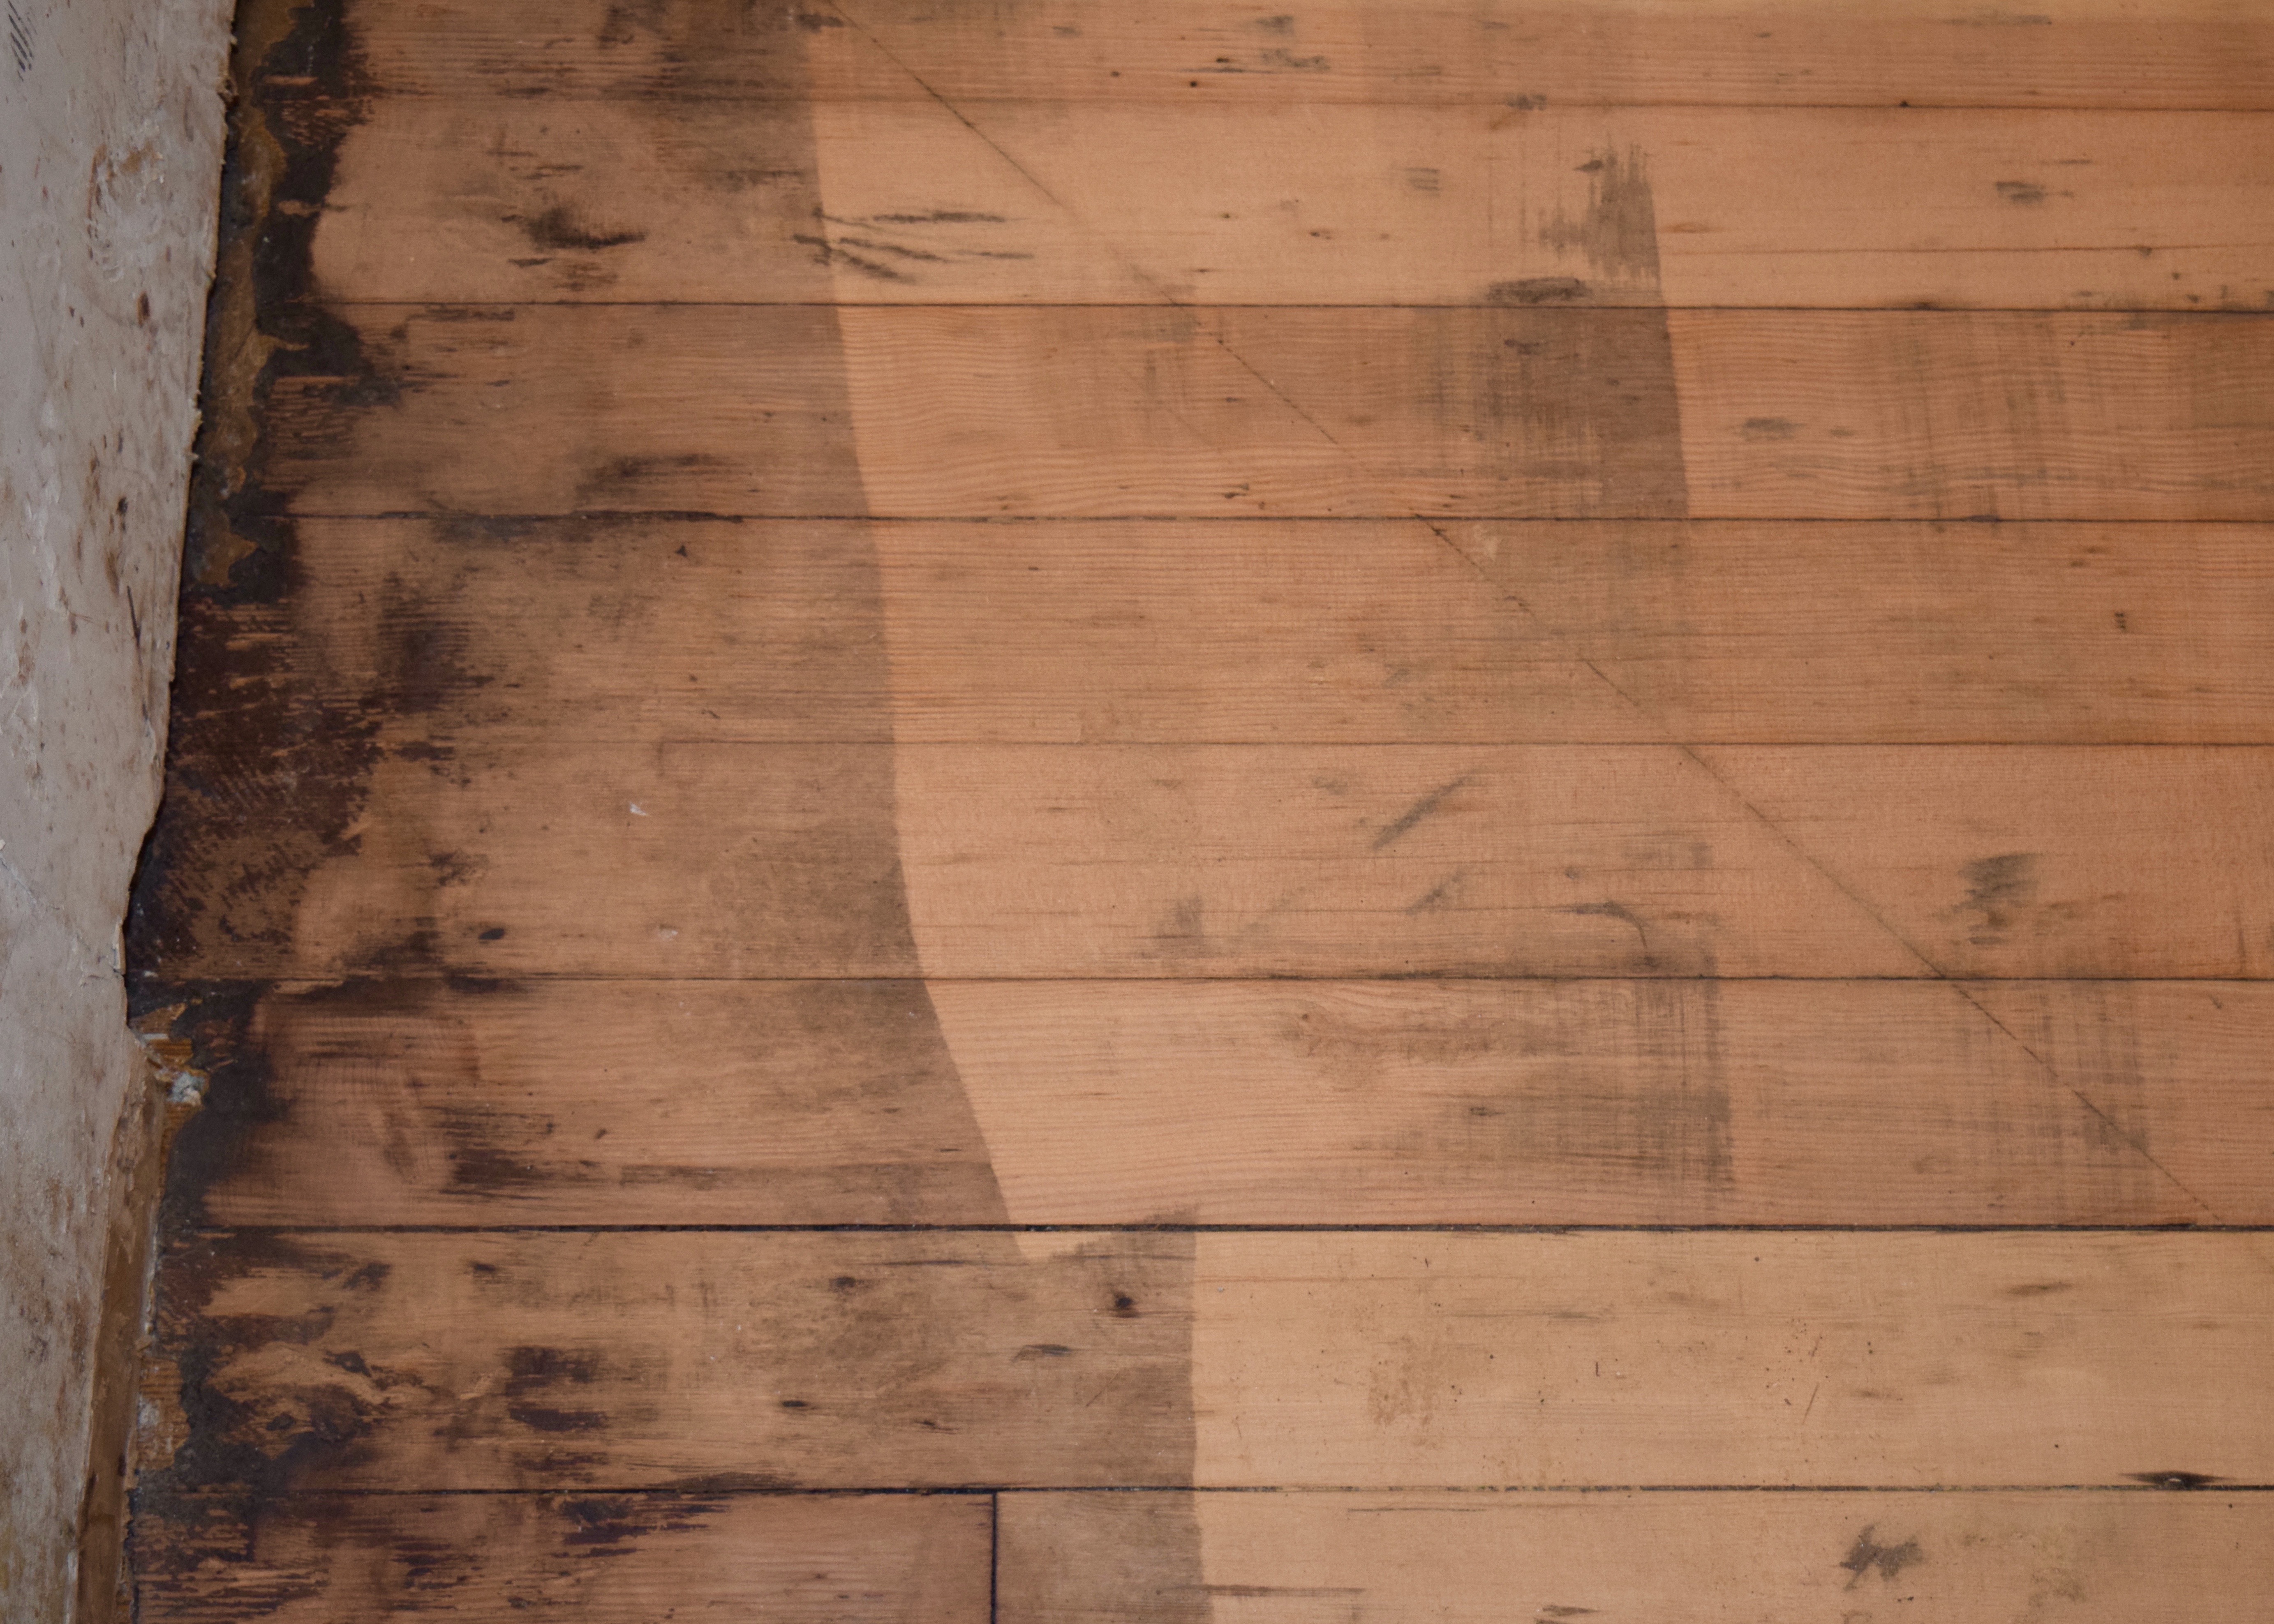
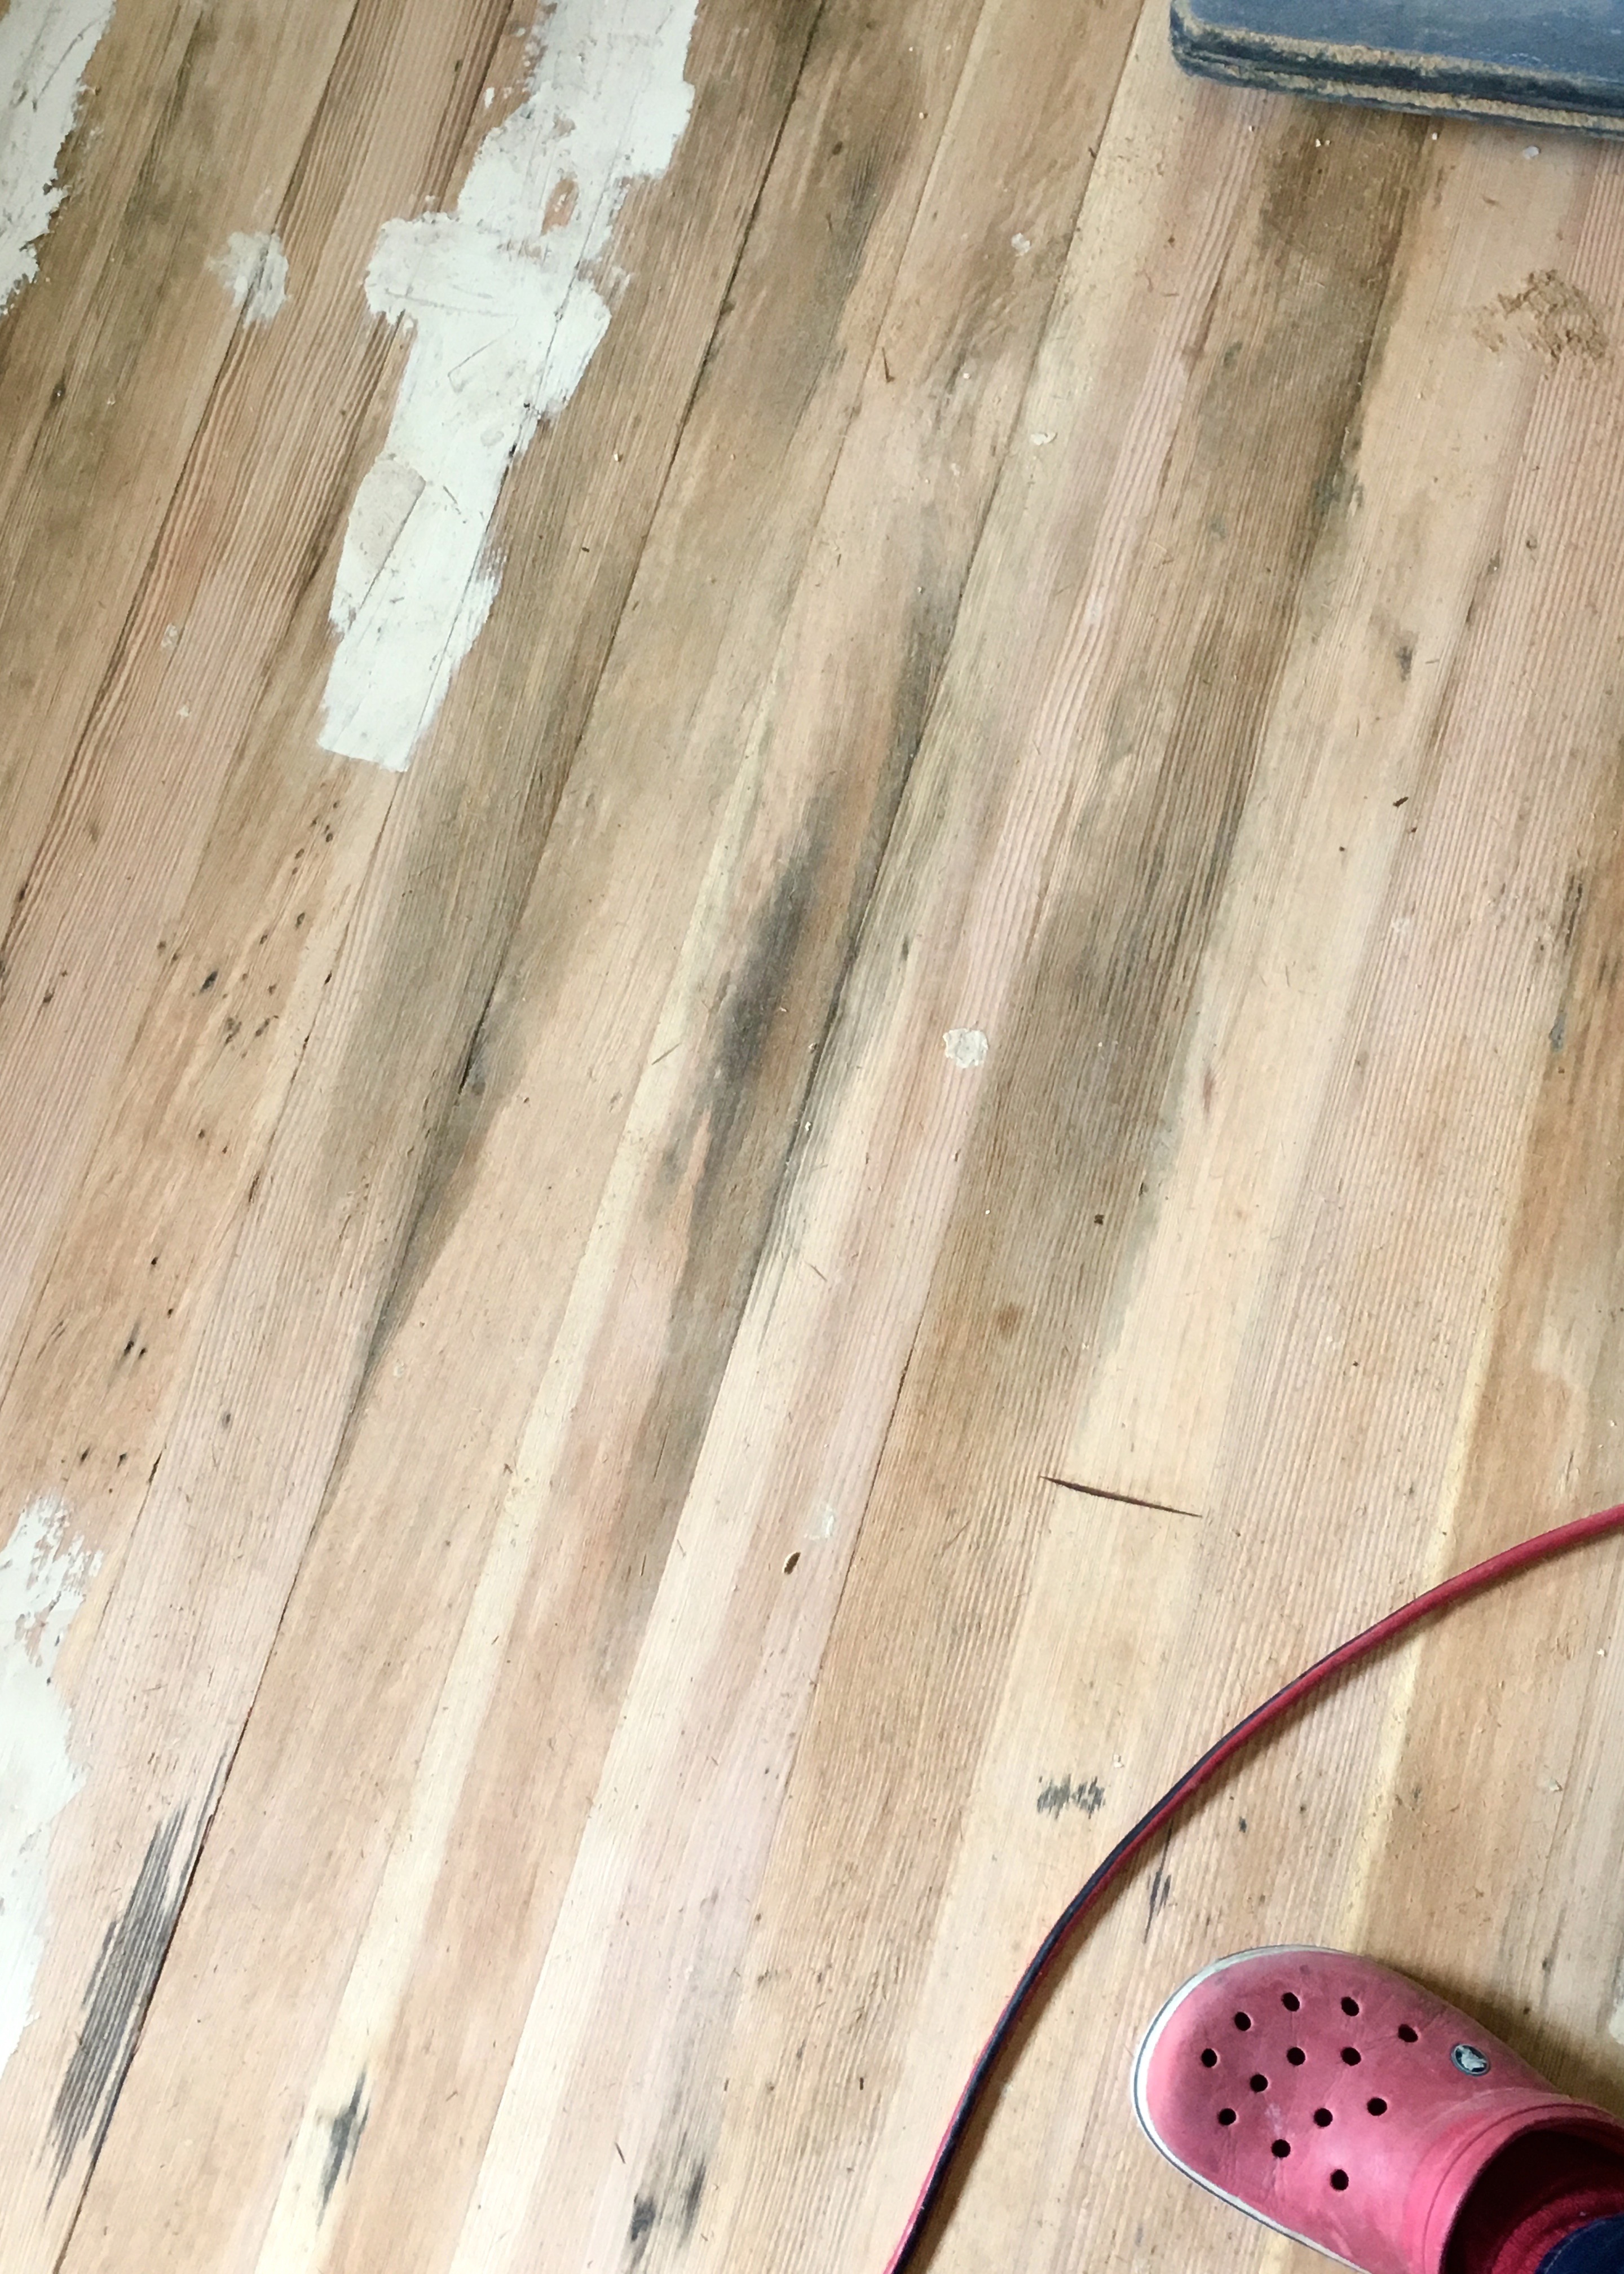
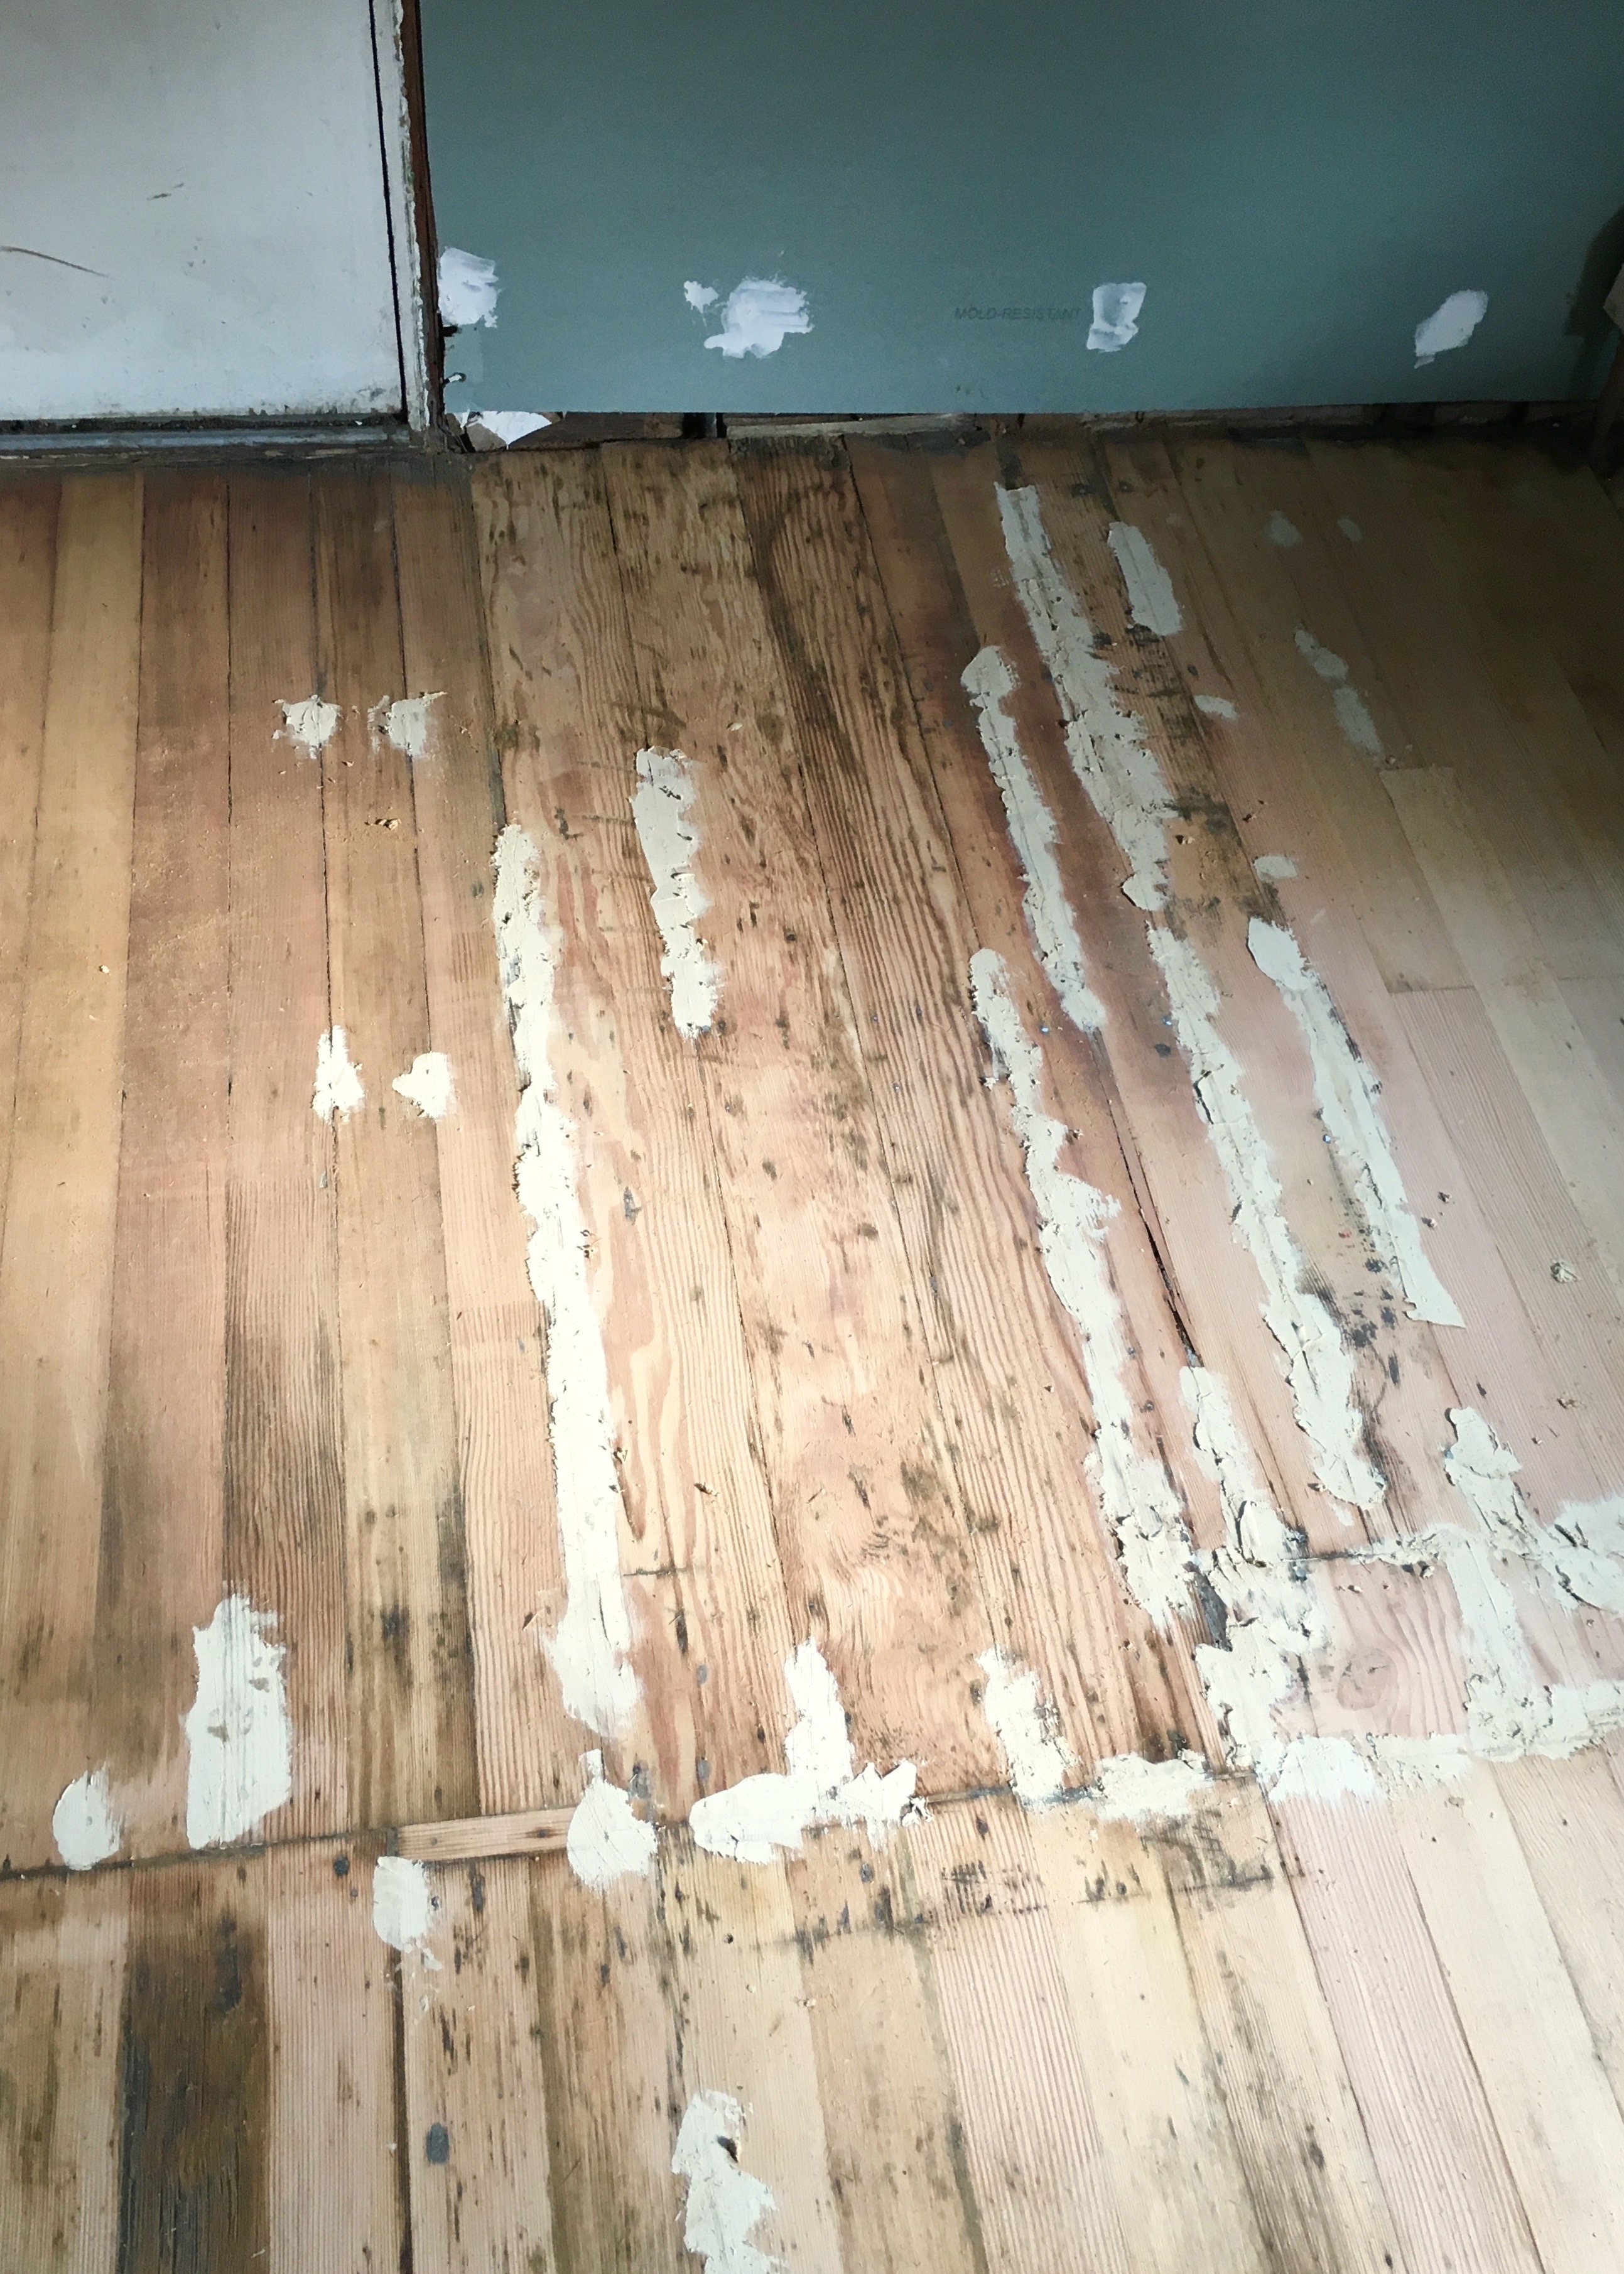
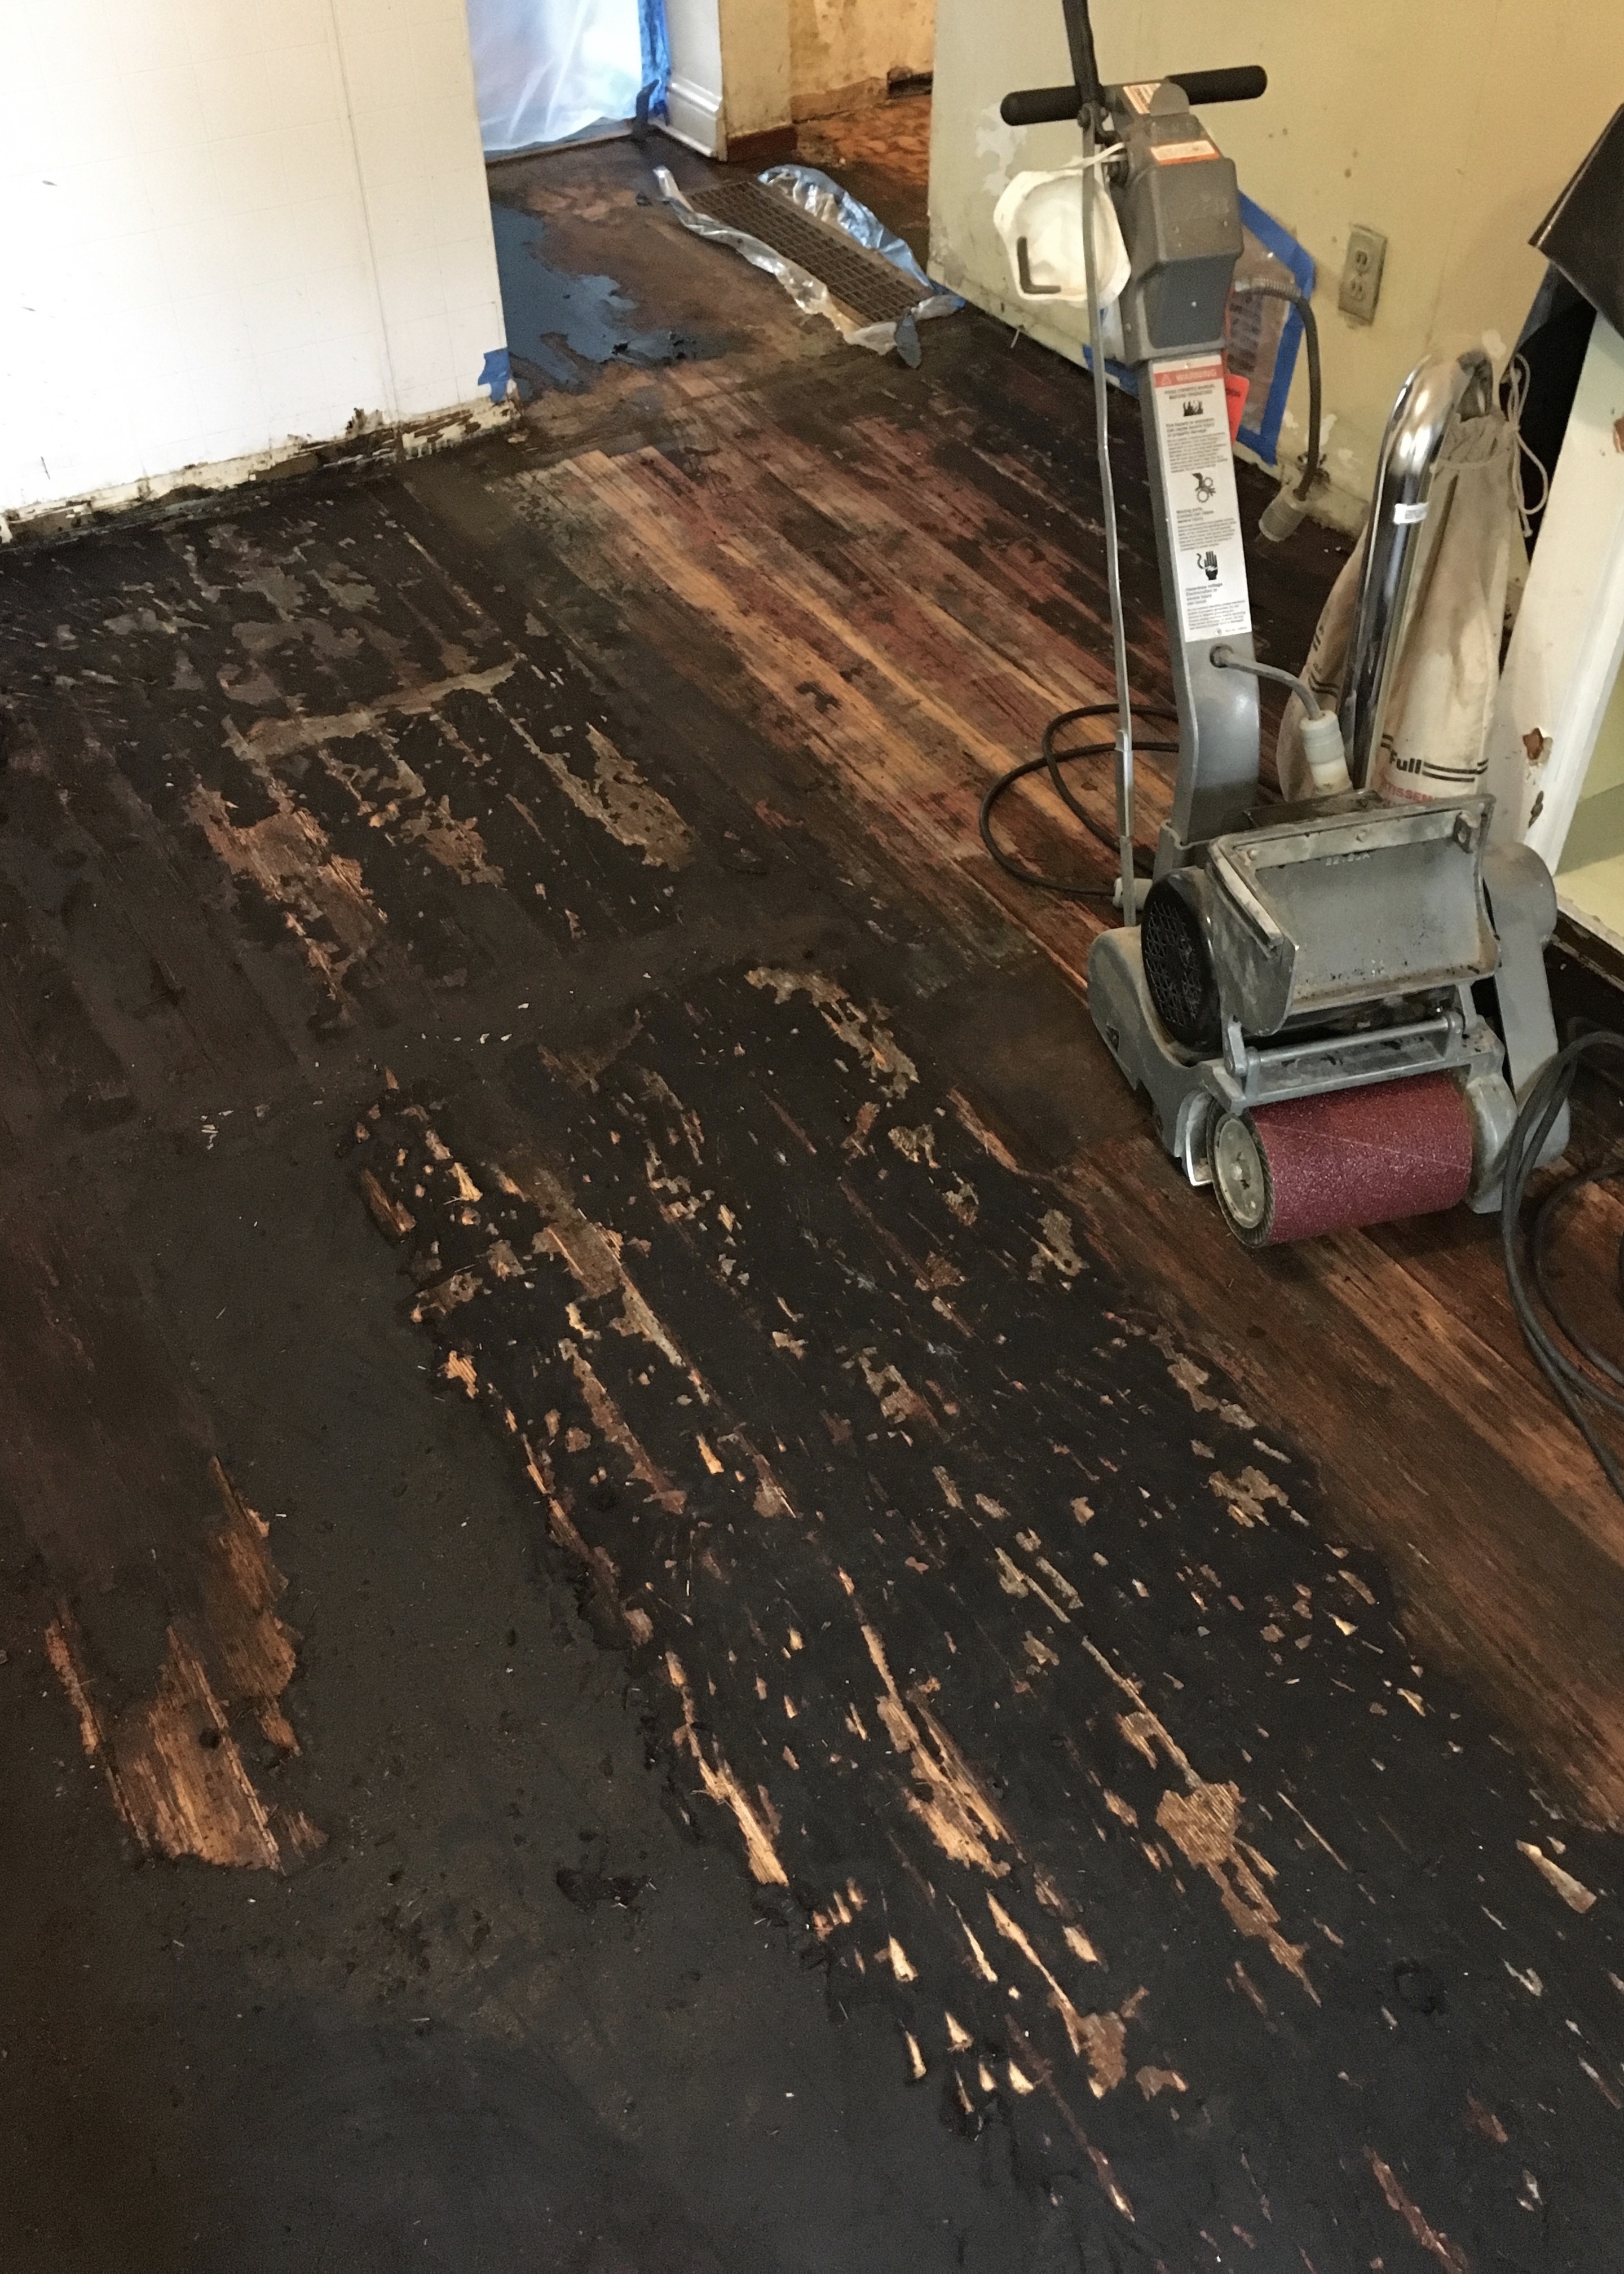
Until you looked at the floors that is. The space in front of the back door and bathroom still looked HORENDOUS covered in tar and the drum sander wasn’t really picking it up. It was almost like the tar in these areas was too hard to be sanded. The floors looked black like this when I began working on the bathroom in November 2017 and stopped working on the floors.
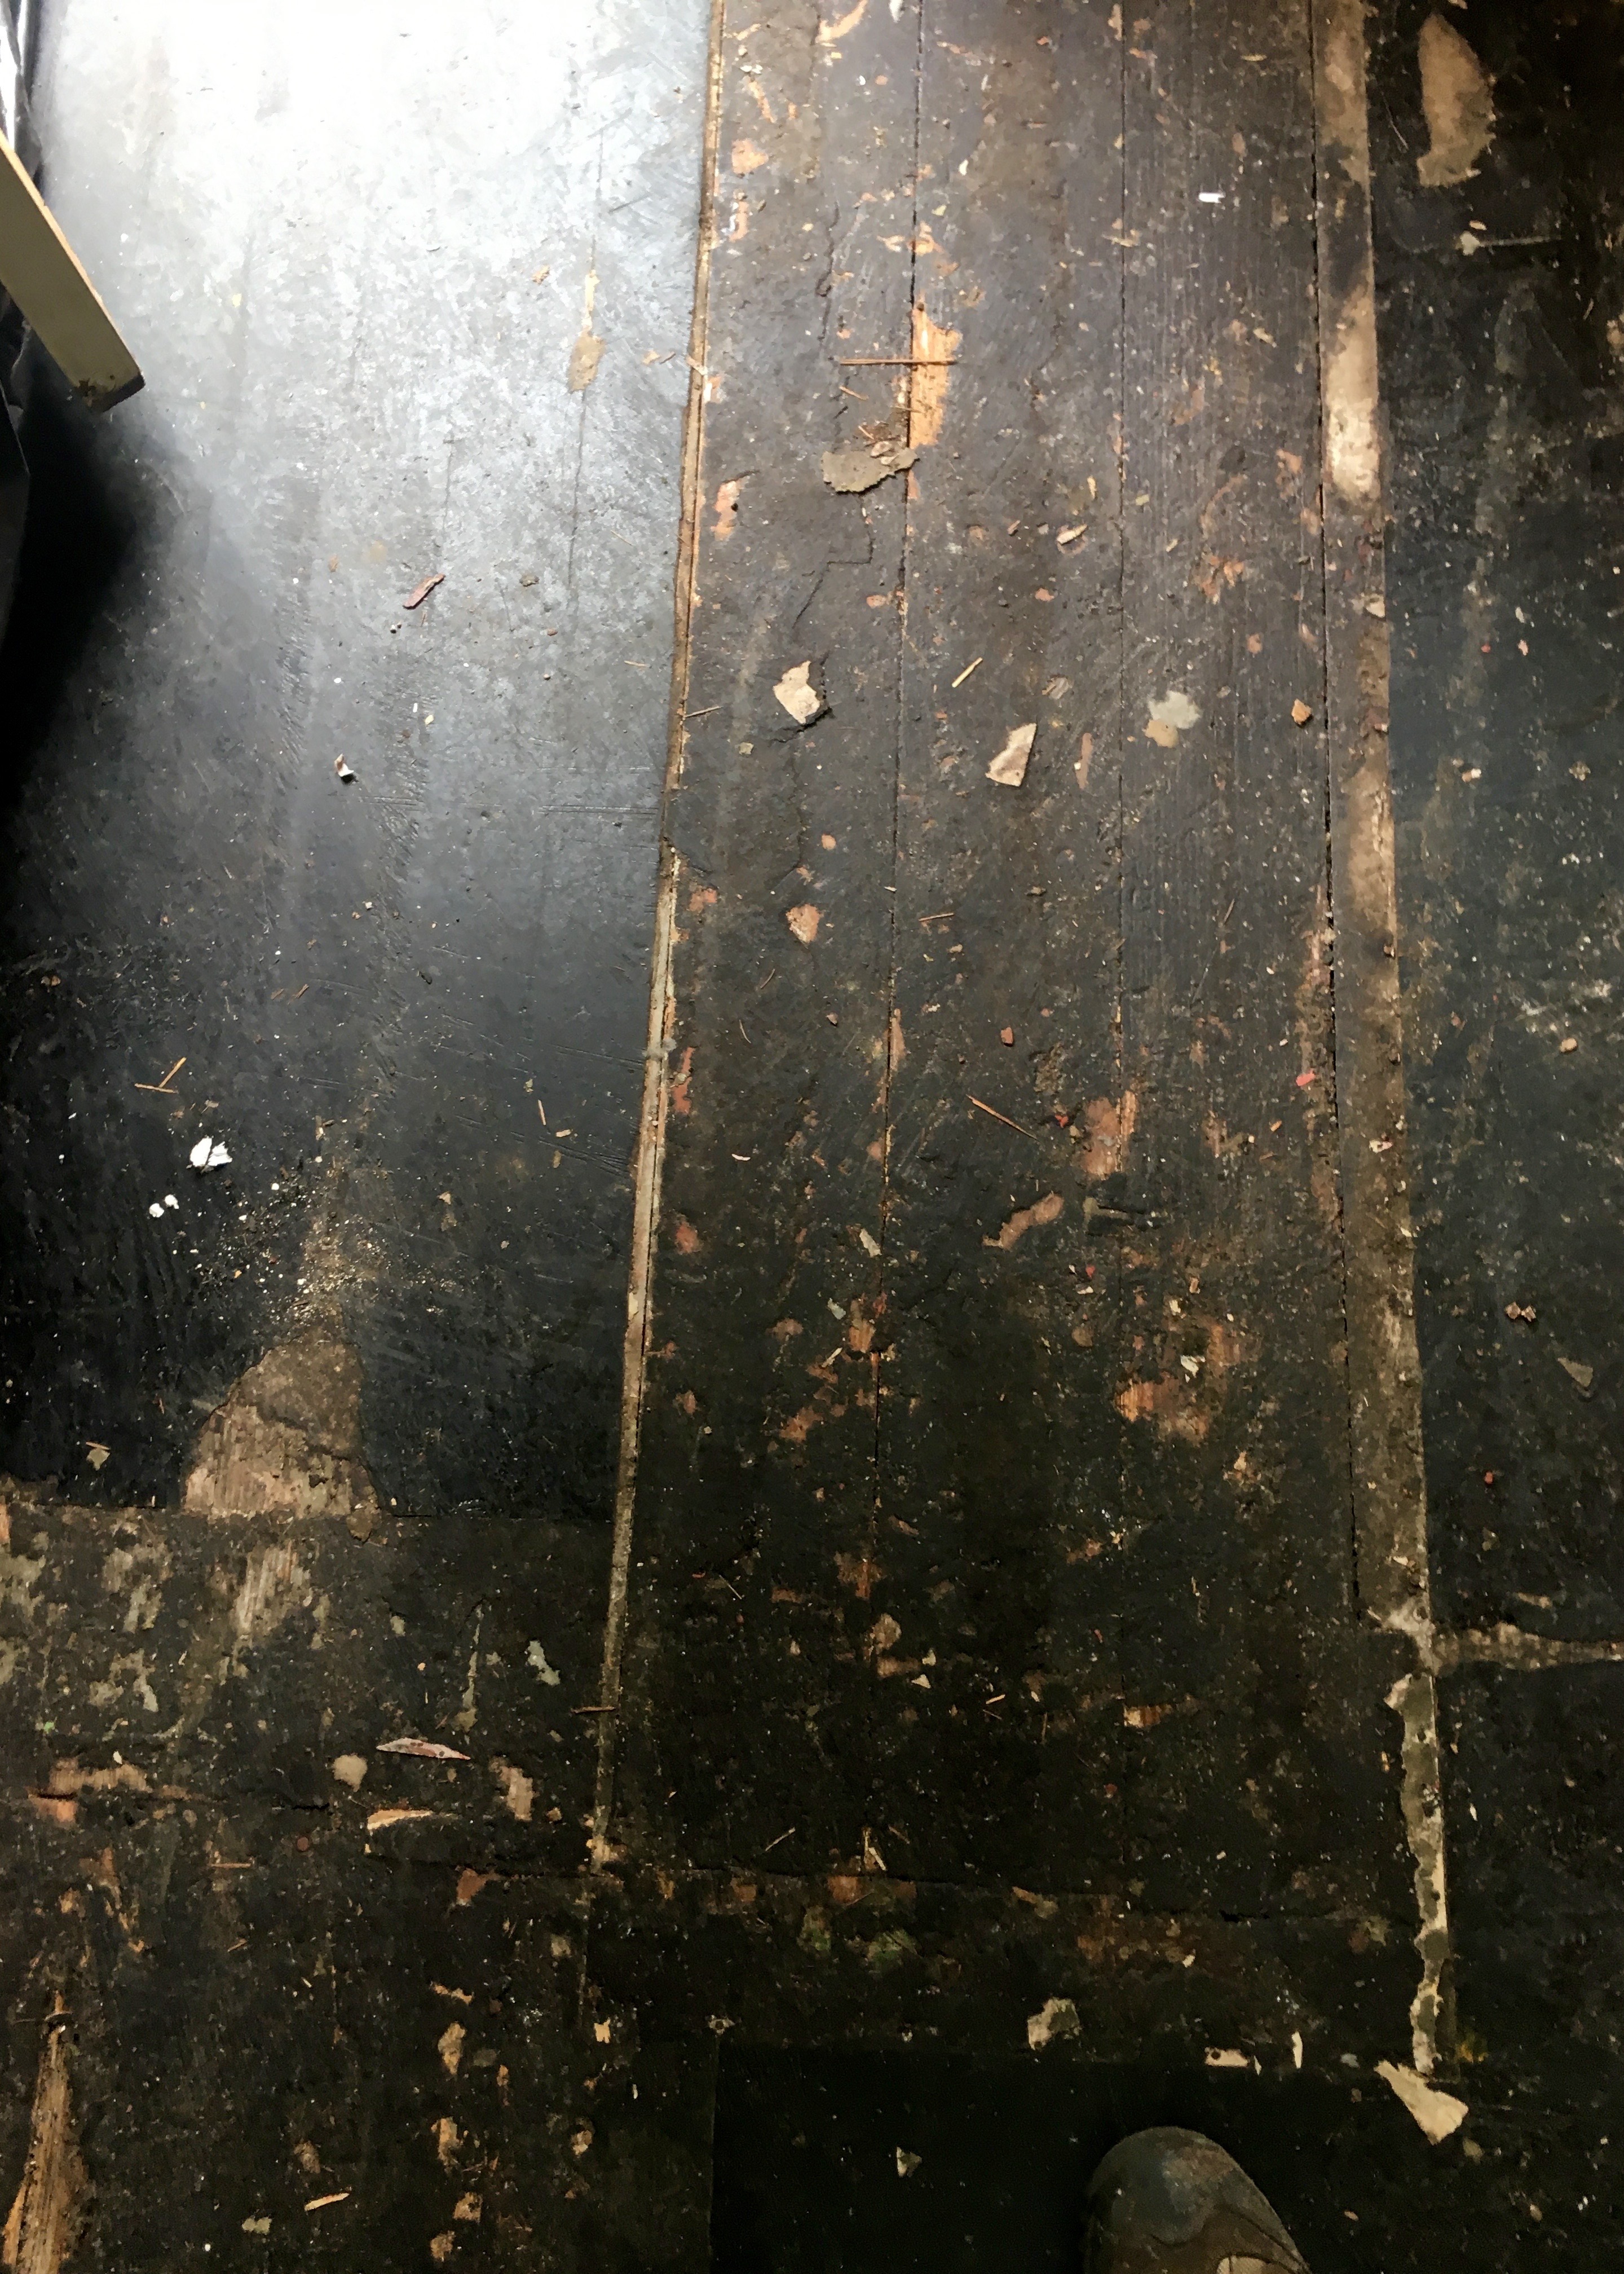
Dust had covered the tar in the time since the vinyl flooring was removed and it just looked… greyer. My dad bought a $25 heat gun at Ace Hardware and worked on getting the last bits of tar off the floor. He spent about a full day’s time working on two main areas: in front of the bathroom door and in front of the basement door; as well as touching up beneath the toe kicks of the cabinets.
The heat gun died at least once, maybe twice and Ace replaced it since it was the same day of purchase! It was hard, gross, and tedious work, but he finished getting it up to the point where drum and hand sanders could do the rest!
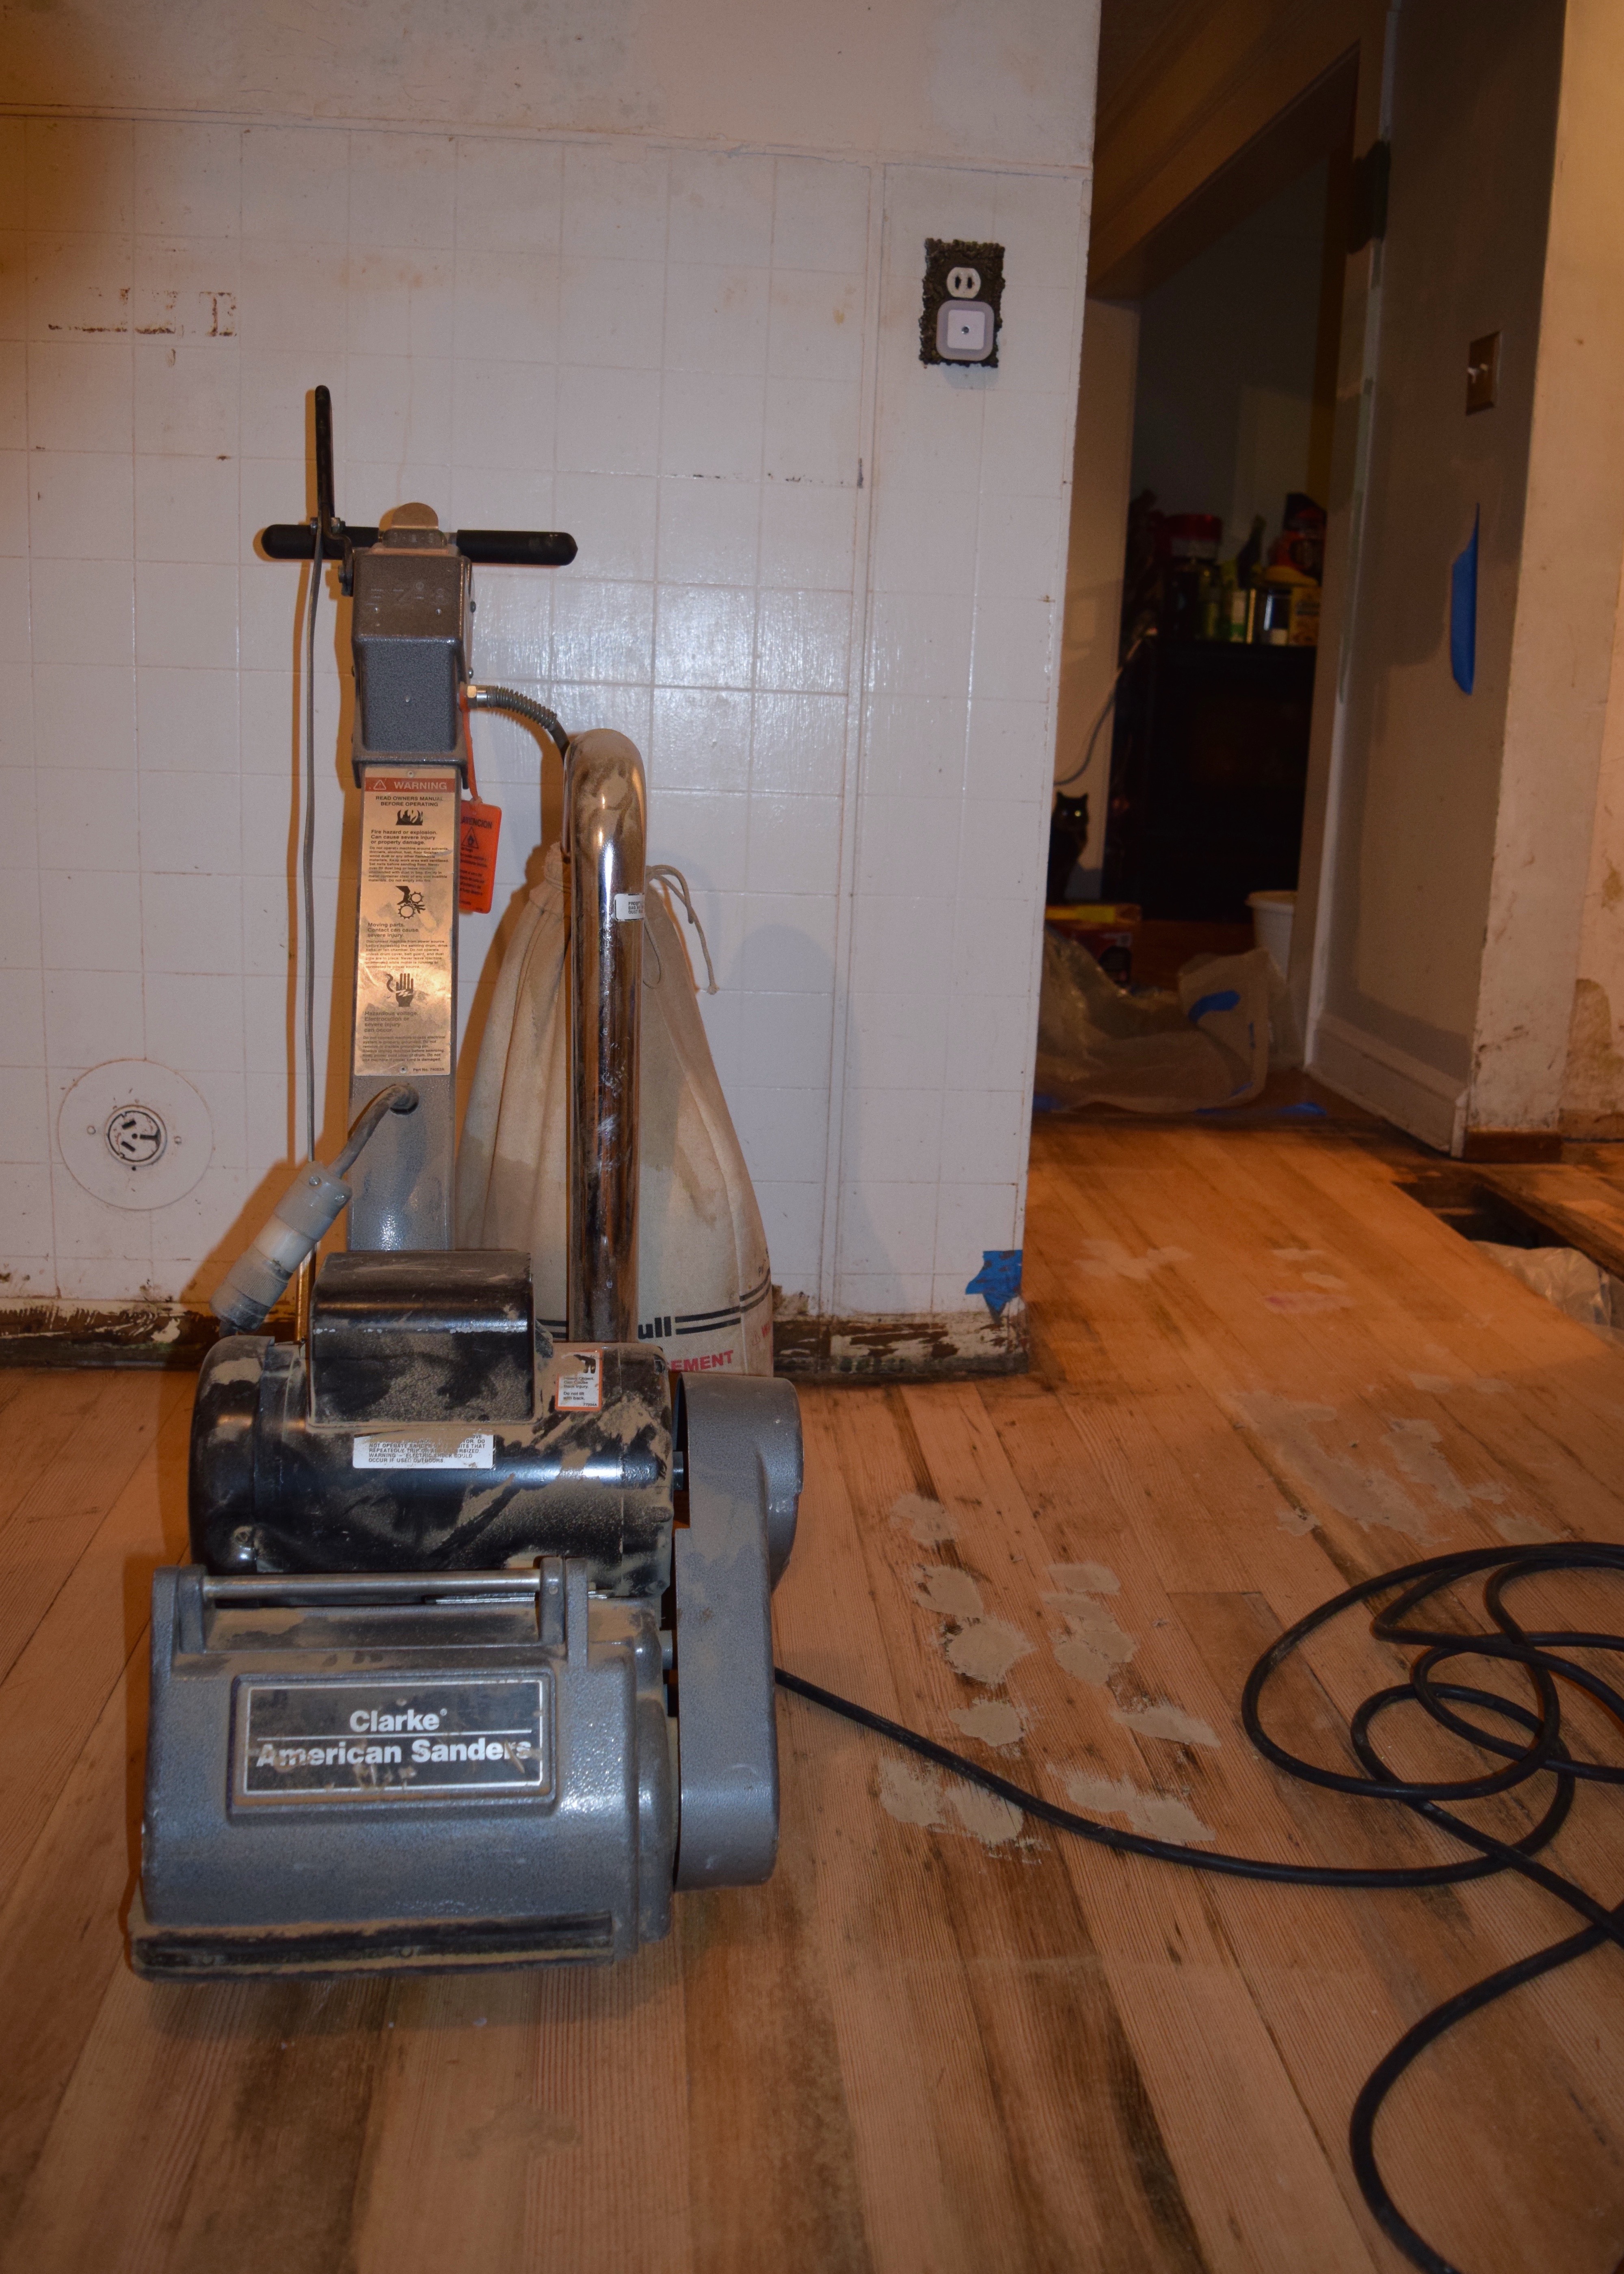
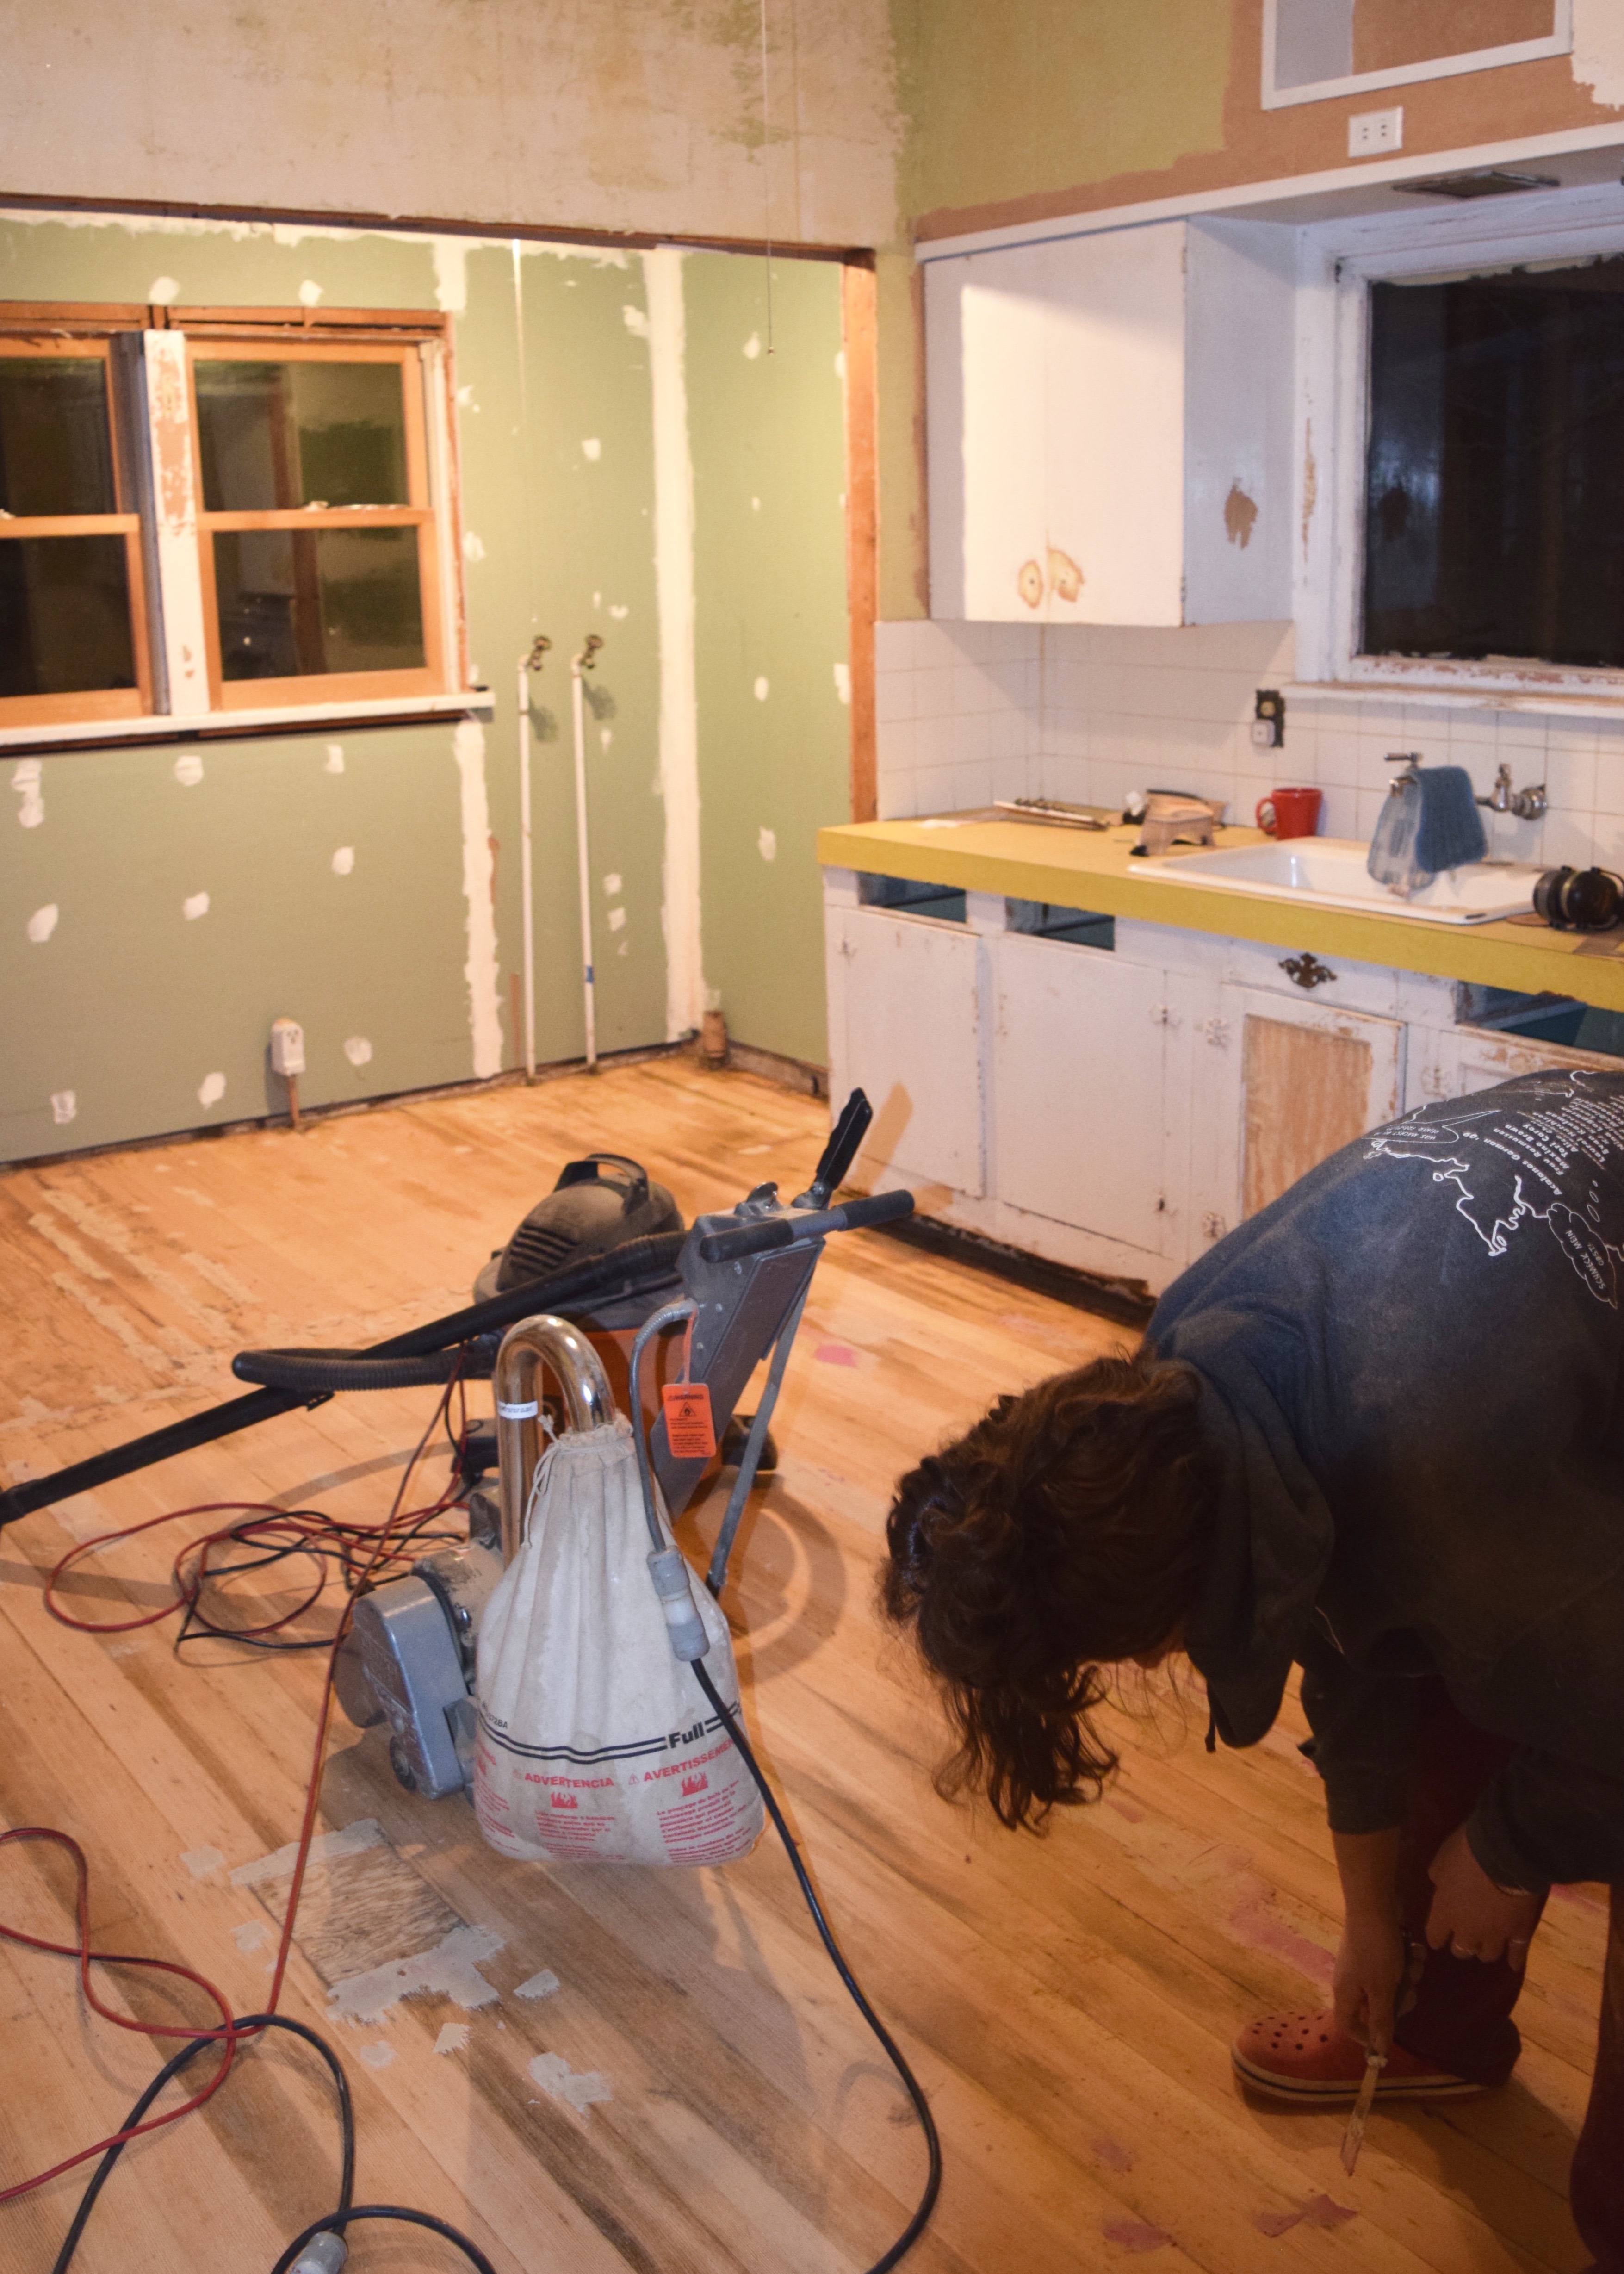
That’s about as far as we got that weekend. My parents left and then it was time to really sand. Bronwyn and I started working after I got off in the evenings. We had a polisher from Erik (who provides me with all the tools I don’t even know exist until he brings them over) with 36 grit sandpaper and then the drum sander (my favorite tool ever!).
Bronwyn worked on the edges of the room with the polisher and 36 grit paper and I focused on the drum sander moving from 24 to 36 to 60 grit one evening after work. It was so satisfying working up from the lower to higher grits and seeing the true color of the floors come out more and more with each pass of the sander!
Mostly, I worked with the grain of the wood, but in tight spots like the mini-hallway to my bedroom, I could only run the drum sander against the grain. It left lines on the floor that we had to patiently smooth out with the polisher later when we moved into higher grits.
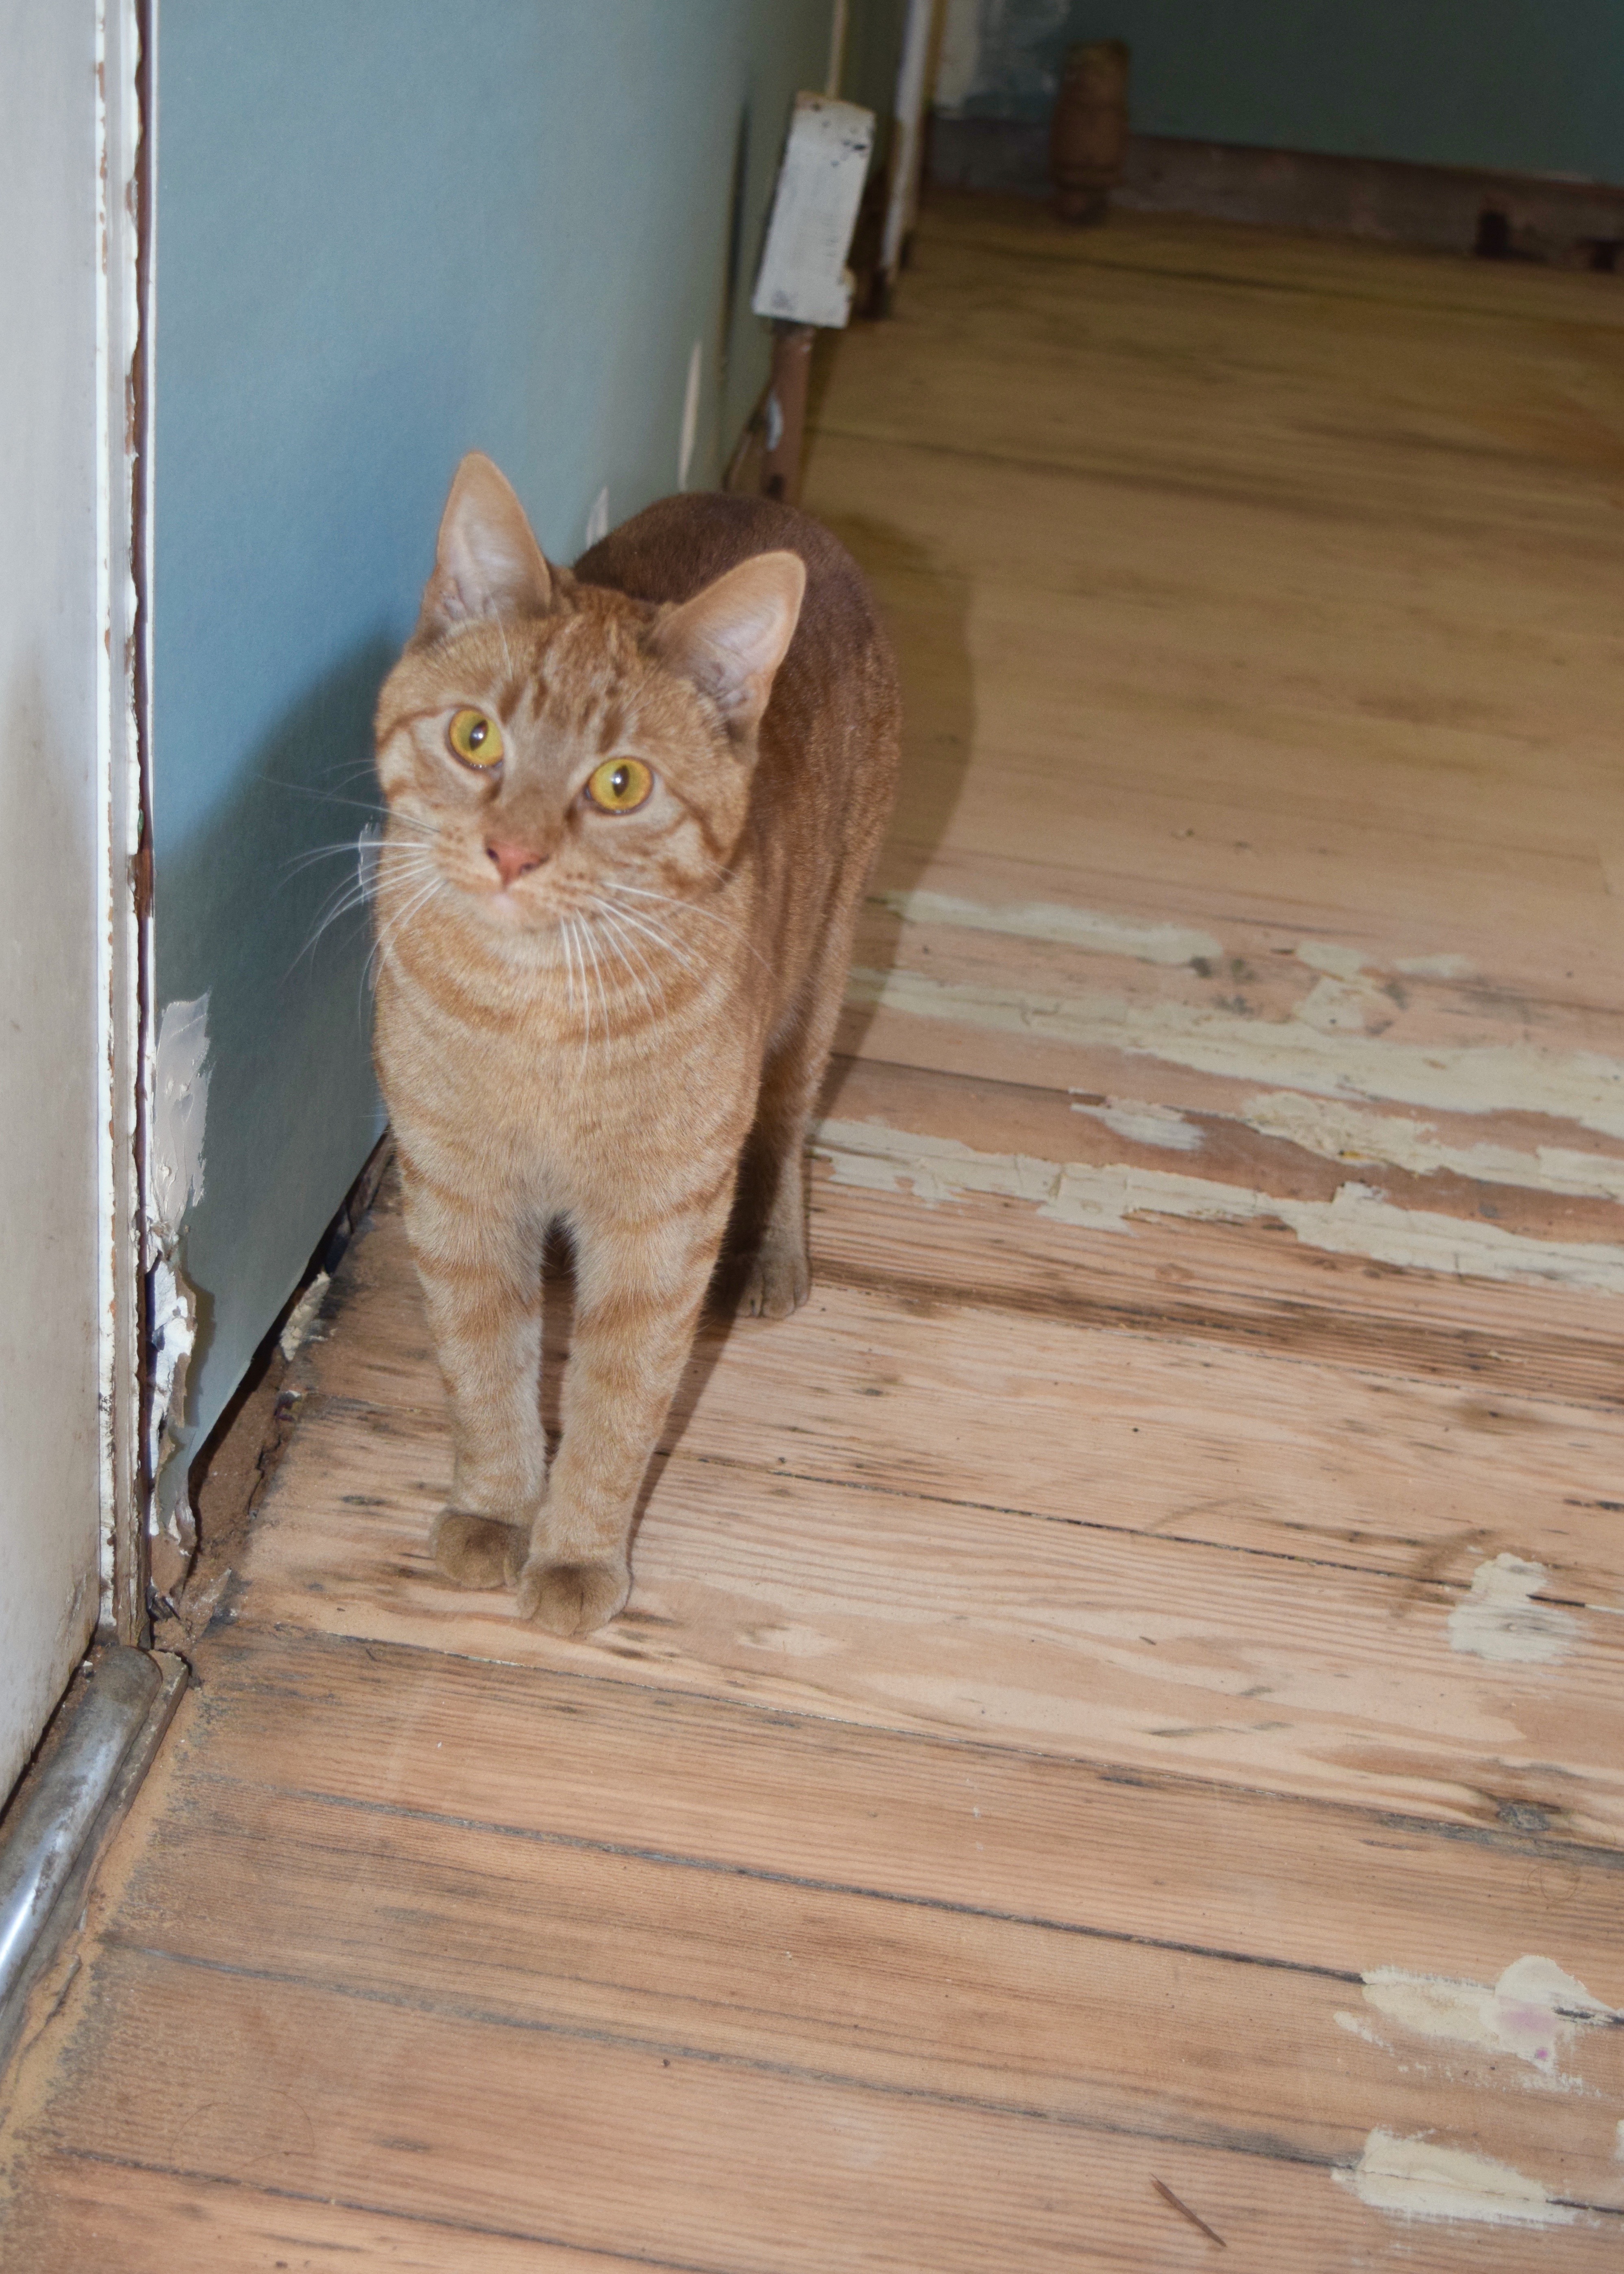
We spent ages sanding and we created SO MUCH DUST. Piles and piles on piles of saw dust. We were sweeping up ginormous piles of dusts in between sandpaper grits. Look at this one by Bronwyn’s feet! It’s almost as big as my cat Jacks!
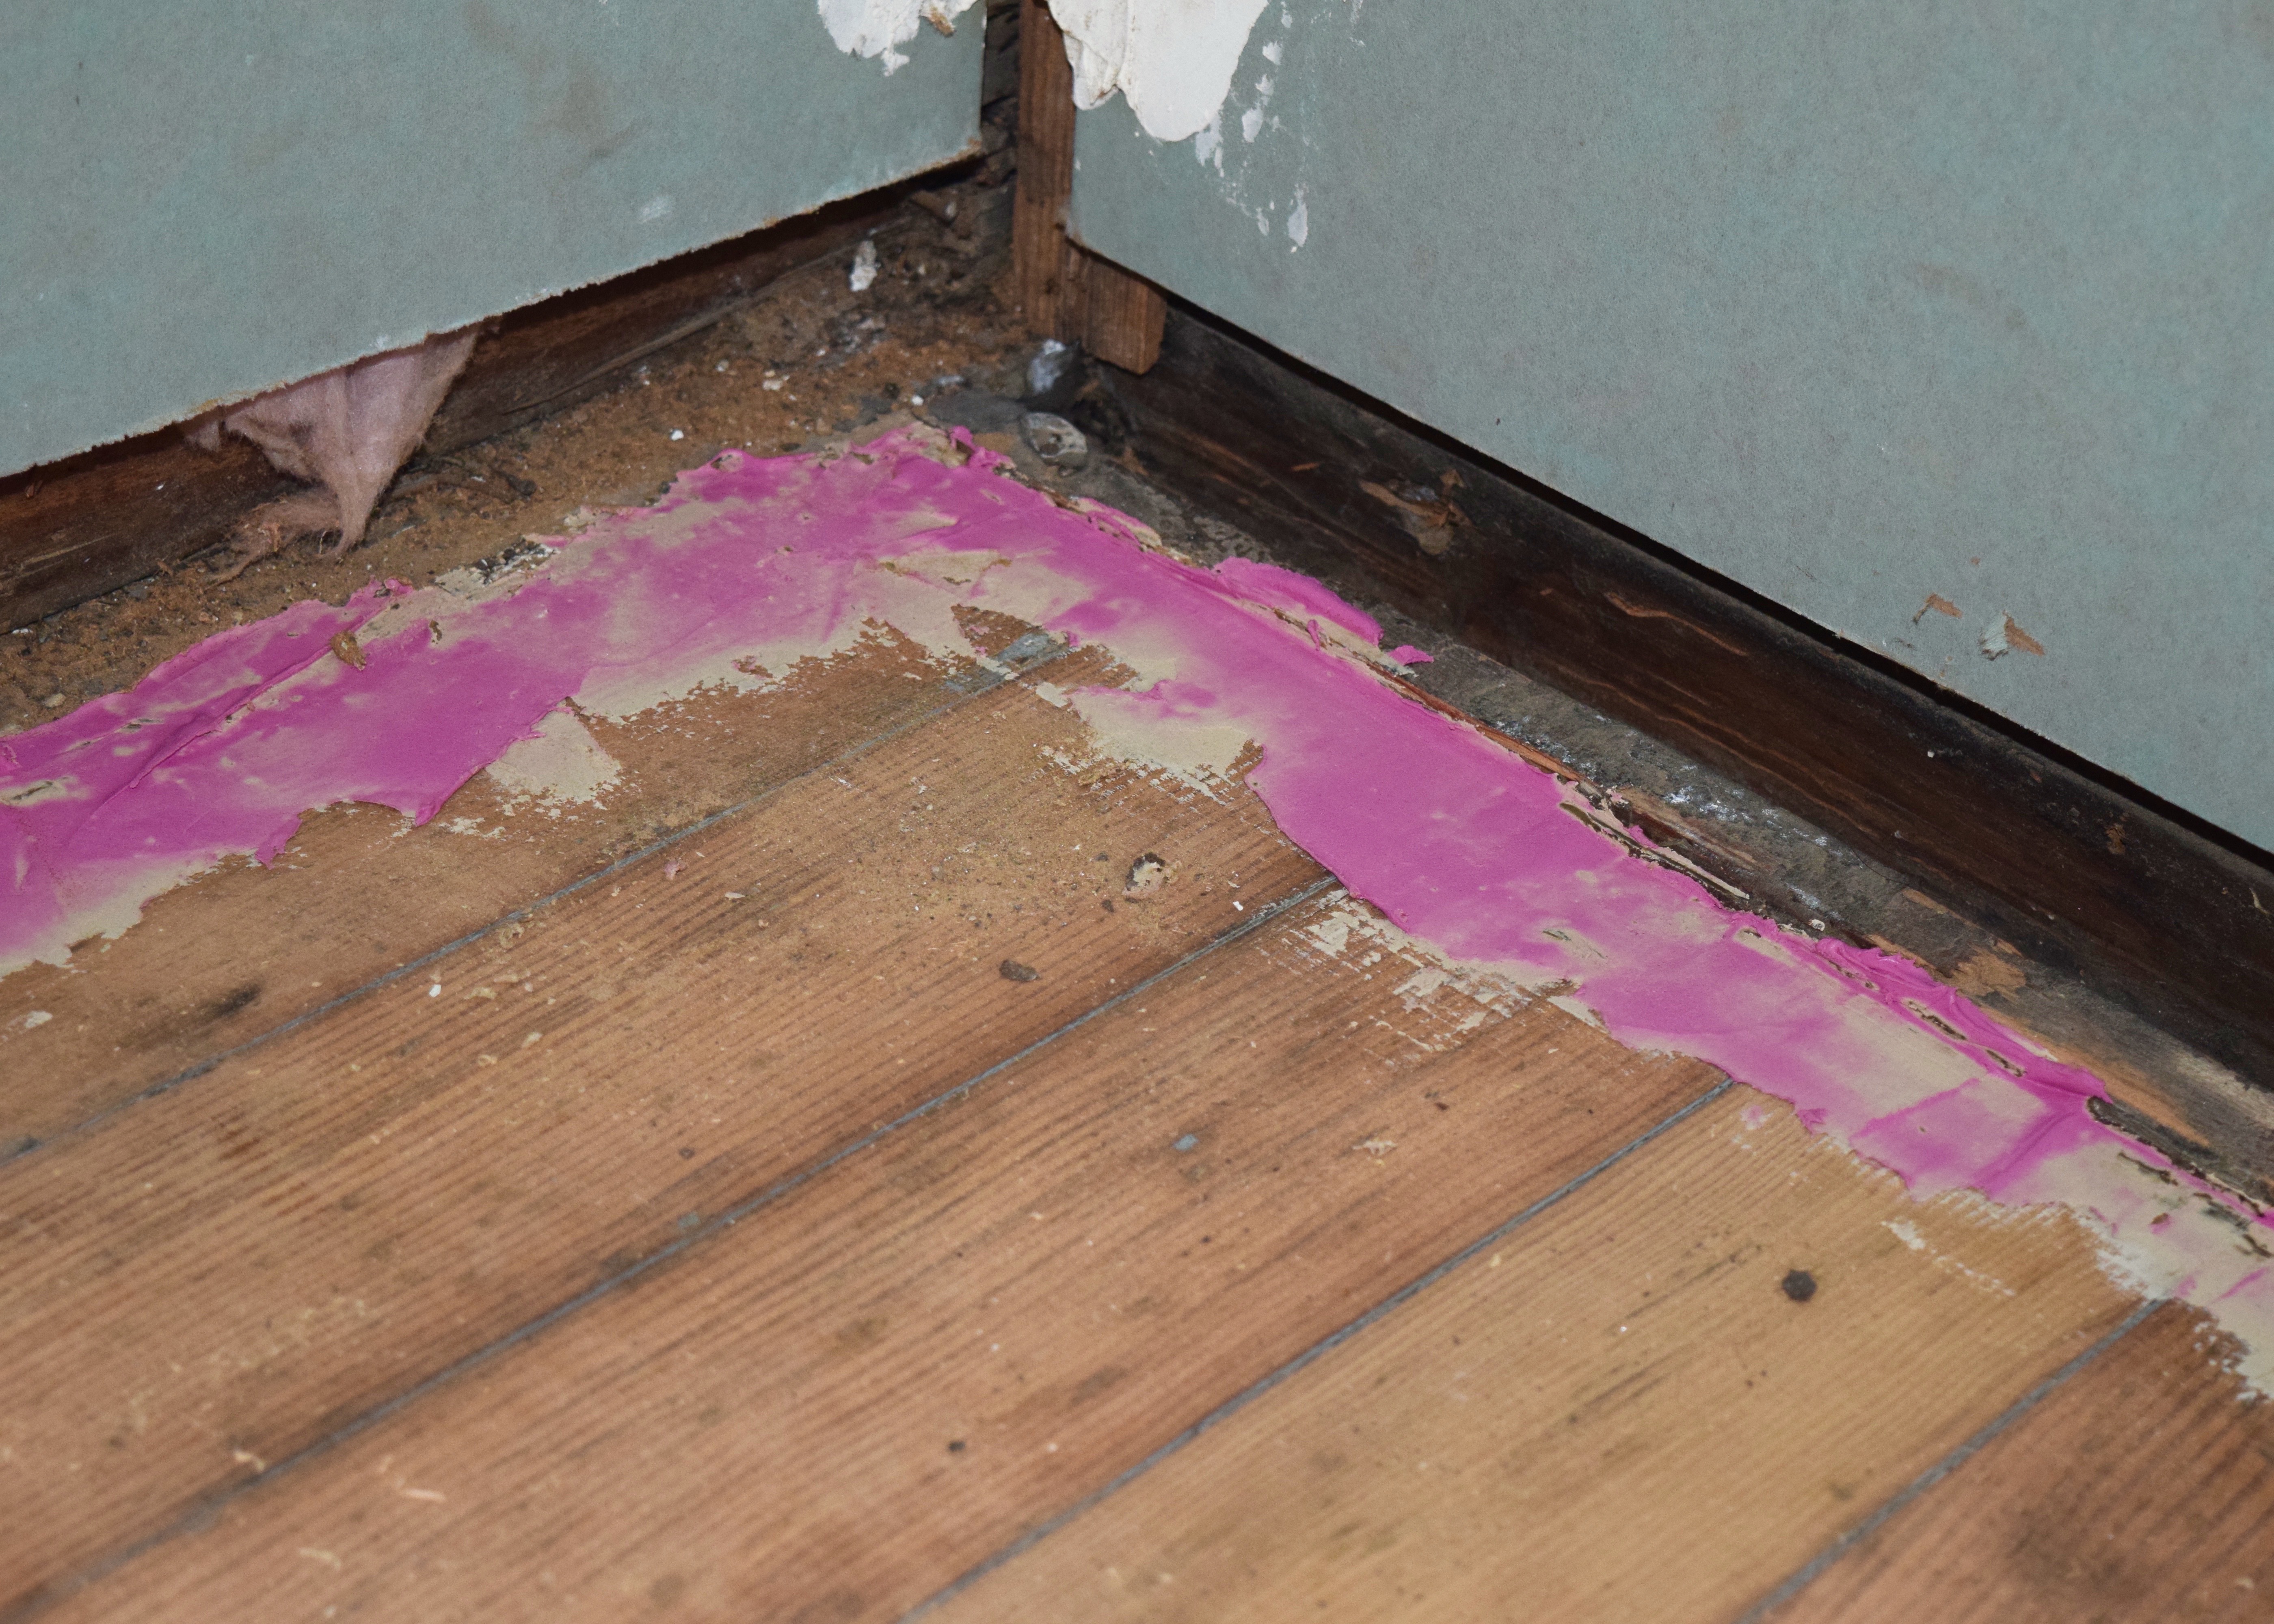
The next day was a Saturday and we spent it filling all the wood scrapes and holes with filler and patching in new planks in two areas. There was a lot of woodfiller to be used! I bought a big box of that stuff that goes from pink to tan and we used EVERY LAST BIT.
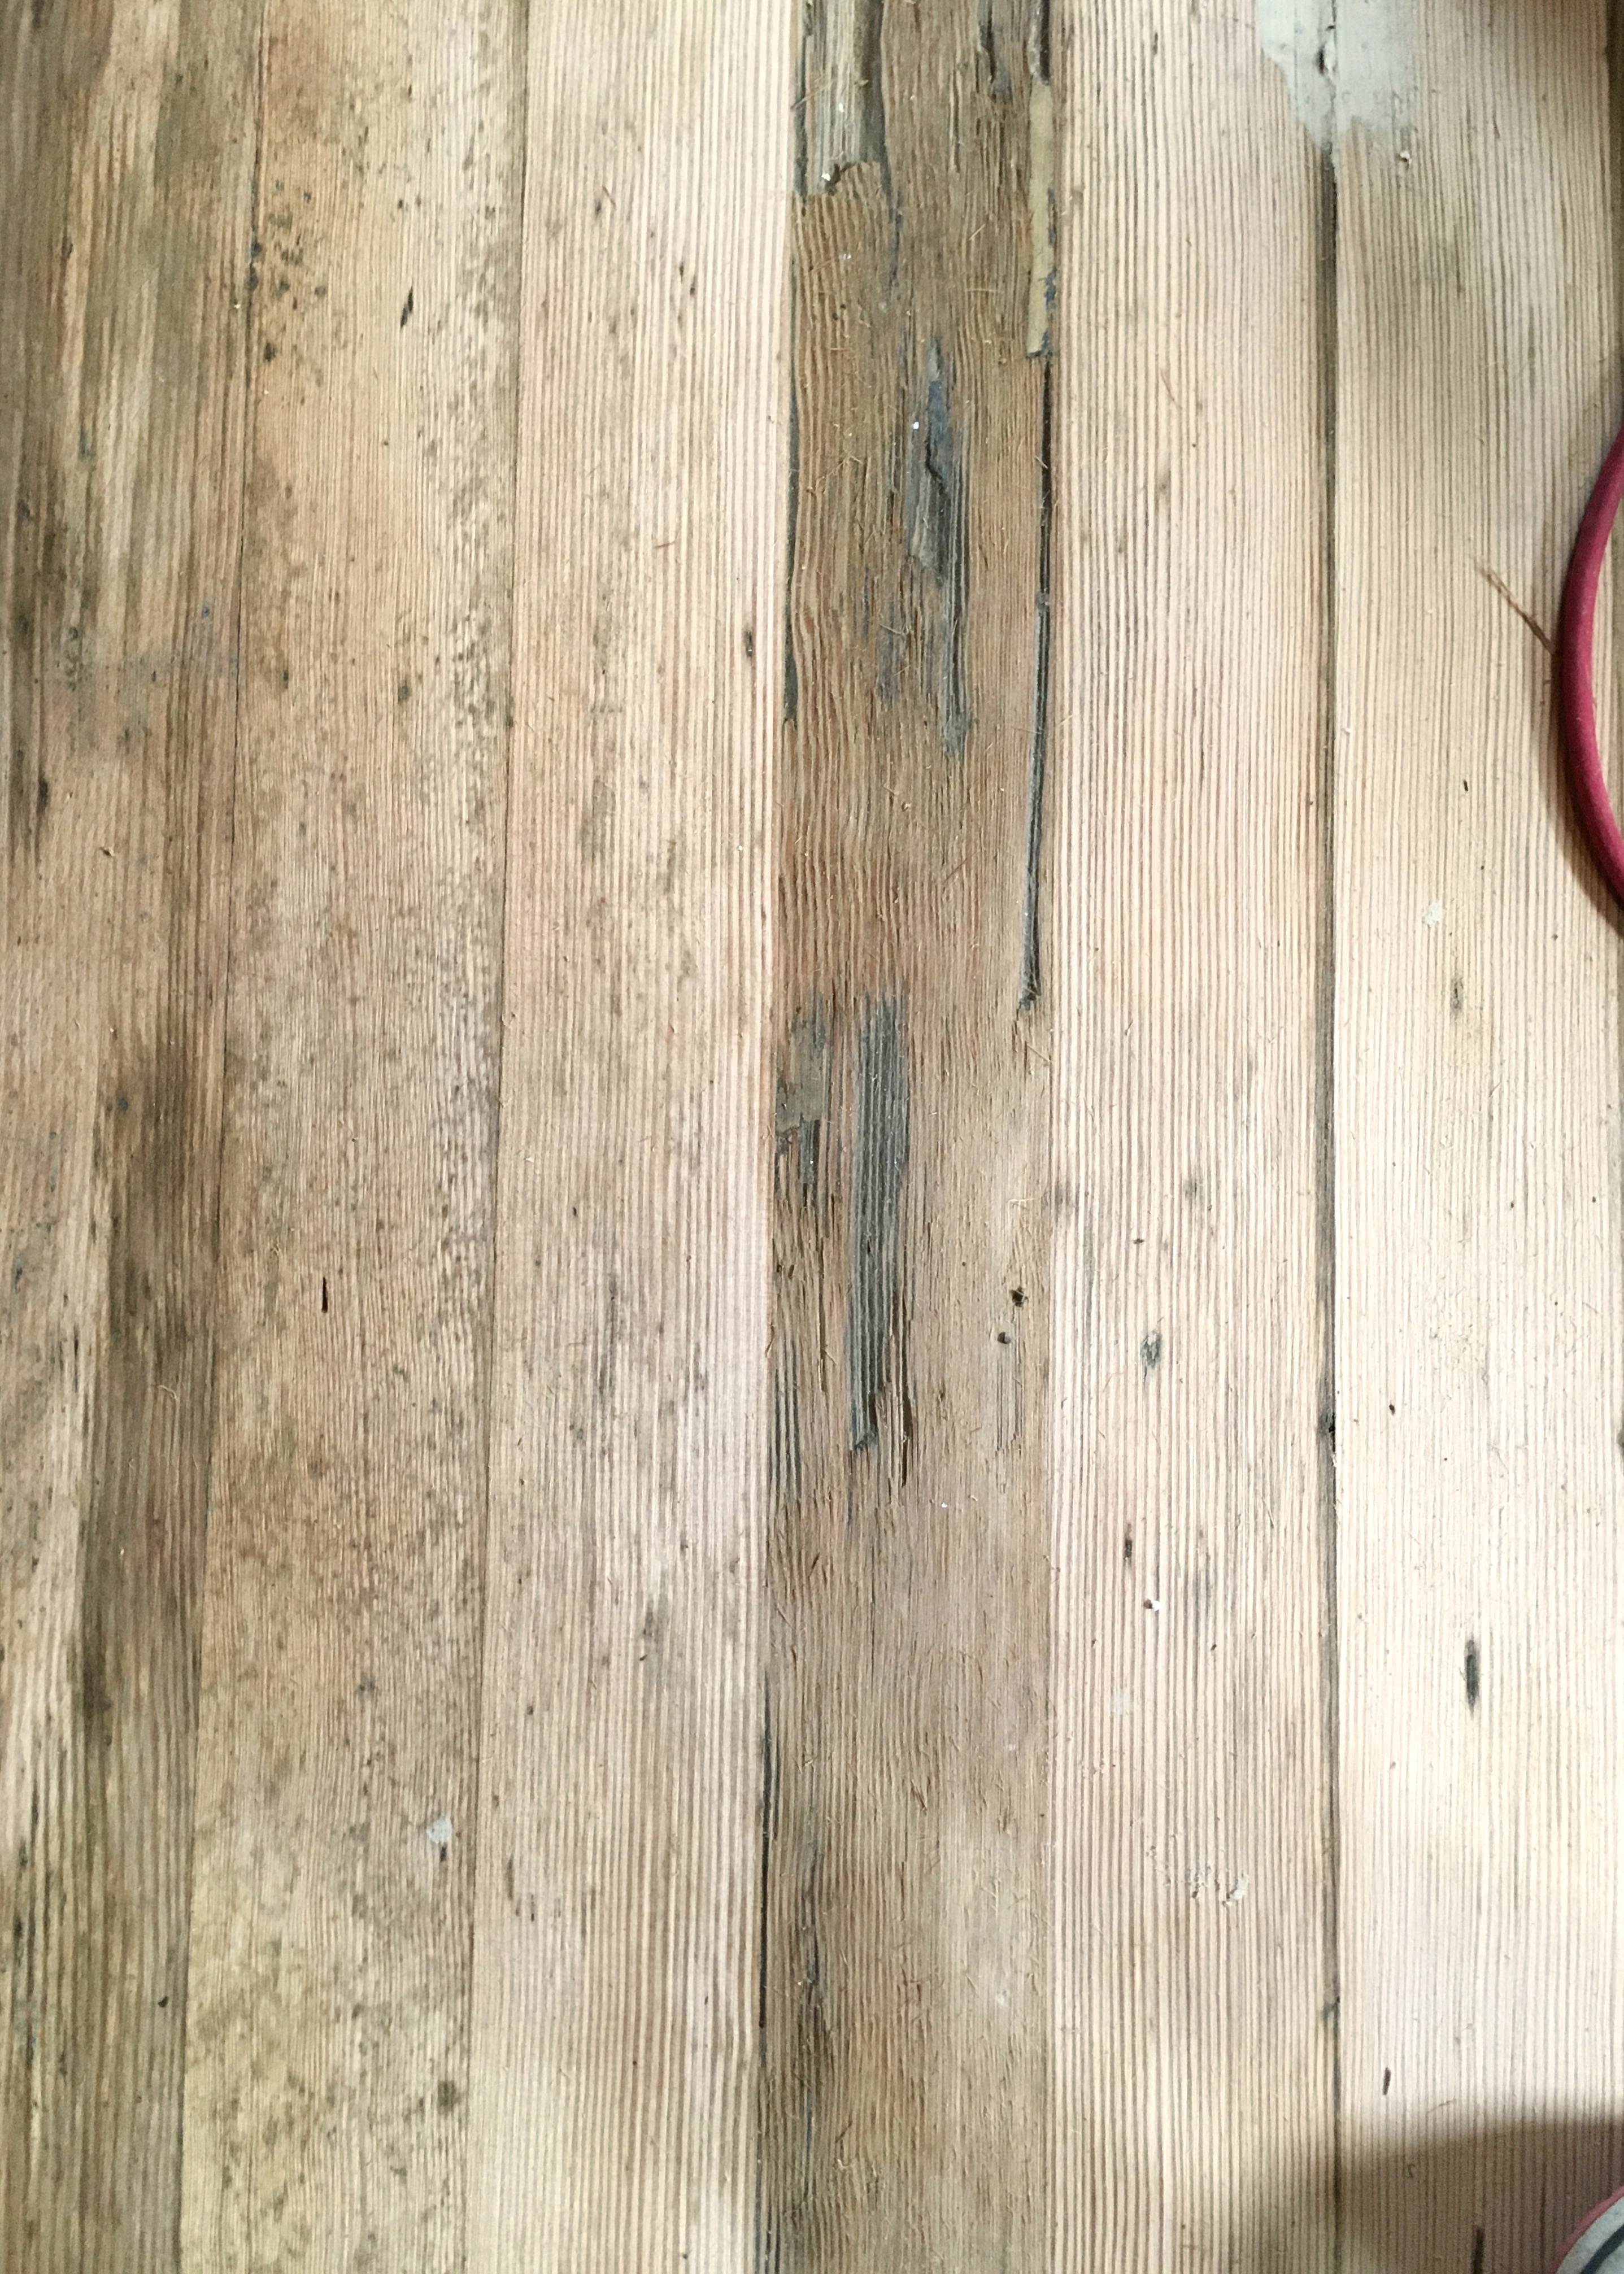
The floors were never going to be perfect and I never expected that, but they are original to the house and I wanted to restore them the best I could. I knew that the tar had stained the wood in places and that it would always have dark patches and light patches, but it’s part of the story of the house, it’s character, and I was all about it.
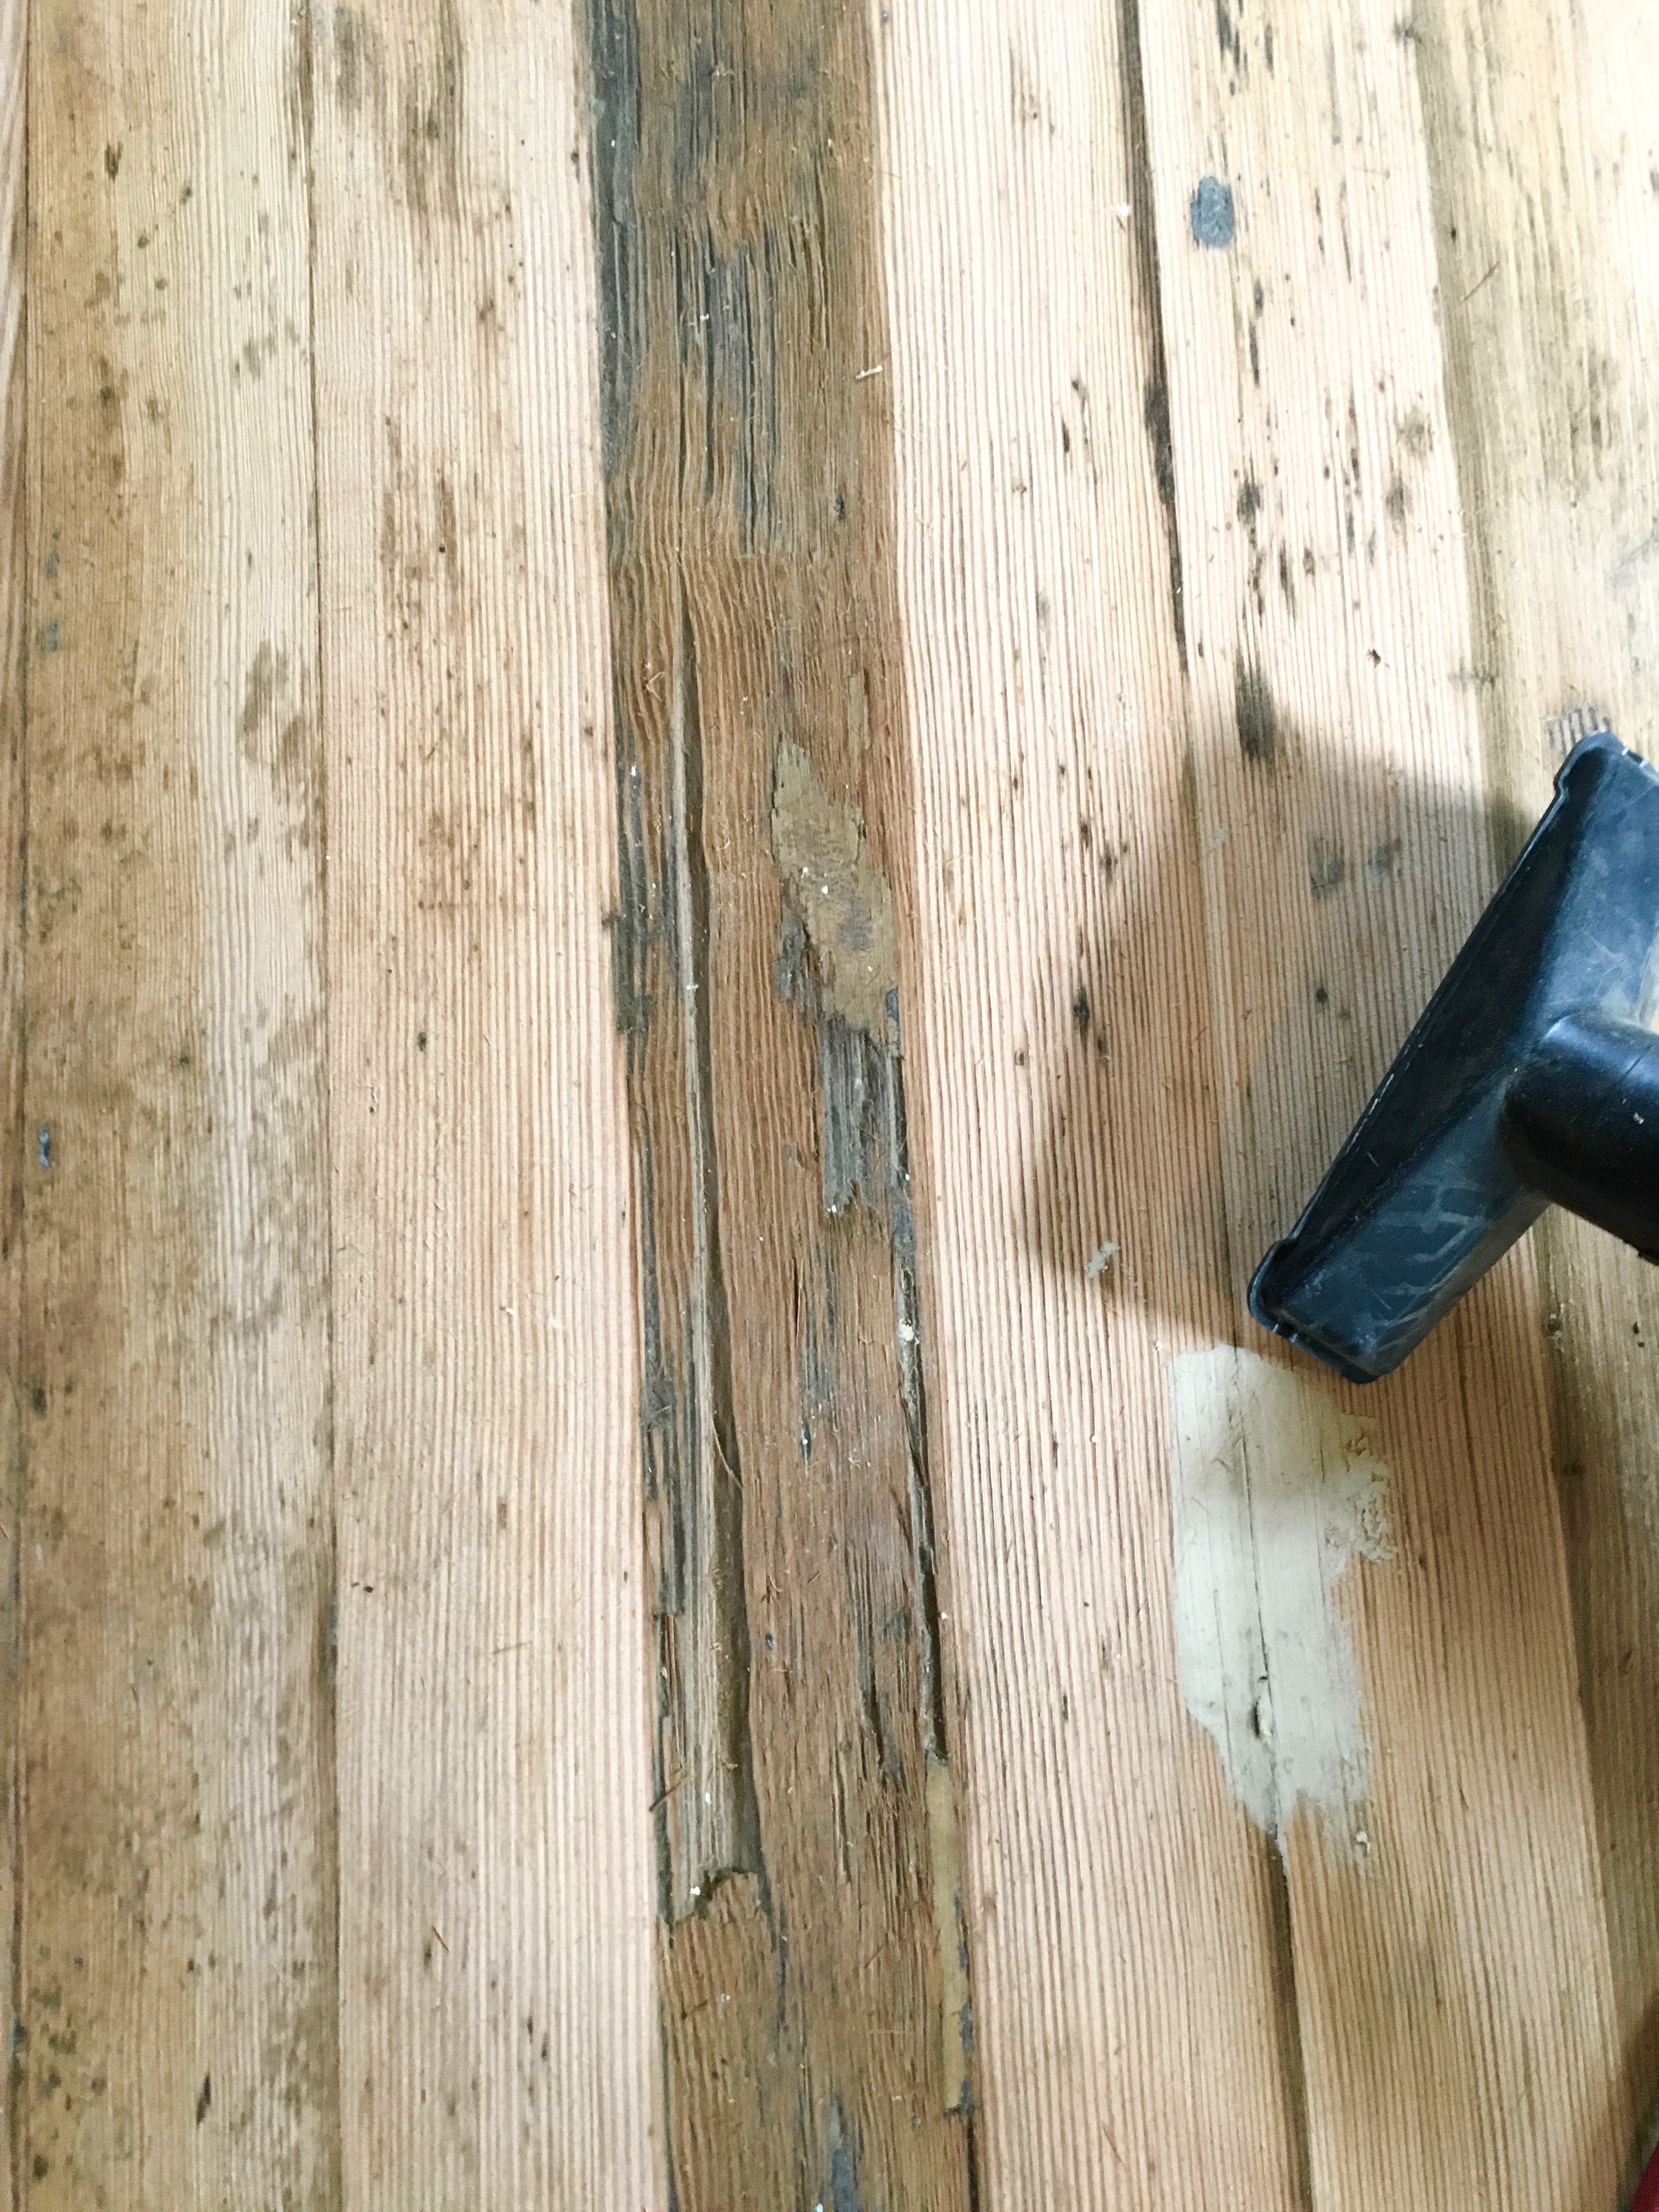
The flooring was really rough by the backdoor where the wood transitioned from the fir planks in the main kitchen to god know’s what by the backdoor and then back to fir planks. Note on the lower right below that weird patch that I’d filled a ton of wood filler around. I think that’s where the wall separating the pantry / cold room and the kitchen was. It had been filled in with a series of 6″wide pieces of plywood which I found highly questionable and eventually decided to remove and patch properly with new fir boards.
Other spots were more fixable and I even used wood glue too to hold some bad areas together the wood was so effed up.
The whole space by the transition looked like a candy cane there was so many wood filler stripes. Here you can at least see that transition really easily though! Flooring clues to the past!
Another particularly rough area was over by the mini-hallway to my bedroom and the air intake vent. I used a ton of glue and filler here too. I think this area is so rough because there was originally a wall here and the master bedroom was originally entered through the dining room.

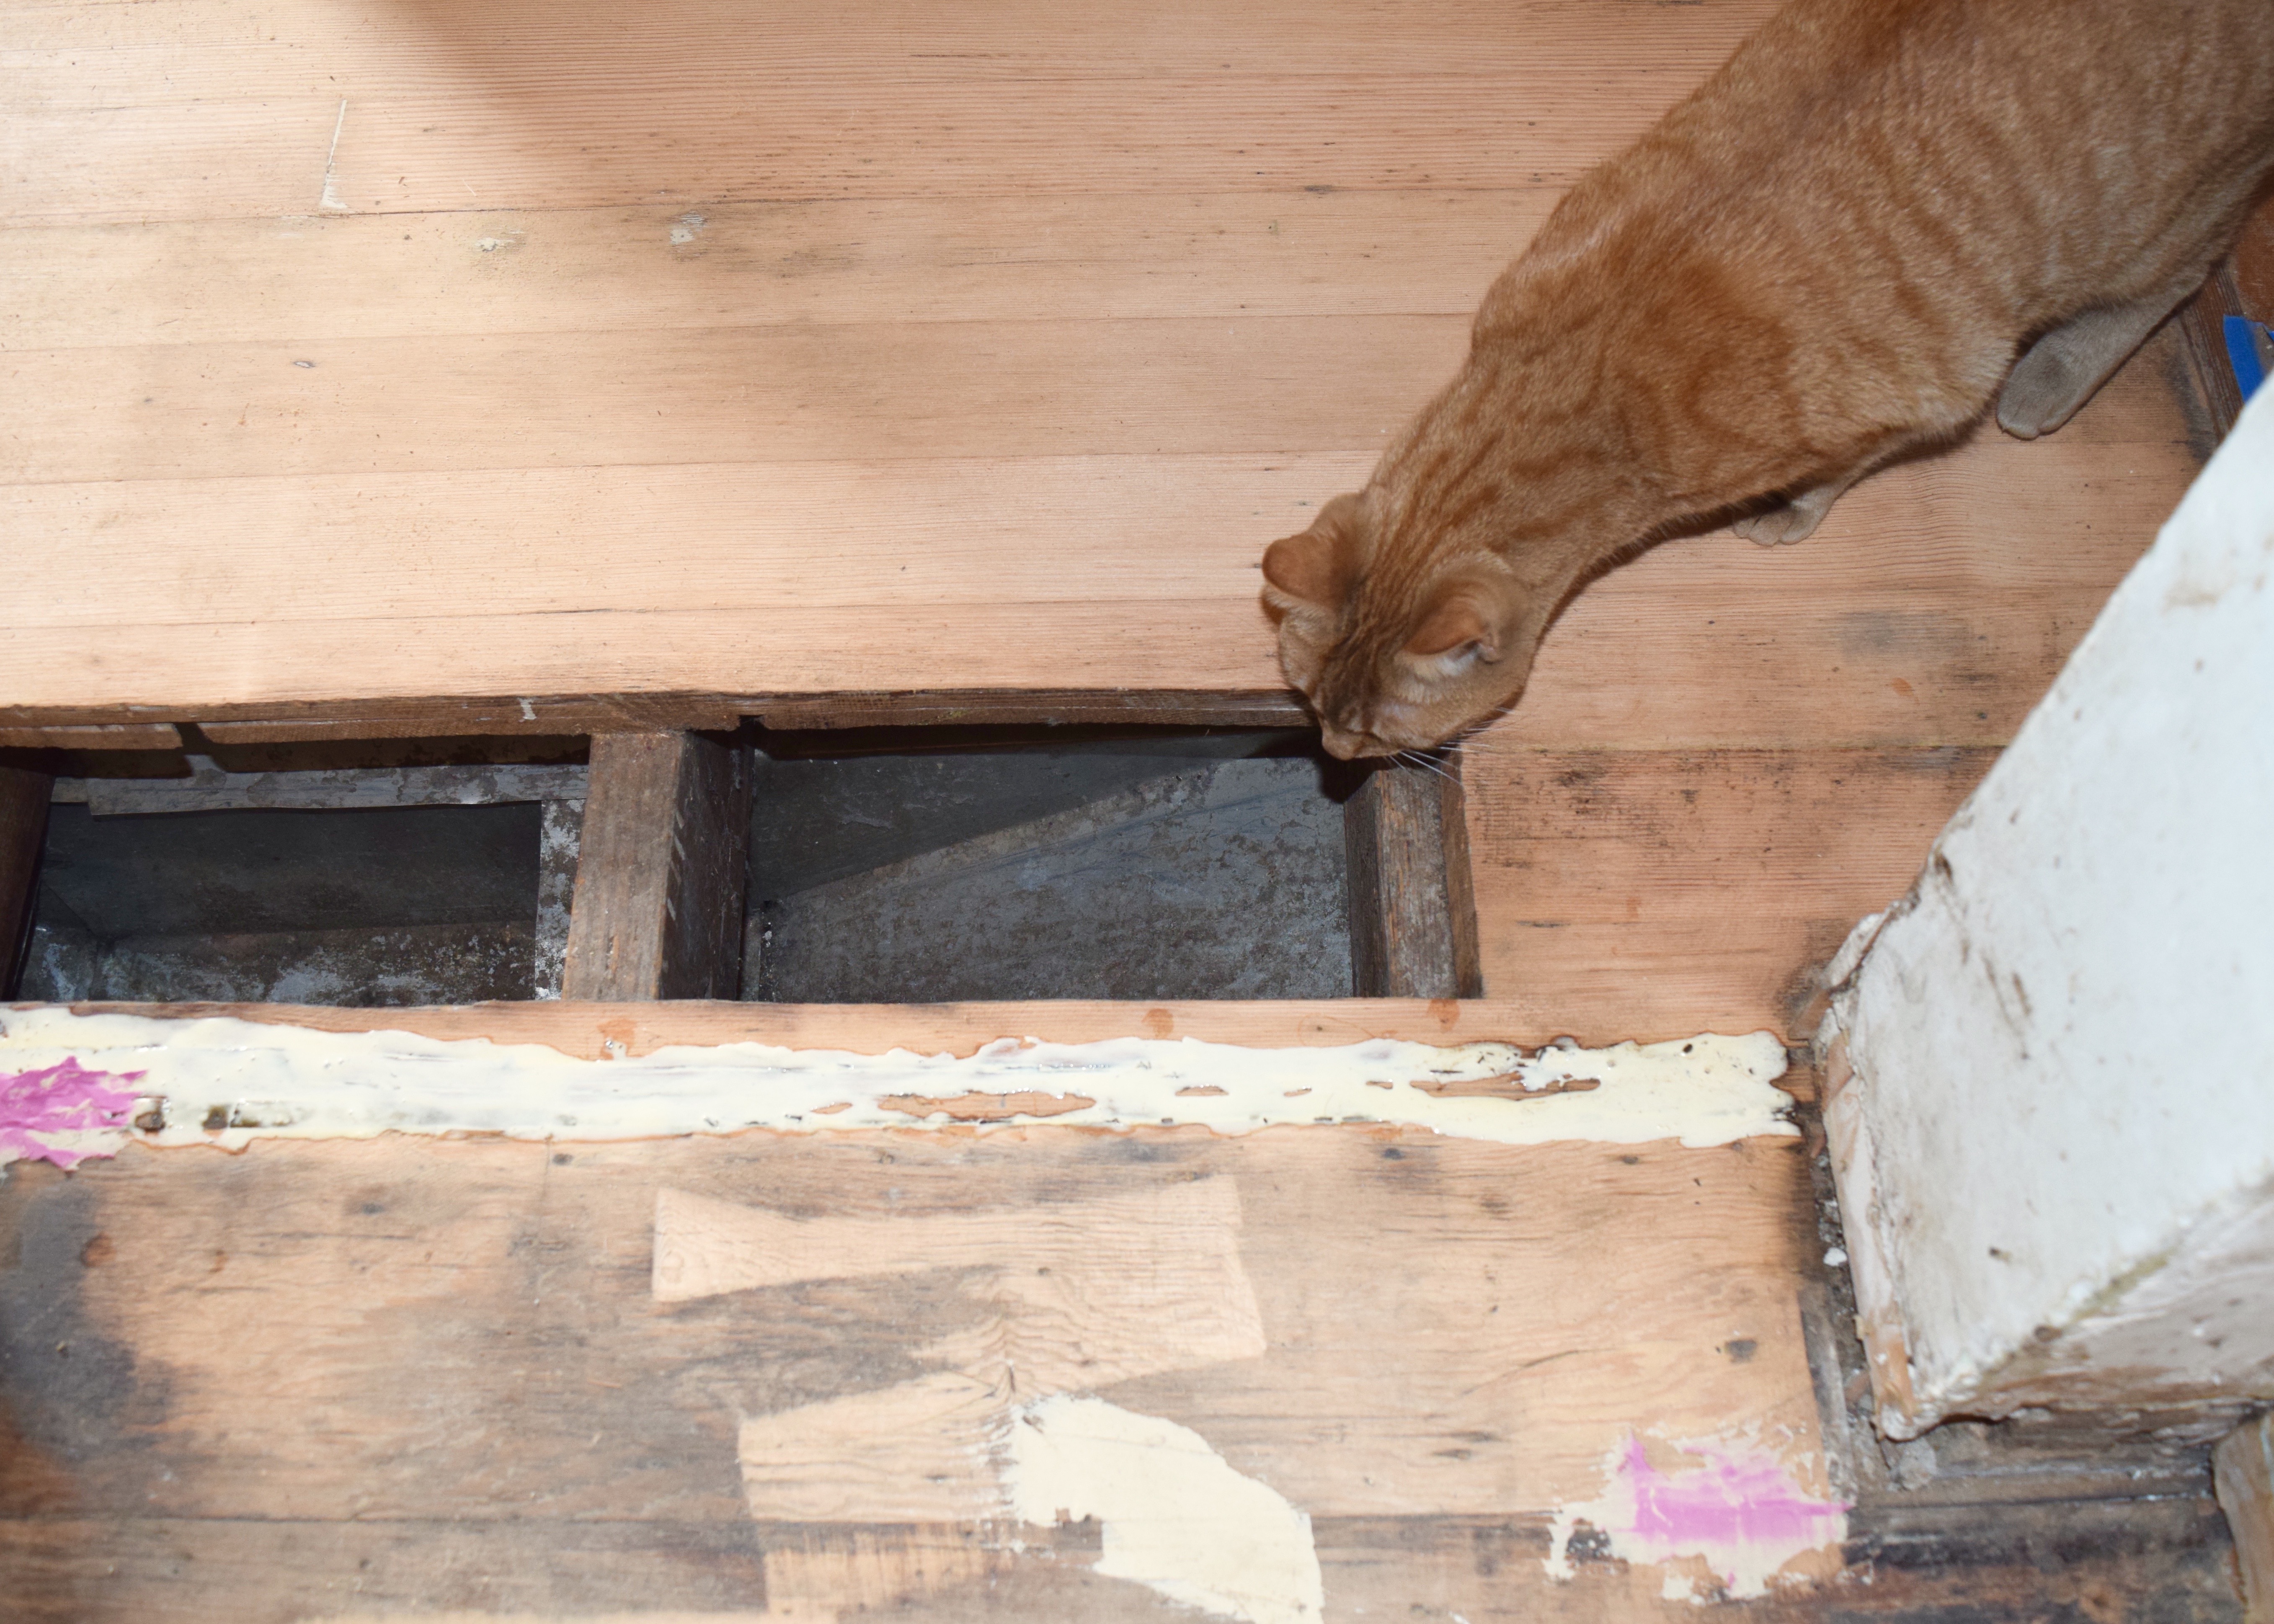
This was also when we learned Jacks had a thing for ductwork. He would crawl into any open vent and just walk through them like tunnels as we shut off the heat and tried to coax him out with treats and wet food!
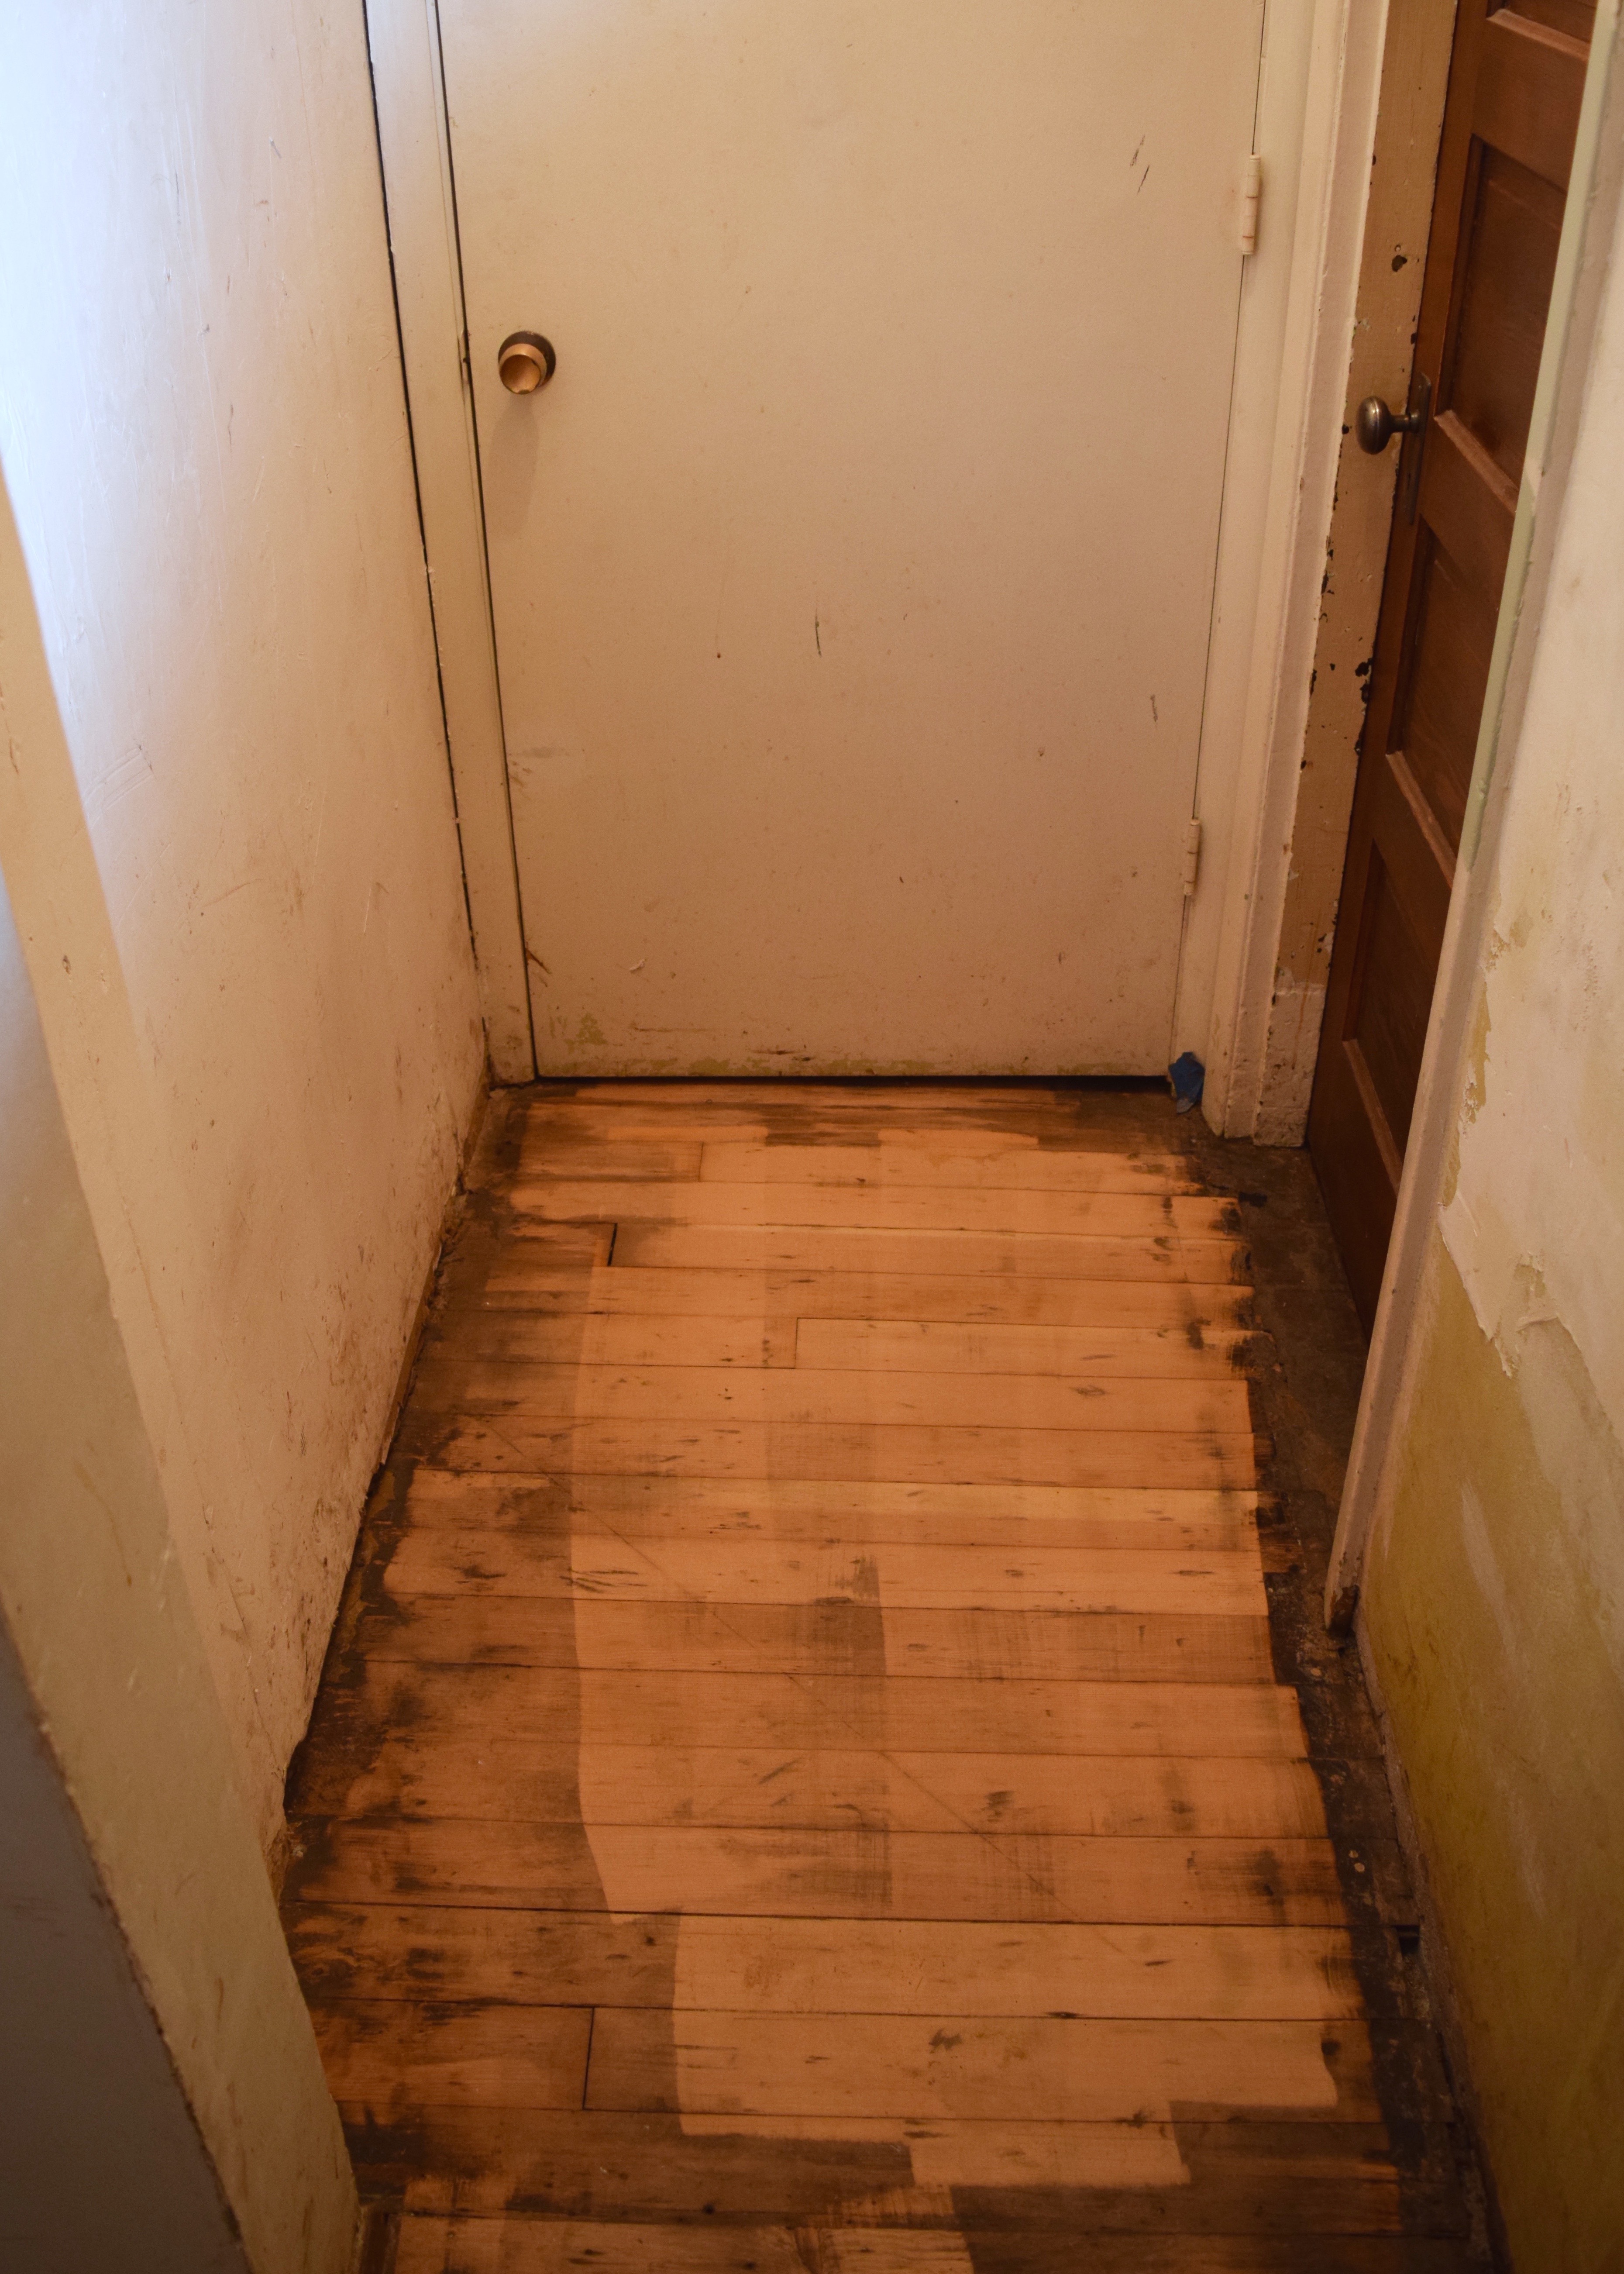
Another rough area was all the edges near the bathroom. I’m not sure why these were so bad… Water damage? It wasn’t obviously apparent and it wasn’t anything a TON of wood filler wasn’t going to fix.
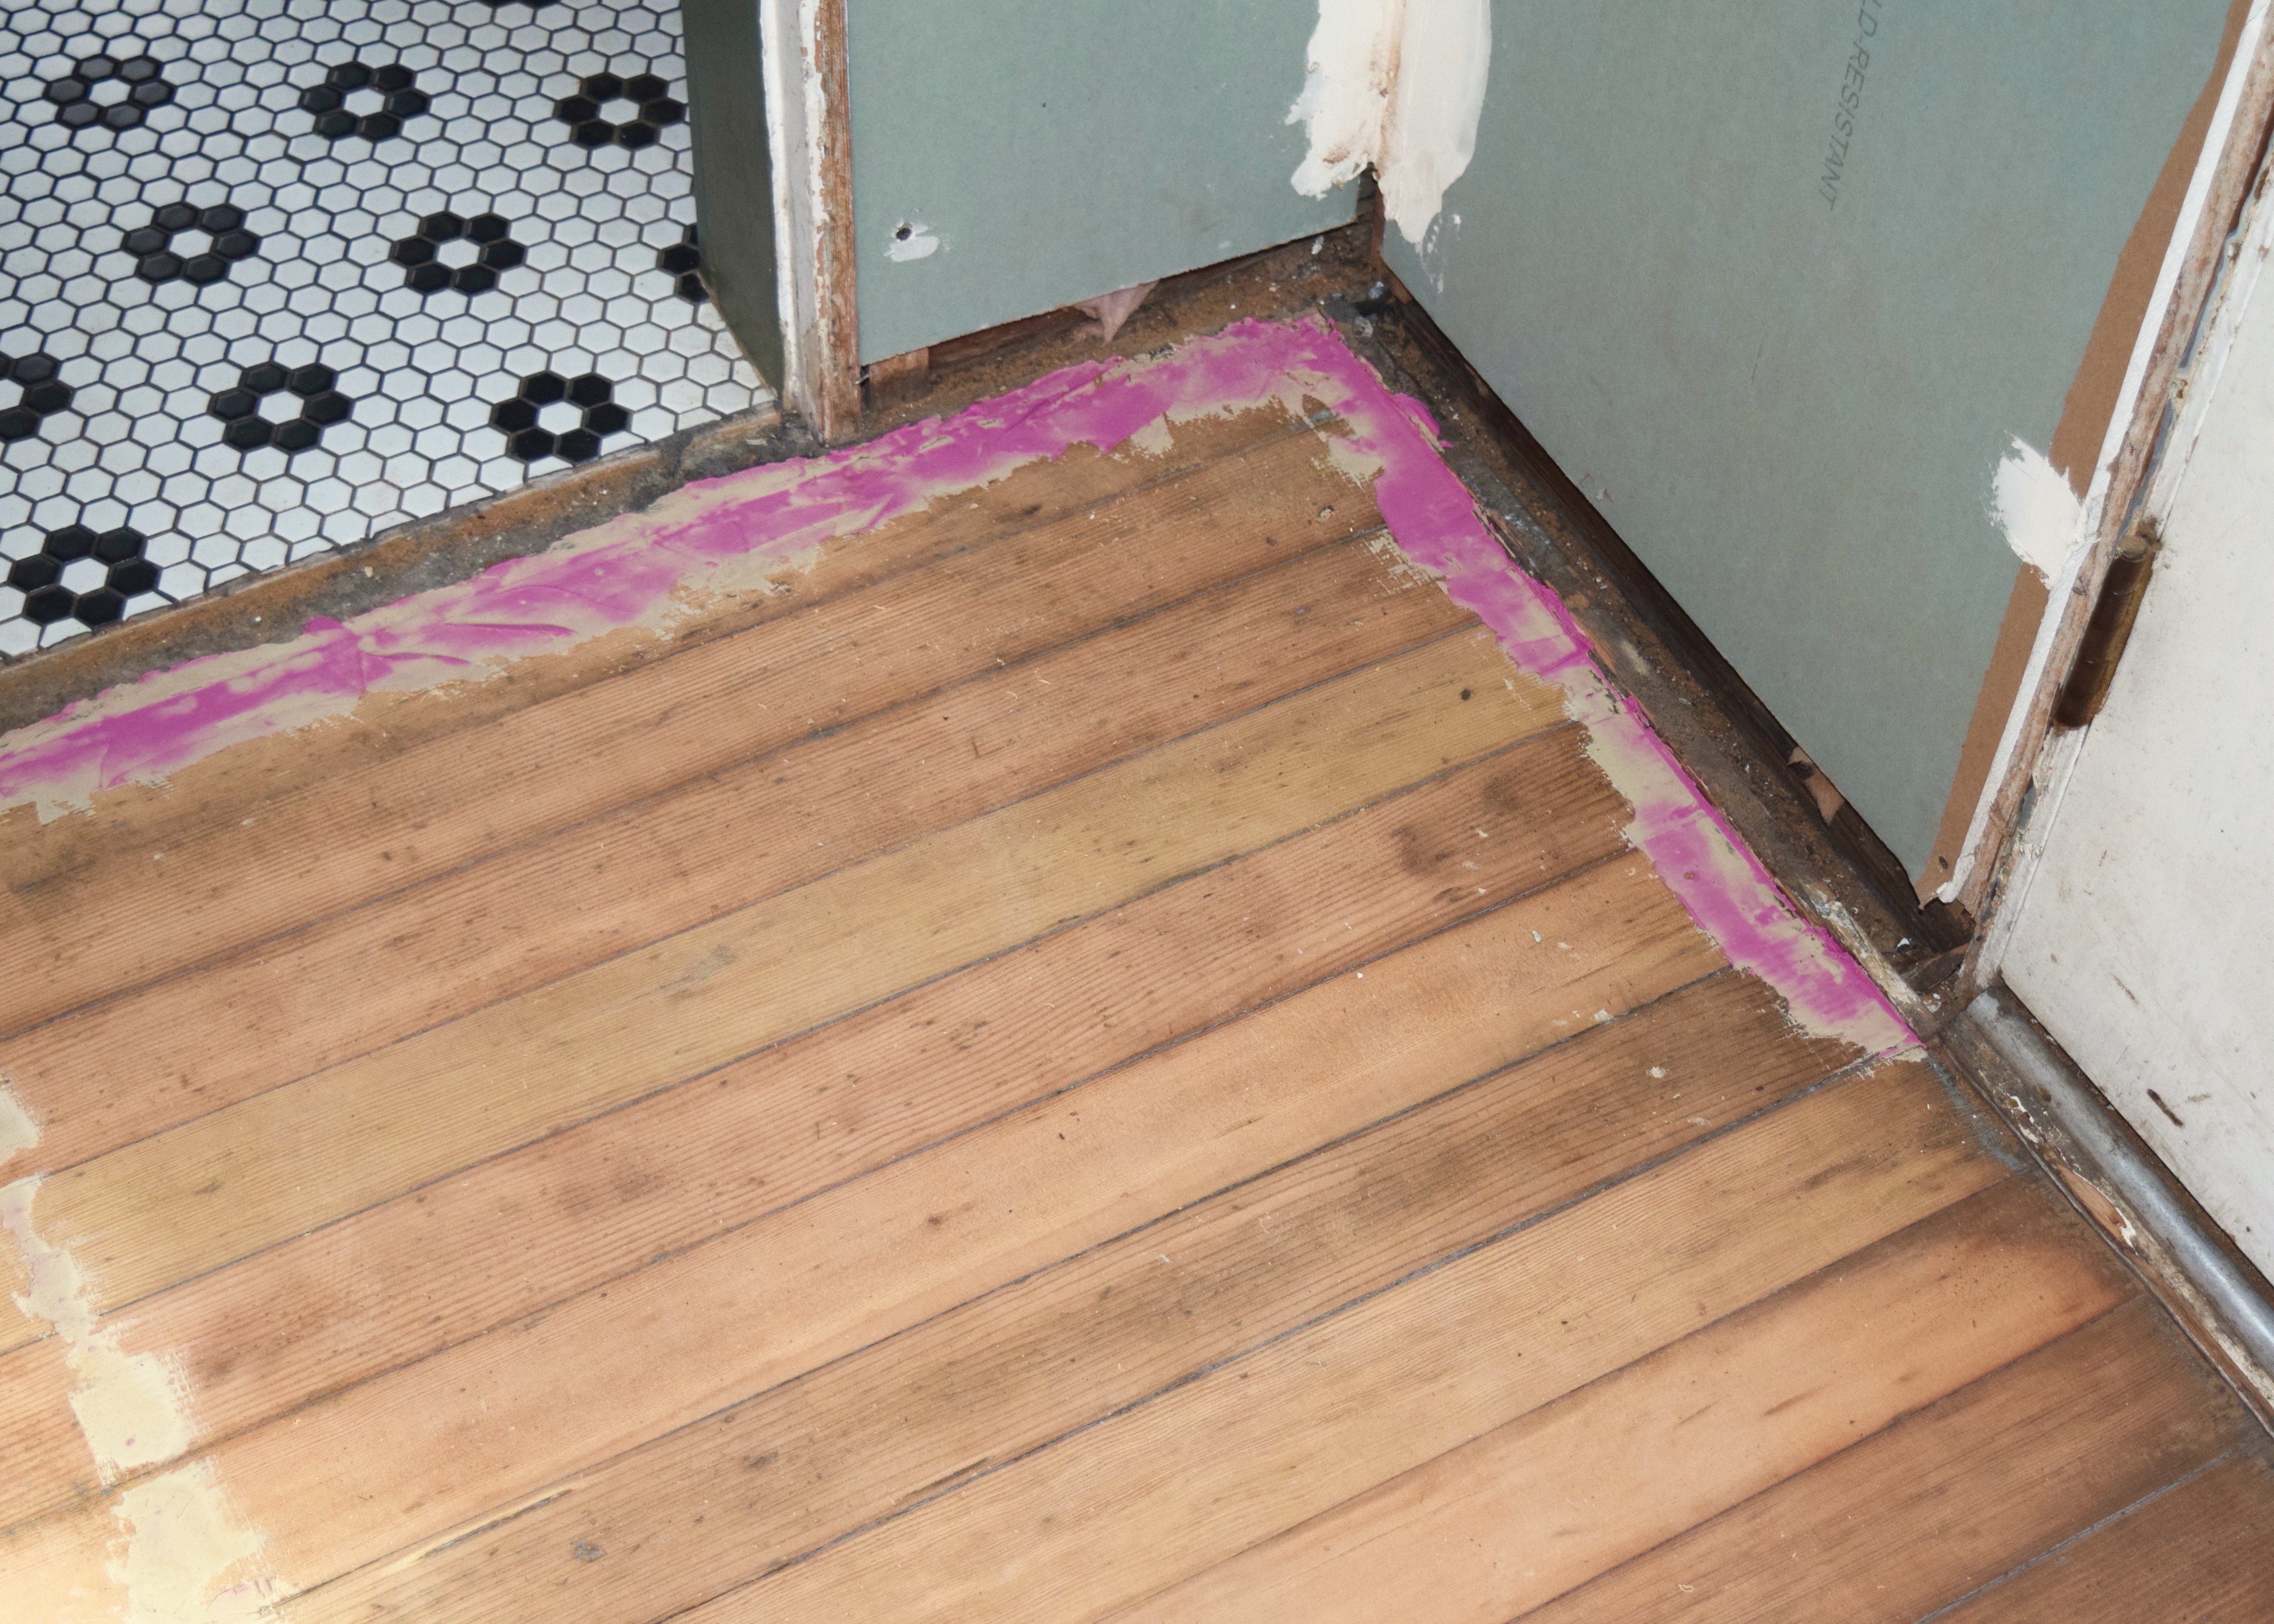
There were a lot of weird things going on in that corner actually. and I was grateful that the vertical V-groove paneling, baseboards, and quarterround I had planned would hide a lot of these questionable areas.
Other damages I had caused. There were definitely big gouges taken out of the floor when I was using a big floor scraper and trying to remove the layers of sheet vinyl. It was an unfortunate part of that task and one I wish I hadn’t resorted to, but, hey, more wood filler it was!
There were other planks that I gouged badly that I worried were actual damaged boards. See how discolored this one is? I figured it had rotted and needed complete replacement too… but eventually it all sanded out. Whoopee!
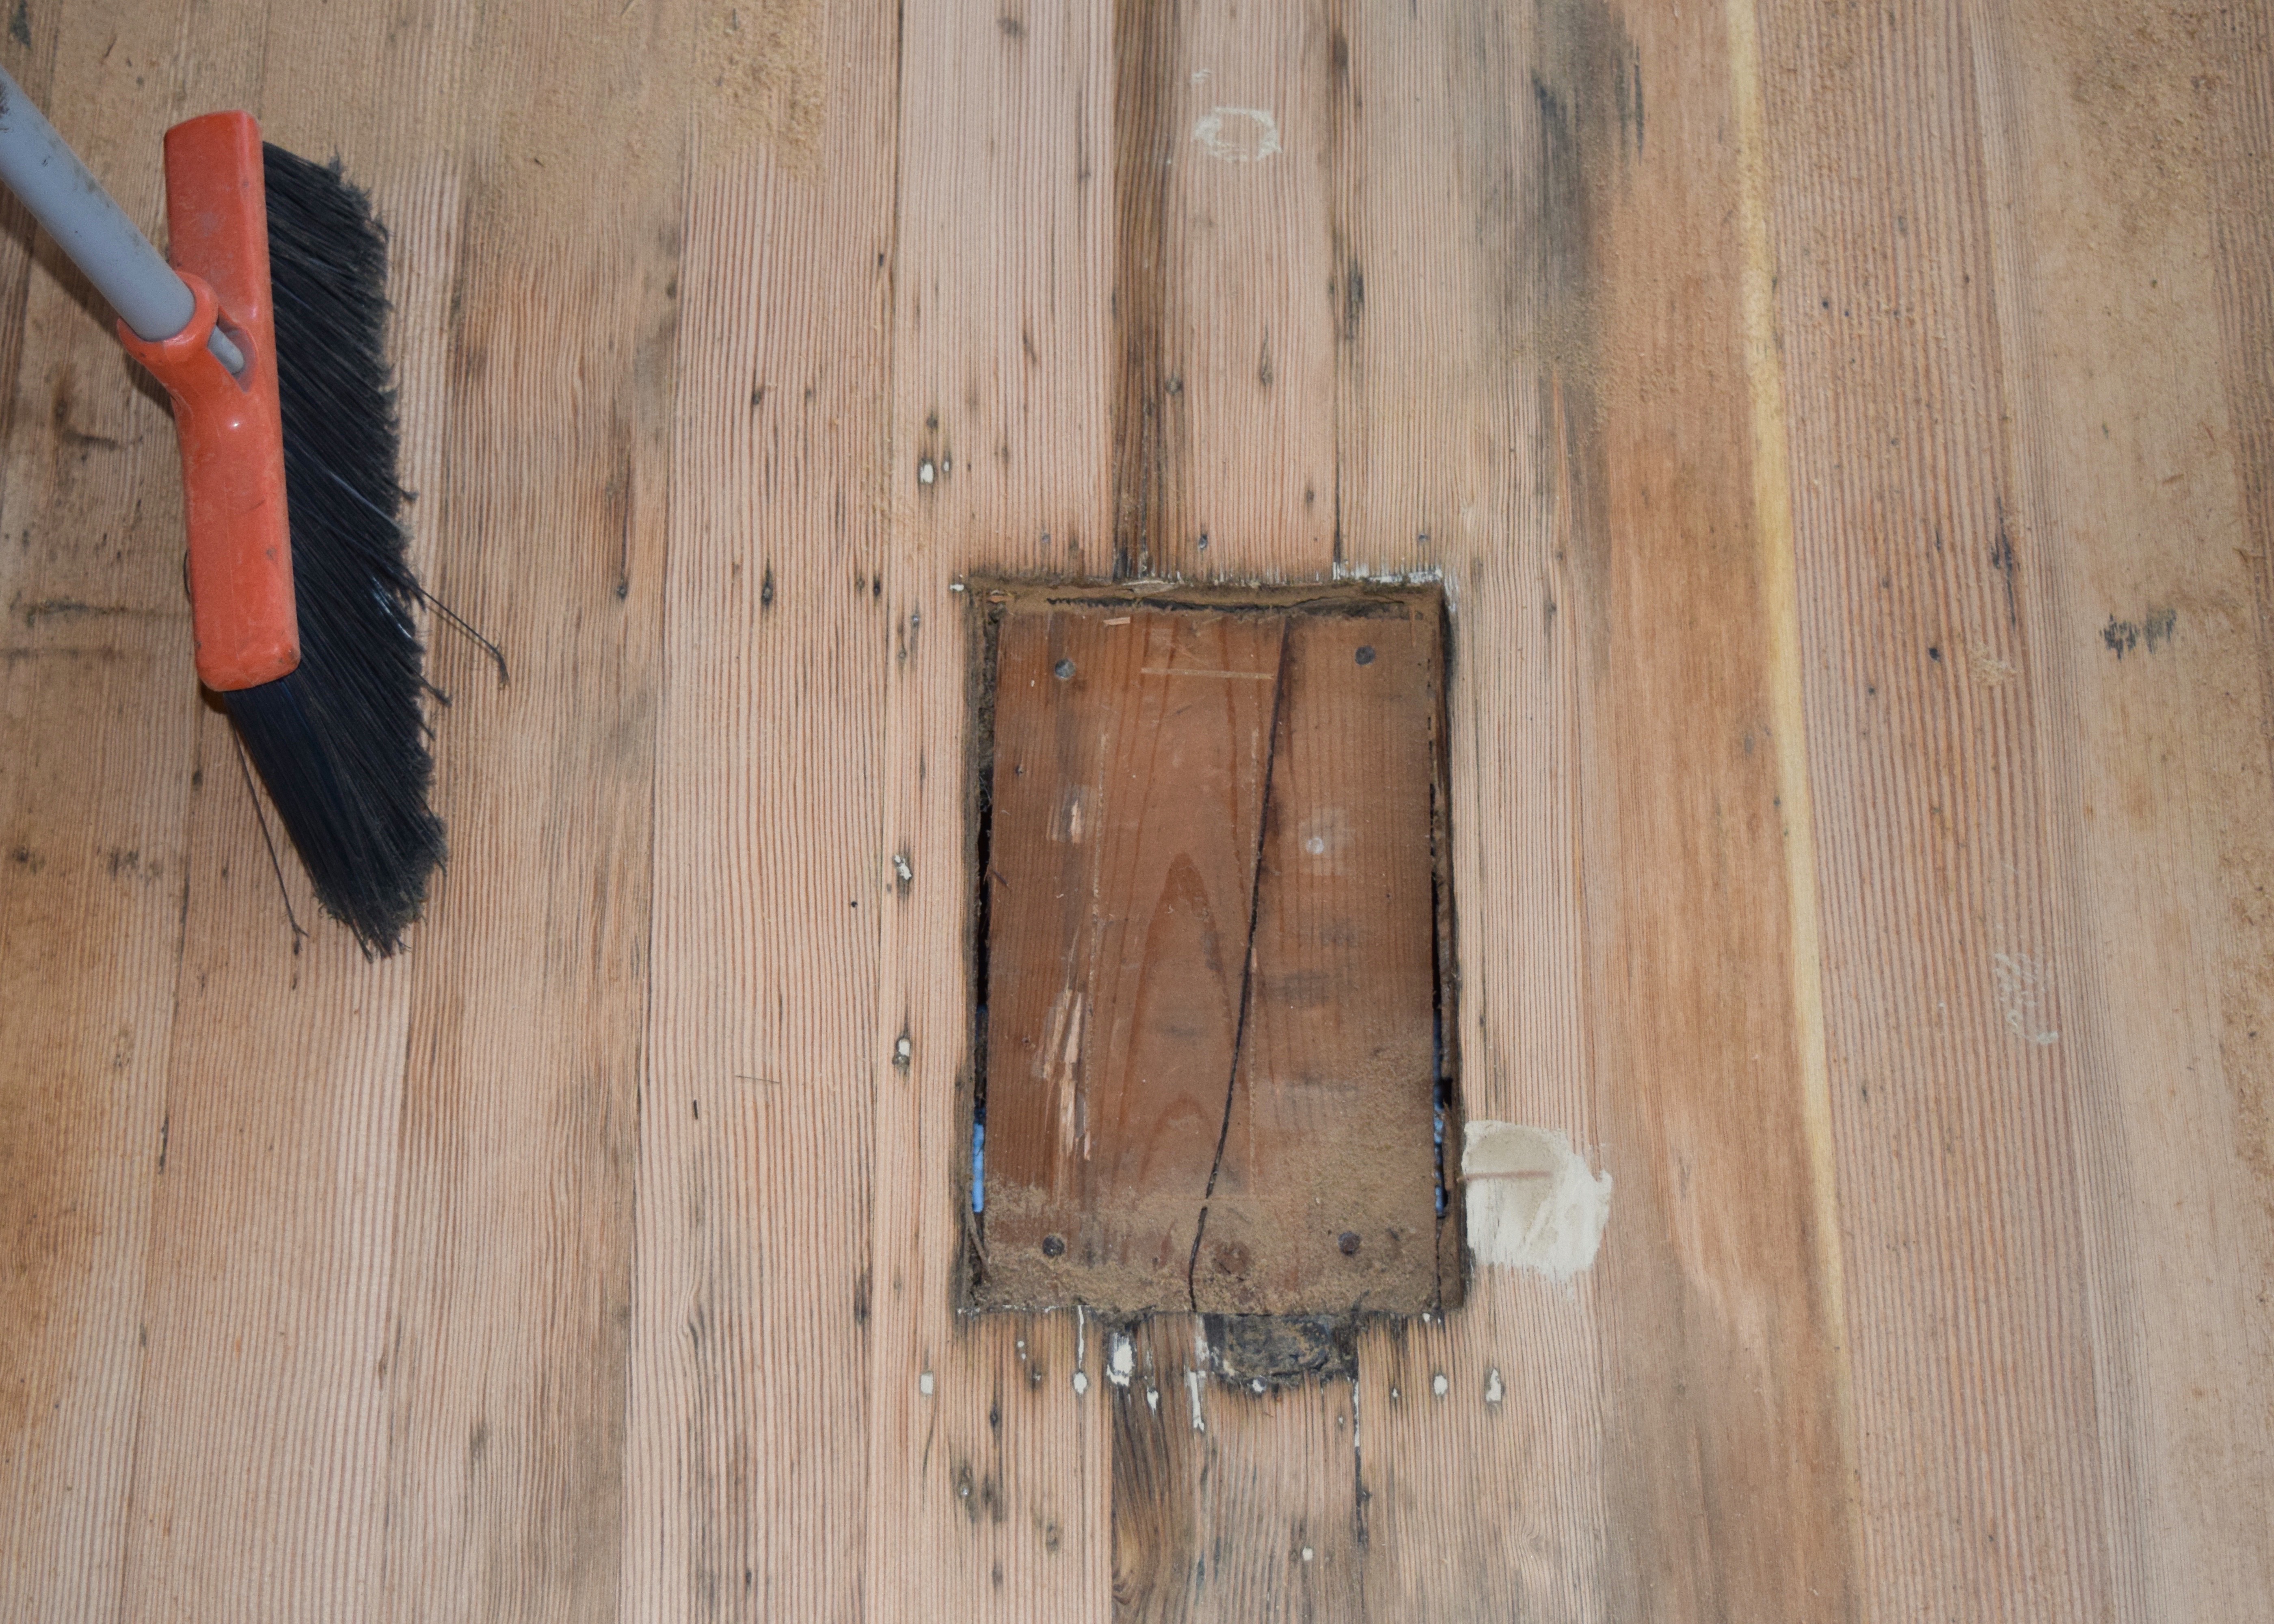
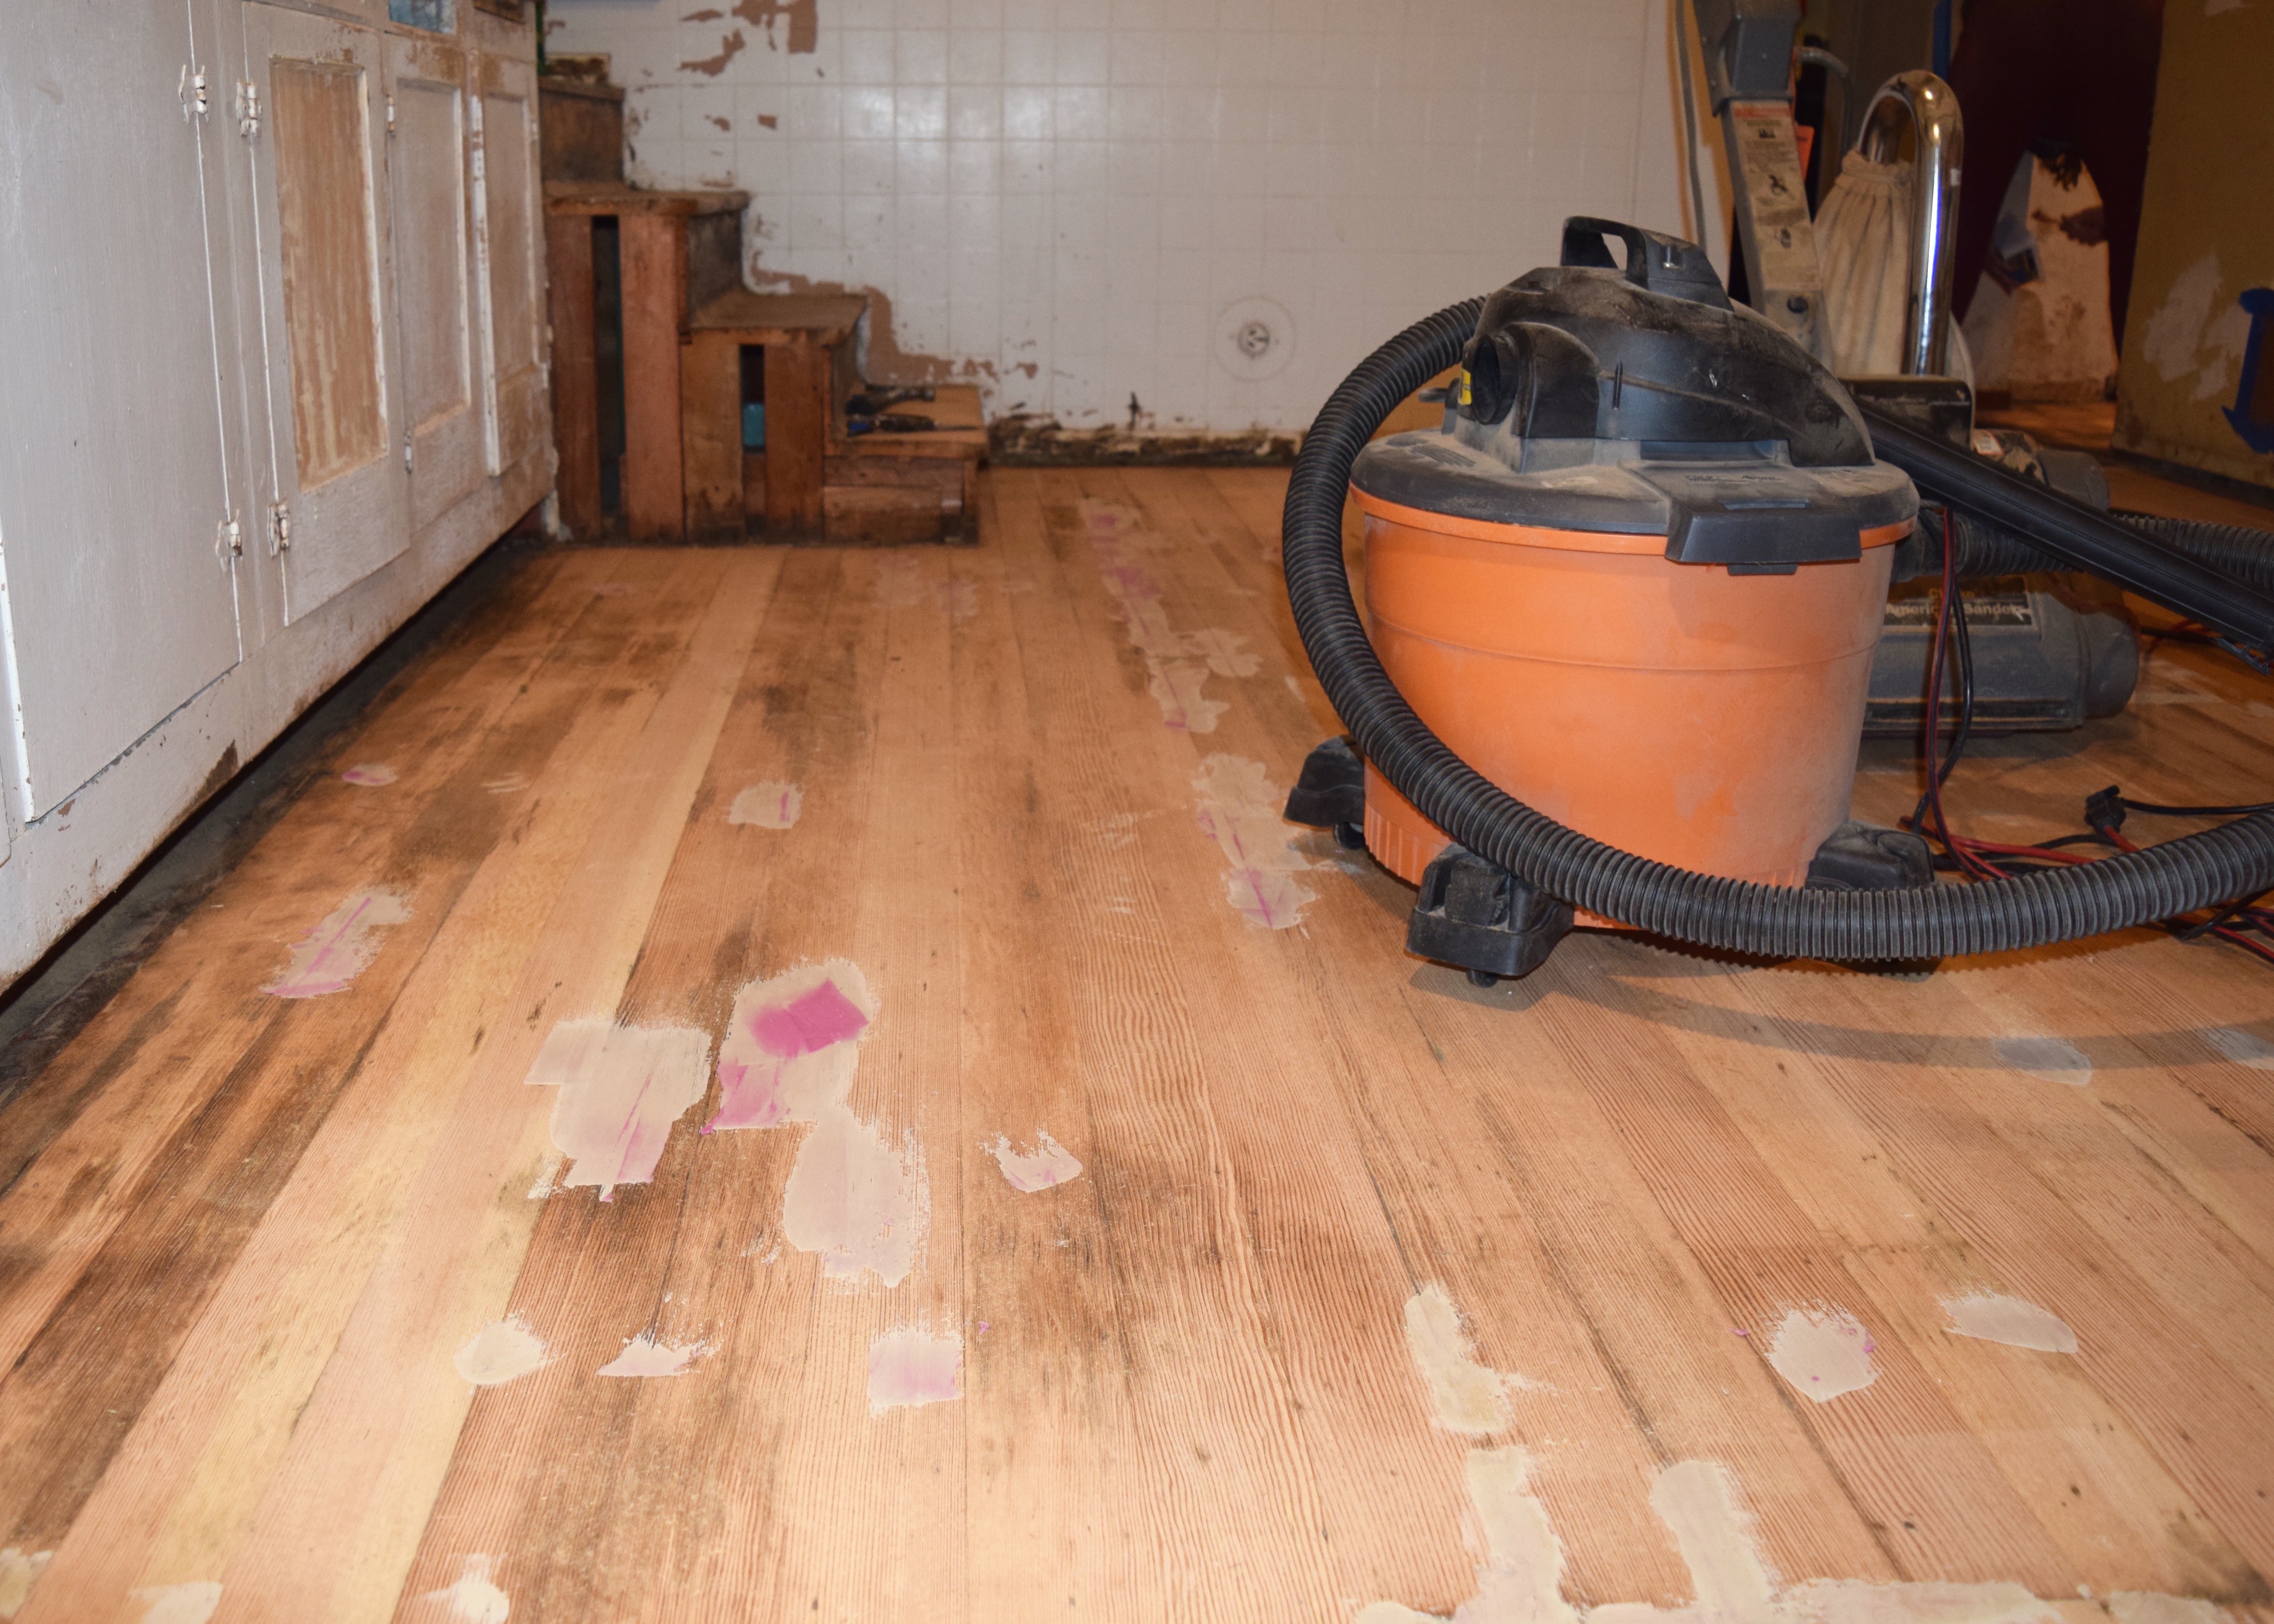
But wait, it’s not just filler and lucky sanding, there’s also legit patching to be done! The first spot was a small square by the end of the cabinets. You can see it below by the back wheels of the drum sander in this picture from when we first realized the drum sander would remove the tar. When we first got the tar off it looked like a concrete patch! How quirky! What was this originally?
Well by the time we got around to 60 grit sandpaper, it no longer had concrete on it, it was just a weird little patch job. I think the concrete was smoothed over it to bring the flooring level flush before they put in the first layer of sheet vinyl in the 40s. Why are you there patch job?! Were you an ash shoot to the basement? Or just… nothing but a patch? You can see the plywood patch here by the edge of the drum sander. This was before I decided to remove it when I was still trying to add would filler to ALL THE SPOTS!
I basically walked around my kitchen for hours bent over like this patching aaaallllllllllll the spots that needed it. FOR HOURS. It hurt. A lot. But back to the patch:
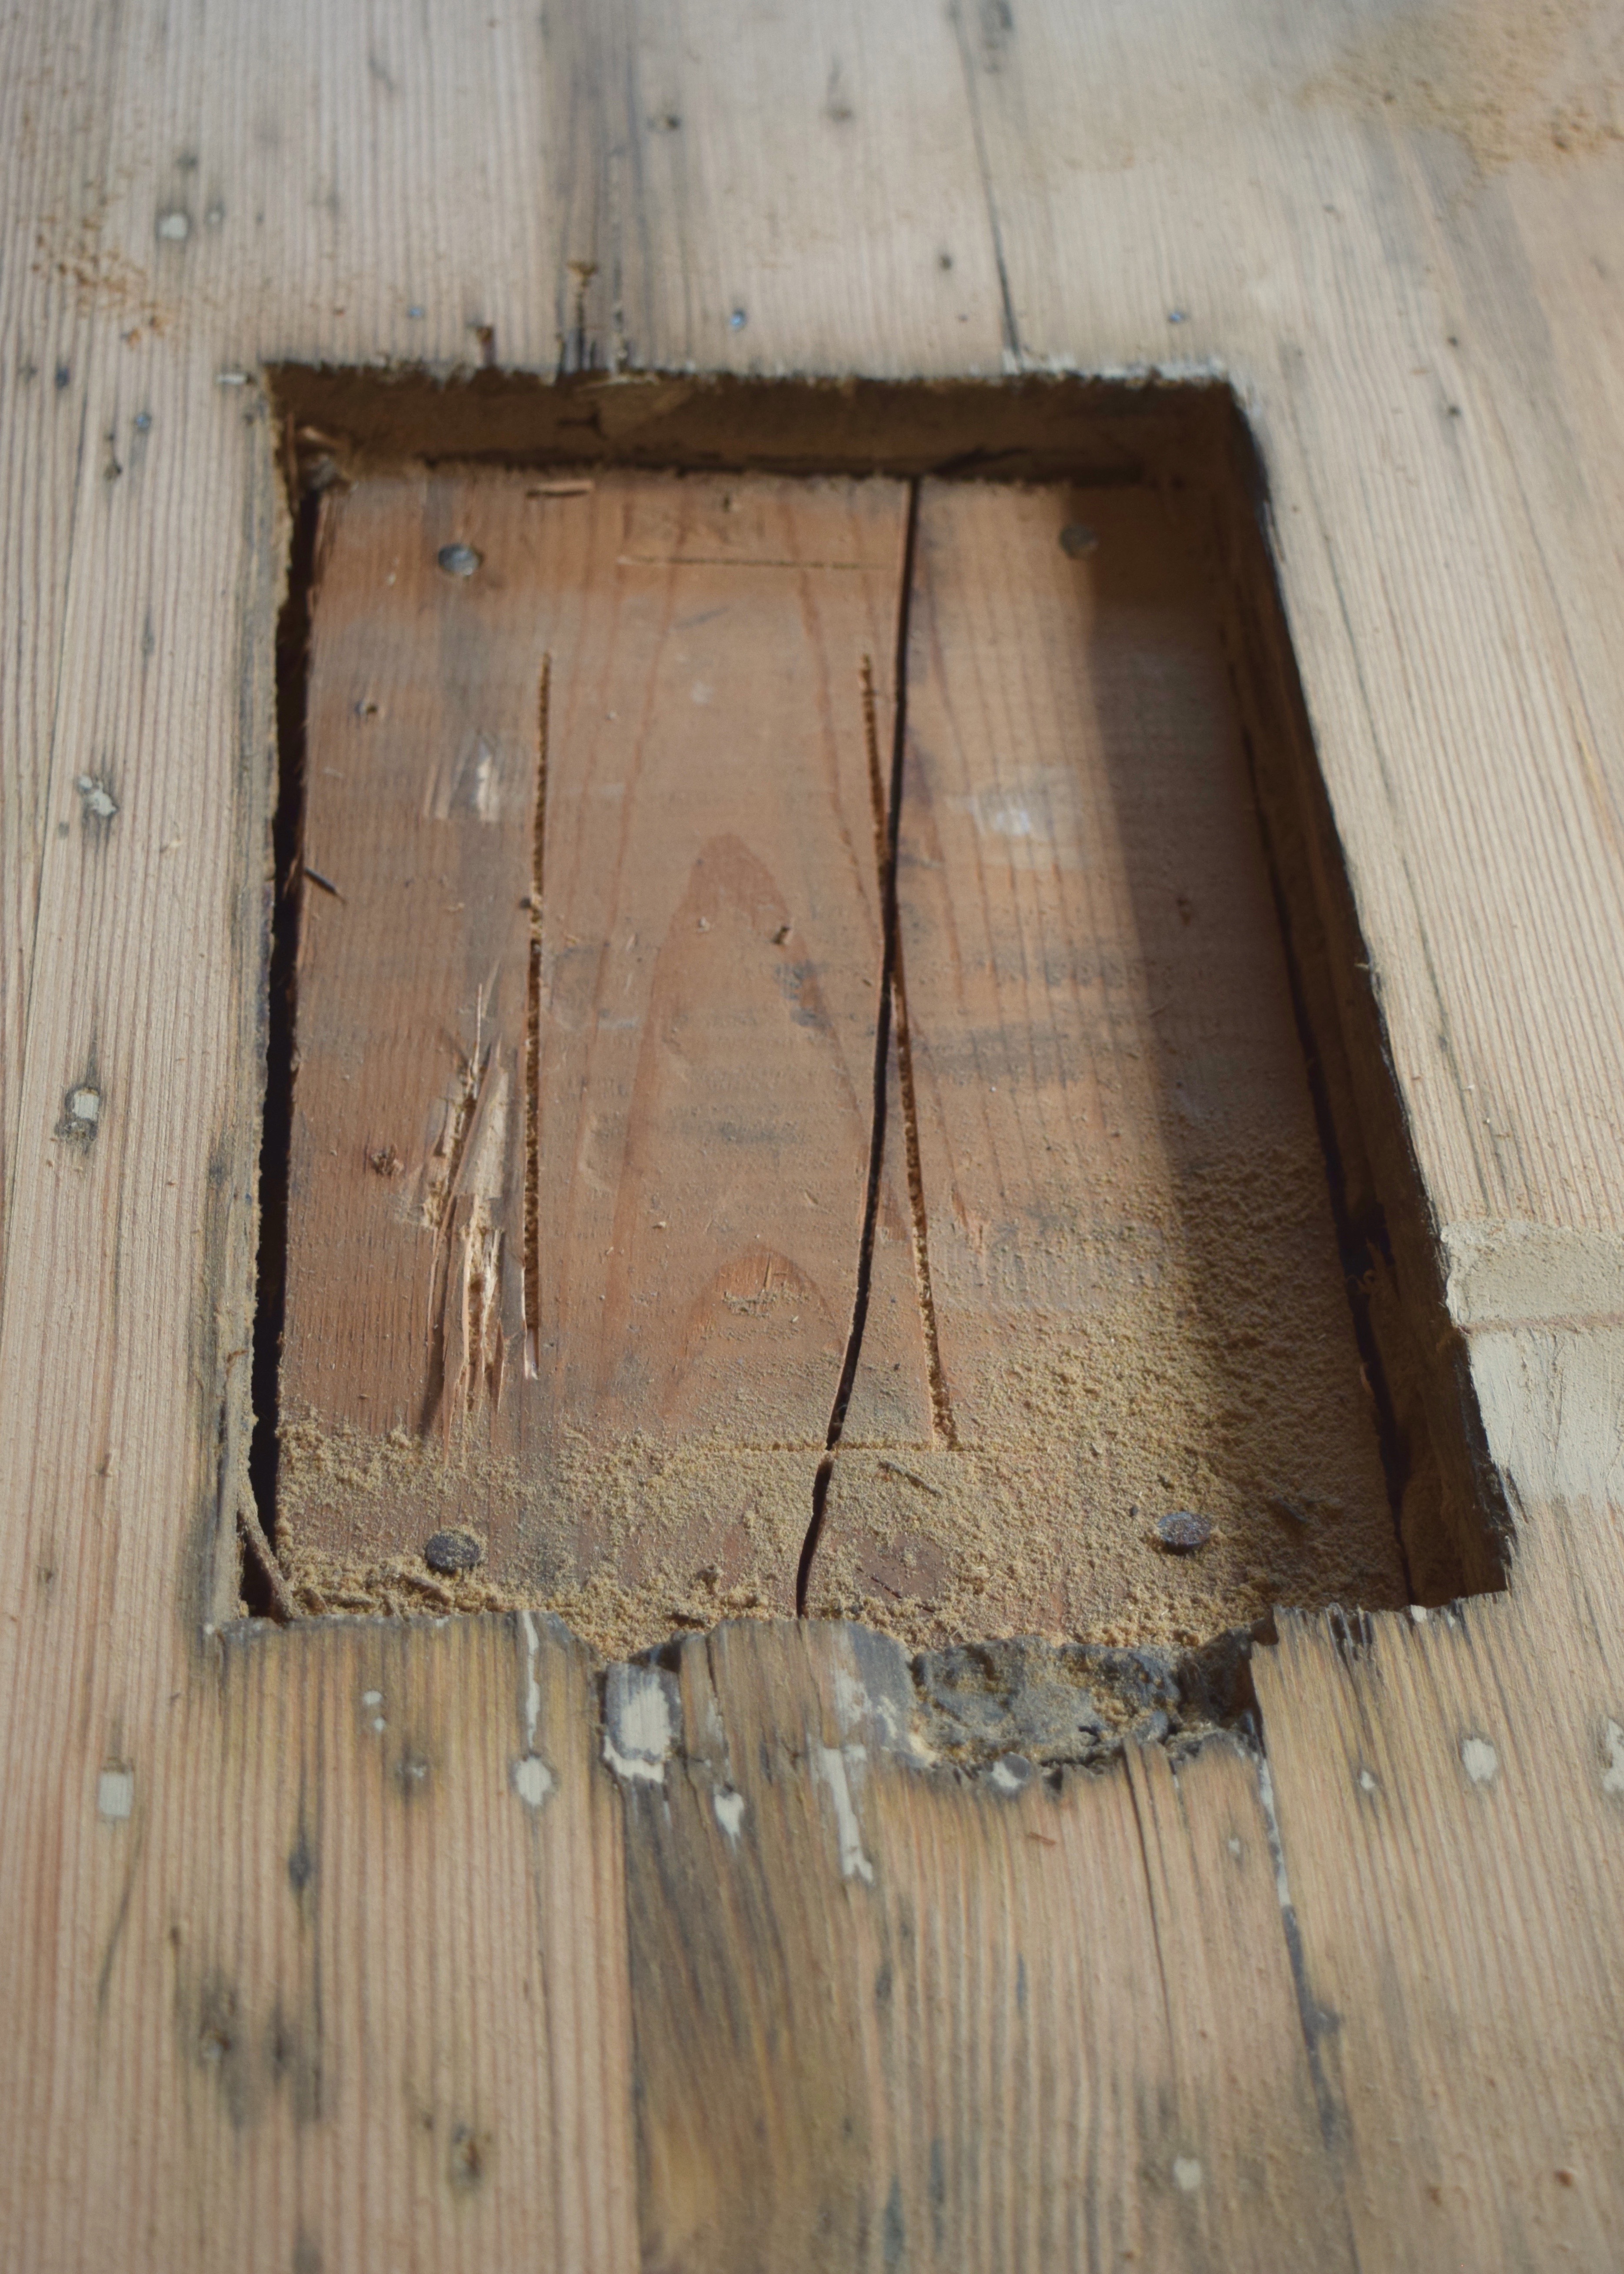
I popped out the patch and cut a couple of pieces of wood flooring to fit, before ripping off the tongue on one of the pieces with Erik’s table saw and dryfitting.
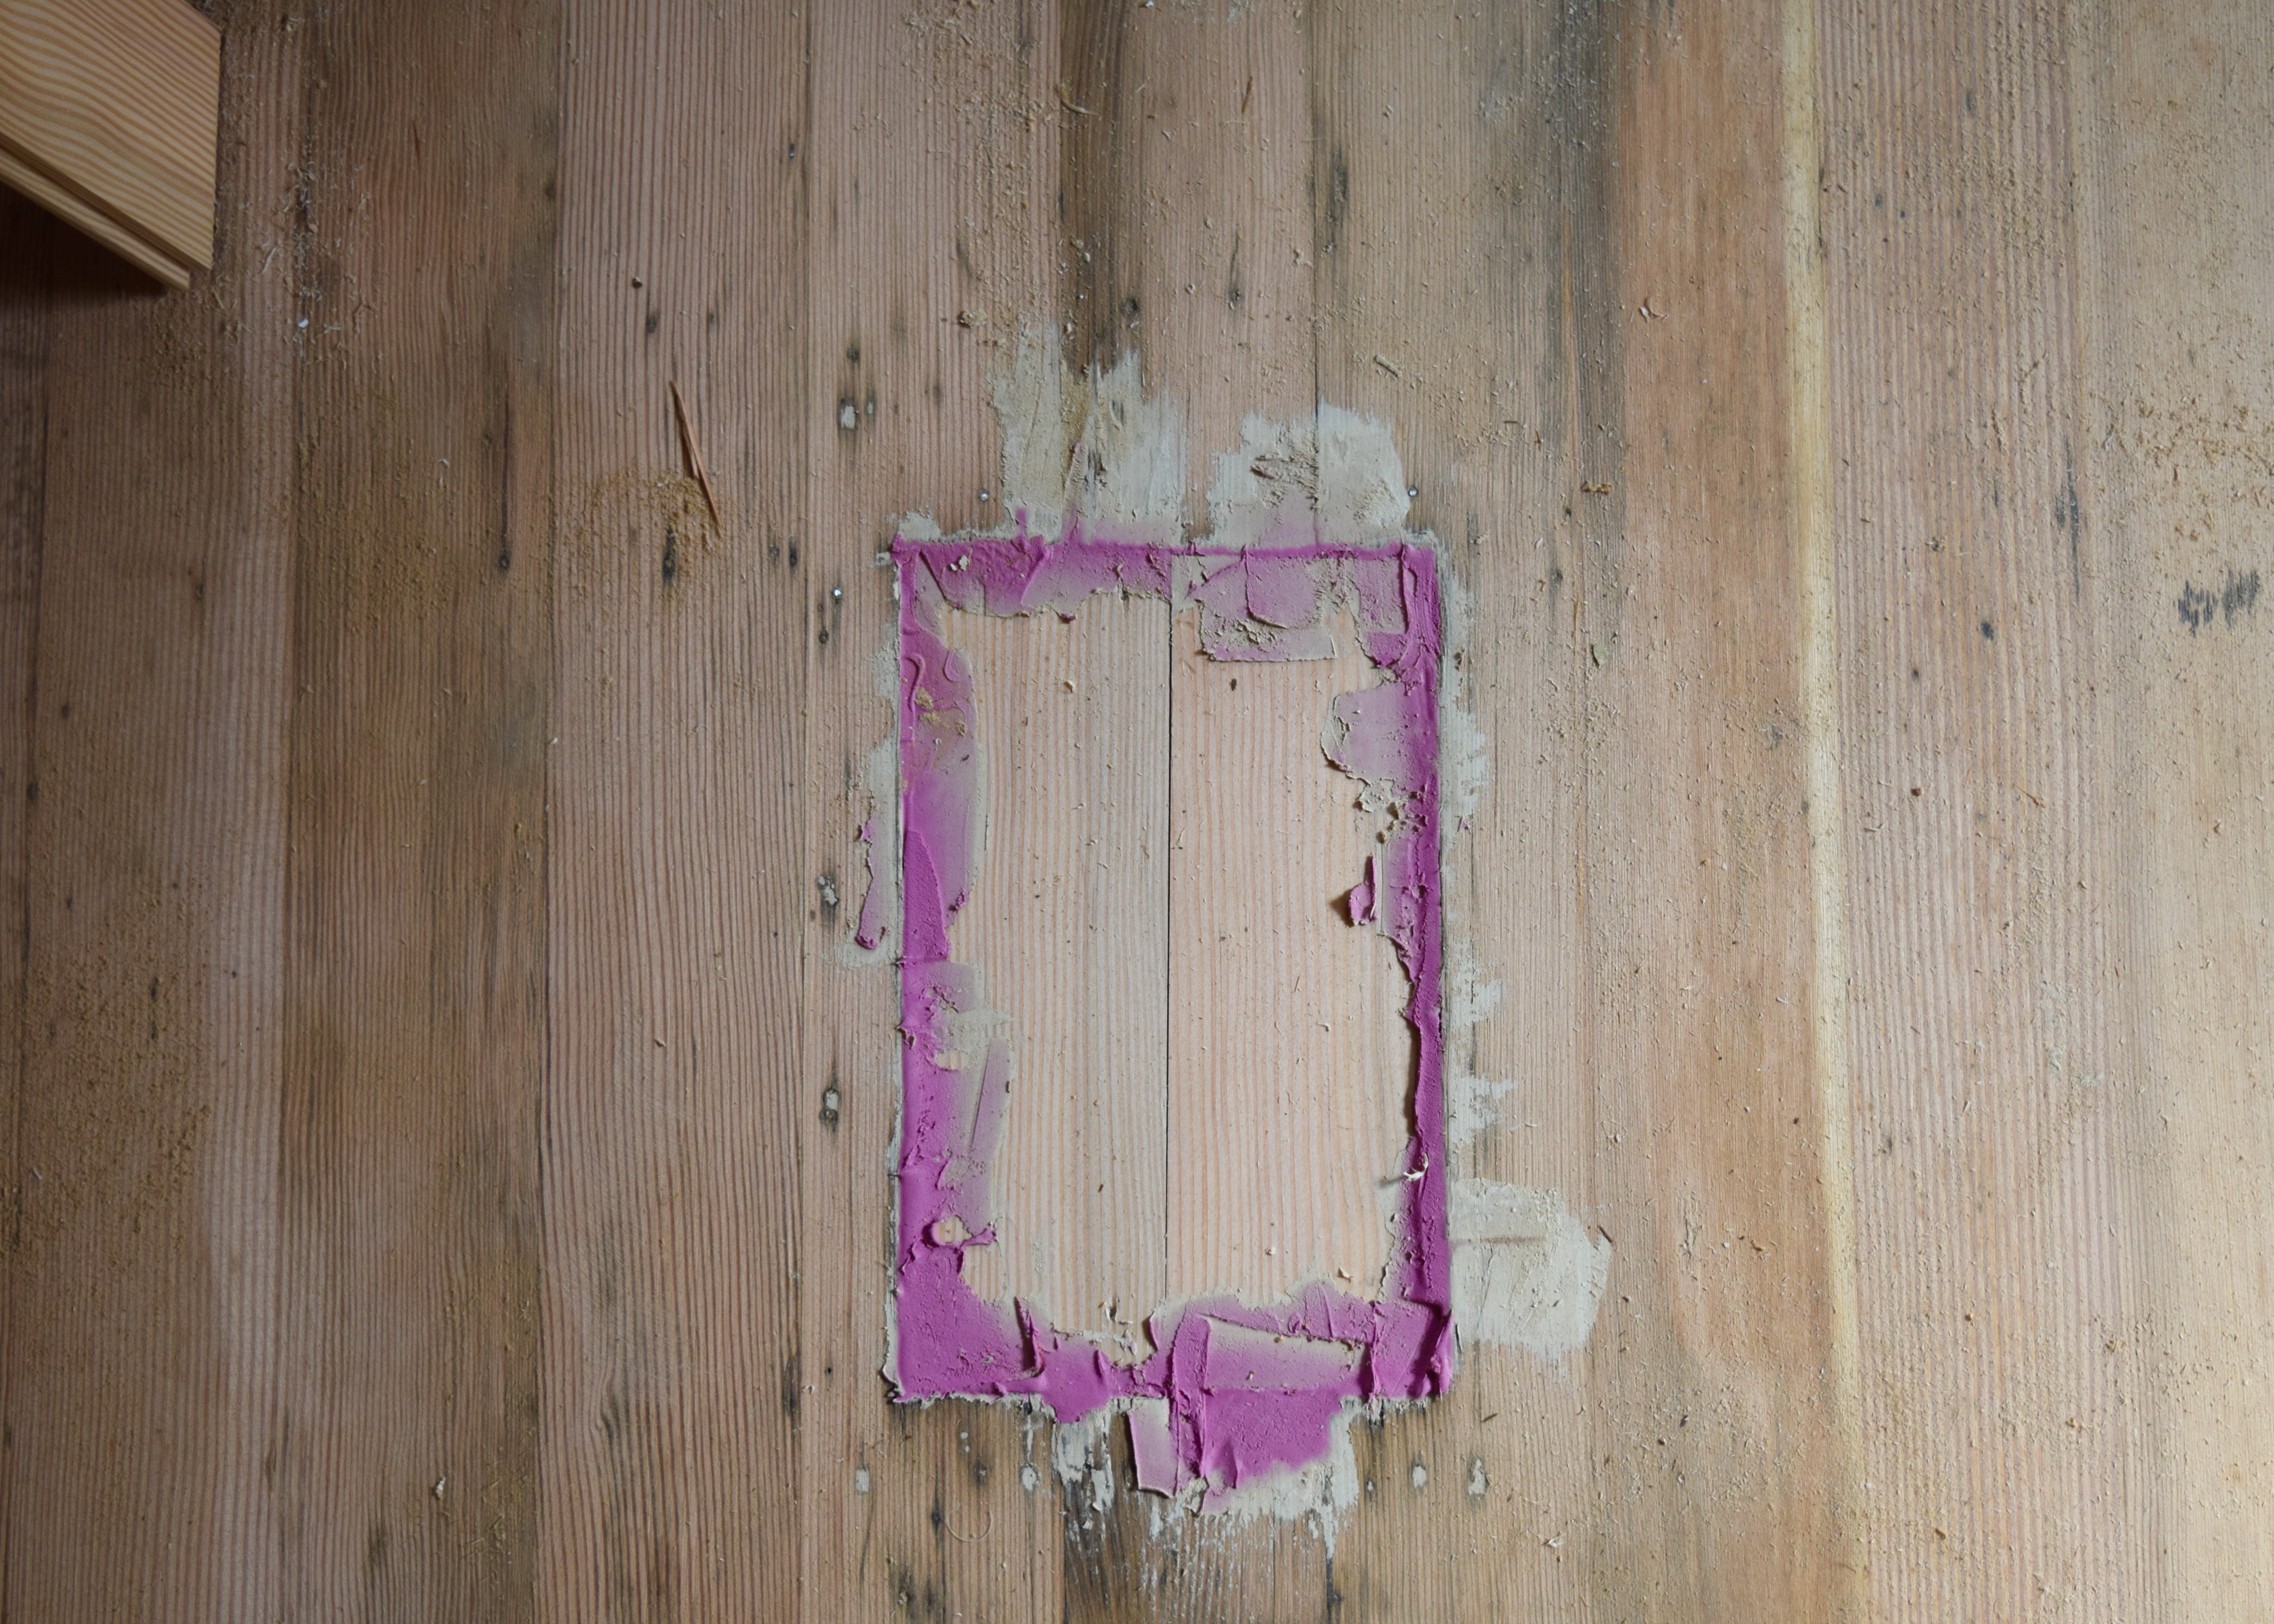
I nailed those pieces into the patch and then added a bunch of woodfiller around the whole thing.
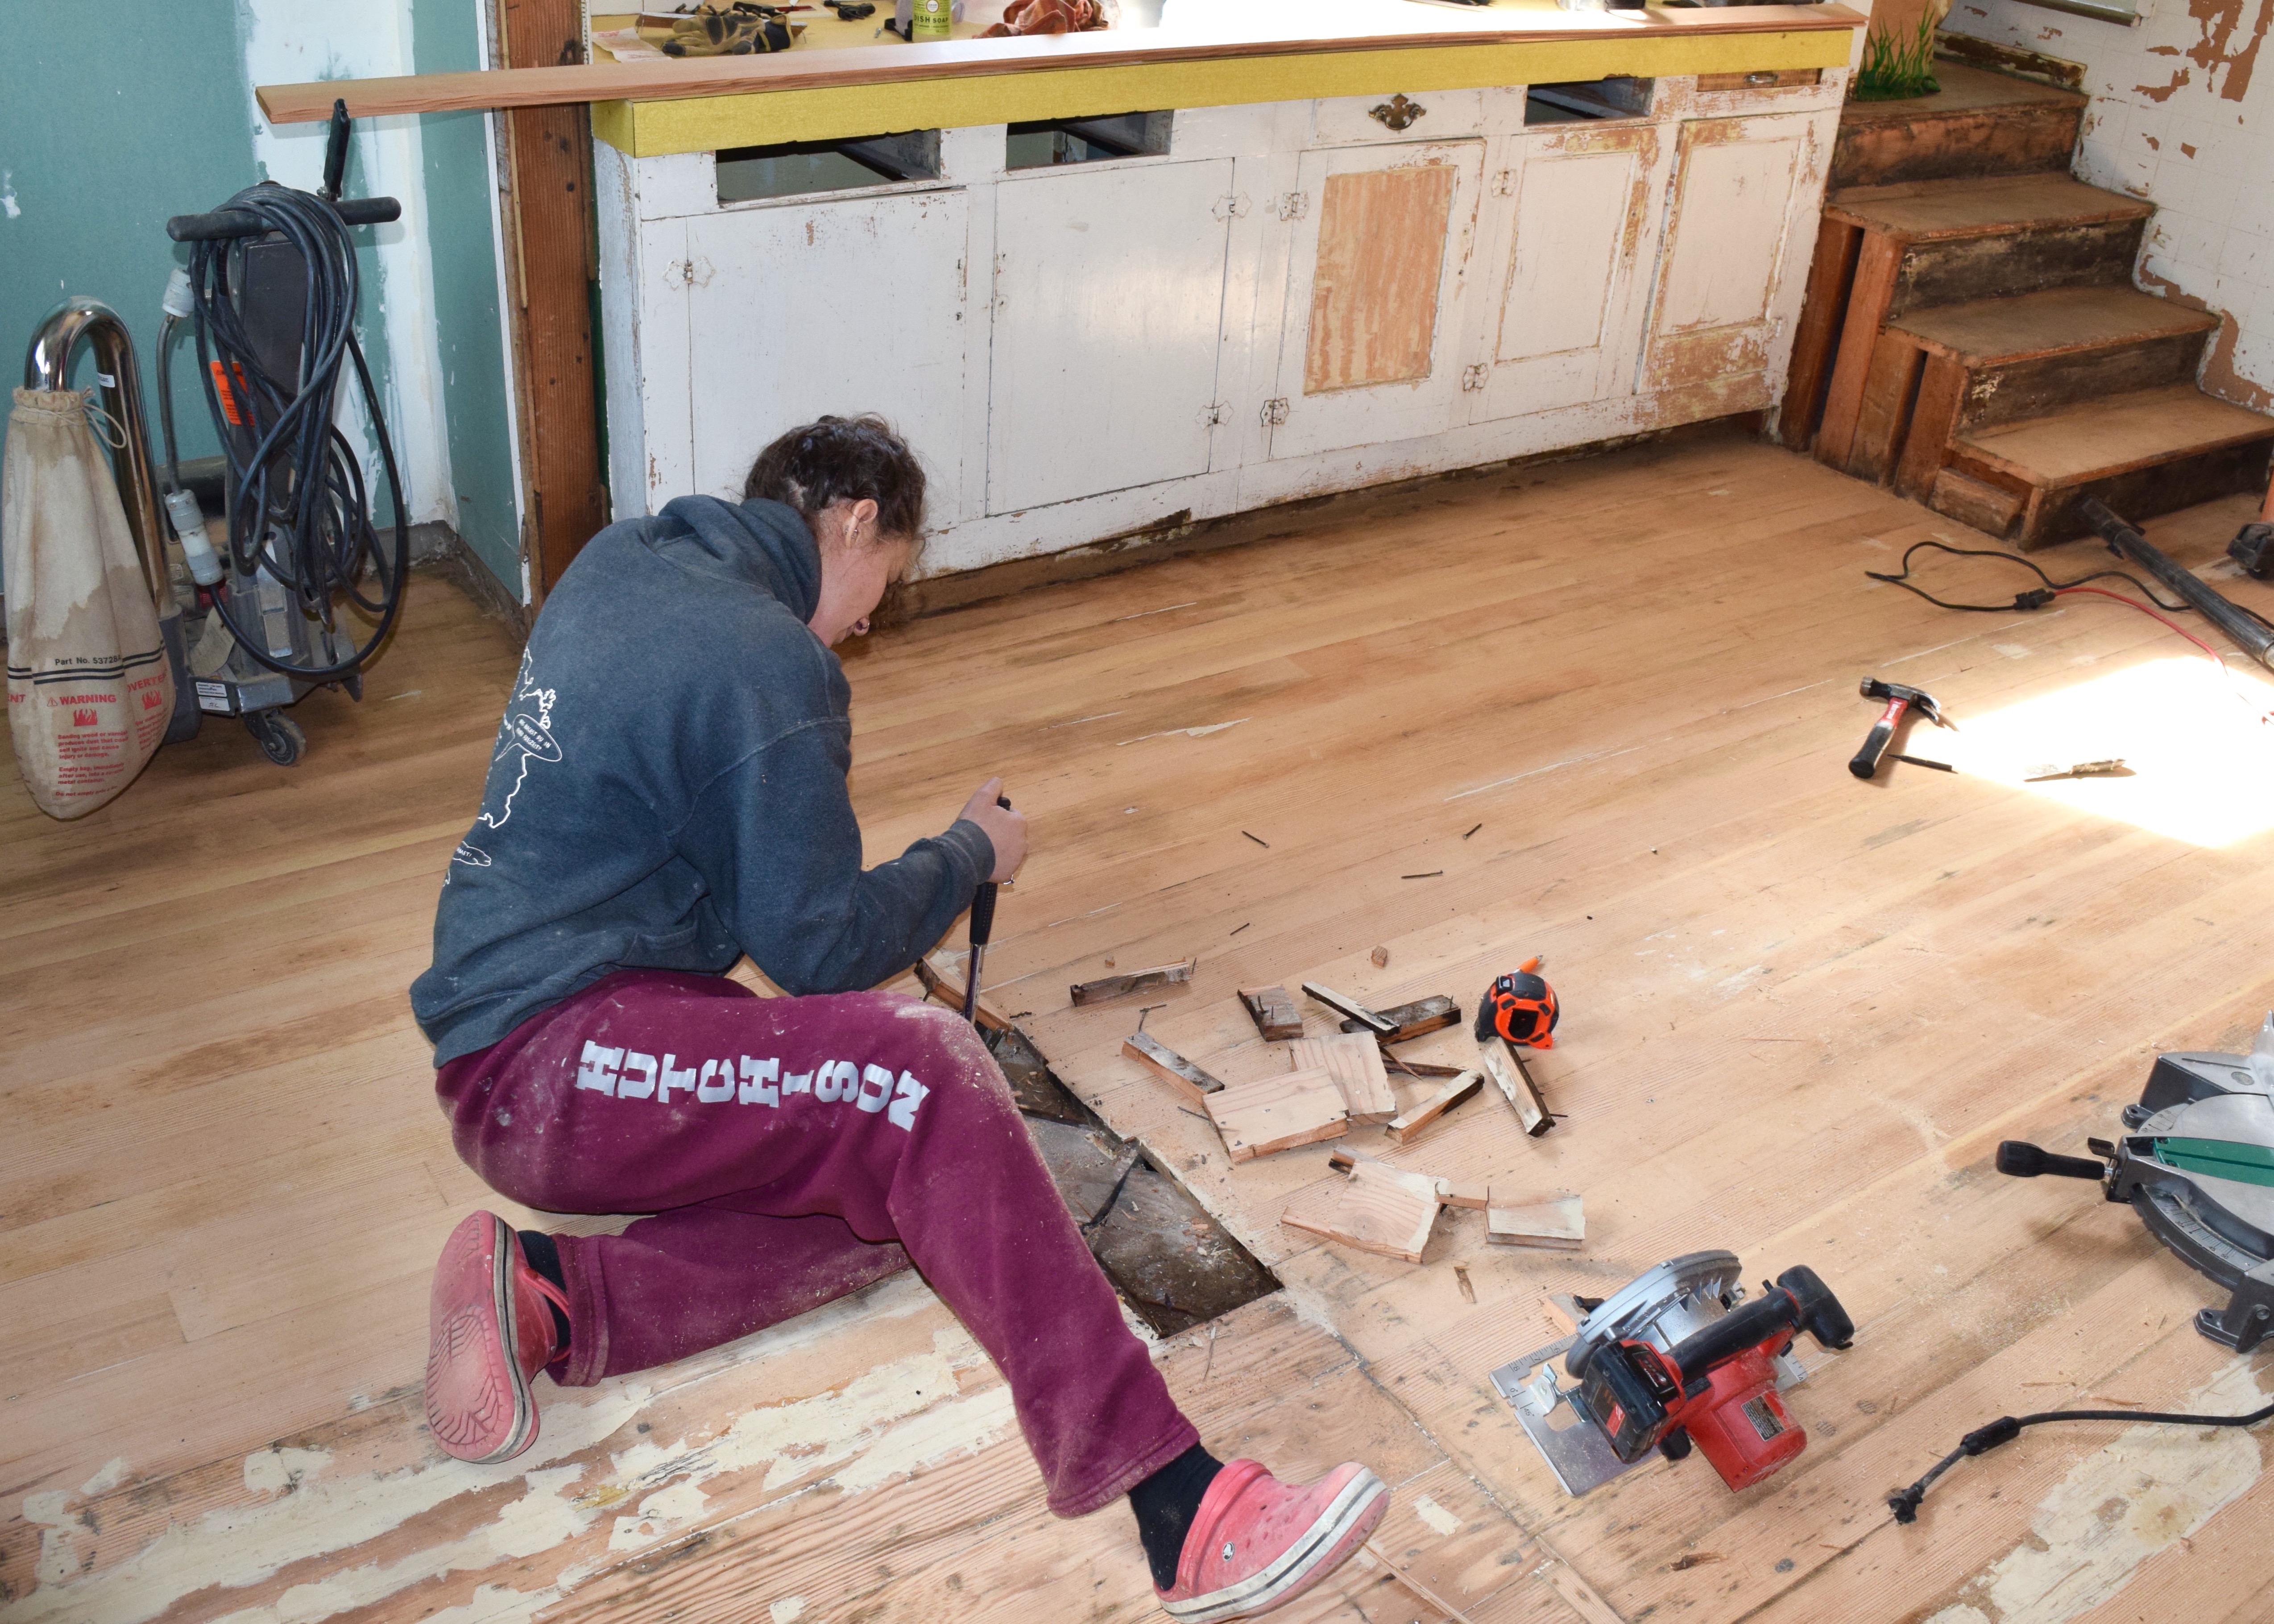
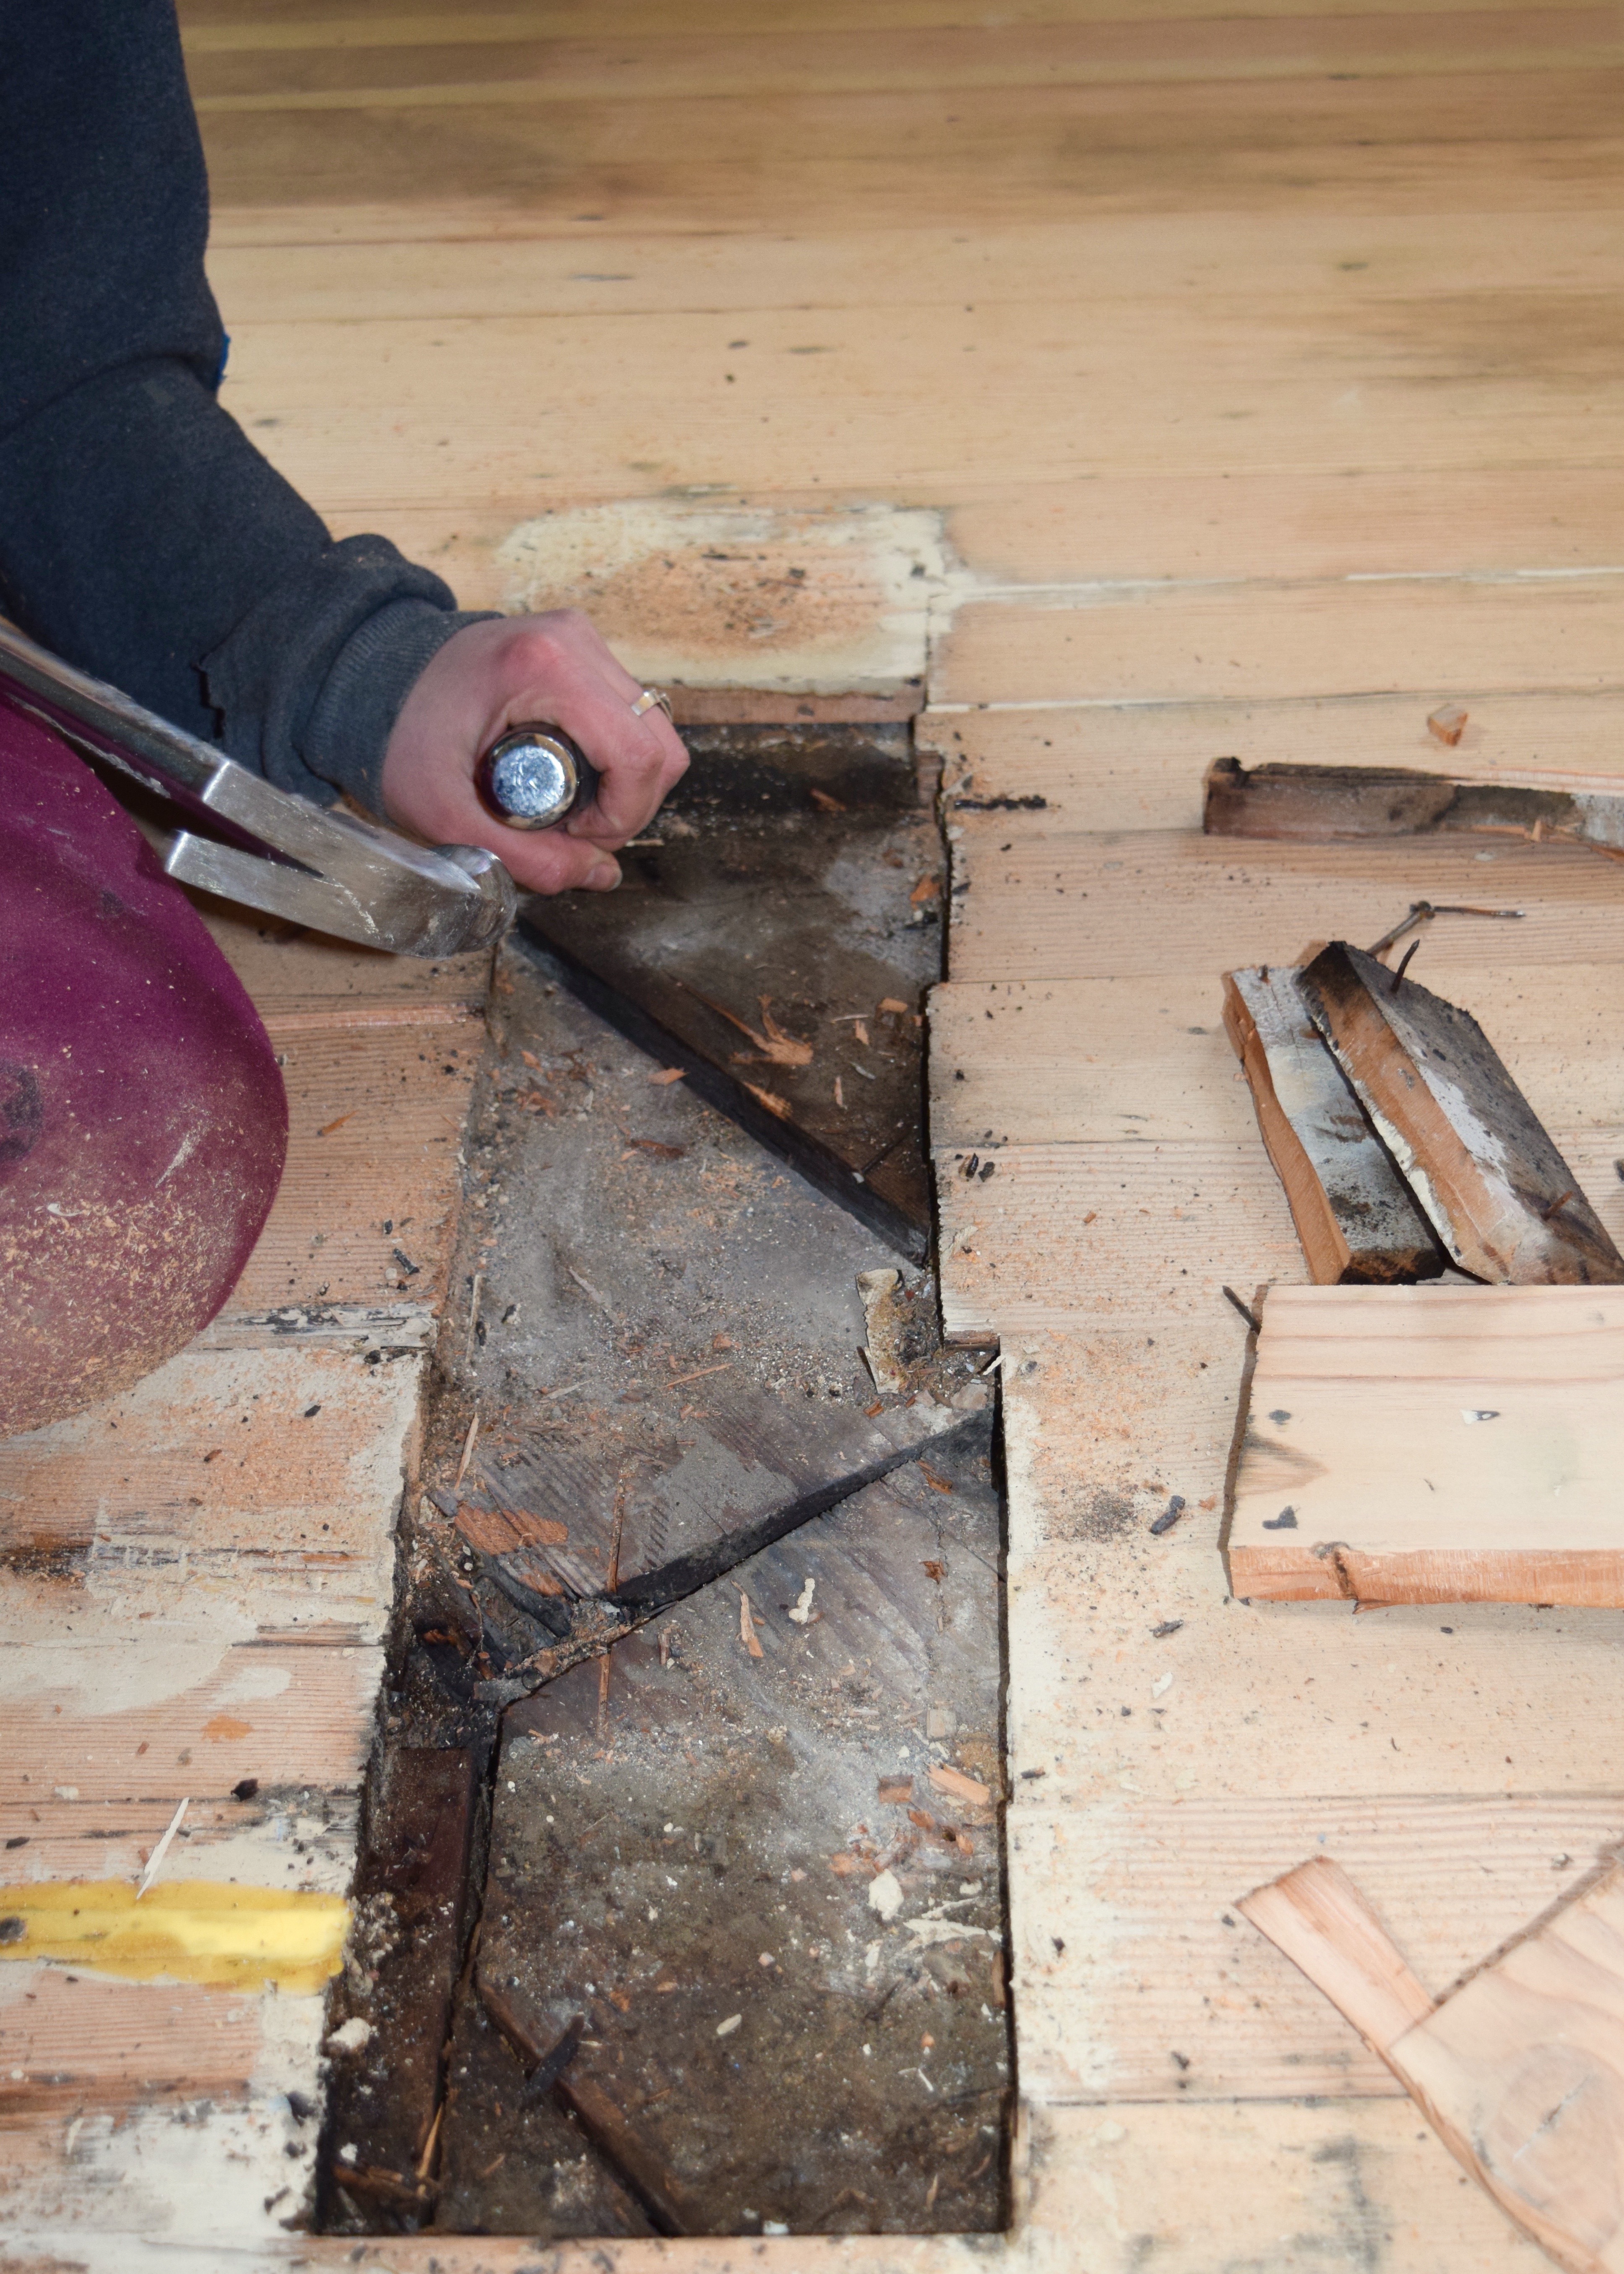
Then I moved to the bigger patch job by the (maybe) former-doorway to the (maybe) former-pantry where all those small patches of plywood had been used to fill in the space left in the floor when the wall was removed. It looked bad and my attempt to just patch it hadn’t worked. So I got a hammer and chisel to get it out. Just look at all those little pieces! All slightly different lengths! WHY?!
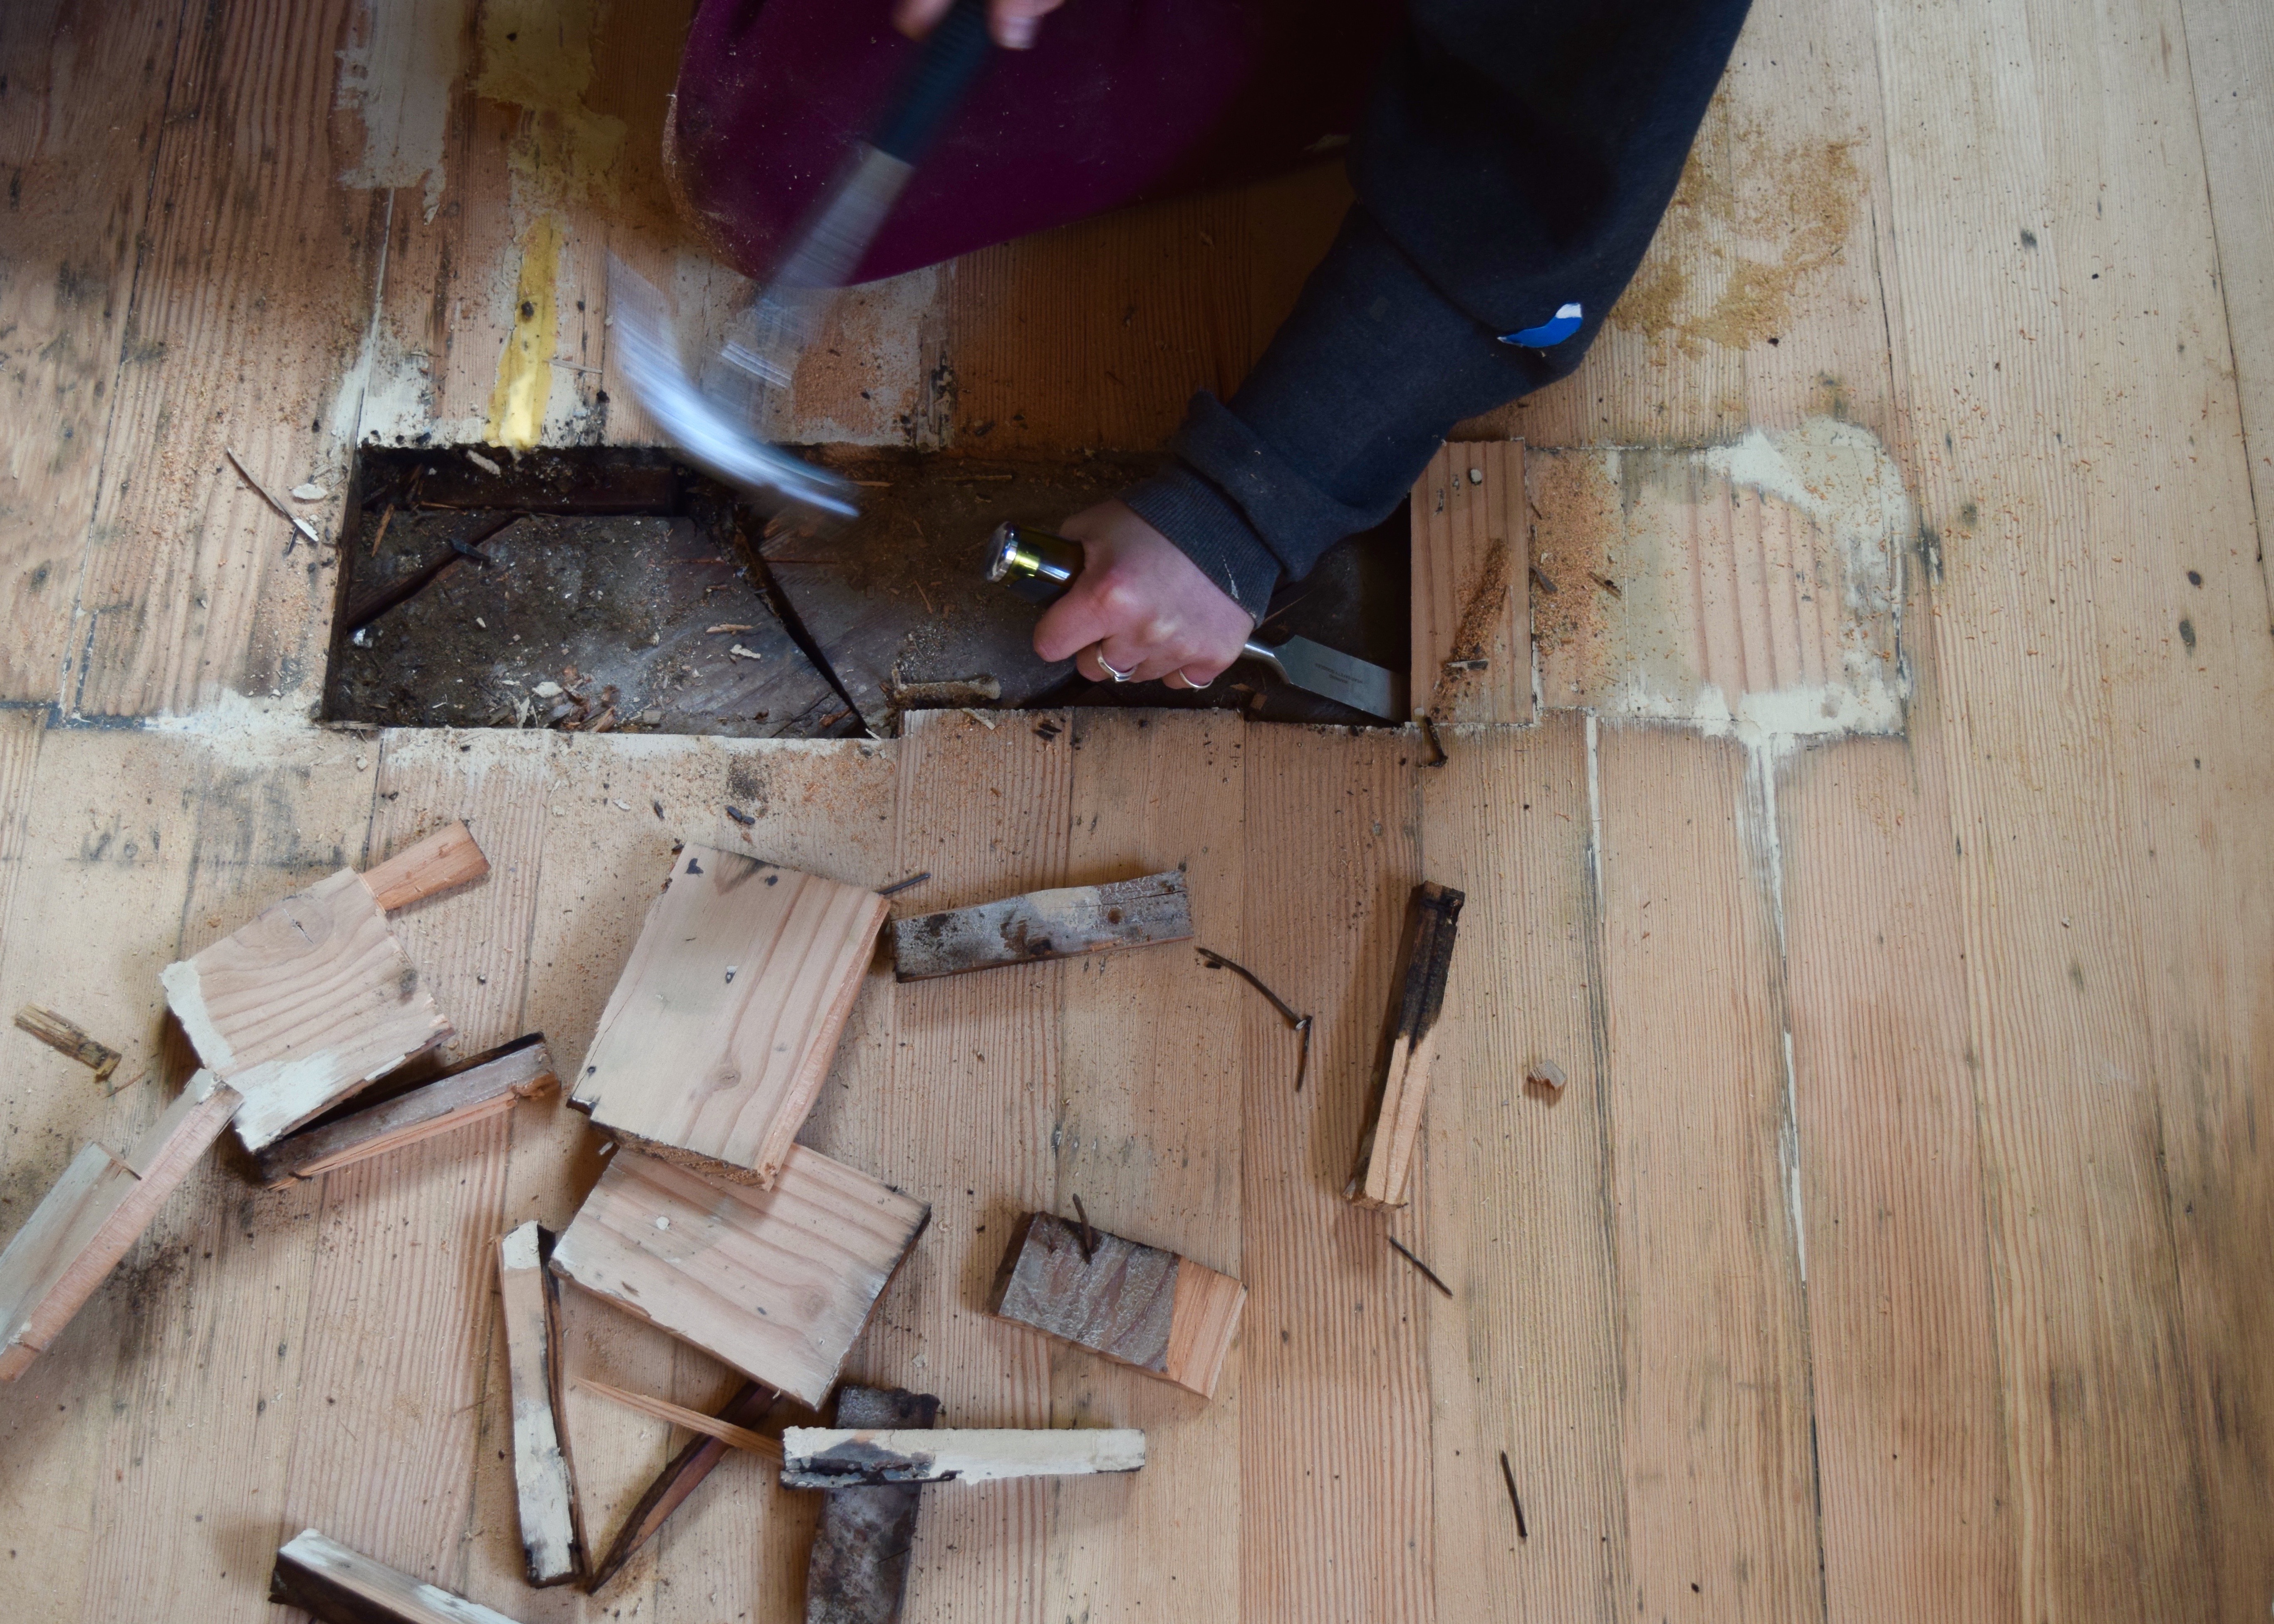
It took, probably only twenty minutes to remove all those little pieces with the chisel, but it was still annoying to wonder why this had happened in the first place.
It was nice when they were gone. Now a professional would have probably feathered in the boards removing more from the (maybe) former-pantry and adding in long boards that stretched into the main part of the kitchen. But I didn’t do that, because a) that would have been way more work, b) I don’t want to be responsible to removing perfectly good floor boards and THEN HAVING TO PUT THEM BACK IN, and c) this patch helped explain the history of the house to me and I don’t believe in revisionist history, I wanted to have my new patch still tell the same story, just prettier.
I also wanted to finish patching the floor in under an hour. So there’s that.
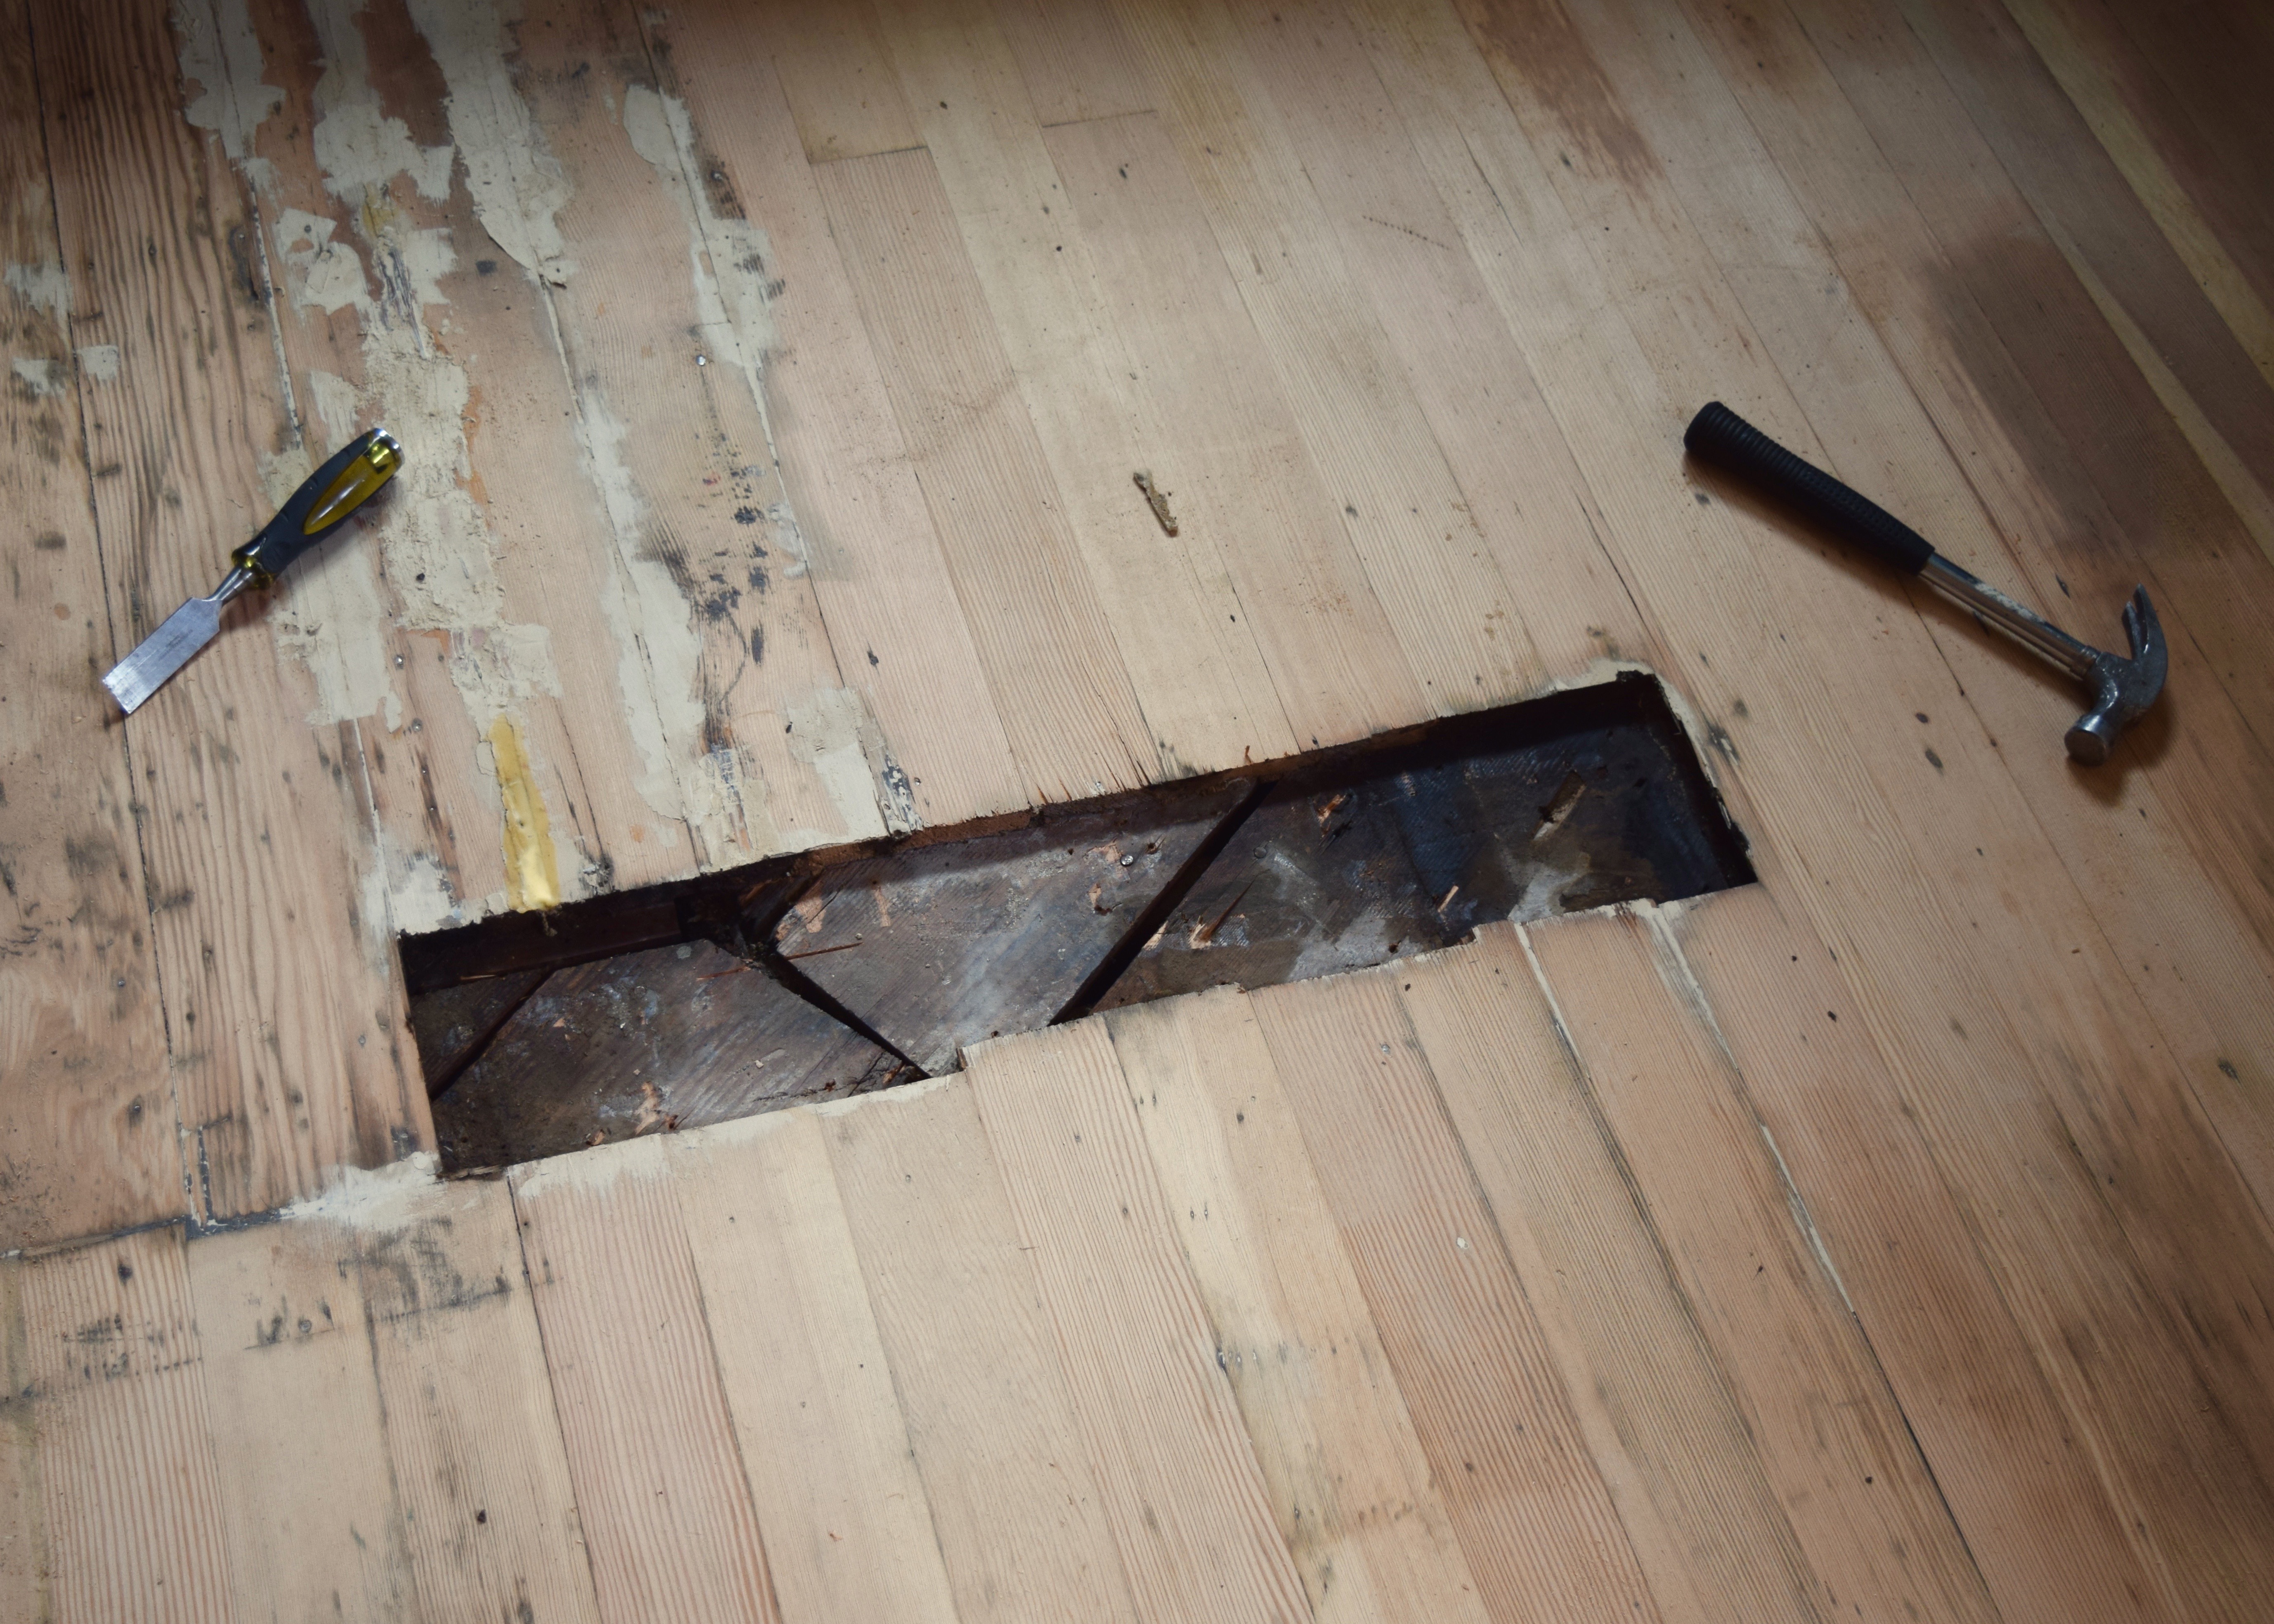
The edges of the section I’d chiseled out were all off though since the planks had been so many different sizes! So I did need to fix that before installing my new pieces.
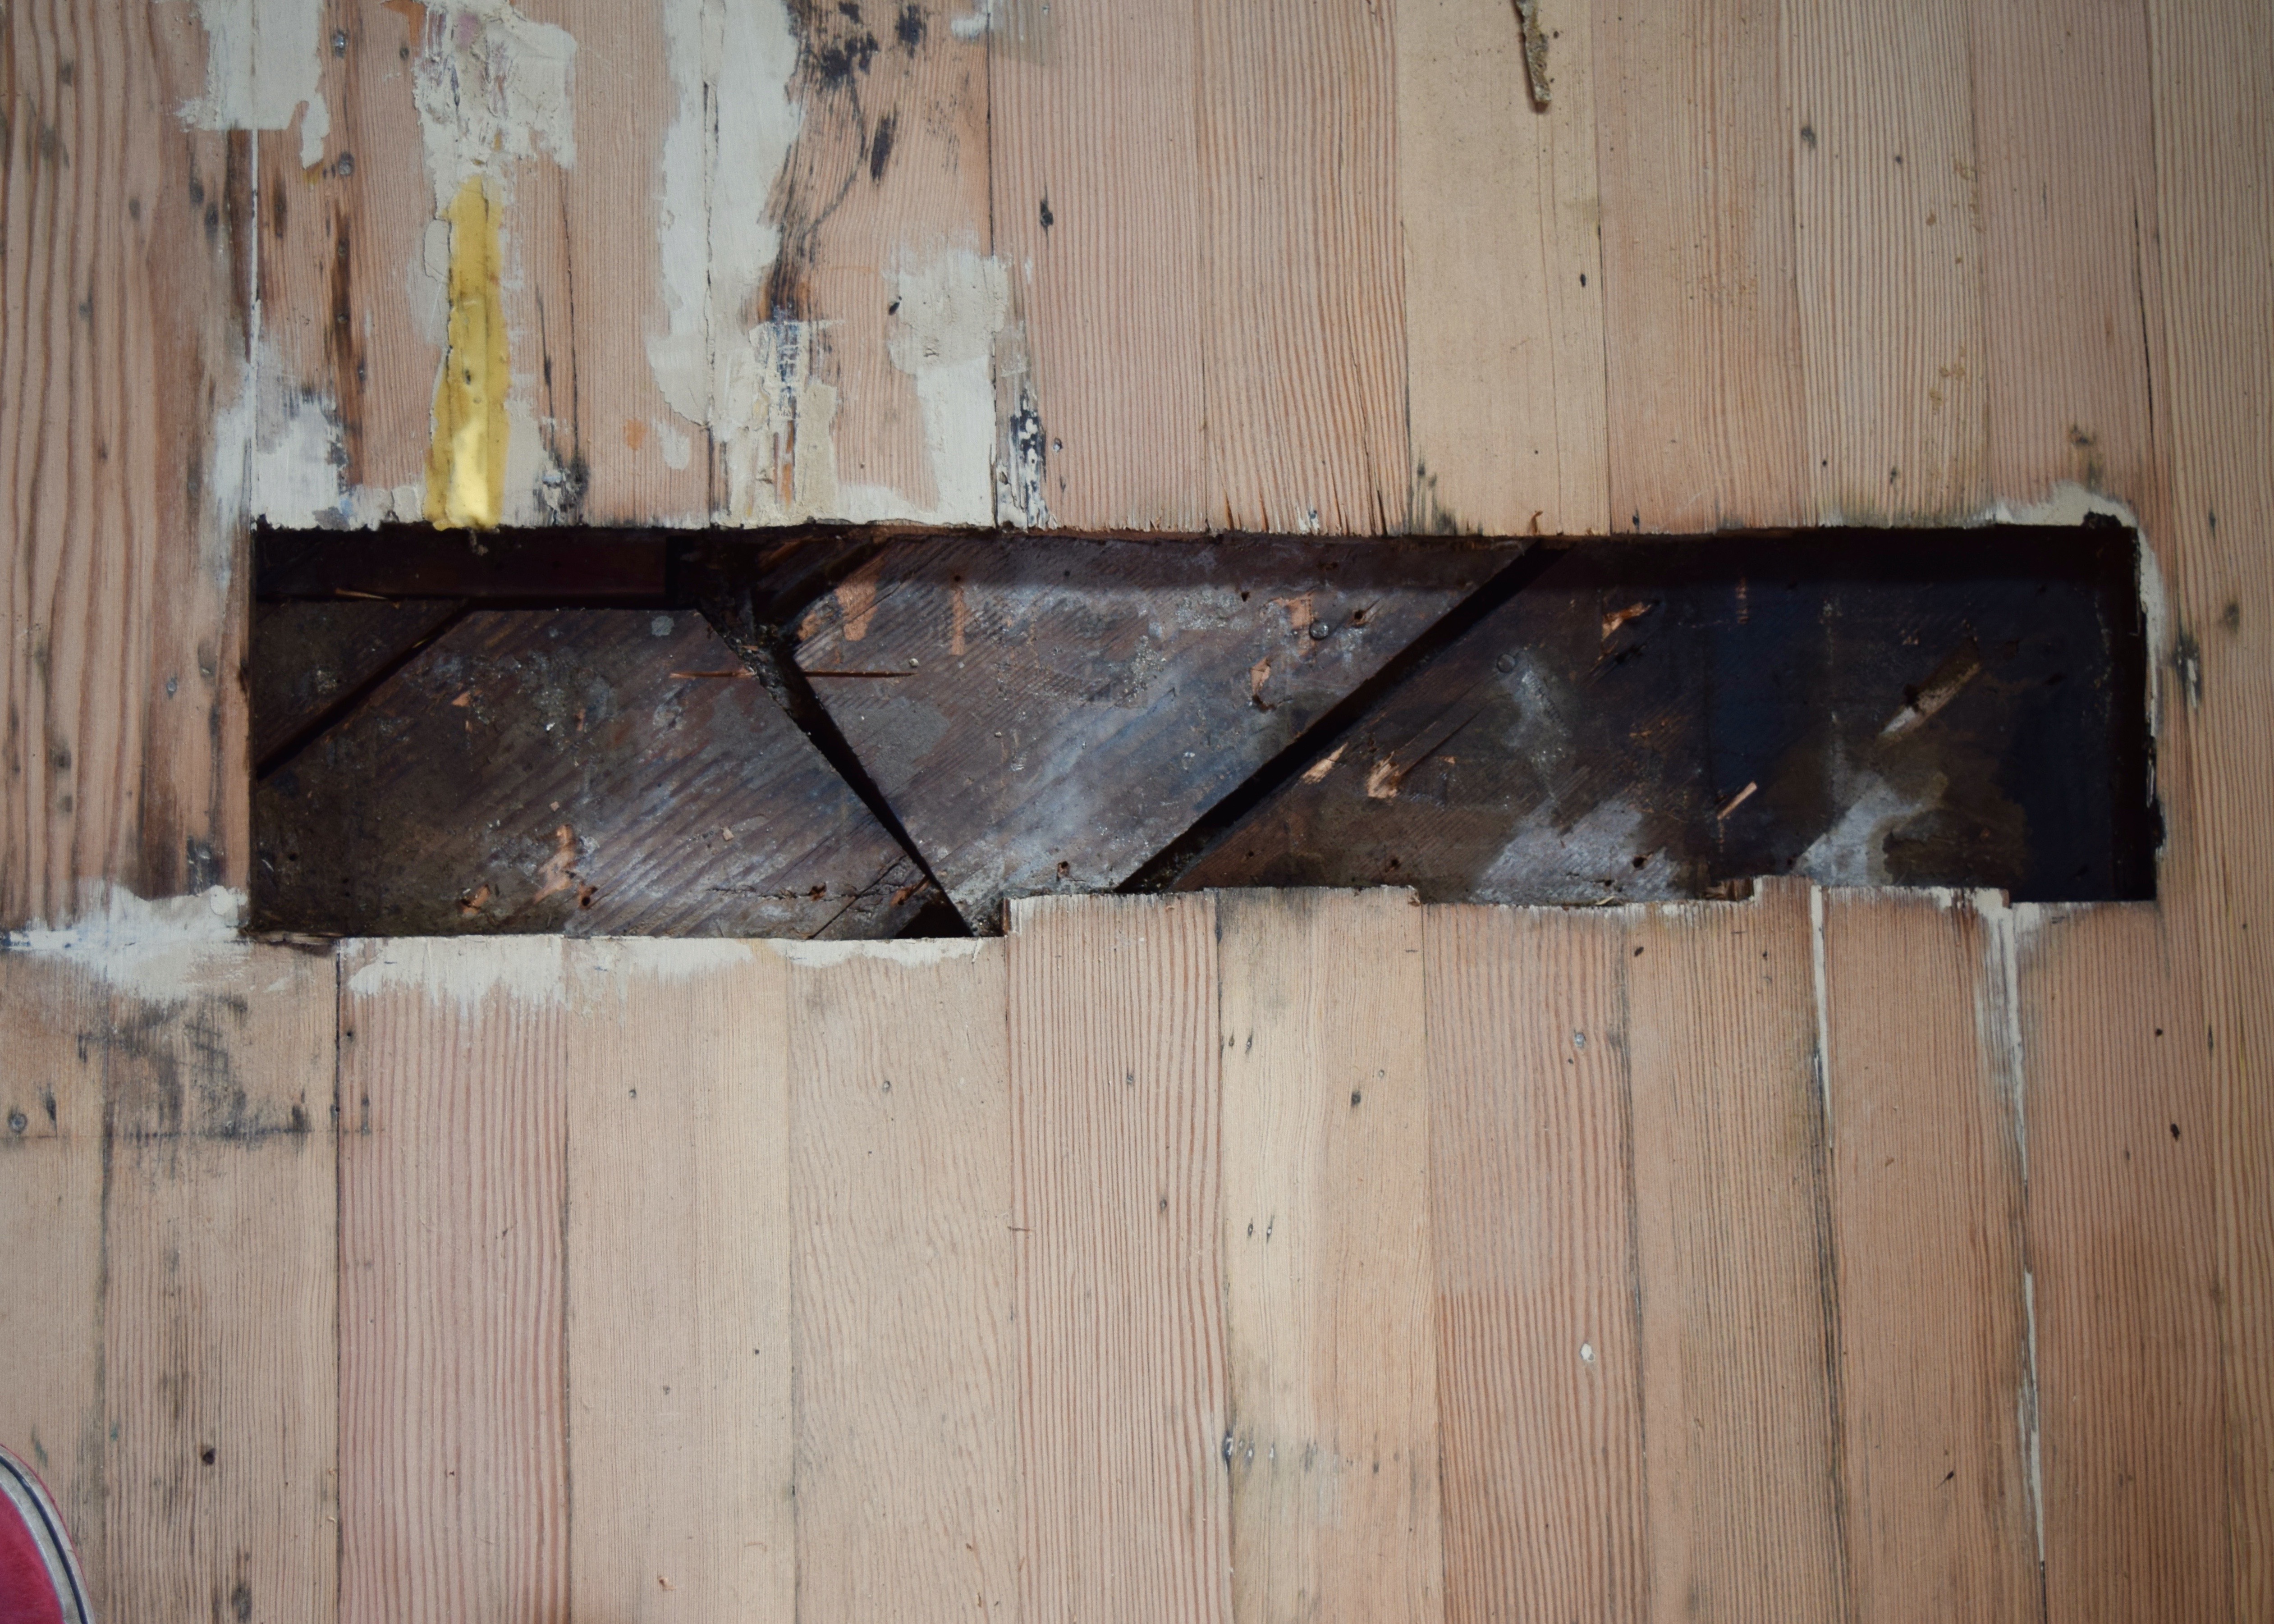
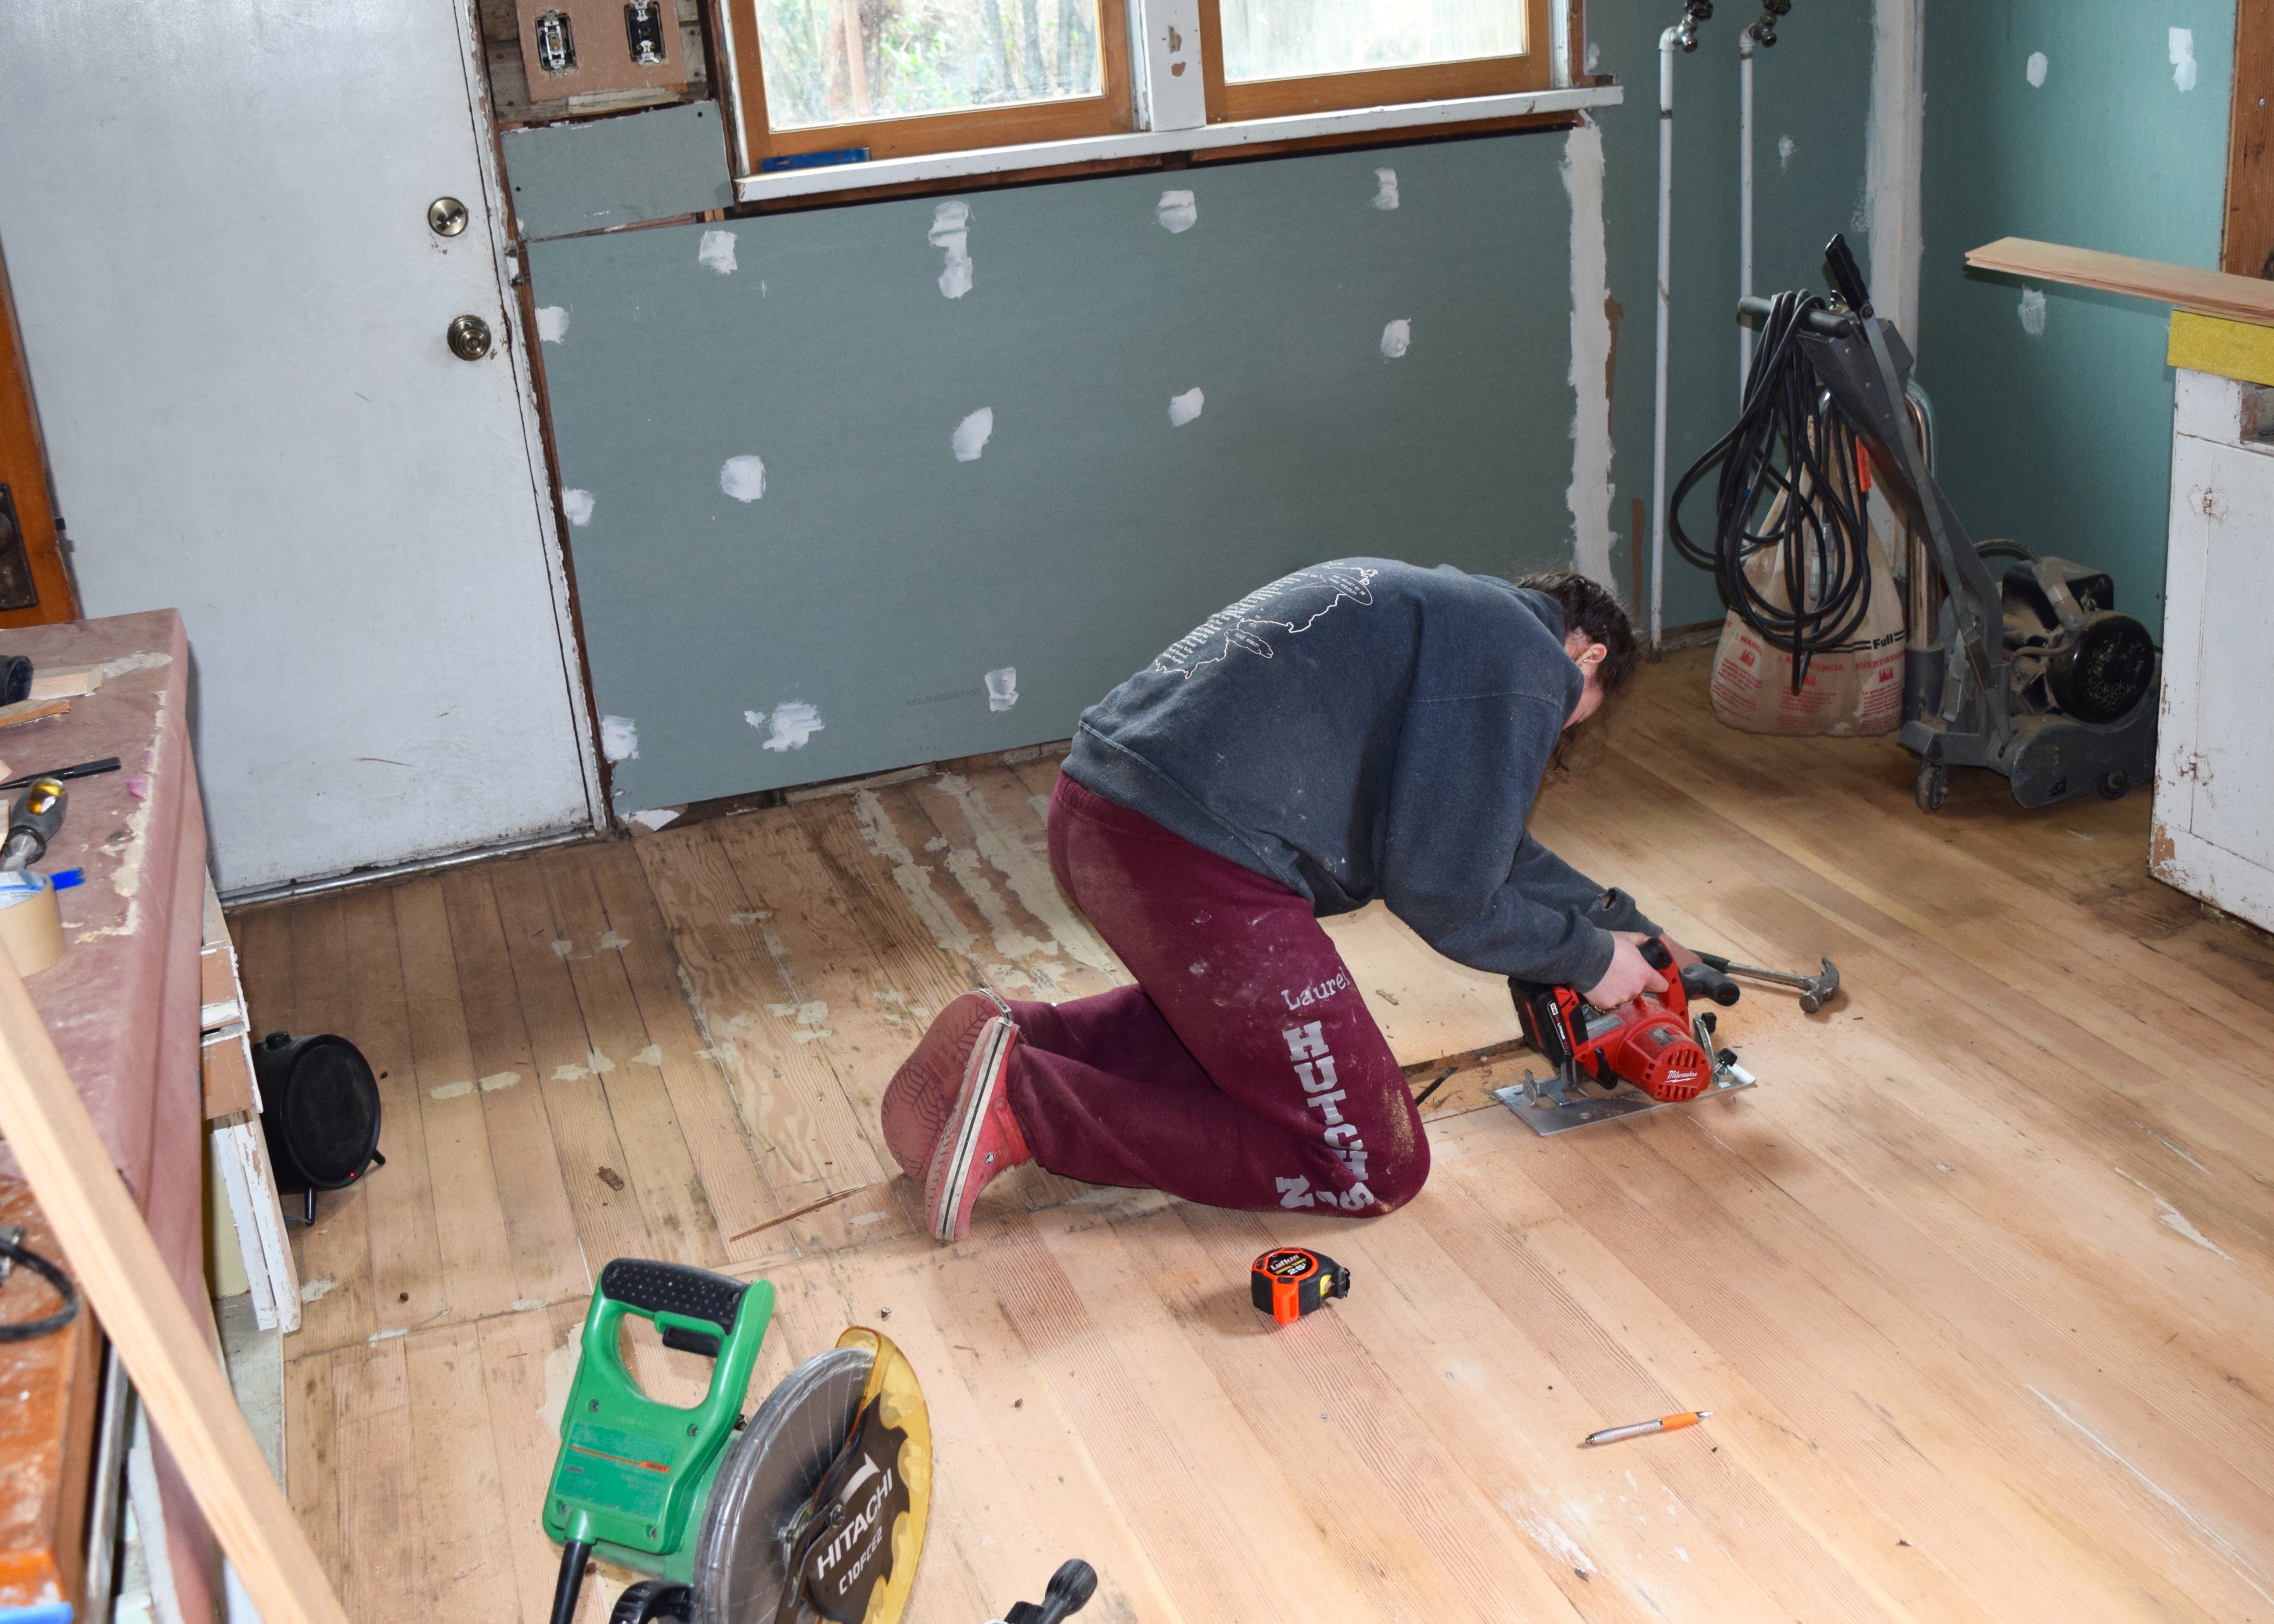
I grabbed my Milwaukee battery powered circular saw, set the depth to that of the hardwood floors (not so deep it would cut the wood subflooring!) and trimmed up some clean straight lines along the patch.
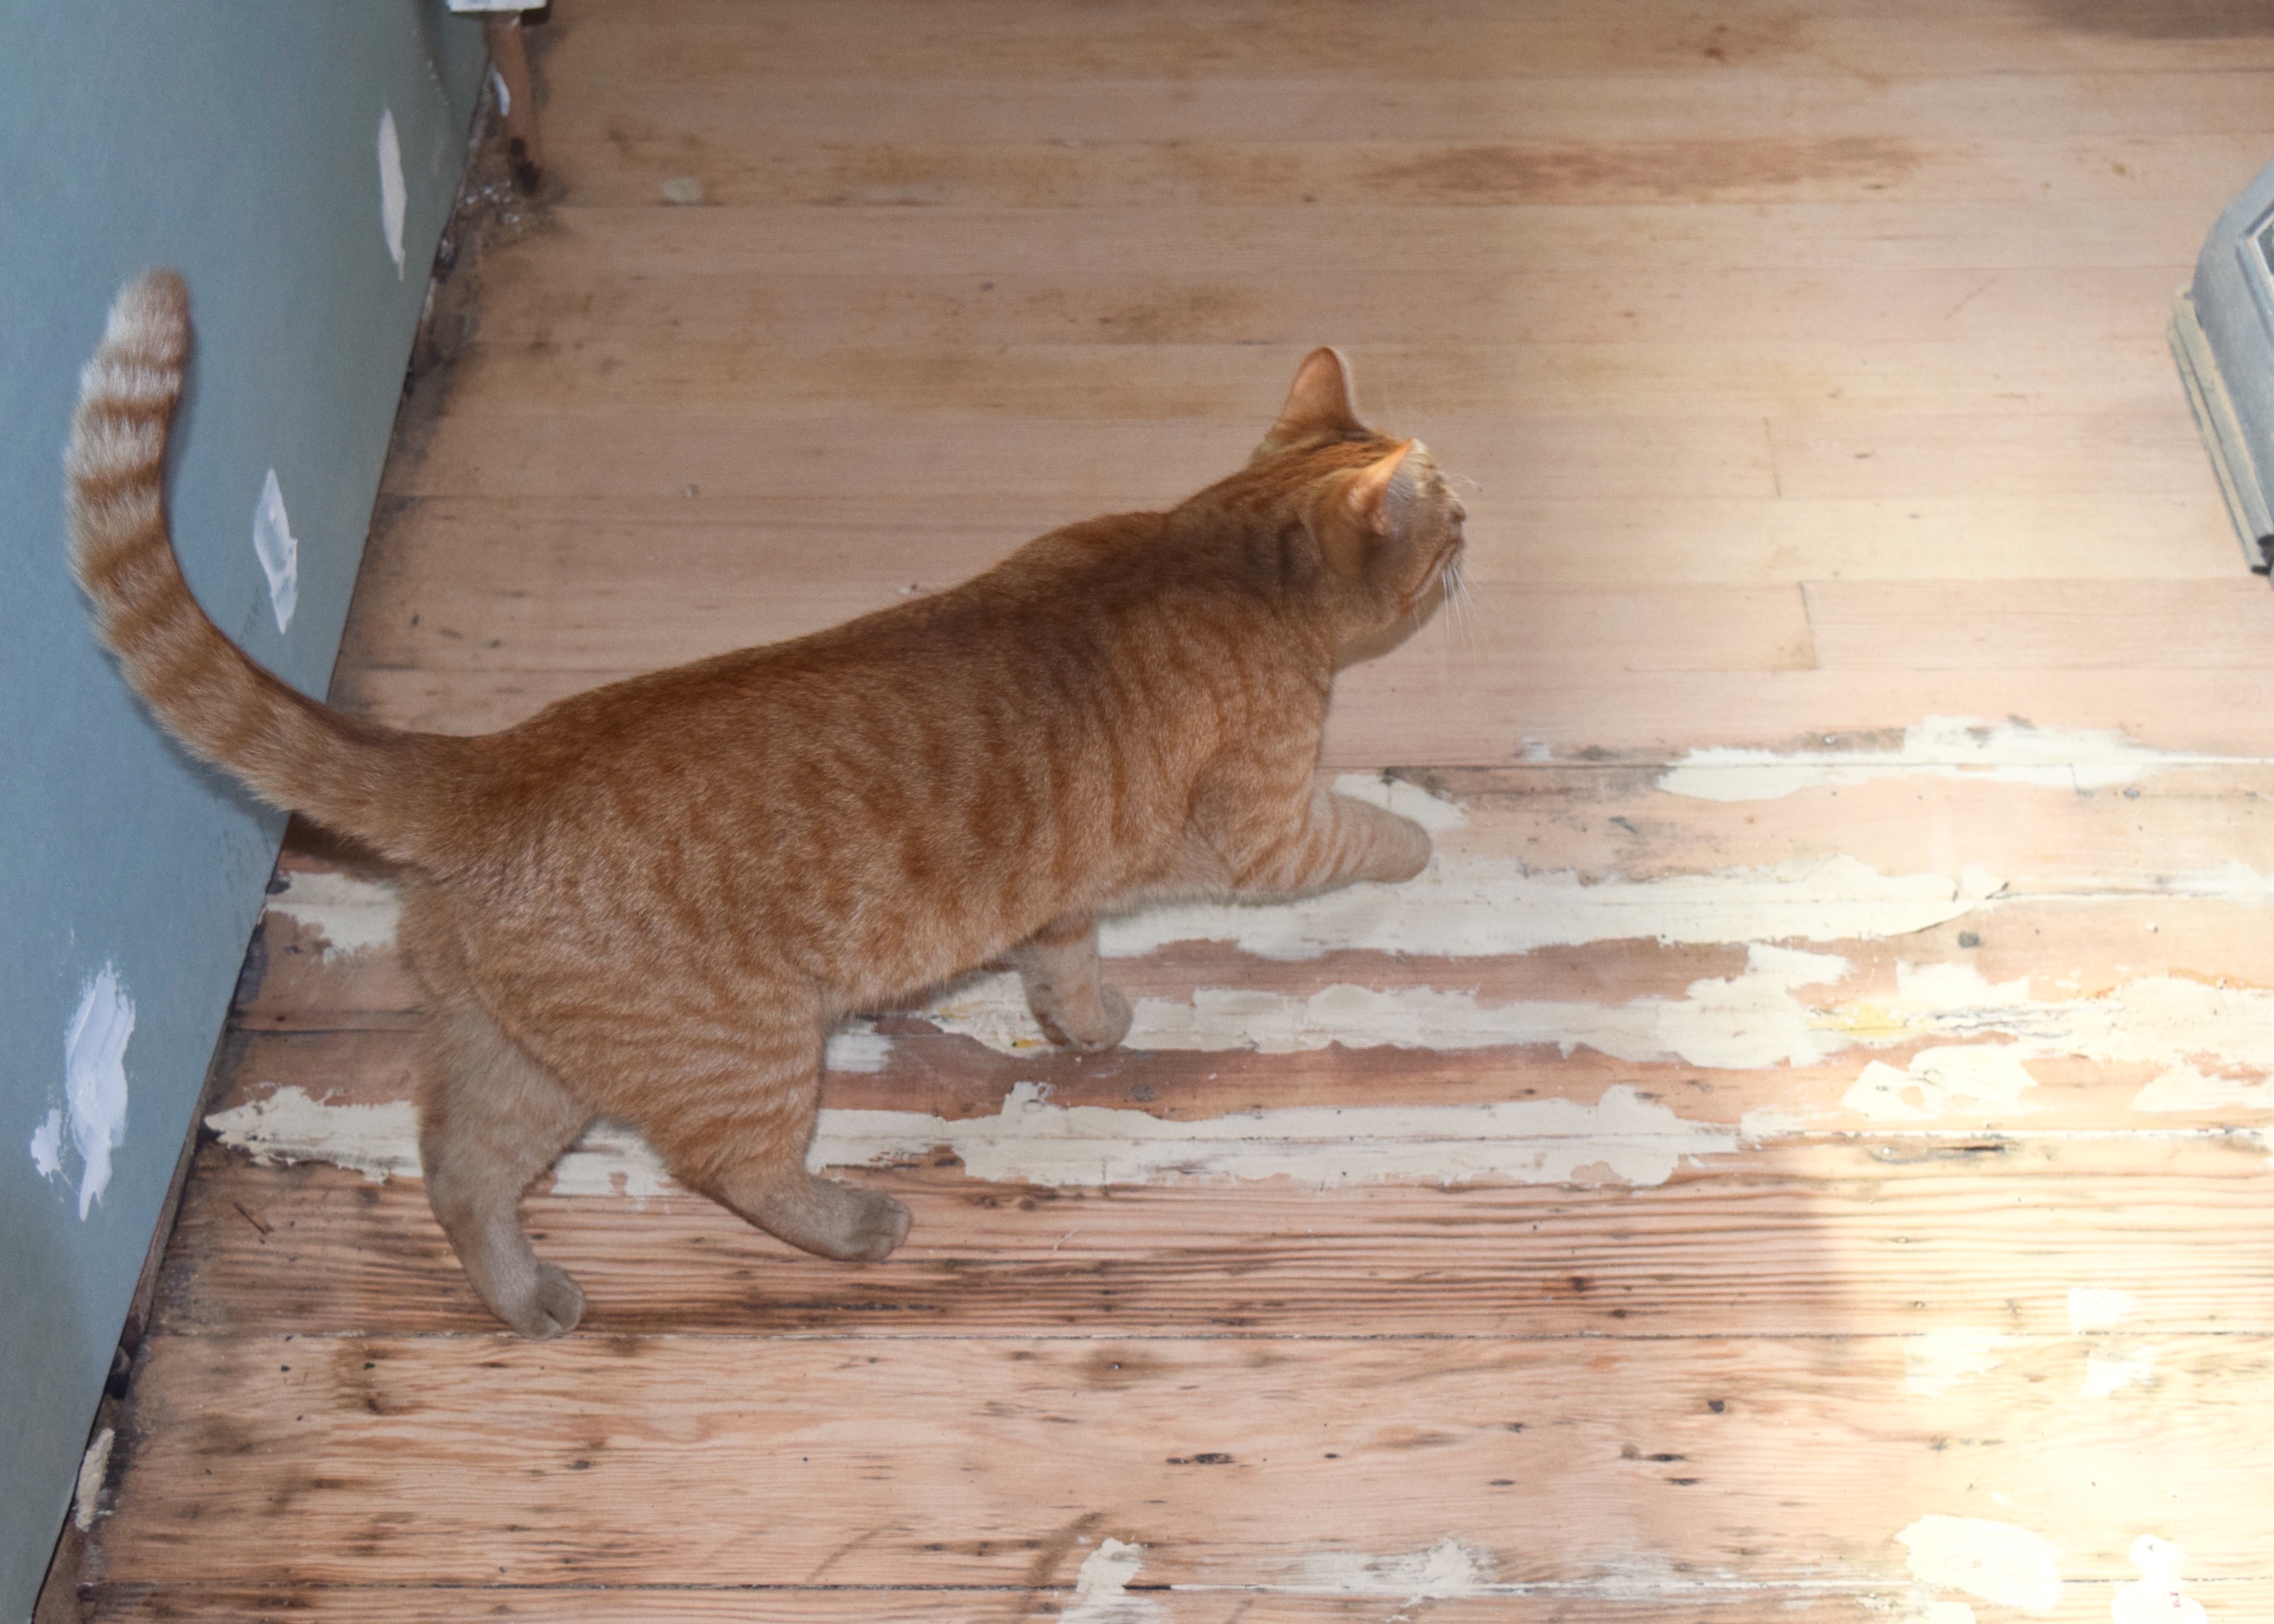
The new pieces were installed the same way, edges smothered in woodfiller. Have I mentioned how much woodfiller we used yet guys? SO MUCH WOOD FILLER! Even Jacks was all, “What’s up with this questionable amount of wood filler guys?”
But then he got over it and walked away without volunteering to help us at all. Little Bastard.
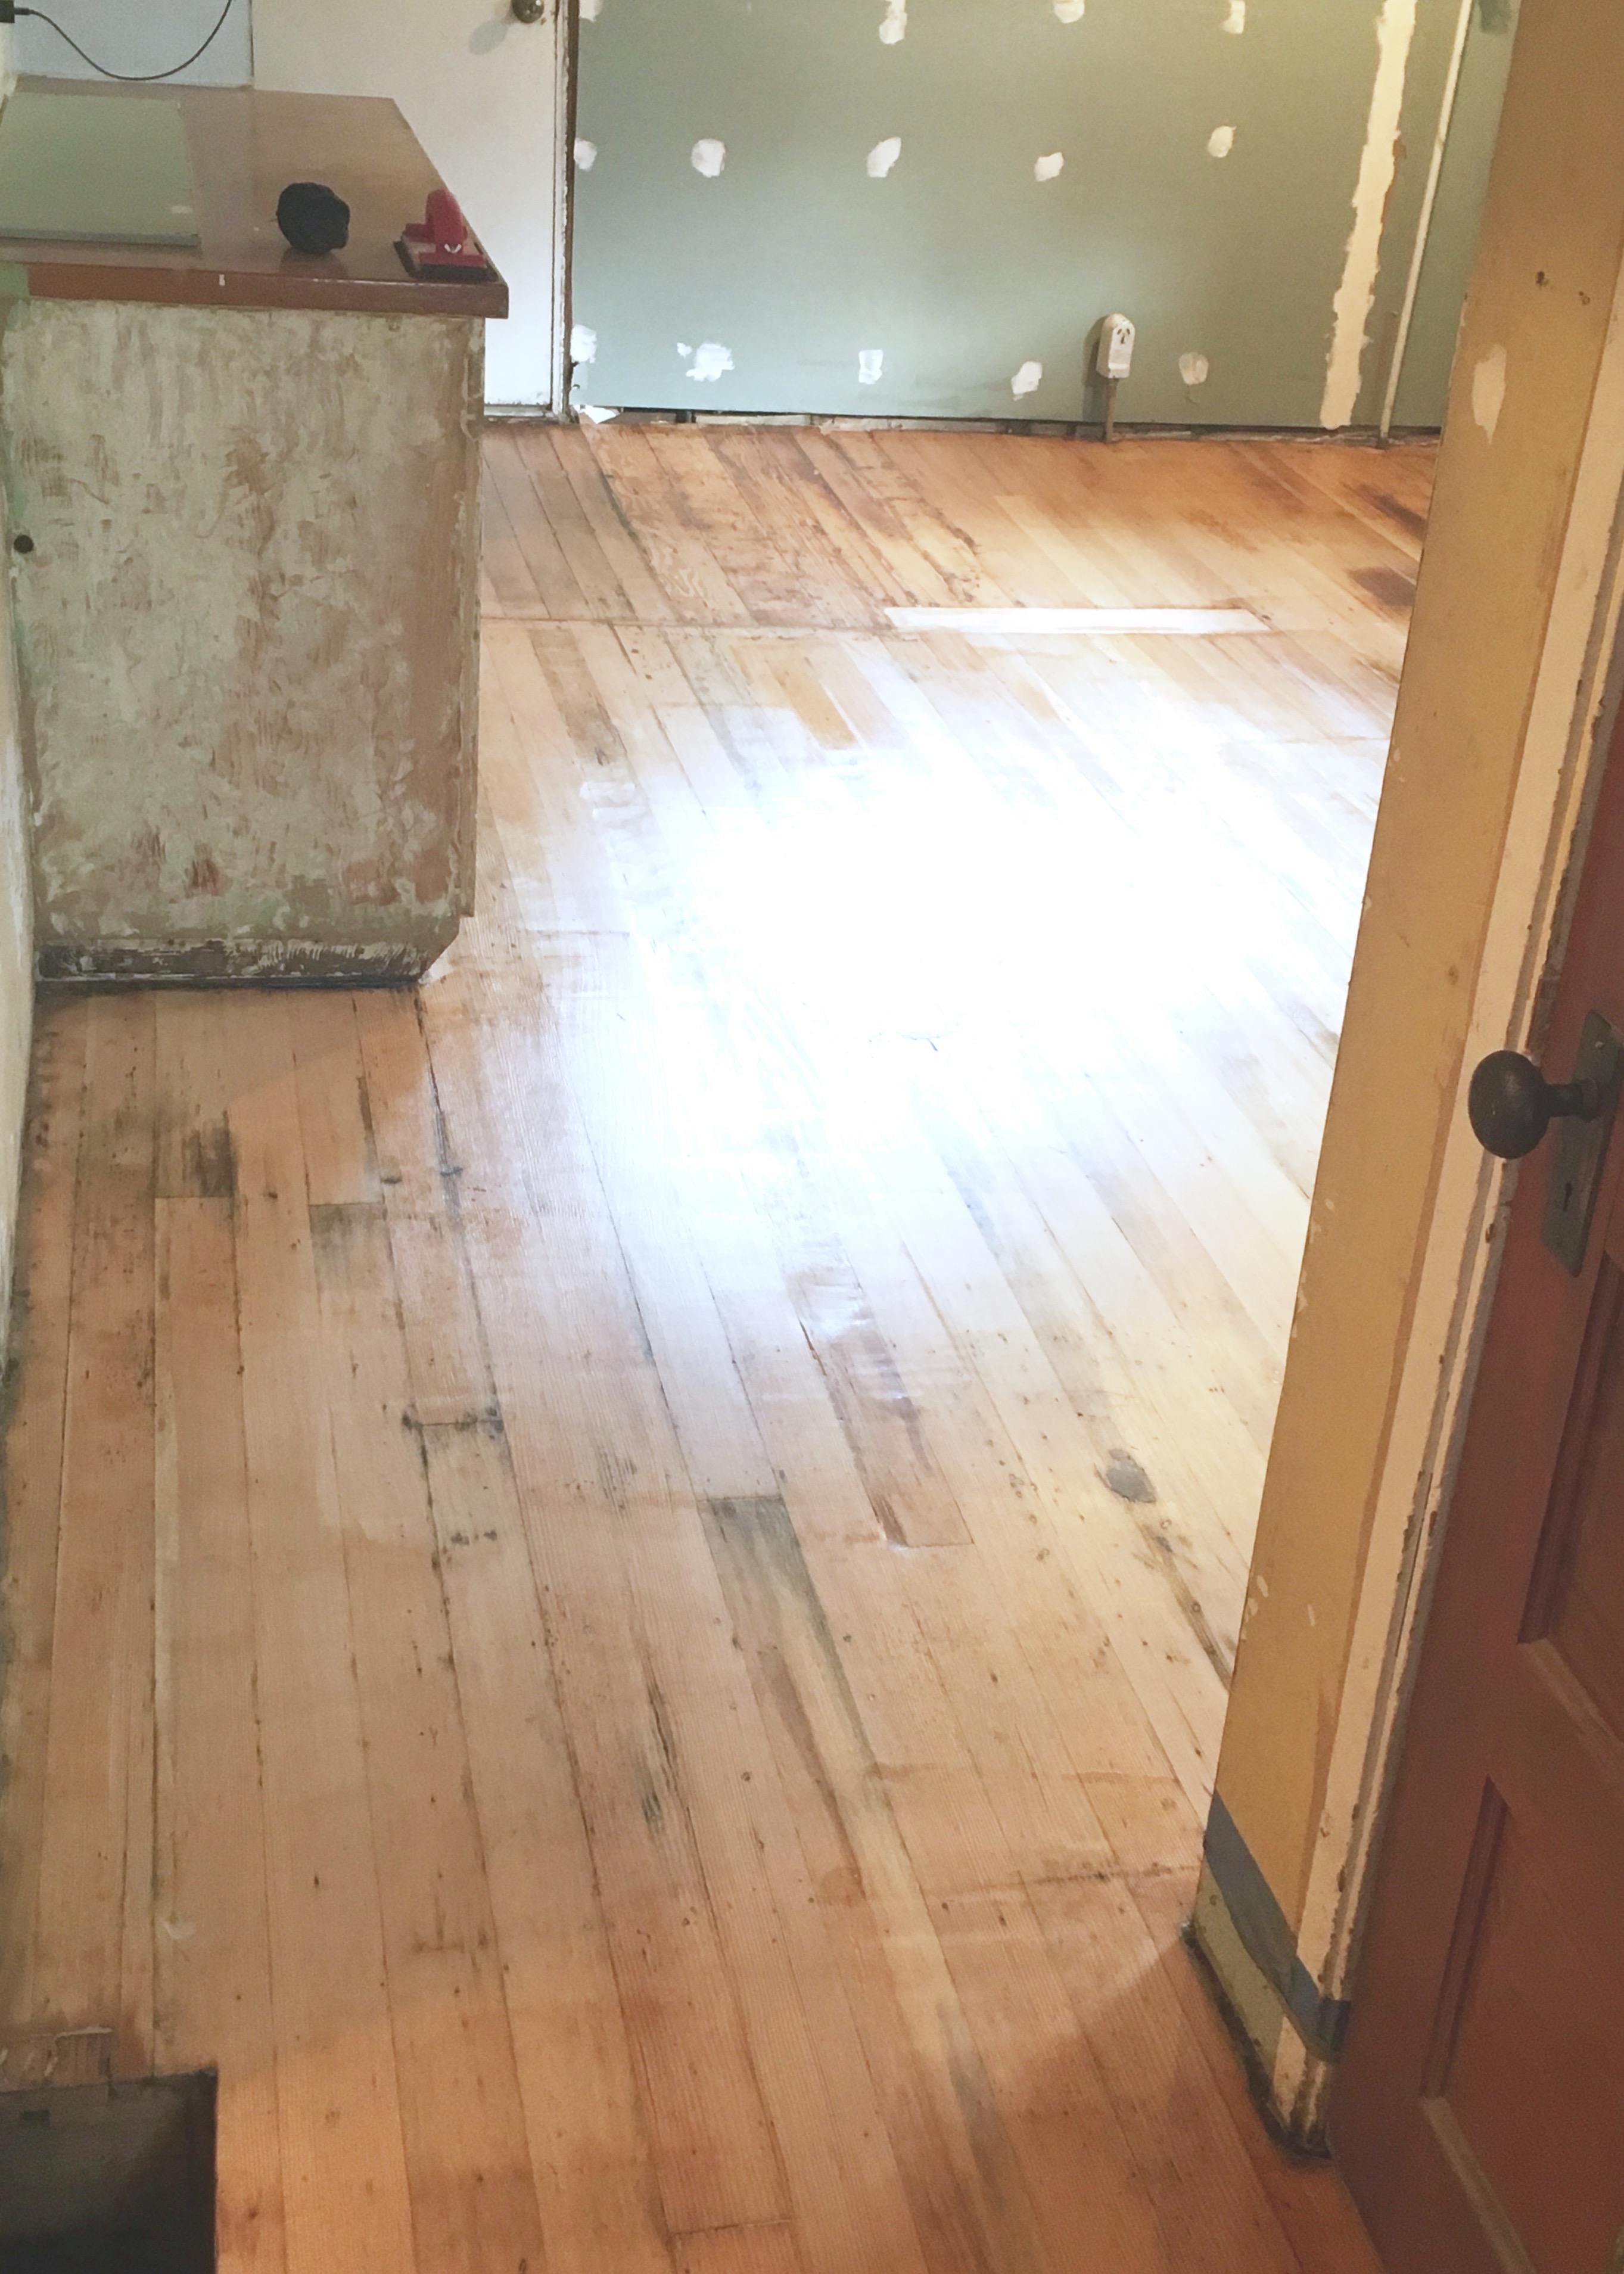
So that was an entire Saturday guys. Moving through 3 grits of sand paper and doing all the patching of the floors until it looked like this crazyness.
Then on Sunday after all the patches and glue were dry we were ready to sand again at our highest grit. But then we found more spots that needed patching! OF COURSE.

Finally finally, we patched everything that could be patched and sanded with the drum sander at 100 grit and did the polisher on the edges with 80 grit. Which took almost the whole morning. Then it was time to clean. Oh we swept, we vacuumed, we vacuumed again, and again.
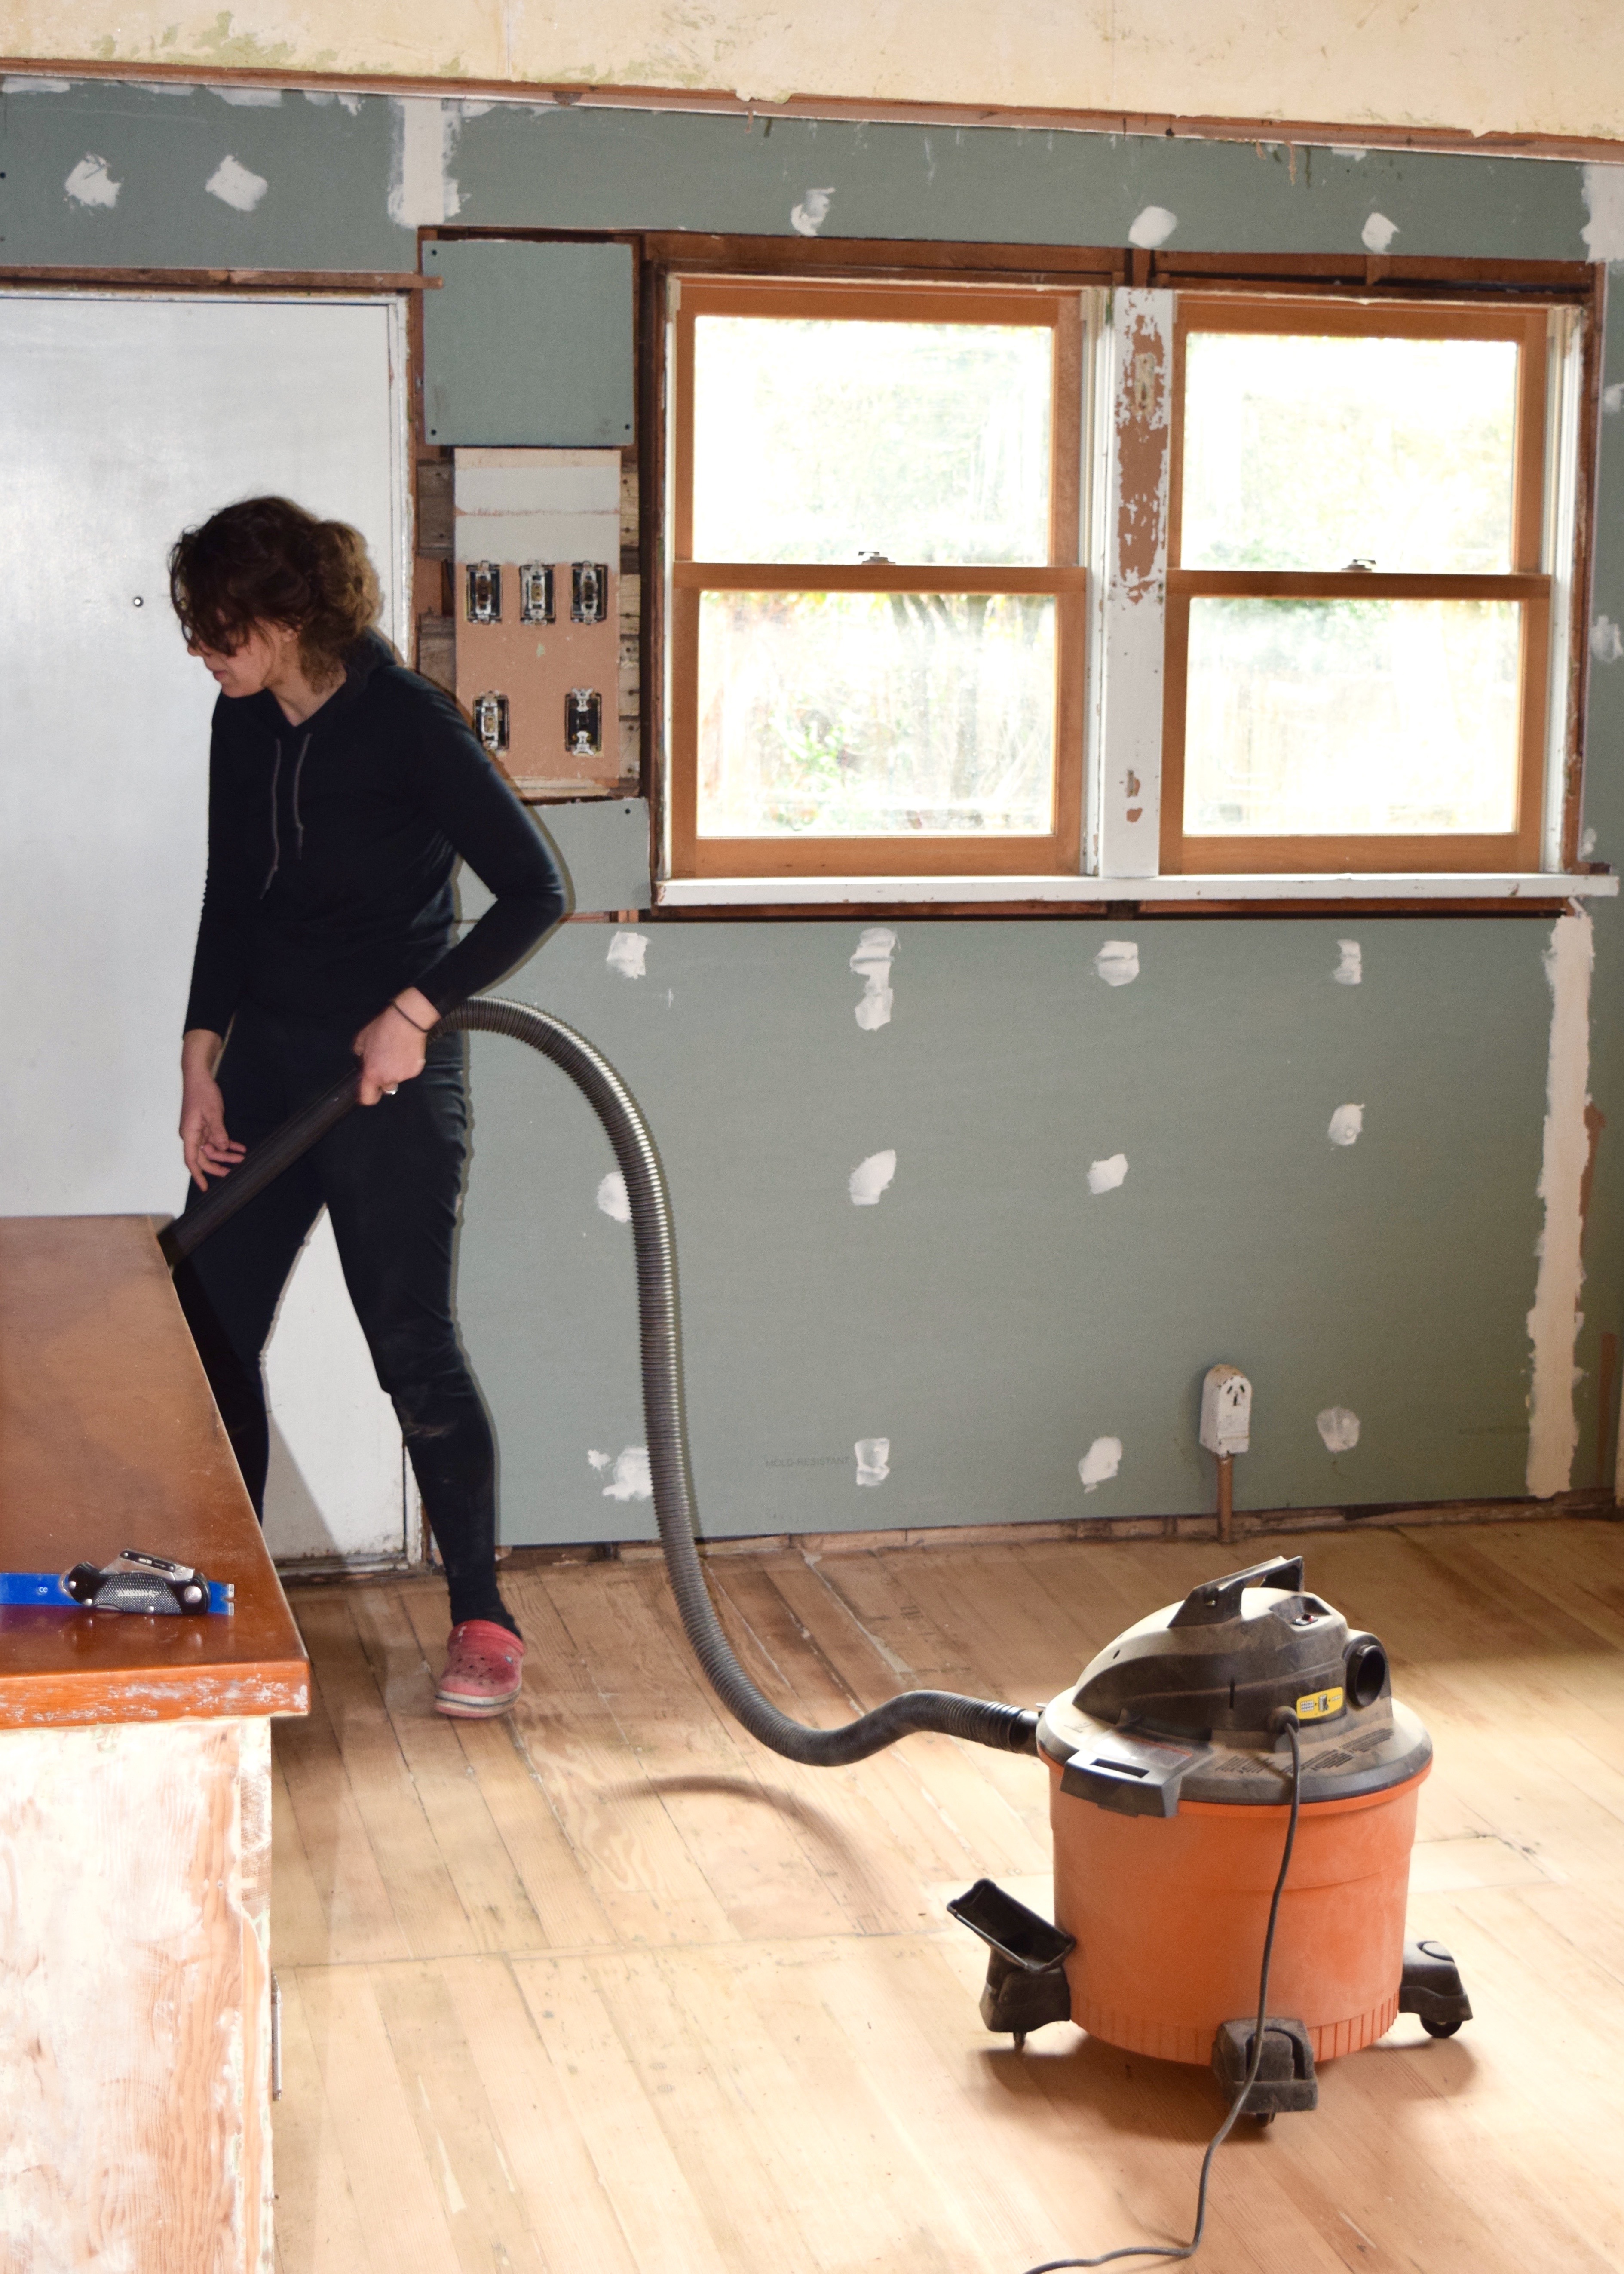
After all the vacuuming, Bronwyn and I got on our hands and knees with wet rags and wiped the floors down. We started at the back of the kitchen working our way across to the main part and into the living room before washing our cloths and doing it all over again. Then it was finally, finally, FINALLY time to start sealing the floors.
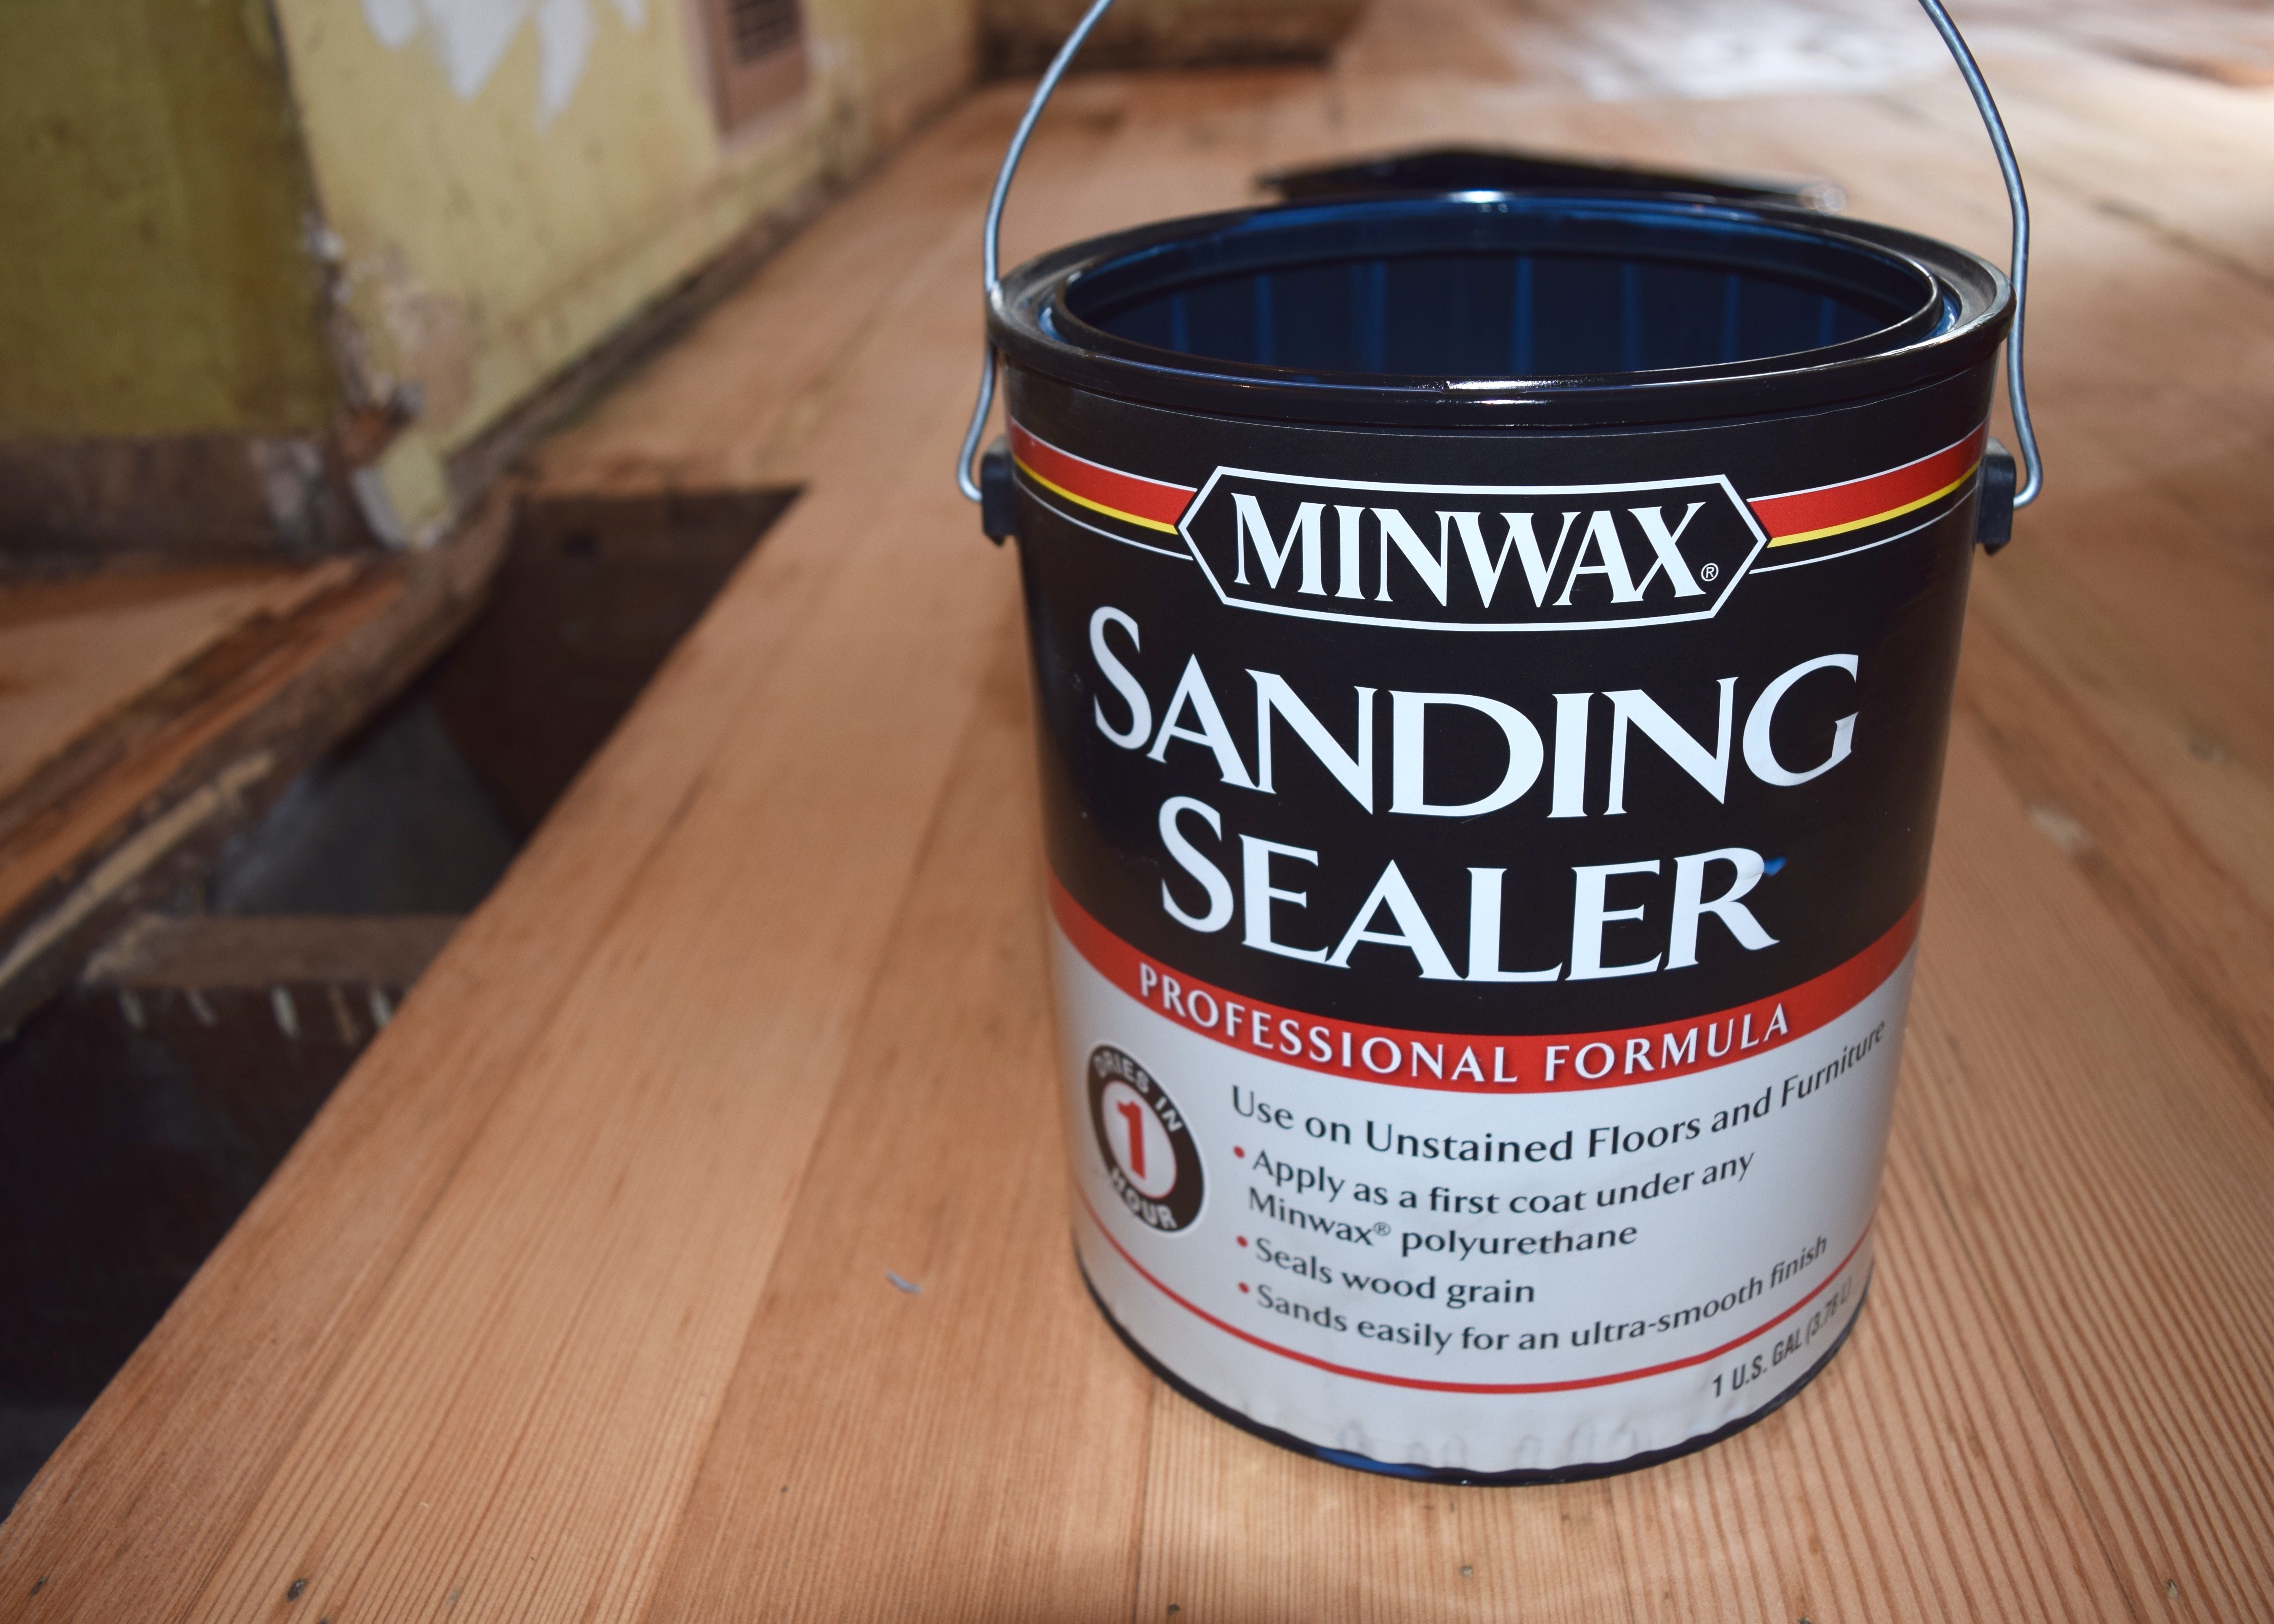
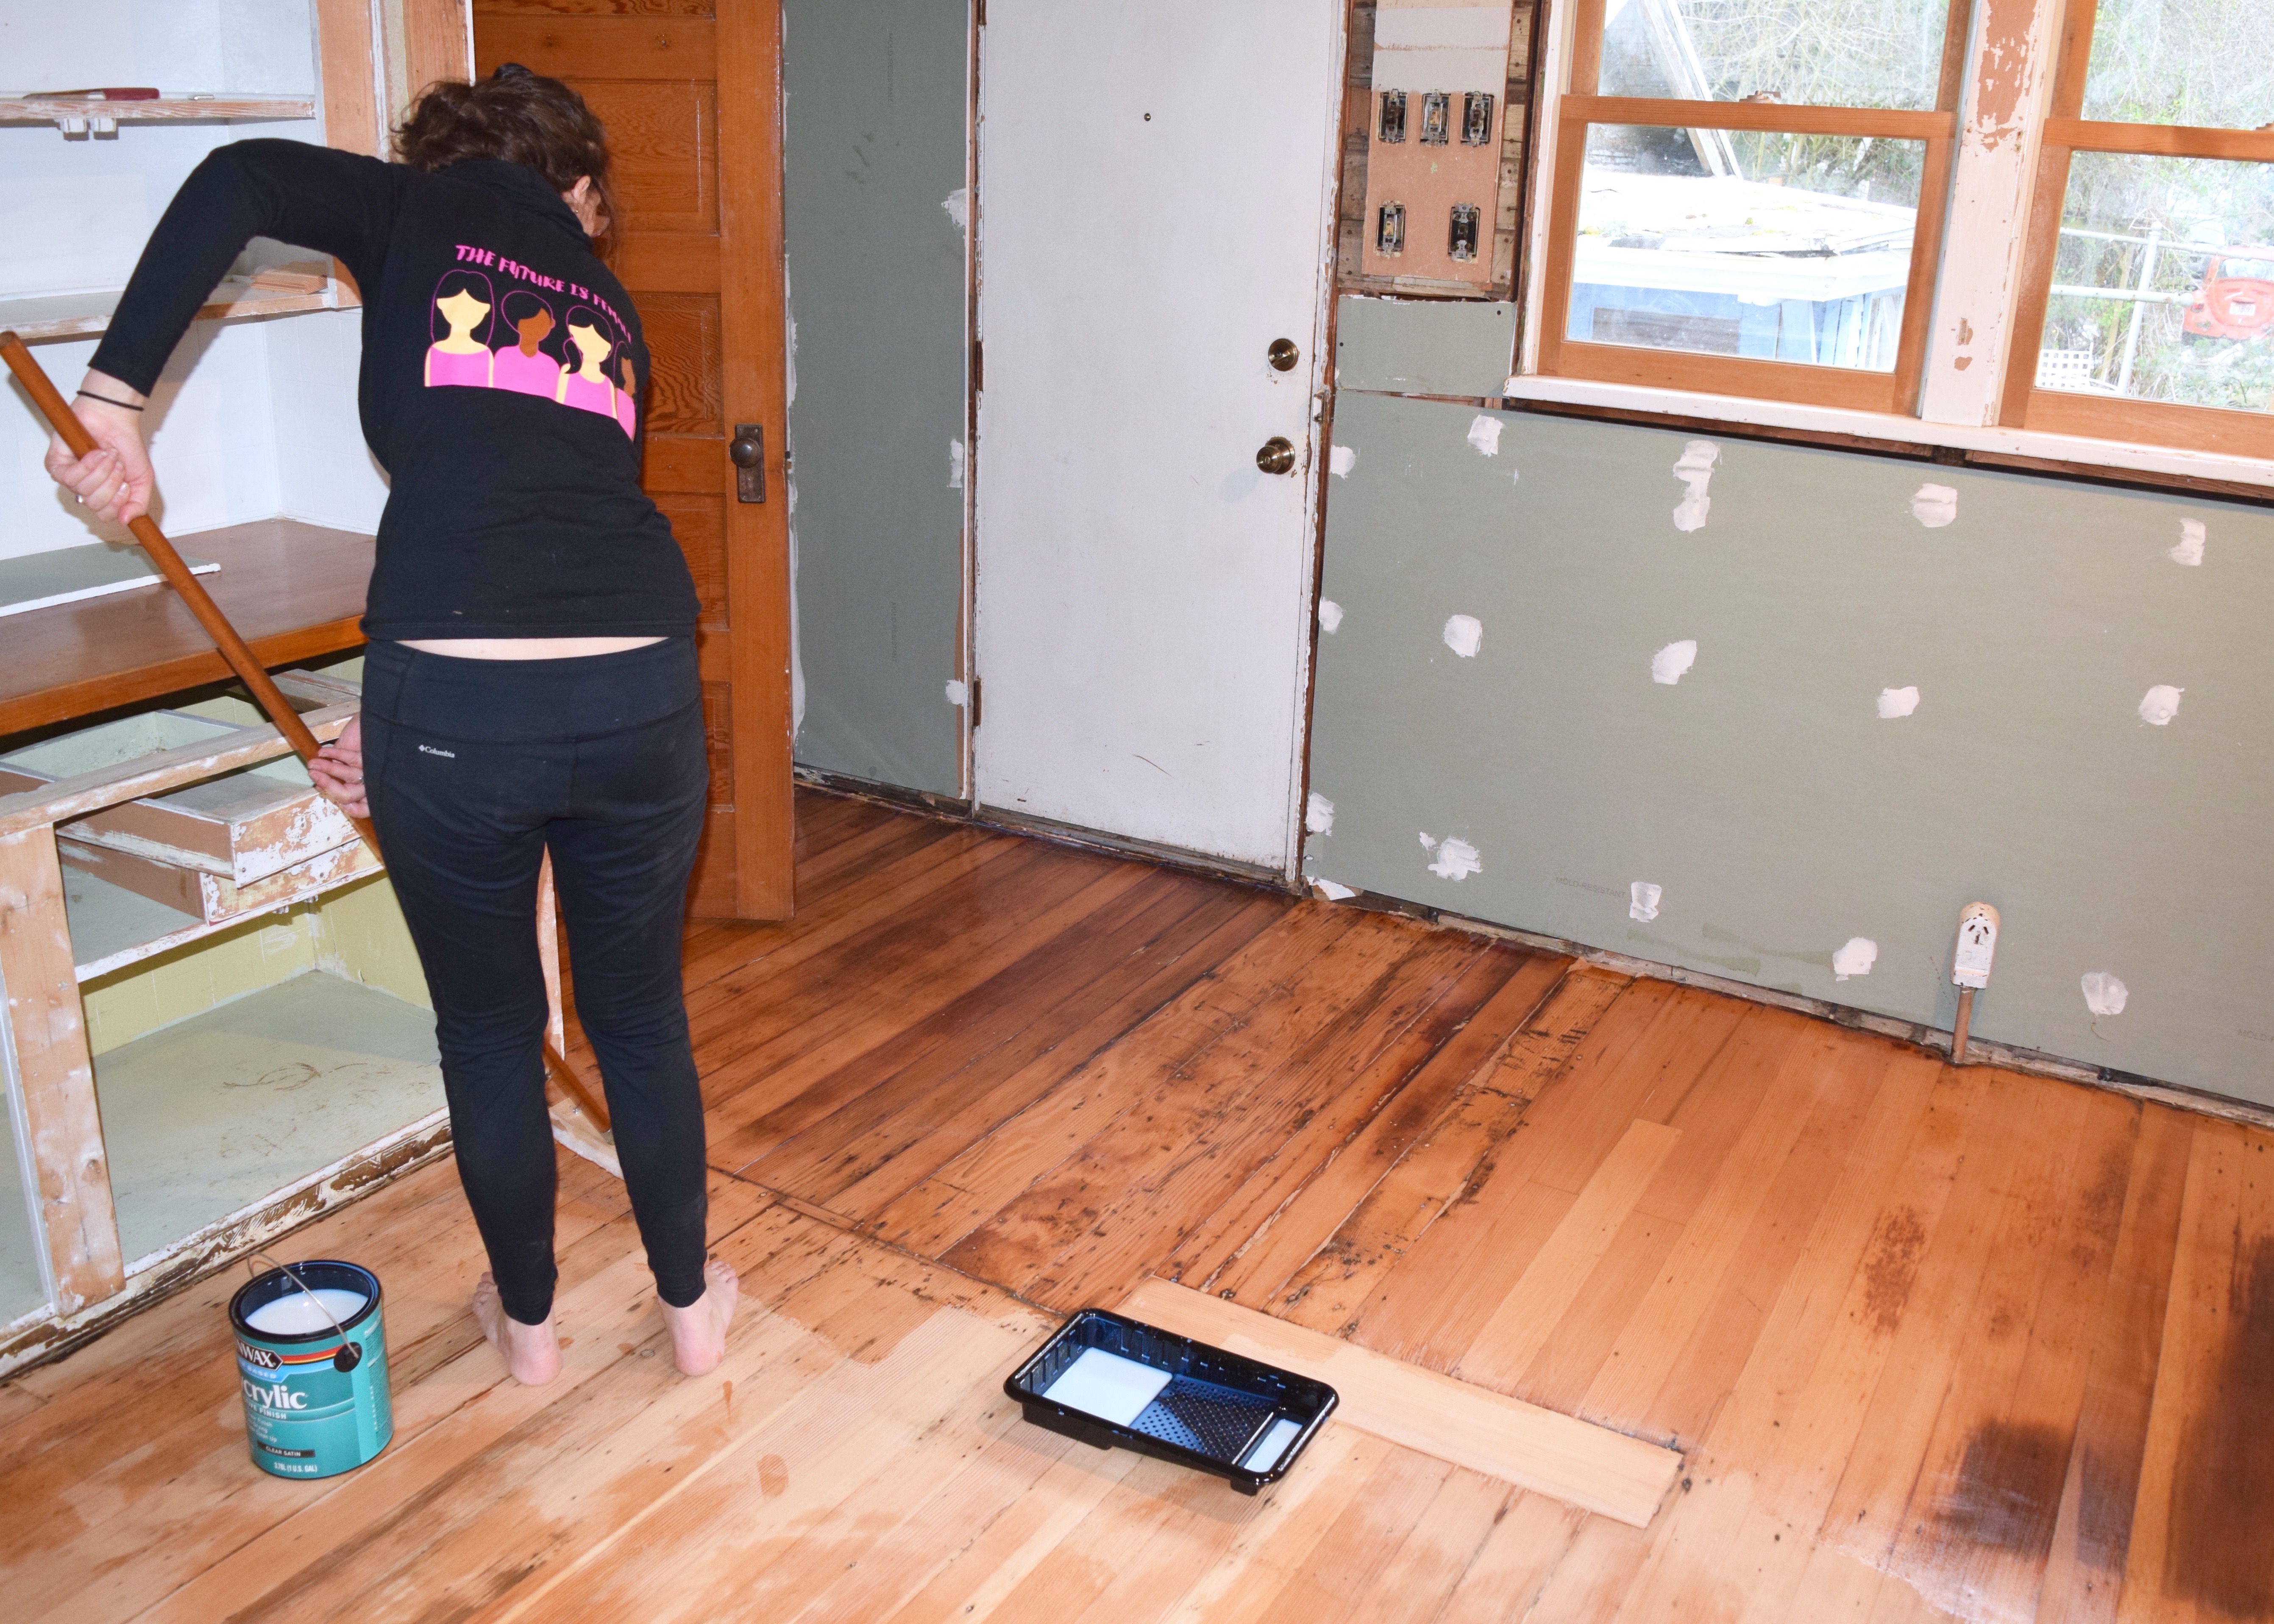
We started with one coat of Minwax’s Sanding Sealer to seal the wood grain and provide a smooth surface for the poly coat we’d add on top.
I worked my way around the room in the same way we’d done the wiping of the floors, starting at the back of the kitchen by the bathroom and working my way into the living room.
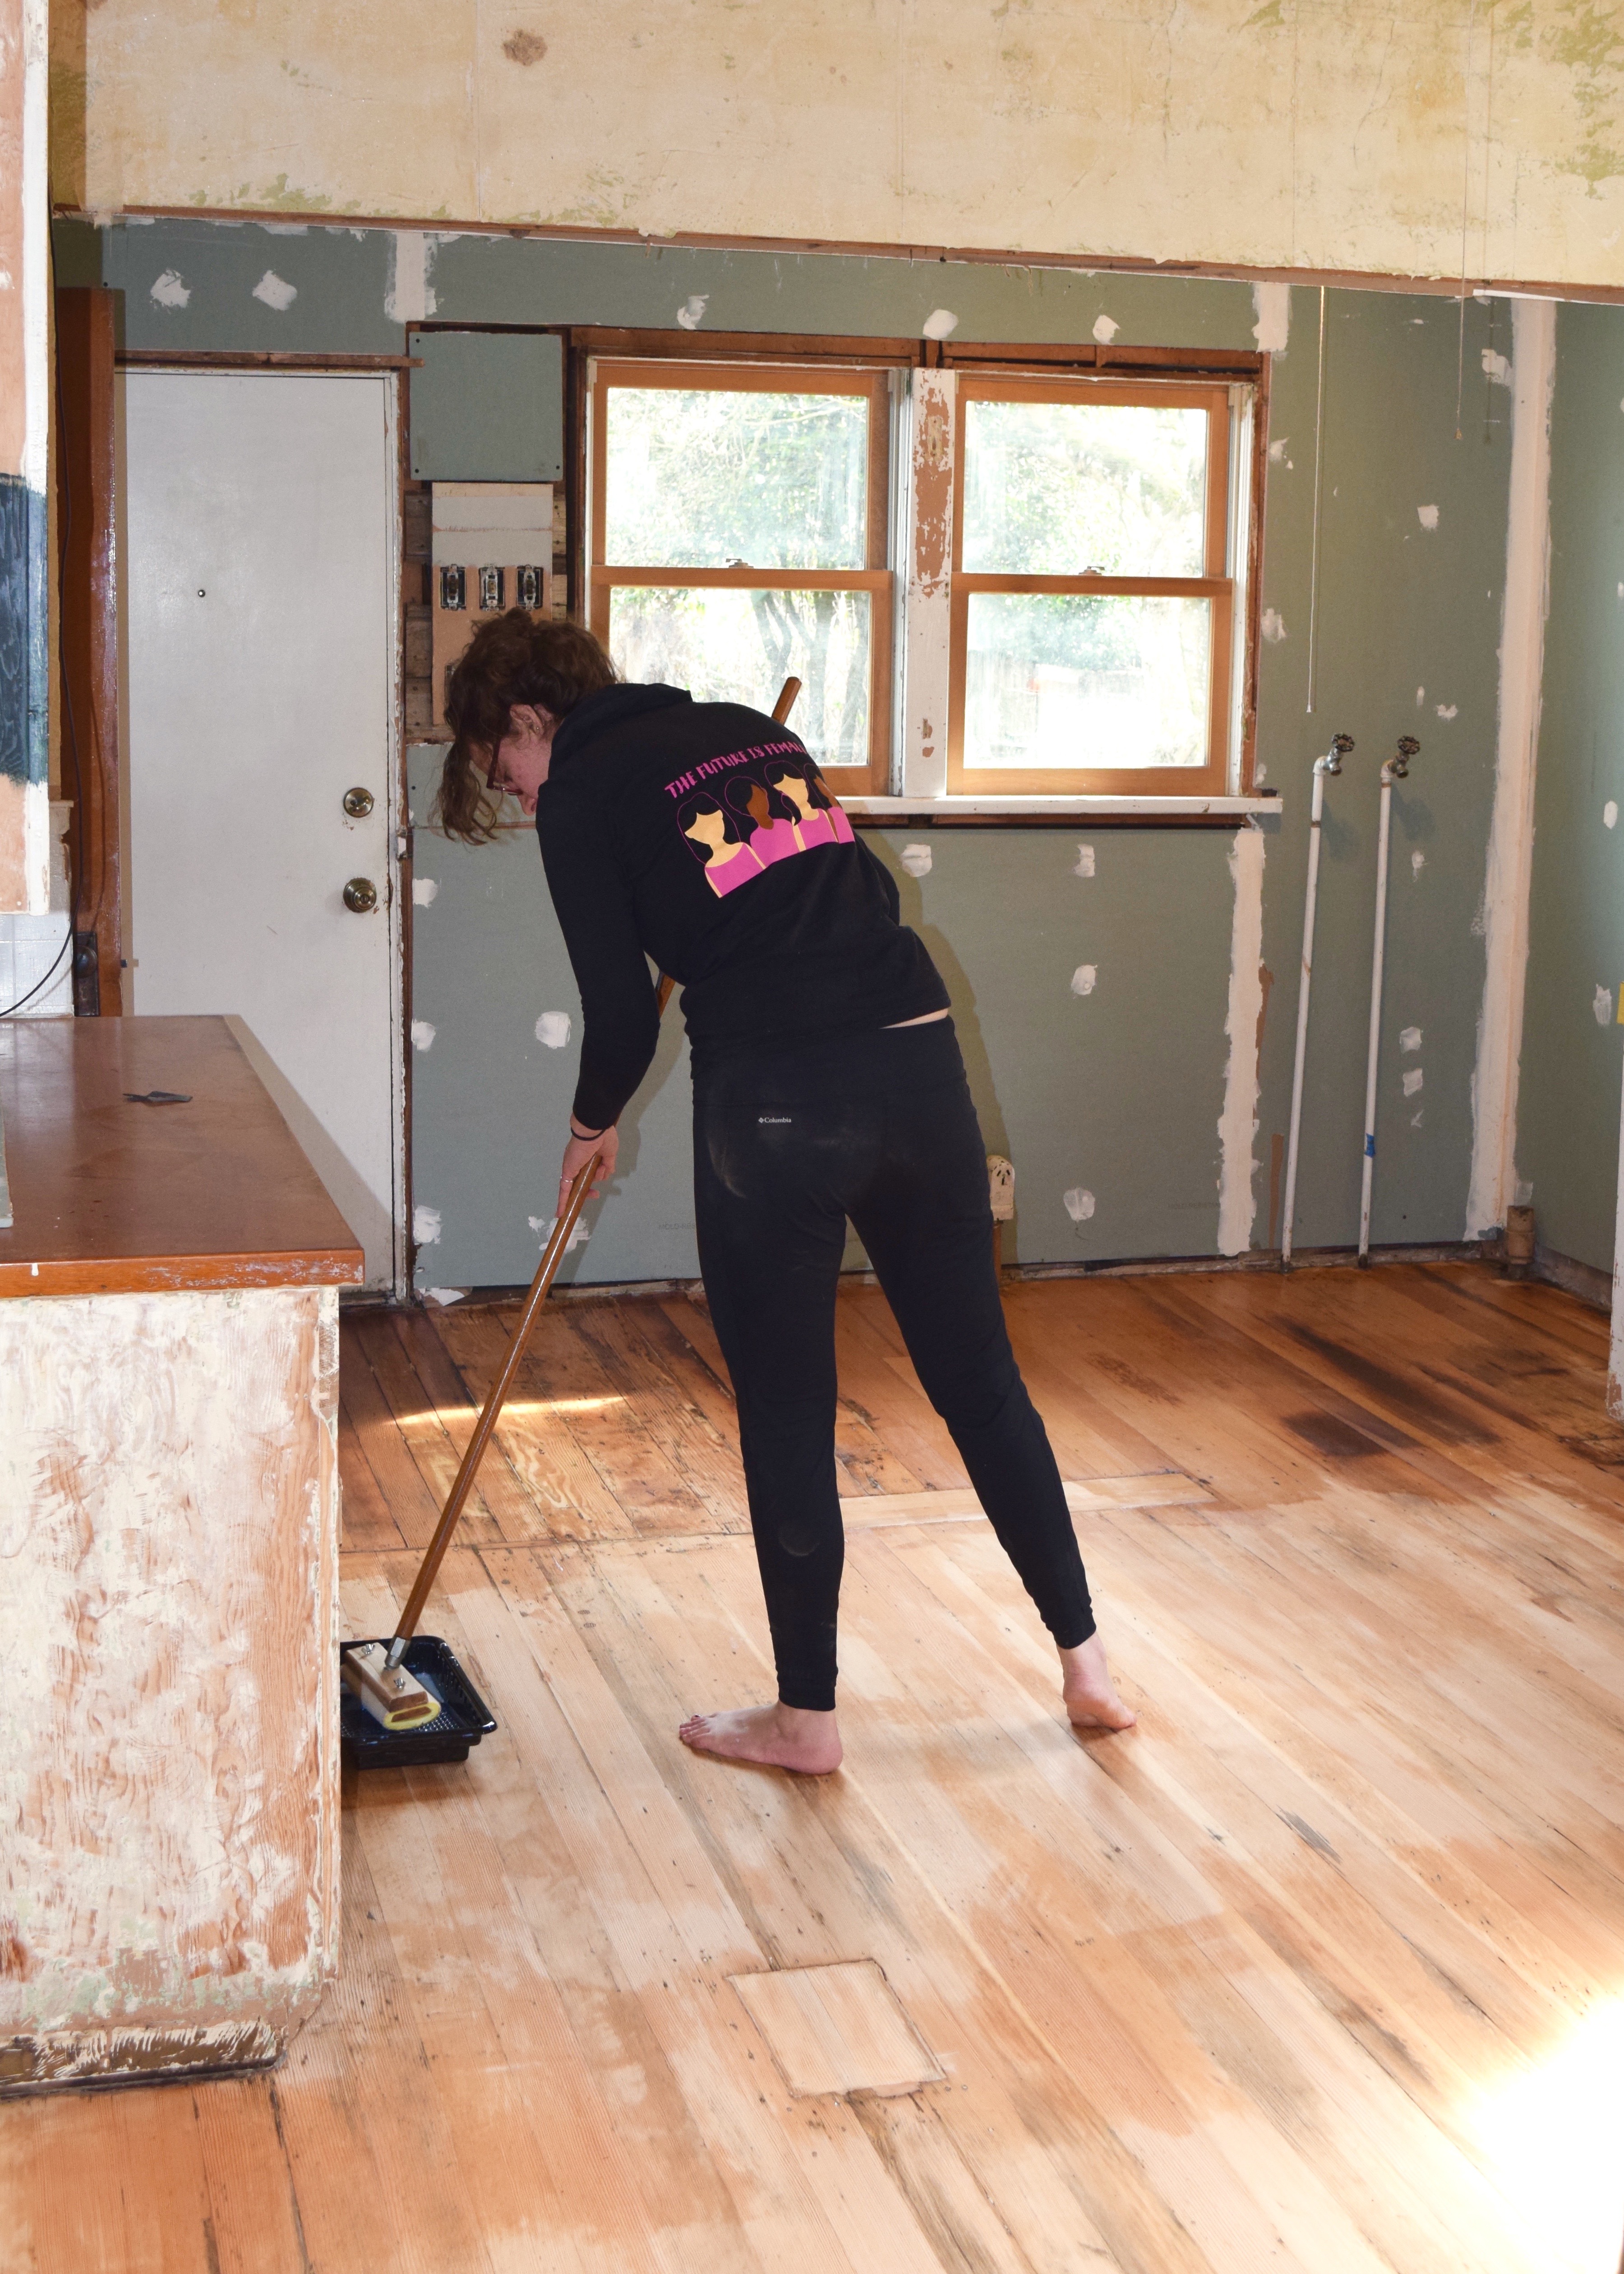
I worked barefoot to avoid transfering anything from my shoes to the clean floors and we finished that first coat around noon.
Since it took three hours to dry and we were kicked out of our kitchen, both bathrooms, and our bedrooms, we opened a window and went to brunch!
It took longer than three hours to fully dry though. So that kinda sucked. We were delayed and it wasn’t our fault! We hung out for a while longer trying not to think about going to the bathroom. Finally, once the sealer was no longer tacky, we sanded everything with 220 grit sanding screens (like you’d use on drywall) and wiped the floors with wet cloths again. We were ready to put on the first coat of sealer!
I picked up a can of water-based poly finish from Minwax, because it has fewer fumes, and creates a less orangey finish. I wanted a lighter natural fir coat throughout the space, especially since I’d worked so hard to expose that natural wood! I pulled a satin finish for a less shiny look too. I hoped it would look similar to the wood in the Living Room and just be an easy transition. Spoiler alert: oil based would have actually created a more similar finish.

For the first coat of poly, I switched from the synthetic applicator pad I’d used with the wood sealer to a “fancy” lambswool one, but I found it left more bubbles than I’d gotten with the synthetic pad. (You can see my patched in wood planks here too by the paint tray!)
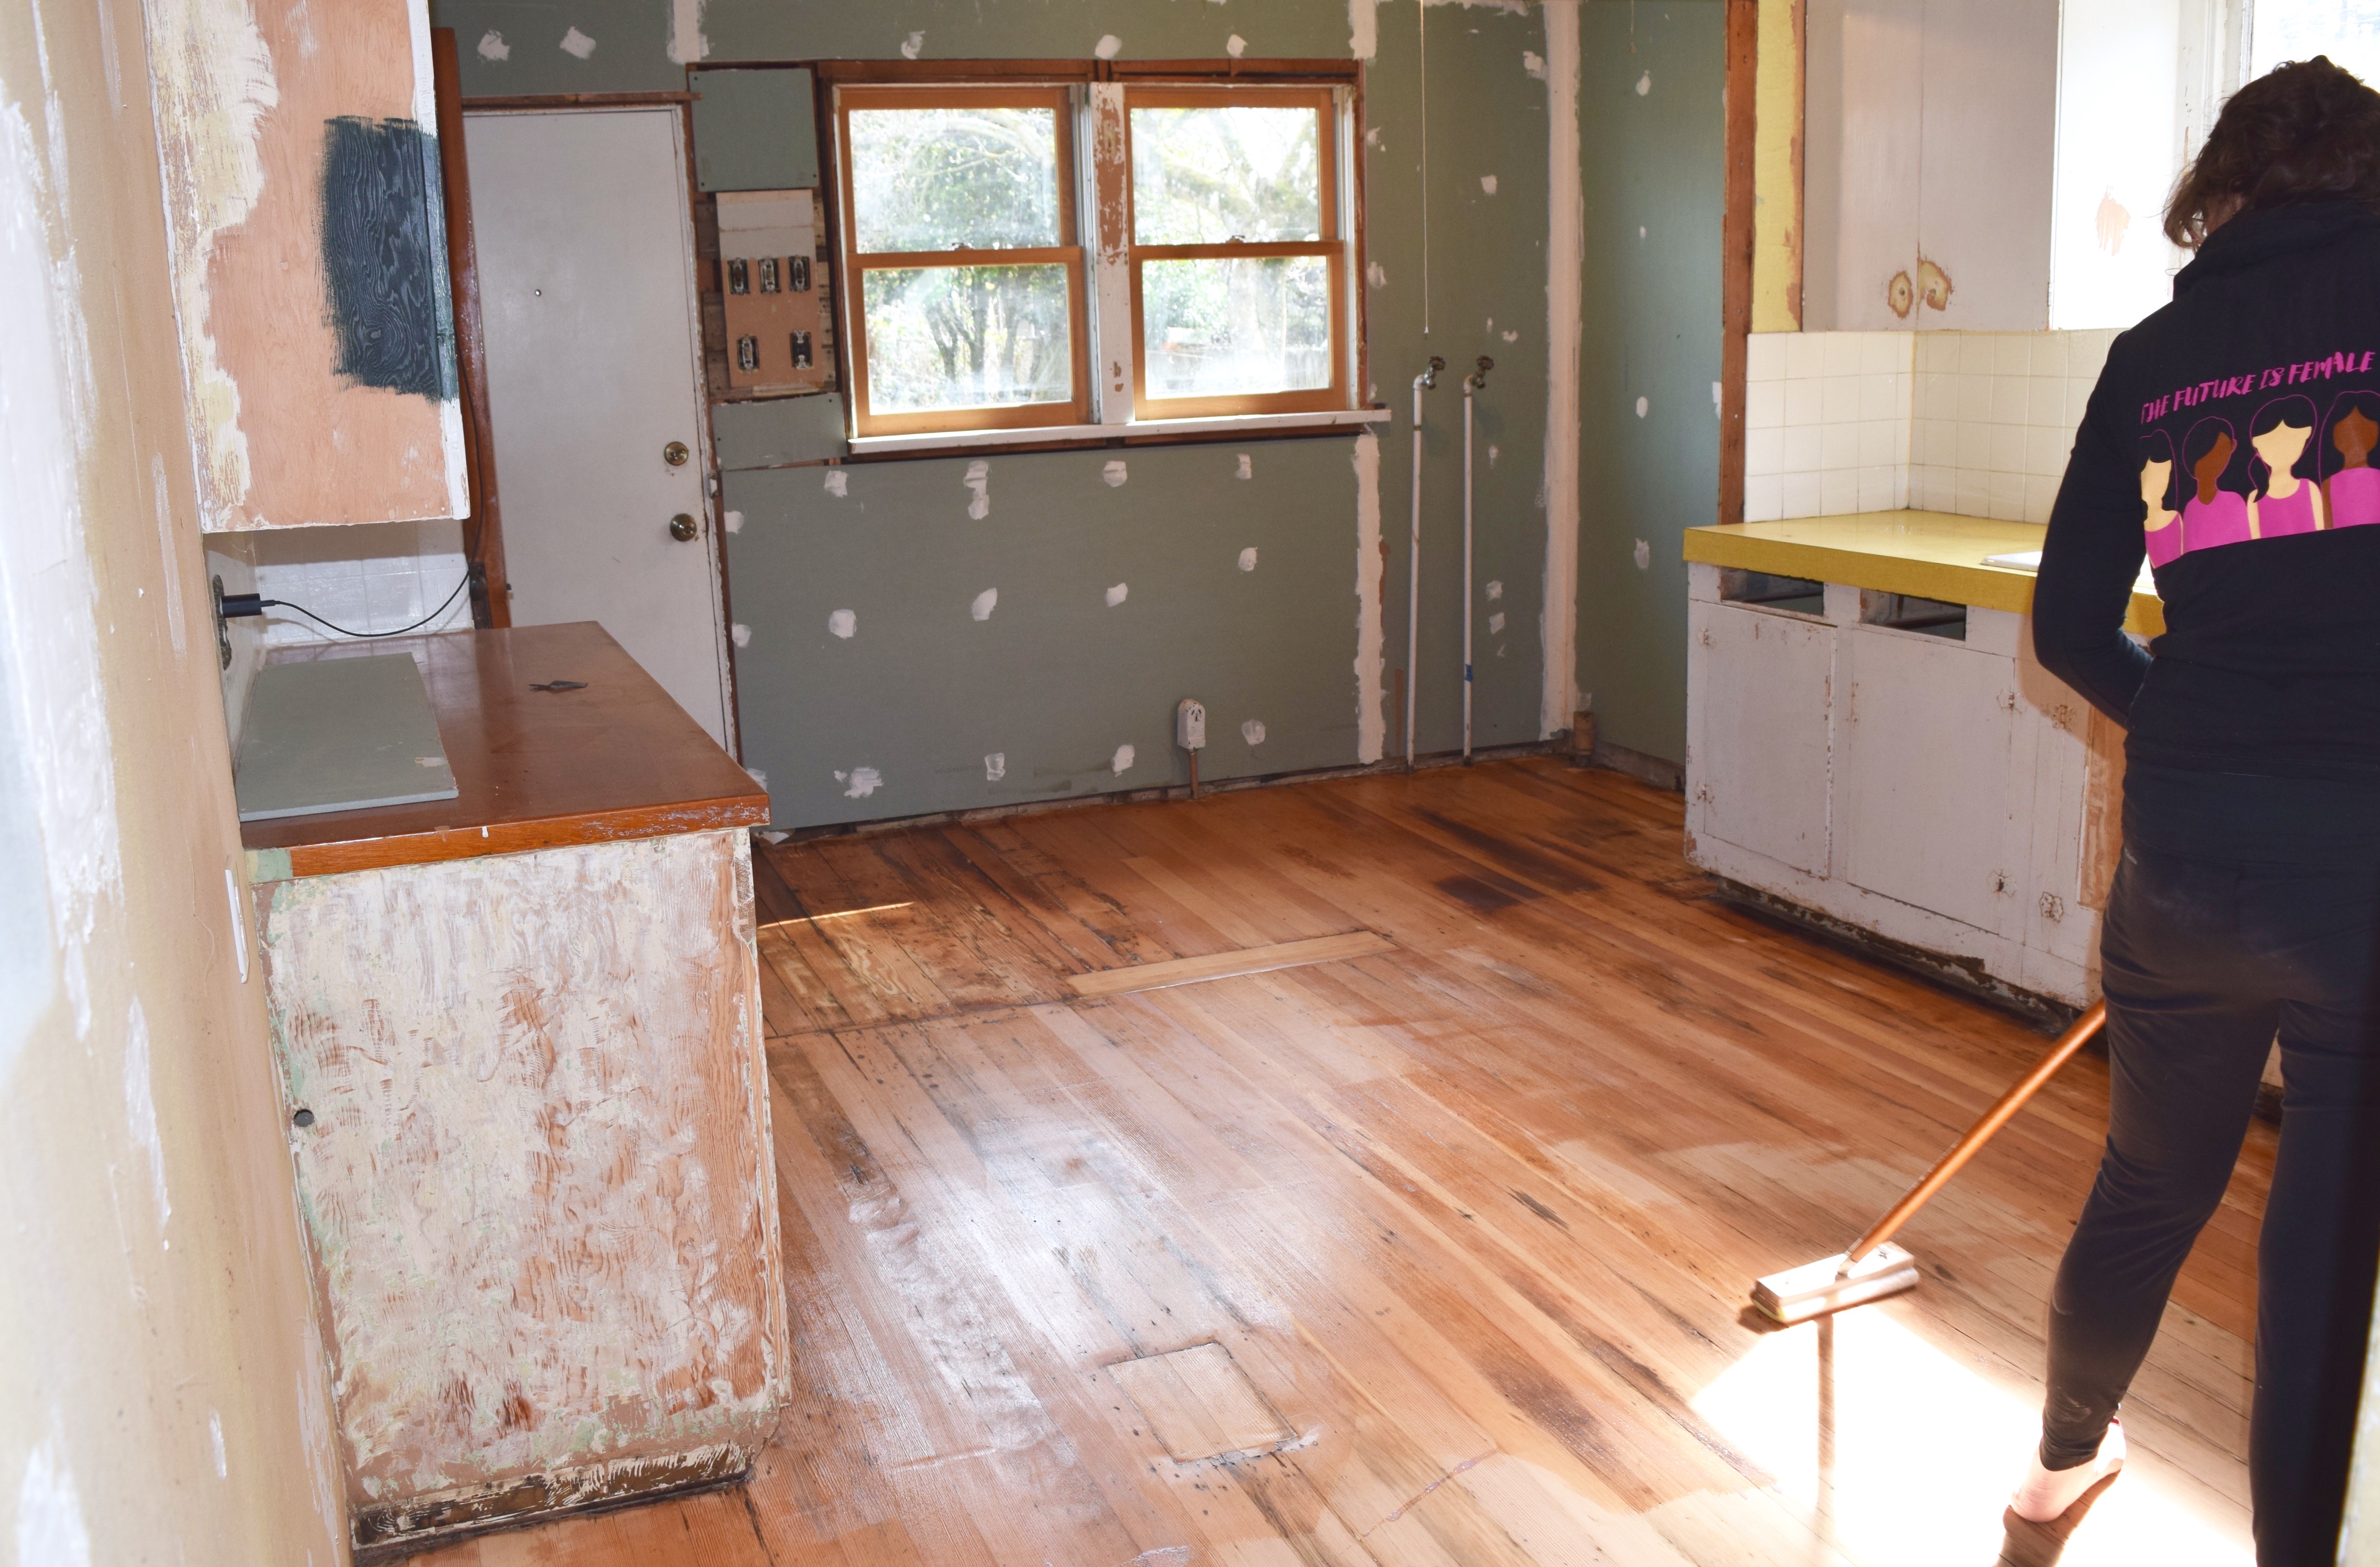
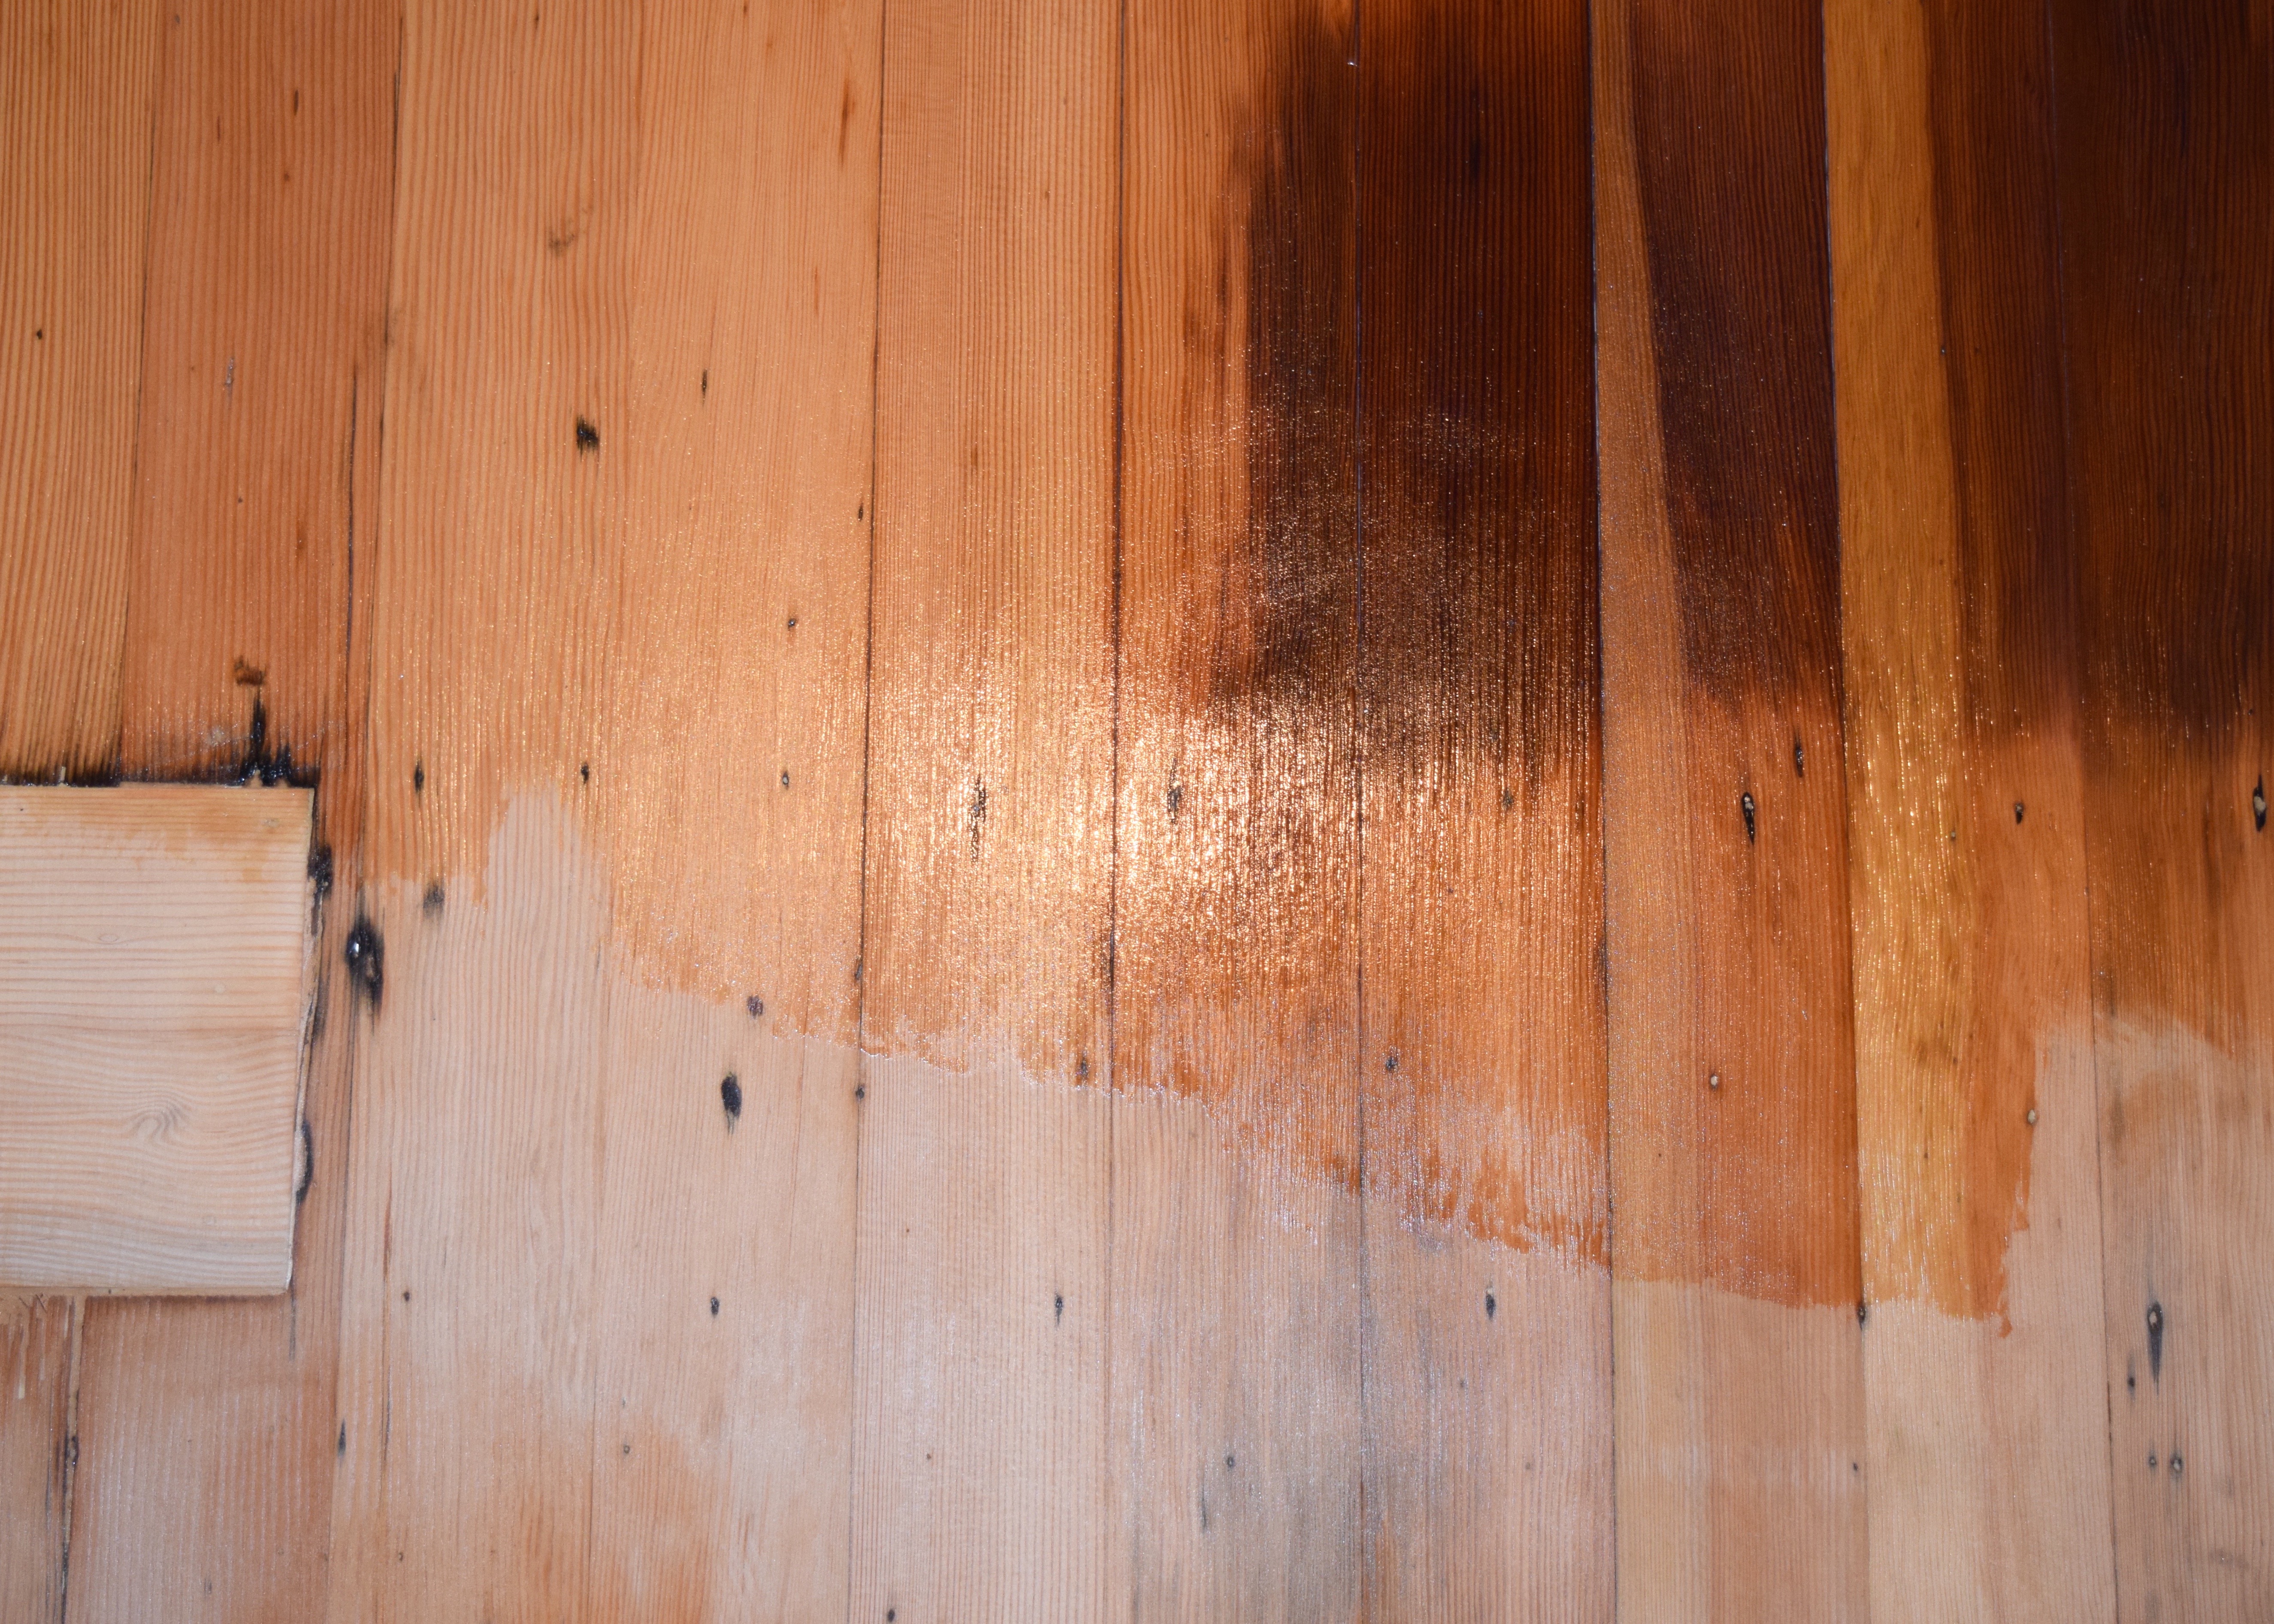
Applying the finishing Polyacrylic was a lot like mopping your floors, but with less dirty water. You start in one area and carefully wipe a liquid down and across the floors without letting it pool in any one area.
You could immediately tell the areas that had sealer vs those that had the first coat of Polyacrylic. Which was nice for working around the room and not missing any patches. It made the floors a bit darker which mean old oil stains like the one in the upper corner here, also got darker. I went with it.
When I was finished with the first coat things were looking really good! Bronwyn snapped this shot with her phone and we celebrated. But then we remembered we couldn’t leave the living room for another 3 hours while this coat dried…
I decided three hours was about the same amount of time as a movie, so I walked to the local theater, grabbed food for dinner, and watched Red Sparrow. When I got home it was the perfect time for Bronwyn and I to take quick showers, do another quick screen sanding of the floors, vacuum everything, wipe everything, and then seal one final coat.
I sent Bronwyn upstairs for bed and began the second coat, sealing myself into my room for the night. The next morning at 6am everything was dry and we did a quick sanding and wet wiping again, before putting on the third and final coat of sealer! Bronwyn stayed in the living room and by 7am I was in the car and on my way to work!
Despite the chaos of the rest of the room, the floors were looking SO GOOD!
I’d expected the slight stains and imperfections and loved them even more! It was a billion times better than where I’d started and I was ohhh soooo happy!
Sure the cabinets were half-sanded, and the walls need skim coating and painting, but this was a miracle! I’d restored these 110 year old floors out from under 2 layers of horrible horrible sheet vinyl and TAR based mastic! I’d done it! I’d refinished these terrible floors!
And there were so, so many doubts and frustrations, and hard days along the way. I’d be discouraged to do this project from the very start. I’d been told this was stupid, that I was silly to even try, that this project was a waste of time AND money by several people (older, white men at that!). I’d been told to put tile down over the old sheet vinyl or to just put another layer of sheet vinyl or linoleum on top. I didn’t want to do any of that, I wanted to restore my floors. And I did!
It was really hard, having people who you trust discourage you like that is really emotionally draining. I had so many things going on with these floors and with the whole house, I just didn’t have the time to listen to those comments or the energy to argue with those people. I had a mission and I just desperately wanted to give everything I could to save these floors. That doesn’t mean I didn’t have moments where I was ready to throw in the towel. Remember when I accidentally partially liquified my tar? I’m pretty sure I cried that day. But in the end I knew I could do it and I knew it was the best thing for the house, the right thing for the house. 110 year old original floors DESERVED this much work. They’d earned it.
I HATE sheet vinyl, I find it soooo difficult to keep clean. Hardwood floors were just a dream. Thankfully, there was one person who was the most knowledgeable person, who told me this was possible, and encouraged me on the worst days, to just keep trying different things until I got that stupid tar up: my contractor neighbor Erik. Thank god for him. I’d never have gotten from here: two layers of crumbling sheet vinyl…
…through this horrendous mess of tar….
… to fully restored wood floors with out my neighbor! I really should bring him some cookies or something else neighborly. BECAUSE THIS FLOOR IS EVERYTHING I EVER WANTED!!
The change felt so good! Being able to walk through my house barefoot for the very first time since moving in felt soooo good! Having a kitchen after 6 months without one felt SO GOOD! This project felt like the biggest of all accomplishments to date. Bigger than the bathroom renovation, which I know seems silly, but this project had so much more riding on it. I knew the bathroom renovation would work out, it was a gut reno, there were no questionable old elements, everything was brand new for the most part. This, this was restoration, this was SAVING 110 year old floors. And I did it myself! Well, myself with a lot of help, but still. There they are in all their glory: 110 year old original fir floors. Now just to finish the rest of that kitchen…

Have you ever SAVED floors before? Or liquified tar mastic? Or done a project everyone you knew told you not to do? How’d you get through it? Tell me in the comments below!

Wow! Such an improvement. I wish I could rip up my kitchen flooring to reveal old hardwood…
You totally could… if you didn’t mind giving up that security deposit!
OK, although I am not a white male. I was looking for a quick fix and might not have been as supportive of your plan but I did do a lot of scraping and tar work. 😂you can tell me I told you so ! Your vision ( and stubborn side) prevailed for great floor. Thanks Eric for being in the right corner.
You did a lot of hard work and were very supportive, Mom!
You forgot to mention the peeing in the backyard without a fence.
I’m still trying to forget about that part of cutting off the bathroom from the rest of the house!!
Great job! I’m enjoying following your progress and enjoy your writing style. Keep it up darlin’!
Awww thank you!!
This was amazingly useful as well as entertaining to read. We are at the same point you were after removing layers of vinyl and other floor covering in our 1940s beach house kitchen. There’s black tarry stuff and lots of sharp nail ends sticking up (I think the heads got ripped off, so walking across the floor now is a dangerous exercise). We were told by our project manager that we should just forget about saving the floor. The rest of the house has all pine flooring and we had been excited at the prospect of continuing that in the kitchen. We knew there was good wood under all the tile and lino because we removed the cabinets and could see the base floor along the edges. I lamented having to figure out what to put on top of the floor, which does have one large patch kind of right in the middle. But after searching for solutions and finding your post, maybe we can save it. I read the two kitchen floor posts this morning and shared them with my husband. We are in our 70s and I don’t know if we have the stamina that you’ve got, so it’ll be up to our floor restoring crew to tell us if they can do this. Oh, and my daughter’s name is Bronwen. 🙂