Hello everyone! Hope everyone has had a wonderful first couple weeks of January! I can’t believe how fast the month has been going. Please excuse my radio silence; I’ve been trying to re-find my footing post-holidays! It’s been a crazy few weeks. Crazy good for the most part. But now — on to the good stuff.
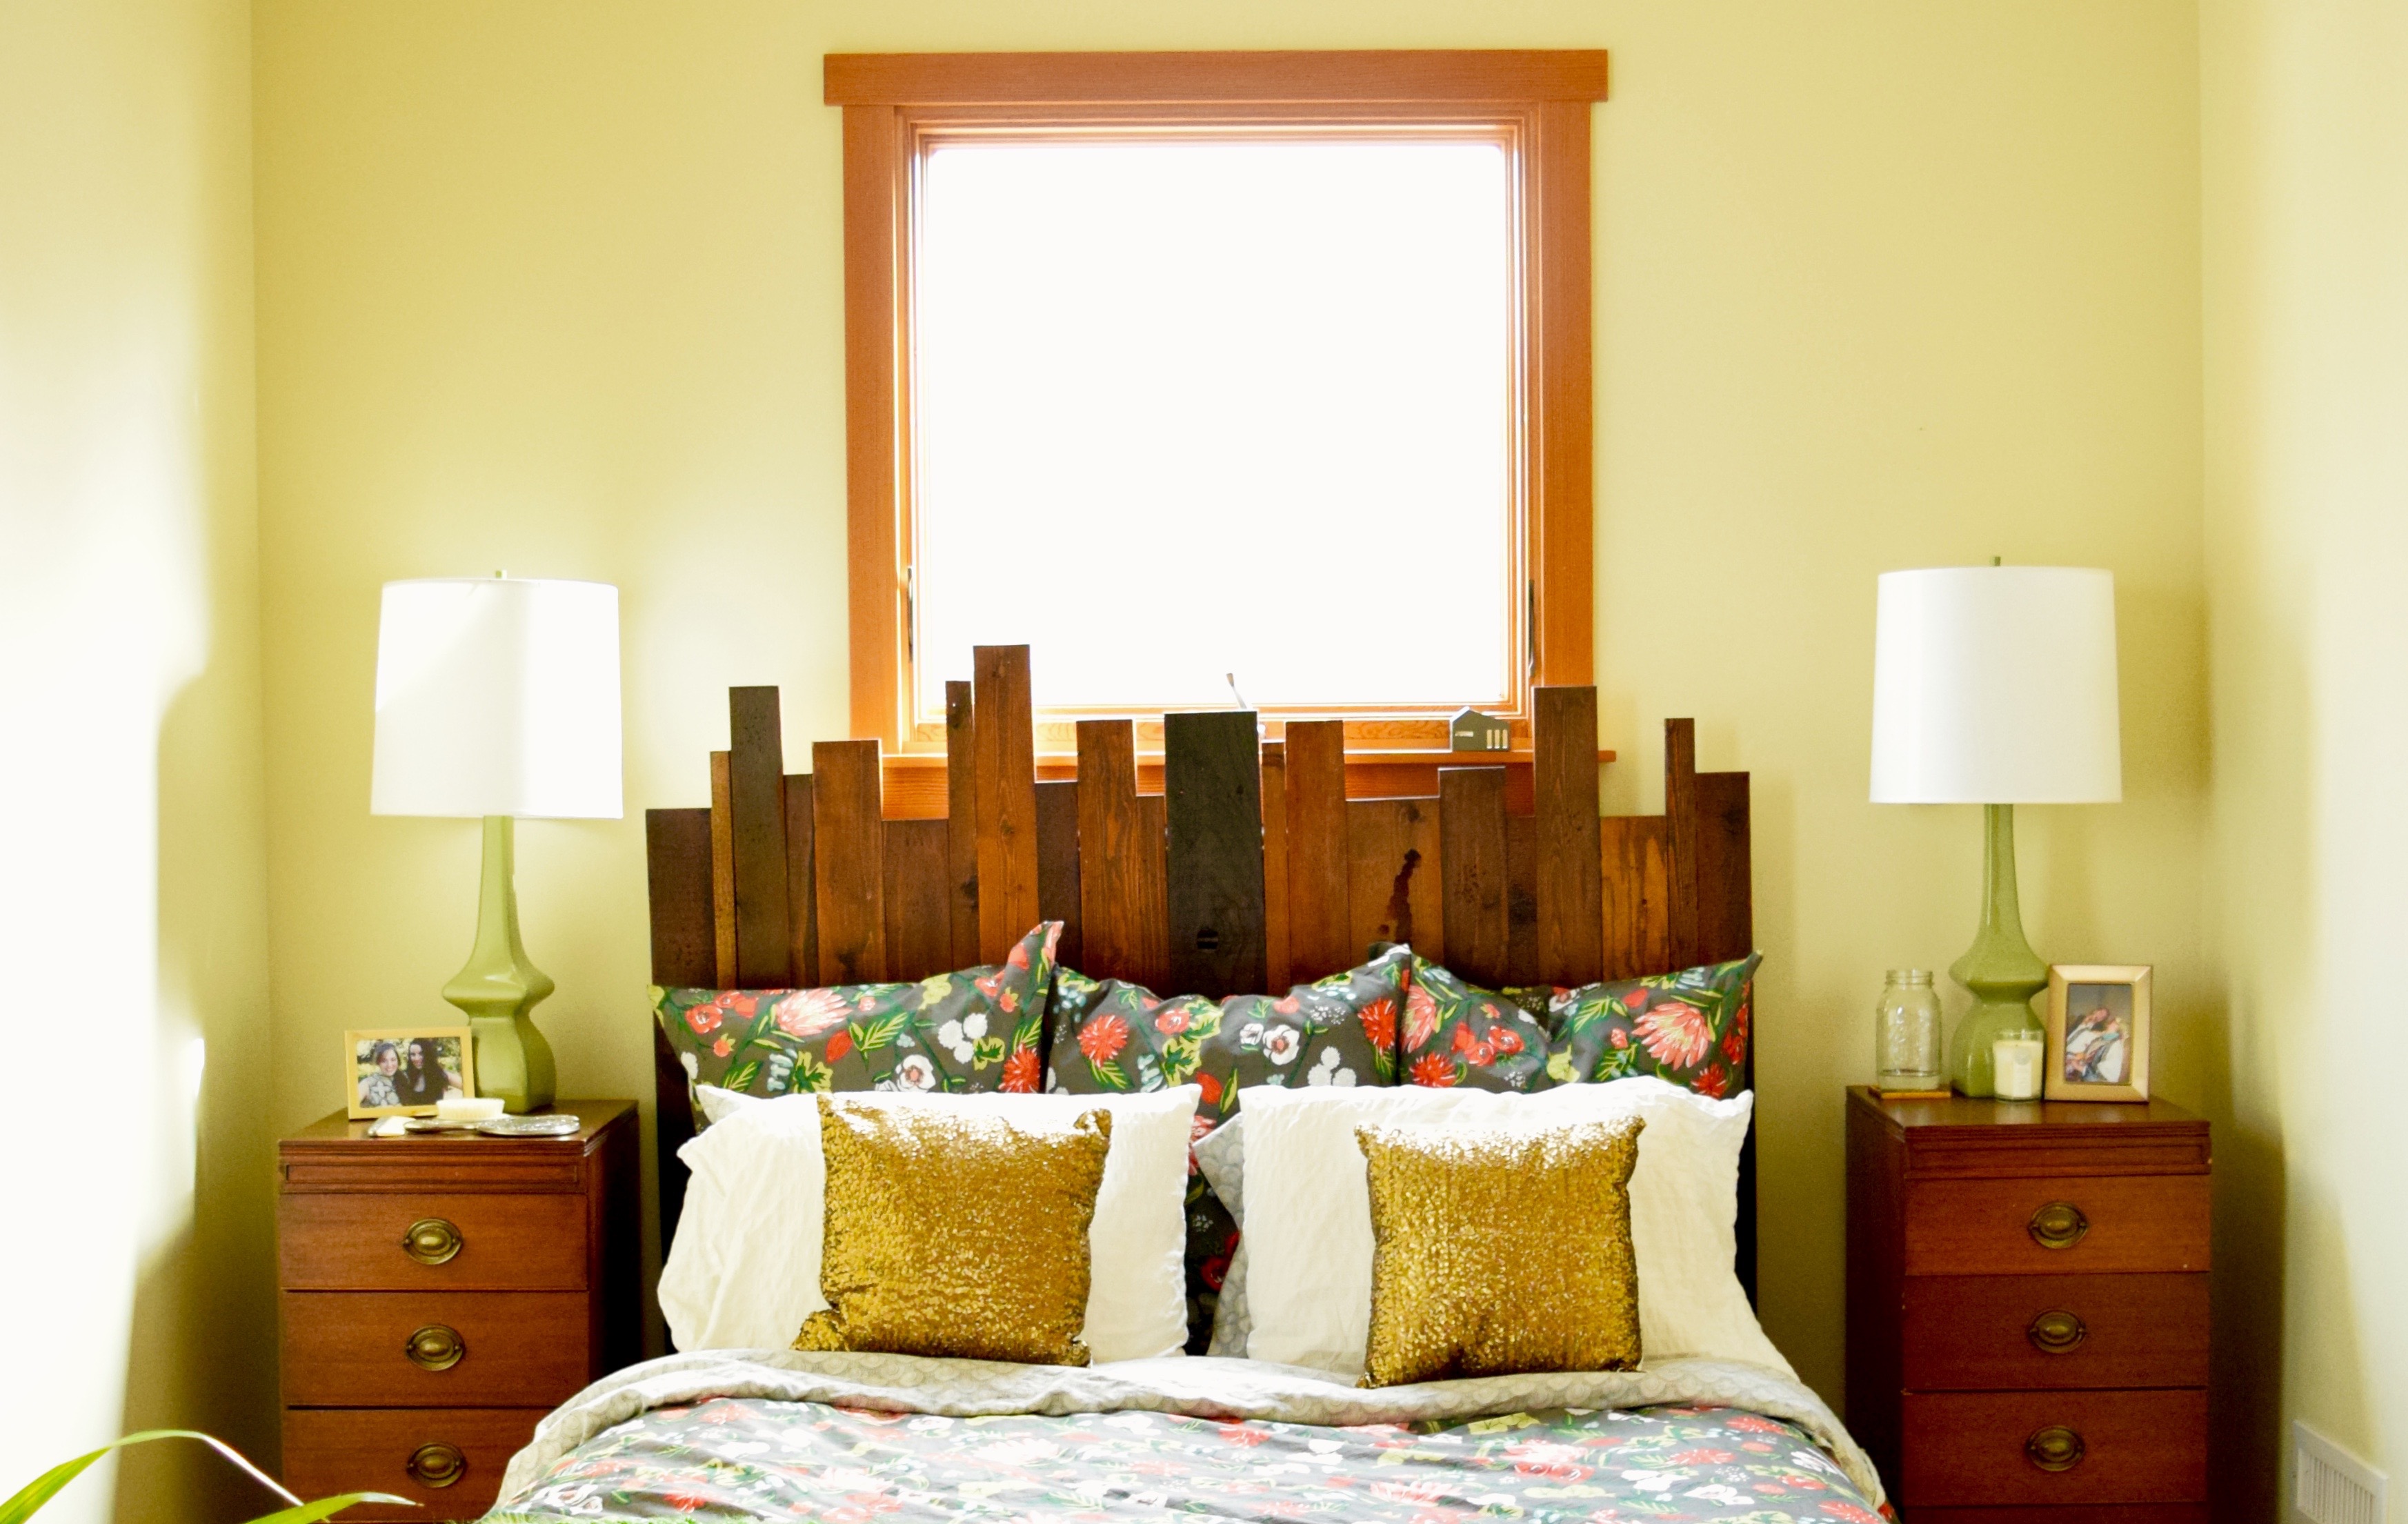
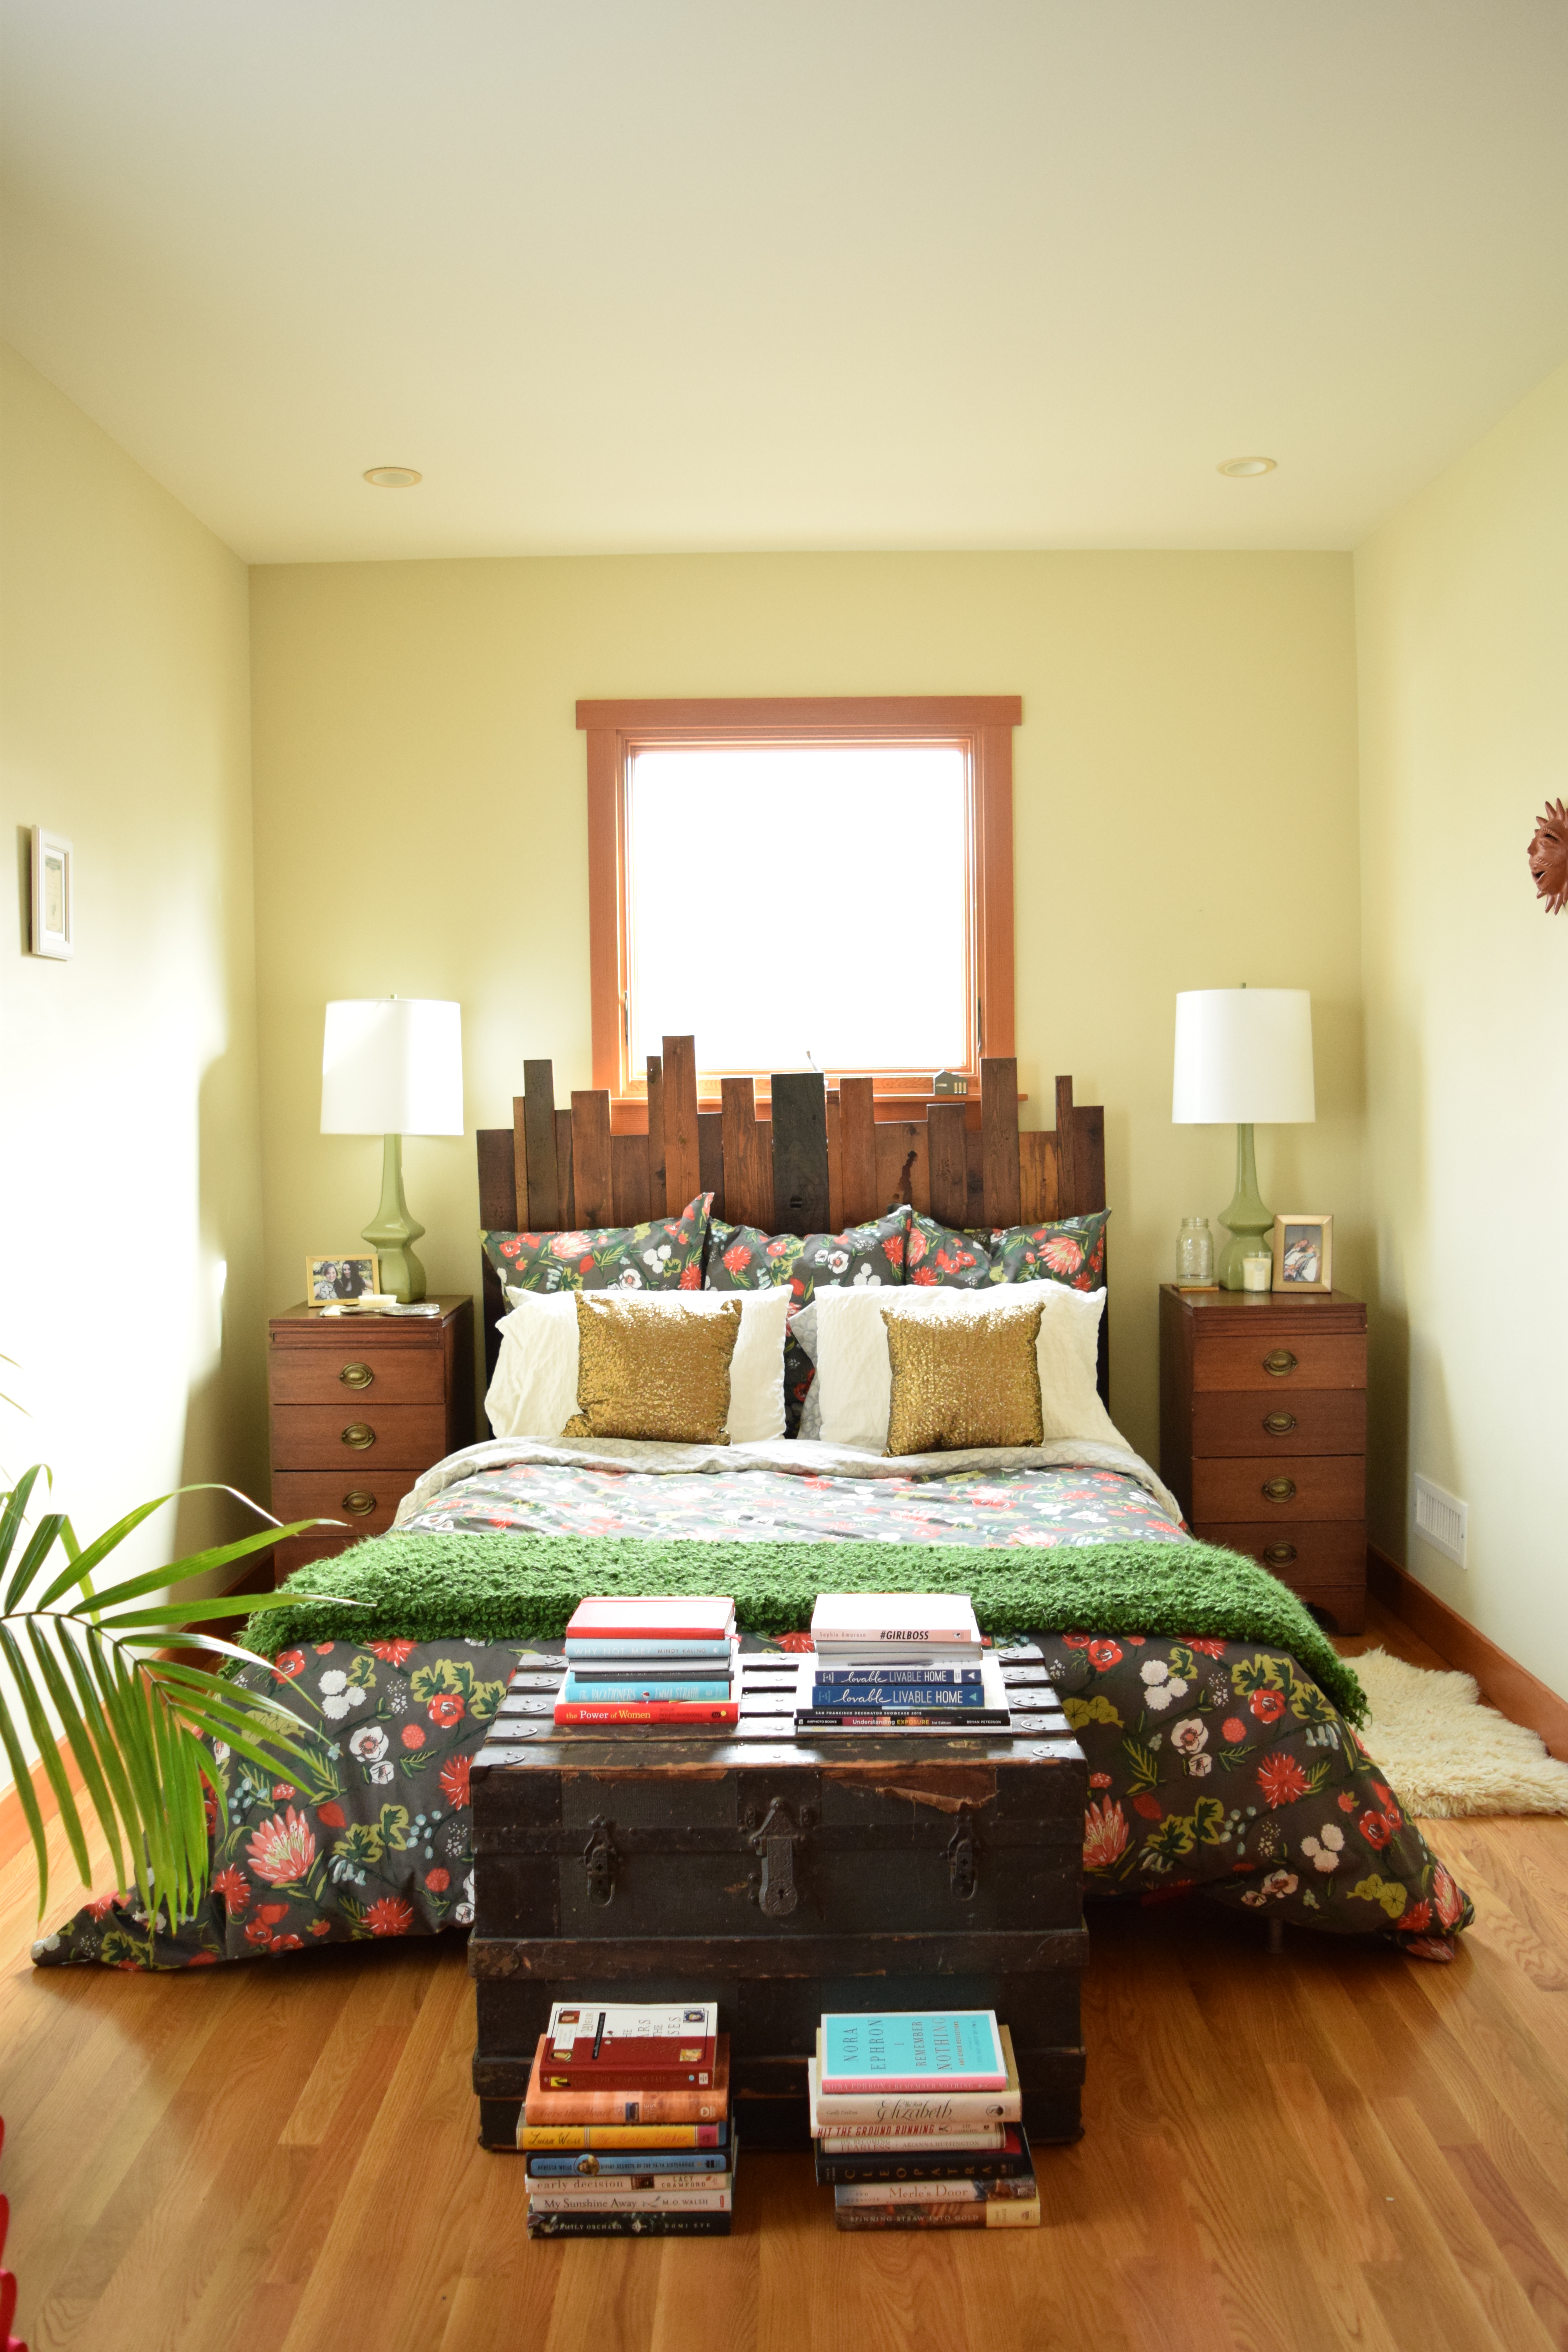
Because my bedroom is on the first floor of the house, people always place their coats and bags in there when we have a party or people over for dinner. I don’t mind at all – in fact, my inner show-off likes to have people parading through that room. Plus it means I really truly have to clean up in there on the reg. Which, for me, is a much needed incentive as I tend to let things (clothes) pile up. By far, what people comment on the most after going into my room is my headboard.
I built my headboard while I was home for the summer during college. I used entirely scrap wood my dad had piled up (maybe this piling is genetic?) in the garage. It was a great way to get rid of some of the left over wood in a fun and useful way. Plus, some of the scrap wood was high quality walnut or cherry. The kind of wood you don’t want to just lie around forever! While I’d seen others use scrap wood to make headboards, most people seemed to be trimming it in, laying it horizontally, or cutting it into the outline of a more traditional headboard. I hadn’t seen anyone really let the mismatched wood take the point of focus. I wanted the scrappiness of the wood to take center stage. I wanted it to be obvious that the wood was collected and different.
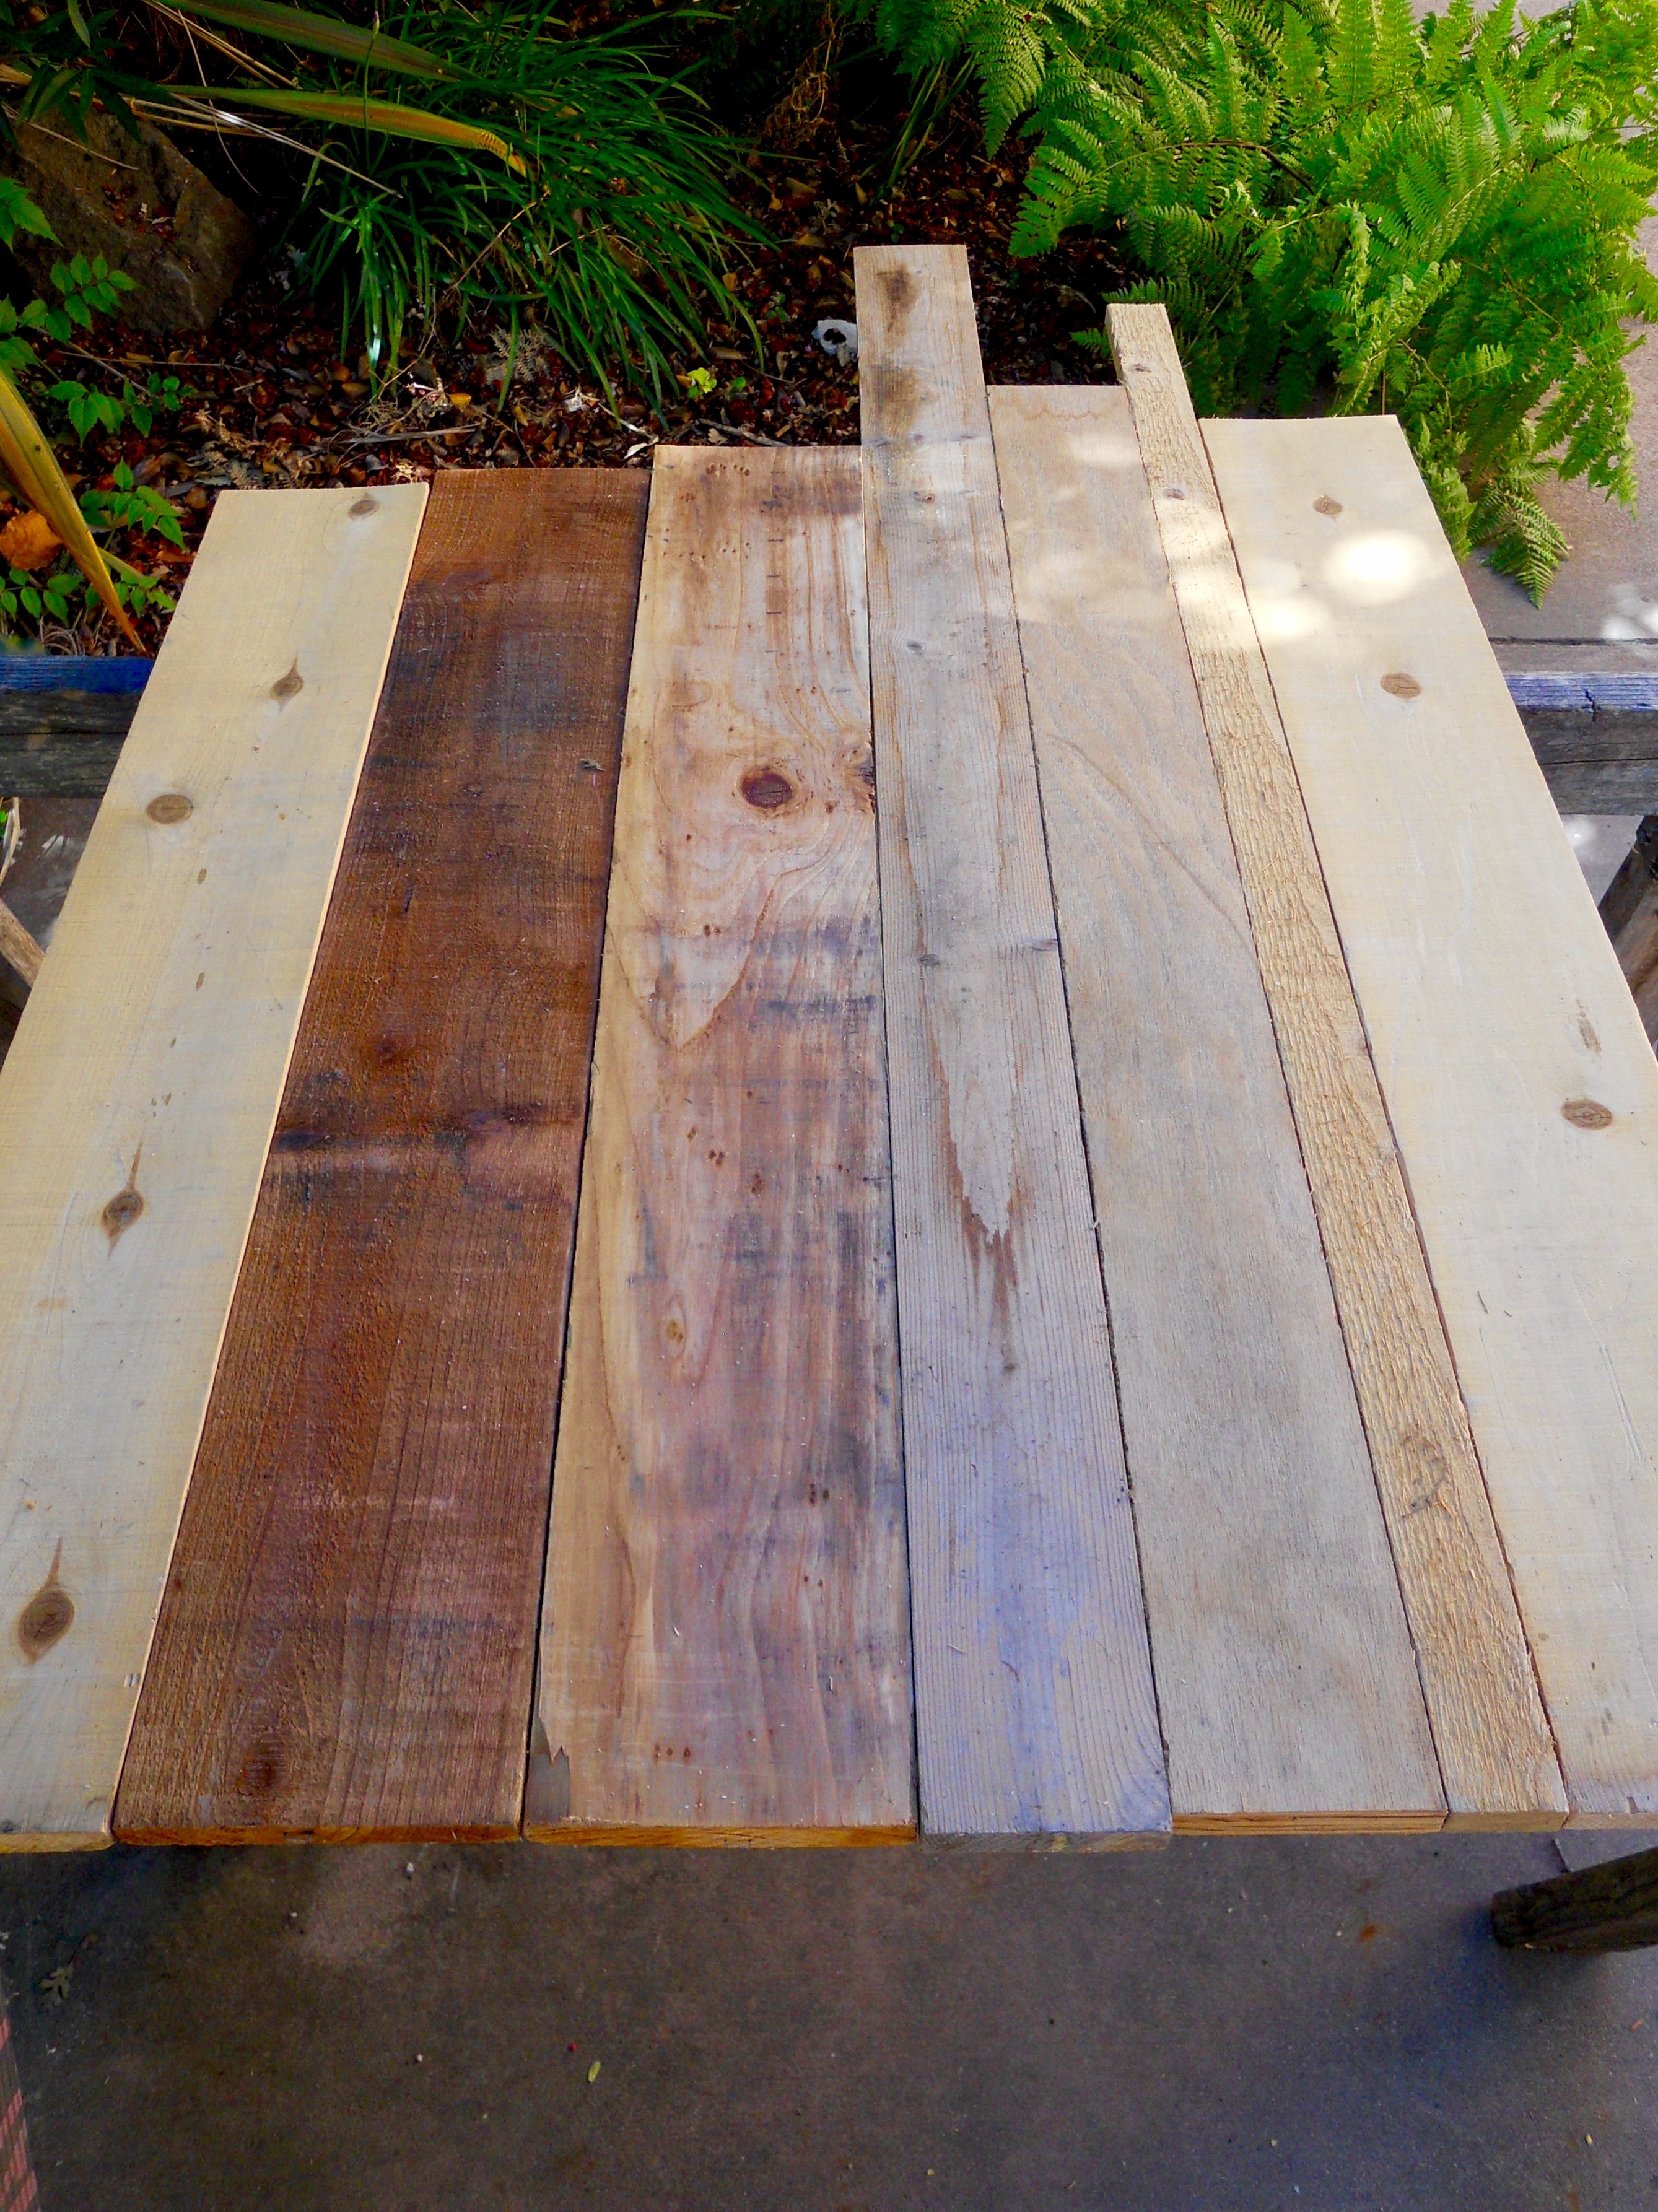
I started by going through the wood in my parents’ garage. I wanted pieces that not only differed from each other, but were also different lengths and widths. Most of all, I wanted wood boards that had character, that looked like they’d live an entire life as something else. I found what I could, but when I first started grabbing, I realized many were looking quite similar. You can see here that several boards were about the same length and width. That wouldn’t do!
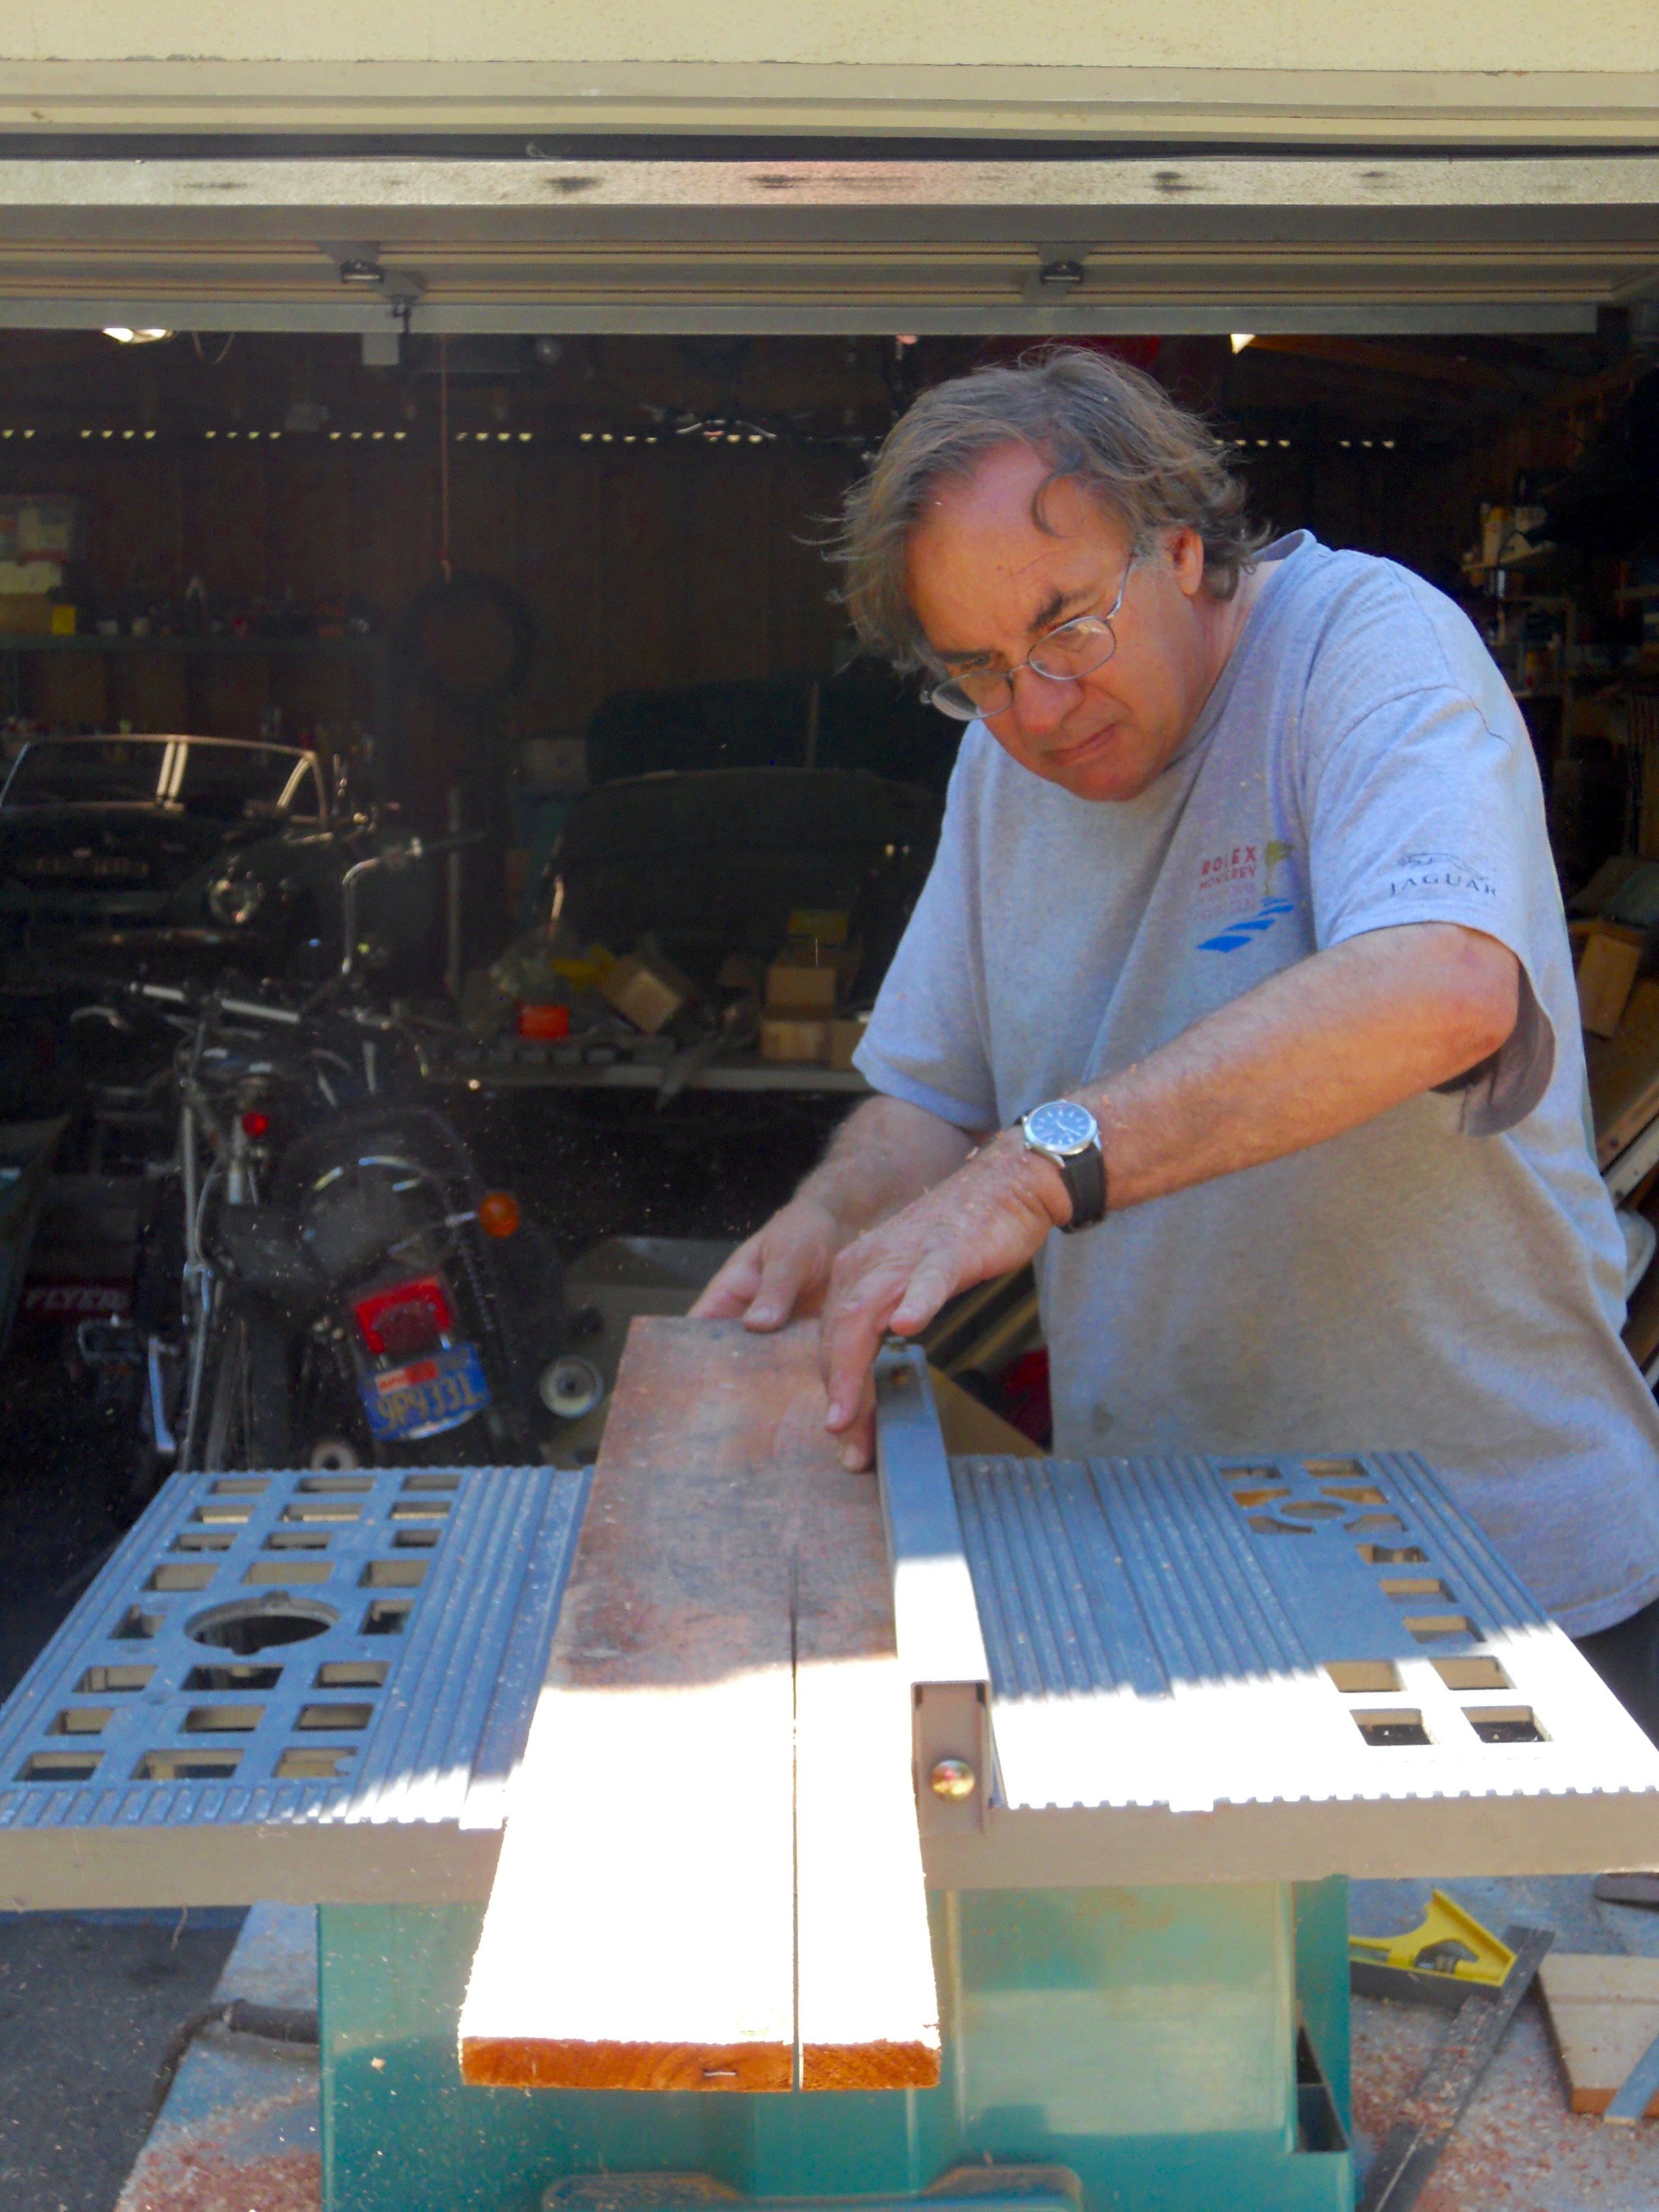
Once I’d laid out all the planks I needed for my new headboard, I marched several to be cut. Some I wanted shorter, some I wanted to rip two or three inches off to make two boards and break up some of the monotony. The whole dream for this was variation, differences, a story. To do this, I enlisted the help of a table saw… And my father. At the time, he felt I wasn’t to be trusted alone with a table saw. Silly man, I may be ridiculously clumsy, but I’ve never seriously injured myself! At the time though, I appreciated the help. I marked exactly where I wanted each board width ripped and handed those off to him, while I used a chop saw to alter some of the lengths. You can see here, how uneven I wanted these cuts. The boards were not being ripped right down the middle!
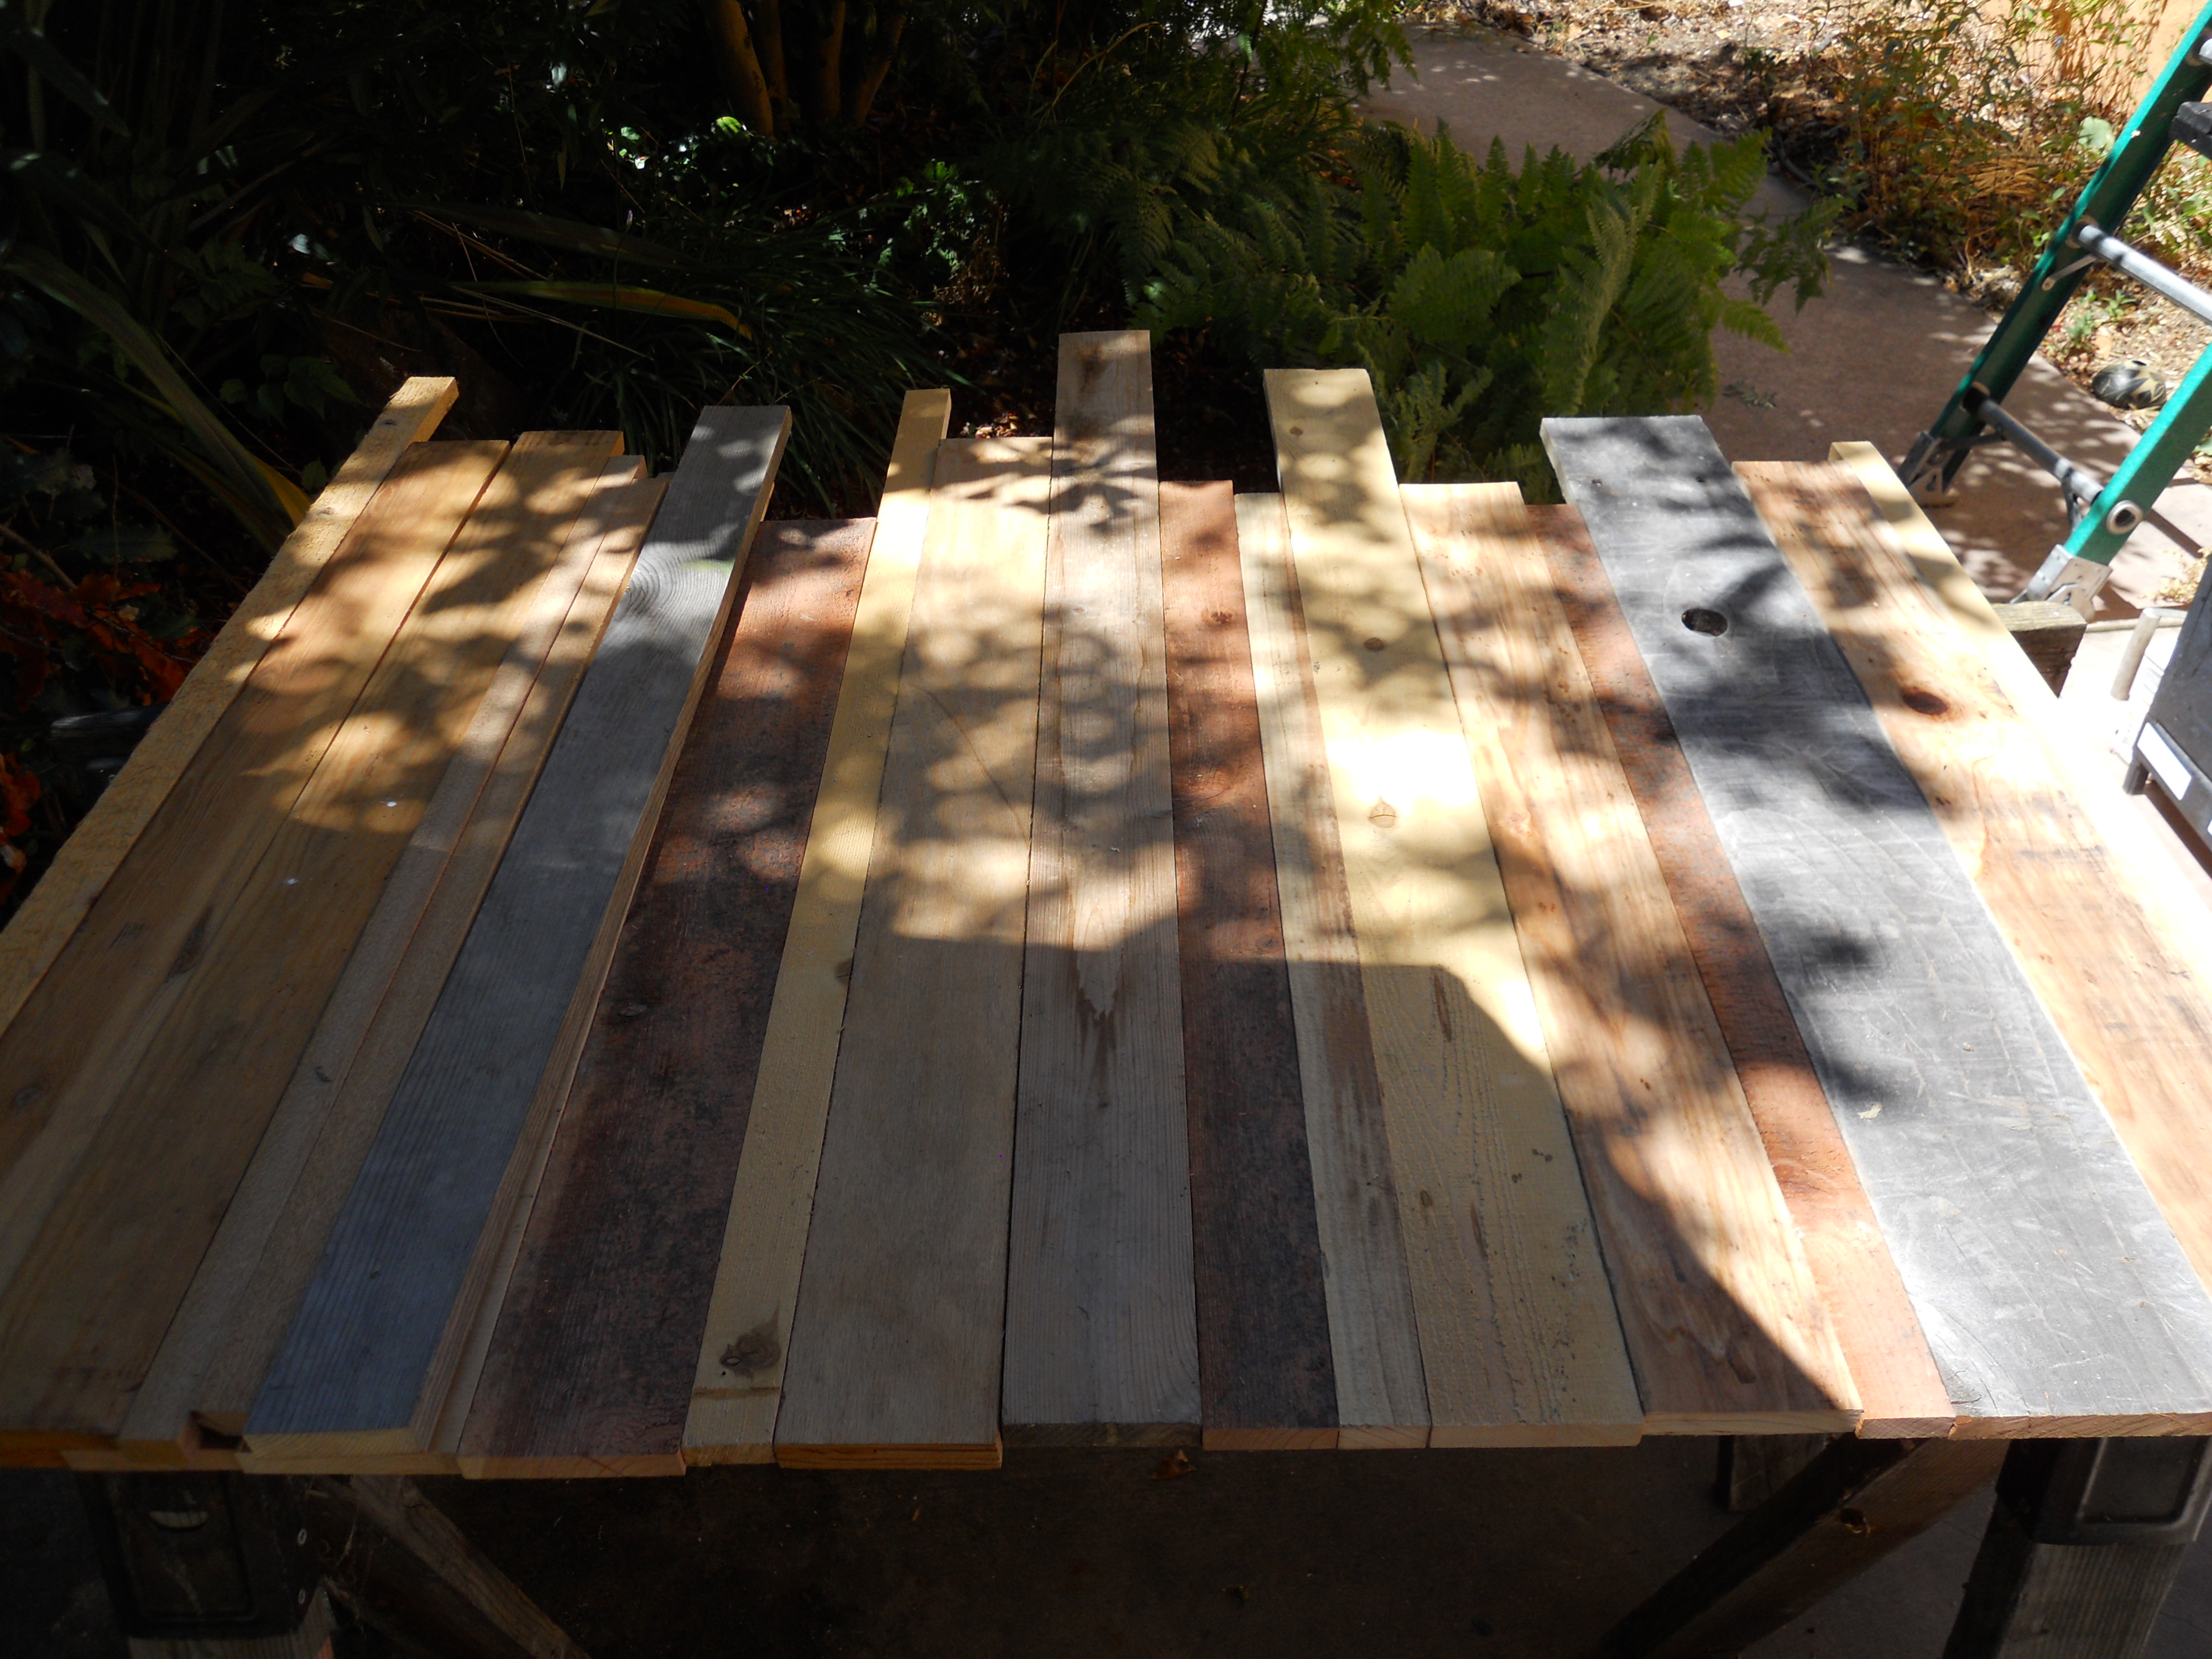
Once we’d made all our cuts, the boards showed so much more variation! It was exactly like I’d pictured, everything different, each plank it’s own story. My clear favorite was – and is to this day – the wide grey board with a knot hole missing from it. That was the kind of character I was hoping for! Now it was just time to figure out what order they would rest in. Again, I wanted contrast, short next to long, wide next to skinny. There needed to be some flow as well and I made sure to pay some attention to symmetry. I wanted to make sure the headboard wasn’t tall on one end and short on the other!
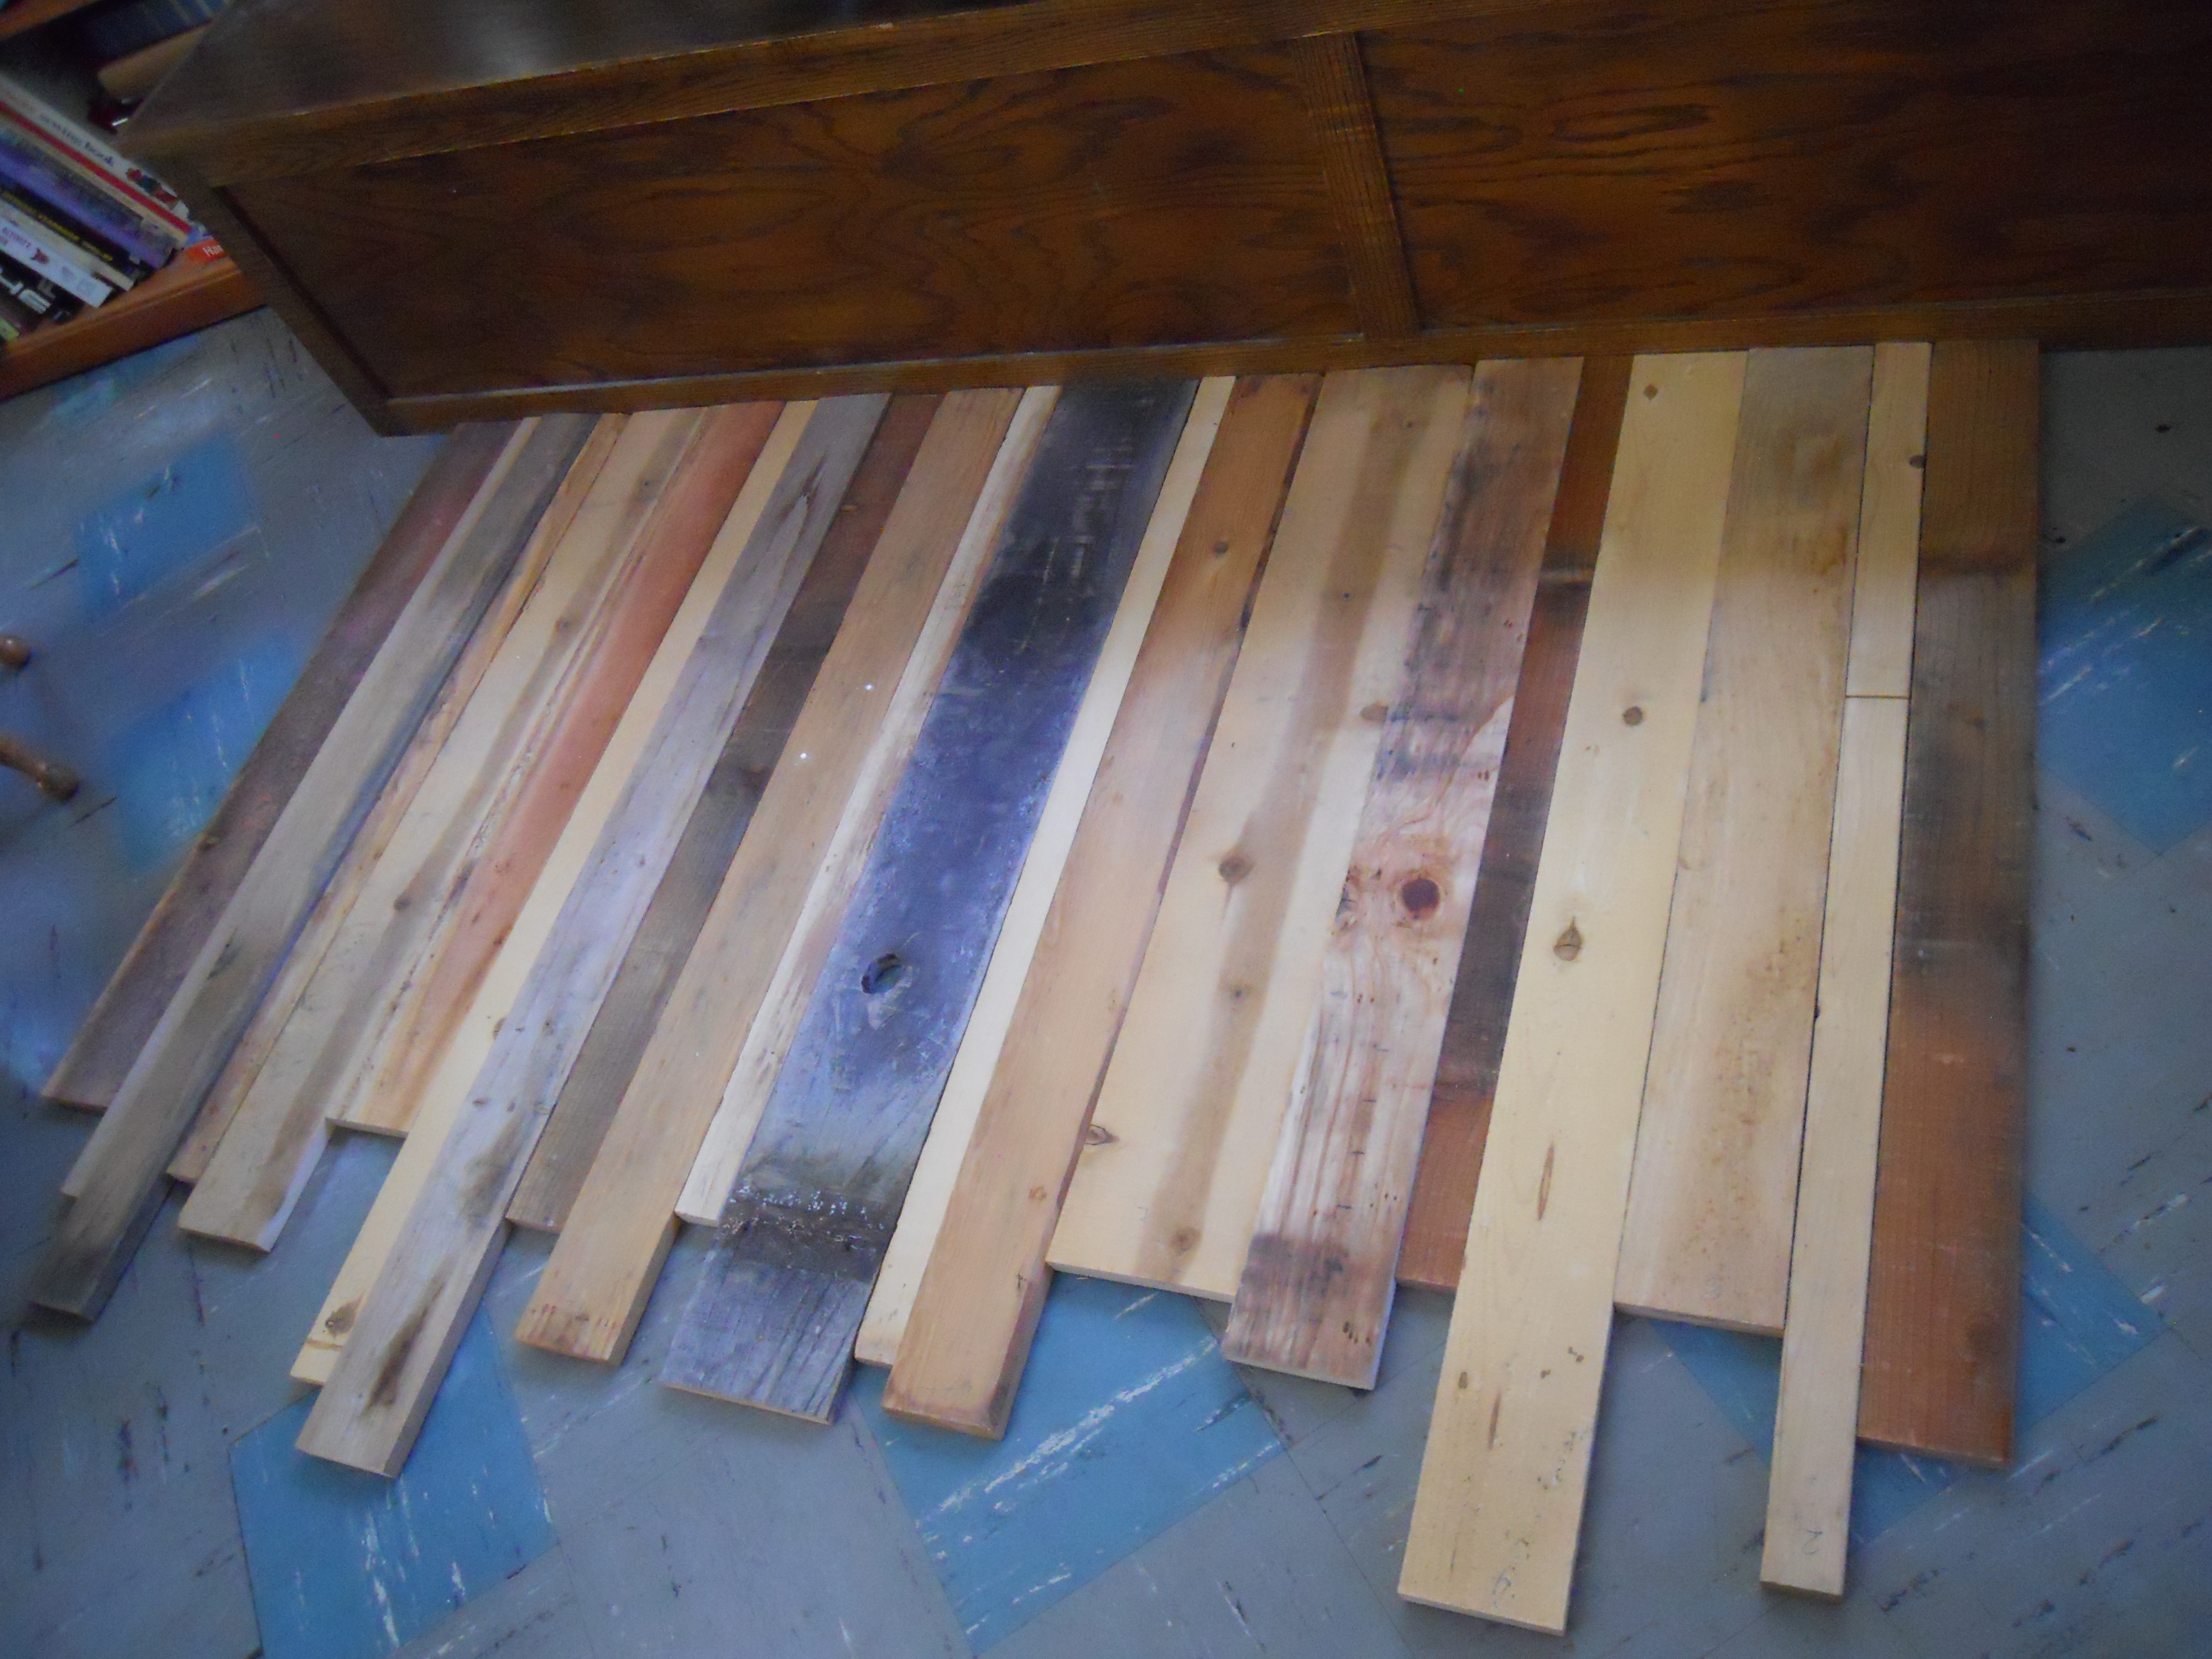
Once my boards were all cut and an order had been decided upon, I numbered them all with a pencil and brought them inside. I lined them all up against a straight object (a window seat in this case), and began the process of fastening them all together. There are a variety of ways I could have done this, but the whole idea at the start of the project was to use only things left over from other projects. So I grabbed a two by four and cut it’s length to match the width of my headboard. I did this twice so I ended up with two matching two by fours.
I wish I had more pictures, but I worked on this project so long ago, I didn’t take them with a blog in mind! These pictures were all taken with an old point and shoot camera too, so excuse the graininess! You’ll have to imagine this next part. I laid both of my two by fours horizontally, perpendicular to the planks of scrap wood. One board I placed close to the top and one closer to the bottom. Then I took a bunch of left over drywall screws, got out a drill, and drilled a screw through the two by fours and into the scrap wood over and over and over until each piece of scrap wood was held on by two screws. Once the whole thing was held together, I took my new (and heavy!) headboard back outside onto the sawhorses.
I wanted there to be variation and character in the planks, but this was, first and foremost, a headboard. Which meant it needed to be smooth, without splinters to catch on linens, hair, or my skin! I got out an electric sander and went to town! I evened out the wood board transitions and made sure nothing was left to catch on anything. After I finished this, I missed some of the natural scratches and lines on the boards though. What to do? How to fix this?
If you ever want to beat something up, this is the project for you, my friends. I took out a hammer and some nails and bolts and started going to town. I made little divots by laying the bolts and nails down on the boards and then hammering them. It was actually really fun! I’ve heard you can also use bicycle chains and pretty much anything else you have laying around to give wood some character.
Then, once my boards were nicely beaten up, it was time to stain! Still outside, I took out a can of dark mocha stain left over from another project (aka free!) and gave the entire thing two coats, waiting between coats as directed on the can. After I wiped down the second coat of stain I went back and dripped additional stain on a few places on the headboard. I was hoping to add a bit more personality to the wood in this way as well. The spots of extra stain became much darker and some combined to create organic shapes.
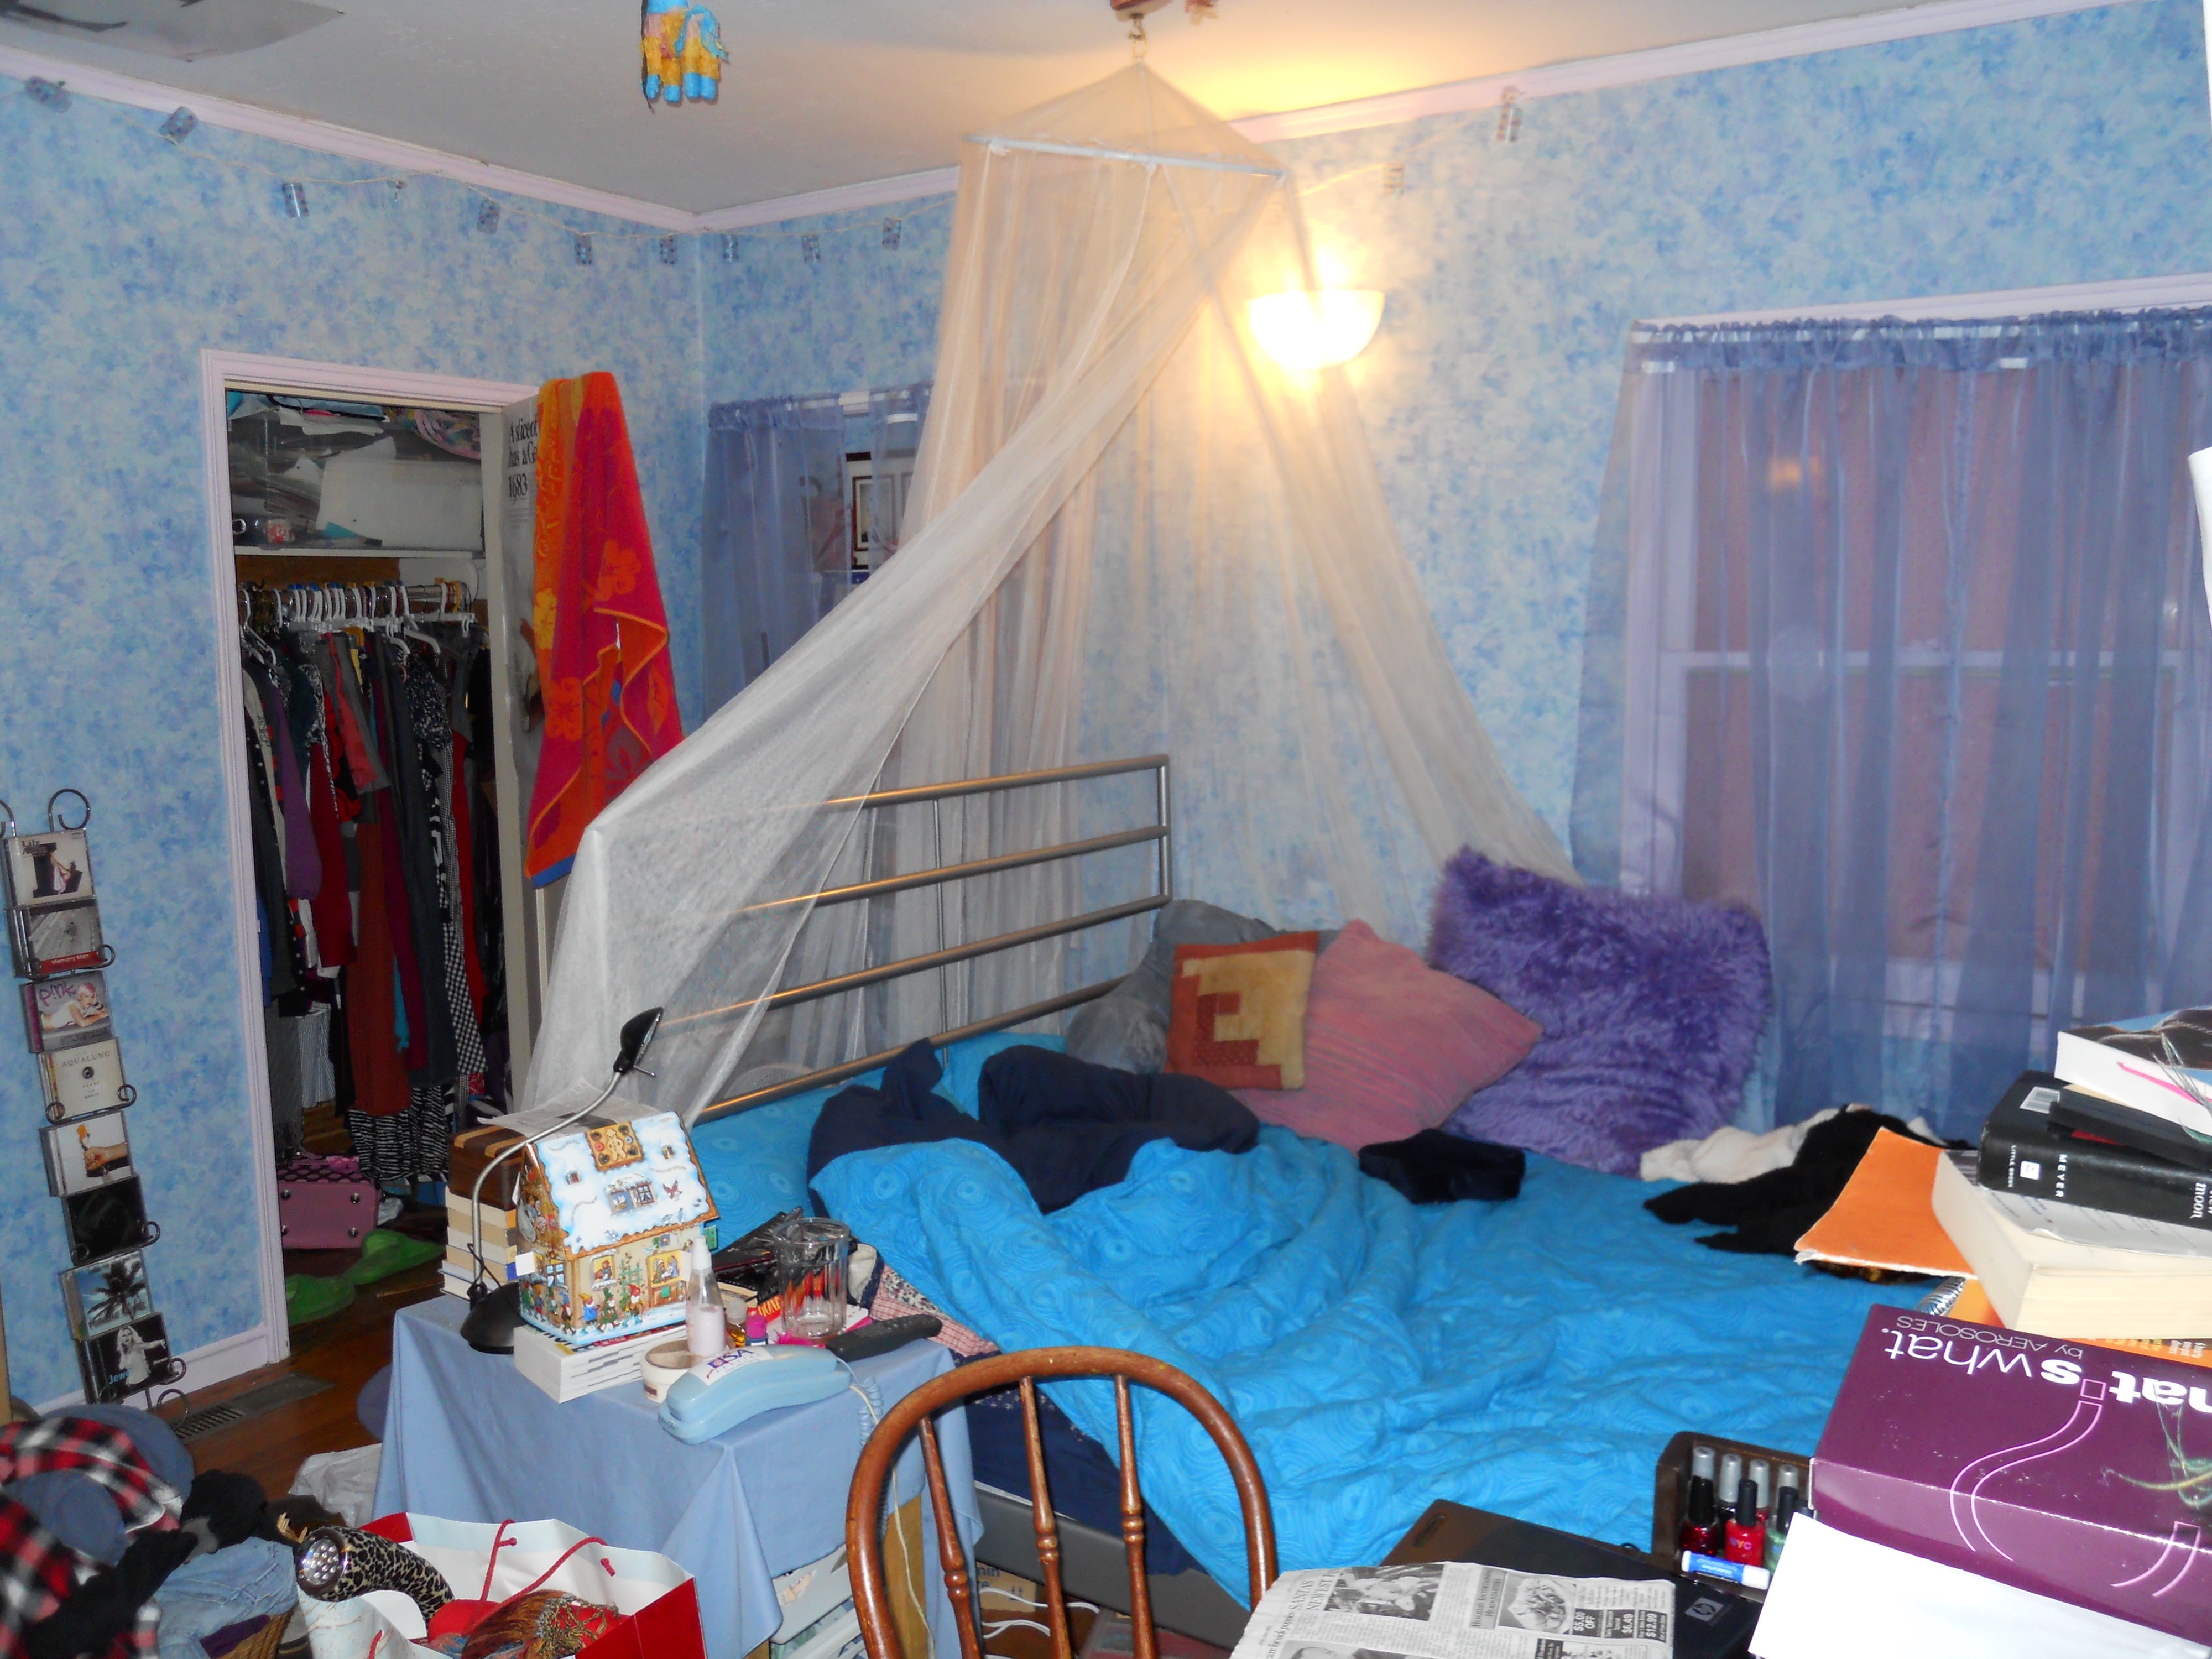
After the stain had dried, cured, and off-gassed outside for several days, I brought inside and leaned it up against my bed. My bed was a birthday gift when I was twelve. At the time, I was completely enamored, but several years later, I was over the cold, silver metal and modern look. It had come from IKEA and had held up well, but just wasn’t my style anymore. I tried to find a picture of it and I did manage to – the picture is just old and showcases my crazy high school bedroom in all it’s holiday finest! Bet you never thought you see something this exciting! Look at that plate holder turned CD rack, the headboard in the center of the room, the extreme mess… so glad I’ve grown up! Haha!
Anyways, the metal headboard? Out! The bed itself? Totally reuseable. In fact, I placed my new scrap wood headboard directly in front of the old metal one and held it in place with eye hooks and twist ties! Now, you can hardly tell the old metal bed lives underneath that gorgeous scrap wood headboard! Plus, my new West Elm bedspread hides all those metal bed legs. Bam! Whole new look! Cost? Absolutely free. Pretty good deal if you ask me!
Have you made a headboard before? Or repurposed scrap wood to make something new and unexpected? It was a fun challenge to make something like this for absolutely nothing!