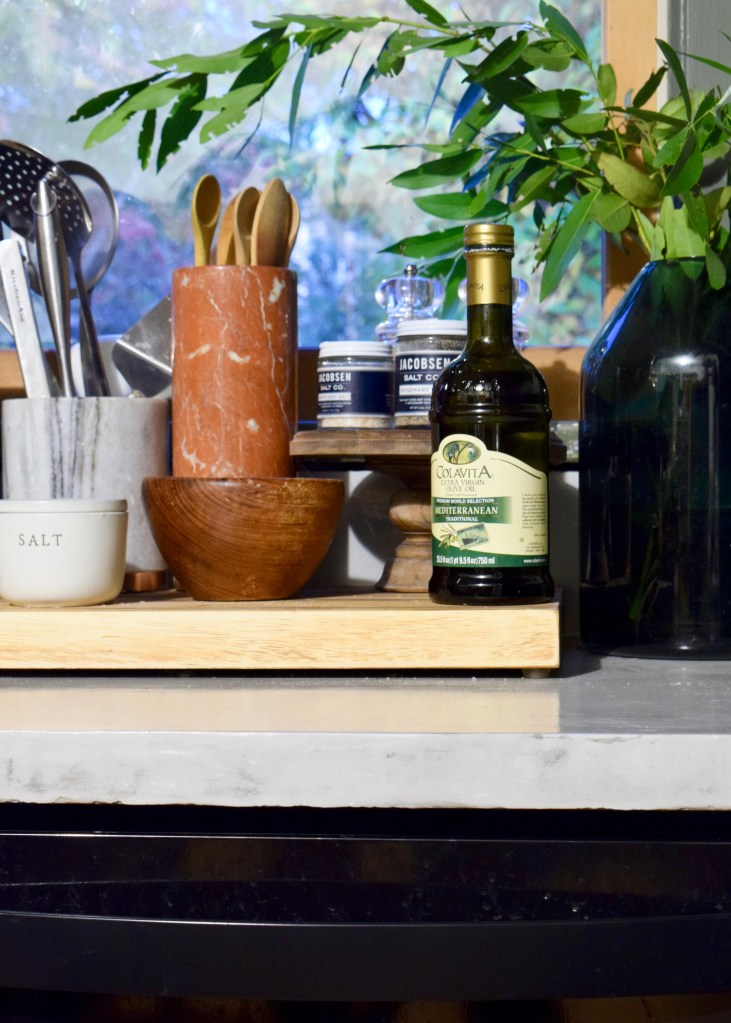
Oh boy, want to know what’s so much better looking than 45 year old yellow patterned laminate counters? Pretty much anything. Yup. Also, my new DIY skimcoated counters. Those are also pretty amazing. And today’s post is all about how I made some simple forms to skimcoat and create a more uniformed counter surface in my kitchen!
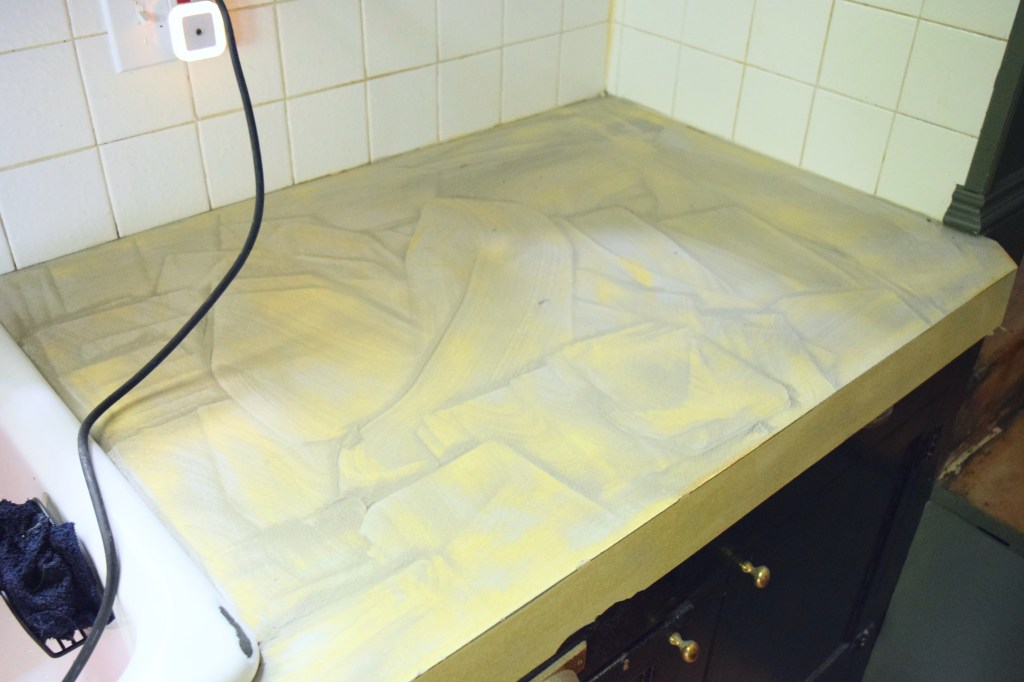
I knew I wanted to skim coat my kitchen counters with concrete since I first toured the house and saw this hot mess.
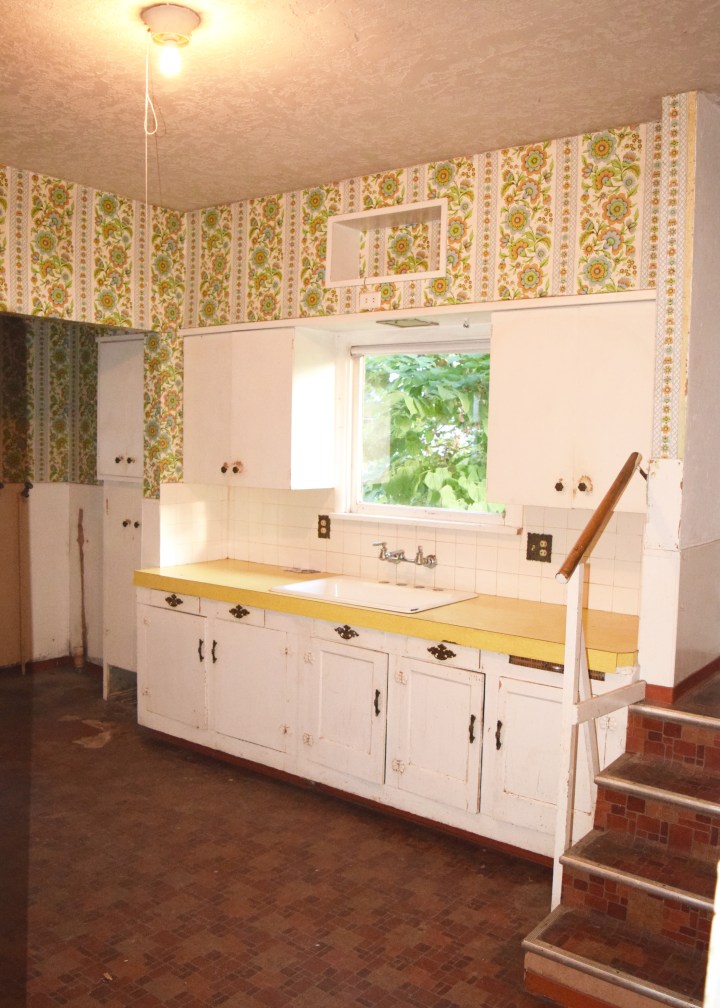
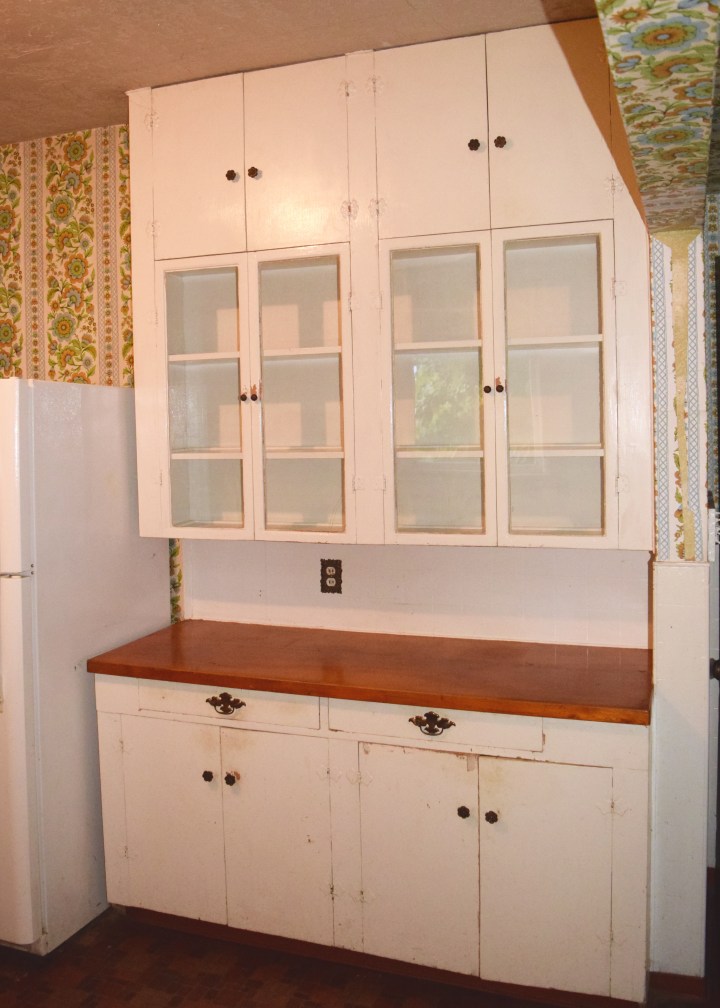
That yellow wasn’t doing anyone any favors. The other side of the kitchen was luckily much nicer and the counter was a wood veneer in a pretty walnut tone.
Over a year ago, unable to stand the yellow counters for another minute and right before I had a party, I painted the counters of the counter by the sink with the same light warm grey paint (Benjamin Moore’s Brushed Aluminum) as the walls. Shockingly it held up pretty well! But I had something better planned, so I took out my palm sander and got to taking off the paint and roughing up the laminate below.
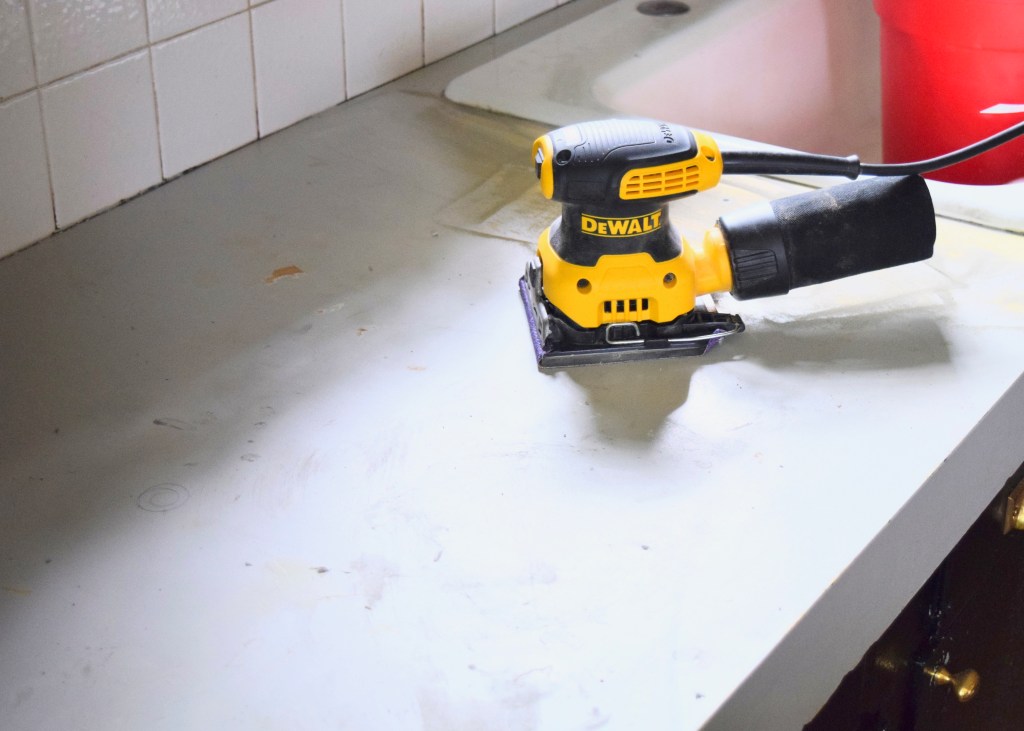
It was very, very dusty, but luckily it went really quickly! Sanding can be so tedious at times, but this was pretty gratifying.
Before I could begin the skimcoating process, however, I had to build some counters to skim by the stove! First I built a super simple frame for my dishwasher with 1″ plywood, butted it up to the existing hot water hook up, and screwed the frame into the wall. I hooked up the dishwasher and then I used the remainder of my plywood sheet to build a countertop.
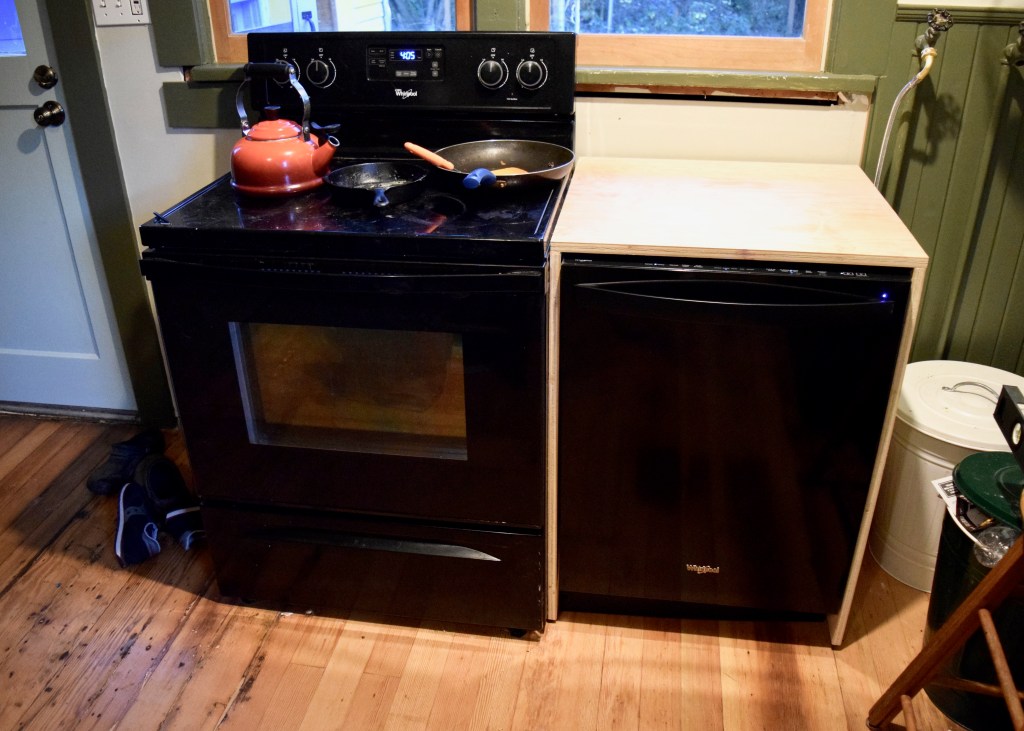
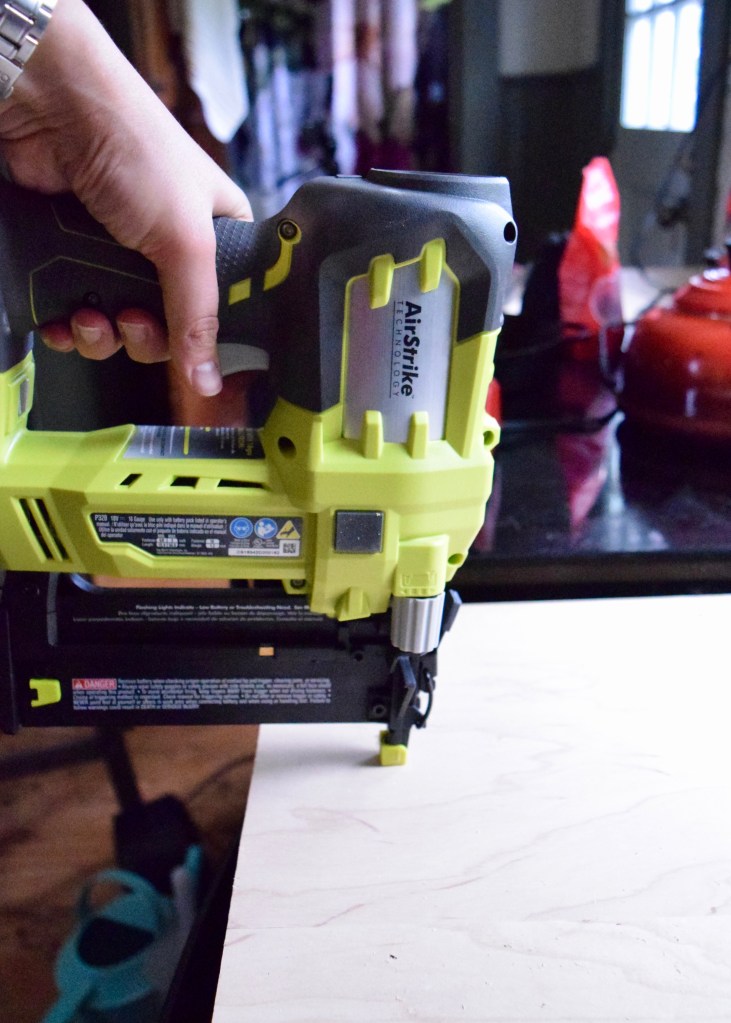
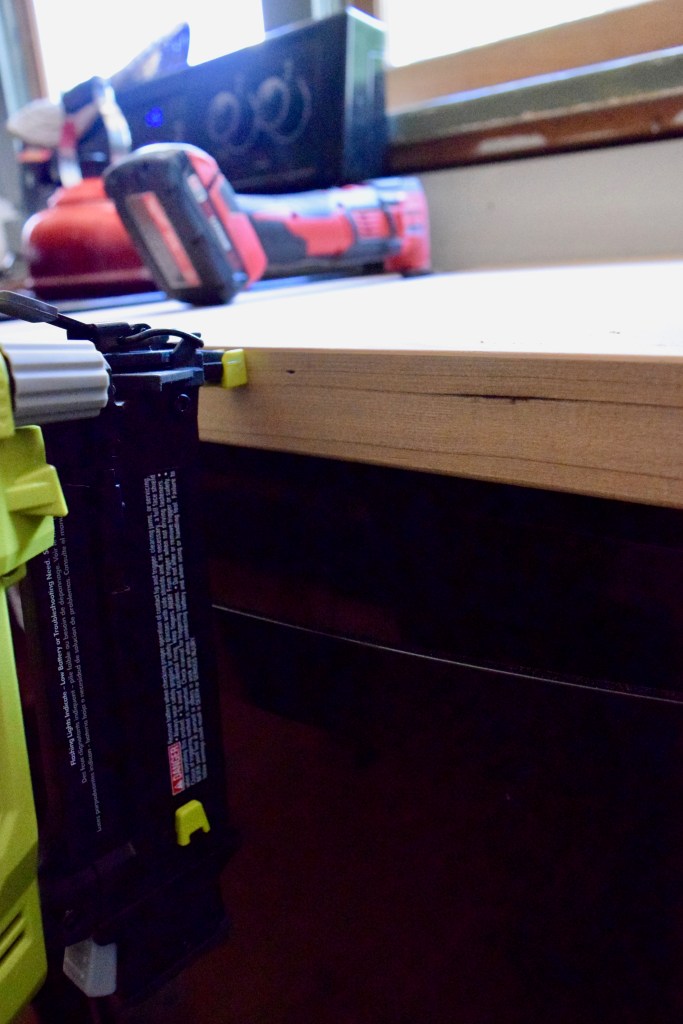
I cut a slightly larger and deeper piece of plywood, set it on top of the dishwasher surround, and nailed it into the top with my new nail gun. Side note: I love my nail gun. It’s electric, battery powered, and so much easier to use than the air compressor one I borrowed from my neighbor to do all the wood trim in this kitchen and this bathroom. I just wish I’d bought it before I did all that wainscotting! I got mine on sale, for about $150 with the battery and I’m never going back to the air compressor version!
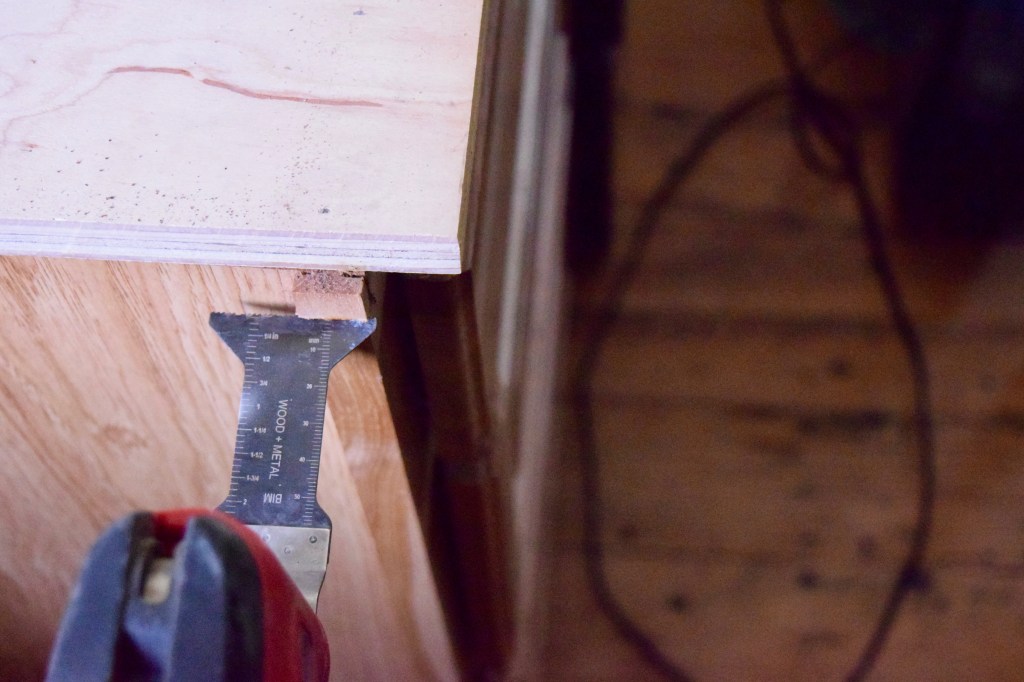
I had to cut a piece to fill the gap between the width of my plywood and the edge of my stove. But I was able to use my battery powered circular saw (another tool I use all the time) to cut a piece that fit perfectly. I nailed that in too.
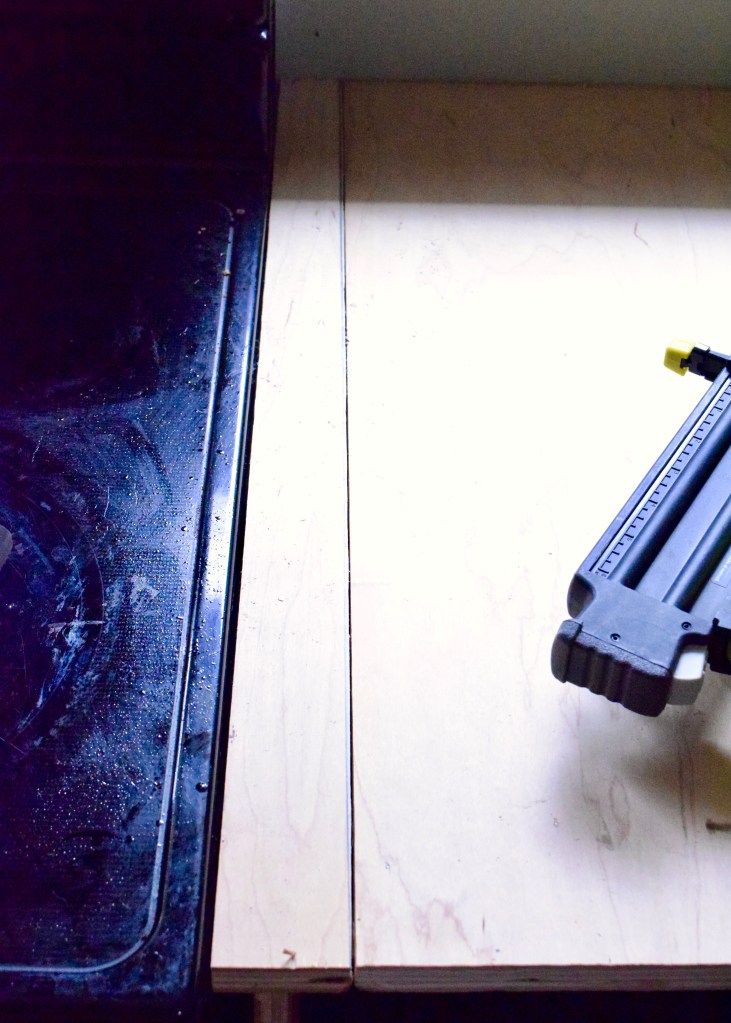
Then I cut 1×2″ boards to build up a chunkier edge profile around the counter. I didn’t miter the corner since it will be hidden underneath the concrete.
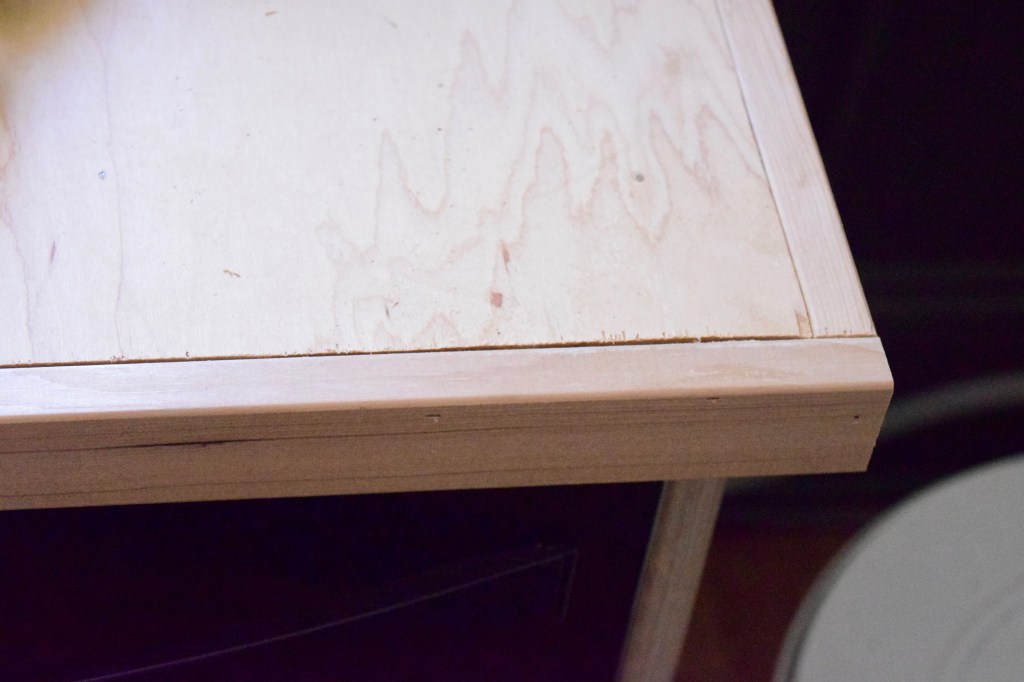
Again, I used the nail gun to secure the edge profile to the top of the plywood.
Then I went on the hunt for the perfect cabinet to land on the other side of the stove. I wanted drawers and for it to be as large of a cabinet as possible to span the 21″ between the stove and the door trim. Since there are already 3 different cabinet door styles in this kitchen, I wasn’t too worried about matching the drawer fronts to the existing. I went to the Portland Rebuilding Center and eventually found an 18″, 3 drawer cabinet that would work! It had one little trim piece that needed to be cut off. I borrowed my neighbors multi-tool and now I want one of these for Christmas! It did the job in less than 5 minutes.
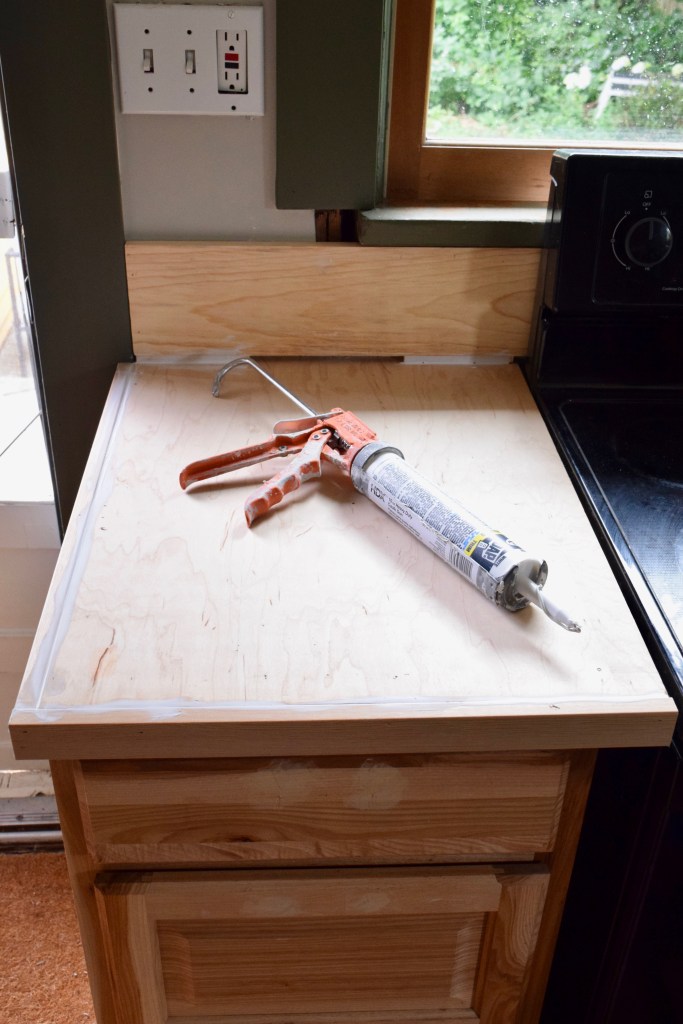
Once the trim piece was cut, I simply put a plywood counter on top of the cabinet and installed my 1×2 edge profile around that. Then, since I needed backsplashes for these counters, I added a 1×5 board to the wall and planned on skim coating that too. I then caulked all the seams, just in case!
I did the same thing on the other side of the stove on the dishwasher cabinet as well.
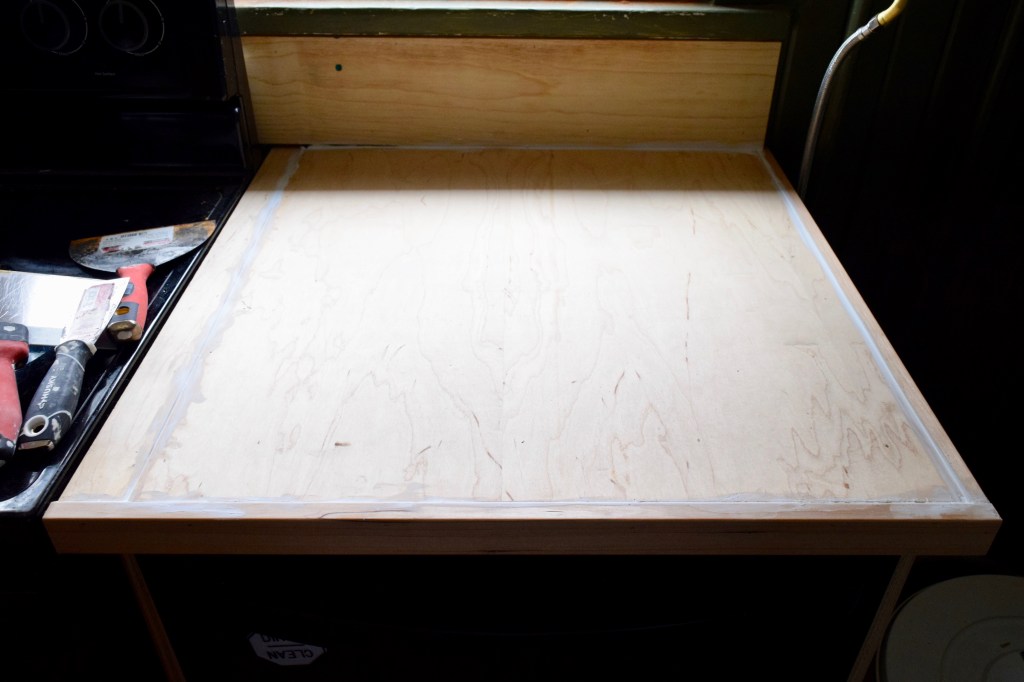
And then it was time for concrete! I picked up a 10 lb package of Ardex concrete and a package of titanium dioxide concrete additive (which would make my counters lighter than traditional concrete). Soon it was time to mix it up. I chose a random ratio of 1:8 white pigment to concrete powder for my first coat to see how it came out in color. It was pretty perfect, so I stuck with that. I mixed up what I thought was a small batch of concrete, adding water according to the package instructions, and quickly learned I’d mixed more than I could skimcoat promptly. I think my first batch was 8 cups concrete mix, 1 cup pigment, 2 cups water. I worked as fast as I could, since it sets in just 15 minutes!

I took a 6 inch knife and began applying my concrete mix directly to the wood tops. It went quickly and was a fun process. Slap down a bunch of concrete, draw it out around the counter in long movements with the blade of the knife at 30° and soon enough the counter was covered.
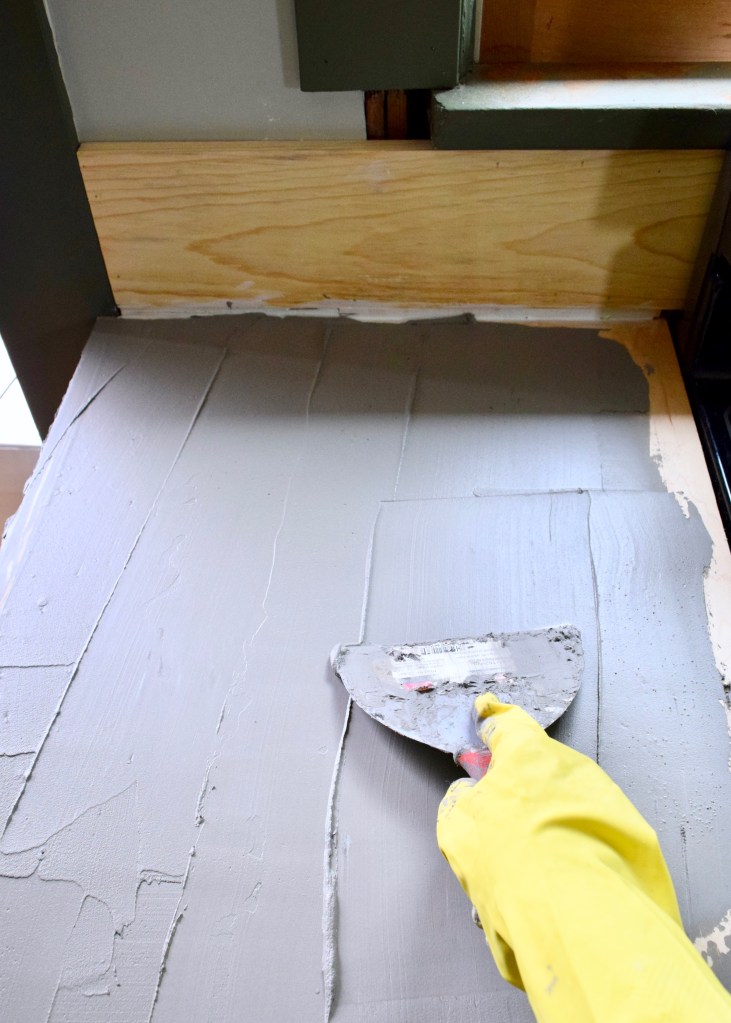
The verticals of the backsplash and edges of the counters were a little harder, but I used the concrete toward the end of the batch to do those areas, since the stiffer concrete dripped less. My first coat sill looked pretty rough though!
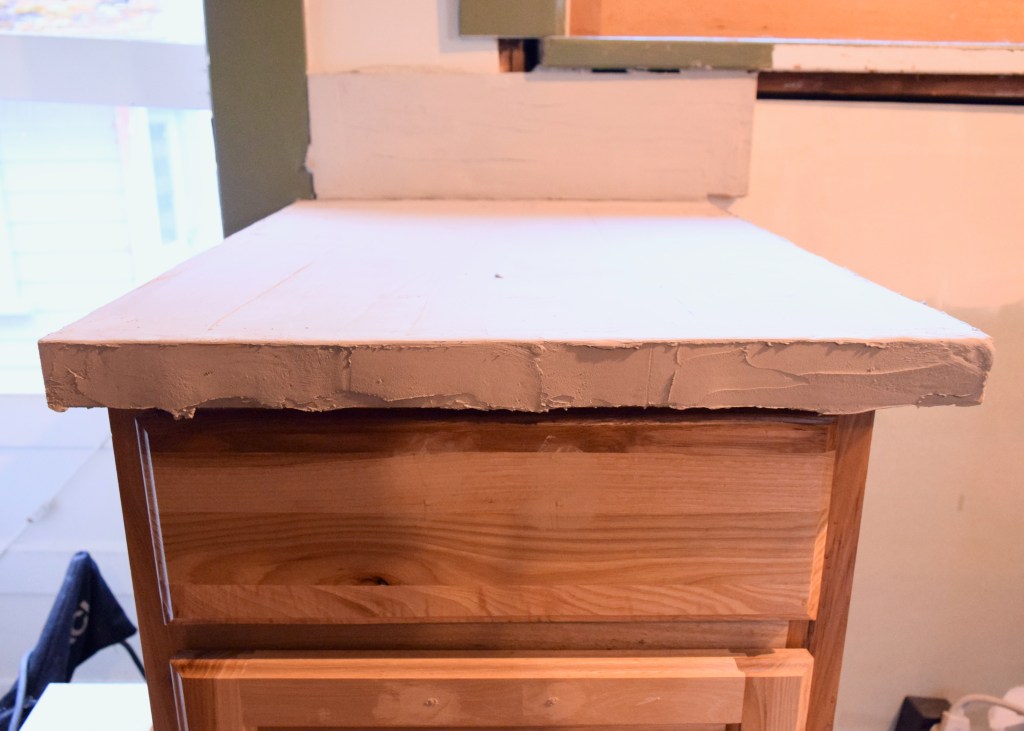
After everything was coated and dried overnight, I first used the same drywall knife to skim off all the hard raised edges and then sanded the counters with my handheld palm sander until they were pretty smooth. For the second coat, I worried I was using too much of my white pigment additive and so I decided to wait and use that on the third coat. I wish instead I’d skipped the additive on the first coat and used it on just the last two coats of concrete. Oh well, it worked out fine!
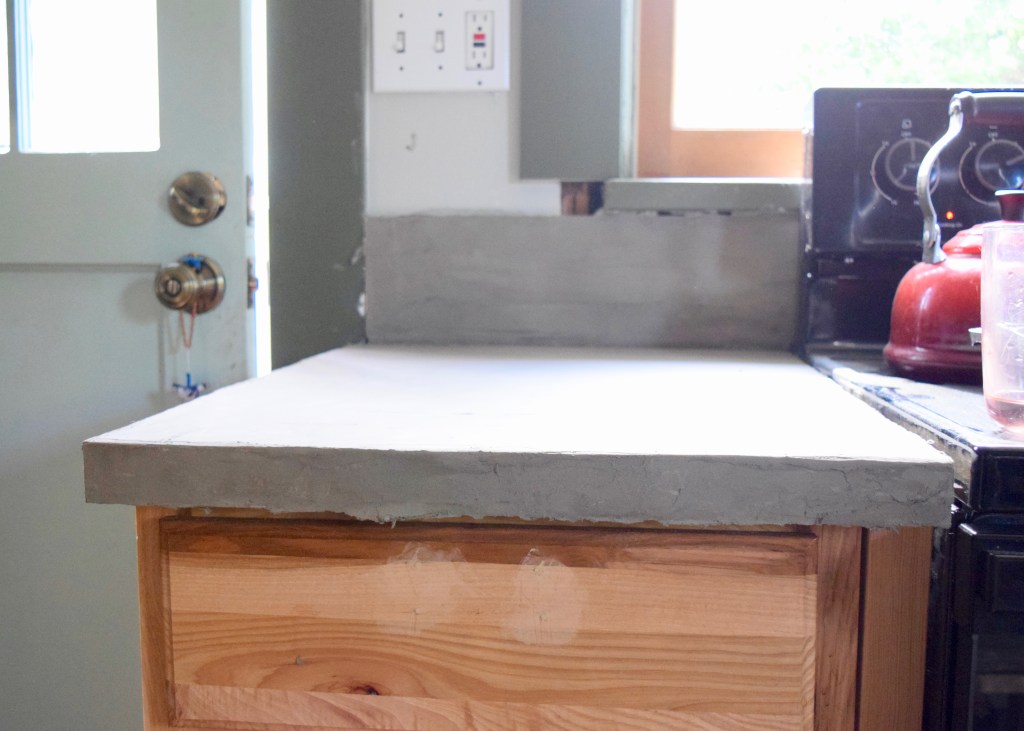
I’d gotten much better at building up a smoother coat on the vertical surfaces and this coat went so much faster than the first layer of concrete! I did the same process of scraping off the ridges and sanding the conrete smooth and then moved on to my final layer of concrete. Luckily, the third was quicker still. I added a little bit more water to my final coat and it helped to make the third concrete layer nice and smooth. It certainly wasn’t perfect though (which I expected) and needed a good final sanding. It looked like this before I attacked it with my palm sander.
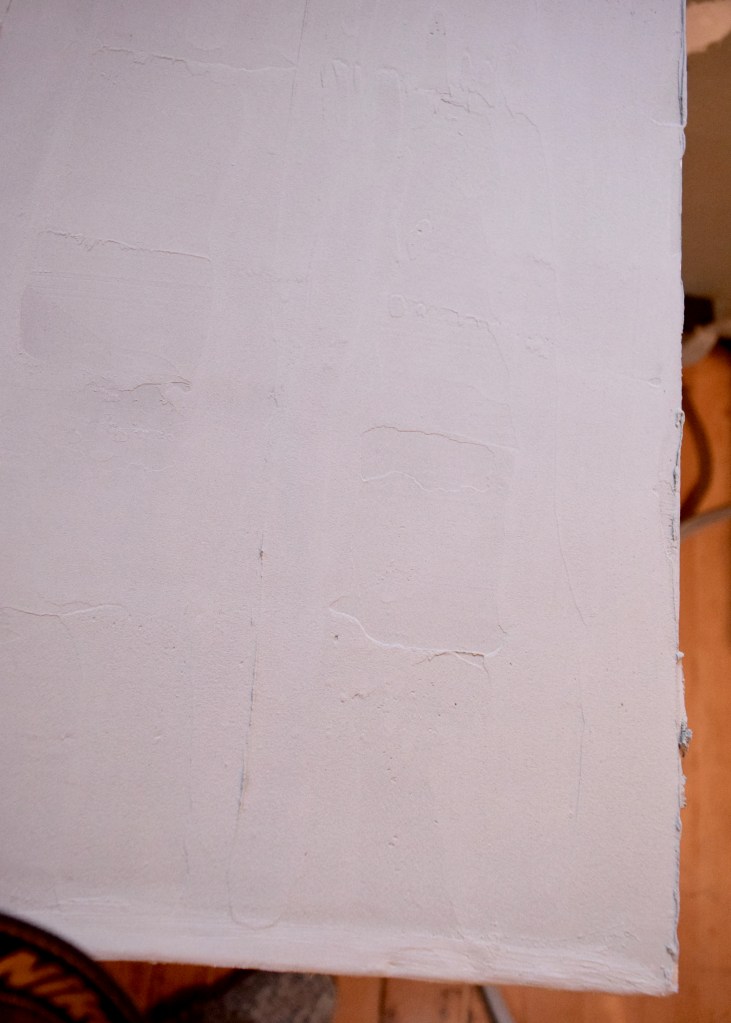
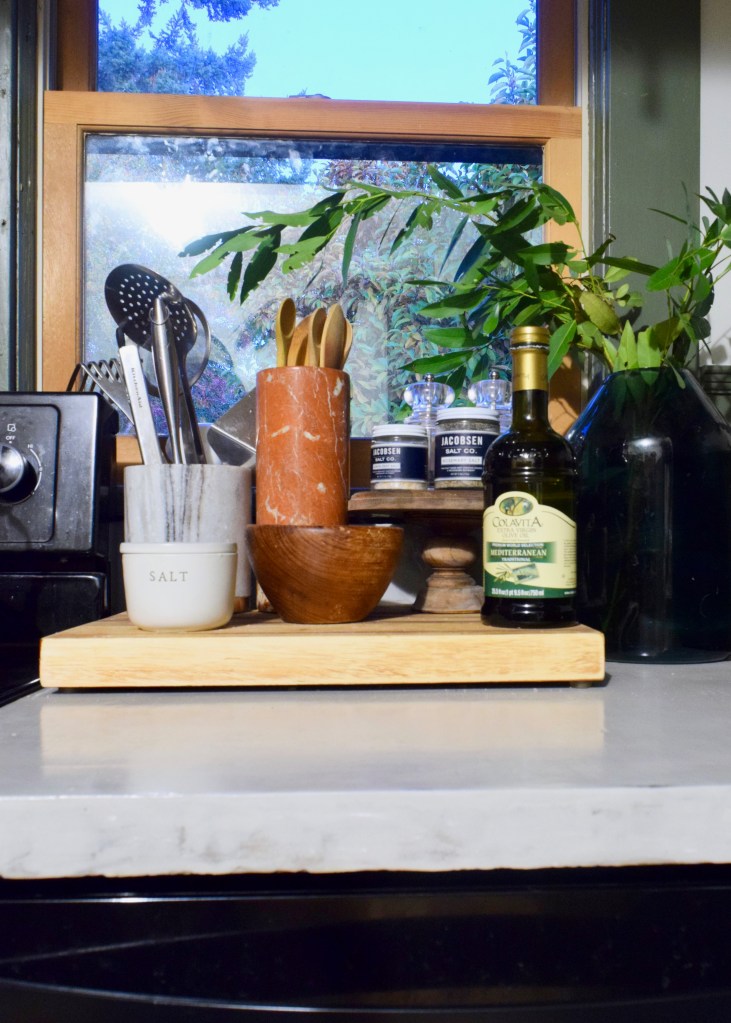
The concrete then got a layer of grout sealer and then 3 coats of my favorite top coat: Safecoat Acrylacq in gloss. If I could go back in time I would have done 3 coats of the grout sealer as well, the first day I used the counter again a few small grease spots showed. It’s not the end of the world and it looks mostly like natural patina, but over time I imagine I’ll continue to see more and more. Since this is just a phase I counter, that’s fine. Overall, it’s looking goooooood!
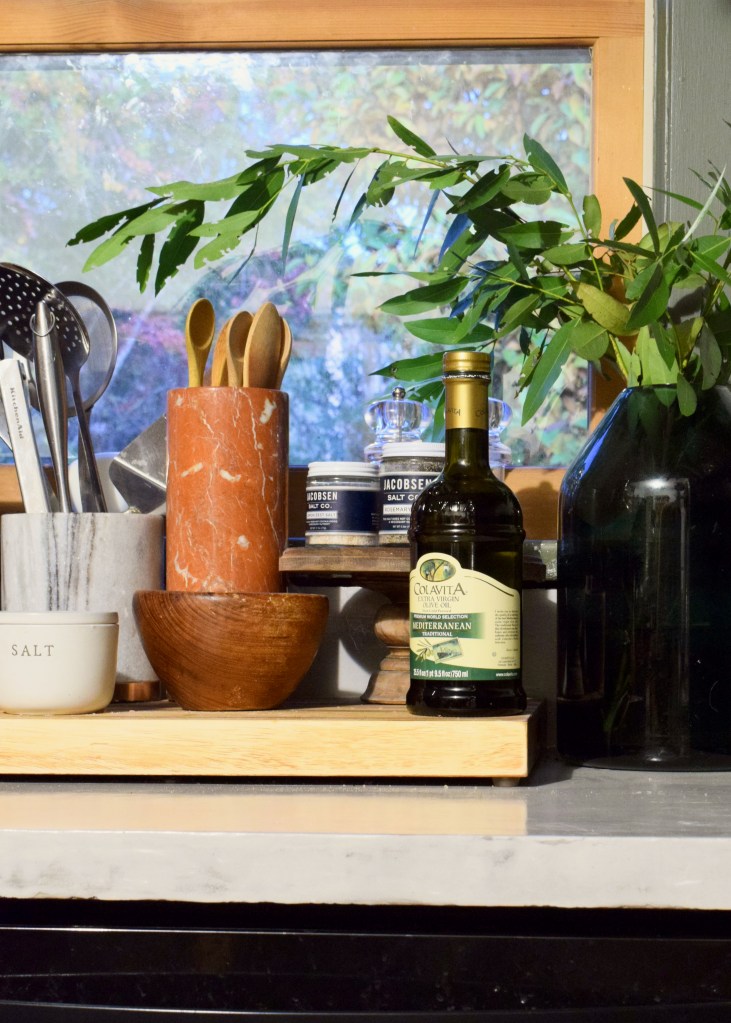
The glossy counter has got a great sheen and repels water! I’m very happy with the look and how quickly I was able to diy these new counters. It finally feels like a real kitchen in here!
Overall, I’d definitely call these counters a win! I can’t wait to show you the rest of the space in a couple of weeks! In the mean time, here’s hoping I can get this all done in the next week:
- Finishing the shelf for pots and pans to the right of the dishwasher (check my instagram to see that progress!)
- Paint these windows behind the stove
- Update the lighting
- Paint my china cabinet turned pantry
- Paint and install my glass cabinet doors
A quick note on the placement of things on this back wall of the kitchen: So, I started working on certain parts of this kitchen ages ago, and a lot of things have been done in stages, as I’ve taken working on the kitchen on and off hold. Over time there’s things I’ve learned how to do that I was afraid to do when I started. Things like plumbing. I bought my dishwasher because having a dishwasher is amazingly helpful and in my kitchen there were some old washing machine hook ups I was able to use without doing any plumbing work. They dictated the placement of the dishwasher to left of the pipes, which then meant my stove would have to be located next to the dishwasher and off center with the window. Ugh. Annoying, but not a huge deal, right? I rolled with it. Why would I mess with plumbing on a phase I kitchen, after all? Ohhhh, regret!
Don’t forget to check out what all the other One Room Challenge participants are up to!


these look so good! I’m tempted to do this on my island
Thanks!! It’s totally worth it!
Looks great! Would love to see a follow up on how these are doing. How did you handle the area around your sink?
I just coated right up to the sink! They’re holding up okay- could be better, but it’s so much nicer than before and a perfect quick fix for this space.
Good information. Lucky me I found your site by chance (stumbleupon). I’ve book-marked it for later!|