How to Build a DIY Shelf With Copper Hanging Bar

How to Build a DIY Shelf With Copper Hanging Bar

One of my favorite corners of my newly refreshed kitchen is this awkward little one in the corner! Before my kitchen renovation the corner was looking really rough with chaotic 70’s wallpaper, a musty cabinet, and flaking vinyl floors. The stove needed to go below the windows in the appliance outlet and I planned to add cabinets on either side. But you know this already!

Continue reading “How to Build a DIY Shelf With Copper Hanging Bar”

How to Paint 1980s Cabinets: Transforming My Pantry Cabinet

How to Paint 1980s Cabinets: Transforming My Pantry Cabinet

Ages ago, I bought china hutch on Craigslist to use as extra pantry storage. I had ever intention to paint it at the time, but then… I didn’t. Flash forward three years and I finally got around to it! You probably saw it in my kitchen reveal, but I wanted to check in and share the whole process with you!

I’m getting ahead of myself though, let’s throw back, now. Remember when the hutch looked like this back when I lived at the Duplex?

Continue reading “How to Paint 1980s Cabinets: Transforming My Pantry Cabinet”

One Room Challenge – Week 5 a Bit of This and That

One Room Challenge – Week 5 a Bit of This and That

Happy Halloween!! I’ve been all over the place working on things for my One Room Challenge kitchen project! I still have a ton to do. Eeek! I’ll be stretching the the length of time I have to do this project to the limit and shooting the kitchen on a Saturday next week. I’m going to need the weekend to round out some of my projects. Plus I got sick so I’ve slowed down the last couple of days. Let me fill you in with what I have in completed though…

Continue reading “One Room Challenge – Week 5 a Bit of This and That”

Installing a Vintage Medicine Cabinet

Installing a Vintage Medicine Cabinet

I grew up in the same house almost my entire life. It’s the only house I ever remember living in. My parents bought it when I was one and a half and they still live in that house today. I had a bedroom in the center of the house with no outside windows except for a skylight, which sounds a lot drearier than it was in reality. My room was always light and bright and I never had to close the curtains to change. My room was right next to the bathroom which had been redone in the 1950s. It was all green and black tile with floral wallpaper and an old sink. There was even some neon orange accent tile that some previous owner then painted black, but by the time I was in middle school the black paint was chipping in a few places exposing the orange. There was this great vintage mirrored medicine cabinet in that bathroom. It may have been original to the house. It had a lovely arched top and two hinged, adjustable wings which was just perfect for checking out your hair before the middle school dance. I loved that medicine cabinet! It was so great for looking at your hair from all the angles, because it had two hinged, mirrored sides.

Continue reading “Installing a Vintage Medicine Cabinet”

Entryway Action

Entryway Action

I have a goal and a plan and I’m ready for action! This is the final push to get the entry whipped into shape! I have a Galentine’s Day Party planned for all the ladies in my life the weekend of the 11th. My goal is to finally complete the entry way so I can decorate it up for the party! I have some cute heart ornaments that just need a place to be hung.

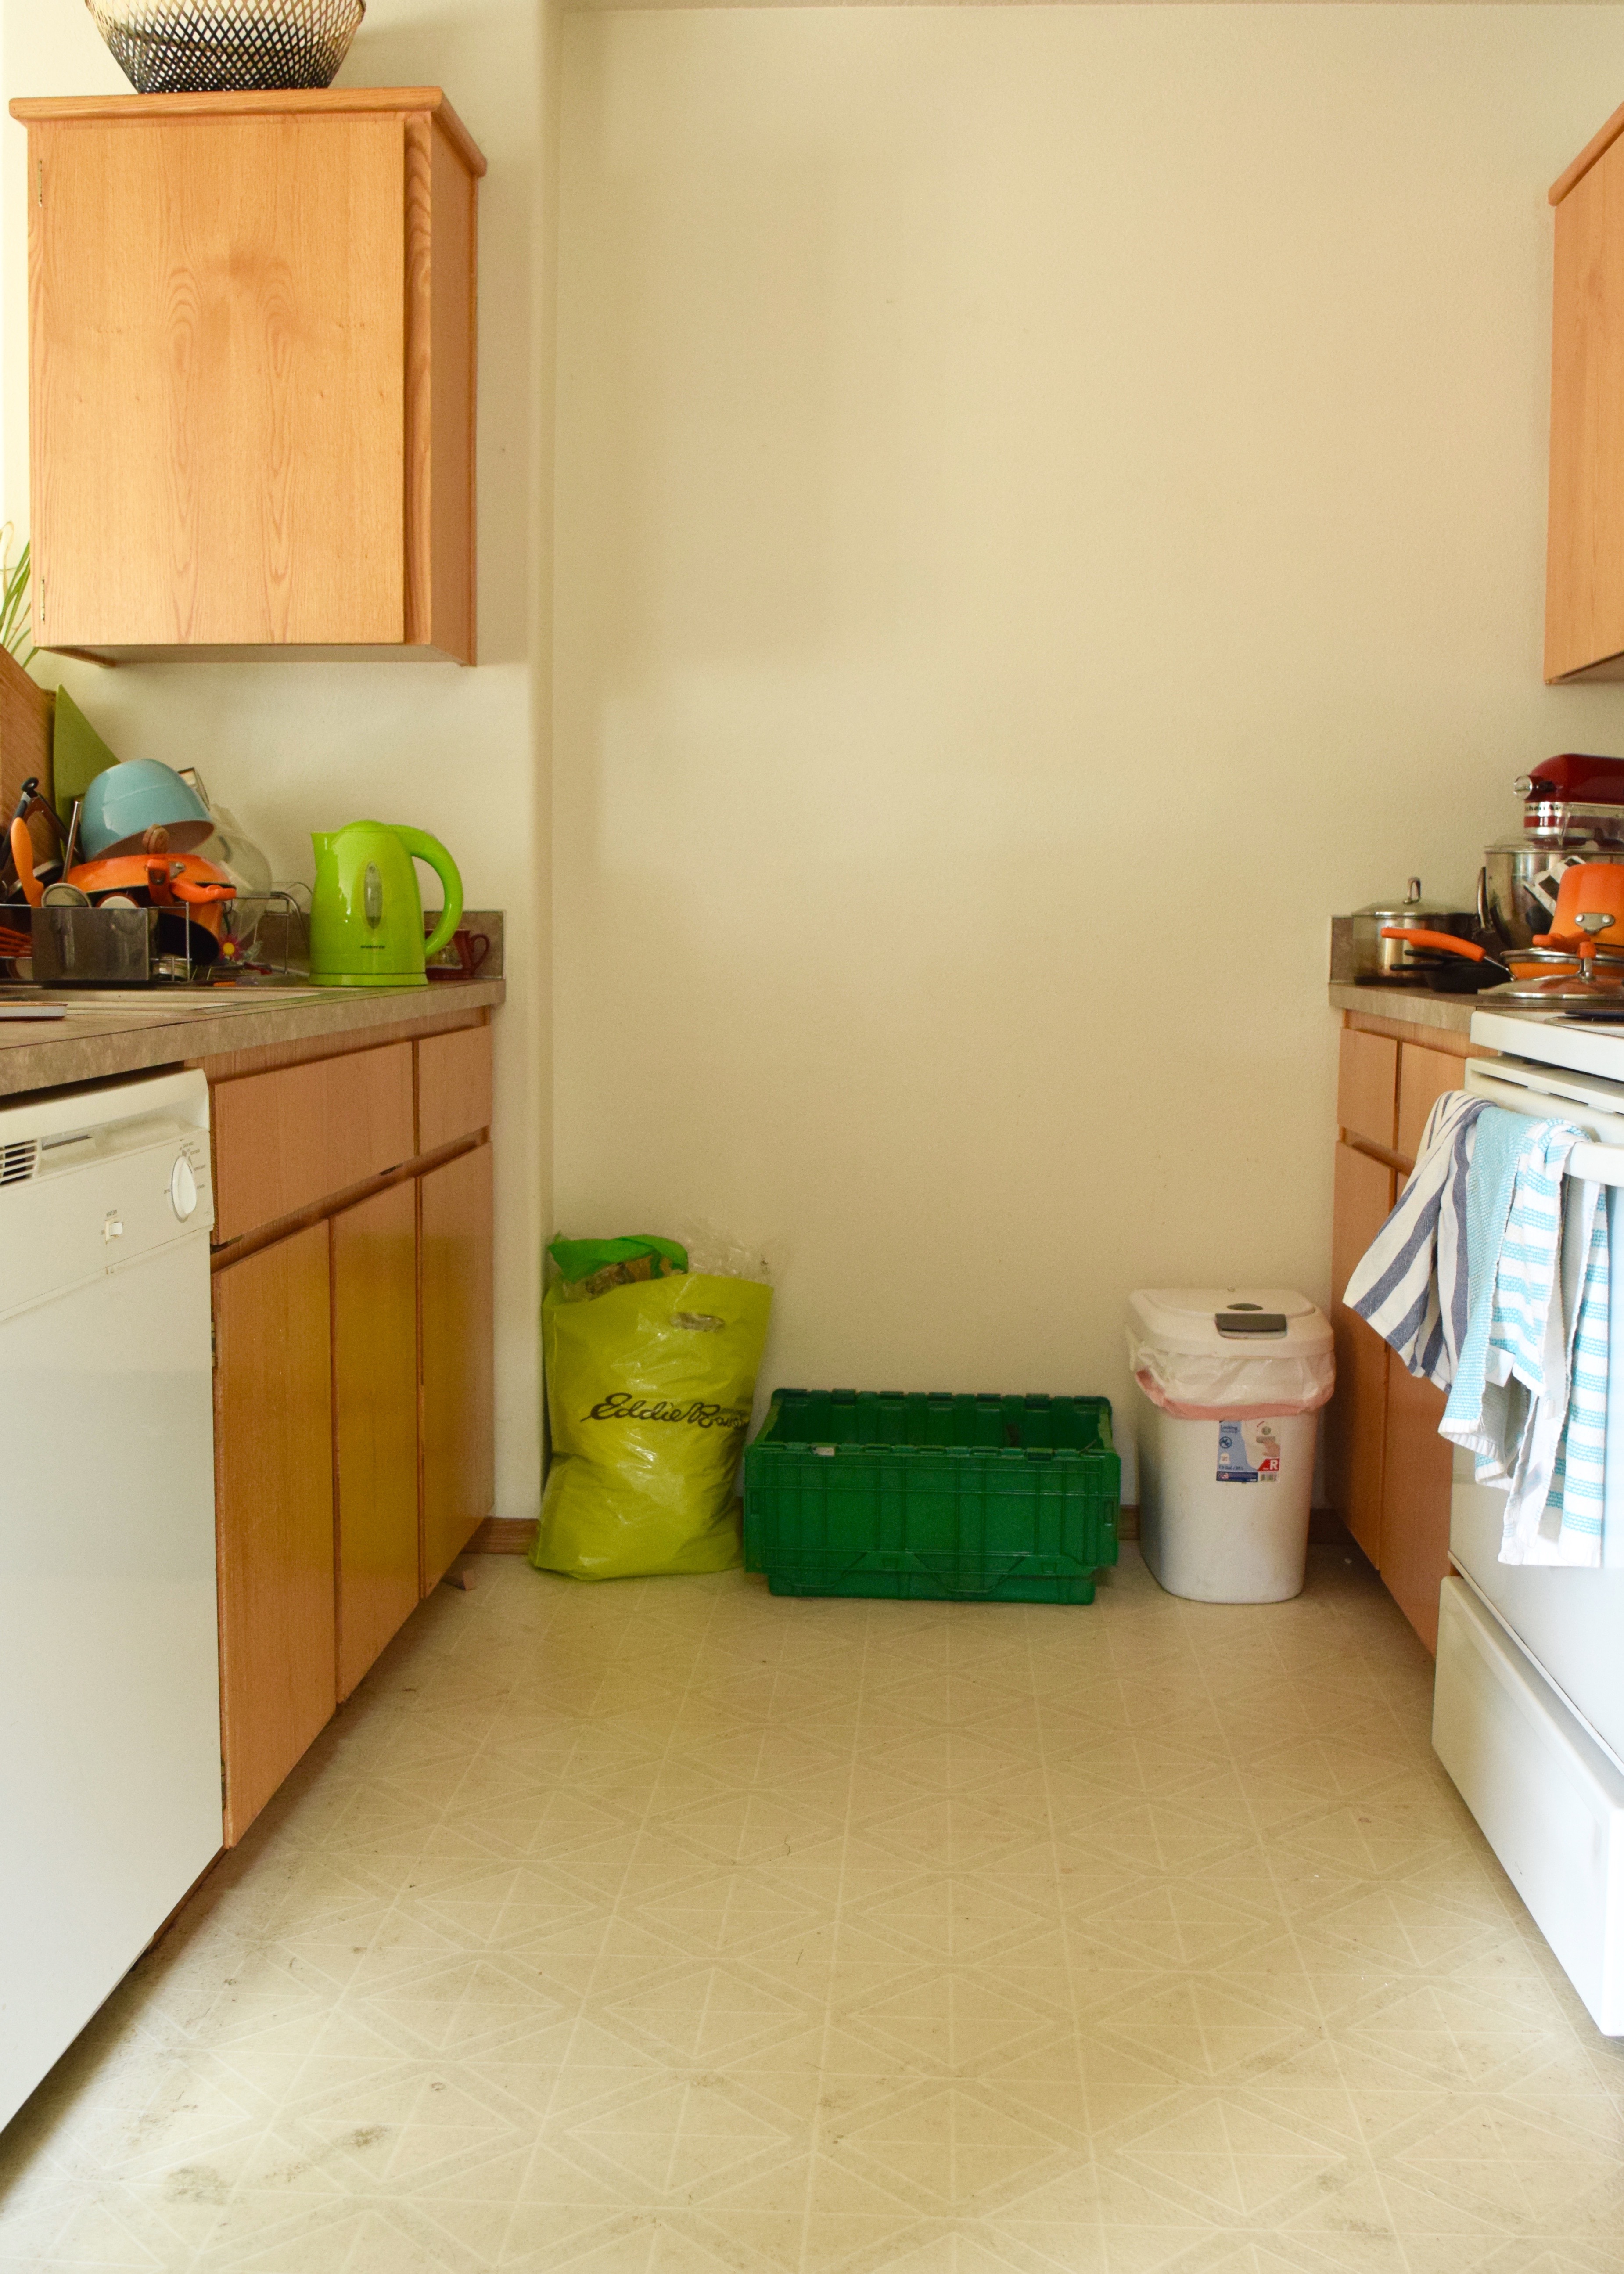
So, why is it the final push? Because I’ve been secretly working on this for months, slowly chipping away at the mess that this area was when we moved in! If you recall, it looked like this to start:

The Duplex Moving In Tour | Land of Laurel

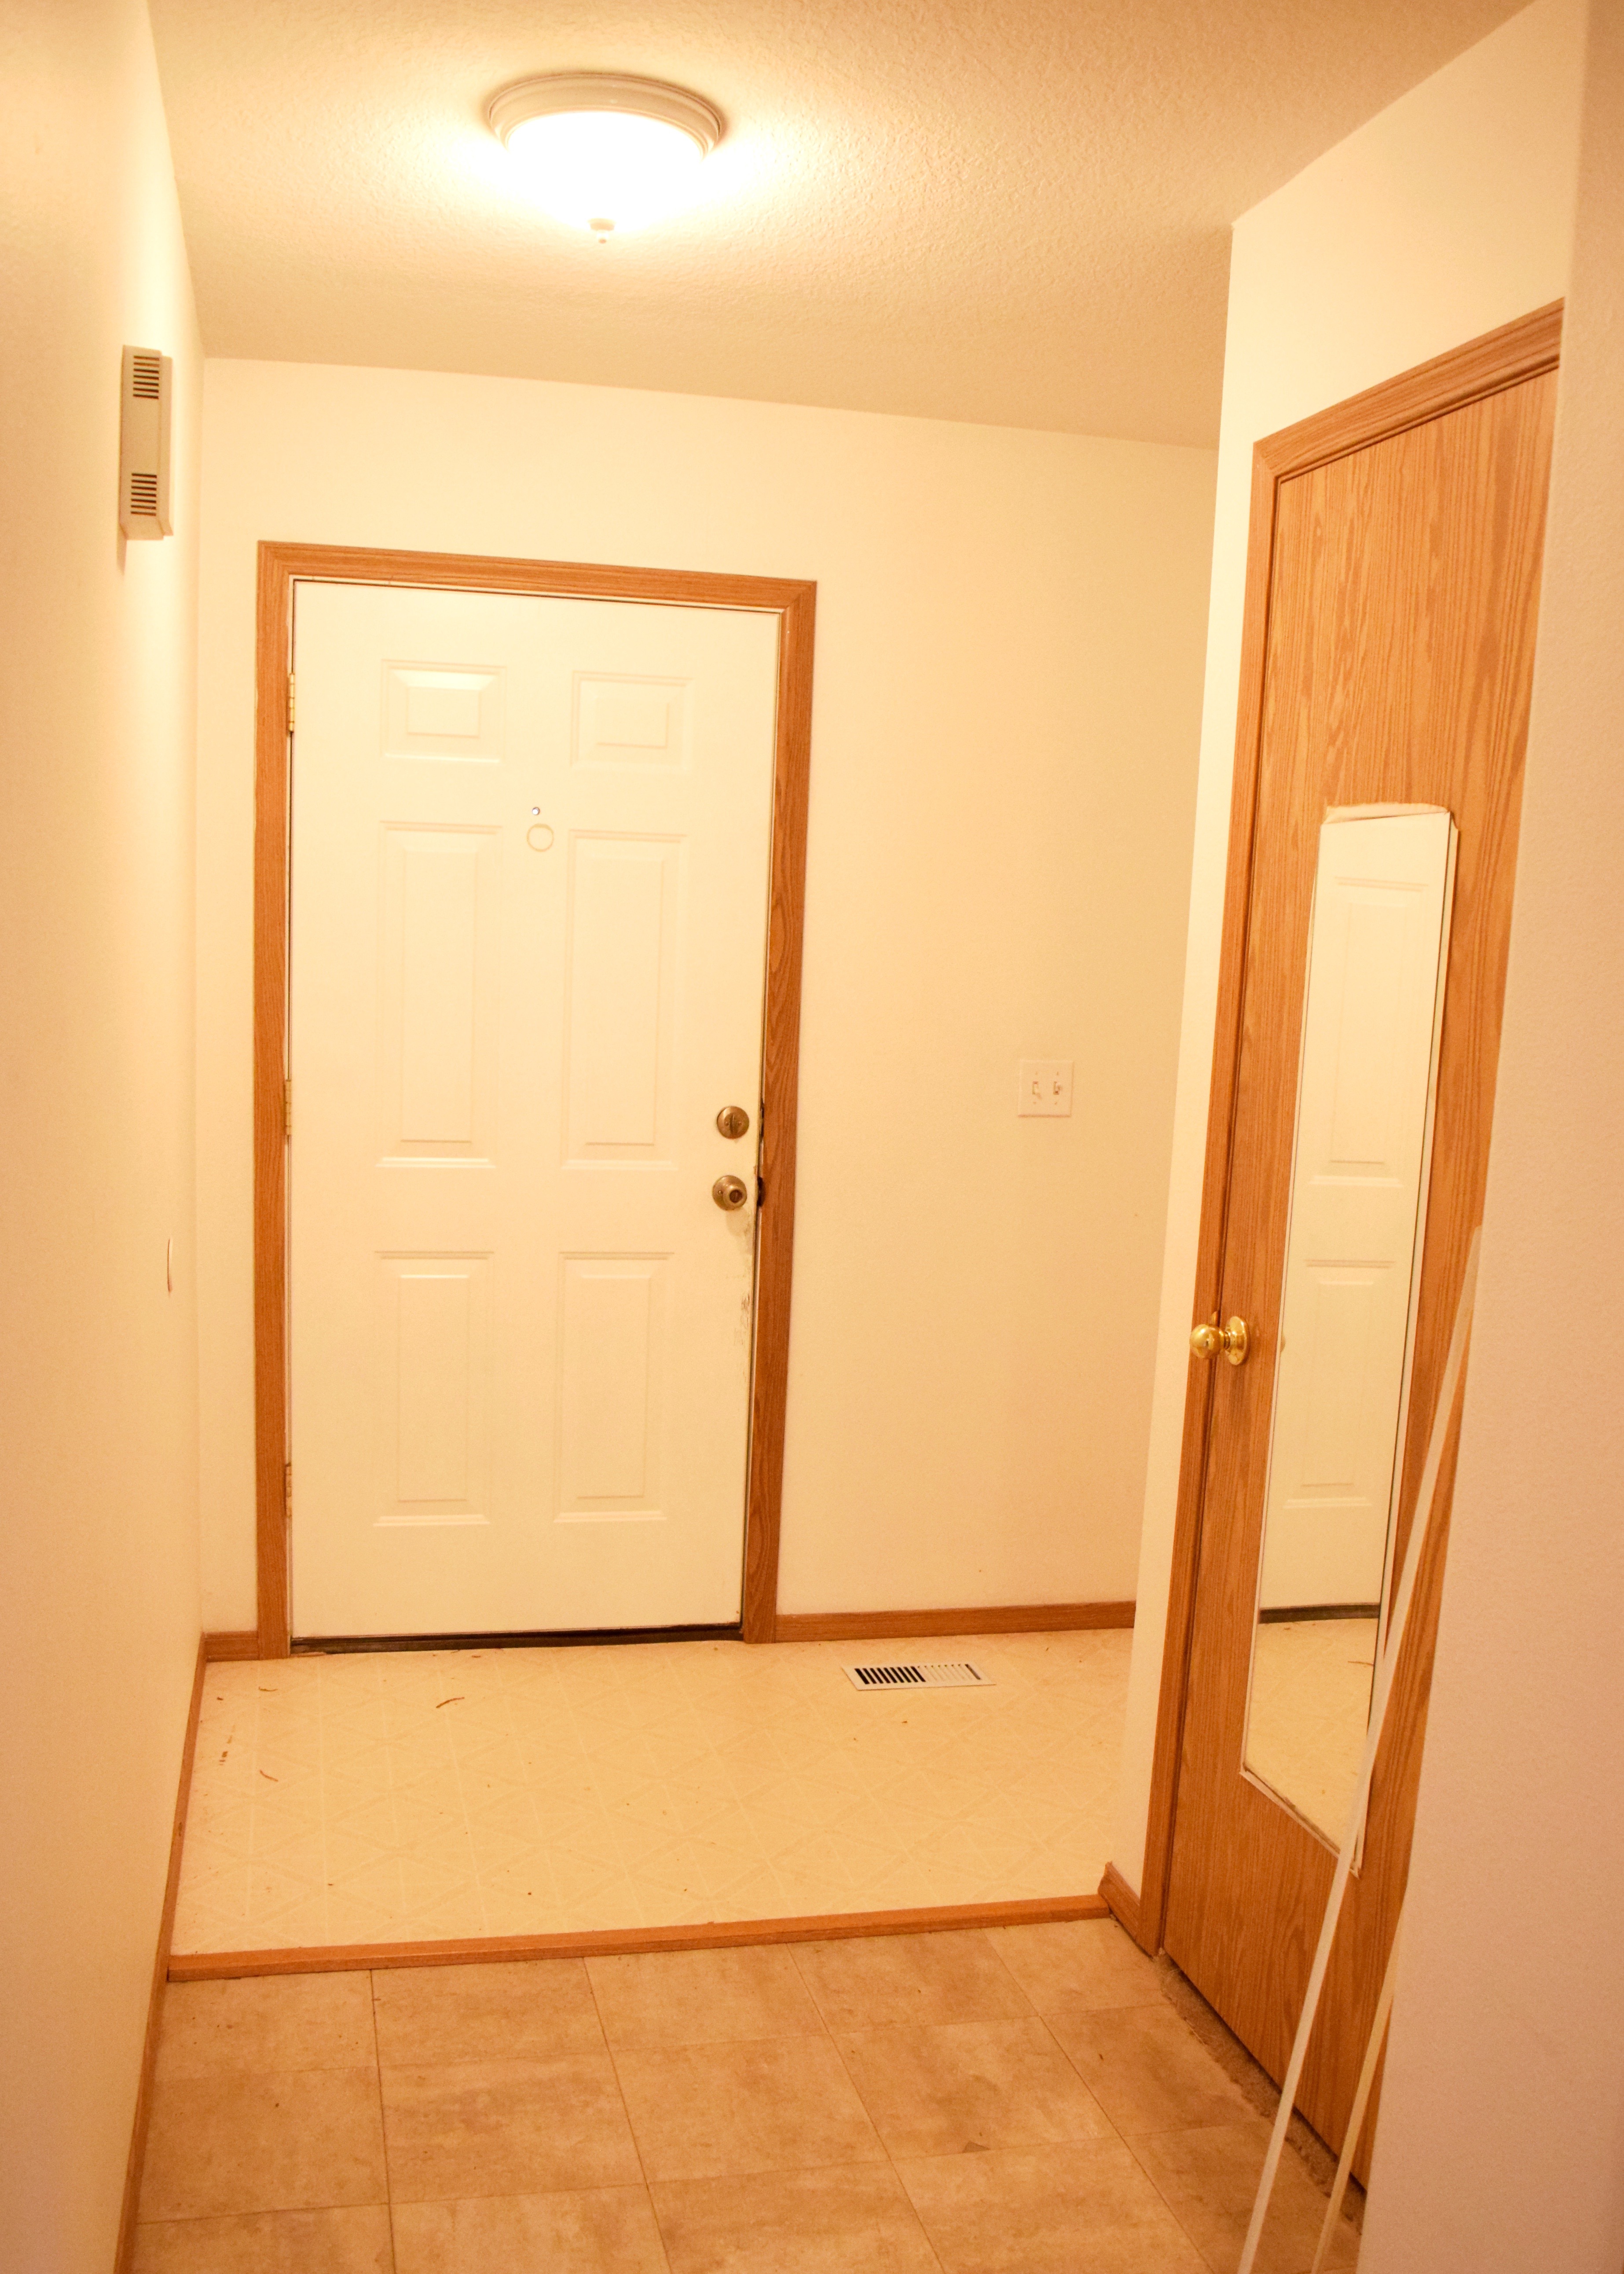
And when you first opened the front door you looked in at this:

The Duplex Moving In Tour | Land of Laurel

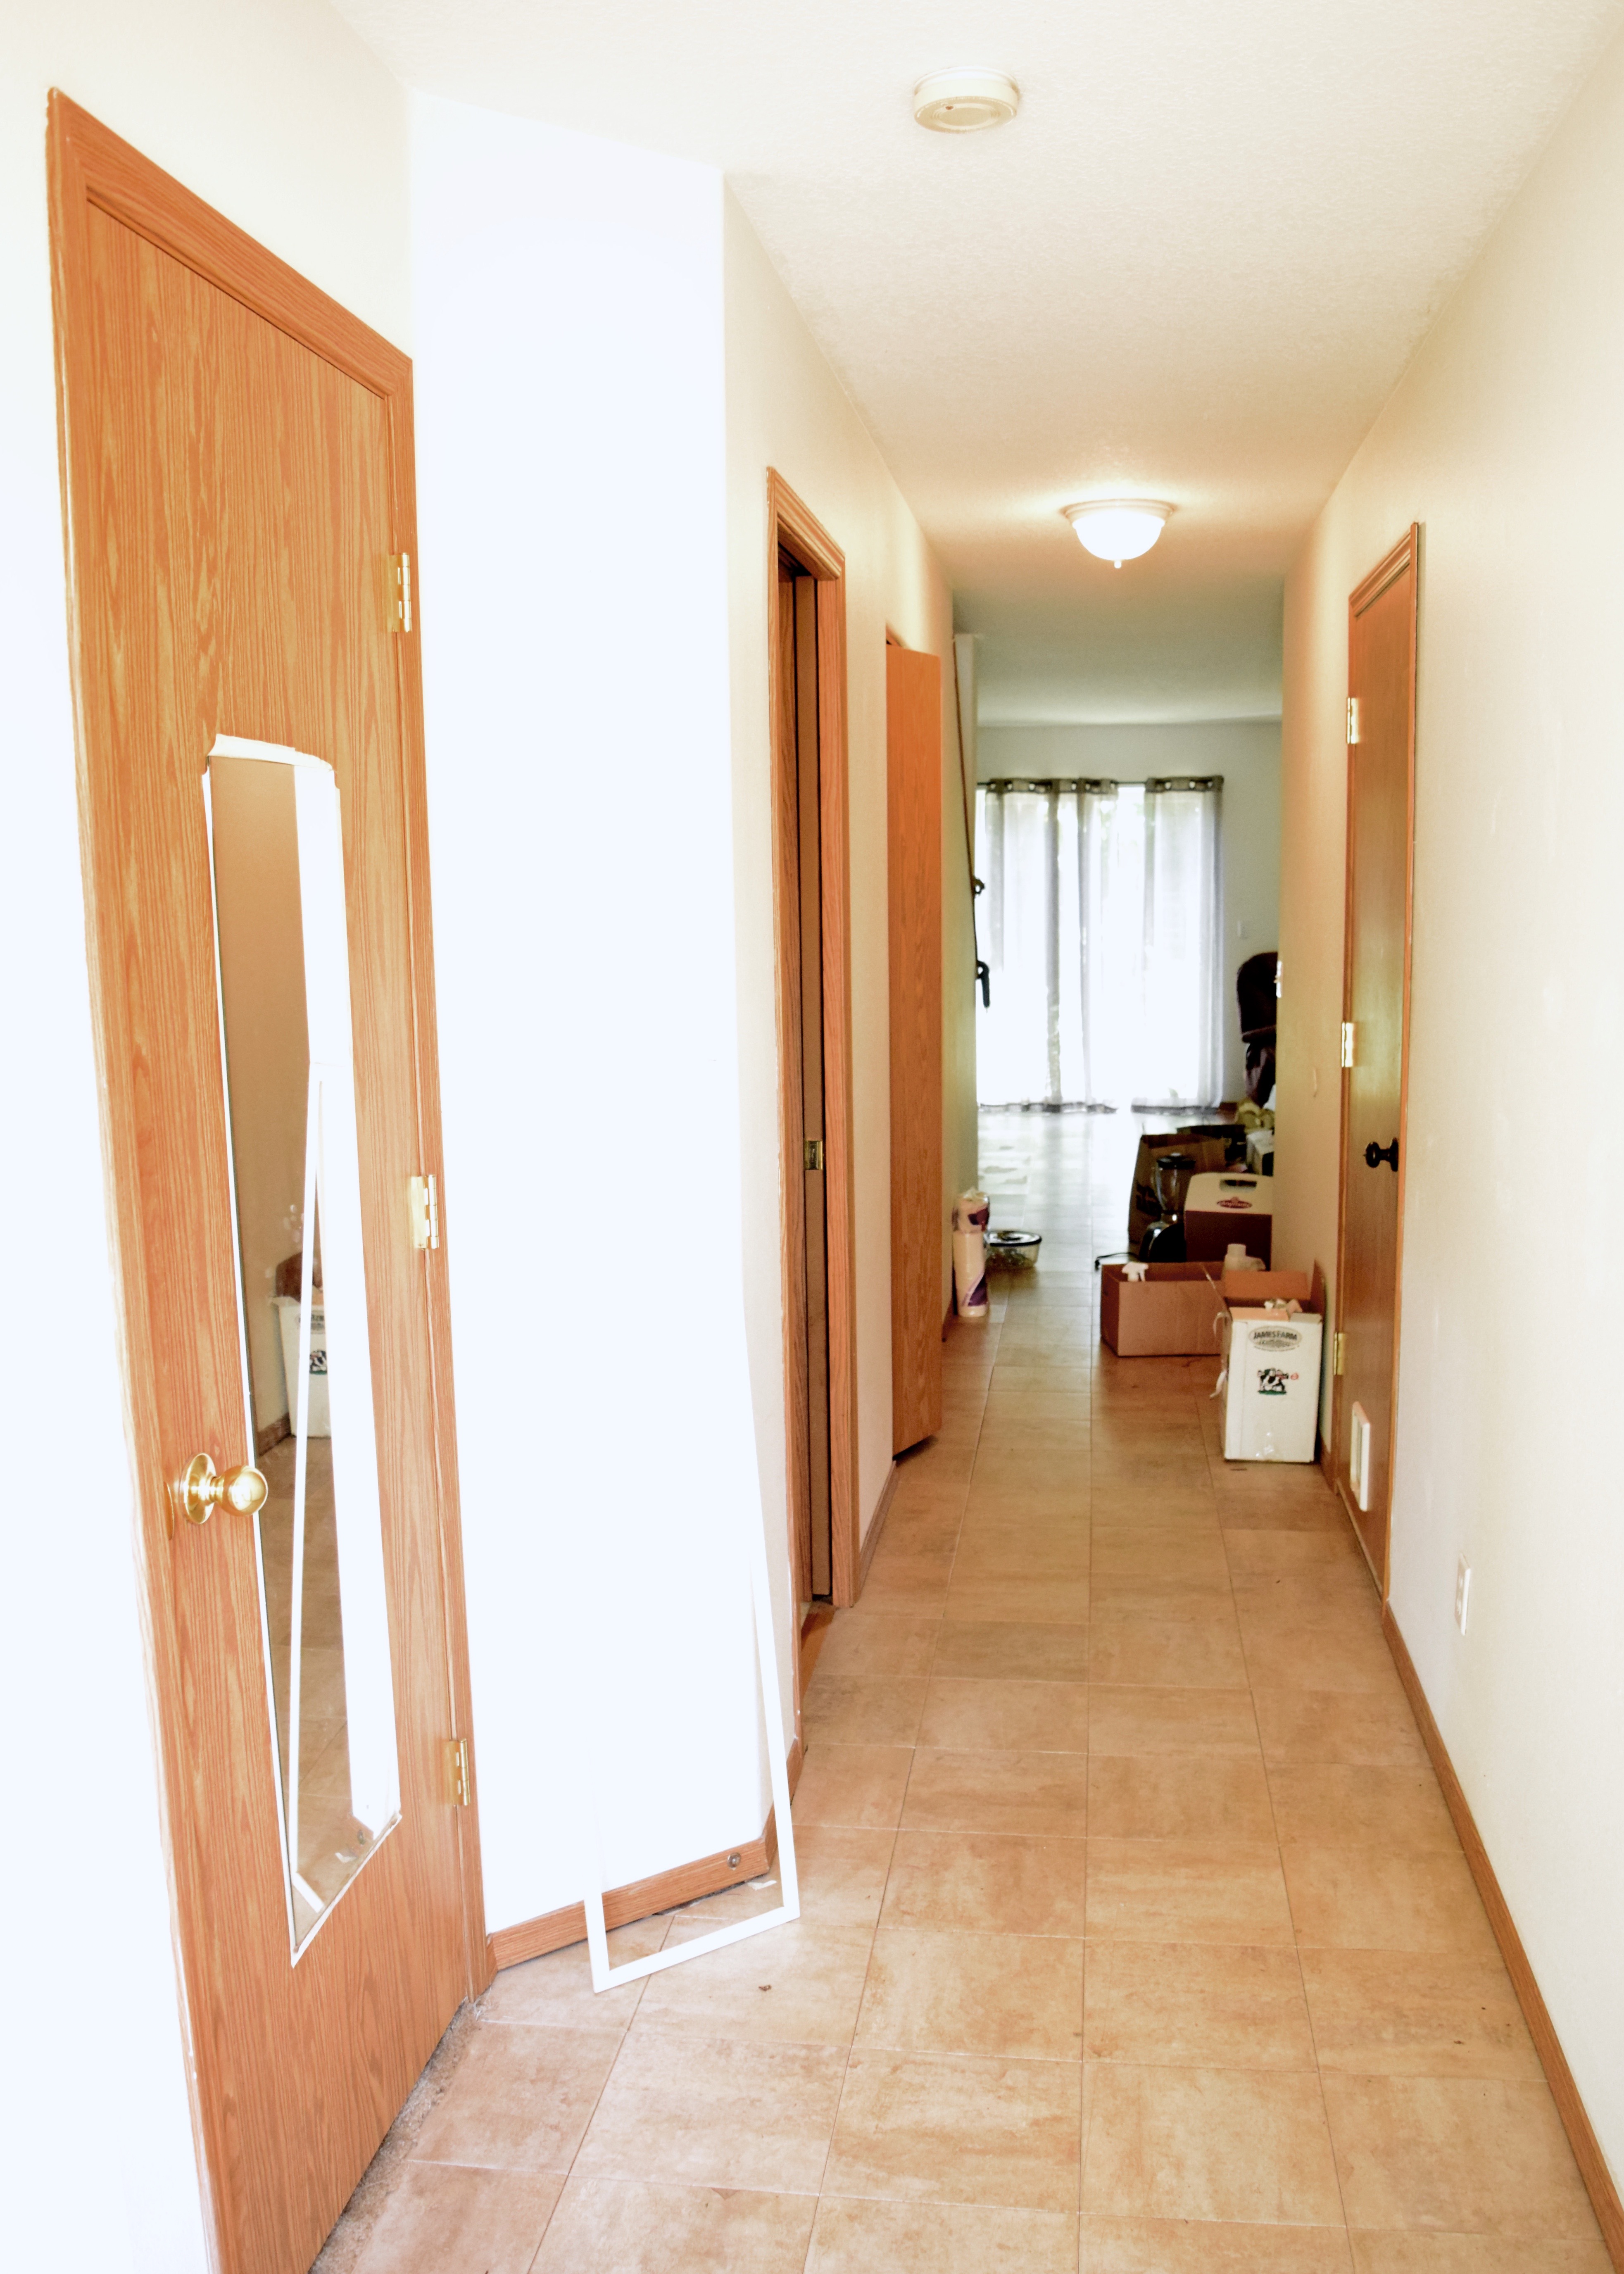
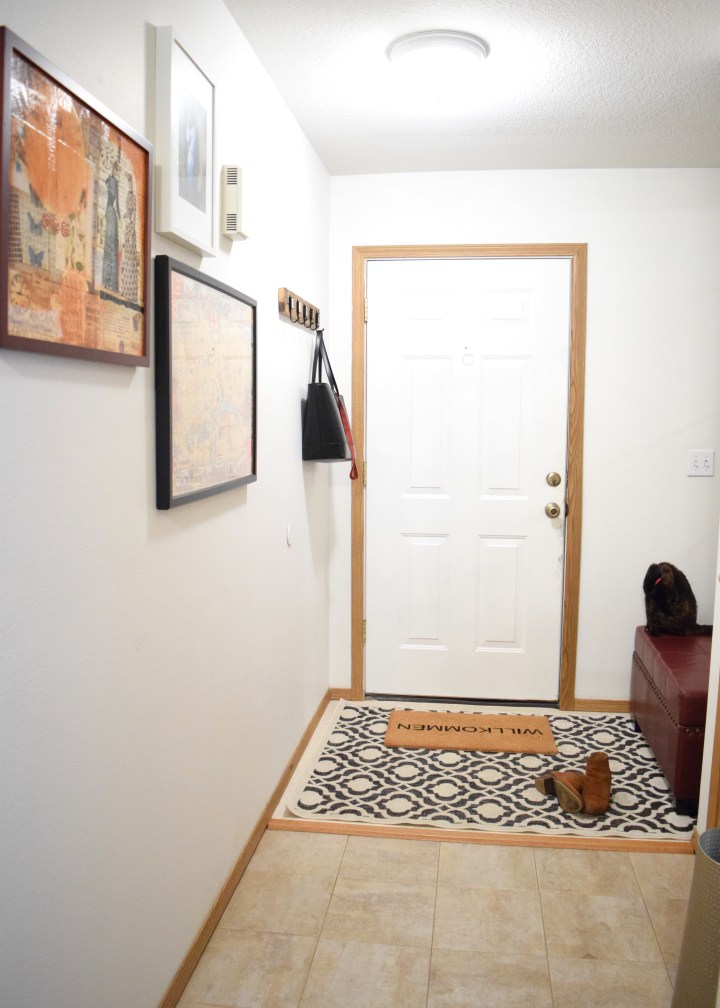
Whew! What a hot mess it was when we arrived! The entry’s one redeeming feature (besides the coat closet) is the little nook right next to the door. This is a great place for us to stash all our shoes and jackets when we first come home. Of course… is started out as a whole lot of nothing!

dsc_0051

Well, nothing, but an electrical panel, a light switch, and a heating vent. Lot’s of mechanical stuff going on in this spot! You may remember my original plan for this area. It included the following items, some of which are now complete:

  • Get seating for putting on/taking off shoes
  • console or buffet for mail/purses
  • Hang art/mirror and accessorize
  • Paint back wall to hide electrical box better?
  • Organize closet
  • Shoe storage!

Since October – when I came up with this plan of attack – I’ve been slowly getting ‘er done! First I got to work hanging a big old heavy mirror I got for free from work several years ago when it was delivered with a hefty scratch. I bought this 50 lb drywall anchor set from Home Depot for a few beans.

Hanging a Heavy Mirror | Land of Laurel

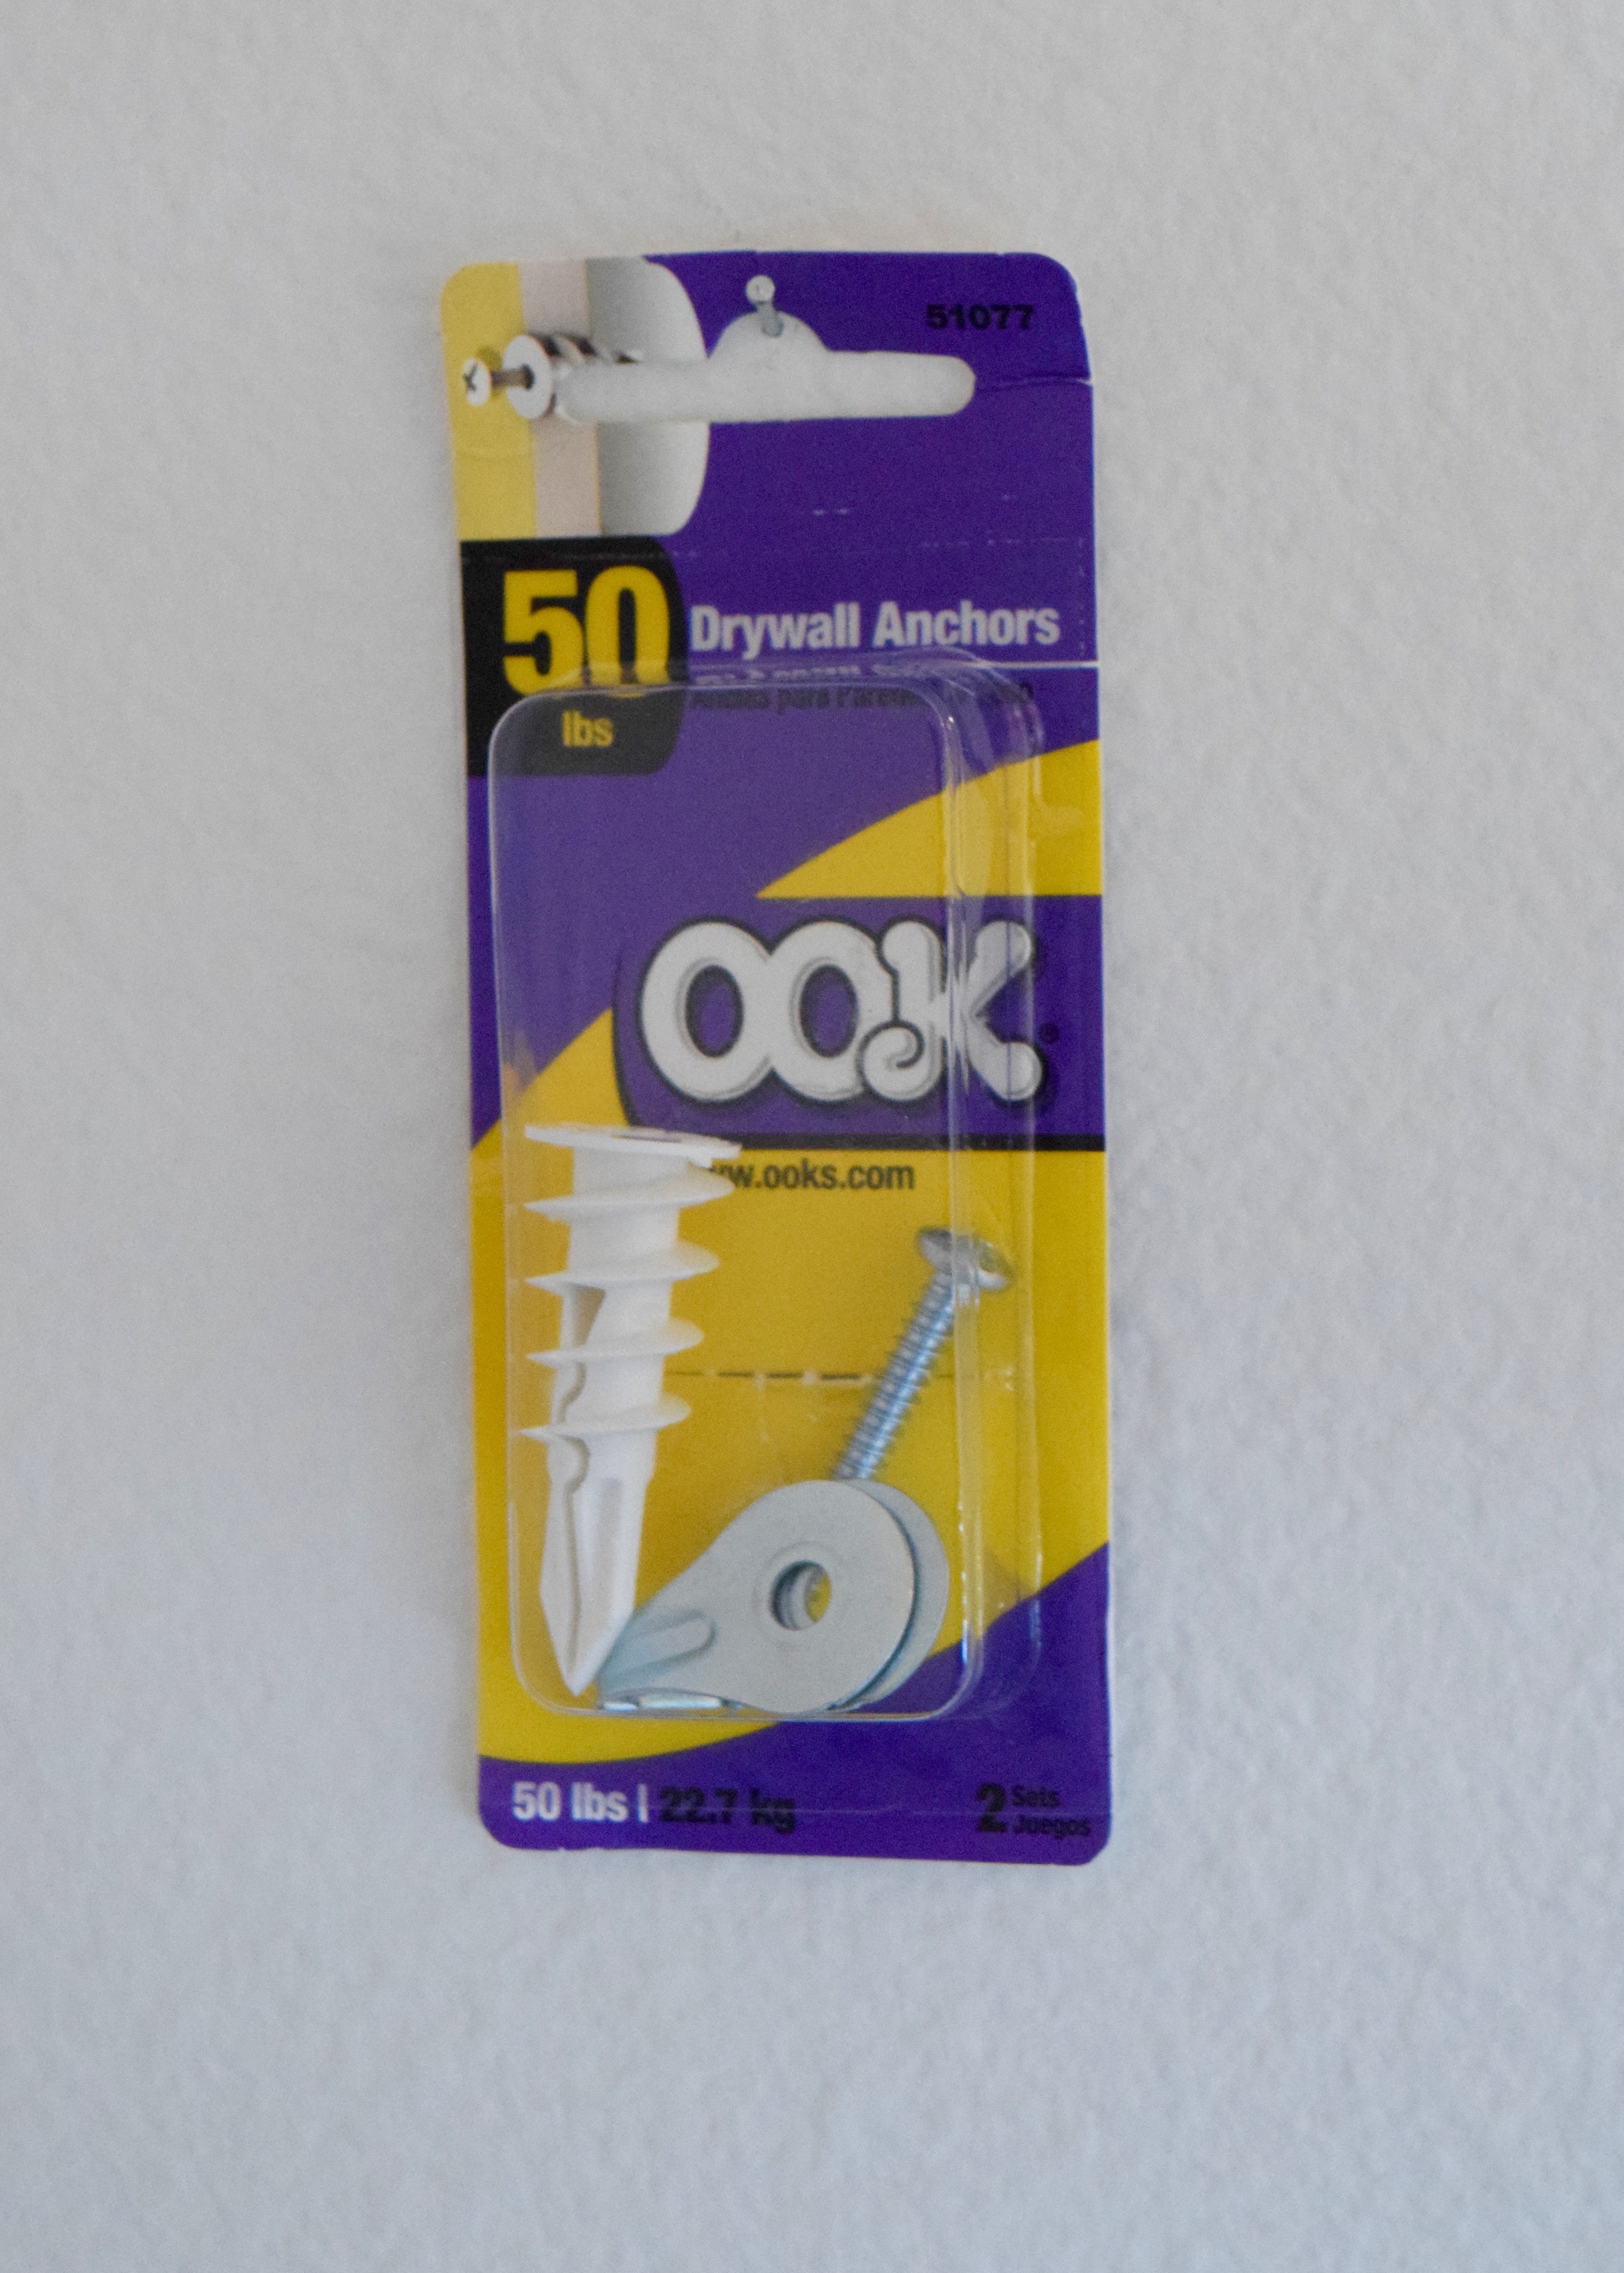
Once I marked my location (I was hanging the mirror high with the plan to eventually put a console table beneath it), hanging the mirror was really easy. I simply tapped the plastic anchor in with a nail first, then screwed it the remainder of the way into the wall.

dsc_0375

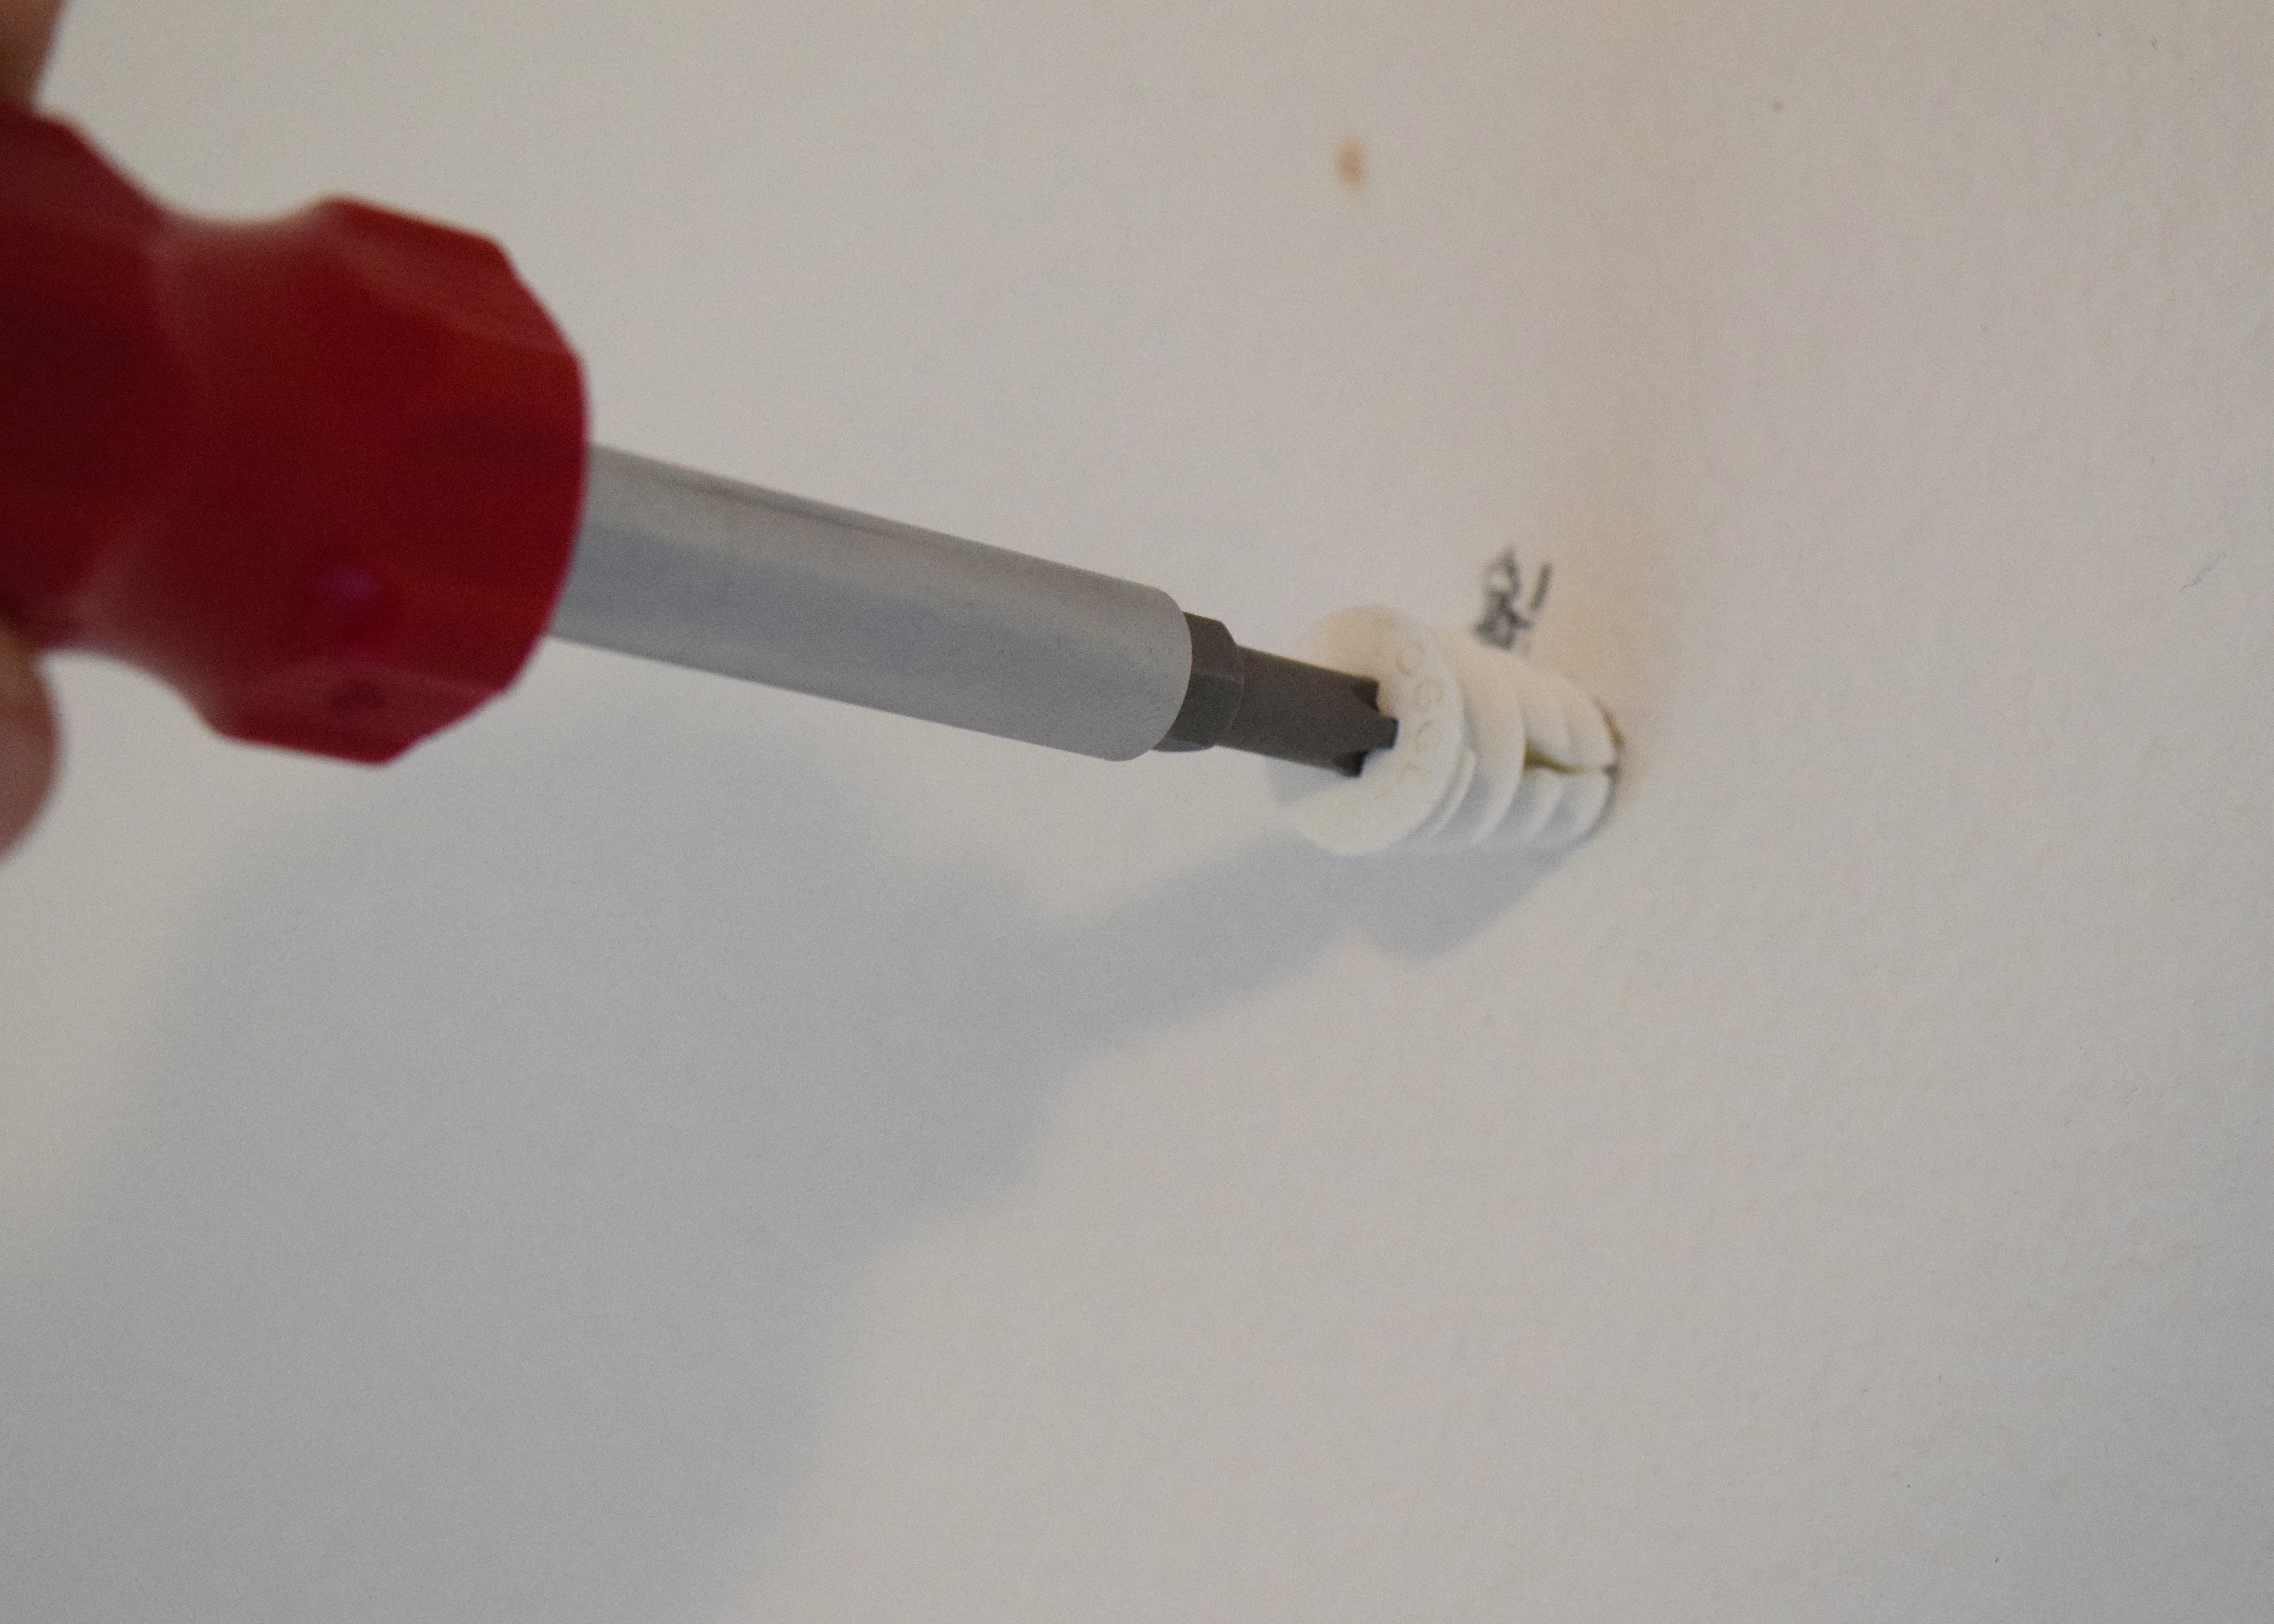
The two other pieces in the kit – a screw and a picture holder, fit into one another, and were then screwed into the plastic piece. Easy as pie.

50 lb Drywall Anchor | Land of Laurel

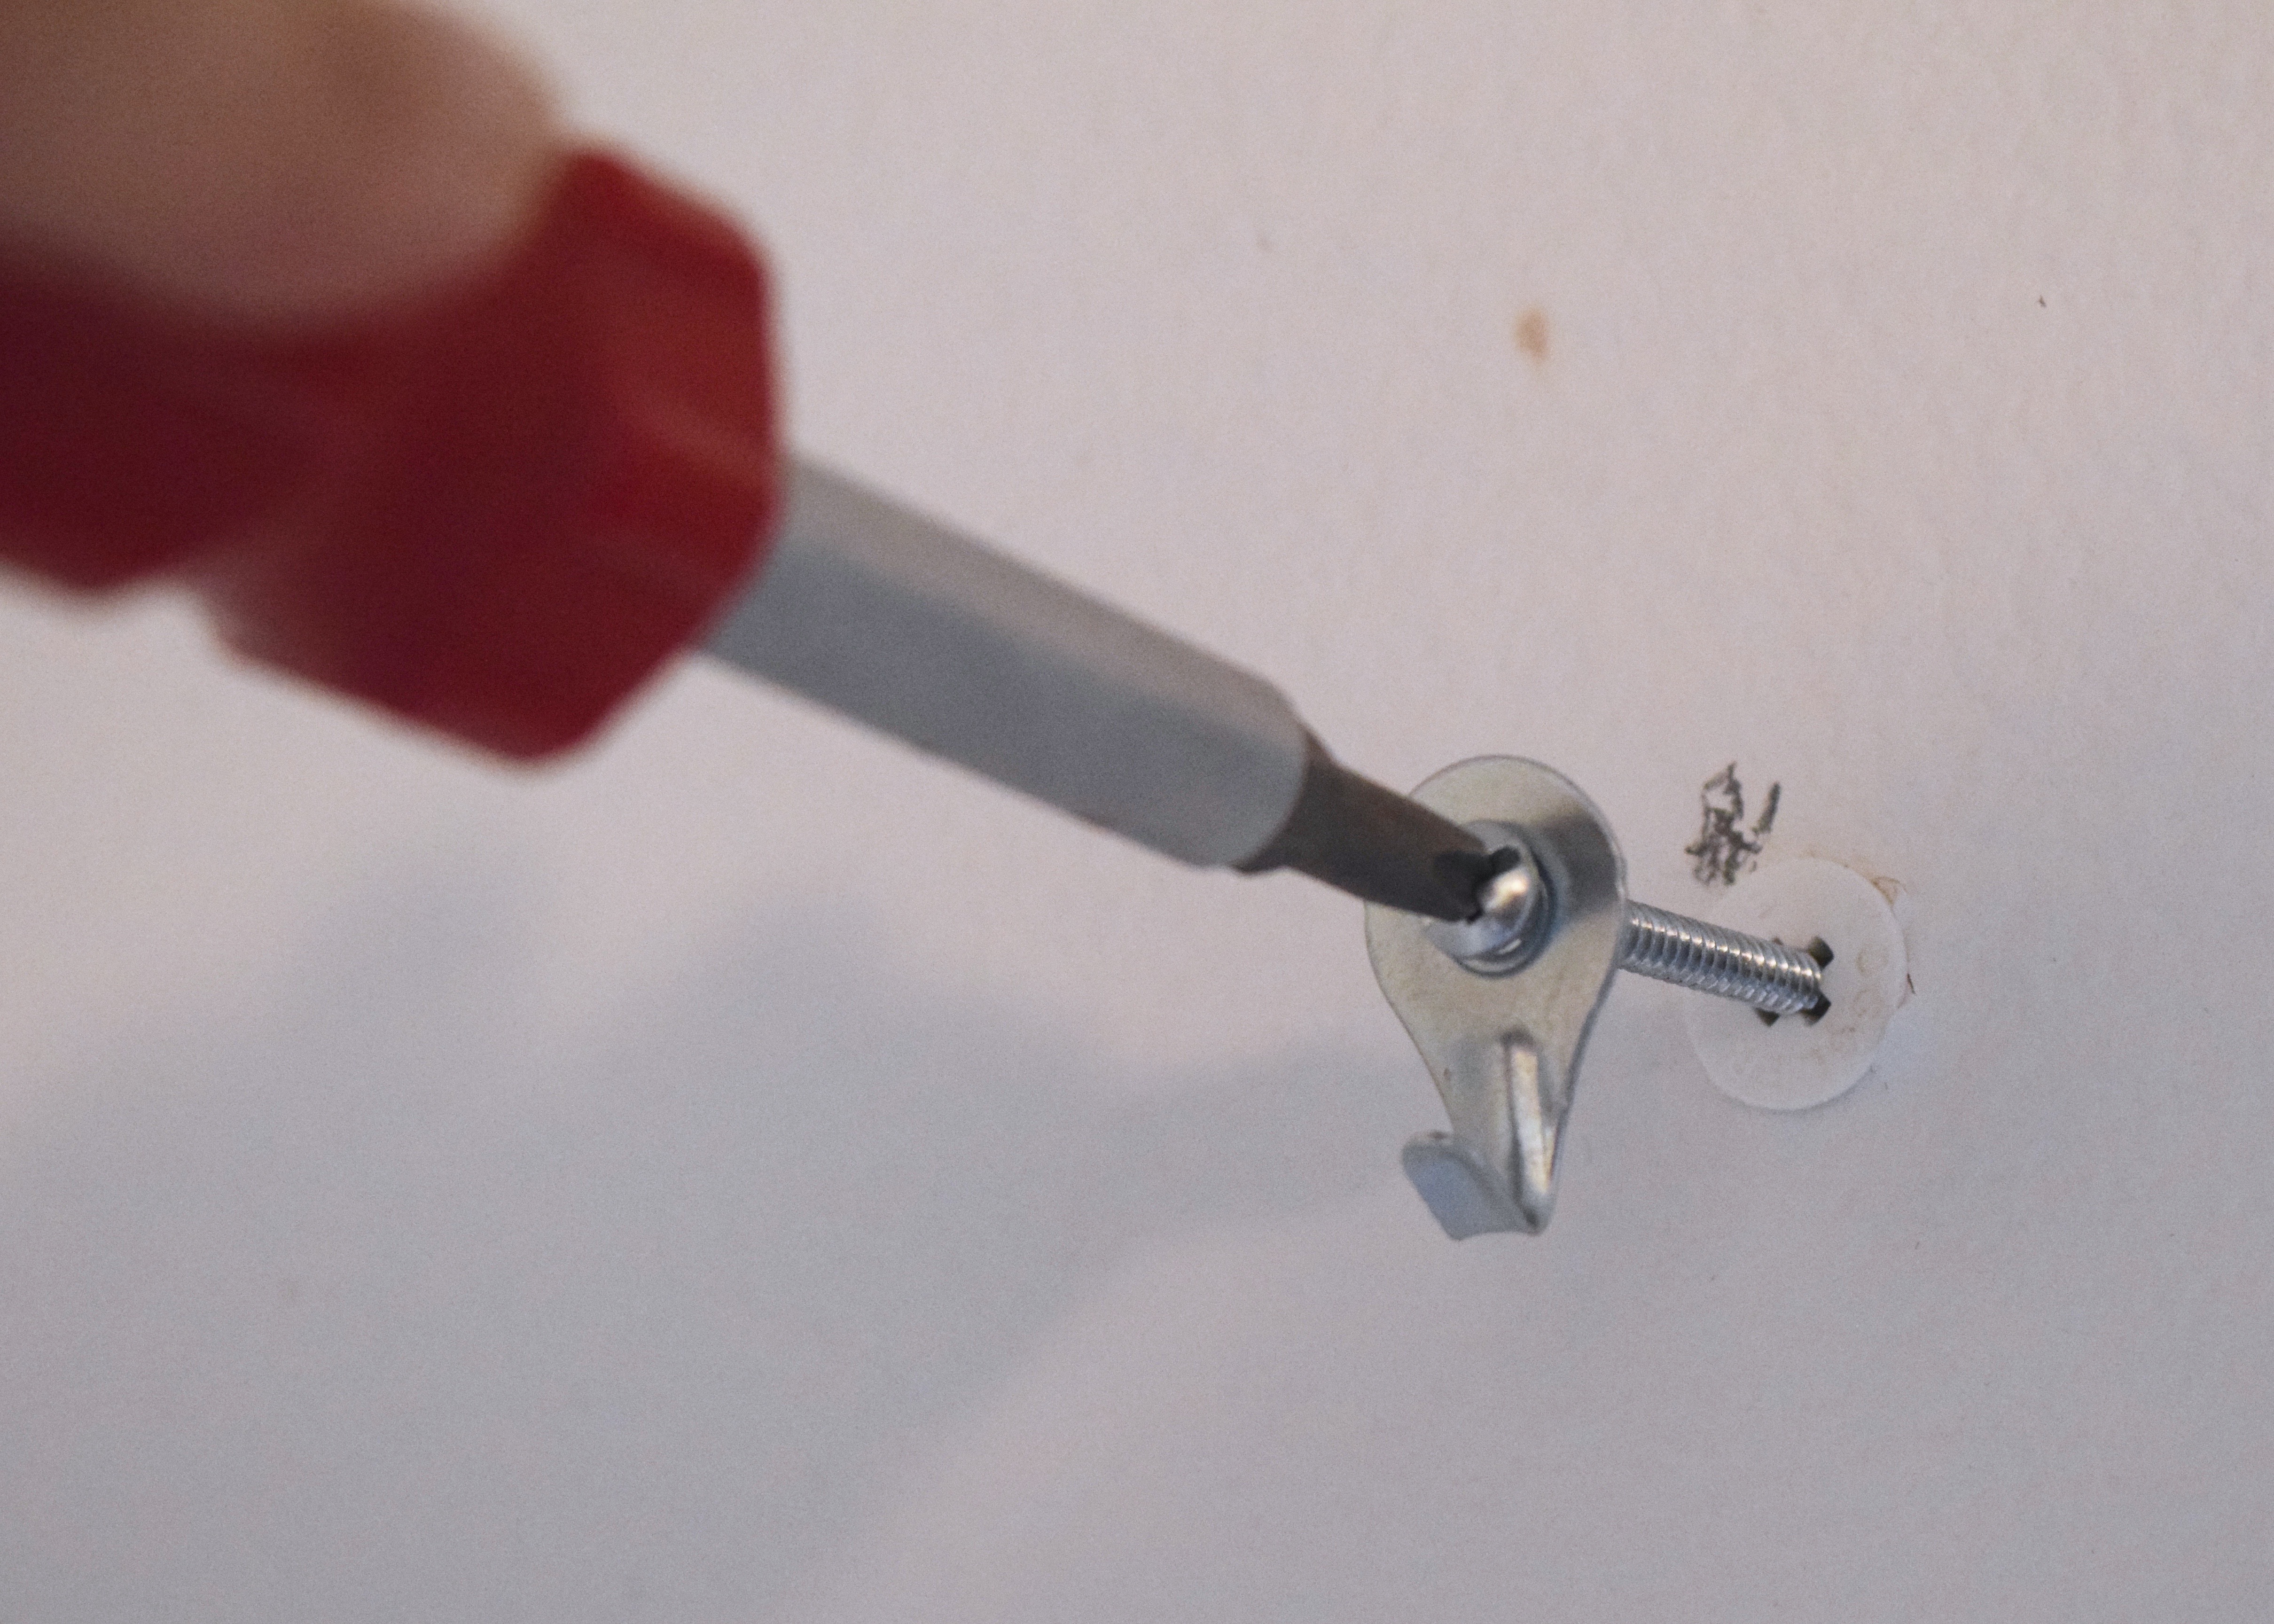
You know what was not easy? Lifting the heavy mirror up and hooking the wire onto the picture hook. Boy! That mirror was heavy! I enlisted the assistance of both my parents who happened to be visiting that weekend. By the time we hung the mirror, I’d also bought an ottoman! It was an impulse buy one morning on the bus. I only semi-regretted it after. And by semi-regretted I mean I realized it was definitely not my favorite option, but it was cheap. I looked it up to link to it in this post and found out it’s now available in cream! Ugh. Cream would have been a great option. Instead I ended up with the cherry red. When I bought it, the ottoman was only available in red or black leather. I have an intense dislike of black leather furniture unless it’s on task chairs, so I went with the red option. I may reupholster it with some extra fabric I got for free from work. We’ll see… For now, let’s concentrate on the positives of this ottoman. A) I got it for a heavily discounted price. B) It opens up and becomes a huge storage ottoman! C) It’s deep enough to provide seating space while still being tucked under a shallow table, so I don’t need to drag it out to open it.

Progress in the Entry | Land of Laurel

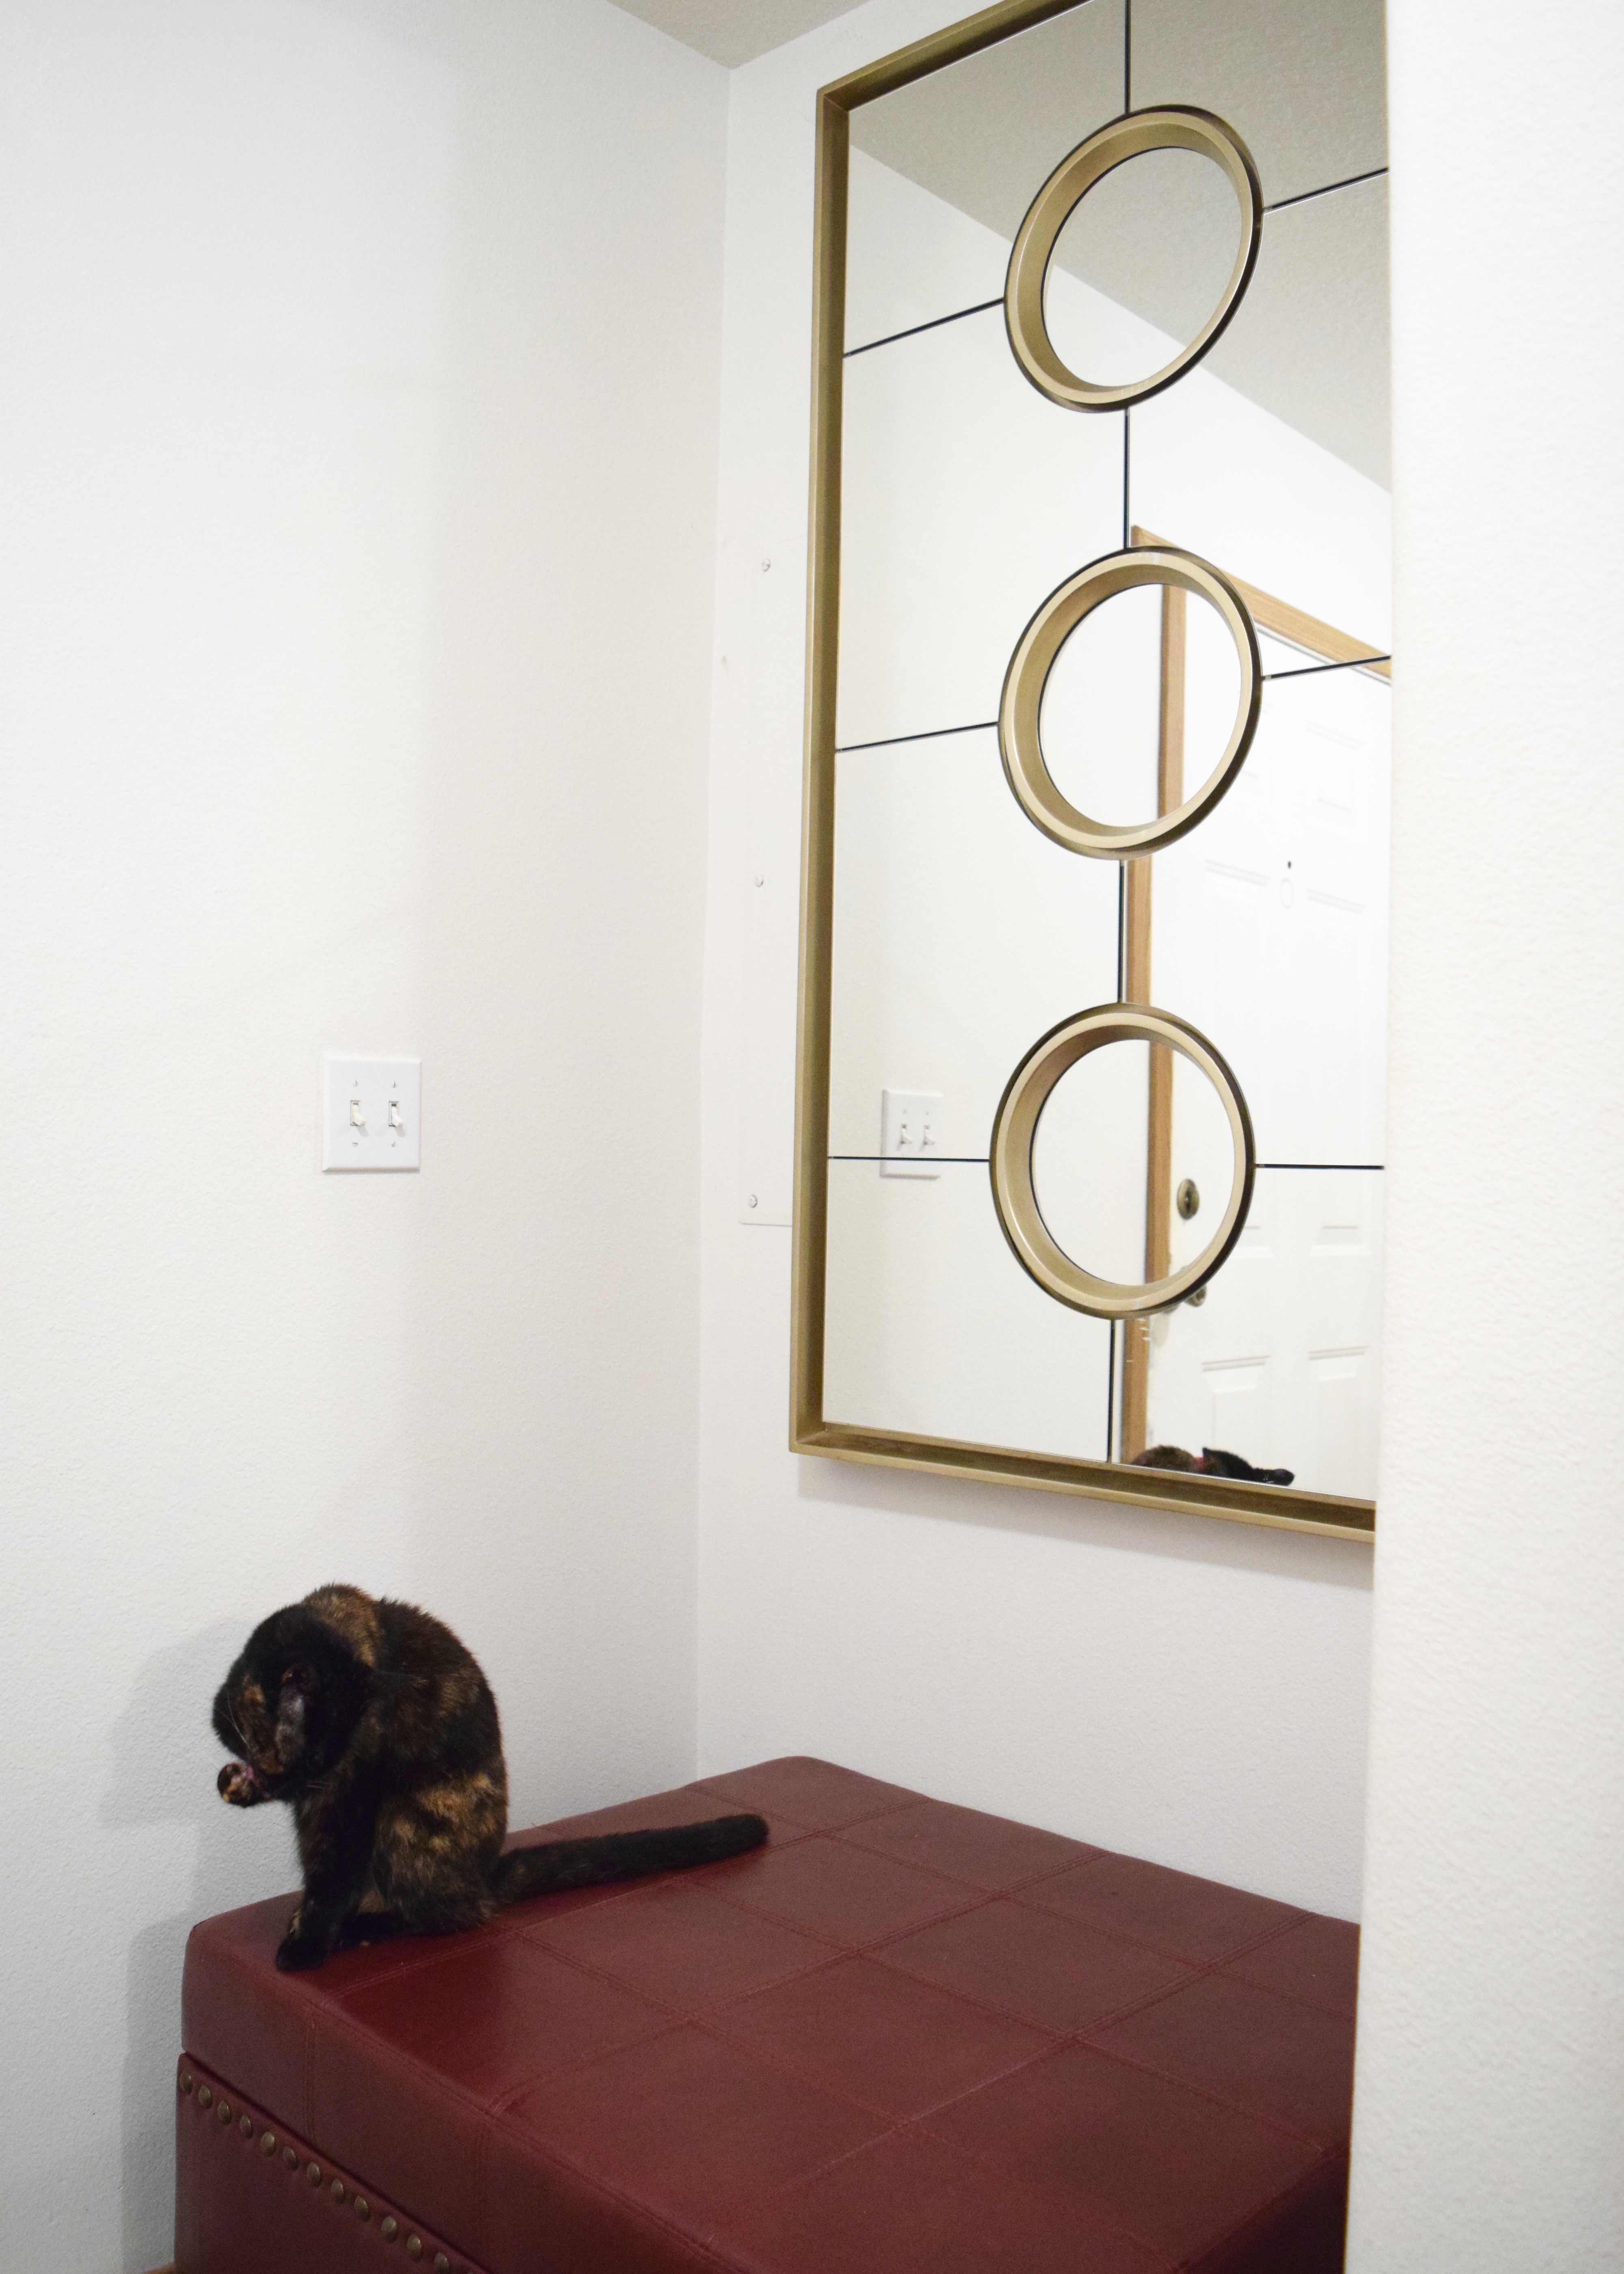
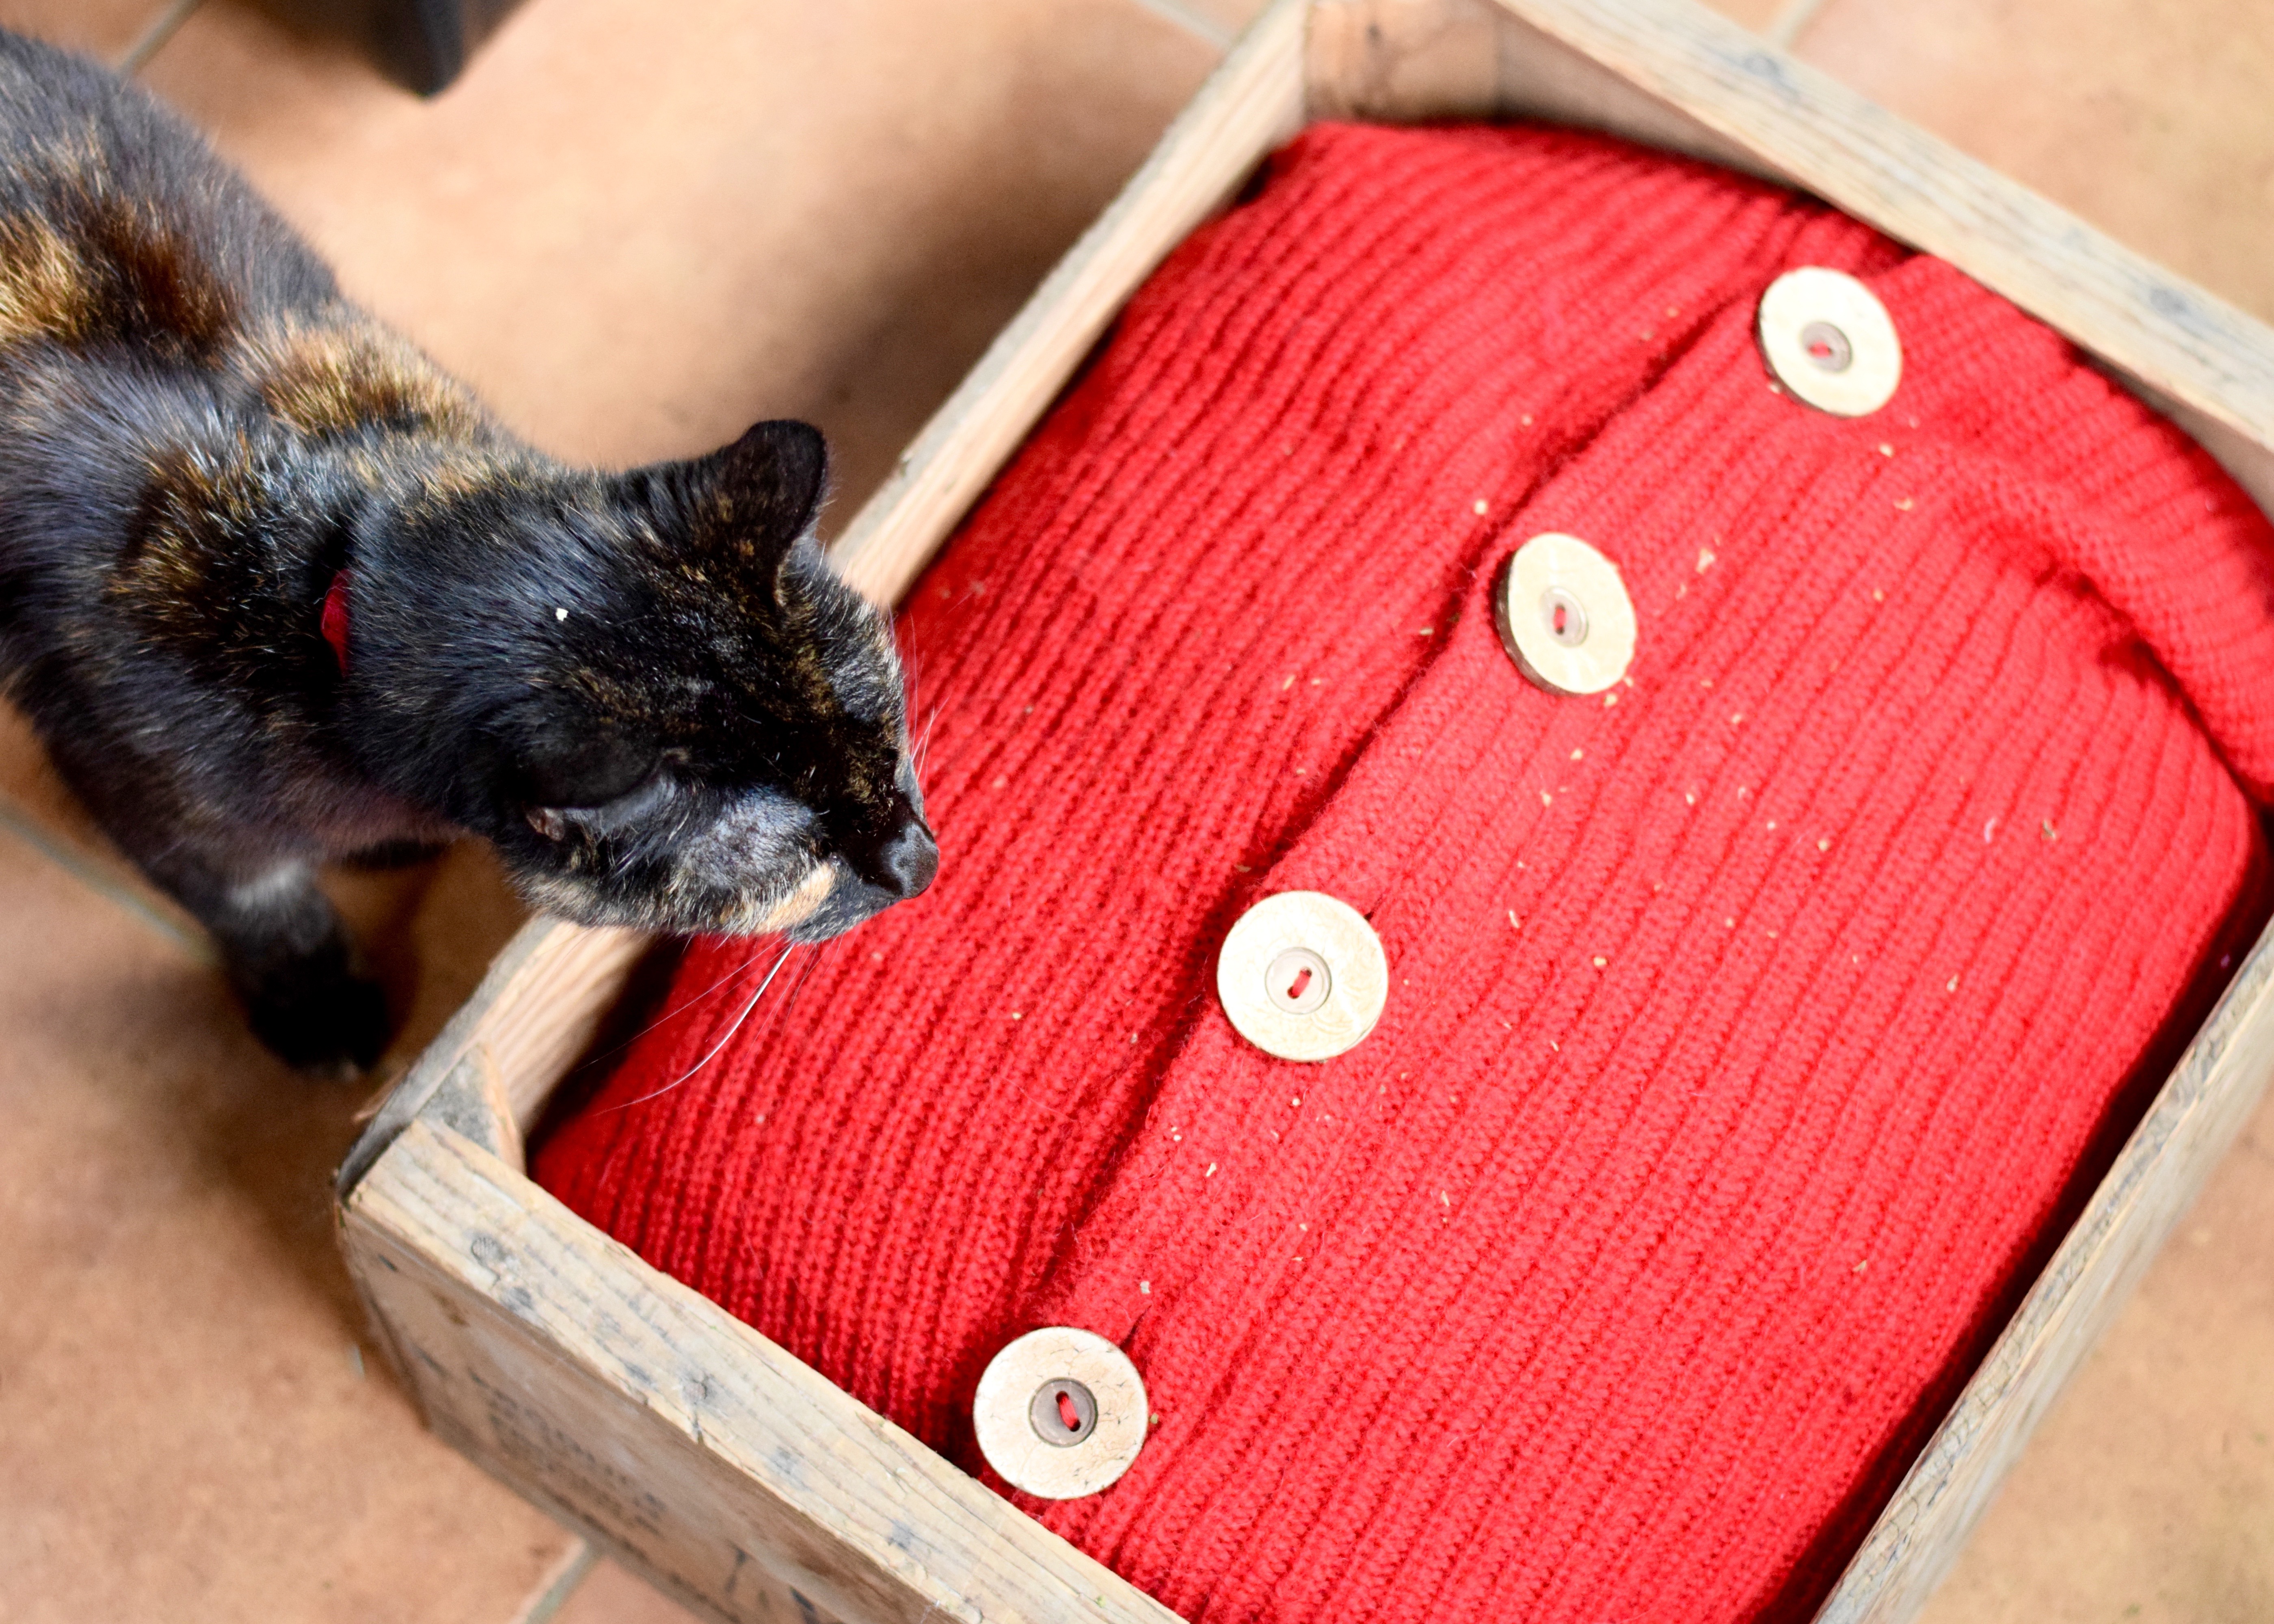
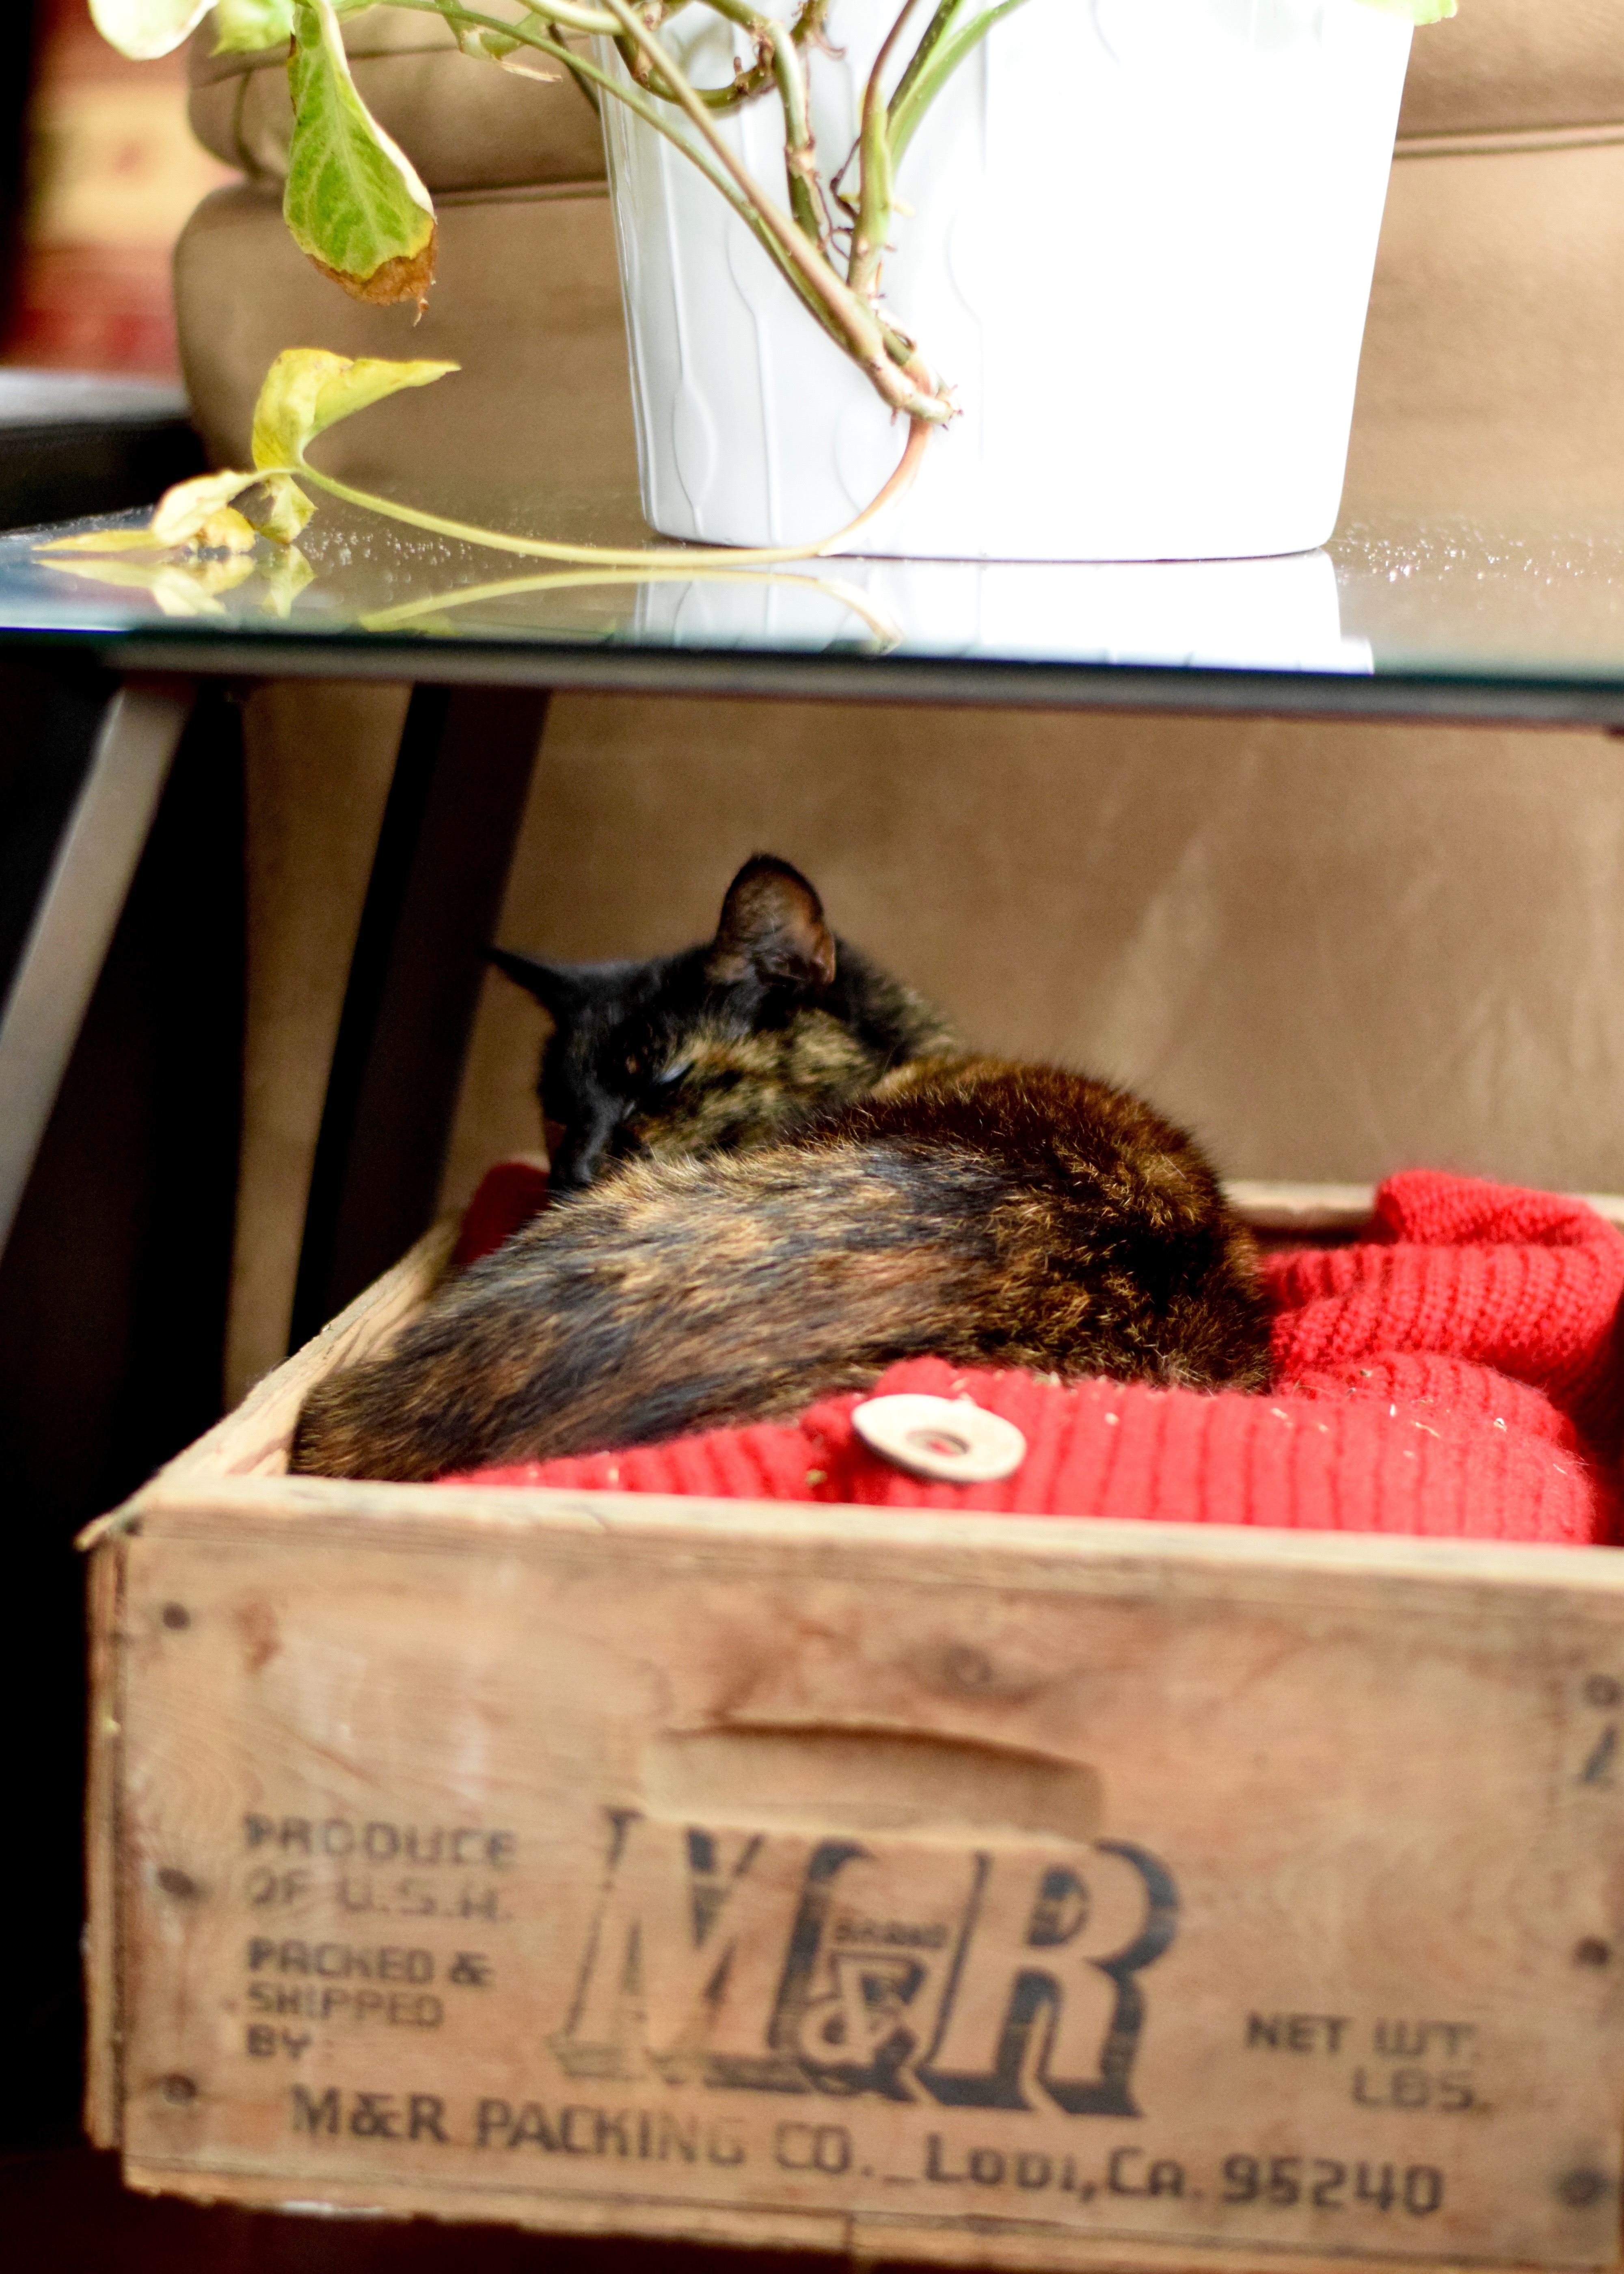
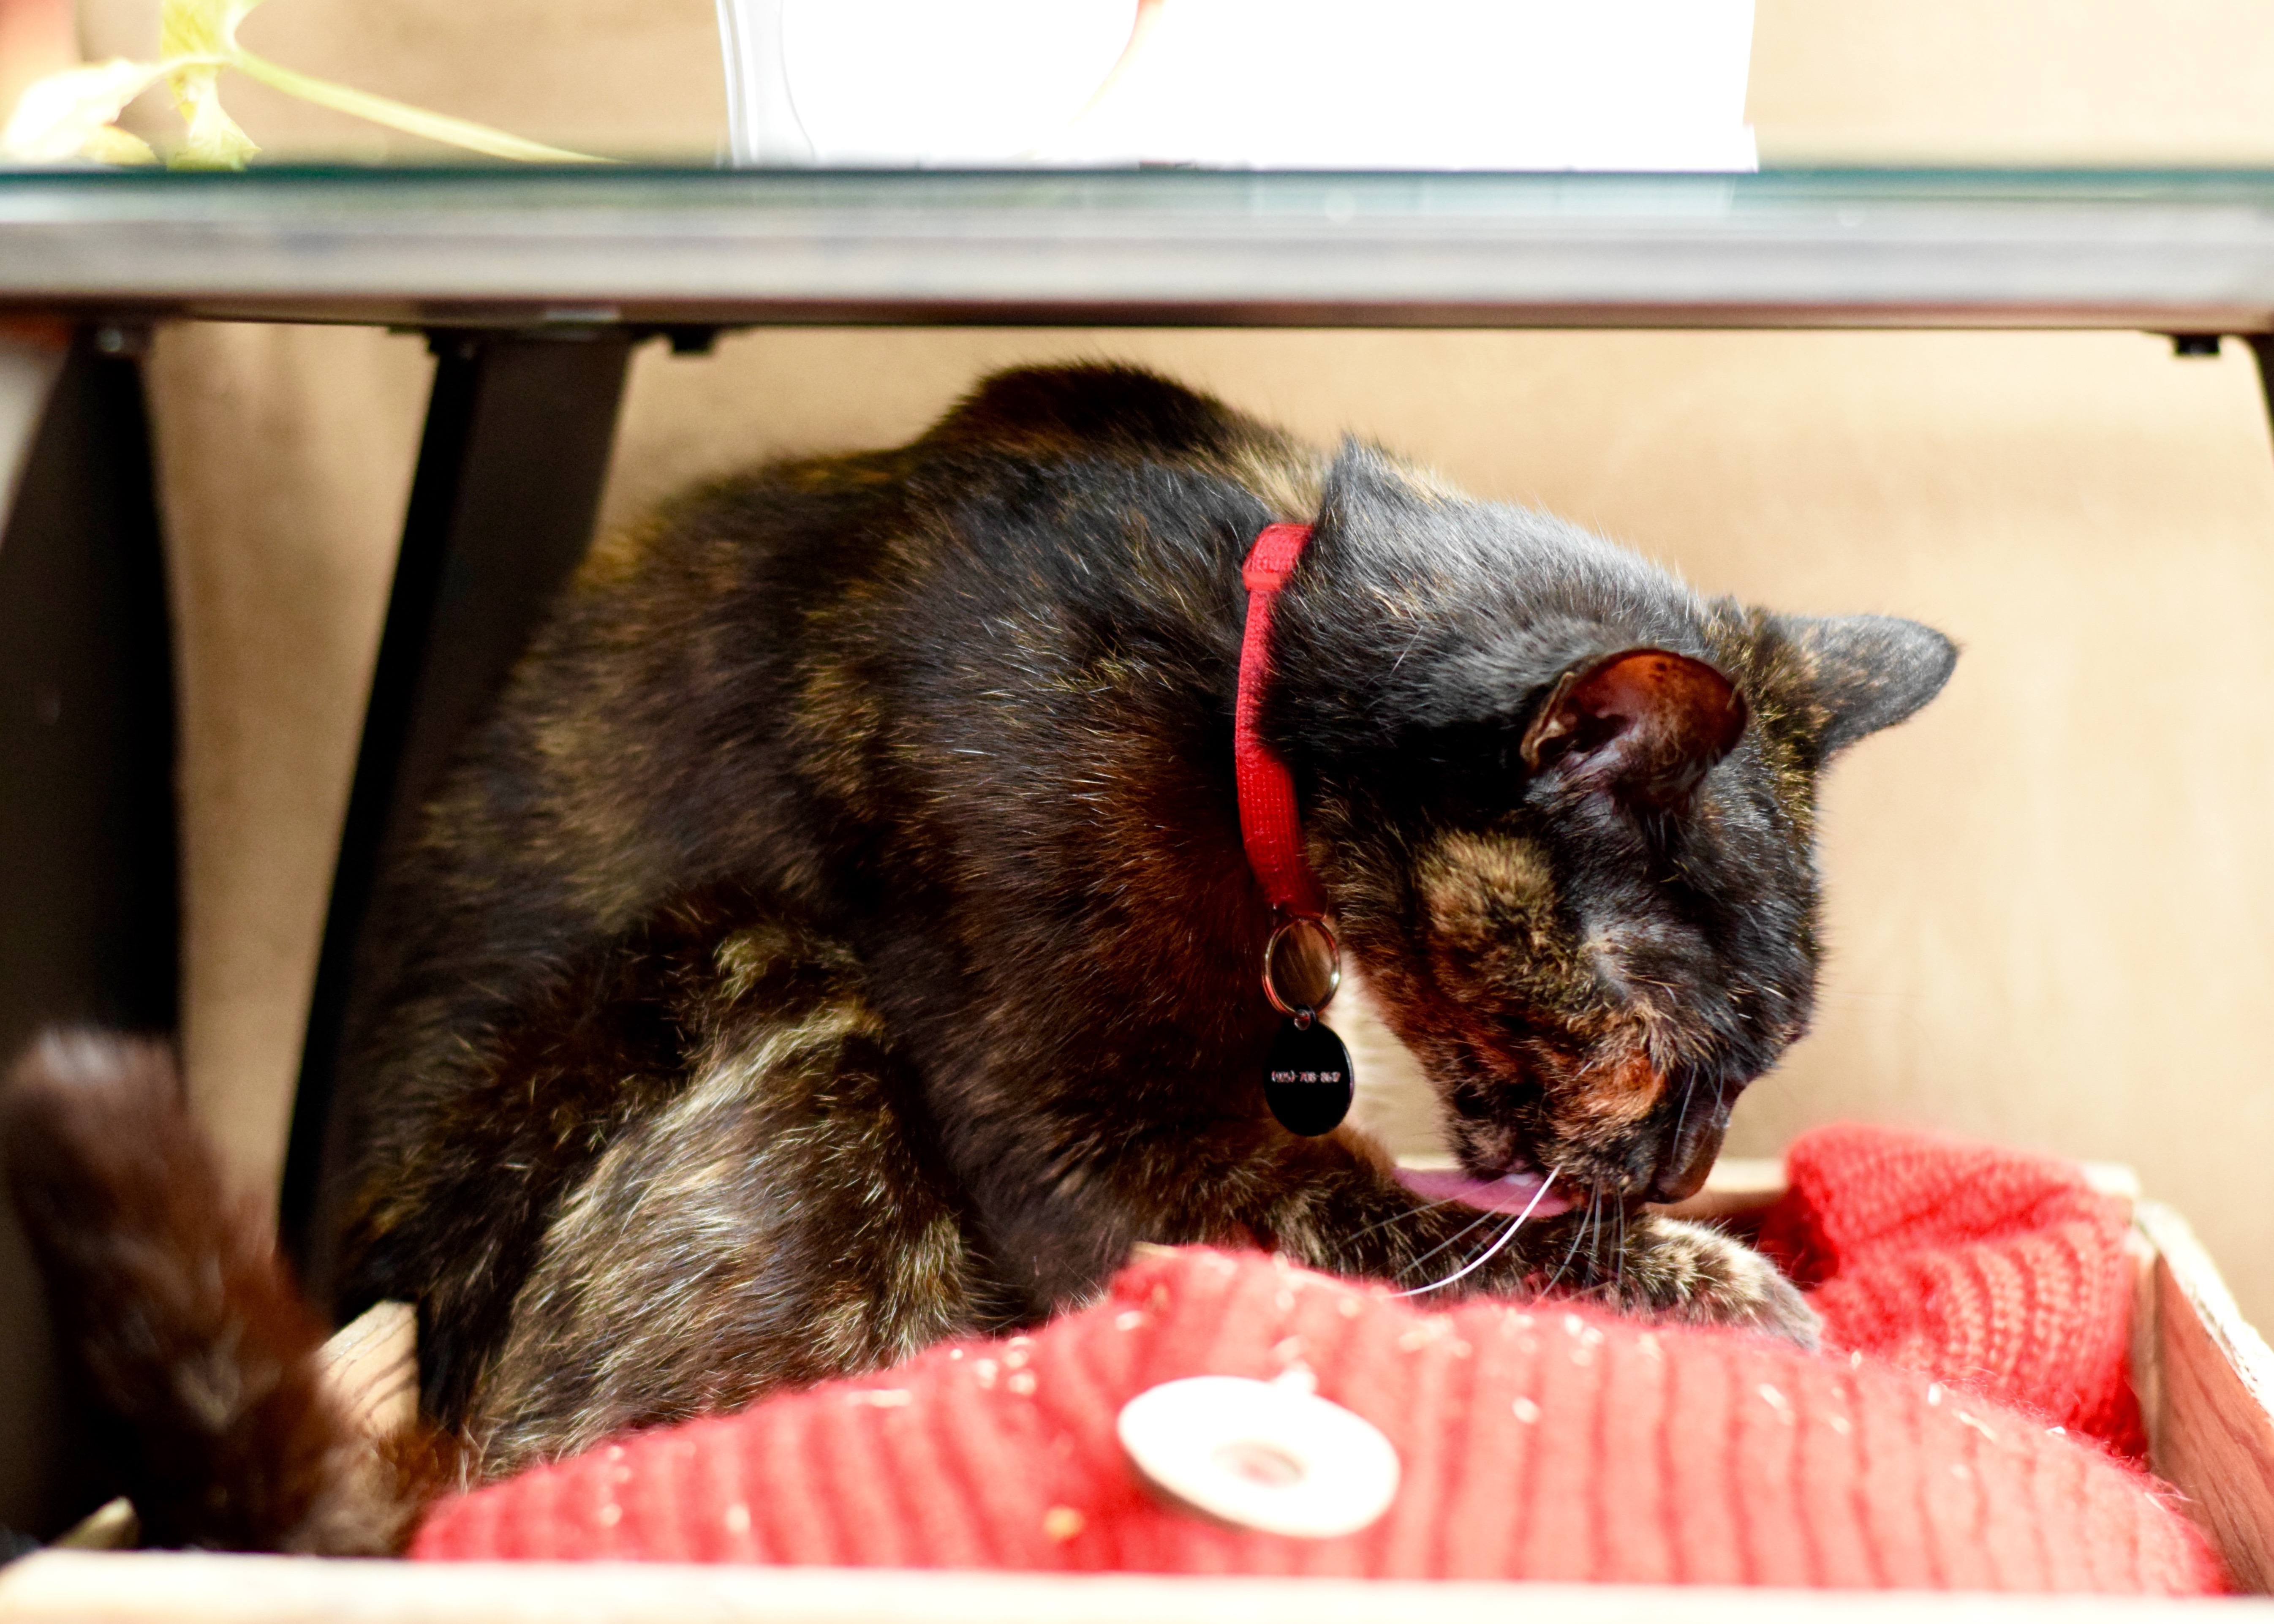
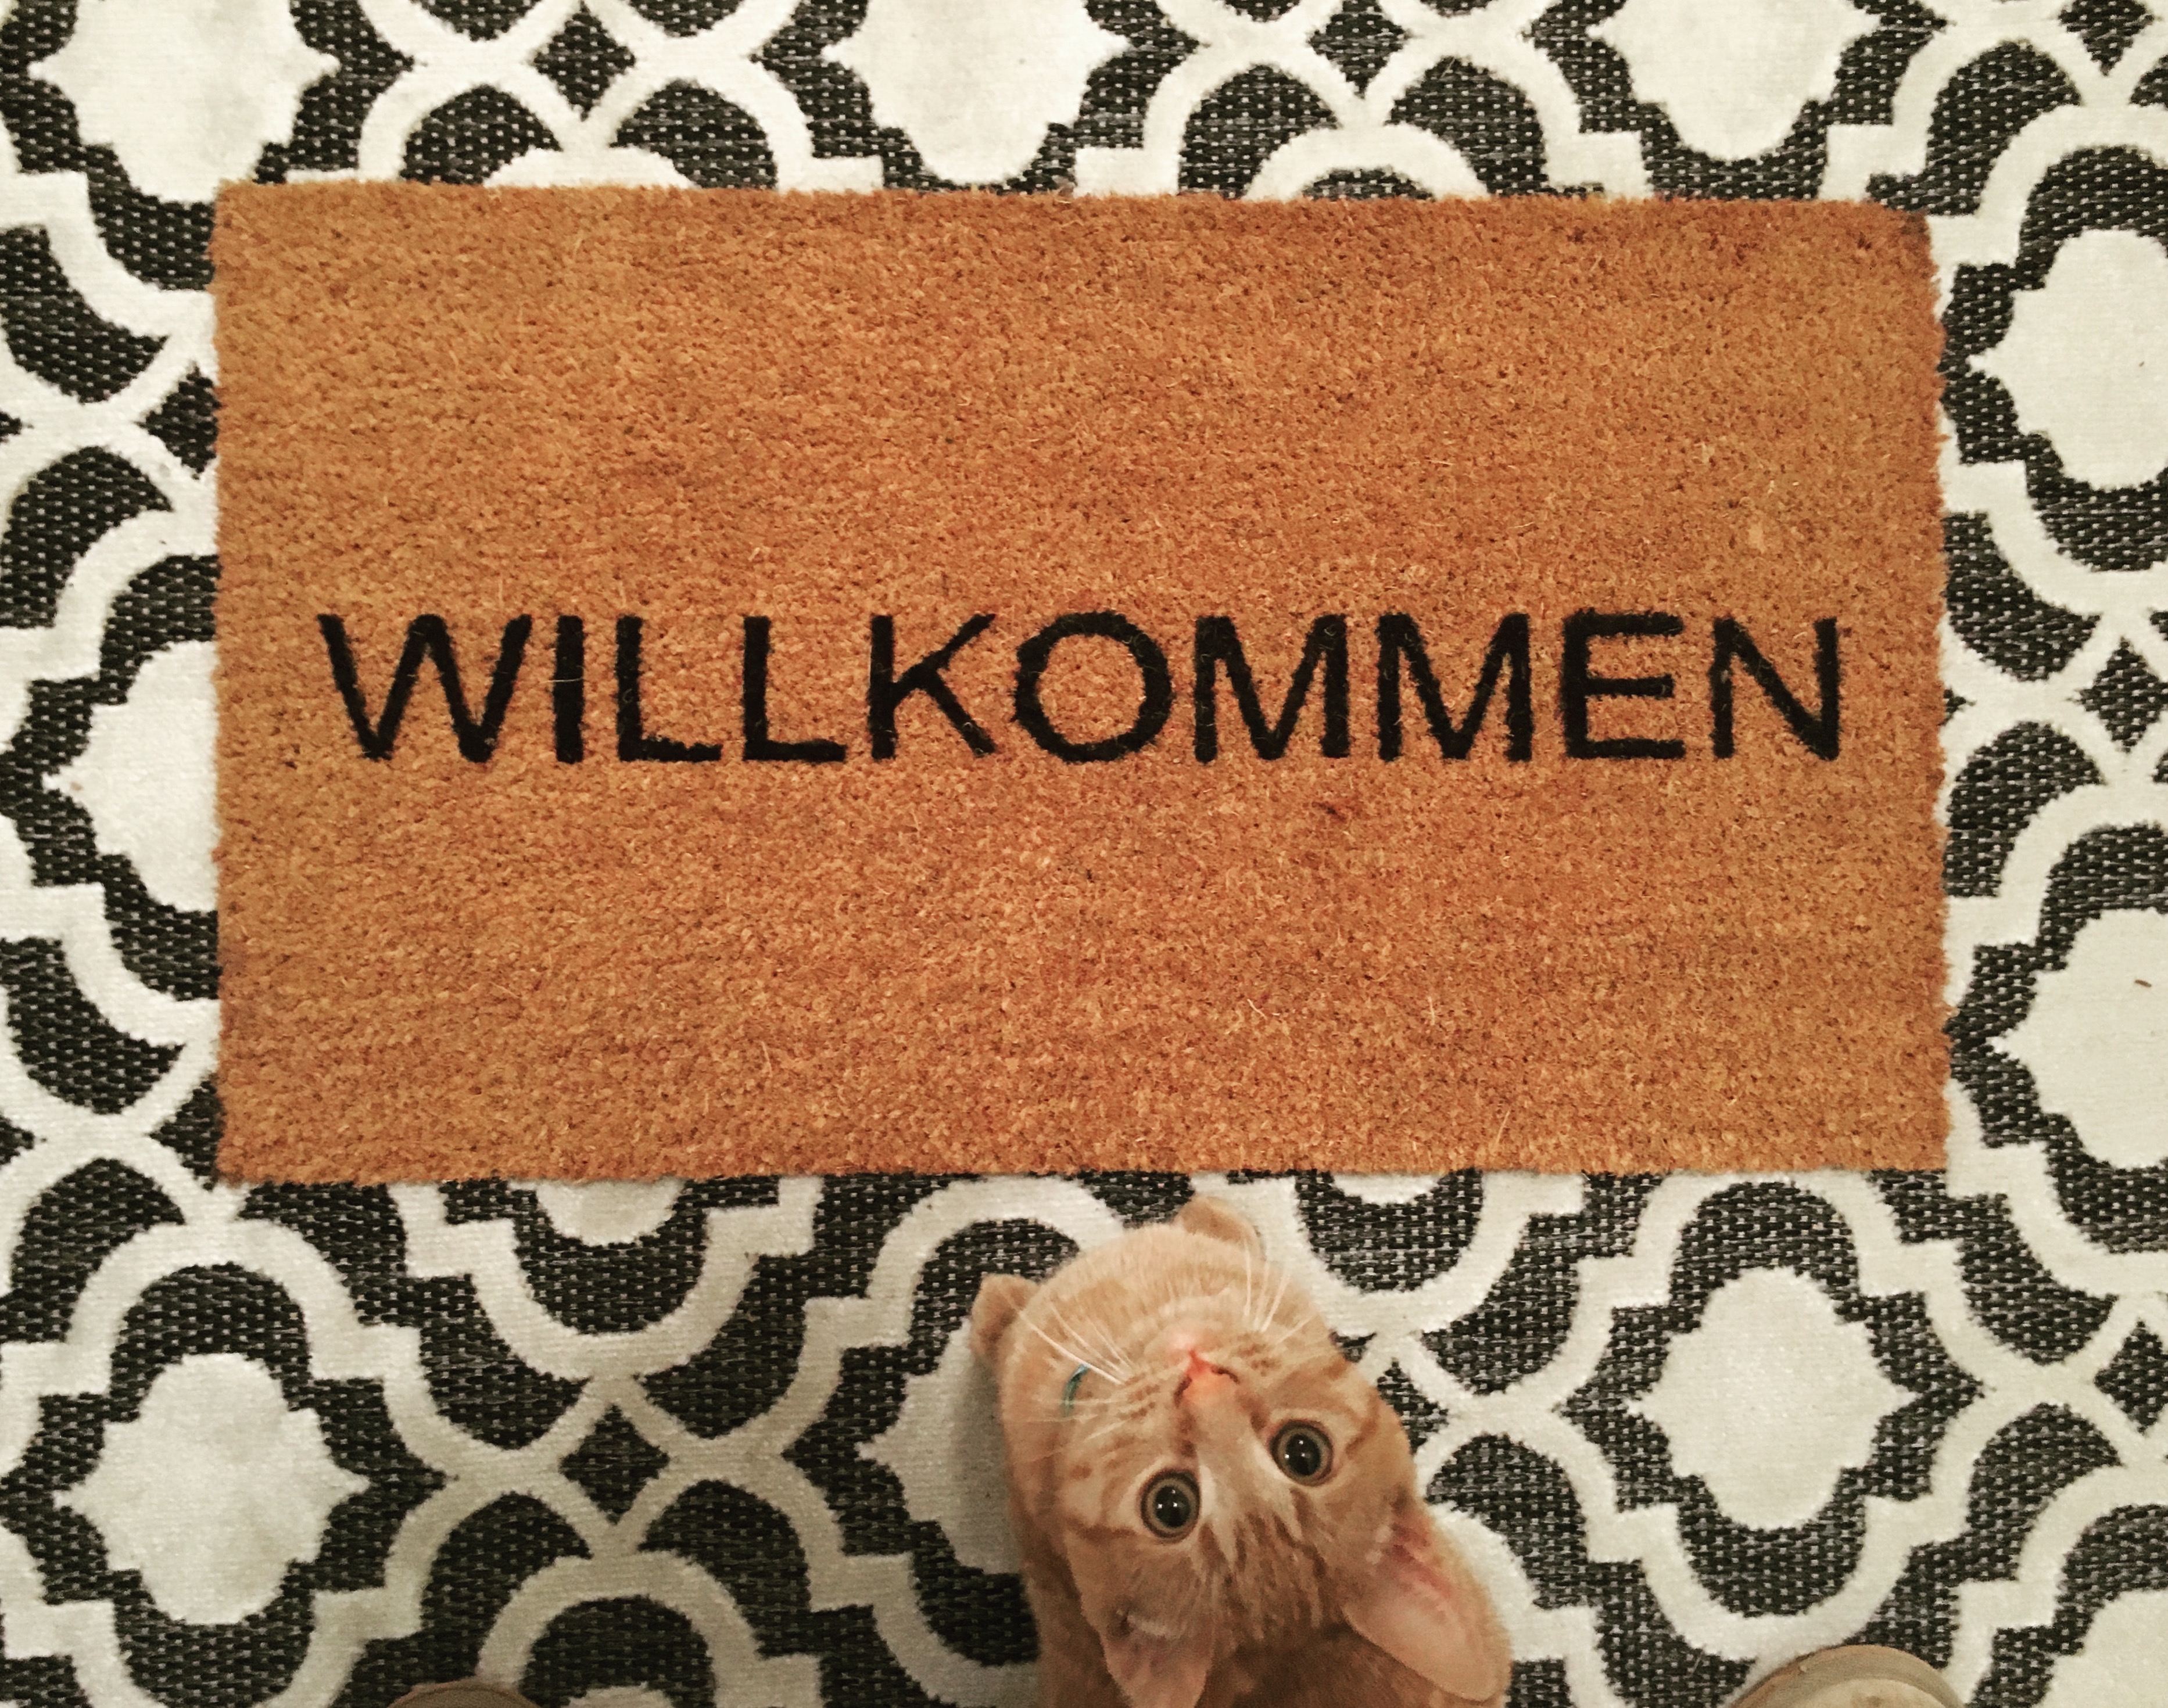
Being quite the spend-it-all-at-once-er I also bought an indoor/outdoor rug at about the same time. I picked one that was made of polypropylene because it would hide the dirt and I could take it in the backyard and hose it off if it got really dirty. The rug itself is also heavily textured with the heathered dark parts of the rug being flatwoven and about 1/8″ below the height of the light part of the rug design. I wanted something that would make the silly transition between the sheet vinyl and LVT floors less obvious. The sheet vinyl part of the entry is 4′ x 7′ and rug I bought was 3′-9″ by 5′-8″ so it covers almost the entire entry area. Then on an IKEA trip I stumbled upon some welcome mats. Most of the mats at the store said “Welcome” in English, but I spotted one that said “Willkommen” which is the German translation. Being the Germanophile I am, I snapped it up instantly and stood over my cart like a mama dog protecting her babies. I took it home and paired it with the larger black and white rug for a modern look. Having this mat inside helps keep things even cleaner, especially since we do not have any outdoor overhang! Jacks was so excited about the rug, he even posed with it for Instagram (yes this was 3 months ago).

Kitten Door Mat | Land of Laurel

With the hanging of the mirror and the purchase of the rugs and ottoman, this entry had a completely different look and feel. Thank goodness! It wasn’t done yet – no there was lots left to do – but, progress had been made and the space was starting to feel like home. Plus I finally had a place to store my shoes (the ottoman!) and a place to sit while putting on my shoes (the ottoman!). No more hopping around on one foot like a clumsy flamingo!

Entry Progress | Land of Laurel

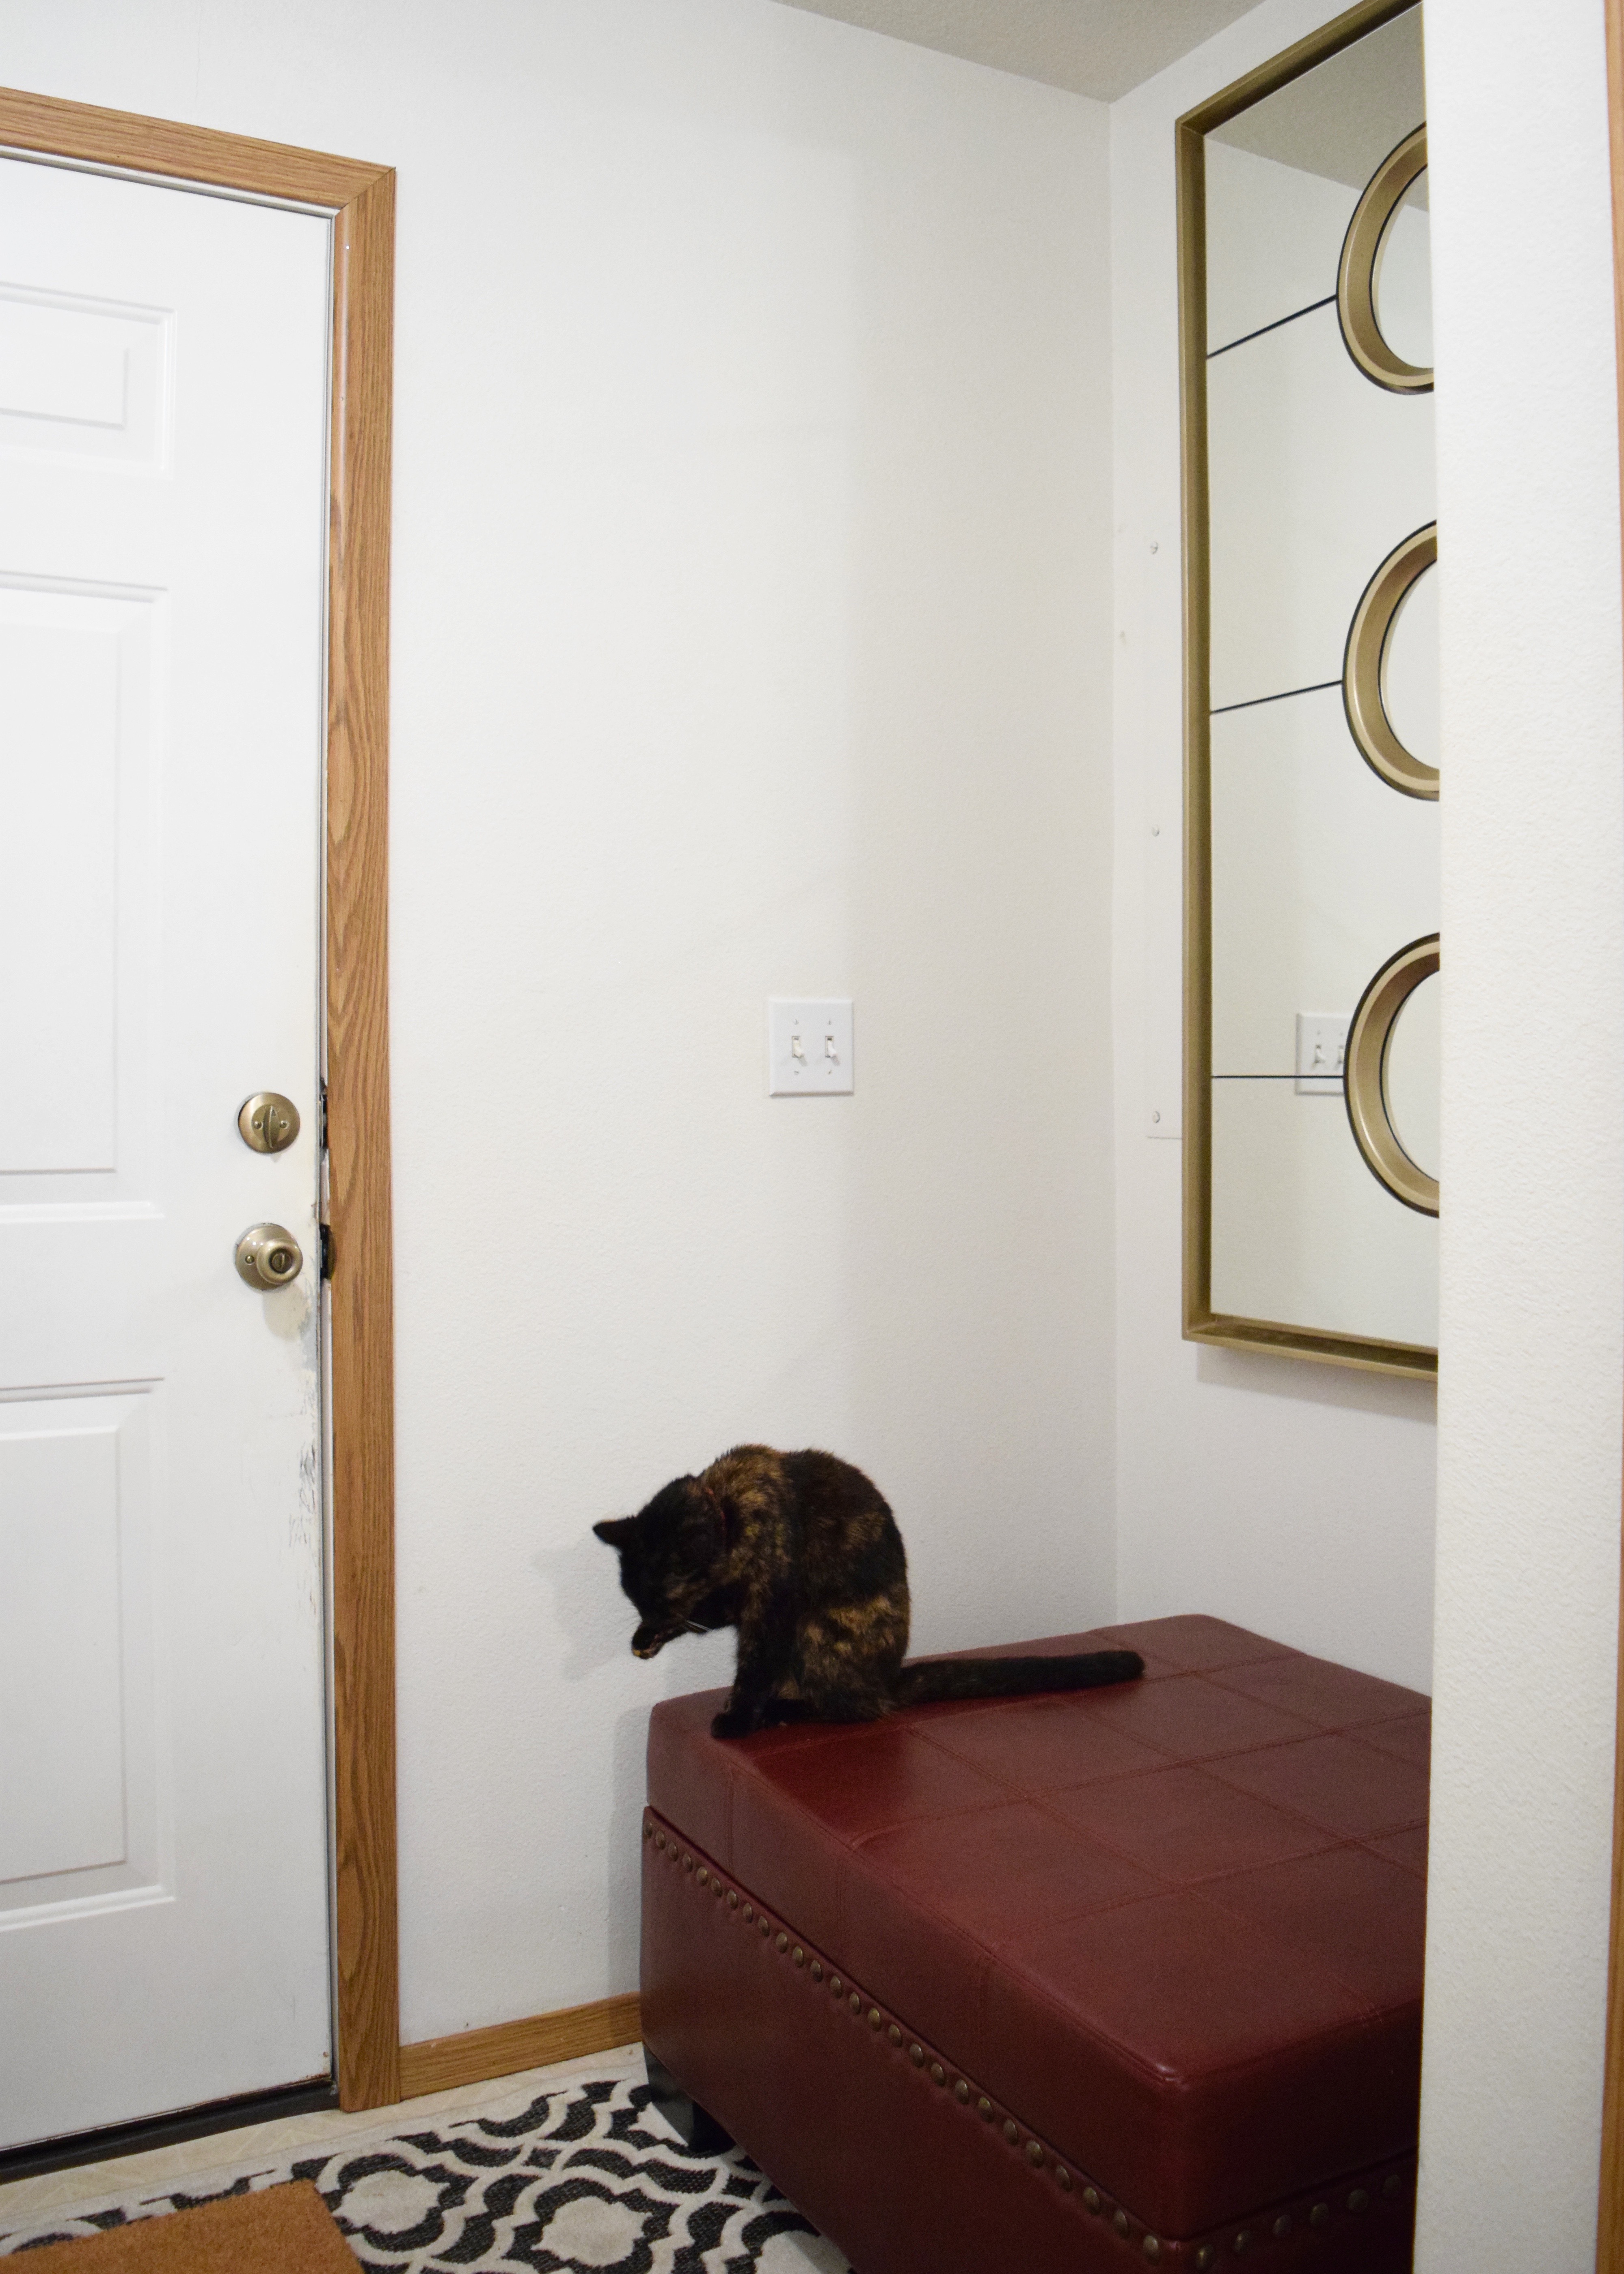
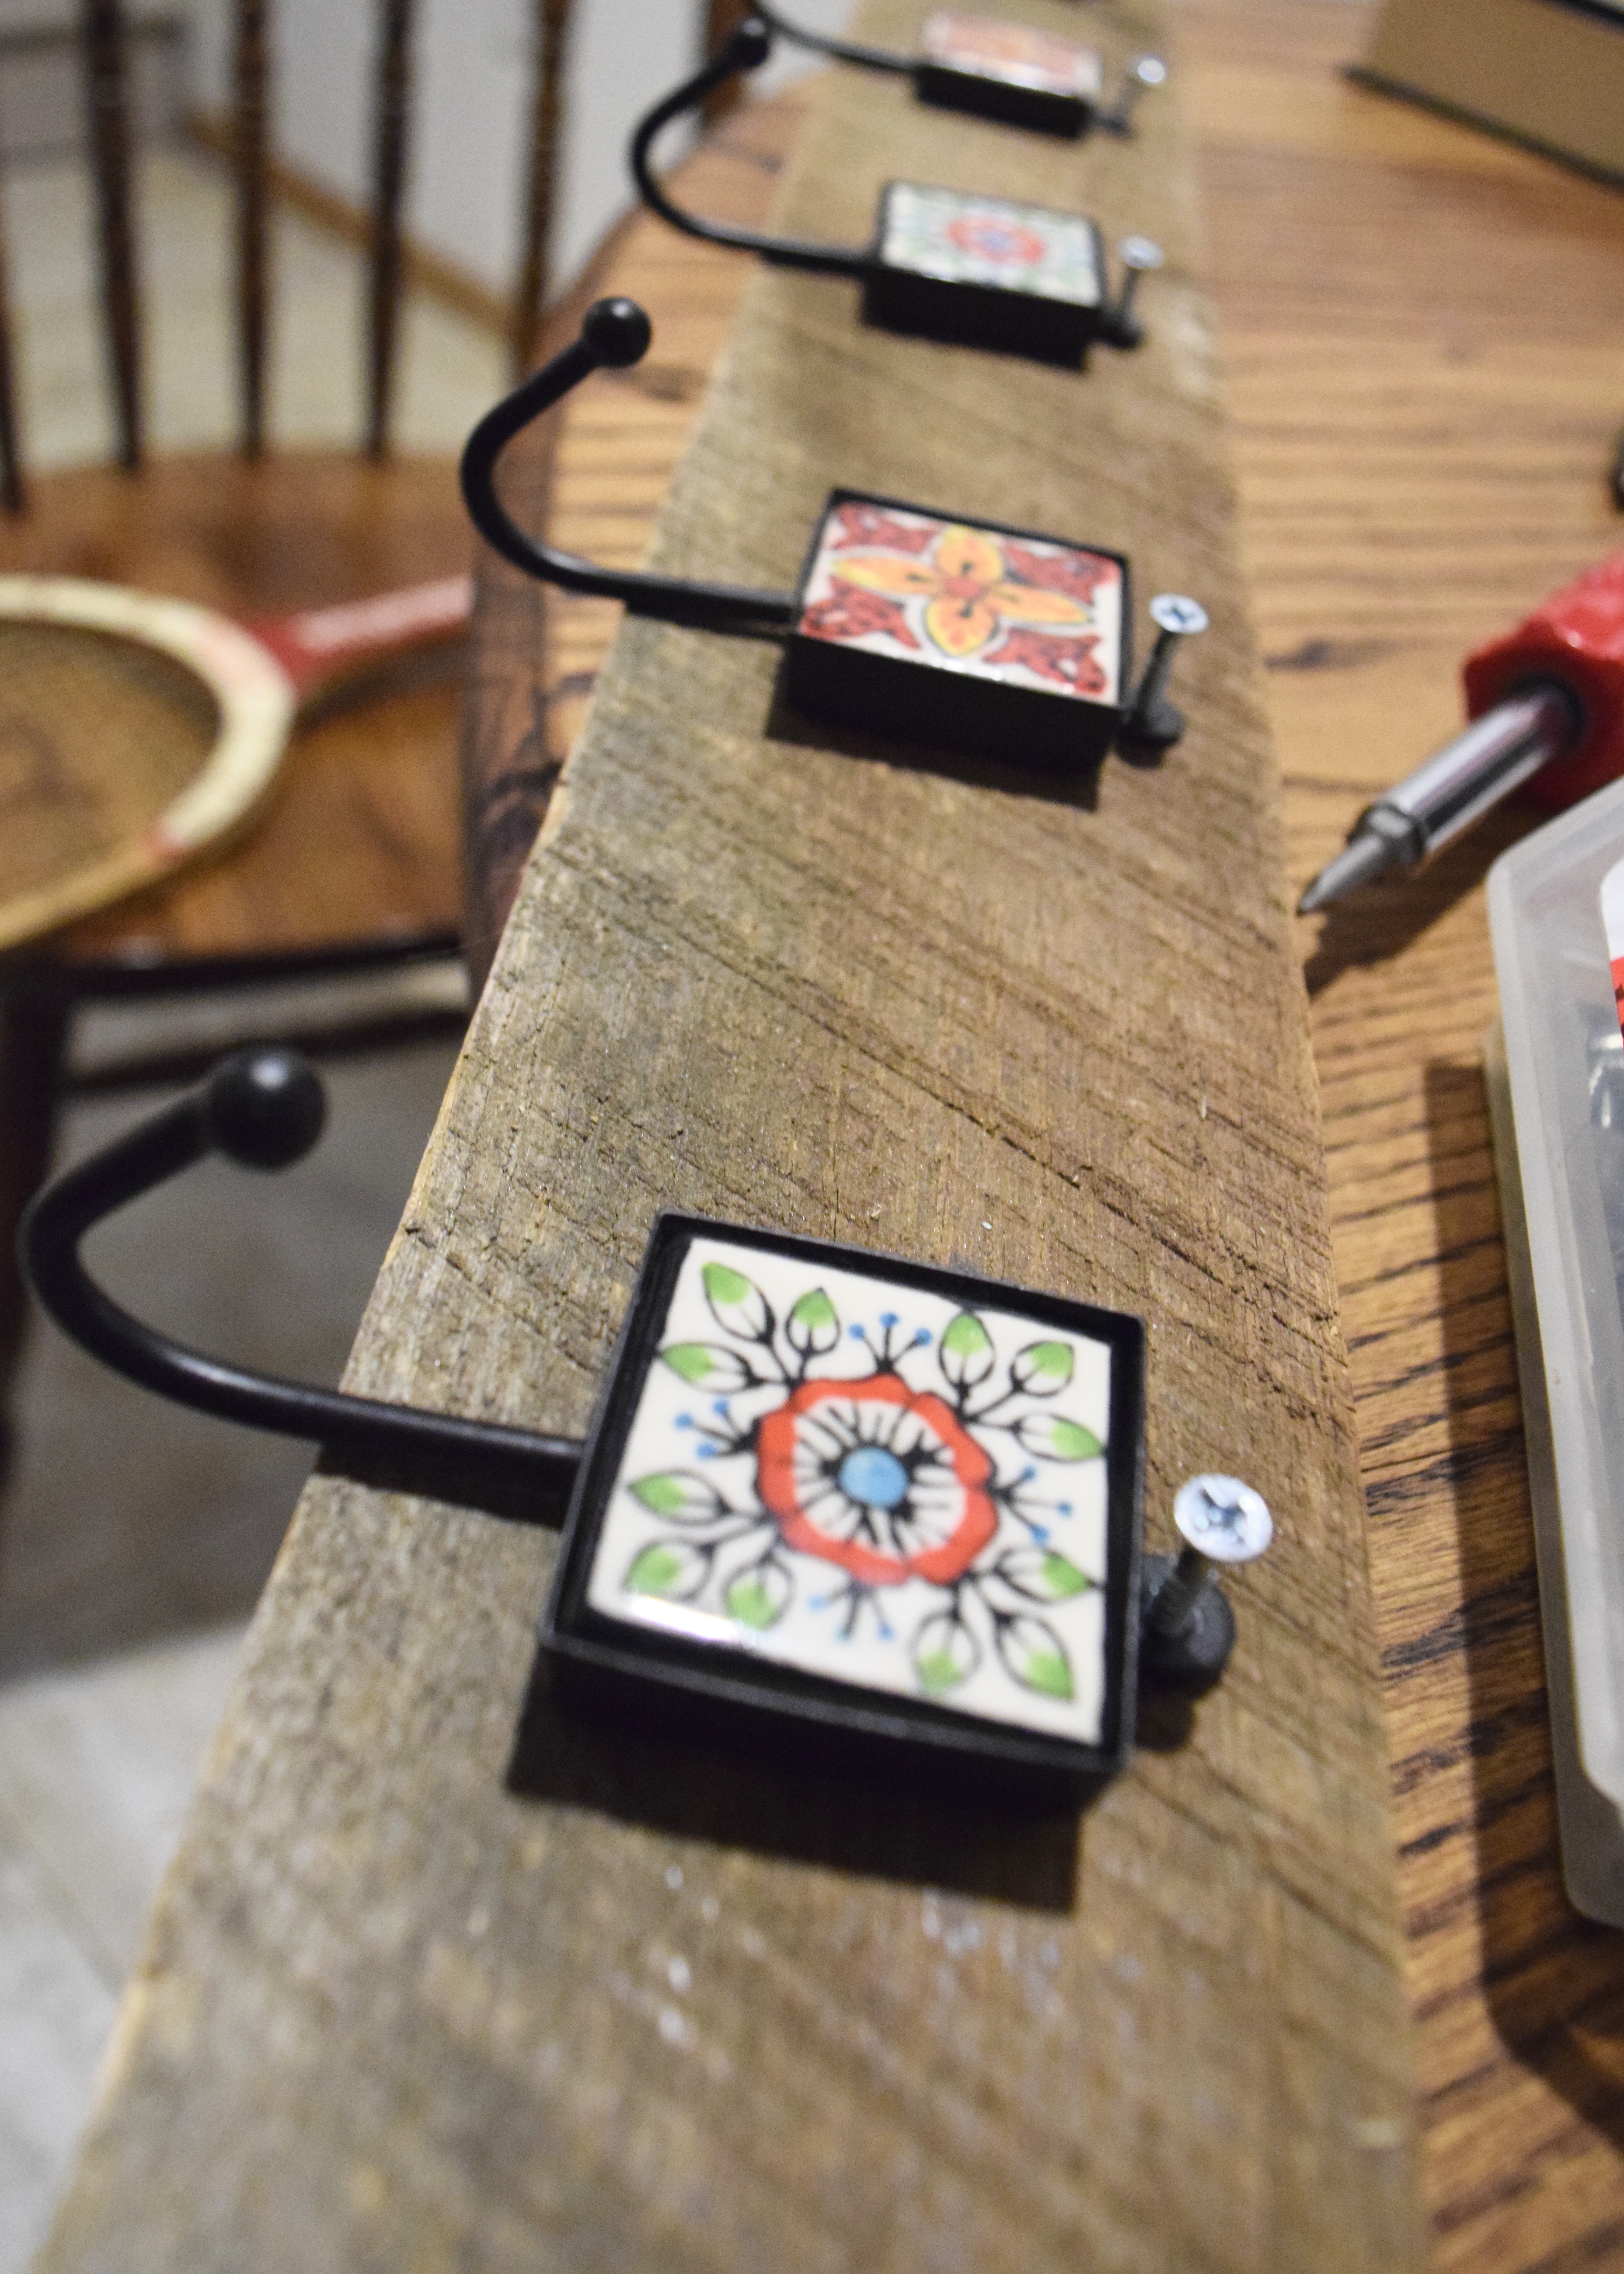
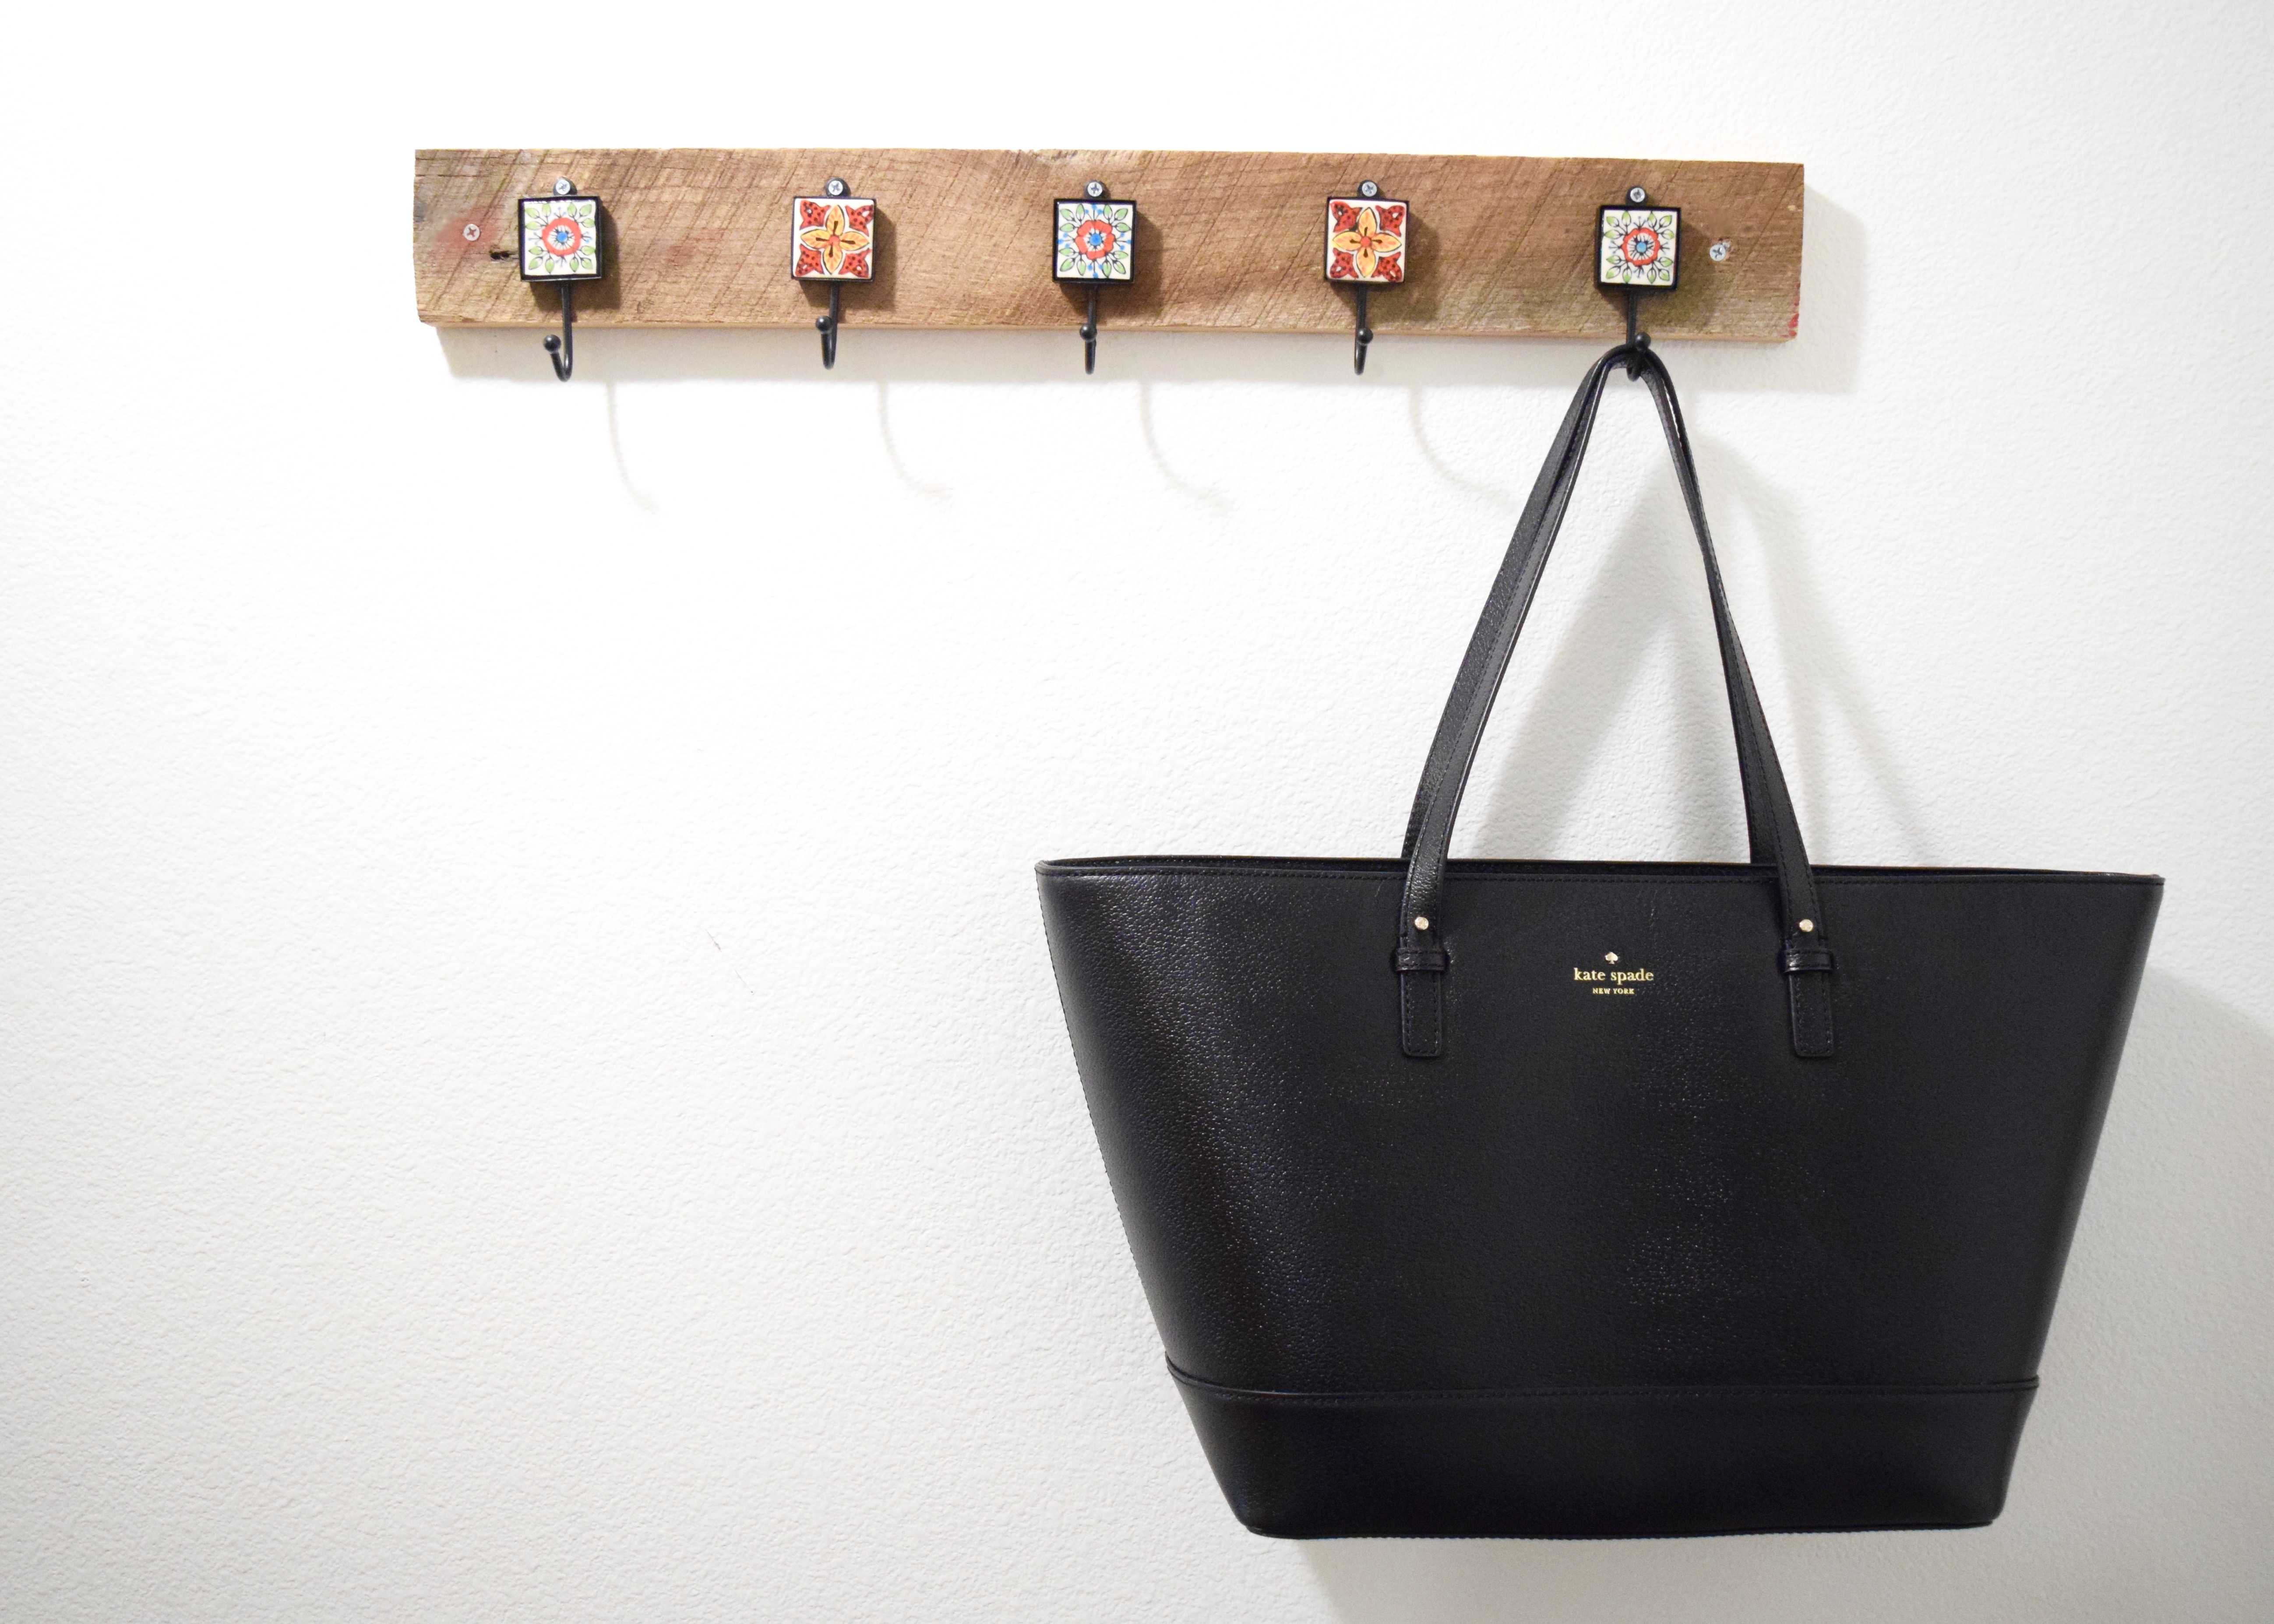
Now that my clumsy flamingo days were over, I also wanted a place to hang my purse and any wet coats (have you heard that it rains here in Portland, OR?). I inherited some pretty reclaimed wood planks from a friend a while back. I pulled one out that looked to be about the right size; its gorgeously beat up and has some paint still staining it. I love old wood (wink wink! No, gross! Bad joke! I take it back.).  Then I picked up some of these painted square tile hooks from World Market.

DIY Coat Rack | Land of Laurel

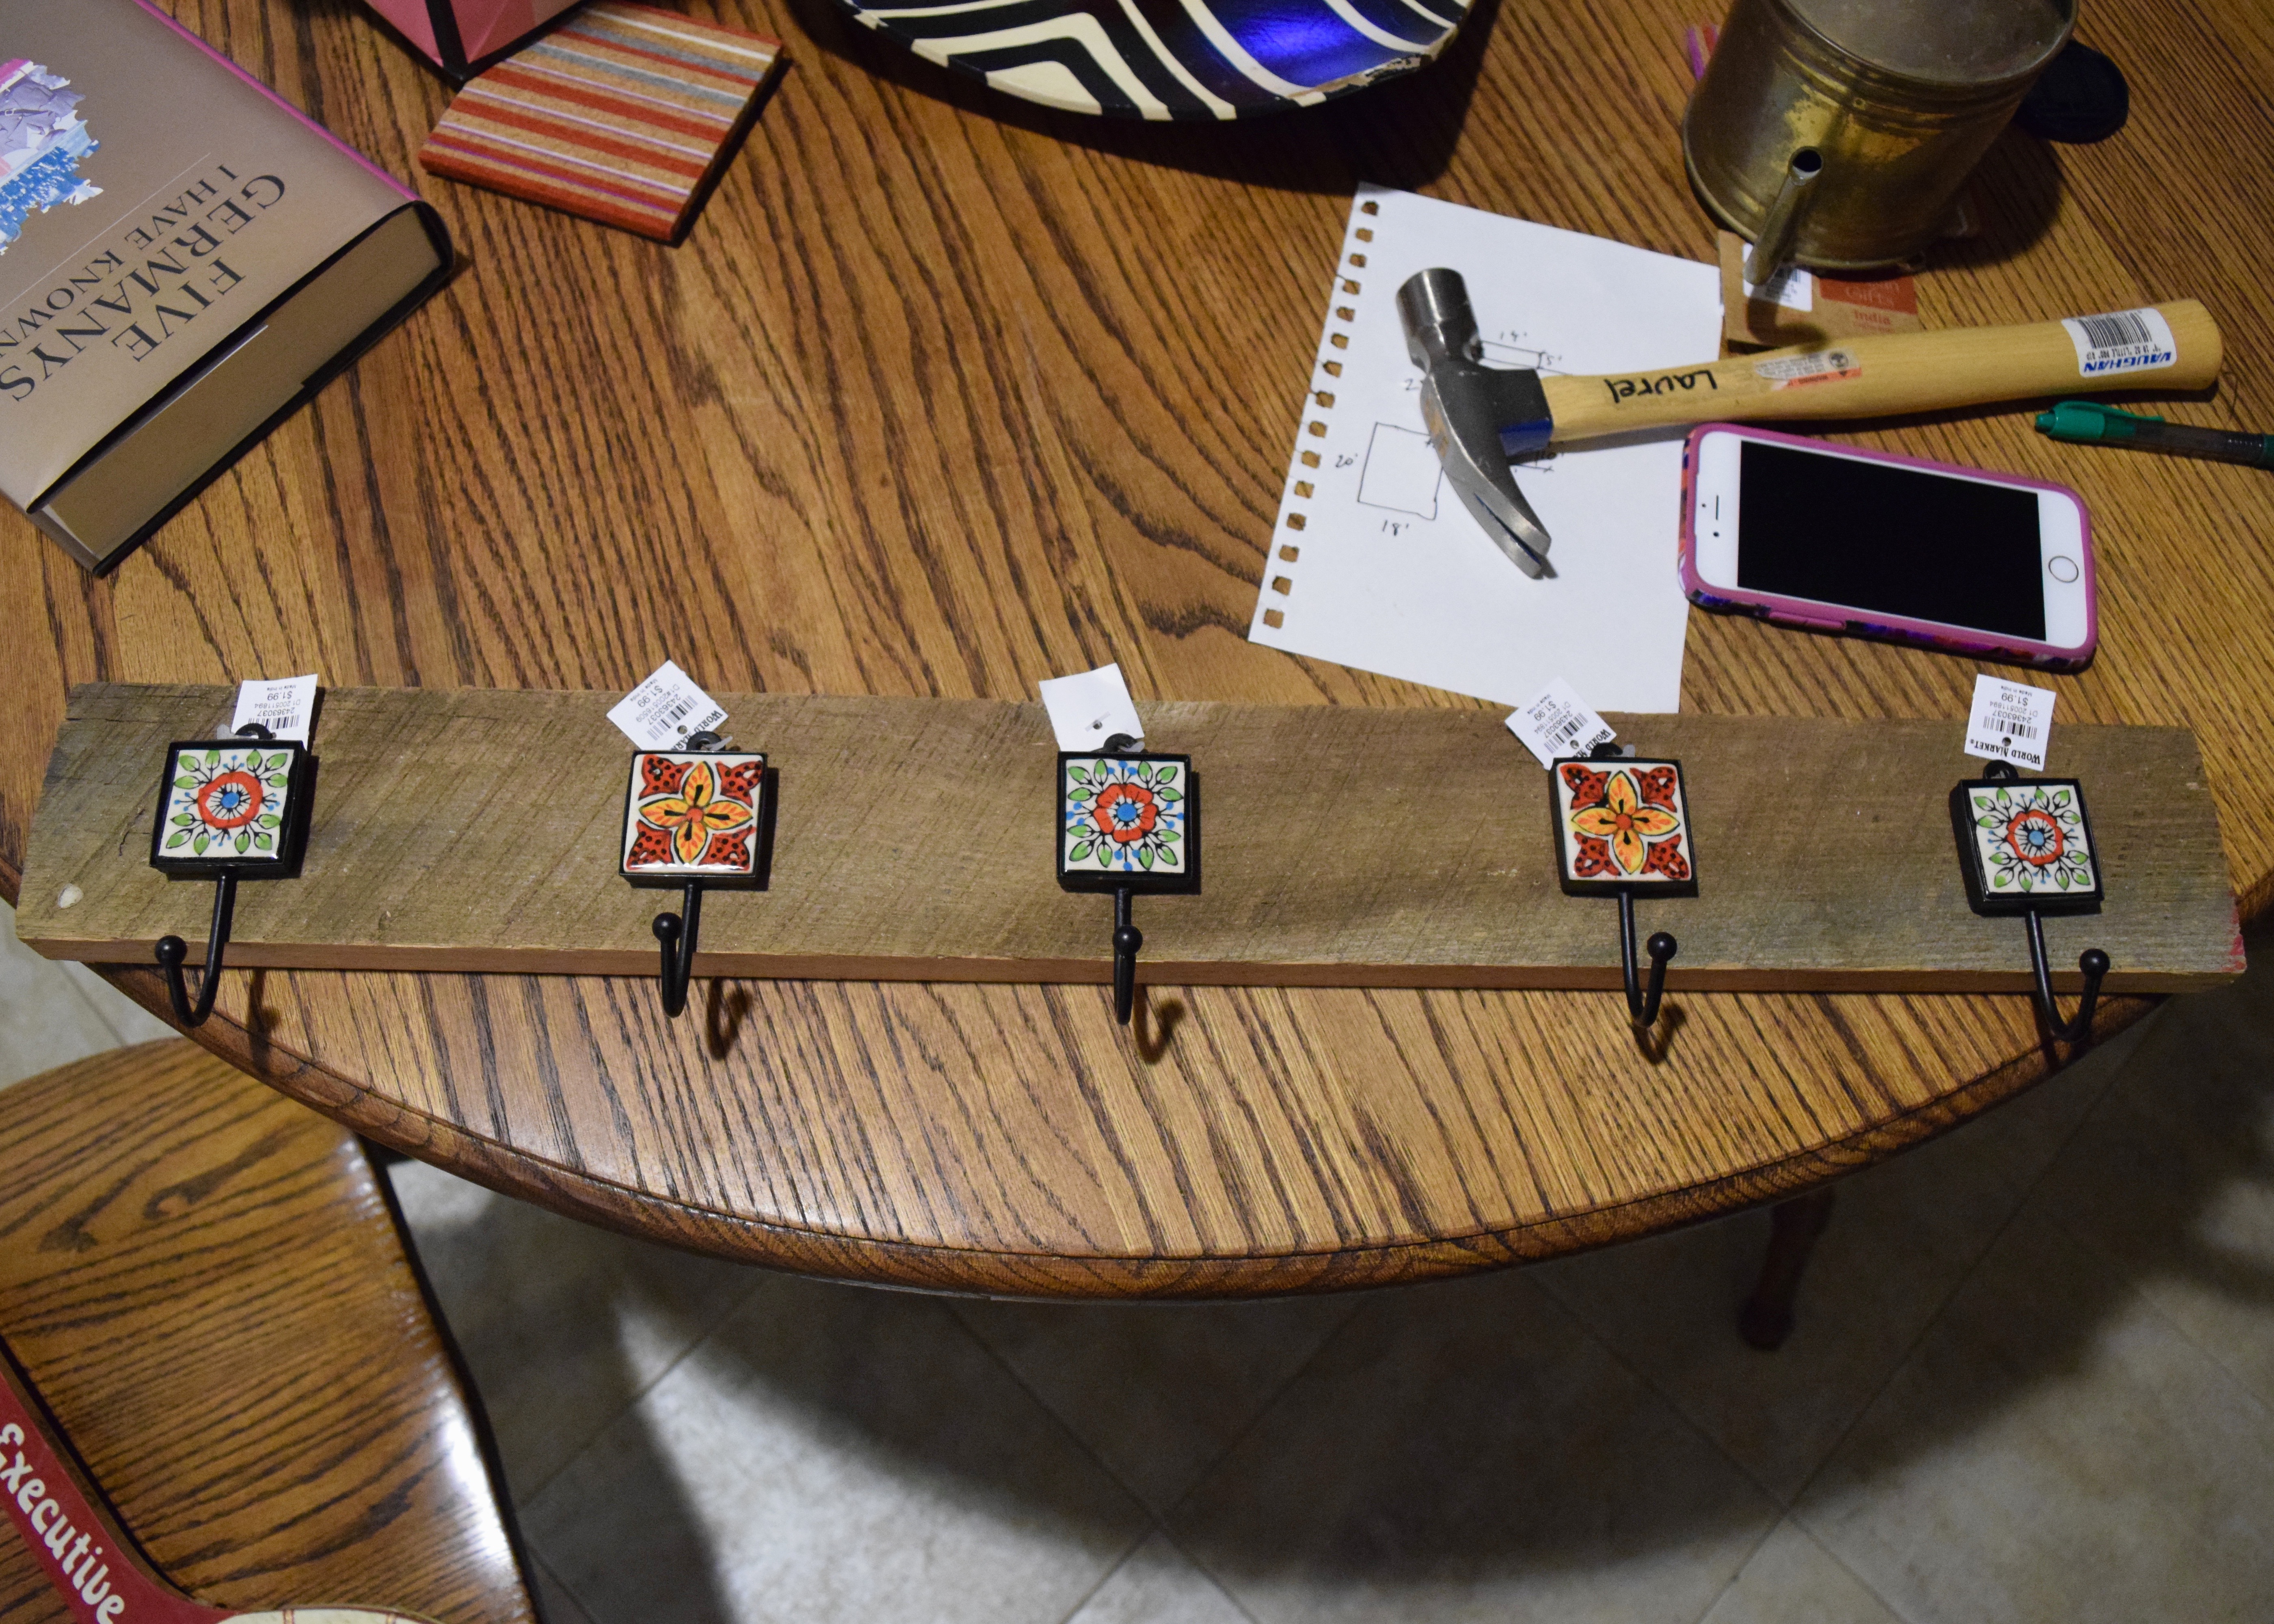
I laid them out on top of the wood plank on my dining table and spaced them out until they were even to the eye, before marking their location with a pen. Then I drilled shallow holes in the wood to allow for the screws.

DIY Coatrack | Land of Laurel

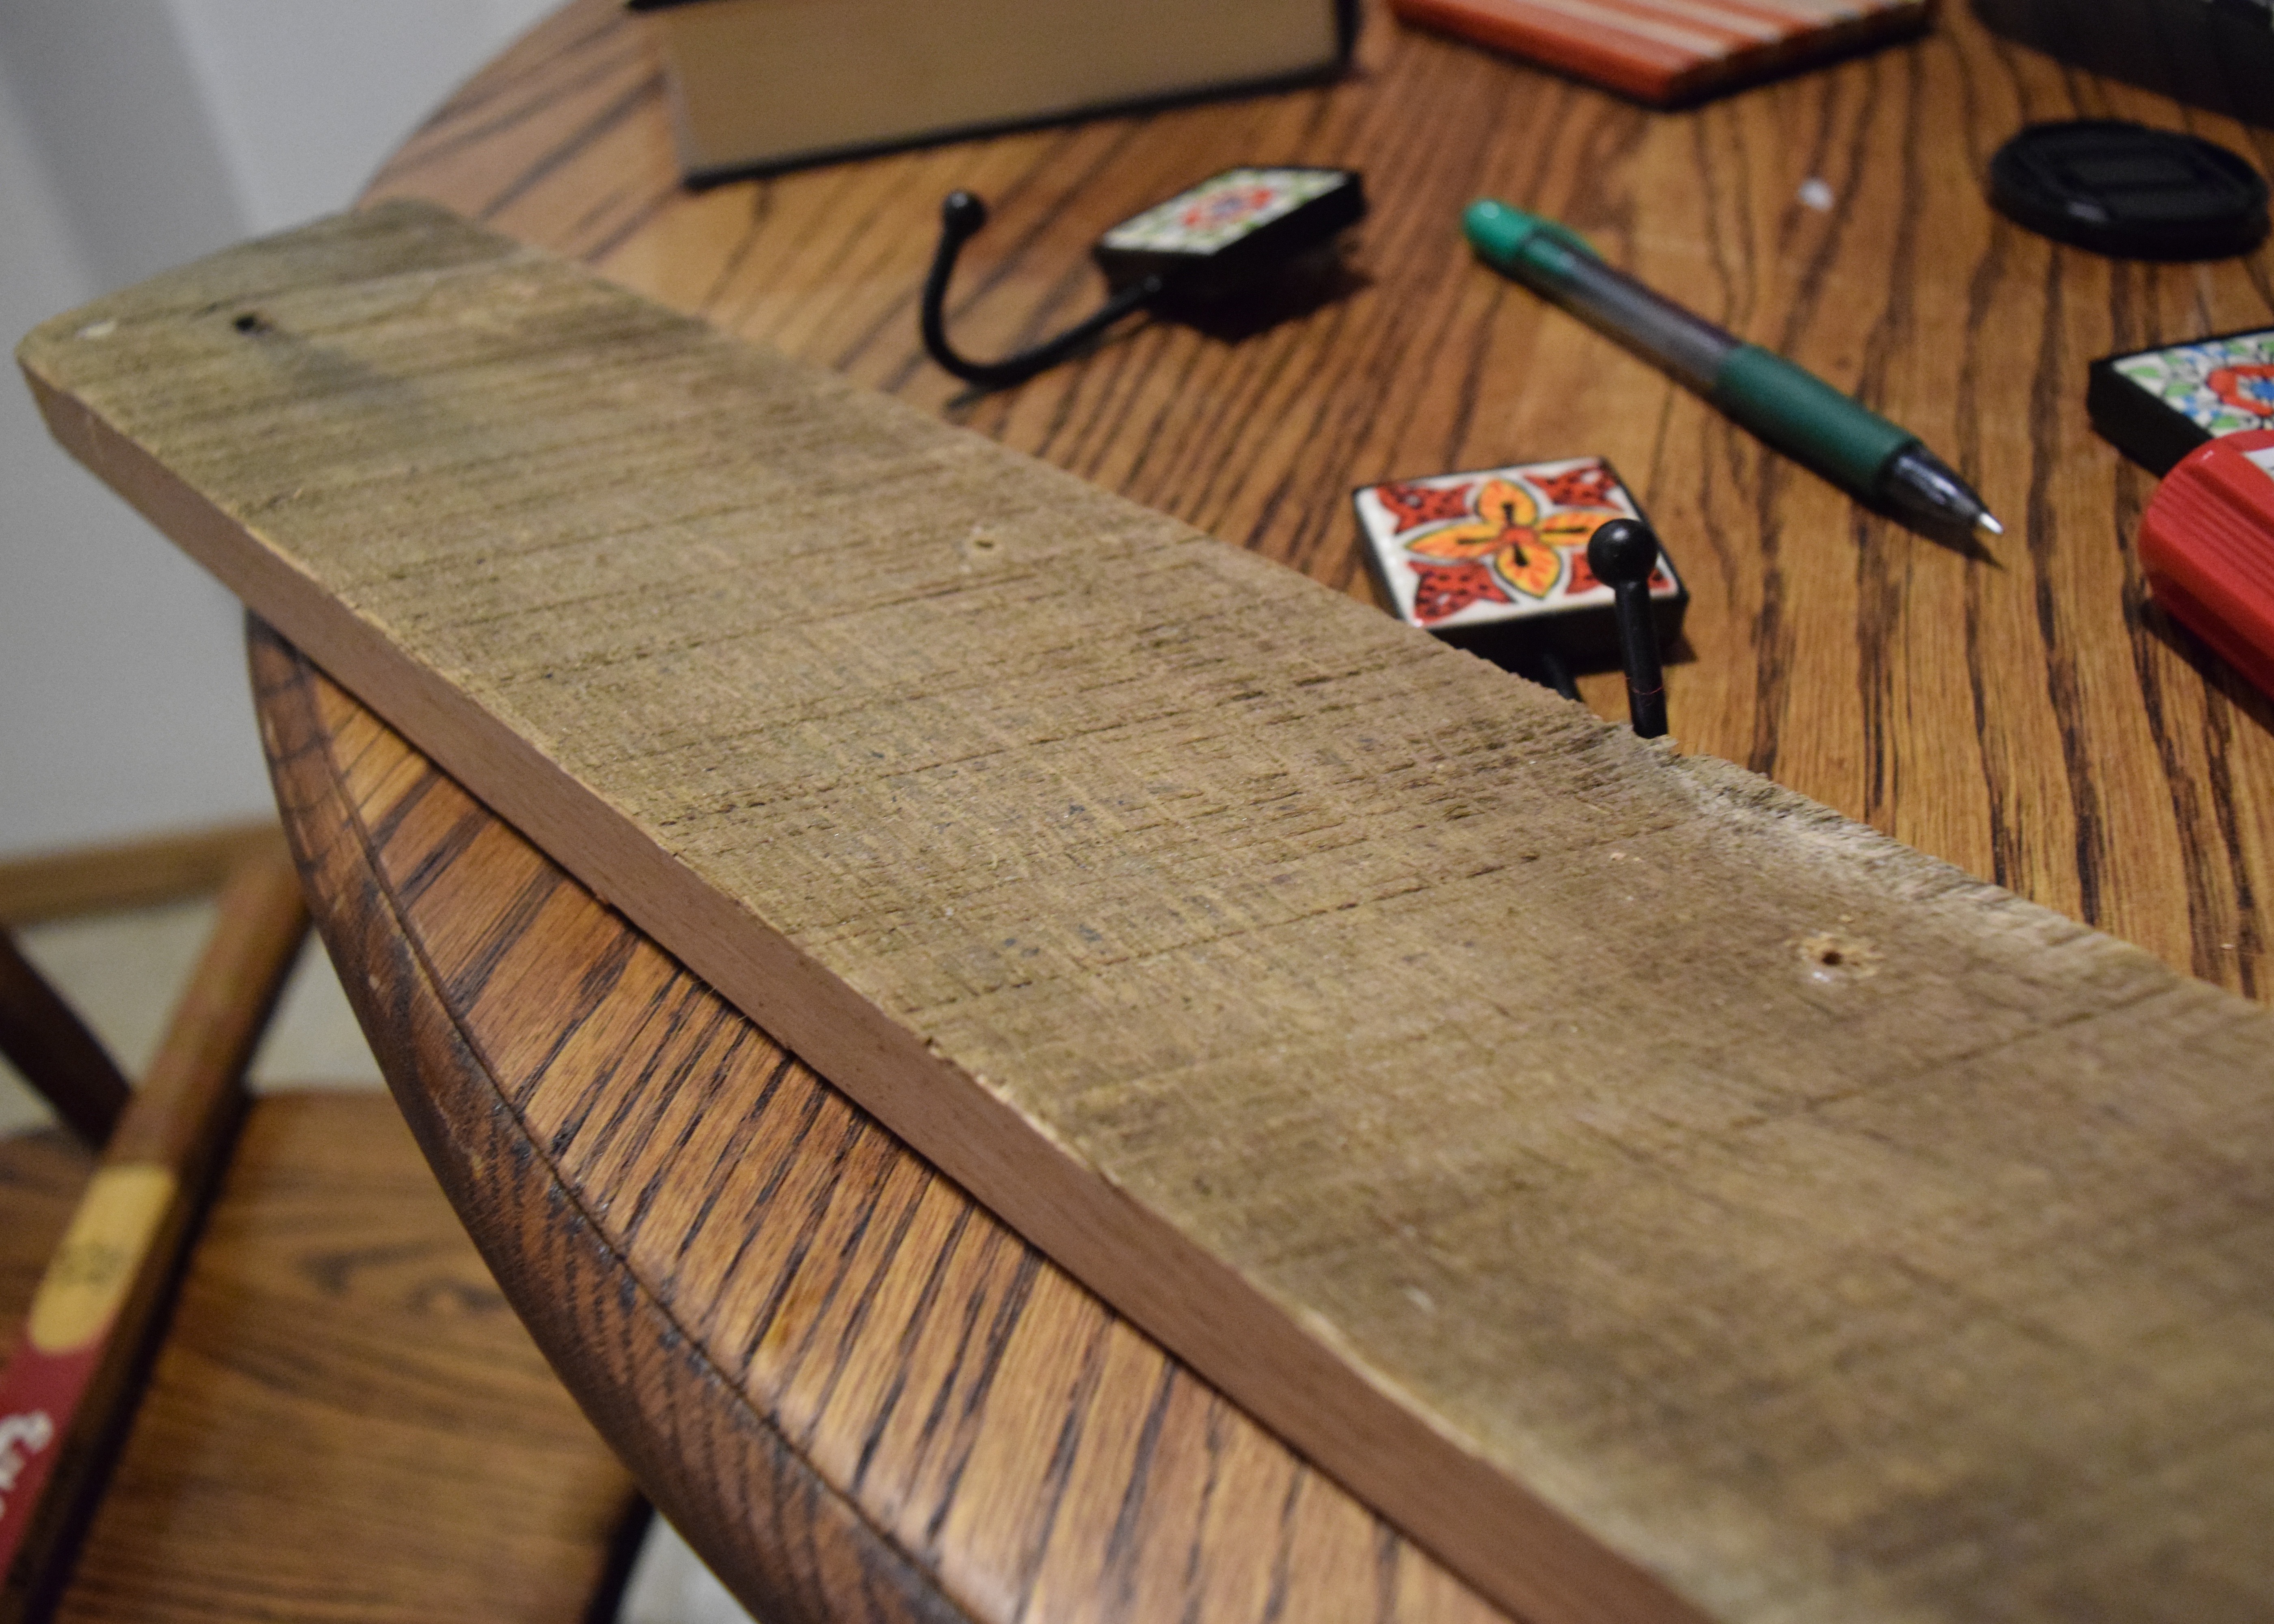
I finished it off by screwing the hooks onto the board. (Is it just me or did that sound dirty too?)

DIY Coatrack | Land of Laurel

I finished it off (oh my god, why does this sound so bad?!) by drilling holes at the middle of each end of the board and taking two 2″ screws to fasten it into the studs in the entry. The coatrack looks cute and holds my purse quite nicely!

DIY Coatrack | Land of Laurel

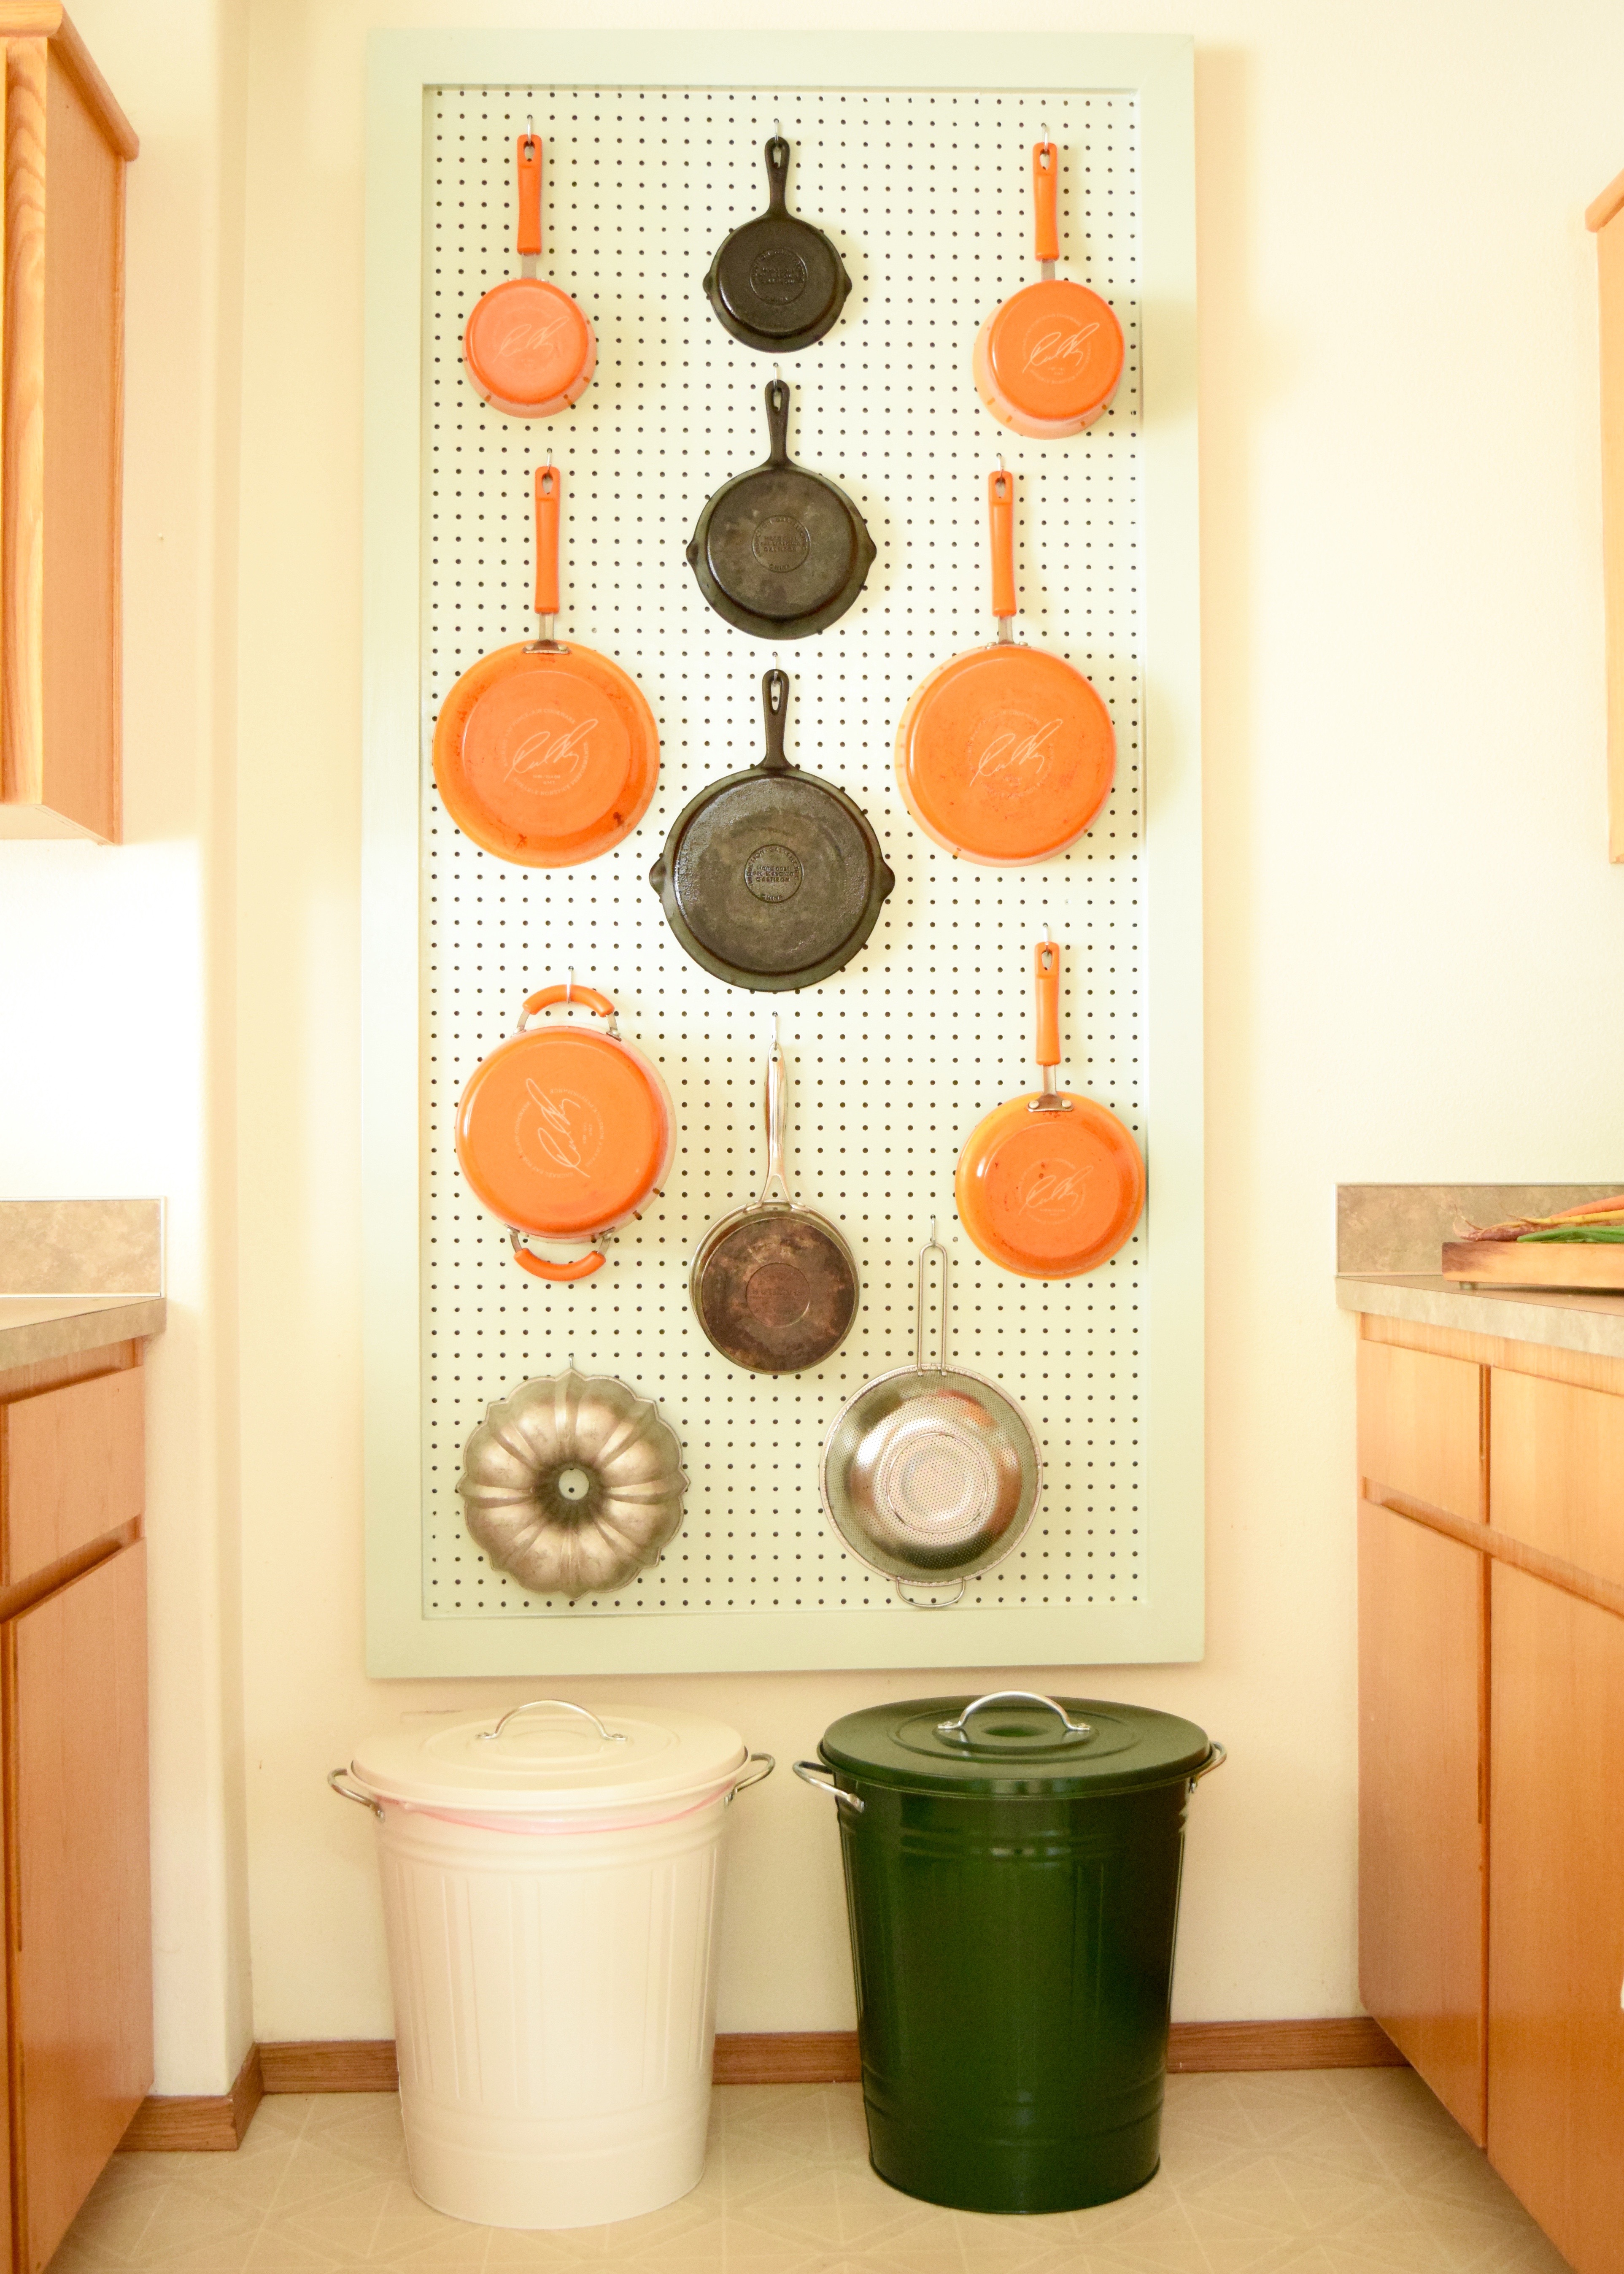
Now, why stop there when there’s so much more to do in this room?! If you scroll all the way up to the first picture in this post, you’ll see a weird box on the wall. What is it? I have no idea. Why is it there? To annoy me. How do I fix it? Classic answer: a gallery wall.

Entry Gallery Wall | Land of Laurel

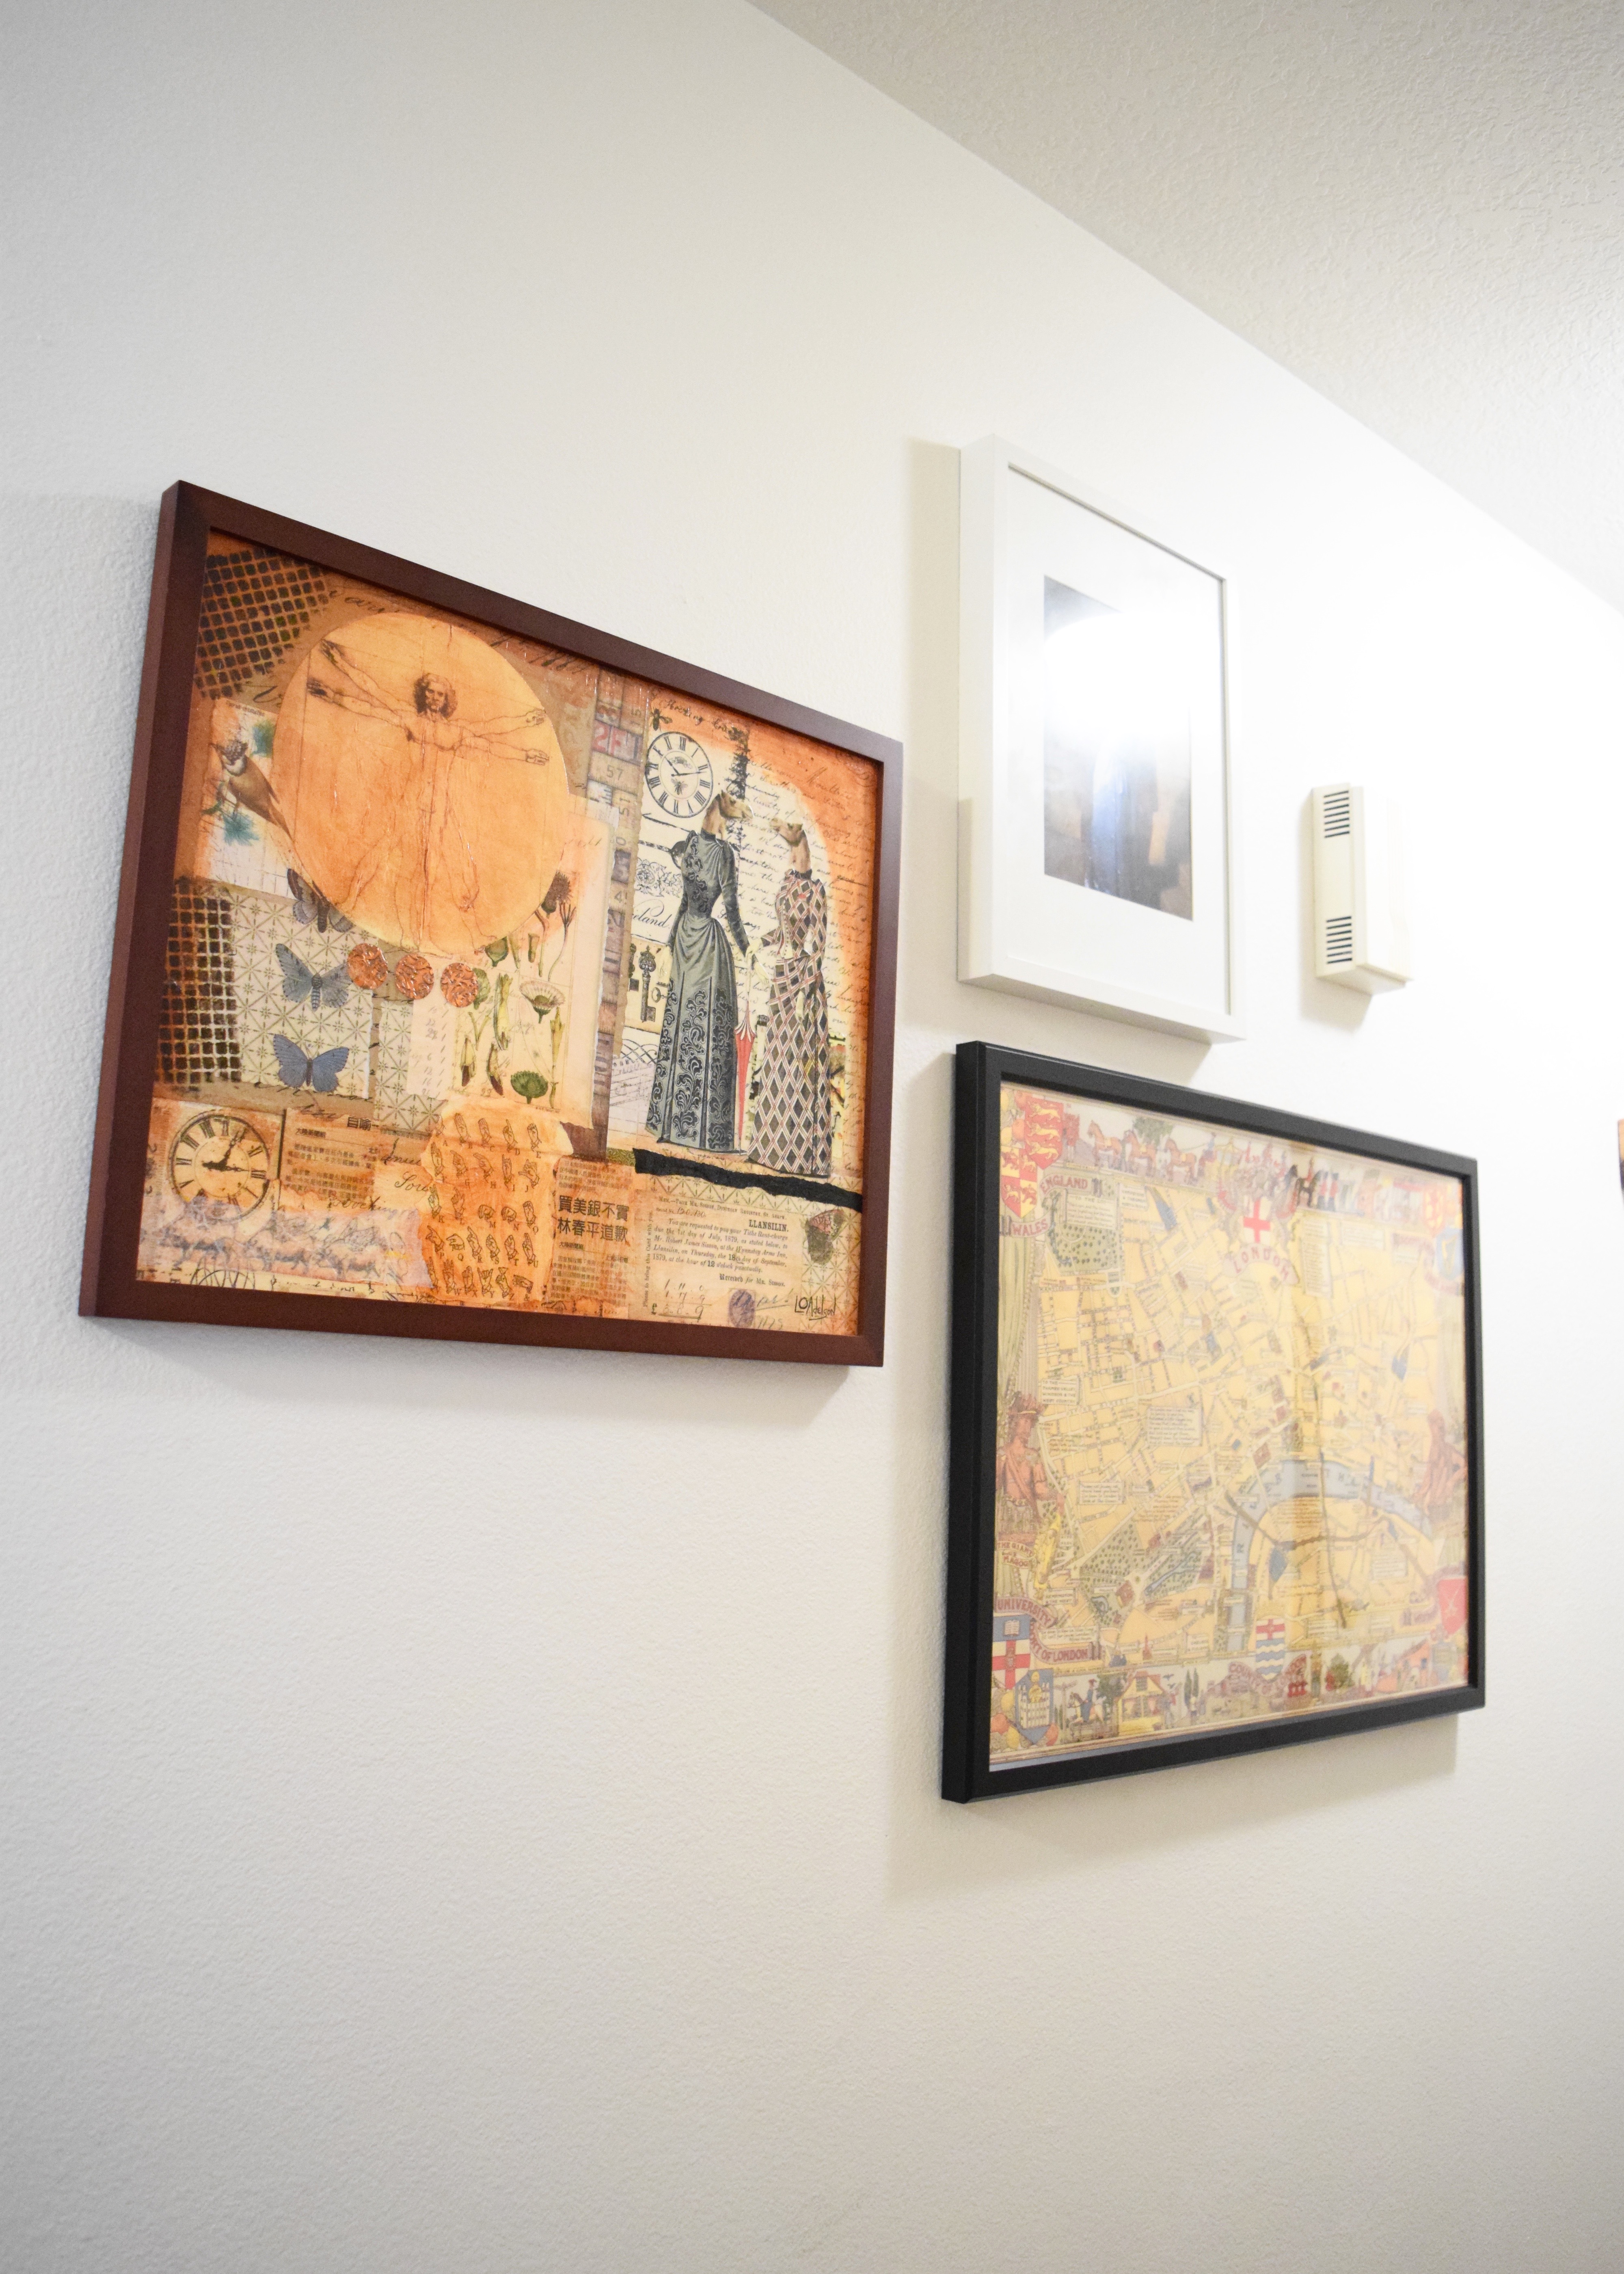
Boom! A few pieces of art and now that box isn’t quite so obvious. Here is my map of England, a fun and funky art piece my Aunt Pat found, and a print I bought at a Museum in Milan. This entry has so many walls, I still need to add art to several spots! This is a good start though. Overall, I’m feeling good, because this entry is looking so much nicer!

Entry Progress | Land of Laurel

A vast improvement over the before, I just have to say!

The Duplex Moving In Tour | Land of Laurel

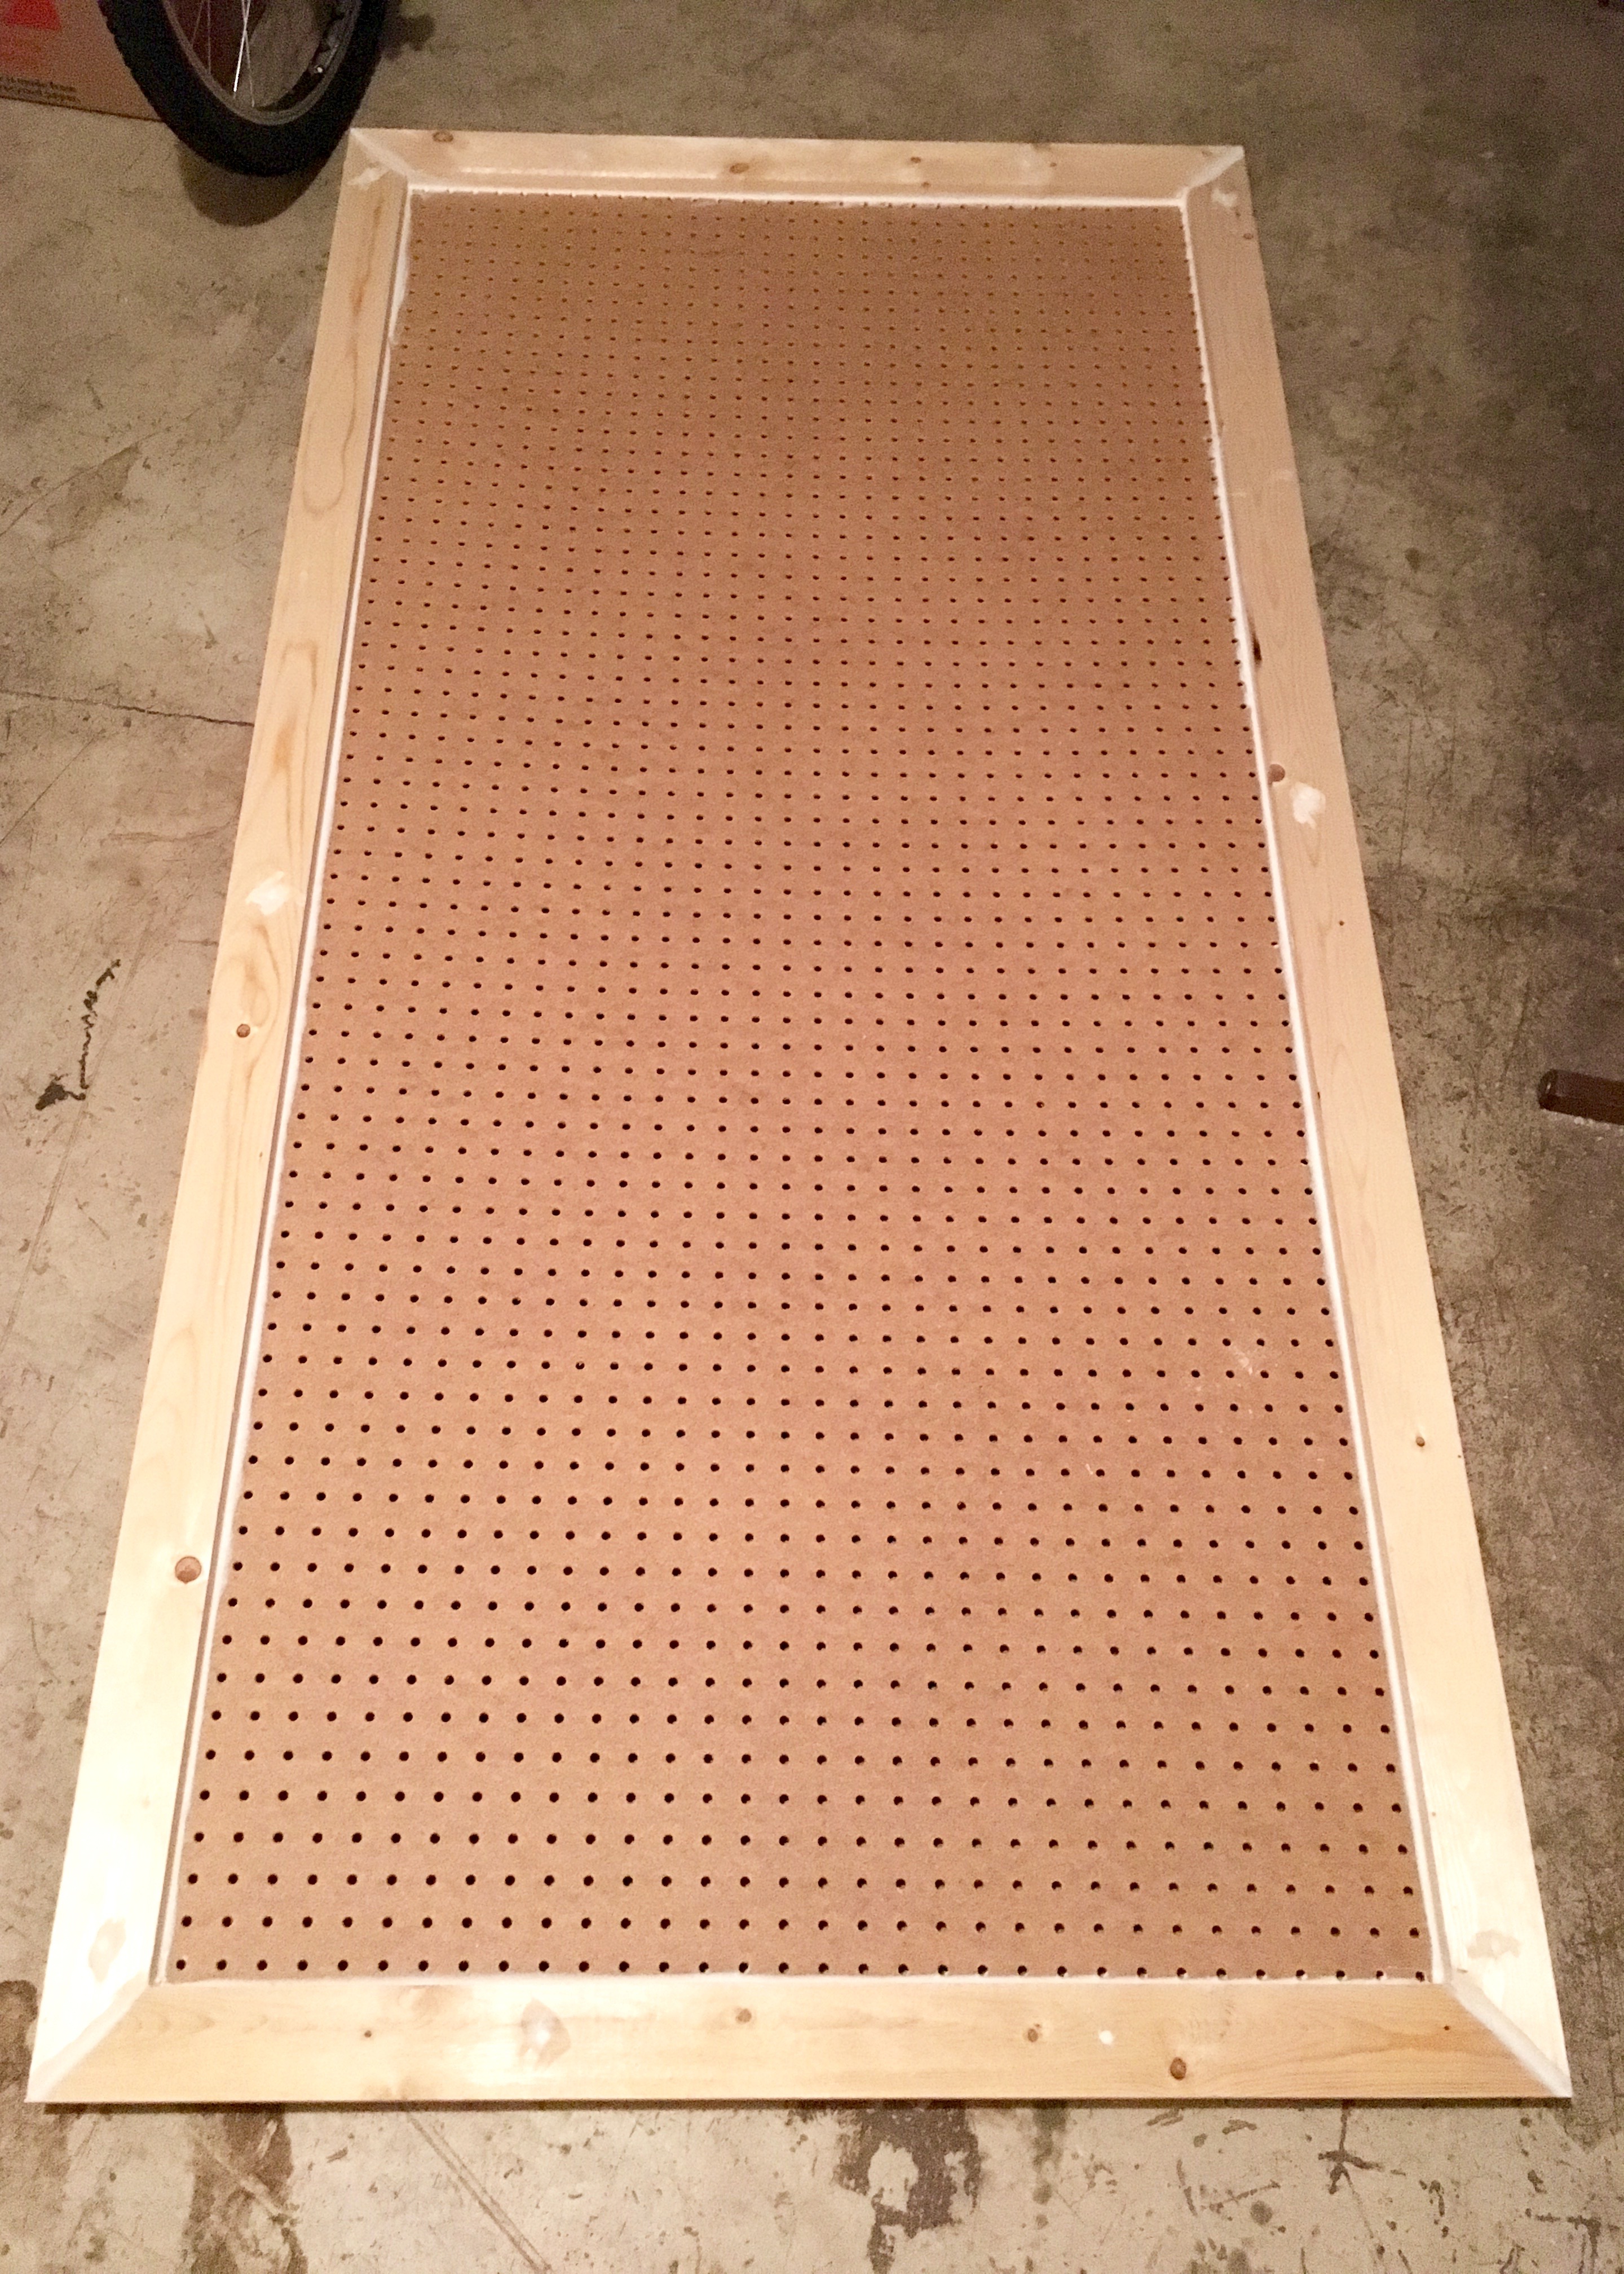
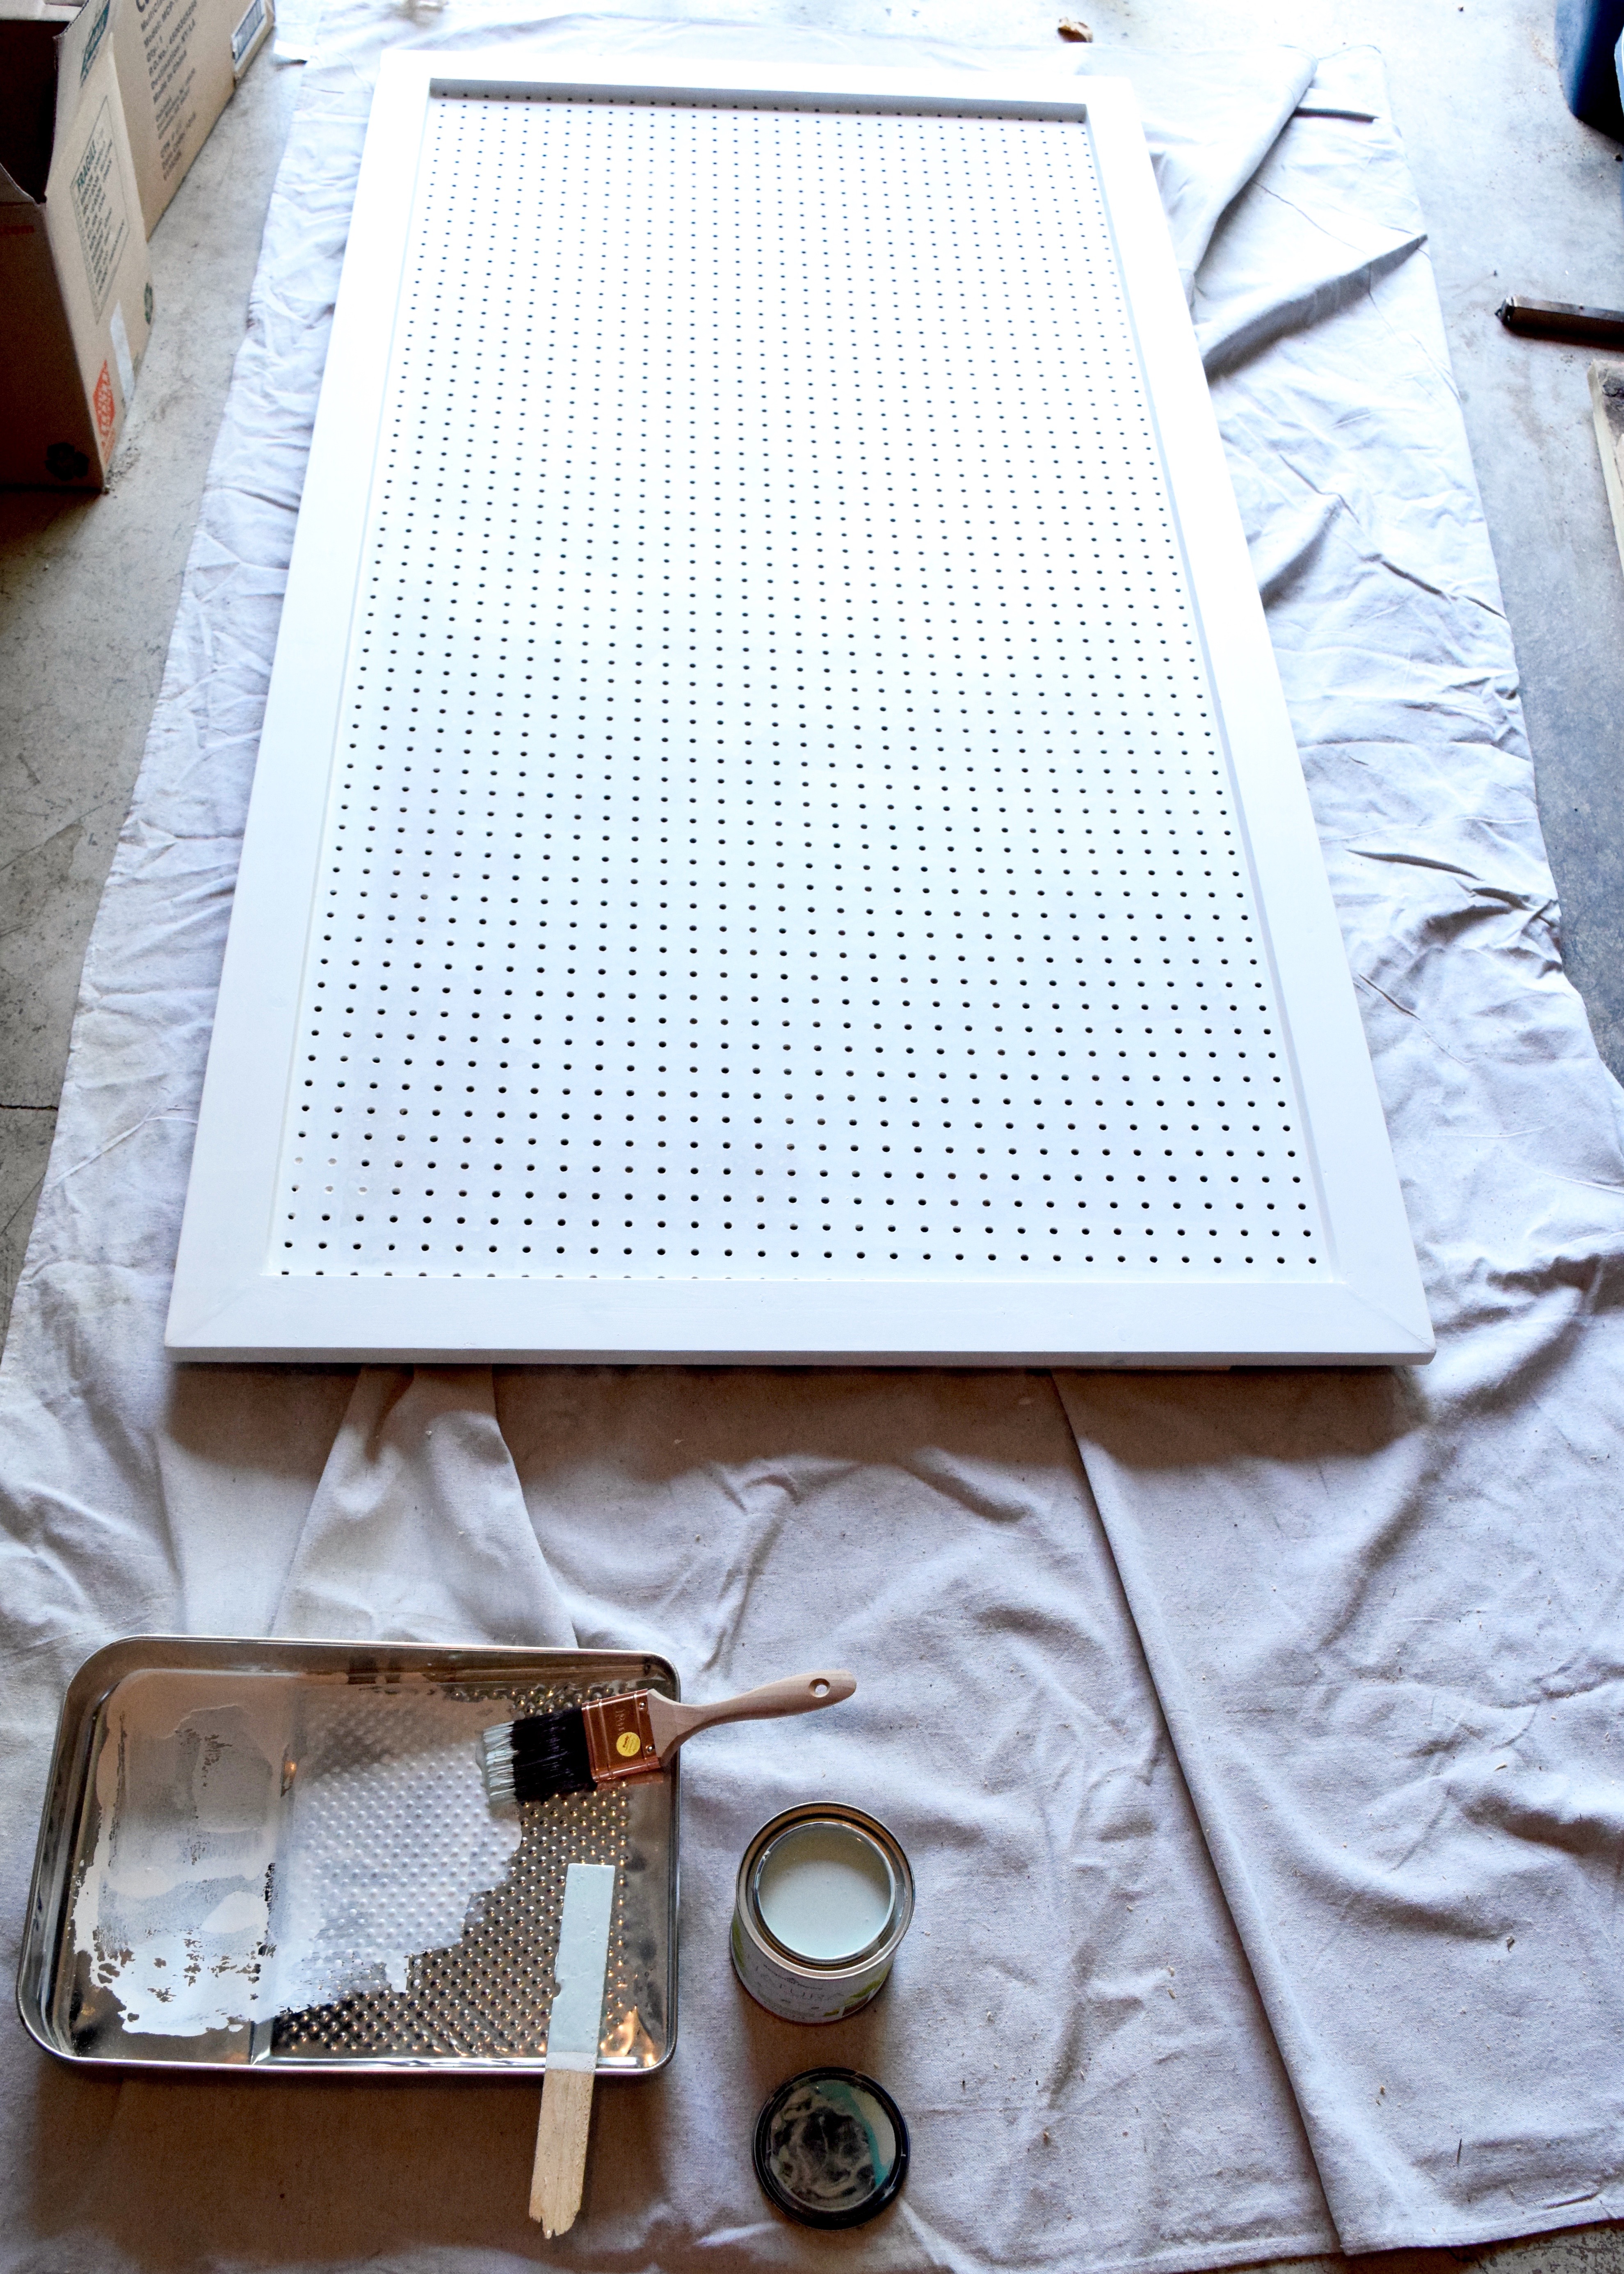
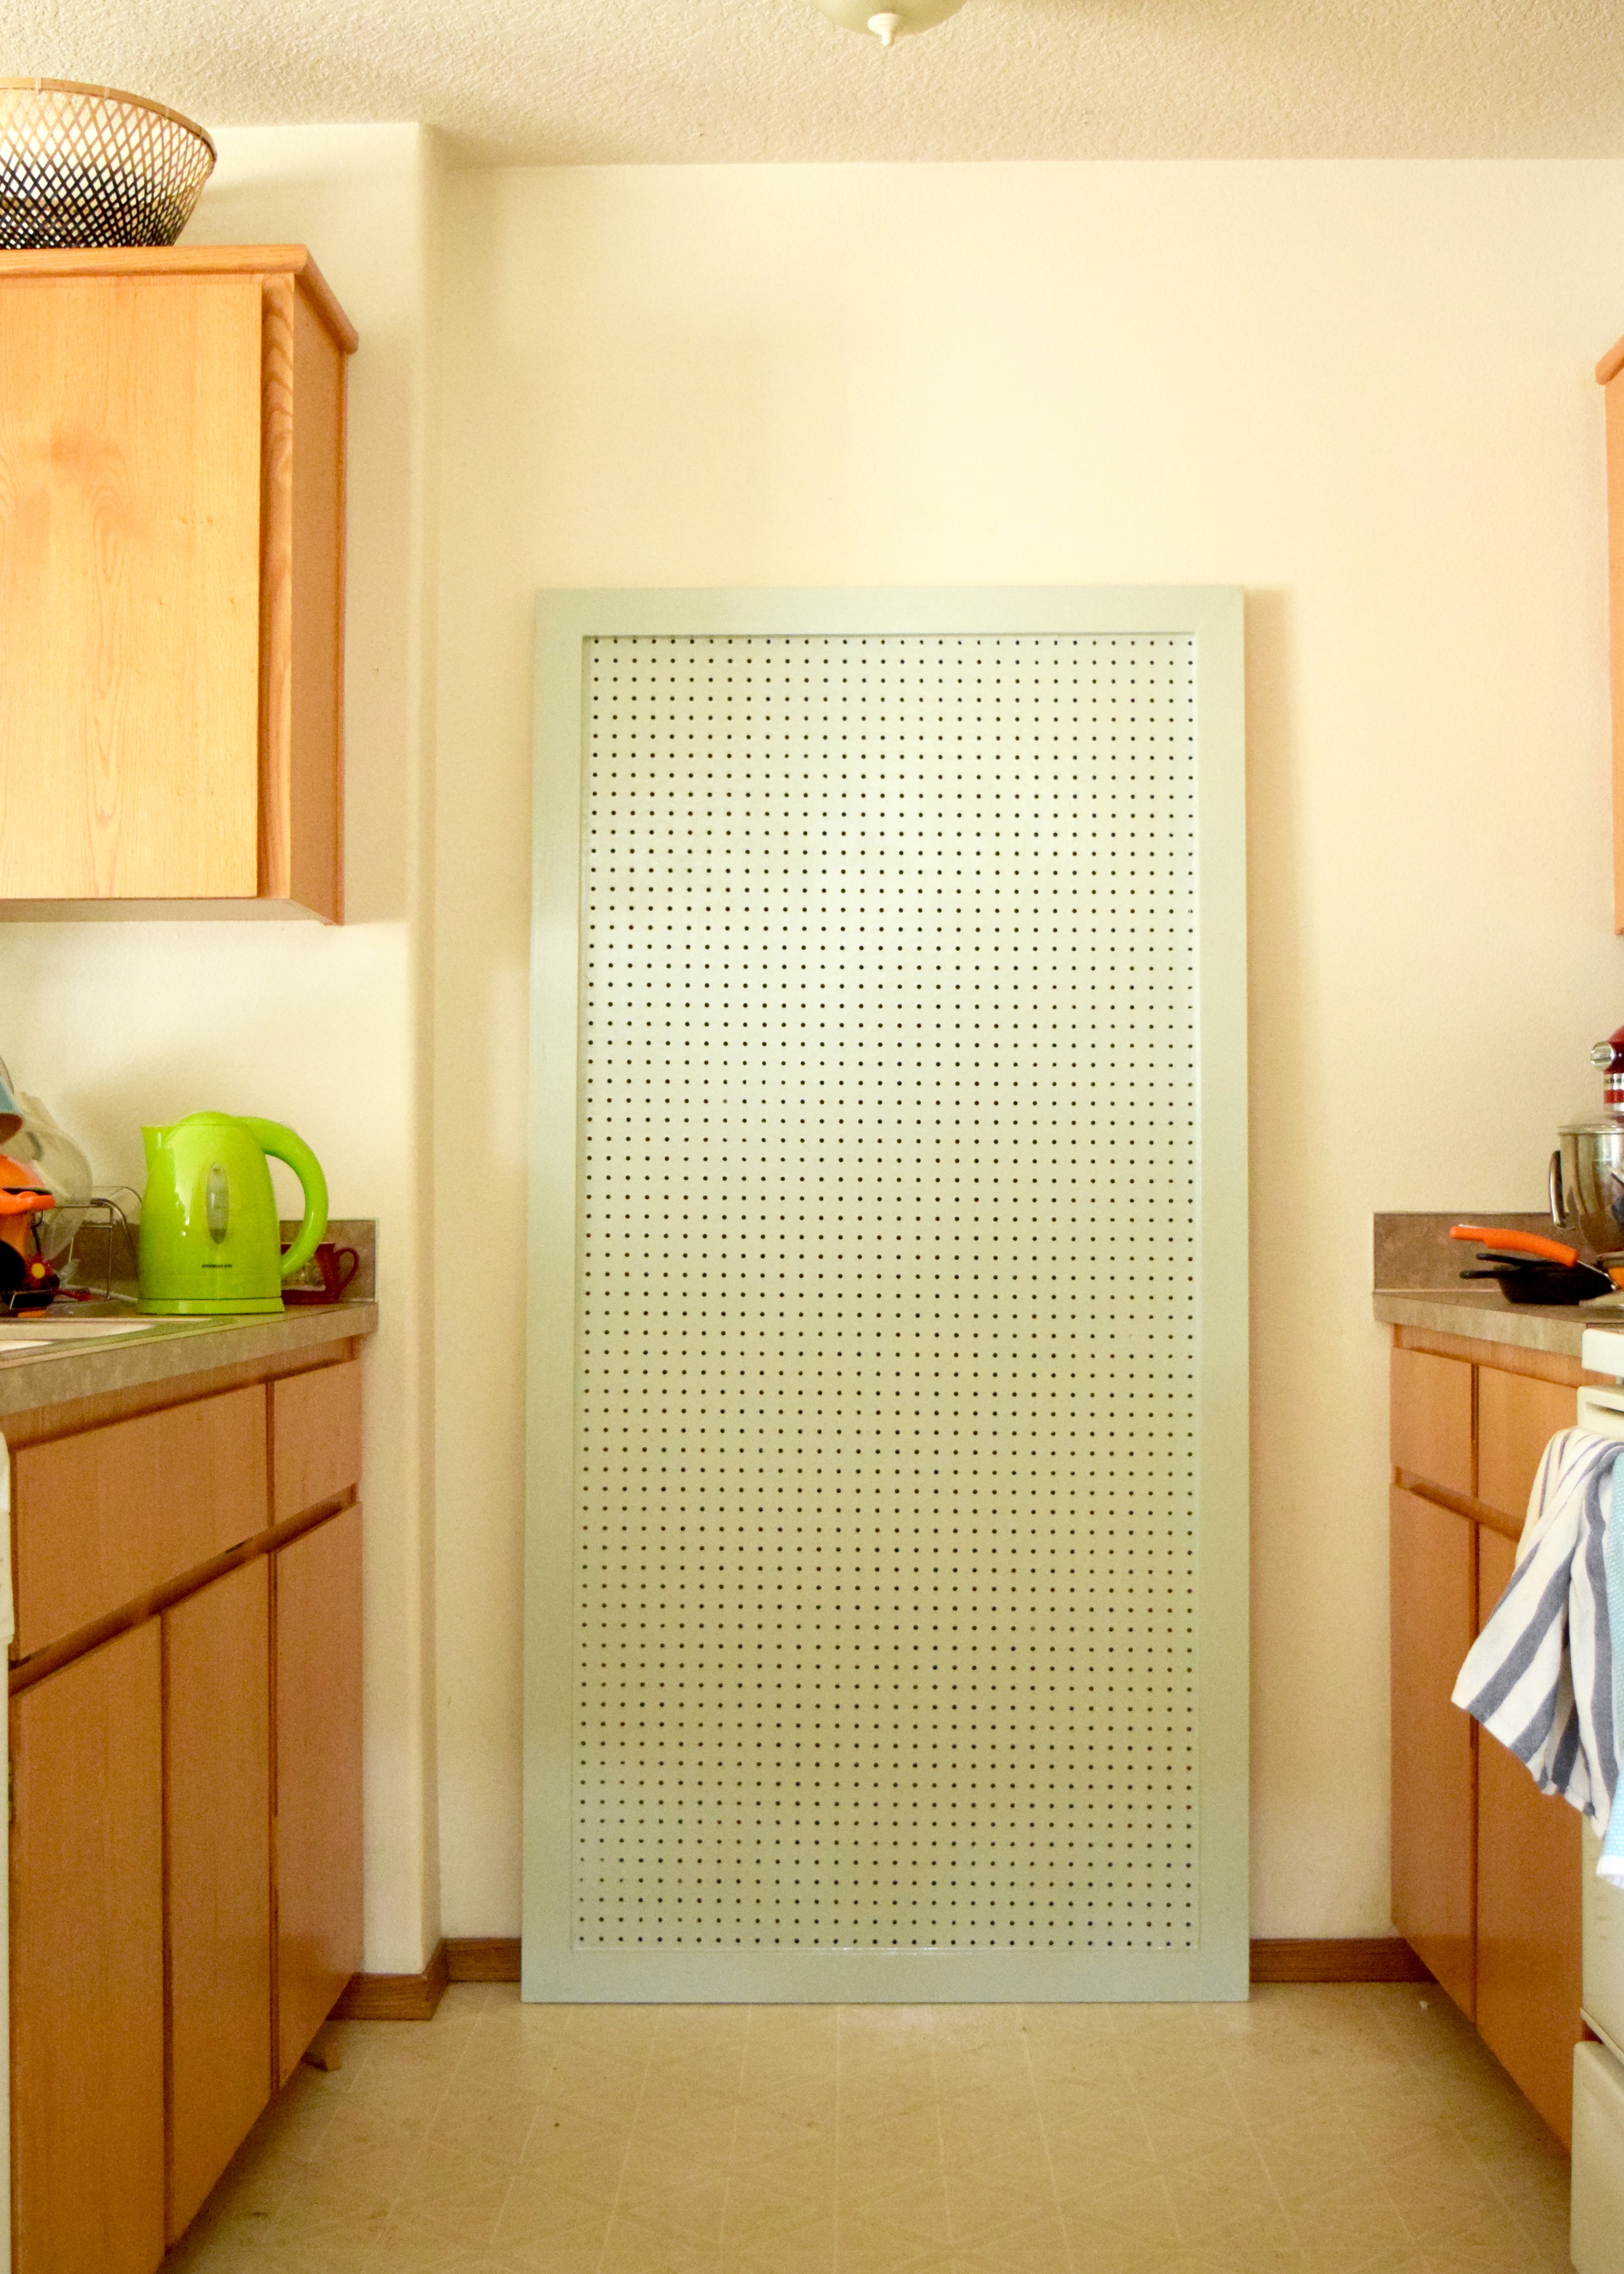
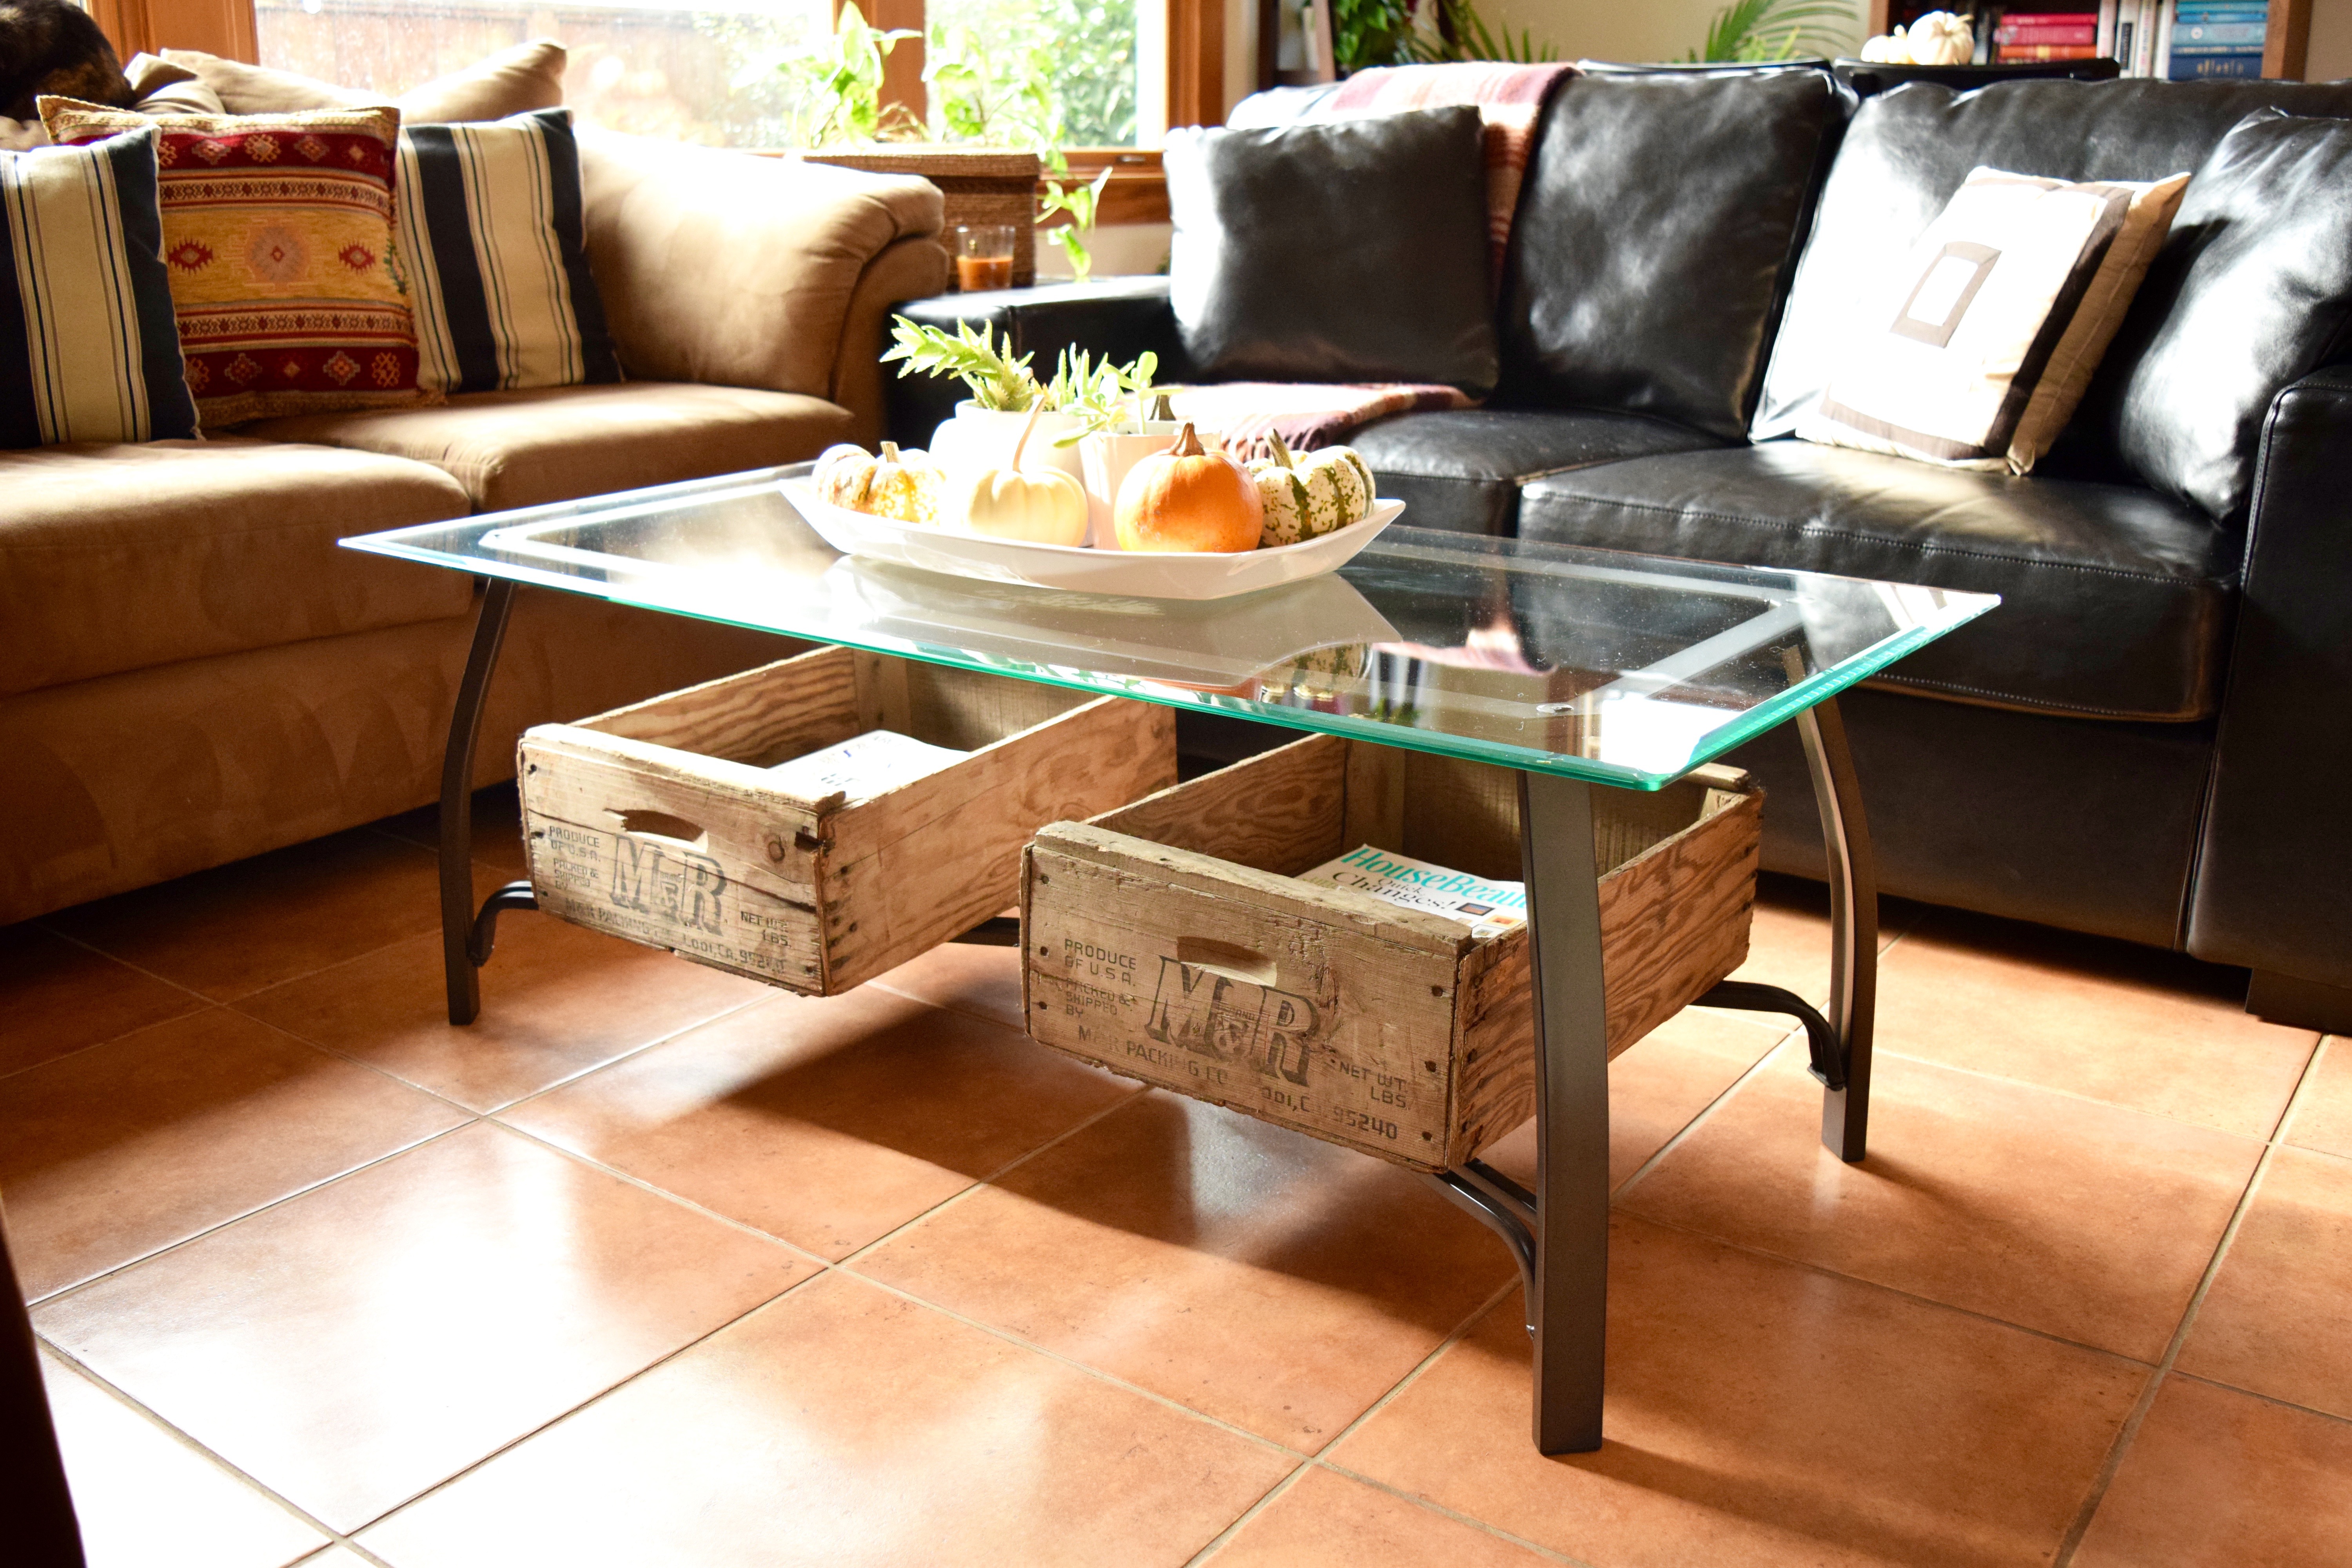
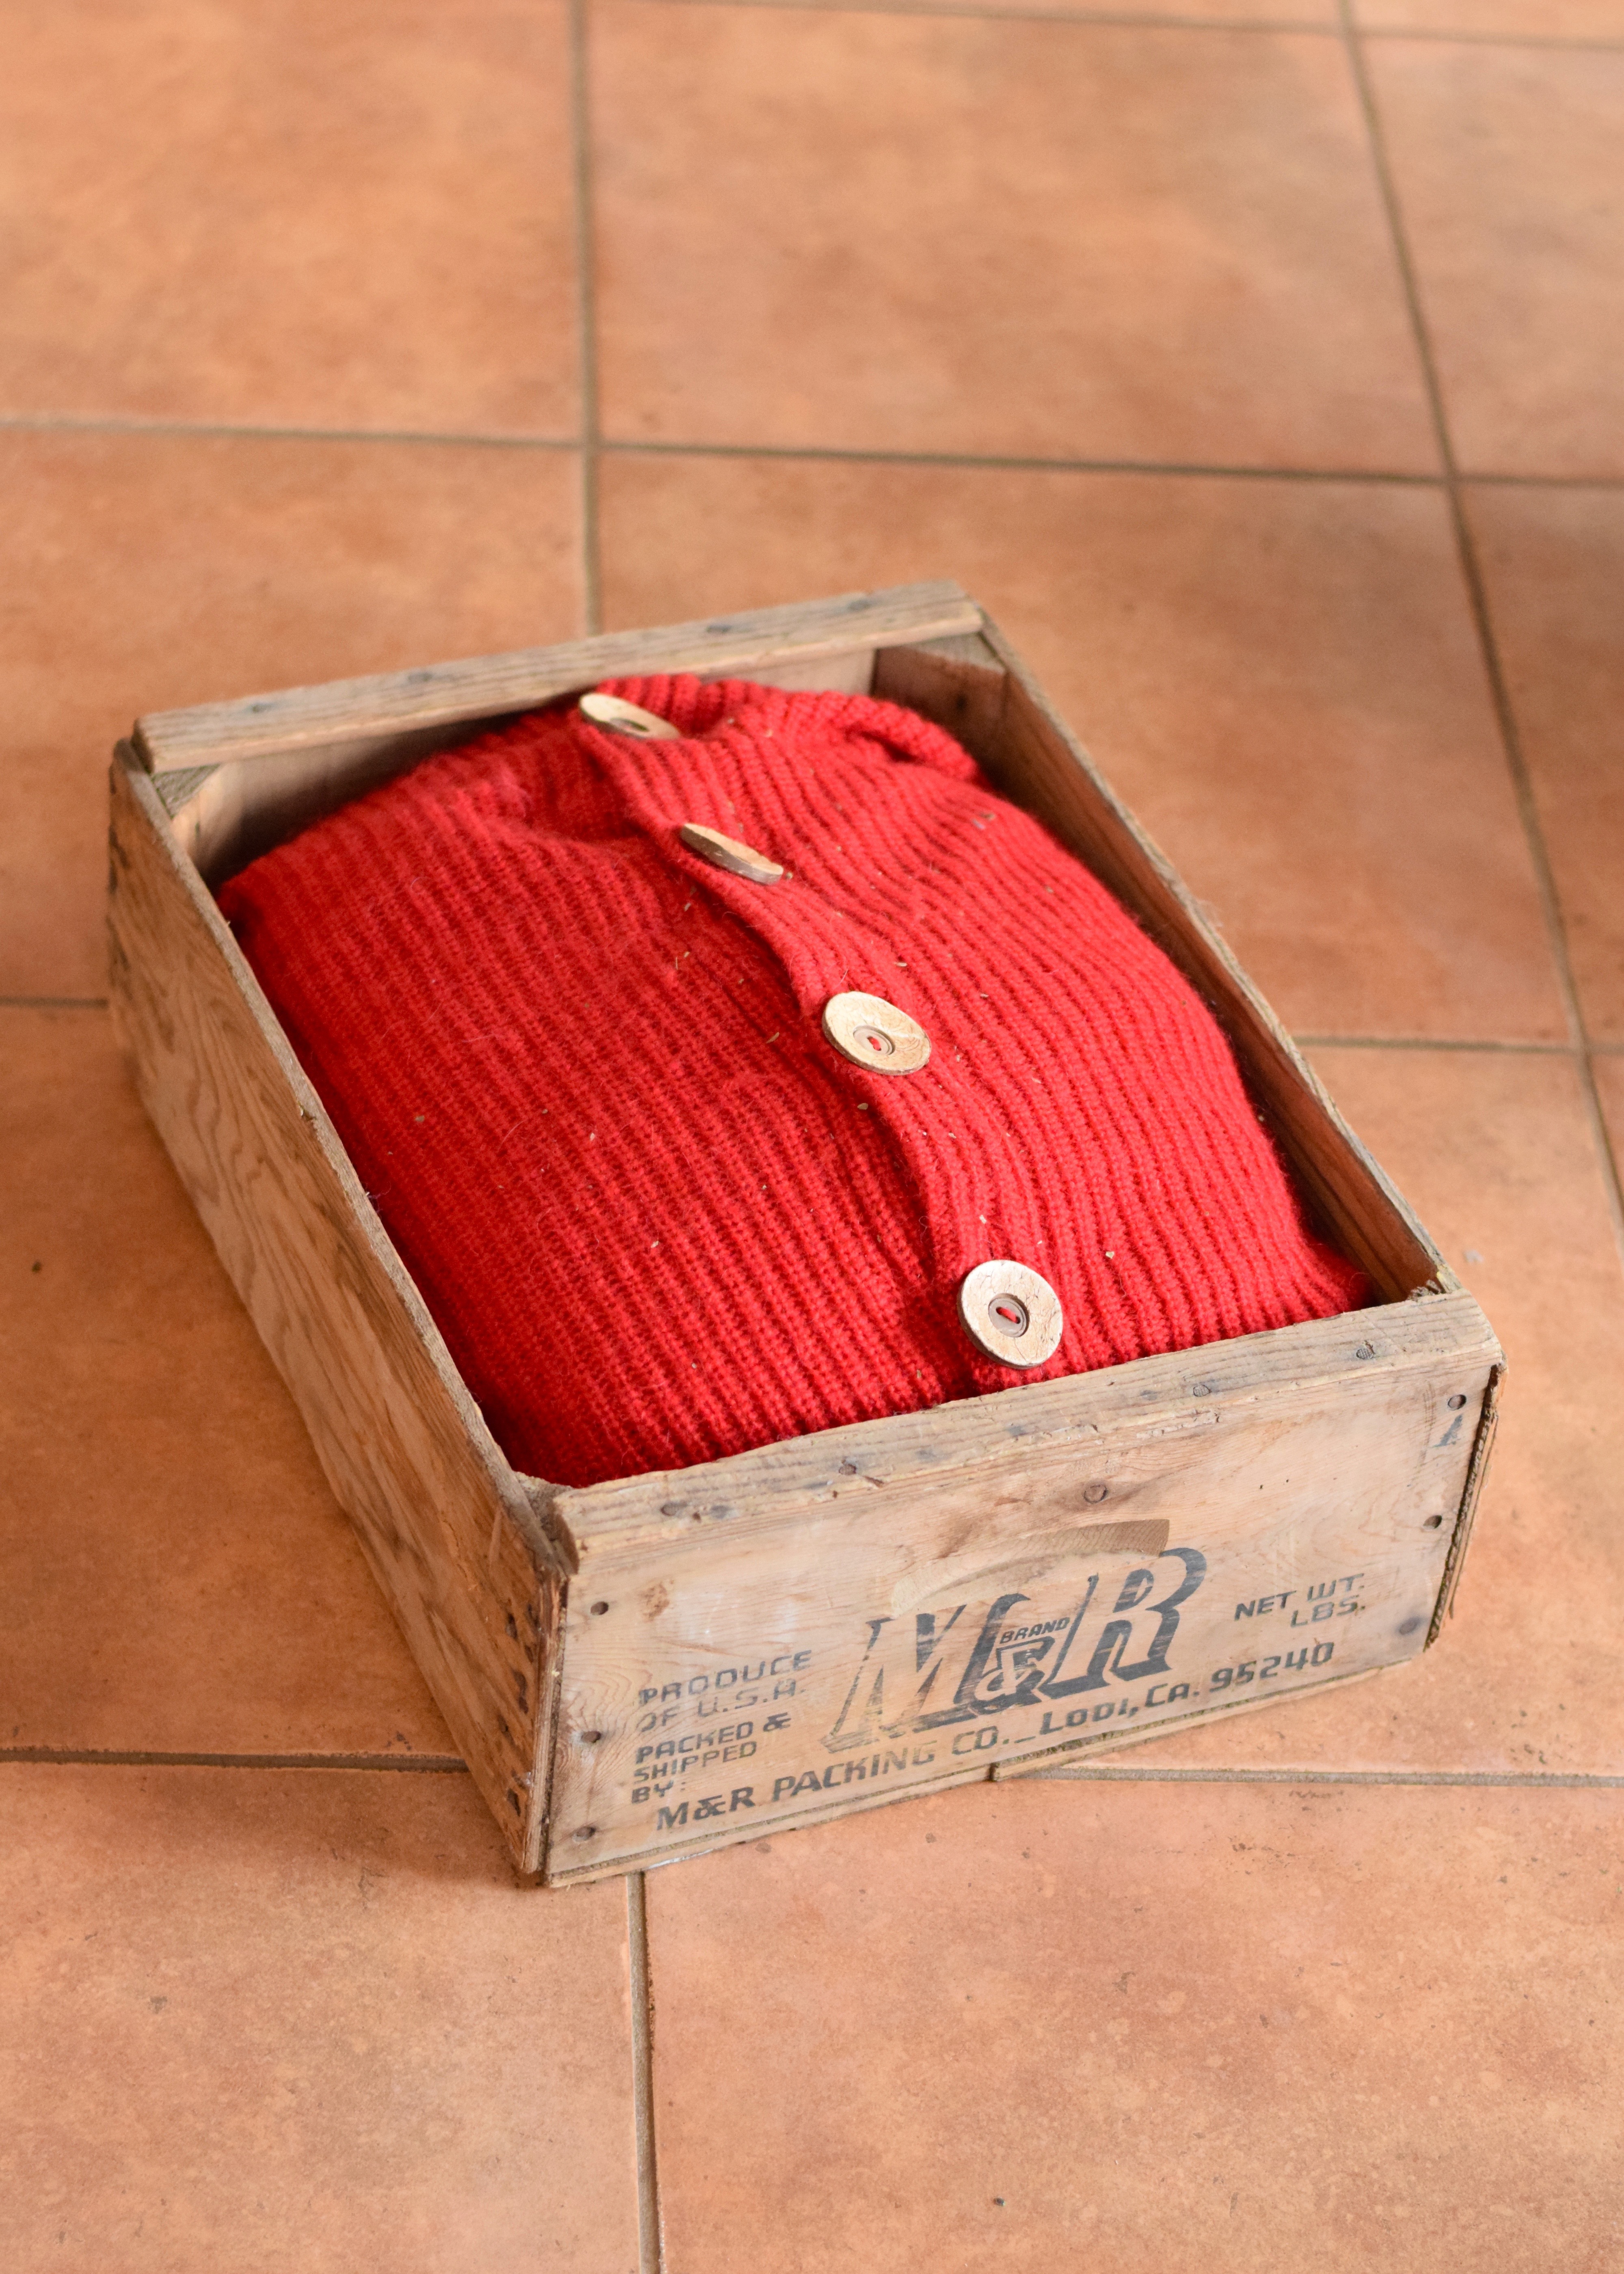
Oh! That before picture makes me realize another couple of quick updates. See that ugly carpet sticking out under the door? Ripped out. Goodbye gross! The cheap mirror on the closet door didn’t even last through the first week in the Duplex. There are some things I can’t change – the yellow brown moldings, the door, etc, but in a rental, sometimes you gotta take what you can get! What’s on the horizon for this space? Lot’s of final touches, but first, a custom console. You may have seen this sneakpeek pic on Instagram a few weeks ago when I was test fitting my furniture build:

Console Prep | Land of Laurel

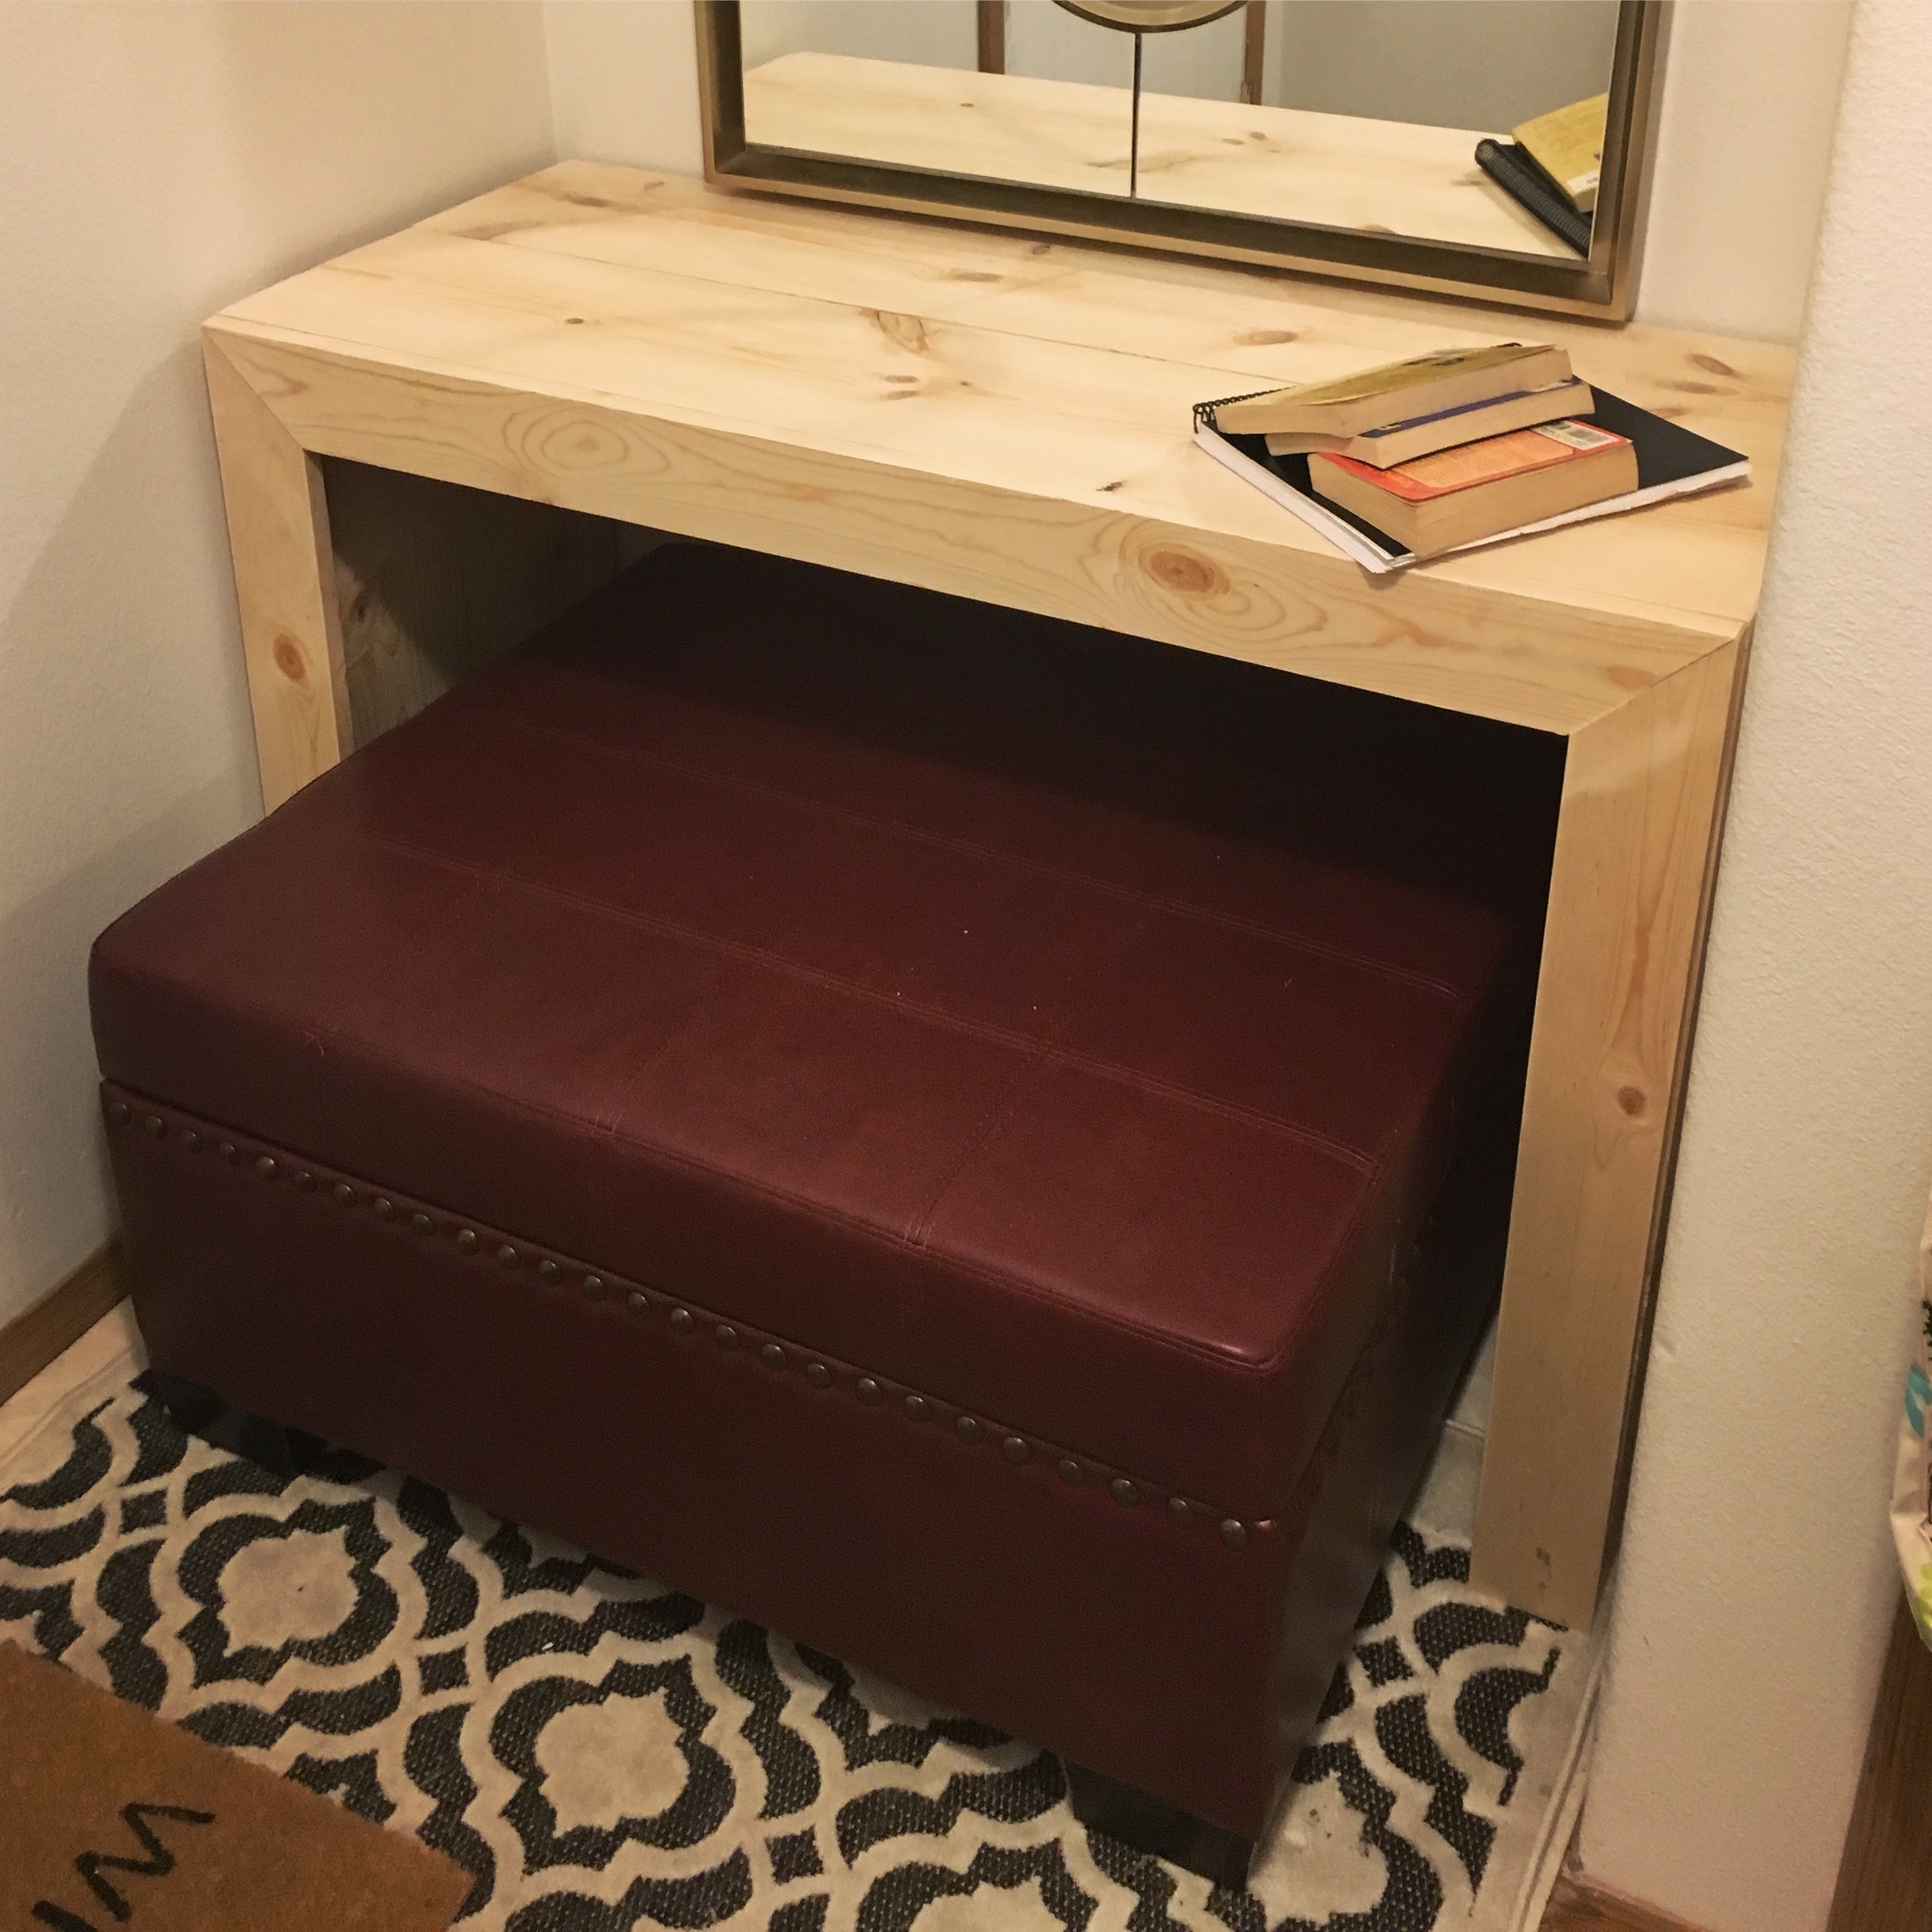
I’m still working on the final touches of that piece, but the goal is to knock that out this week and begin accessorizing and putting more art up next weekend. Wish me luck!

Do you have anything you’re working on that has a fast approaching deadline? Does that make you panic? Or work harder? Or both?! Let me know what you’ve been up to in the comments!

Hanging in there!

Hanging in there!

Woah. Did you guys watch the Walking Dead last Sunday? Because, I need to talk to somebody about that punch-you-in-the-face, heart- wrenching, knock-you-dead season premiere! So violent. So psychotic. So depressing. Wowza! Let me know your thoughts. I need to talk about it with somebody or I’ll go crazy.

In other news, I am no longer living with all my pots and pans sitting on the counter! Nice segue, right? Remember when I filled up my china hutch-turned-pantry and started pulling this kitchen together? I shared this shot:

China Cabinet Pantry | Land of Laurel

Well, take a look at this and see if you can spot the difference:

China Hutch Pantry and Pegboard | Land of Laurel

No the dead plant is still the same dead plant (really need to get my s*** together and share a shot of the lovely new snake plant which now lives in that pot!). And no the random lamp on the floor isn’t anything new (you should remember that lamp from long ago). It’s the pegboard over in the kitchen! That’s right! Vertical storage wins again!

Now rather than moving 15 million pots and pans around every time I need to use the counter space, I can actually use the counter space! It’s the little things, people! The back wall of our kitchen was so under utilized before. A big blank wall with nothing but some mismatched trash/recycling receptacles was not an ideal situation in a kitchen lacking storage.

Kitchen Before | Land of Laurel

There just is no reason for this wall to have so little purpose. And no reason for all those pots to sit on the counter. Now? Much better.

Kitchen Pegboard | Land of Laurel

Matching trash and recycling containers from IKEA (I spray painted the recycling bin green) plus a pegboard adds up to a much nicer view. Most of the pots and pans are my roommate’s, but the center column holds my cast iron pans and the one pot I’ve had since college. My Staub dutch oven and pie pans live in the china hutch. Having all the pots and pans within such easy reach is absolutely wonderful. I just reach over any time I need any thing, I much prefer it to digging through the lower cabinets. Putting together the pegboard was super easy. Anyone can do it as long as you have the right tools.

I picked up the actual pegboard at Home Depot and had them cut down the 4’x8′ size to the dimension I wanted: 3′ x 6′. They offer this service free, so take them up on it if you don’t have the correct cutting tools. While I was there I grabbed a couple of 8′ long 1x2s to pop the board off the wall (allowing the hangers to slip in) and some 1x3s to trim the board out.

At home, two quick cuts later and I had the boards ready for the back of pegboard. Excuse the dark garage photos. There are worse pictures yet to come. Cutting the 8 foot boards down to just under 6′ allowed me to have boards along the lengths of the pegboard and the top and bottom. They didn’t need to be perfect since they were purely for function and wouldn’t be visible. I screwed them in from the back so they were completely invisible (like ninjas) from the front.

Pegboard | Land of Laurel

The trim pieces were almost as simple: set saw to 45 degree angle and cut.  But of course I started right off with a mistake. Luckily I was able to reuse the board for the top and bottom trim pieces and didn’t waste much.

Cutting Error | Land of Laurel

Once I turned my brain on, I quickly made the rest of the cuts. Each length was an inch longer than my pegboard so the trim would stick out from it on all sides. I then screwed all of these boards into the pegboard and things started taking shape. It looked so good, Malary decided to pose with the pegboard. It’s so nice to have such a supportive pet.

Pegboard | Land of Laurel

Since edges never match up entirely perfectly, I filled the mitered corners with wood filler and gave the same treatment to the more prominent knots.

Pegboard | Land of Laurel

Then I did some minor sanding (I get super lazy about sanding, but it’s a requirement so I tried to tough it out). After that, I filled the gaps where the trim meets the pegboard with some paintable caulk wiping up the excess with a wet finger. I like this little container because it stays good for a long time, rather than drying out immediately like the caulk guns.

Caulk | Land of Laurel

Once everything was caulked the board was functional, it just needed a coat of paint to spruce things up!

Pegboard | Land of Laurel

Two coats of primer later, it was ready for some paint.

Pegboard | Land of Laurel

I chose Benjamin Moore’s Palladian Blue (HC-144) in their Natura line (zero-VOC) for the board. It’s a really light aqua tone that is subtle, but still stands out from white. It has quite a bit of grey in in and the swatch seems to be almost white, but once it’s up on the wall, BOOM! COLOR! Plus, I love Julia Child and she had teal-blue pegboards all over her kitchen, so I’m in good company! After two coats of paint, I did three coats of Safecoat Acrylic sealer in high-gloss. I wanted the board to be extra protected from water and oils. Once that was all done, it was time to bring it inside.

Pegboard | Land of Laurel

I hung the board on the wall with a few heavy duty D-rings hooked on hangers screwed into wall studs and it is fairly sturdy. I picked up this pegboard hardware kit at Home Depot too, which was way more than enough to hang the pots and pans. I have enough left over I might take the pegboard scraps and make another for the garage!

Pegboard | Land of Laurel

Covered in pots, it really does make things look happy, colorful, and organized. I’m ready to sauté those carrots at a moments notice now.

Pegboard | Land of Laurel

Having our counters back and free for their original purpose (prep space) is delightful. Not looking at a pile of pots and pans every time I walk into the kitchen is pretty great too! The trash and recycling containers are just the right size for us too. I love the matching size and though not everyone would like the different colored recycling, it’s nice to easily be able to identify it as “the green one” when people come over.

Pegboard | Land of Laurel

Plus I get to lovingly stare at my cast iron pans now. Definite bonus.

Pegboard | Land of Laurel

I love those pans… though I wouldn’t mind upgrading them to Lodge pans down the line. I’ve got these guys seasoned just perfectly now with just over a year of use. Cast iron is my favorite!

So if you have a blank wall – put it to use! Don’t fuss around with birds, put a pegboard on it! (I’m so Portland now).

Have you guys ever come up with creative storage solutions in your rental kitchens? I’d love some good ideas!


5 Minute Cat Haven

Remember that time I found cherry crates at a fruit stand on the side of 101? And it was pretty much the most exciting thing ever? I took them home and filled them with magazines and placed them under the glass top of the coffee and side tables in my living room. They looked pretty awesome and helped prevent incredibly clumsy people like myself from running into the glass table top so frequently. As they were sitting there I soon realized I wasn’t the only one who loved the crates. Malary could frequently be found sitting in them, on top of the magazines, or stretching out resting her paws on the crates. She seemed to prefer the coffee table crates and occasionally surprised visitors with her presence.


Cherry Crates Under Coffee Table | Land of Laurel


Well, lately, I’ve been trying to purge all the excess crap I have in my life. I took two laundry baskets full of clothes to Goodwill; I organized my bathroom medicine cabinet and under-sink cabinet, tossing the excess products I no longer use; I organized my shoe/jackets closet, got rid of several coats and pairs of shoes; and I went through my magazines tossing everything I no longer wanted (don’t worry, I kept every issue of House Beautiful).


I used four of these cherry crates in my living room. Two under the coffee table and one under each side table. One side table is sitting below the ivy plant in the middle of the photo above. I ended up tossing every single magazine I had in that crate. I have no idea why I’ve held on to so many magazines, I never flip through the non-house/home related ones.


Anyways, I was left with an empty crate! Now… I just love my cat. I know, I know, I’m a cat-lady, but whatever. #catladyandproud I decided that in this little tucked away crate I could make Malary a little spot of her own.


I hopped over to IKEA in Emeryville (holla ten minute drive! #entirereasonImovedhere) intending to buy two small throw pillows or a stand bed pillow to stick into the crate. Well, IKEA doesn’t sell standard pillowcases by themselves from most of their bedding lines. You can get the plain solid color ones, but that seemed too plebeian for my little kitty queen. I looked through the throw pillows and almost sprang for two of the faux sheep skin ones, but then I stumbled upon the red version of this guy, the Annbritt pillow. Apparently this is from the winter collection and they’re no longer shown online. IKEA still had a whole bunch of these sweater pillows in grey, cream, and red. Of course, I had to go for the red. The funky dimensions (approximately 15×30″) made it a perfect fit for the wooden crates. I was a little nervous Malary would be off put by the buttons, but I decided to go for it anyways. And at $13 buckaroos, really, how could I not?


I brought the pillow home and immediately stuck it into the empty crate. I sprinkled it with cat nip to get Malary’s attention right before snapping this picture.


5 Minute Cat Bed | Land of Laurel


The cat nip worked pretty much instantly, because as soon as I snapped that last picture, Malary was all, “Hmmm, excuse me, what are this?”


Malary's Cat Bed | Land of Laurel


After she spent a few minutes exploring the new bed, I stuck it back on the shelf on the side table. She hopped on in and pretty much hasn’t left it since. Although she normally spends most of her mornings napping on the back of the couch by the big windows, the last couple of days I’ve found her curled up down here.


Sleeping Cat in Bed | Land of Laurel


It’s pretty freaking cute, y’all. And I’m not just talking about the cat. This is a pretty attractive cat bed in my opinion. The crate? Vintage and cool, textural with the wood. The pillow? Happy, bright, red, and the sweater texture is just so cozy! By tucking it under the side table, not only is it more isolated and cave-like for Malary, it also doesn’t scream “CAT BED!!” to anyone hanging out in this room. By placing it beneath a glass top, I can also stalk my cat while she’s sleeping. Yes I am a complete creeper, but she’s just so cute!


Hidden Cat Bed | Land of Laurel


Ignore the bits of pollen the ivy decided to dump all over the table. Thanks!


Eventually she clued up to my cat-stalking and gave me her pissed off face.


Malary | Land of Laurel


…so I had to stop watching her curled up on her new cat bed. She is the boss after all…


Just kidding! She then started cleaning herself and it was ADORABLE.


Cat Tongue | Land of Laurel


I mean, seriously, can you believe this little girl is sixteen years old?! She is still my cute baby girl. Gah!


Cat Bed | Land of Laurel


Okay, okay, enough fan-girling over my cat. I told you I was a #catladyandproud, right? Who else out there is a self admitting cat lady? Made any cat beds lately? Or found one that fit in with your home decor?


The Moment We’ve All Been Waiting For…

I found new nightstands! Finally. Yup, that took a while. Before I jump into the new, let’s go over this again. You might remember my old nightstands? They were about 16 inches too tall for my bed and belonged to my parents. I’d promised them I would eventually return the side tables and when they bought a new bed for their guest room, I knew it was time. Their new bed is the perfect height for these tall, dark, and handsome guys.


Left Nightstand | Land of Laurel


I’d been checking craigslist, yard sales, and estate sales for about 8 months now, searching for anything that I could substitute these guys for. I needed something about 20″ – 26″ high and no more than 24″ wide. The width was a major issue, as I truly only have 25″ on either side of my bed. Any nightstand wider than that simply wouldn’t fit in the room. The deeper, the nightstand, the better, as I am lacking in storage. I hoped for something with lots of drawers I could fill up. My love of symmetry demanded there be two identical ones. After months of looking, I finally landed on this somewhat promising looking ad:


Craigslist Nightstand Ad | Land of Laurel


The nightstands looked functional and the drawer was much needed, plus there were two of them and the price was decent. I didn’t love the color, but I figured I could always paint them green or white or blue. The fact that they only had one drawer, deterred me slightly, but I had yet to find anything else that would come close to fitting in my space. Plus, I could always stick a basket there and fill that up. I figured I might as well give it a try. I emailed the seller to see if he’d take $50 for both of them. He agreed to the price and I met him the next day with cash. When I took a look at the nightstands in person, I was disappointed. His measurements from the ad were completely wrong. The nightstands are 20 inches wide, 14″ deep, and 24.5″ high. It may seem like only a slight difference, but when you’re lacking storage and need incredibly functional nightstands, every inch counts! My plan to paint them would still work, however, the wood finish was in such good shape, I was hesitant to even do that!


I turned to the seller and told him that the nightstands were a lot smaller than what I was anticipating and I didn’t want them. He was surprised, but he really wanted to get rid of them. He offered me $40 for both. Now, a normal person would simply have walked away. They didn’t really fit my needs, right? I am not a normal person. This was such a deal! Two solid wood, matching nightstands in great shape with dovetail joints? This isn’t an everyday find. Maybe I’d learn to love them. At $20 each, they were significantly less expensive than anything else I’d see. Most people on craigslist were asking for $200 per nightstand. Way out of my budget. So what did I do?


I handed over two twenties and left with the nightstands of course.


I have no will power. None. At all. Whatsoever. Just ask that bar of chocolate in my kitchen… Oh wait. You can’t. I already ate it!


I brought the nightstands home and wiped them down with Honest Multi-Purpose spray. Once they were clean, I moved them into my room. I didn’t want to buy baskets for them just yet, so I filled the bottoms with what I had lots of: books. They looked… okay. Sigh. Not exactly the magical moment I was hoping for…


New Nightstands with Books | Land of Laurel


Even if that photo had been taken when the weather was sunny and the lighting cooperative, they general idea wouldn’t change much. The new nightstands just didn’t look right in the space. Dang! The books certainly were not helping. The color of the nightstands contrasted both from the red tone of the fir woodwork in the house and the espresso finish on my headboard. This was not good.


I tried one more time to make things look a bit better and filled the nightstands with blue and green books in tones similar to that in my bedding. This helped things, but honestly, the nightstands were still not doing it for me. Sure, the book storage was great and I could even slip my laptop in there among them, but I lost tons of storage overall and this just didn’t look great.


Nightstands with Blue Books | Land of Laurel


I was somewhat surprised that I had enough books in these color tones to fill the other nightstand. I have a lot of books. Possibly too many, but whatever, I love them. And I re-read them! Also does anyone else see a monster peeking up out of the floor in the shadow outline of the bottom of the nightstands in between the feet? Just the top of his head, two little ears sticking out?Just what I need, right? A monster hiding in my bedroom. As if I don’t already have enough stress dreams!


Nightstand with Green Books | Land of Laurel


Still this look… wasn’t working for me. I thought, maybe if I lived with them I’d learn to love them. So one month later here I am. What have I decided? Nothing. What have I created? A Pro/Con List.


New Nightstand Pros

  • They’re the right height for the bed, making turning on or off the light at night easy
  • They are wide enough to fit the space by the bed, but skinny enough to not overwhelm the space or make it look stuffed in
  • I can store books here!
  • I can paint them green or white
  • I have a great excuse to buy cute new pulls at Athropologie or the Alameda Flea Market


New Nightstand Cons

  • The wood tone is awful, but the finish is in such good shape, I’d feel guilty painting them
  • There is not enough storage
  • The drawer is too shallow to fit some of the taller things I’d like to store in it (like vitamins!)
  • I could fit wider nightstands for more storage
  • I don’t particularly like the curvy look


Conclusions? These nightstands work in some ways, but not others. If I didn’t need more storage they would be okay. I don’t love the look, so why keep them? I’ve already started looking for new ones on craigslist. I also have high hopes for a nice sunny spring day hitting up some Santa Cruz yard sales too. My Aunt Pat is the queen of Santa Cruz yard sales and we could make a fun day of it. If only it would stop raining!


Yay for mistakes! Someone told me once to be proud of your failures, because how else do you learn? In fact, she told me to yell it out. So, here it goes. I FAILED!! These nightstands were the wrong choice.


Moving on. What have I learned? Sometimes, you should just wait it out until you find something truly perfect for your space. Once I find new nightstands, I’ll sell these guys on craigslist and hopefully make a small profit. Someone else out there must be looking for matching nightstands right? Fingers crossed! It certainly has been a rough design rollercoaster in 2016. I’ll share some other not so great things I’ve bought recently later this week. Oops!