How to Stop Using Paper Towels (and Be More Eco-Friendly!)

How to Stop Using Paper Towels (and Be More Eco-Friendly!)

Let’s talk about paper towels. Raise your hand if you know where they come from. Trees. Everyone answered trees there, right? Right?! Well… here’s something that surprises so many Americans. You don’t actually need paper towels. I know! I know! It’s gonna be okay, I promise, this is not the apocalypse!

So I actually grew up never using paper towels. We had sponges and dishtowels that cleaned up all the kitchen messes and used rags for all the other messes. As I got older I eventually realized how disturbing this was to most Americans. It wasn’t all that rare for people to say things such as, “You don’t use paper towels? Such a dirty hippie!” or “How inconvenient, you must like making your life more difficult!” This happened regularly! It was like we offended people, by having a different lifestyle choice. Isn’t it funny how people take differences as insult? We certainly weren’t trying to convince anyone to change their own ways, we just simply said, “Oh we don’t have those,” when people asked for a paper towel at our house and handed them a sponge / dishtowel / rag depending on their need.

Continue reading “How to Stop Using Paper Towels (and Be More Eco-Friendly!)”

A Scary Night and My New Emergency Backpack

A Scary Night and My New Emergency Backpack

So in a very dark irony to this recent post title about updating my electrical at Berrybrier, my neighbor’s house caught on fire in the middle of the night a few weeks ago. We still don’t know the cause of the fire, but it was an extremely terrifying experience and definitely had some lingering effects on me…

I’d gone to bed around 10pm that night and fell asleep quickly as after work, I’d spent all evening cutting beadboard for my master bathroom in the driveway. Around 1:30am I rolled over in my sleep and gained just enough consciousness to realize it was raining. The raindrops were relatively persistent. This actually made me wake up even more as I’d left some beadboard in the driveway and the rain could seriously ruin the MDF. Ugh! I was annoyed at myself for not putting it away like I knew I should have, but it wasn’t actually supposed to rain! These thoughts of frustration woke me up further and I could tell through closed eyes that the room was pretty light out so it must be morning. At the same time I realized the sound I was hearing wasn’t quite raindrops. I opened my eyes.

My entire room was lit up red orange. I thought the wood I left in the driveway had caught fire and then caught my house or the garage. I didn’t know how that was possible, but it was my first thought. As i bounded over the pile of tools I’d left next to my bed, I could hear movement above me, which meant Jackie my roommate was awake too. By the time I’d clambered over my bed and over the pile of tools, grabbing some PJ pants and a bathrobe, I could see properly out my bedroom window that it wasn’t my house at all, but the neighbor’s house kitty corner behind us. And the flames were already 30 feet high.

I sprinted out of my room throwing on clothes along the way and shouted “Jackie!” She responded immediately, “I know! I’m on the phone with 911, I’ll get Bronwyn!” I was grabbing shoes at that point and ran for the backdoor, “Good! I bet someone’s already done that! I’m getting the hose!” Jackie knew better, her conversation describing the fire and location of it with the 911 operator wasn’t going well. “I don’t know what the street name is! It’s the street behind ours! If you come to us you’ll see the fire!” “Your location information isn’t helpful.” “I know! But that’s all I’ve got!”

Meanwhile I grabbed the hose from the front yard and sprinted through the brambles in my backyard to the far corner. The house from my perspective was hidden by 30 foot flames which were sneaking around the corner of the house towards a shed which was next to the fence line that backed on to my neighbor Erik’s property which also had a shed: squished on to the 12′ of space between the fence line and his garage full of 12 years of wood he’s collected from job sites. Erik and I shared a fence and that fence continued along the side of my garage. As I sprayed the corner of the fence line, I hoped my soaking would delay the violent, crackling flames by seconds, maybe a minute. I knew that if the fire continued to lick the side of their house and caught their shed, the whole fence line could go up, catching an exponential number of other things on fire.

As I soaked the corner of the fences, Jackie grabbed Bronwyn from her room and they both ran out of the house. Jackie grabbed some water bottles, asked Bronwyn to check on me, and walked briskly around the corner to the street behind ours. It wasn’t until Bronwyn was out of the house that she knew what was going on. The thirty foot flames were obvious from the front steps, whereas her street facing window hadn’t provided any context to the house behind ours. Jackie reached the neighbor’s street and thankfully they were all out of the house!

Bronwyn came to make sure I was a safe distance from the fire (which I was). Then she headed to Erik’s house which he rents to three young people, one of whom is our second cousin. No one appeared to be awake and if the fire caught the shed and fence line, Erik’s house wouldn’t be around for long. She pounded on their door, but no one answered. She quickly realized the front door was actually unlocked. She ran inside and up the stairs to pound on the bedroom doors, but still got no answer. Finally she screamed out our cousin’s name, “Carla!” And the three housemates woke up and realized someone wasn’t just messing around. Bronwyn got them all out of the house and that’s when the fire department arrived.

The fire department simultaneously arrived on both the street of our neighbor’s house and our street. Jackie met the first firefighter on the neighbor’s street and let him know the family was out of the house. They sent several fire fighters through the front gate to assess the fire. I was standing holding my hose by the fence when the first firefighters came through the neighbor’s yard. One of them yelled “Holy F***! That’s hot!” which was not exactly reassuring. The firefighters on our street thought the fire was at Erik’s house and started unloading ladders. Bronwyn was coming out of Erik’s house at this point and directed them to the 30 foot flames behind Erik’s house. They asked her to open his gate (she knew the padlock code) and she led them (and their hoses) around Erik’s house to the backyard where they sawzall’ed down the back fence between Erik’s property and our neighbor’s and opened up streams of water on the fire.

They arrived as the flames began licking at the shed and quickly forced the fire back. I turned off my hose and walked back to our house where I ran into Jackie who told me the neighbors were all safe. Thank goodness! There were four firetrucks on our street at this point and the firefighters directed the kids who live in Erik’s house to stand in front of our house as “people who are standing in front of their houses when they catch fire have a tendency to go back inside to get something.” They also told us to get any pets out of our house and to wait outside.

The firefighters arrived within 3-5 minutes of Jackie’s 1:38am call with seven total firetrucks and at least 30 firefighters. They had the fire under control within minutes of arriving, though it took them several hours to get out all embers and call it a night. I was extremely impressed by their response time and quick action against the fire. We were able to return to our house around 3:30am and Jackie, Carla, Bronwyn, and I sat upstairs in Jackie’s bed watching the firefighters walk the neighbors property, roofline, and house checking for hidden embers. We were completely hyped up on adrenaline. By 4:30am though, we called it a night and set up a bed for Carla on our living room sofa. We just wanted to all be together. The firefighters finished their work around the house by about 5am and most of the firefighters left before that.

The devastation of the house is obviously apparent, but more importantly, no one was hurt in the fire. The experience is one I hope to never go through again and I cannot even imagine what the family underwent. Thanks to a recent permit finalizing of the dormer, I had freshly installed carbon monoxide and smoke detectors throughout all three levels of Berrybrier. I feel good about that and I know the house is a lot safer now that the electrical is updated. I learned later that you typically only have 2 minutes to evacuate in house fires since homes are so flammable. This makes me want to run fire drills!

But, I wanted something else, something I could grab in an emergency when the fire department tells me to grab my pets and clear my house.  I know I should also put together a supply of emergency water in the basement soon too (we have plenty of food that could be eaten in an emergency) in case of an earthquake type emergency. My 13 years of girl scouting has taught me to be prepared if nothing else! My friend Claudia had an emergency backpack in college and I decided to make my own.

This is a just in case backpack, I hope to never need to grab. Ironically I’d donated an extra backpack I had lying around a few days before the fire, so I ended up buying a new backpack at the Columbia Employee Store. This one has a much larger capacity though, so that’s probably worth the $25. Online, they don’t have the moss + red colorway I bought and it costs a bit more that I paid, but it’s a great 25L bag! Inside the backpack I placed supplies in three categories: personal supplies, first aid, important documents, survival goods.

Here’s broken down lists of what I included as well!

Personal Supplies:

  • Shirt
  • Leggings
  • Underwear
  • Socks
  • Sandals
  • Sweatshirt
  • Toothpaste
  • Toothbrushes
  • Contact Solution and Case
  • Bar of Soap

First Aid:

  • Antibacterial / Itch / Pain Ointment
  • Bandaides
  • Roll of Gauze
  • Ibuprofen
  • Ace Bandage

Important Documents:

  • Printed PDF copies of my important / identification documents

Survival Goods:

  • Protein Bars
  • Two 2 Liter Bottles of Water
  • Matches
  • Emergency Blanket
  • Fleece Blanket

Can you believe I managed to squeeze that all into a $25 backpack? I was impressed too! Now this bag lives where I can easily grab it while running out of the house and gives me a bit more peace of mind. What’s been your experience with emergency situations? Did it encourage you to get more prepared?

Have you ever had a run in with a fire? Or know someone who’s house caught? What was the cause? What did you do to make yourself feel better about it afterwards? Did you put together an emergency plan? Am I overthinking this?! Let me know in the comments below!

The Downstairs Bookshelf

The Downstairs Bookshelf

Happy New Year everyone! I hope you had a great holiday and got a chance to relax and spend time with family and friends! I spent my break at my parents house eating way too many waffles and drinking hot buttered rum. Lots of hot buttered rum! While I was down in the Bay Area, I also installed a project for a private client of mine. We’re about 95% done with their home and once we finish I can’t wait to go down and photograph the project to share here on the blog. It’s always such fun seeing things come to life from idea to specs to reality! Back home I’ve just been sorting through things trying to purge some of my belongings and trying to find a place for the too many books I accidentally bought at the local used bookstore in my parents’ town.

Speaking of bookshelves, back when I shared how I style my bookshelves full of books I mentioned I’d share my downstairs bookshelf, which, though it has many books, definitely holds a lot more “things” too! This bookshelf is a hand-me-down from my parents which my mother surprised me with when I moved to Berkeley. It needs refinishing and I’ll probably paint it black when I finally get around to painting all the things I want to paint black like my china-cabinet-turned-pantry and dining table. For now though, the bookshelf is a rusty brown shade that I rather dislike. Styled full of pretty things, however, it’s not so bad!

Bookshelf | Land of Laurel

The bookshelf sits tucked in the corner of the main living area next to the dining table and slider door. It fits this spot pretty perfectly and gives this spot some definition and meaning!

Dining Room | Land of Laurel

These days, Finley the Fig Tree hangs out in front of the slider about 3 feet in front of the bookshelf. She tends to hide the bookshelf from view a little bit, but it was the only place to put her!

Living Room | Land of Laurel

Anyways, this bookshelf is more styled than my stuffed-with-books shelf upstairs. This shelf holds all my pretty vintage books, too many of which I bought only because they looked nice (Shhh! Let me have my addiction!). It also holds my collection of German steins (somewhat touristy in taste) as well as a few plants (see above about addictions) and knick knacks.

Bookshelf | Land of Laurel

I can rarely let a surface stay empty so I nabbed a picnic basket I had to sit on top of the shelf and flanked it with two plants. I’d rather these plants live in a different color container, but these were already planted, so I stuck with what I had. Below that, a vintage collection of children’s stories is propped up with inexpensive candlesticks. On the eye level shelf is my collection of steins which I frequently pick up a flea markets and garage sales. I’ve always got an eye out for them. They usually have some sort of interesting pastoral or forrest scene both painted and embossed on them so they’re textural as well as colorful! Below the collection is a shelf with a few stacks of books, a heavy goat bookend I got from my Oma and a Burros Tail succulent I picked up on my birthday last year at a greenhouse in Half Moon Bay.

You’ll notice that these objects are all fairly symmetrical and centered on the shelves. This is very me. I love symmetry! If this shelf was located somewhere else I’d probably use less symmetry to keep things more interesting. Because this is a one-off bookshelf off-centered in a corner, a little lot of symmetry keeps things more orderly.

Bookshelf Upper | Land of Laurel

A lot of my viney plants ended up on this bookshelf. I’ve helped them grow in and around the things on the shelves and they don’t seem to mind sprucing things up a bit! This shelf below is my favorite. The plant really took off and loves that I’ve wound it around the items on the several shelves! Plus I love the stacks of red and blue books with little car on one stack and small box on the other. The car is actually a Christmas ornament my mother gave me, it’s a little truck of fruit though so I keep it out all year round. The box is also from my Oma and is full of little labeled rocks she picked up around Europe in the 1980s.

Lower Bookshelf | Land of Laurel

Below this shelf are just rows of books – tall ones on the bottom, short ones on the shelf above that. This photo made me realize that last shelf was put on crooked and has been crooked for nearly seven months. Whoops!

Bottom Shelves | Land of Laurel

So that is how this bookshelf is looking! Still holds a lot of books, more so than a lot of styled shelves on the internet, but holds a lot of less practical things as well! Hope that inspires you to straighten up your shelves and make them look nice too.

Happy New Year! Also, shout out to Steve!


Styling a Bookshelf with Actual Books

Styling a Bookshelf with Actual Books

So we’ve all seen them, the “How to Style a Bookshelf” posts, they’re everywhere! But have you ever noticed what’s most lacking in these bookshelves? Books! Almost ever tutorial, every blog post, every instruction manual I’ve ever read on styling a bookshelf maintains that you need many knickknacks and very few books. Well, for all my fellow bibliophiles, let’s take a minute to acknowledge how little that makes sense. If you’re anything like me, you have tons of books. You may reread them, they may be on your to-read list, they may sit untouched just looking gorgeous on your shelves, but doggone it, there’s tons of them! The joy of having too many books and not enough book storage has haunted me ever since I memorized the words to the Velveteen Rabbit and told everyone who would listen that I knew how to read. It has never been uncommon for me to have stacks of books sitting all over my home. After college, I stacked books 3 and a half feet high in my bedroom on my childhood dresser. Miraculously they withstood the 2014 Napa Earthquake.

Stacks of Books | Land of Laurel

Every time I see another “How to Style a Bookshelf” tutorial, I sigh, think, hmmm that’s pretty, and move on, because for me, that’s completely impractical. My bookshelves are groaning under the weight of years of reading material. They’re packed to the brim with thousands of pages of paper, trillions of words, hundreds of stories. And that’s how I like them: full of books. The bibliophile in me wants more and more, collects them even. The romantic in me dreams of home libraries packed to the brim and smelling of paper and ink. The designer in me pauses a minute and thinks, how can I make this collection attractive?

This past weekend I moved around the furniture in my room and this bookshelf got booted out and into the bonus room upstairs. I packed it full of as many books as I could, styled the top, and it’s beginning to set the tone for this whole room.

Without further ado, how to style your bookshelf with actual books! If you follow these guidelines, not only will you have an attractive bookcase filled with books, but you will also be able to store more books than you would normally. Booklovers rejoice! You can use any books for this, hardcover, paperback, falling apart, old, new, used! Is this the only way to style a bookshelf full of books? Definitely not. But this method is fun, fresh, and brimming with books!

First start with an empty bookshelf. The small hole drilled in the back for your childhood stereo is essential. Just kidding! Pretend it’s not there…

Styling a Bookshelf with Actual Books | Land of Laurel

Gather a stack of books in the same color family, you want the stack to be about as tall as your shelf when laid horizontally. Place that on one of the shelves.

Styling a Bookshelf with Actual Books | Land of Laurel

Gather another stack of similarly colored book spines. Place that next to the horizontally stacked books.

Styling a Bookshelf with Books | Land of Laurel

Add more books in this spine color to finish out this half of the shelf. Begin gathering books of other spine colors. At this point you might want to pop in a special books you have. For me, this means a collection of dilapidated books on top of the bookshelf and a three volume series on a shelf below.

Styling a Bookshelf with Books | Land of Laurel

Now things began to move quickly. Continue adding stacks of books vertically and horizontally until your shelves begin to fill up. Things will move around a bit as you adjust for different spine colors. Don’t be afraid to mix hard- and soft-cover books together! At this point your goal to to pack the shelves and keep your horizontal stacks misaligned for a more collected look.

Styling a Bookshelf with Books | Land of Laurel

As you continue on past the first few shelves, you may vary between one horizontal book stack and two per shelf. This helps keep you eyes moving around the shelves.

dsc_0542Styling a Bookshelf with Books | Land of Laurel

As you get further down your varying colored books help give the shelves blocks of color, creating a more appeasing and “styled” look over all.

Styling a Bookshelf with Books | Land of Laurel

At this point, your shelves are full, but don’t stop there! Add an arrangement to the top of your bookshelf to tie the entire thing together. I used an old printed wooden box I have which mimics the blocks of colors formed by the books in the shelves below. The plant adds some organic shape and life; it’s long tendril down the side of the shelf visually binds it to the books on shelves below. A candle, a little metal house, a silver stein, and a happy painted armadillo fill in the remainder of the space.

Styling a Bookshelf with Books | Land of Laurel

And that, is a bookshelf styled full of books! I love this because not only can I fit way more books on this shelf, but it looks clean, collected and modern rather than cluttered. There are many ways to style shelves, I don’t have anything against most of them. But for me, it’s important that my styled shelves are packed with the books I need them to store, and not just interesting objects!

I made a gif so you can follow along with this step by step as well!

How to Style Your Bookshelf with Actual Books | Land of Laurel

I’ll share the bookshelf I have downstairs later, to show you how I style shelves with fewer books too. And guess what? I need more bookshelves… I’m out of room and there are stacks of books everywhere around my house, eek!

Do you run into the problem of not having enough book storage? Have you styled your shelves full of books in a different way? Let me know your secrets!

Hanging in there!

Hanging in there!

Woah. Did you guys watch the Walking Dead last Sunday? Because, I need to talk to somebody about that punch-you-in-the-face, heart- wrenching, knock-you-dead season premiere! So violent. So psychotic. So depressing. Wowza! Let me know your thoughts. I need to talk about it with somebody or I’ll go crazy.

In other news, I am no longer living with all my pots and pans sitting on the counter! Nice segue, right? Remember when I filled up my china hutch-turned-pantry and started pulling this kitchen together? I shared this shot:

China Cabinet Pantry | Land of Laurel

Well, take a look at this and see if you can spot the difference:

China Hutch Pantry and Pegboard | Land of Laurel

No the dead plant is still the same dead plant (really need to get my s*** together and share a shot of the lovely new snake plant which now lives in that pot!). And no the random lamp on the floor isn’t anything new (you should remember that lamp from long ago). It’s the pegboard over in the kitchen! That’s right! Vertical storage wins again!

Now rather than moving 15 million pots and pans around every time I need to use the counter space, I can actually use the counter space! It’s the little things, people! The back wall of our kitchen was so under utilized before. A big blank wall with nothing but some mismatched trash/recycling receptacles was not an ideal situation in a kitchen lacking storage.

Kitchen Before | Land of Laurel

There just is no reason for this wall to have so little purpose. And no reason for all those pots to sit on the counter. Now? Much better.

Kitchen Pegboard | Land of Laurel

Matching trash and recycling containers from IKEA (I spray painted the recycling bin green) plus a pegboard adds up to a much nicer view. Most of the pots and pans are my roommate’s, but the center column holds my cast iron pans and the one pot I’ve had since college. My Staub dutch oven and pie pans live in the china hutch. Having all the pots and pans within such easy reach is absolutely wonderful. I just reach over any time I need any thing, I much prefer it to digging through the lower cabinets. Putting together the pegboard was super easy. Anyone can do it as long as you have the right tools.

I picked up the actual pegboard at Home Depot and had them cut down the 4’x8′ size to the dimension I wanted: 3′ x 6′. They offer this service free, so take them up on it if you don’t have the correct cutting tools. While I was there I grabbed a couple of 8′ long 1x2s to pop the board off the wall (allowing the hangers to slip in) and some 1x3s to trim the board out.

At home, two quick cuts later and I had the boards ready for the back of pegboard. Excuse the dark garage photos. There are worse pictures yet to come. Cutting the 8 foot boards down to just under 6′ allowed me to have boards along the lengths of the pegboard and the top and bottom. They didn’t need to be perfect since they were purely for function and wouldn’t be visible. I screwed them in from the back so they were completely invisible (like ninjas) from the front.

Pegboard | Land of Laurel

The trim pieces were almost as simple: set saw to 45 degree angle and cut.  But of course I started right off with a mistake. Luckily I was able to reuse the board for the top and bottom trim pieces and didn’t waste much.

Cutting Error | Land of Laurel

Once I turned my brain on, I quickly made the rest of the cuts. Each length was an inch longer than my pegboard so the trim would stick out from it on all sides. I then screwed all of these boards into the pegboard and things started taking shape. It looked so good, Malary decided to pose with the pegboard. It’s so nice to have such a supportive pet.

Pegboard | Land of Laurel

Since edges never match up entirely perfectly, I filled the mitered corners with wood filler and gave the same treatment to the more prominent knots.

Pegboard | Land of Laurel

Then I did some minor sanding (I get super lazy about sanding, but it’s a requirement so I tried to tough it out). After that, I filled the gaps where the trim meets the pegboard with some paintable caulk wiping up the excess with a wet finger. I like this little container because it stays good for a long time, rather than drying out immediately like the caulk guns.

Caulk | Land of Laurel

Once everything was caulked the board was functional, it just needed a coat of paint to spruce things up!

Pegboard | Land of Laurel

Two coats of primer later, it was ready for some paint.

Pegboard | Land of Laurel

I chose Benjamin Moore’s Palladian Blue (HC-144) in their Natura line (zero-VOC) for the board. It’s a really light aqua tone that is subtle, but still stands out from white. It has quite a bit of grey in in and the swatch seems to be almost white, but once it’s up on the wall, BOOM! COLOR! Plus, I love Julia Child and she had teal-blue pegboards all over her kitchen, so I’m in good company! After two coats of paint, I did three coats of Safecoat Acrylic sealer in high-gloss. I wanted the board to be extra protected from water and oils. Once that was all done, it was time to bring it inside.

Pegboard | Land of Laurel

I hung the board on the wall with a few heavy duty D-rings hooked on hangers screwed into wall studs and it is fairly sturdy. I picked up this pegboard hardware kit at Home Depot too, which was way more than enough to hang the pots and pans. I have enough left over I might take the pegboard scraps and make another for the garage!

Pegboard | Land of Laurel

Covered in pots, it really does make things look happy, colorful, and organized. I’m ready to sauté those carrots at a moments notice now.

Pegboard | Land of Laurel

Having our counters back and free for their original purpose (prep space) is delightful. Not looking at a pile of pots and pans every time I walk into the kitchen is pretty great too! The trash and recycling containers are just the right size for us too. I love the matching size and though not everyone would like the different colored recycling, it’s nice to easily be able to identify it as “the green one” when people come over.

Pegboard | Land of Laurel

Plus I get to lovingly stare at my cast iron pans now. Definite bonus.

Pegboard | Land of Laurel

I love those pans… though I wouldn’t mind upgrading them to Lodge pans down the line. I’ve got these guys seasoned just perfectly now with just over a year of use. Cast iron is my favorite!

So if you have a blank wall – put it to use! Don’t fuss around with birds, put a pegboard on it! (I’m so Portland now).

Have you guys ever come up with creative storage solutions in your rental kitchens? I’d love some good ideas!


Extra Storage in the Kitchen

Extra Storage in the Kitchen

When we first moved in, our kitchen was a hot mess. The small, awkwardly placed cabinets were difficult to organize. Living with a roommate means doubles of many of the “basic” kitchen items – in our case, baking supplies – which takes up more room than it should. We each had half of a cabinet for all of our food, the rest of the space was filled with pots, pans, tupperware, and all of the other kitchen things you tend to accumulate. This wasn’t working with my grocery shopping/food storage habits. See, I like to keep a lot of things (legumes, nuts, grains, flour, etc) on hand in my pantry at all times, so the only things I really need to grocery shop for are items that get stored in the fridge (almond milk, eggs, vegetables, fruits, cheeses). This allows to me to stock up on non-perishables infrequently and makes my trips to the grocery store a bit quicker since I only hit up two areas, rather than the entire store.

Remember what my kitchen was looking like when we first moved in?

dsc_0033

A hot mess. That’s what this place was, except minus the hot part.

The Duplex Moving In Tour | Land of Laurel

Our storage system evolved a bit after we settled in a bit more, but these pictures remain exemplary of our kitchen’s progress in the first couple of months we lived here. It was not working! I needed a solution, and after seeing something similar in an airbnb my mother and Aunt Stephanie stayed at while visiting, I got an idea stuck in my head. I started hunting for a china cabinet on craigslist soon after. A china cabinet? Isn’t that a little dated? Just wait. See that weird wall that caps the closer side of the galley kitchen? It’s not in line with the long hall way wall, but rather 2-3 feet back closer to the kitchen. It’s almost perpendicular to the center line of the refrigerator. It makes no sense! It serves no purpose! It annoys me! That is where the china cabinet will go. It will extend the kitchen storage and make the wall more functional in the mean time.

I hunted and hunted. That wall is only 43″ wide so the cabinet had to be skinny. I still wanted something tall though, so I could gain as much storage as possible. Finally, I found it! The perfect cabinet. It was exactly the right width for the wall! I drove with my friend Kayla to Hayden Island in North Portland and we stuffed the china cabinet into the van I borrowed from my parents, paid the man his $90 bucks, and headed back to my house. A little dusting and a wipe down with Honest Co. Multi-Purpose Cleaner, and she was ready to be filled on up!

The cabinet even came with a little light that makes the pantry goods look super cute and cozy in their new home. The glass shelf inside lets the light shine down on to both levels. I filled the open middle area with cookbooks belonging to both my roommate and I. The cabinets below hold mason jars, my Staub dutch oven, and my waffle iron, while the drawers contain some random bits and things like frosting squeeze bottles and rolling pins. Boom! Insta storage! The cute cabinet almost makes me forget the annoying the flooring transition I talked more about here. Fake wood meets fake tile in such a dumb way, don’t even get me started! Just concentrate on the glorious cabinet!

China Cabinet Pantry | Land of Laurel

You see I also got some new stools. And one of my Parlor palms died. I’ve left it there in such a stylish manor. I bought a new snake plant replaced this guy with the new one in the meantime! The stools I bought when my office moved from east to west Portland. I picked them up for $20 each and I have five. I’ve been using 4 here at the “counter” but the ledge is only about 8 inches deep so people mostly sit sideways and I think I’ll need to remove one more for ease of access.

The china cabinet so perfectly fits this spot and it really ties the kitchen into the living room beyond. It feels so great to walk over here in the evenings and grab my jar of cous cous or lentils. Each morning I make my bowl of oatmeal and set the bowl in front of the cookbooks while I get out the chia seeds from the upper cabinet to sprinkle them on top. It’s quite a handy spot!

China Cabinet Pantry | Land of Laurel

Inside my jars hold a whole manor of non-perishable goods! I really have more storage for this than I really need, but I really love the affect of all the jars within. On the left side I have muesli, sunflower seeds, chickpeas, cous cous, black rice, and sliced almonds on the top shelf and rye flour, lentils, dried mango (for the all of two days I have it before devouring every last piece!), polenta, whole wheat flour and my tin of steel cut oatmeal.

China Cabinet Pantry | Land of Laurel

On the right side I’ve got black beans, black eyed peas, tri-color wild rice, finely milled whole wheat flour and pine nuts on top, while the bottom shelf holds tri-color popcorn kernels, chia seeds, rolled oats, and usually chocolate chips, but I believe I finished them off before taking this picture!

China Cabinet Pantry | Land of Laurel

Our kitchen is small so it’s not a big deal to walk to the china cabinet; it’s no further from the sink than the fridge! Having everything out in the open in the china cabinet makes things so easy, too. There is nothing like a full pantry to make me smile. I just love the way different foods look in jars! It’s simple and colorful, classic and clean. It makes me feel like a pioneer with jars full of canned goods lining her cellar. In reality I have jars full of foods that were not available then and none of them are canned and I can walk into the grocery store to buy them pretty much any time of the year. But that makes it feel less special, so I still like to day dream about pioneer cellars.

China Cabinet Pantry | Land of Laurel

I love these jars. I’ve been picking them up at IKEA for a few years now. The small ones are $2.99 and the larger ones are $3.99. I hope they never discontinue them, though it’s hard to imagine needing any more that I already have. I did buy a few more when I bought the cabinet, since I wanted to fill up both shelves. They’re well worth it. The jars I fill with organic foods mostly from the bulk section. I loved Berkeley Bowl for this when I was living in the Bay Area. I’ve yet to find a go-to grocery store here in Portland, but these were all filled with bulk goods from Fred Meyers here which has a surprisingly good organic bulk section!

China Cabinet Pantry | Land of Laurel

The cabinet is standing functional for now, though I would love to paint it at some point soon. I’m thinking of painting it a lovely black similar to how Dana at HouseTweaking.com re-did her armoire in her studio. The hardware I might keep or just replace with knobs. I’m not sure yet and I don’t have plans to paint this until a number of other things are checked off my to-do list! For now, I’m just to busy staring at all the non-perishable pantry goods with goo-good eyes.

China Cabinet Pantry | Land of Laurel

How do you store your food? Does it affect how you shop? Are you the matching jars/containers type or the everything in the box it came from type?


Wooden Crates are So Great!

Happy Tuesday! Happy March 1st!  Did you have a good weekend? Enjoy the Oscars? Outraged by the winners or happily agreed with the votes? I didn’t watch! Just read about it and enjoyed the dresses online. I went with my family to eat at Gather here in Berkeley instead. So yummy! I had a very chill weekend overall and got many things done, so I got to prep some blog posts for y’all! Yay!


Remember my living room? Those glass coffee and side tables always make me cringe. As I am among the World’s Clumsiest People, glass in places I can easily fall/trip over makes me… nervous, to say least. Because the tables are pretty perfectly sized for the space and I don’t have the budget to invest in new ones (plus, where would I put my roommates if I did?), I wanted to make them a bit more visually prominent in hopes I wouldn’t break them and time soon. Or, ever, really. Yes, let’s concentrate on not breaking them ever; that sounds much better, really. My attempts to make the table more prominent involved holiday displays, trays, and plants. It helped, but it didn’t quite add the visual weight I hoped for…


Living Spaces | Land of Laurel


A while ago, while driving down Highway 101 on the way home from a job site, my co-worker and I stopped for sustenance at a fruit stand. We were so hungry! Among the piles of various fruits and nuts they had piled old wooden cherry crates and were selling them for only $5! I see crates like these all the time at the Alameda Flea Market but always priced more than $30! I could have played it safe and bought one or two, but do I ever play it safe? Hell no! I hopped on that deal like a monkey on a banana! I bought eight cherry boxes for a total of $40. Worth it! Then I stuffed them into our already full (of chair samples!) van and called it a #colddeadfingers find worthy of Mandi! Here’s the pic from the overly excited text I sent to my two best friends, my mom, my sister, my aunt, my next-door-neighbor, and my next-door-neighbor’s dog. Let’s just say, I was pretty freakin’ excited about this!


Great Crate! | Land of Laurel


They were a little dirty, but I knew they’d clean up quick! At first, I had no idea what I’d do with them, but I knew I’d figure it out quickly. Produce crates aren’t hard to come by, but at that price, I felt so overly joyed. I was ready to celebrate! When I got them home, I wiped them down with a sponge and some Honest Multi-Purpose Spray. They were pretty clean by the time I was done, but I think in the future I’d like to try some furniture wax or polish to bring out the wood tones even more. For now, they’re just fine!


Because we had two side tables and the coffee table, I went and stuck four of the crates in the living room. The X-support under the glass of the coffee table ended up being absolutely perfect for the crates! They fit perfectly and we nice and stably balanced. More importantly? The coffee table went from barely there to having actual visual weight! Here it is before; see how your eye just glances over it? Not great for someone who needs many visual queues in order to not trip into things!


Glass Coffee Table | Land of Laurel


Then, look with the cherry crates stacked neatly on the bars! Boom! You can actually see the thing!


Cherry Crates Under Coffee Table | Land of Laurel


Not only were the crates very stable on the X-support, they actually extended the perfect amount, just a couple inches less than the width of the table. That meant, your eye could distinguish the edges of the glass and my brain could tell my body to avoid falling into it. Yay!


At first I just stacked the boxes under the glass of the tables, but then, as you can see above, I got a better idea! I filled the boxes with the design magazine I have lying around all over my house. Not only does this clear out the stacks I had lined up against the wall in my bedroom, but it provides reading material for any guests. Many of our visitors glance through them while we’re in the kitchen or chatting around. It’s nice to see the magazines in use and not gathering dust!


Magazine Storage | Land of Laurel


And there, my friends, is a ten minute fix to a small problem that will hopefully prevent me from dying a glassy death. I’ve definitely noticed that I bump into the table far less frequently now! Plus, I have four more cherry crates sitting in the attic waiting for another project to come by. Hmmm… any ideas for how I should repurpose them? Do you like glass tables inside? Do you notice the visual weight of items in your home?

A Bit More than Bathing in the Bathroom

I’m struggling to write at the moment, because I just watched the Walking Dead and now I am dead inside. One of my favorite characters died and I do not know how’ll I’ll keep watching without him. What will his wife do?And Rick (my least favorite character) isn’t in a great situation either!! The Walking Dead has never hesitated to kill off the most loved characters, which makes it a fantastic, heart breaking show. Bah! I can’t be the only one near tears, right?! Who else watches this??

Now the Walking Dead has absolutely nothing to do with today’s post. Literally nothing. Although, I do really want to go to Georgia. Wait no, that’s still sidetracking. What am I supposed to be writing about?! Oh yes… my bathroom.

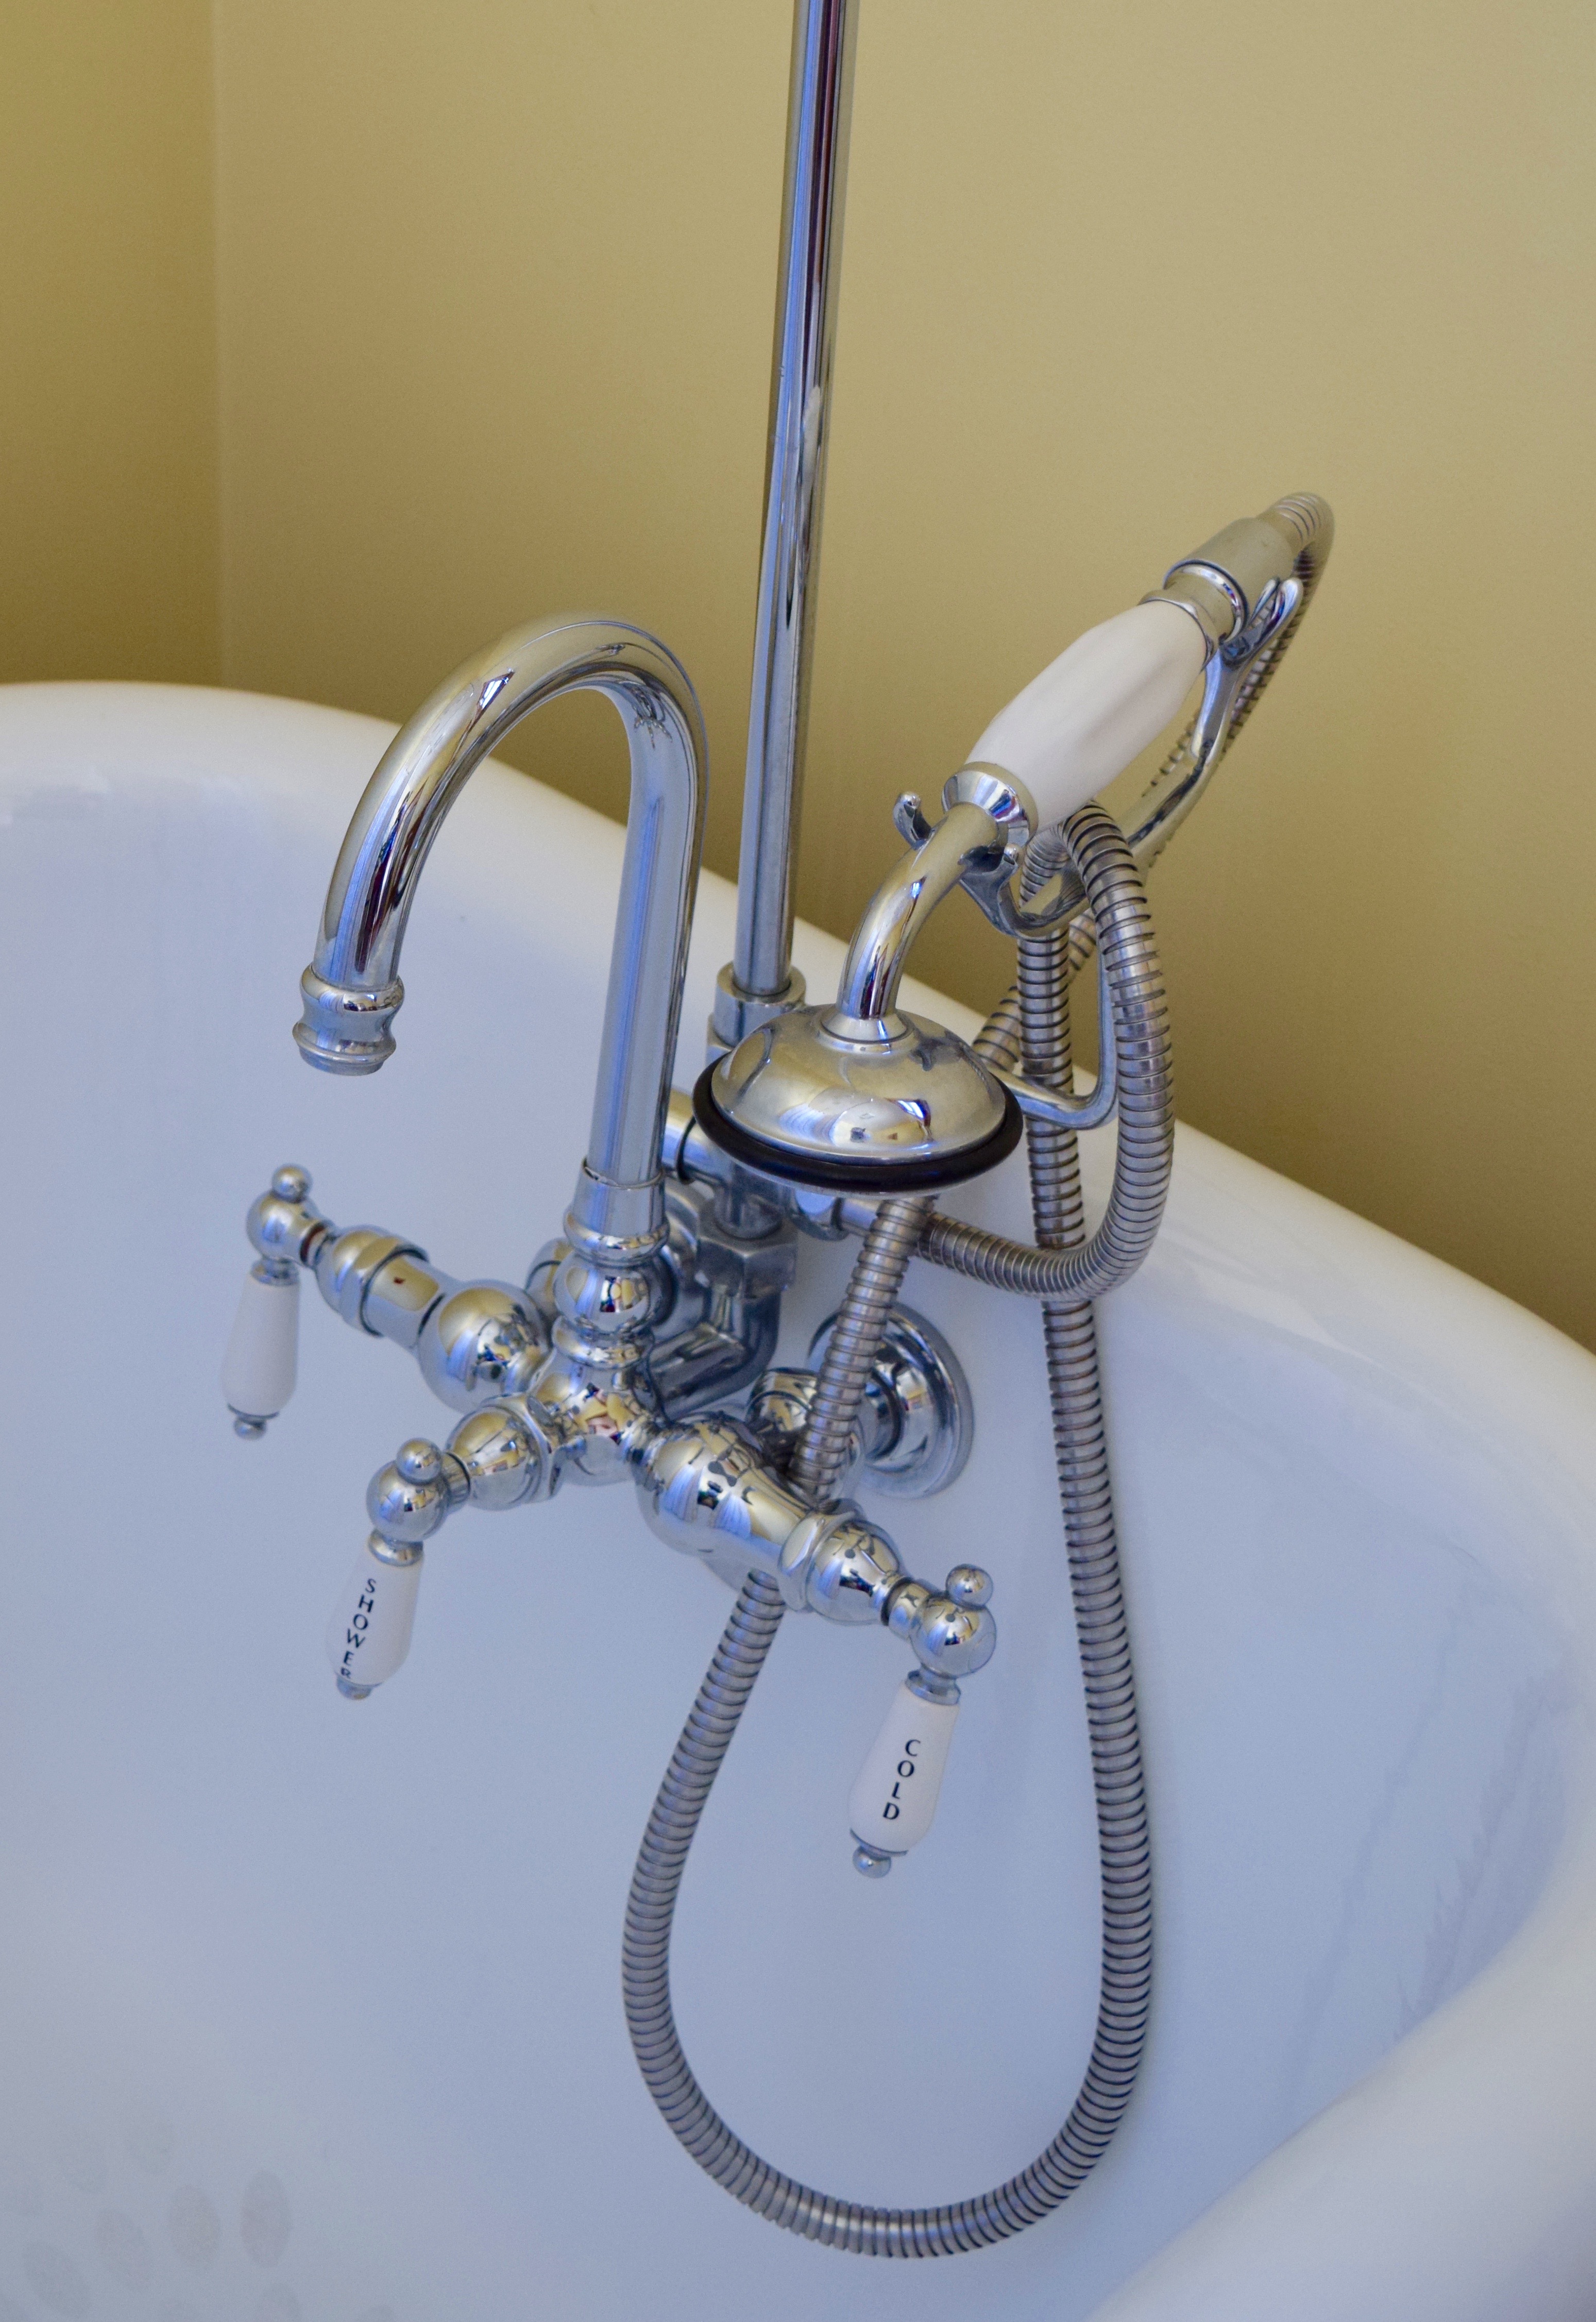
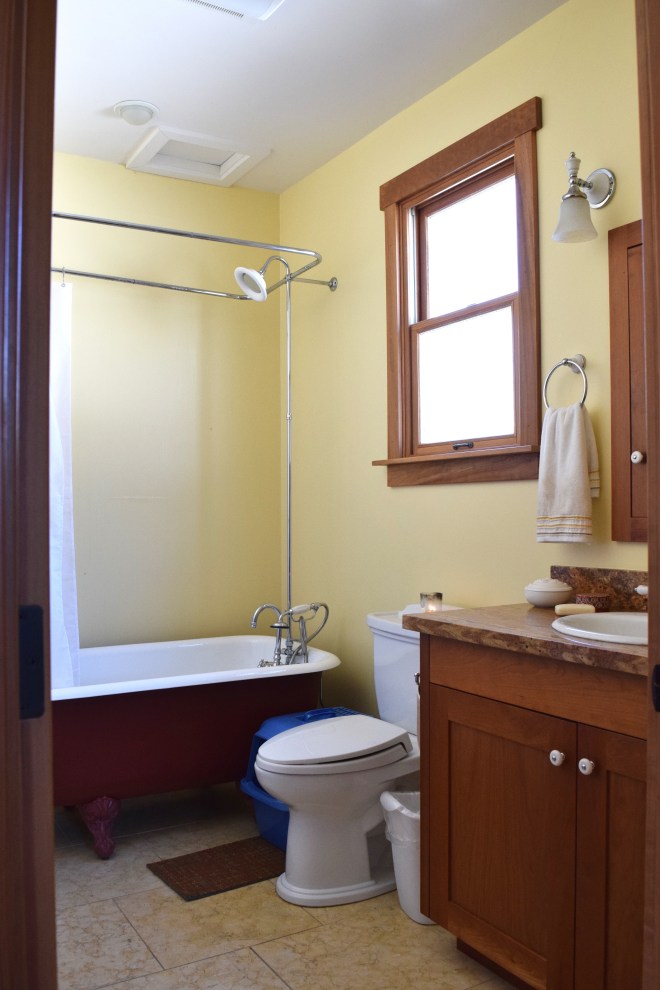
So as much as I now love my roommates, their radiant personalities did not play a huge part in me choosing to live here over some of the other places I found on Craigslist. Why did I choose this place? The bathroom. Once I walked into the bathroom, I was sold on this place. It was really the bathtub. I have great memories of my Aunt Karolyn’s clawfoot bathtub at her house in Oakland near Glenview Elementary School. Her daughters– my cousins– were about the same age as my sister and I so we would go there all the time. Even as a kid, I loved houses and design, and I freakin’ loved that bathtub. My bathroom now? Clawfoot bathtub. Entire reason I signed that lease. I mean besides the fact that the house is near BART and my roommates are normal, clean people, and our home is beautiful. Whatever. That stuff does not compare to my bathtub! This is what my bathroom looked like when I first moved in.

Move in Bathroom

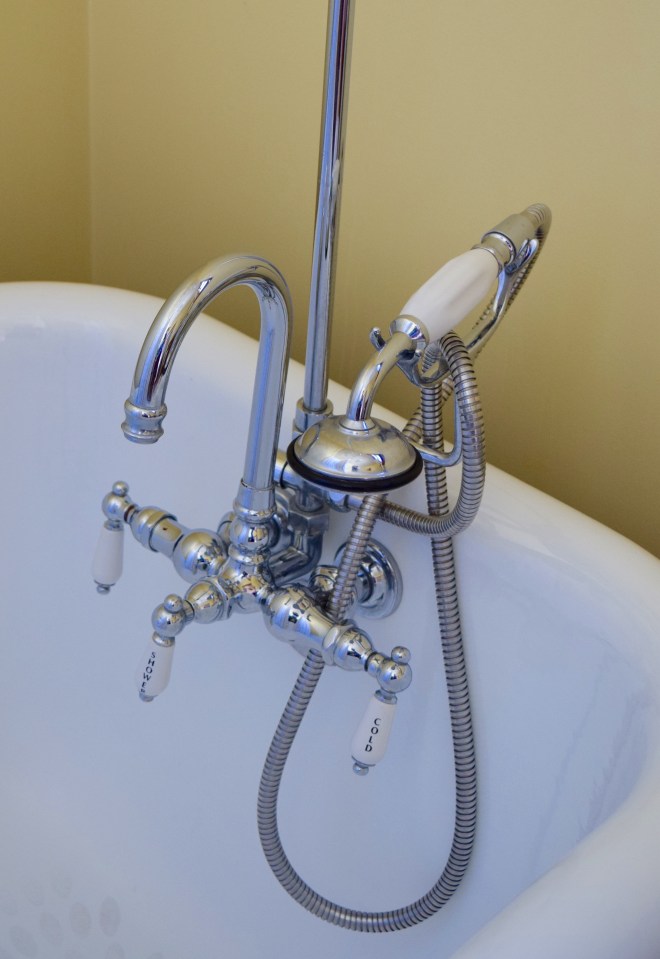
And the the bathroom fixtures are Kohler! I love Kohler! The bathroom is all from the Kohler’s Antique Line. It’s very much a 1930’s throwback. They’re beautiful. The chrome bits on the end after the ceramic knobs were loose on a few when I moved in. I tightened them up easily by wrapping plastic wrap around some pliers. I want some rubber nose pliers, but when I asked one of the employees at Home Depot about them he looked very confused. It’s possible I made the existence of them up. Regardless, the plastic wrap worked just fine. Once I tightened them, the have not come loose again. I just love the “hot” and “cold” labels! It’s details like this that make our house so interesting. It really is a contemporary craftsman, elegantly straddling old and new design!

Kohler Bathtub Fixture

I’m lucky that the house is really beautiful. The craftsmanship is really well done. There was a lot of care taken when it was built 10 years ago. Anything I do to the house isn’t really changing it, but rather accentuating it. For now this blog is about taking a home from 75% to 100% done. That last 25%? All the itty bitty details. This is the storage and organizing and decorating. The things that make this place functional and beautifull! This is the part that takes the most time and can even seem unnecessary, but it really does complete the space.

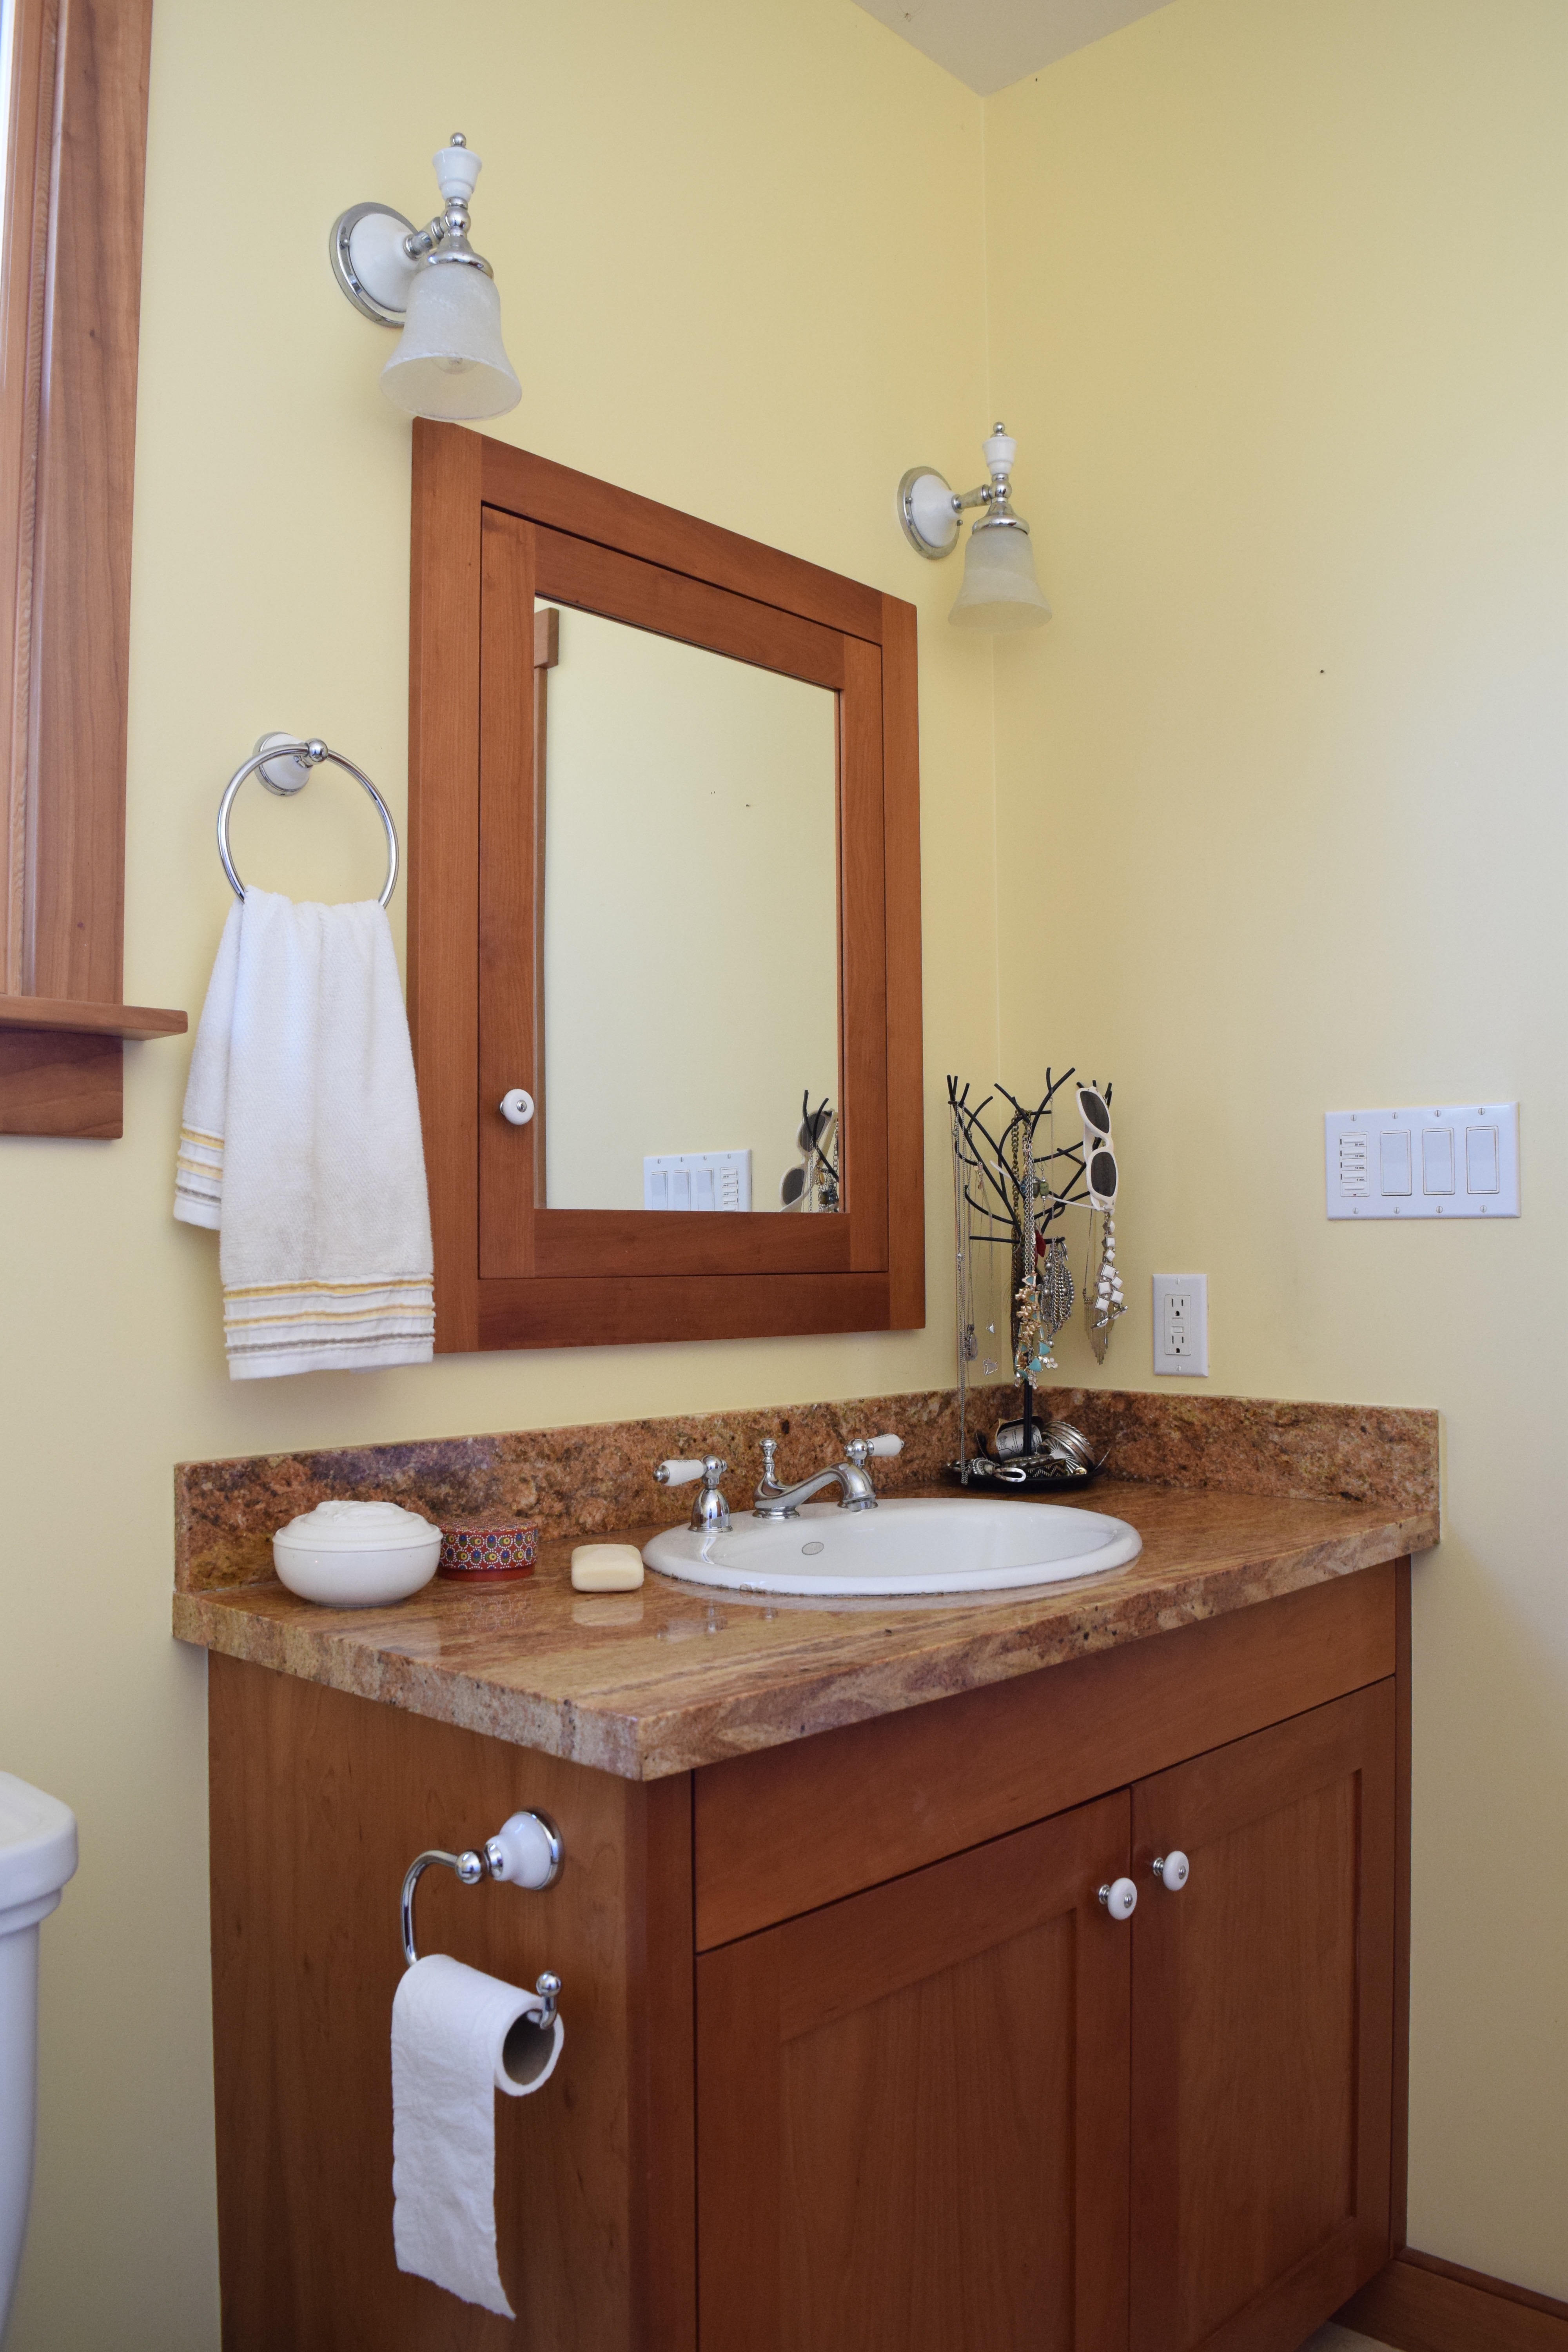
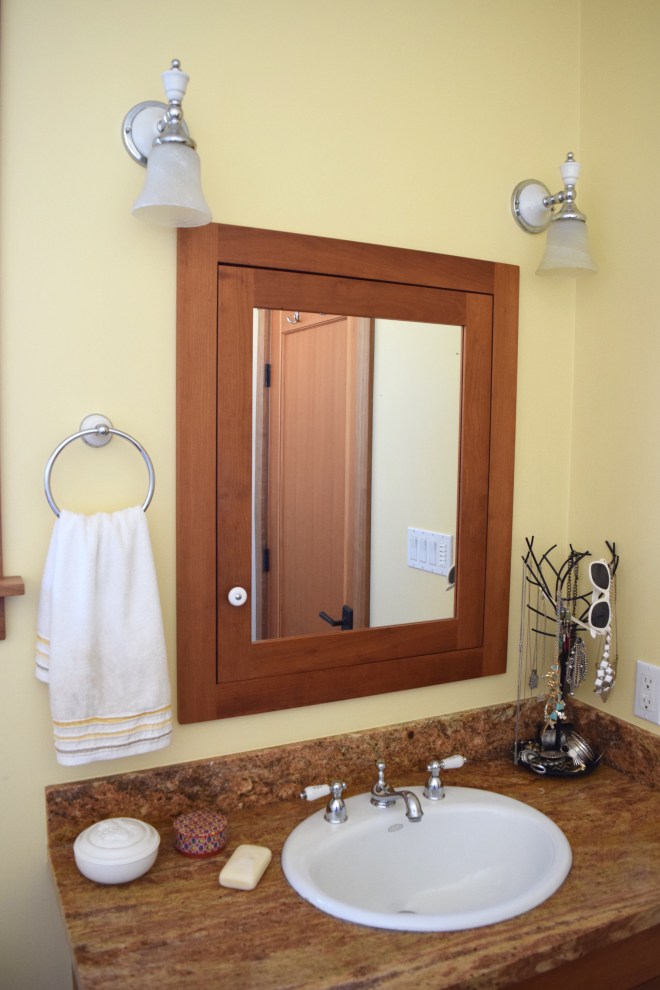
Now the bathroom vanity is gorgeous, but it doesn’t have any drawers. Just one huge open space within the cabinet isn’t all that functional and means a lot of my things needed to live on the counter. When I first moved in, things just landed where I needed them the most, without much thought into how it all looked.

Move in Bathroom Vanity

That means the soap went straight on the counter since I didn’t have a soap dish, necklaces went on the first rack-thing I saw at Target, and earrings stayed in the boxes I’d moved them in (in which they are tangled and impossible to find). My new Target towels looked good, but this one is dirty!

Movein Bathroom Counter

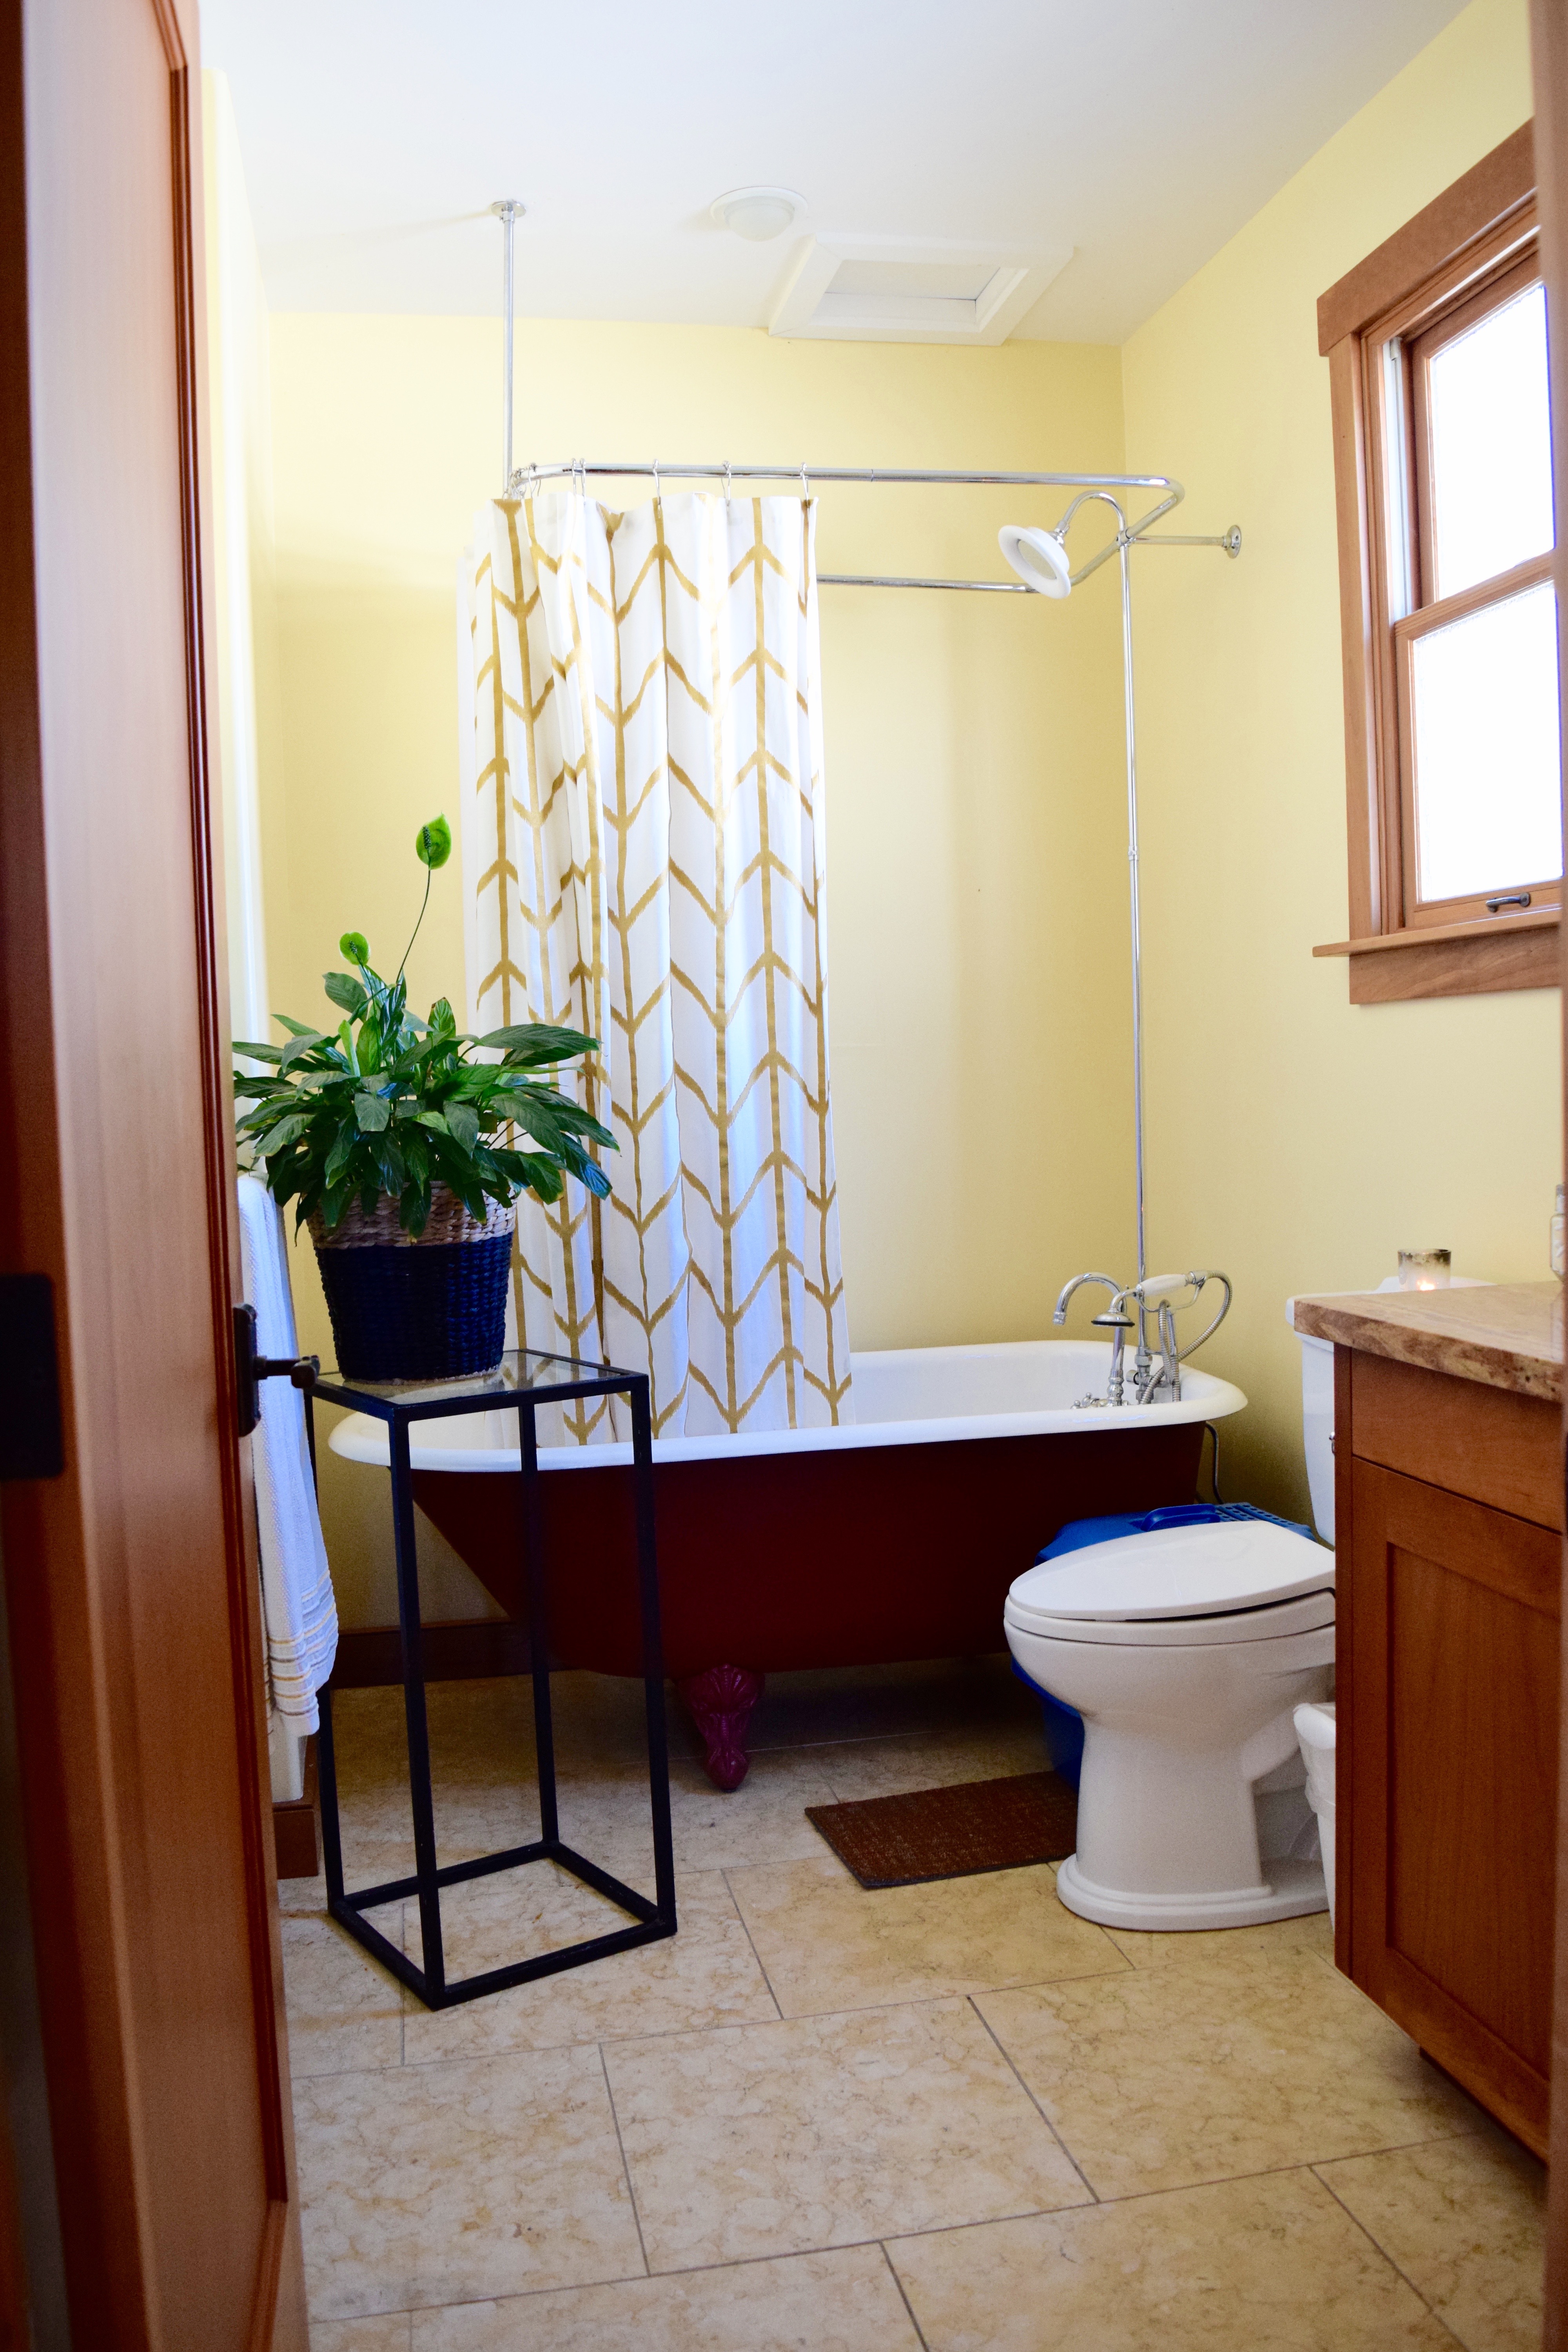
My bathroom looked pretty much like this — shower curtain-less, with things stuffed into the cabinet– for a few months before I could finally get around to tackling the first stage of the room. Some of this stage was new purchases to help with function, some of it was a matter of moving things around. I had gotten a dingy looking plant stand with a glass top from my last job. They were going to throw it away, but I liked the clean lines! A basic Target shower curtain helped helped hide the necessary plastic one behind it and pumped up the fun factor. After a few months, the room had much more personality.

DSC_0241

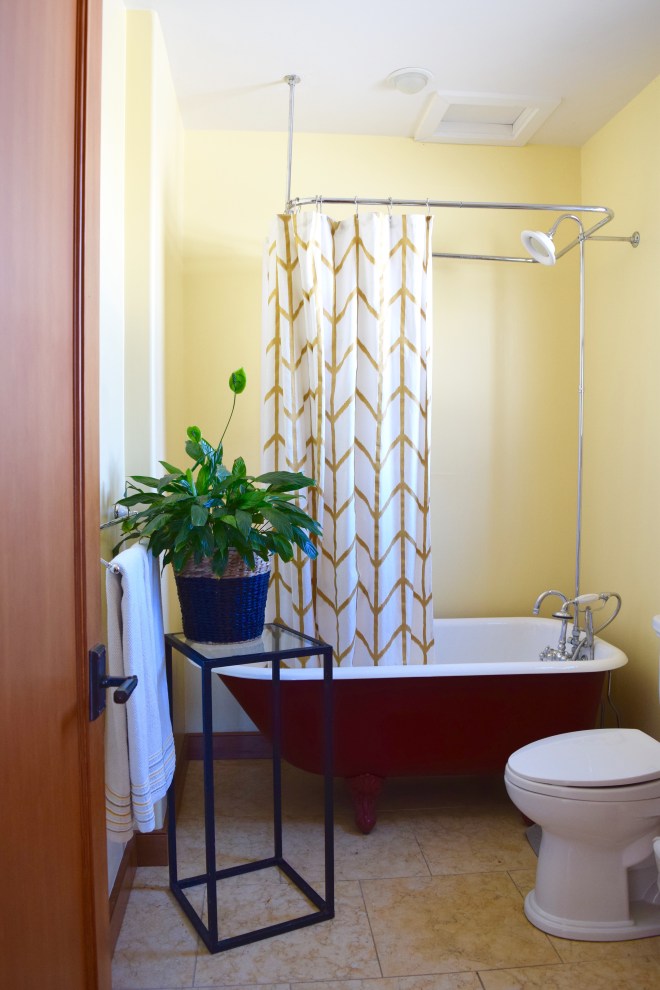
The plant I plopped on plant stand came from my Oma’s house, just like Fred the Fish. I repotted it in this IKEA basket. I wished I’d picked up another matching basket for toilet paper to sit on the floor beneath it! Alas, the no longer sell the baskets! Arg! I’m bummed. Instead I usually stick a watering can there that I fill up in the shower when the water is getting hot before I get in. The plant on top really brings some life to the space, it’s thriving on the humidity too! Plus I washed my hand towel. Who’s proud? Me! Such an adult.

Over on the vanity, things changed less dramatically. I still haven’t found a great solution for my jewelry, but I did get a soap dish! The little things, right? This looks one billion times better than leaving it on the counter. Plus the counter stays shiny longer this way after I clean it.

Bathroom vanity

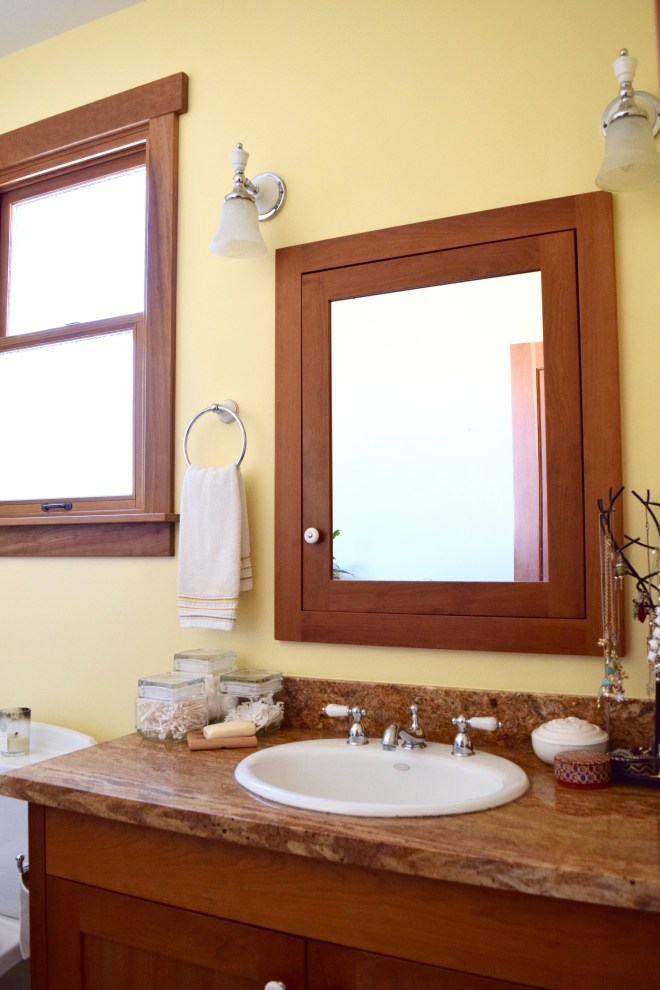
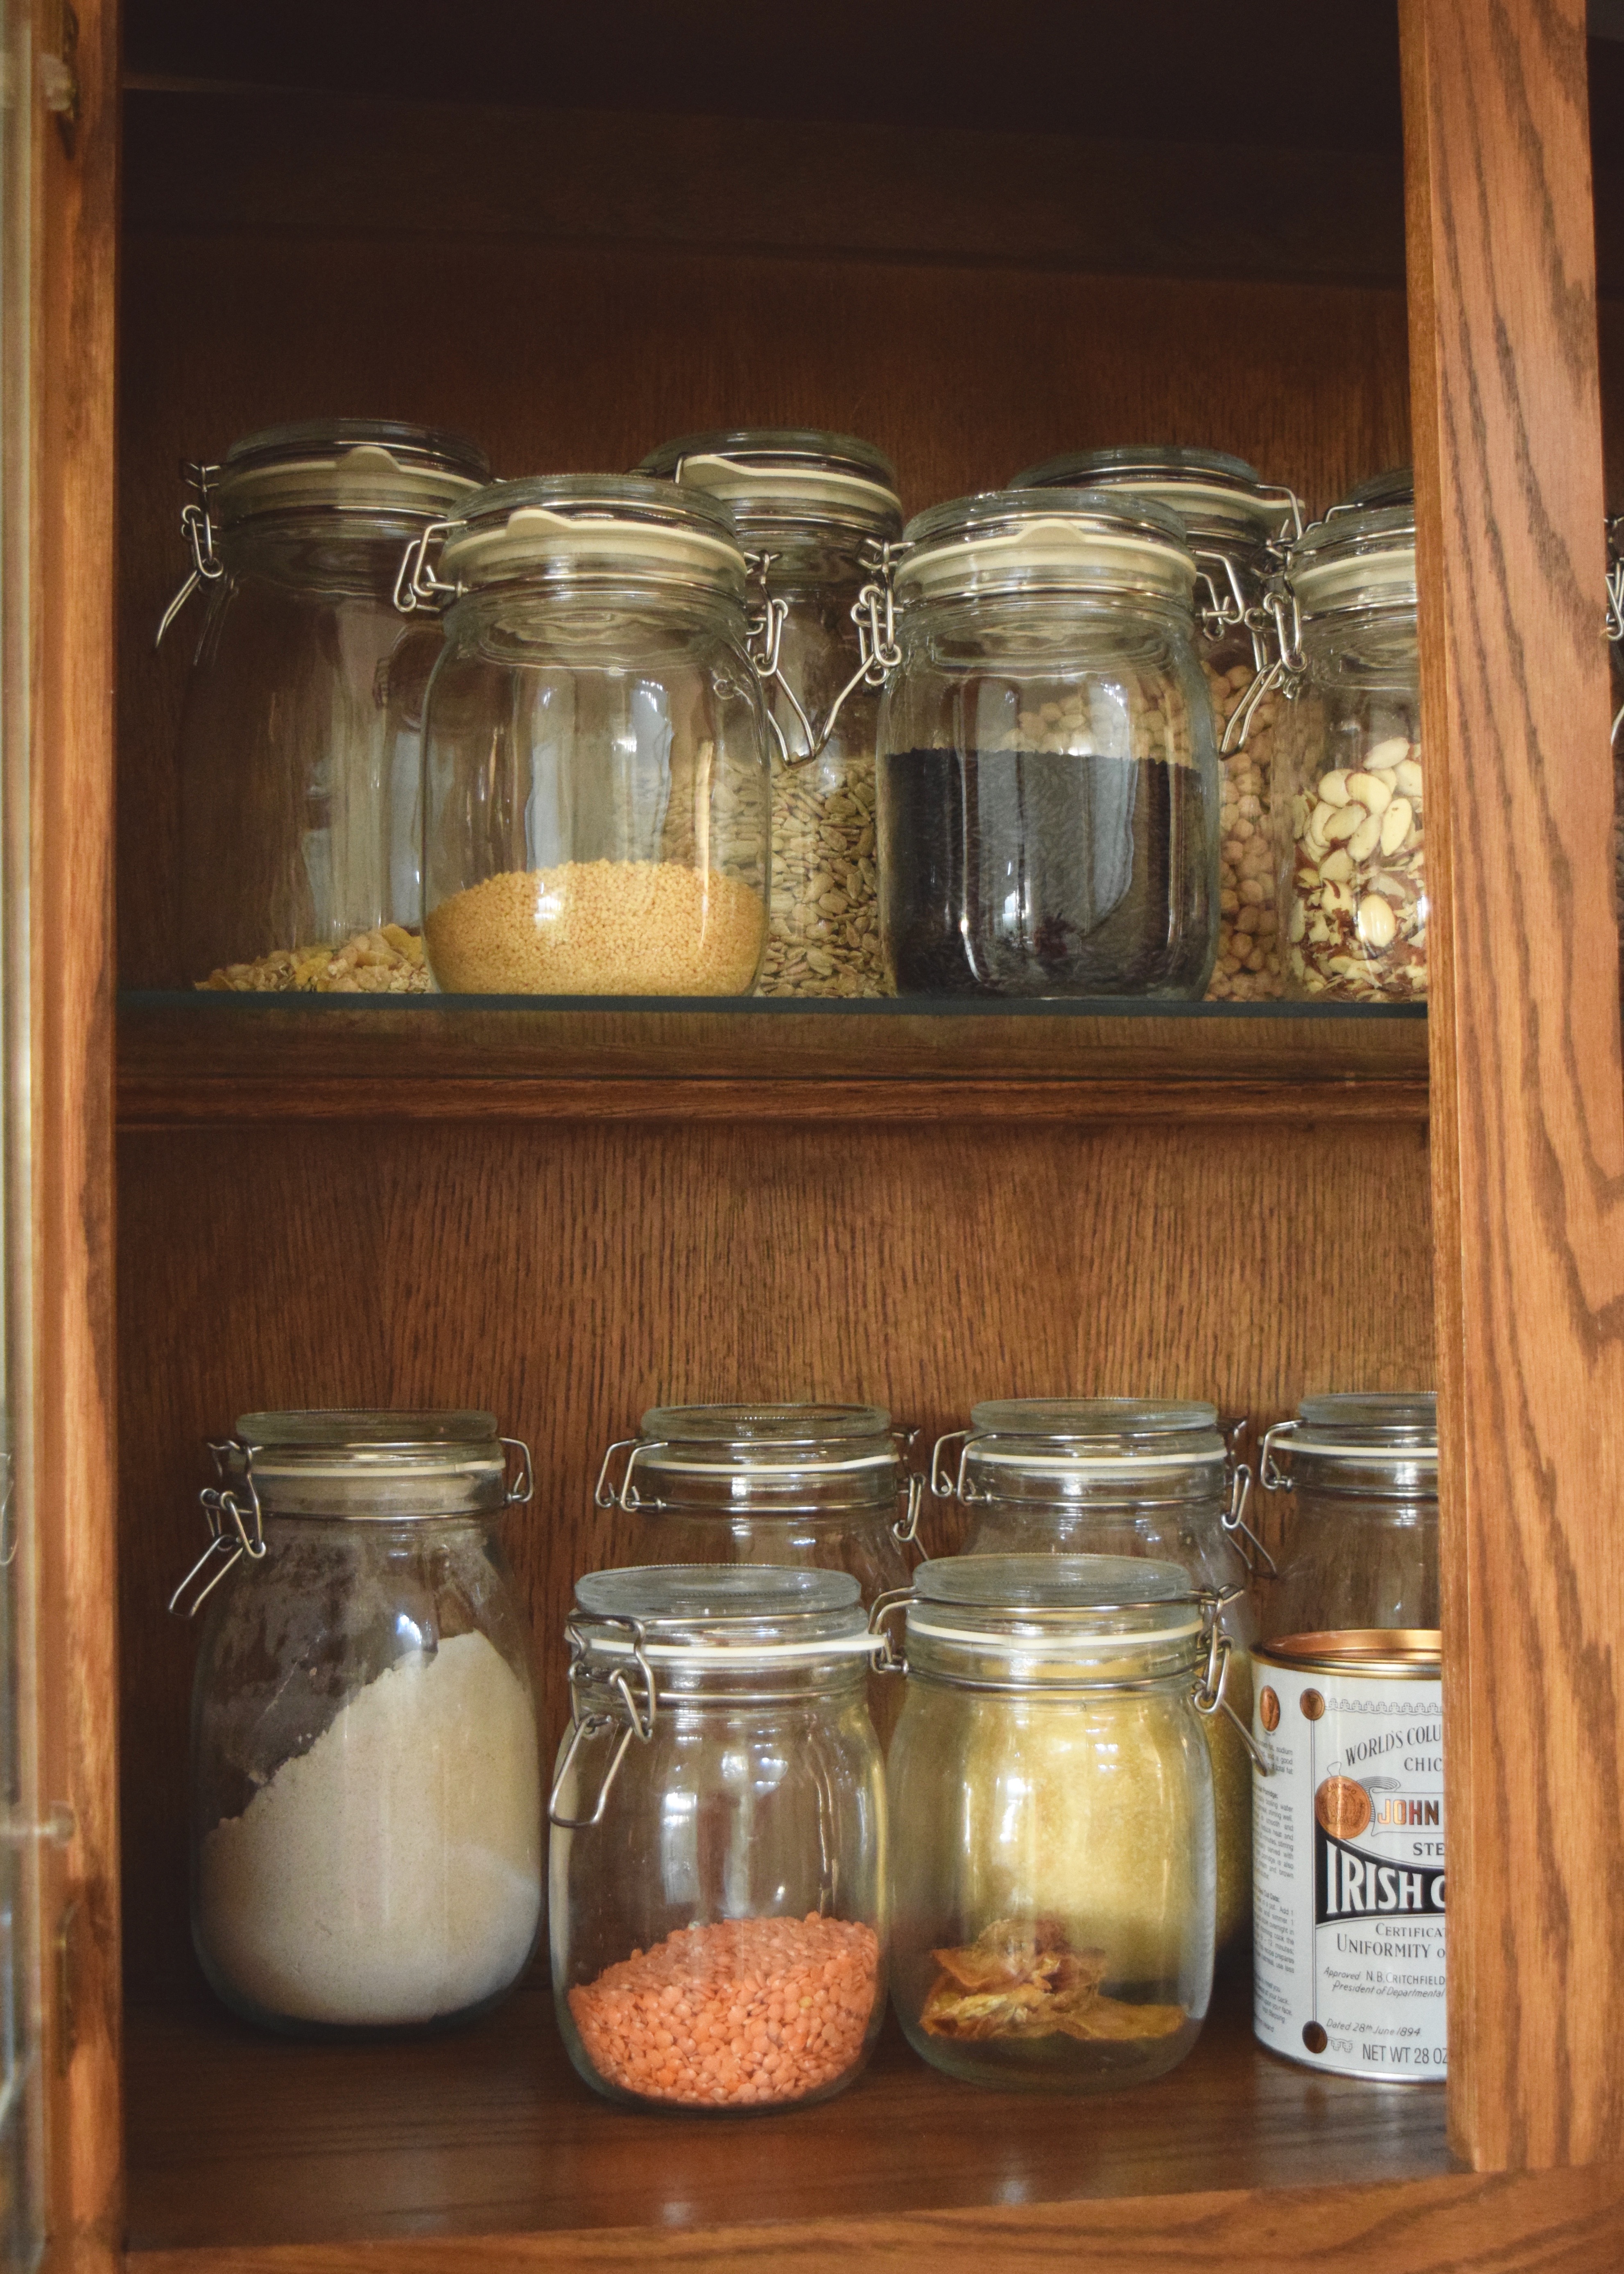
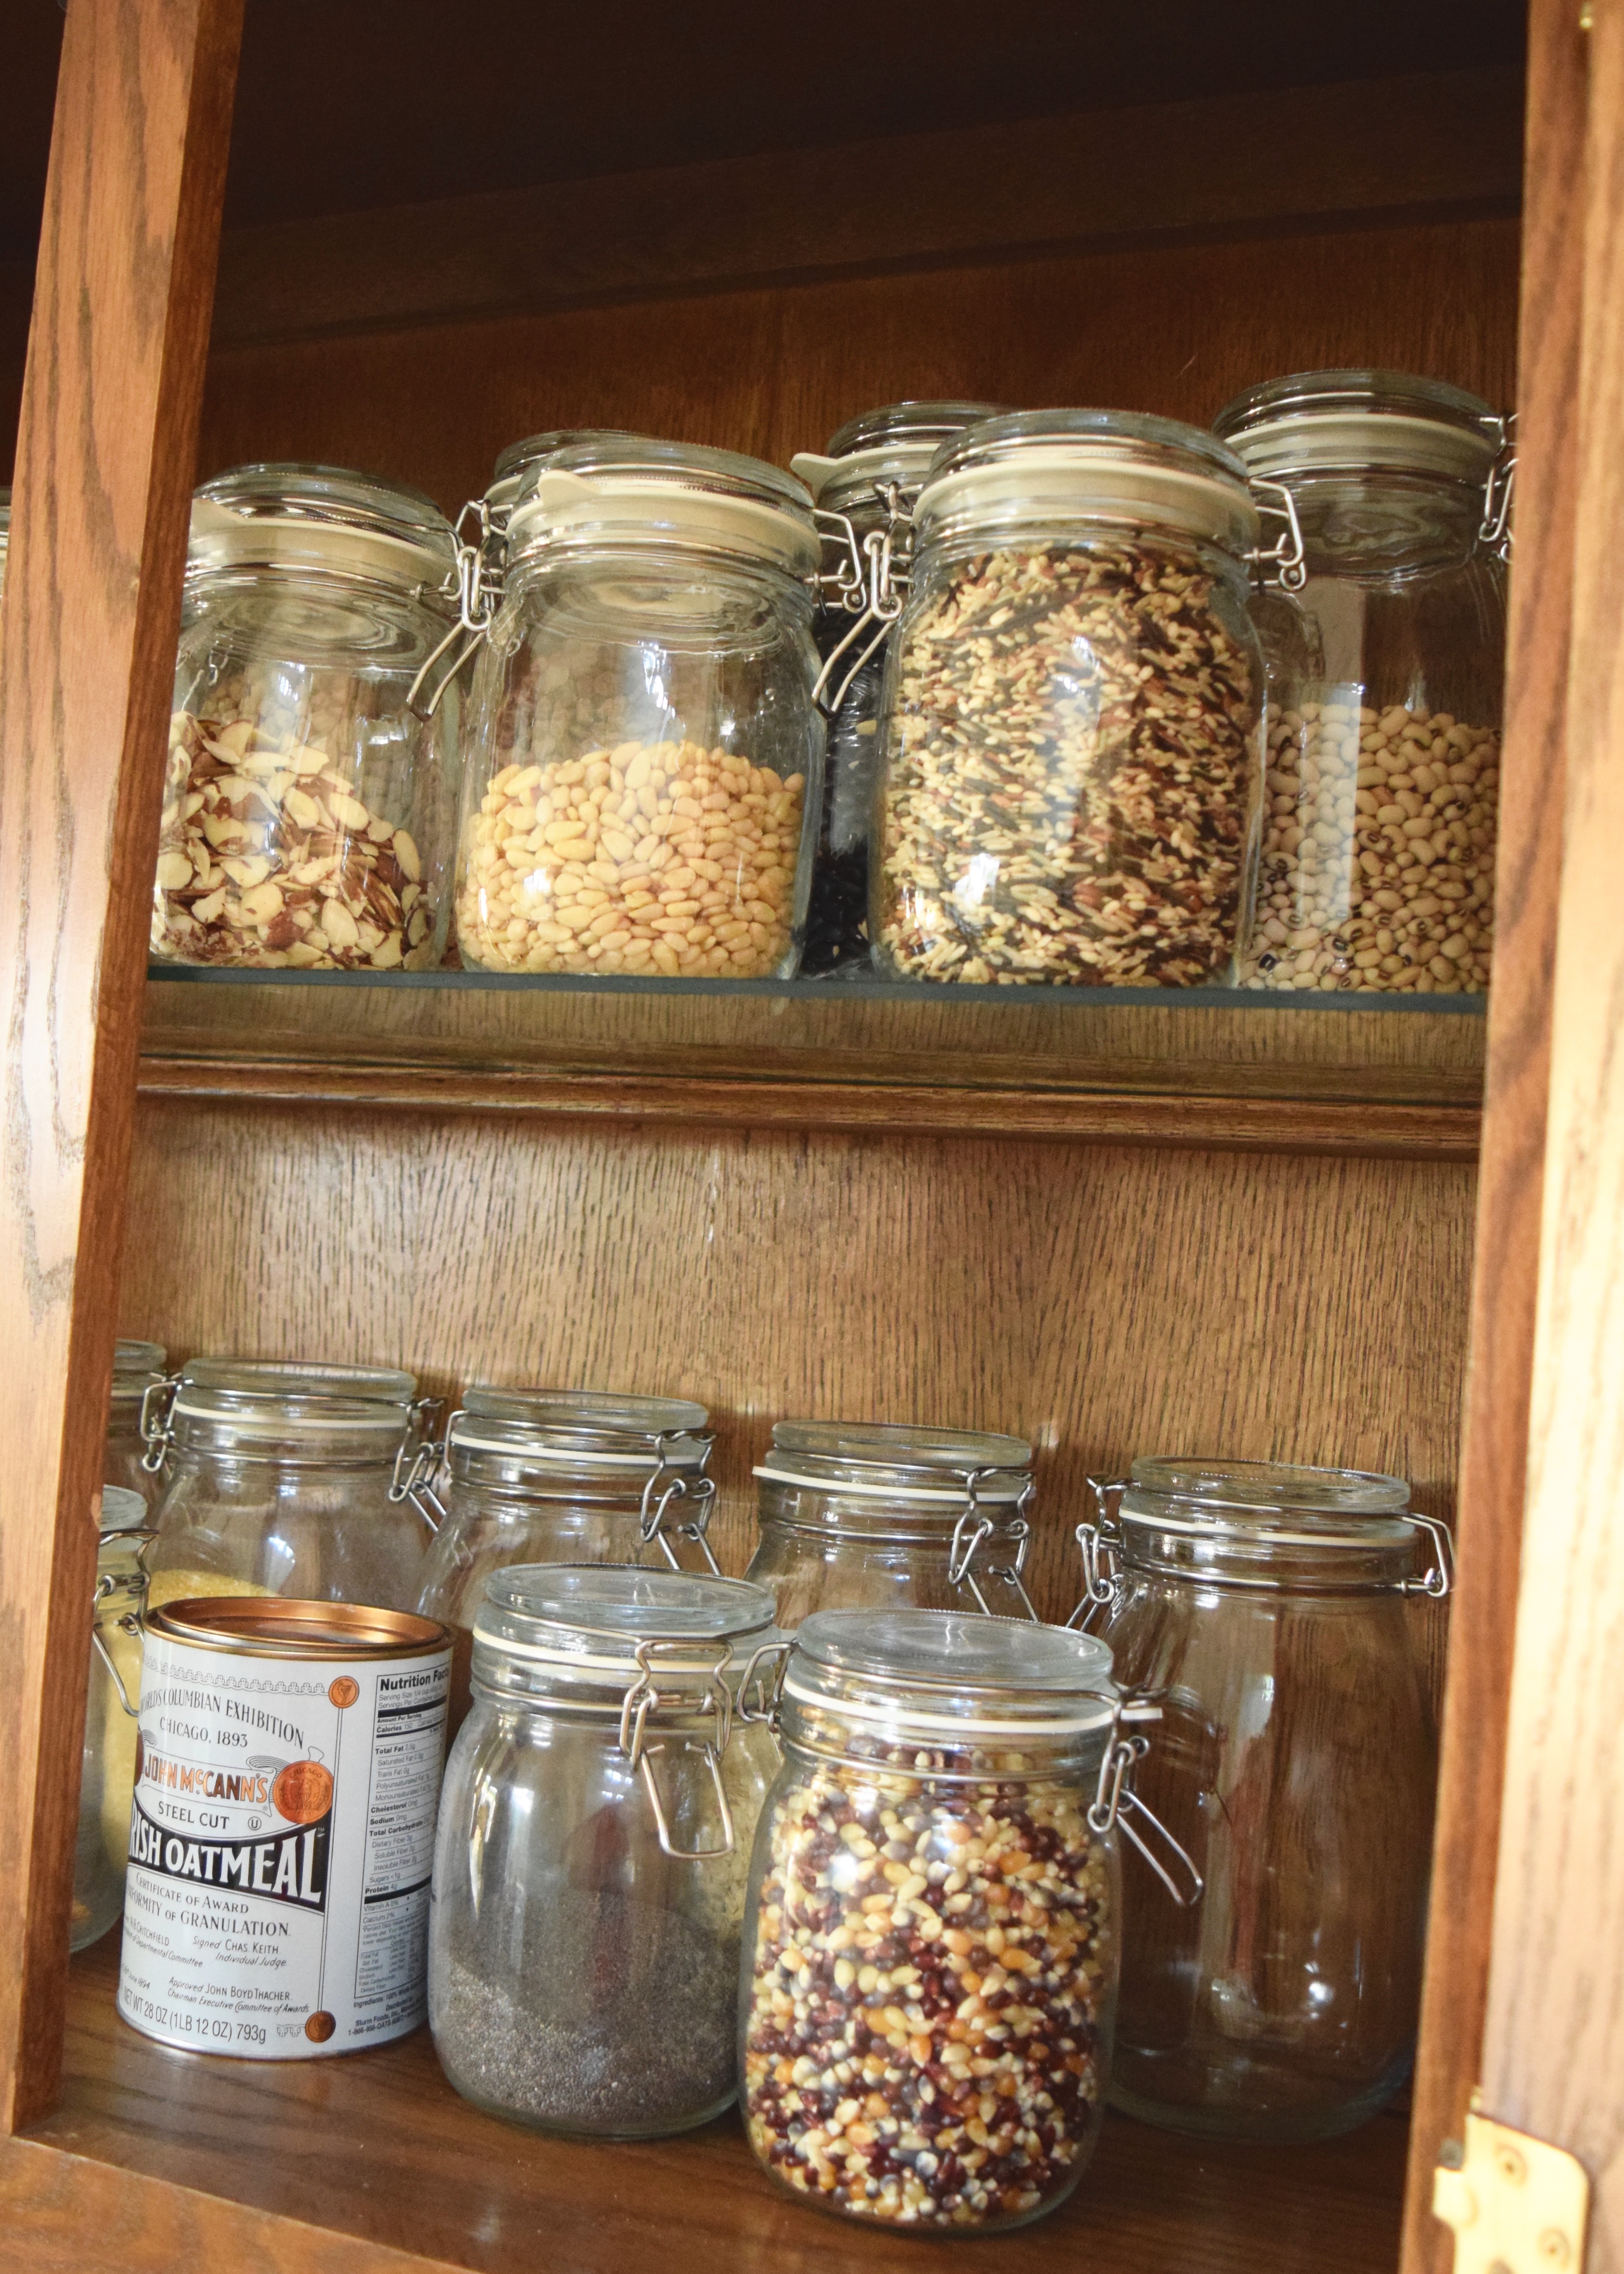
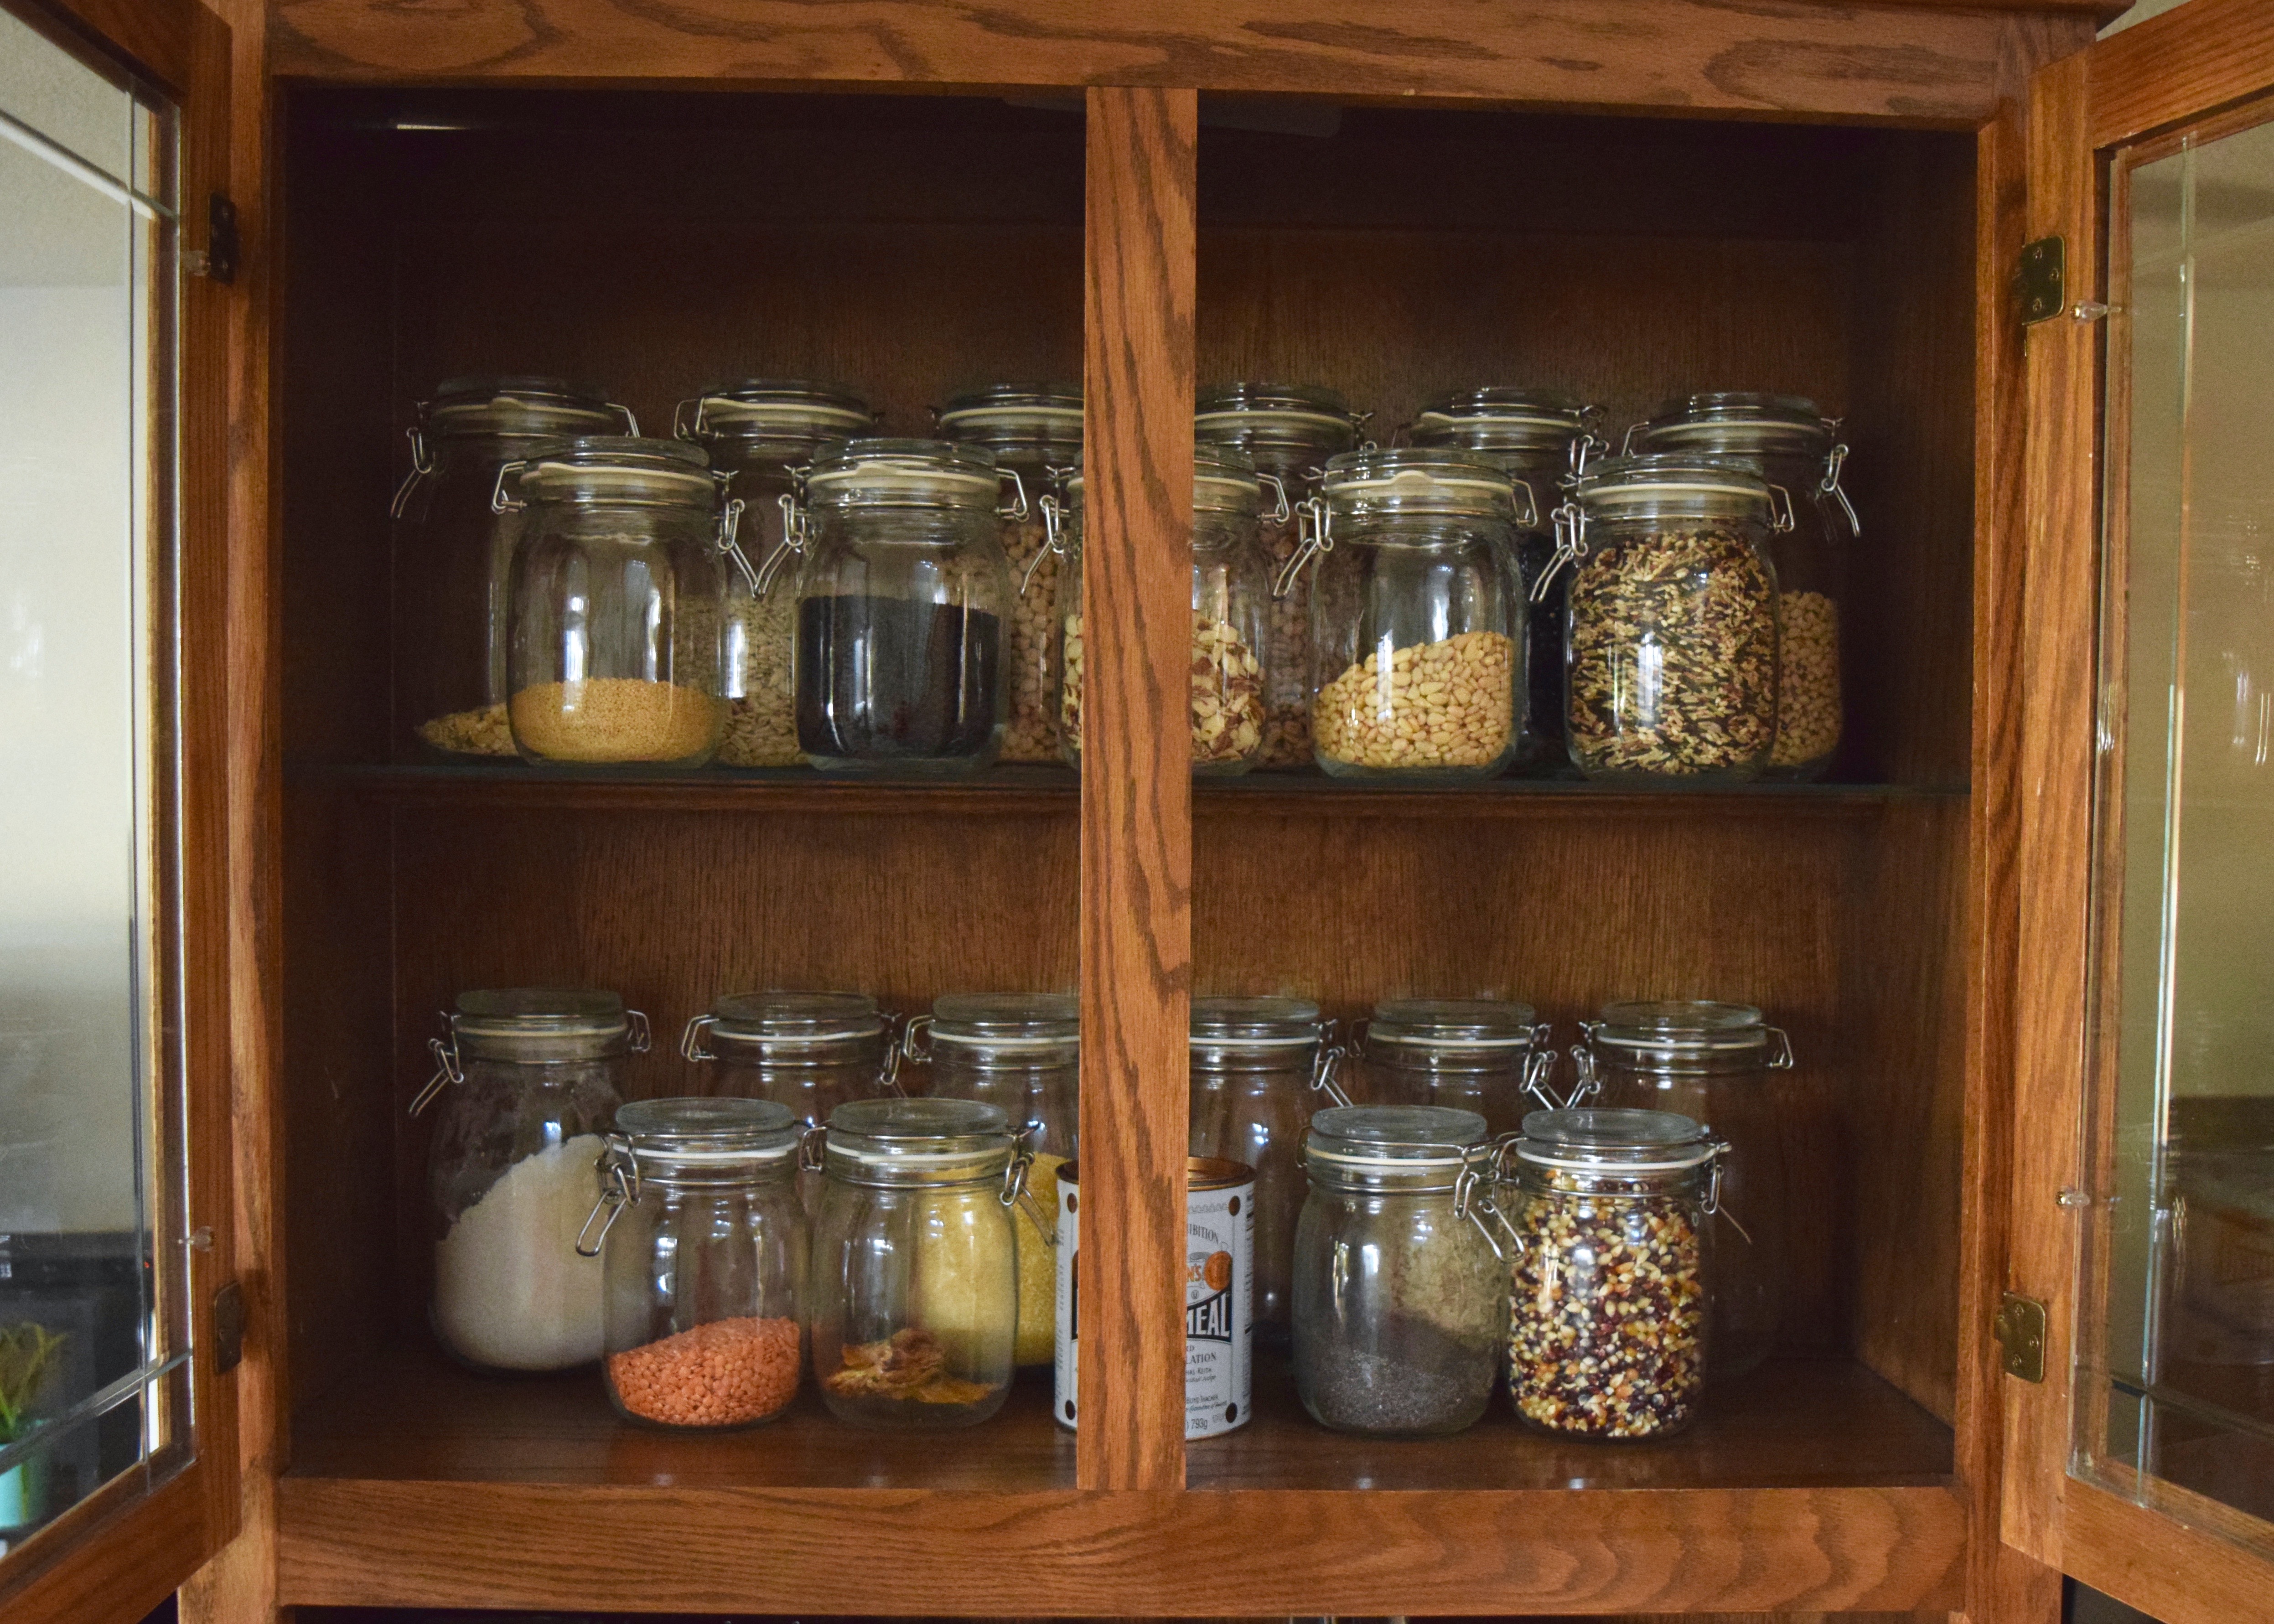
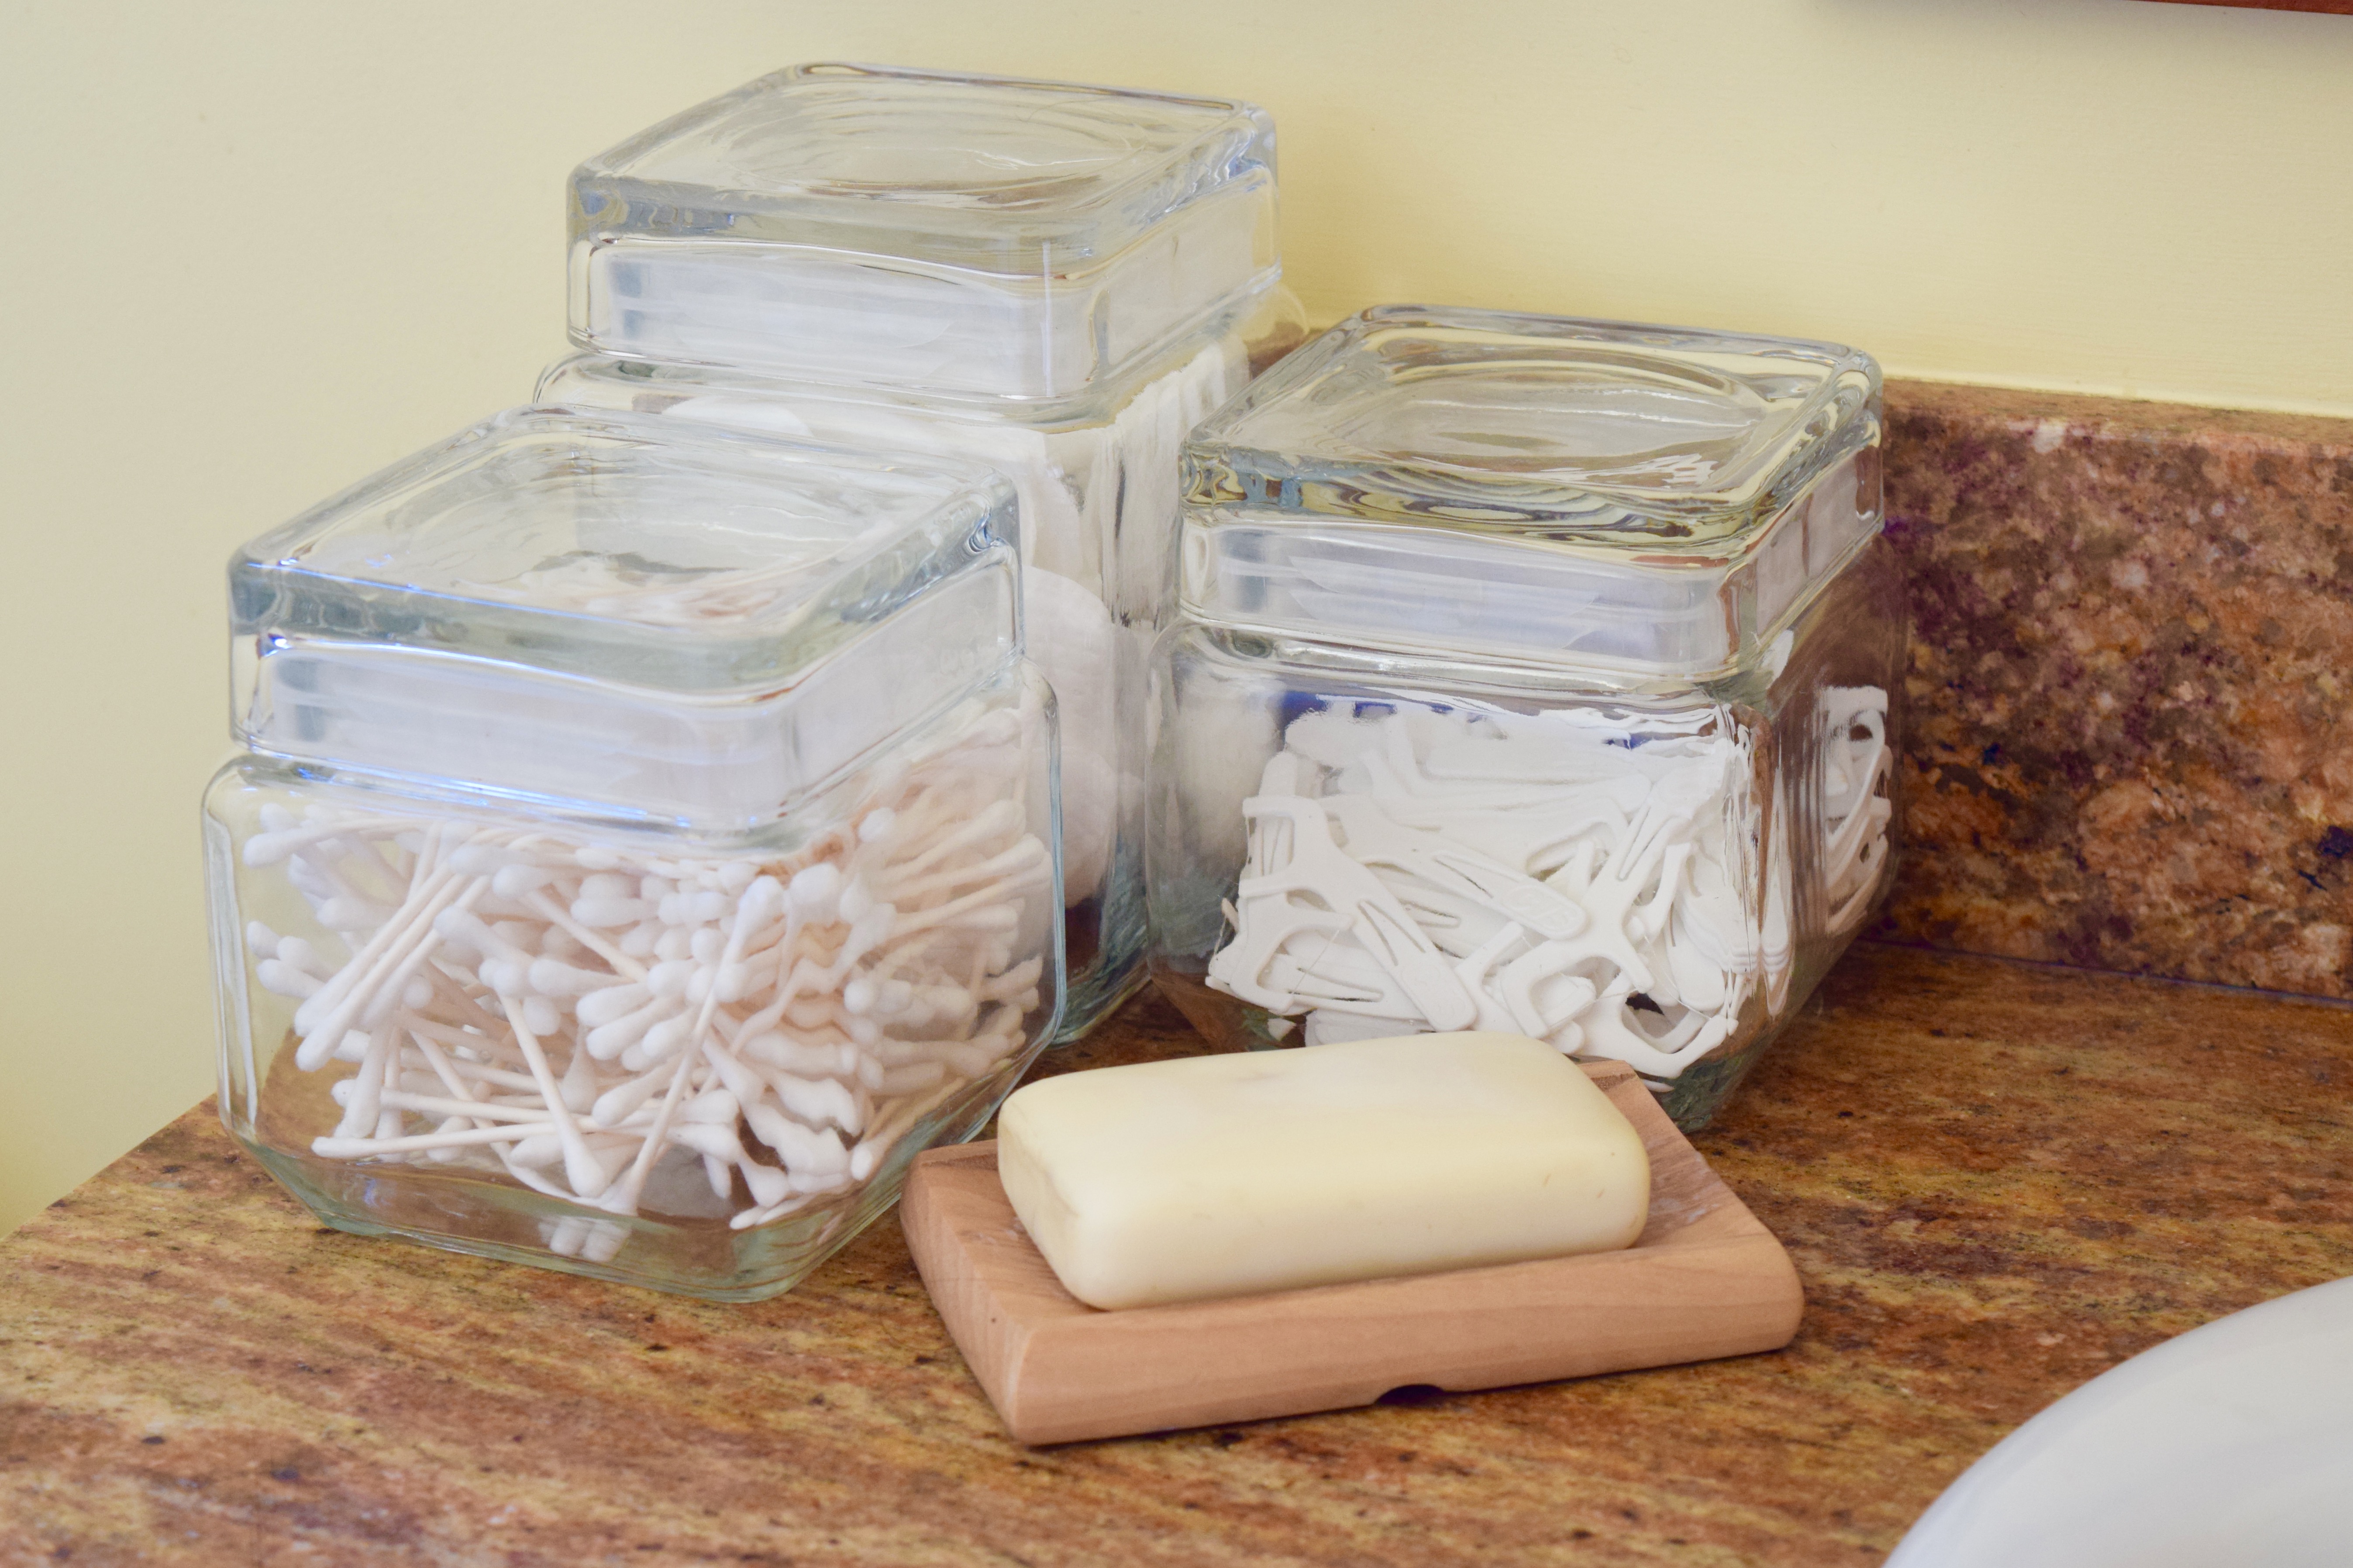
The glass jars I bought at Cost Plus World Market. They were exactly what I hoped to find. How often does that happen?! I wanted something square with a thick, sturdy glass, and — most importantly– a rubber seal. I wanted the latter to prevent moisture and germs and what have you from getting into the jars. I don’t know how protective the rubber really is, but I wanted something that would theoretically seal the jars off.

Bathroom jars

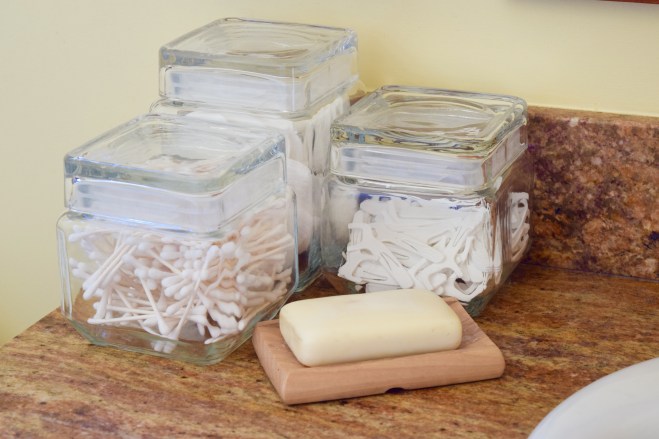
The jars add so much functionality to the space! They store many of the big space stealers from my medicine cabinet. I use the jars for cotton pads which I use to remove eye make-up and put on toner; q-tips for the ears; and these little plastic flossers which I swear I’ll never buy again, because they add so much to the landfill and who actually flosses anyways? Just kidding I floss every monthonce a week, I mean, twice a day. Regardless, the jars fit into the previously unused corner of the wide vanity and allow me to fill the medicine cabinet with more important things, like Honest Beauty products. Ha!

Just for honesty sake, I do have to say, the kitty litter box lives in here too. It’s the only place for it in the house. I’m still brainstorming on a prettier way to hide it, but for now, it lives next to the toilet complete with the carpet sample I stole from work (spoiler: it doesn’t really work to prevent litter tracking…)

Bathroom Litter Box

The room is definitely getting there though! It’s amazing what a few tweaks will do. What else do I have on my bathroom to-do list??

  • Find the perfect glass storage jars
  • Add a piece of furniture to place a glass of water or a book on when I take a bath
  • New shower curtain
  • Necklace holder
  • Soap dish
  • Better jewelry storage, perhaps building an earring holder??
  • Add some plants in small pots on top of the toilet back
  • Paint the plant stand gold to go with the shower curtain
  • find a better way to hide the kitty litter box
  • Organize the vanity cabinet to better contain everything I hide away down there
  • Hang art
  • Even more plants?!
  • Take so many bubble baths!

It’s not quite there yet, but it’s close! For now, I’m loving this look!

Bathroom phase one

Have you been adding some functional touches to your home lately? Isn’t it great what that last little bit adds to the space? It’s like, “Wow, now that they’re not buried in the depths of the vanity cabinet, I can actually find my q-tips!” The little things in life!

P.S. If you’ve been watching the Walking Dead, tell me because I need to talk about it!!!