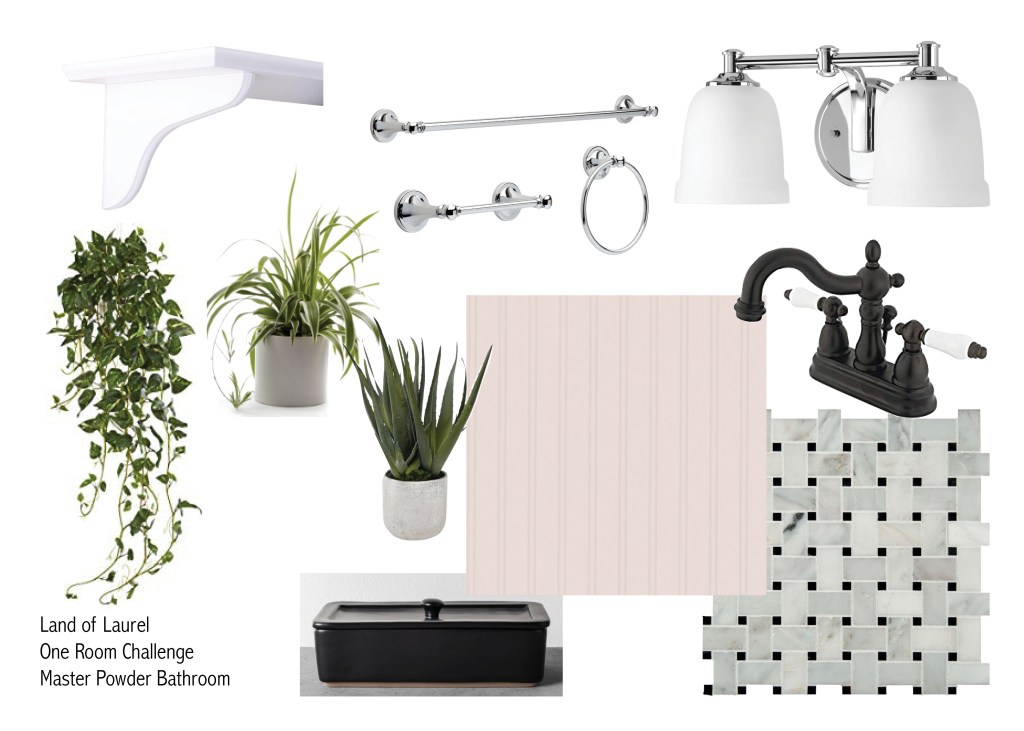
Once my tiny little master bathroom was painted and tiled I could not be any more excited to start getting my plumbing and accessory fixtures installed into the room! The space was really starting to look like I’d envisioned when I first laid out my mood board.
I was planning on reusing the original plumbing fixtures that were in the bathroom since there was nothing really wrong with them and I wanted to keep this whole project as low budget as possible. They looked pretty bad in the original space, but I knew a new environment would shed a completely different light on them. See the place where the purchase sticker was never removed from the toilet?! It had probably been installed for 5+ years when I bought the house!
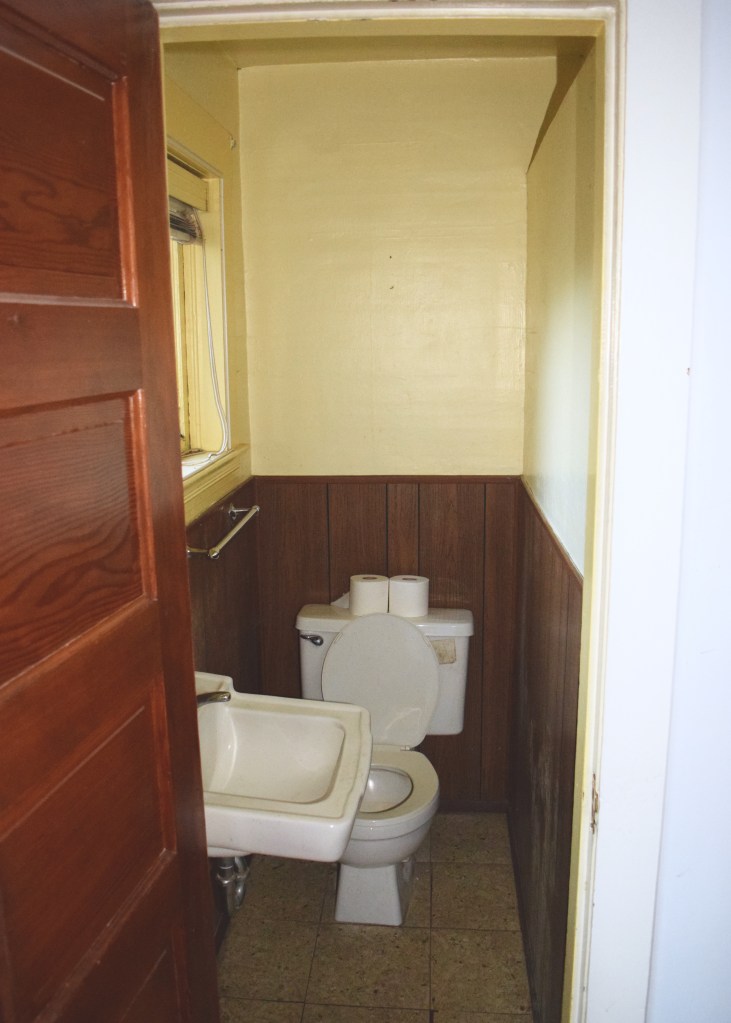
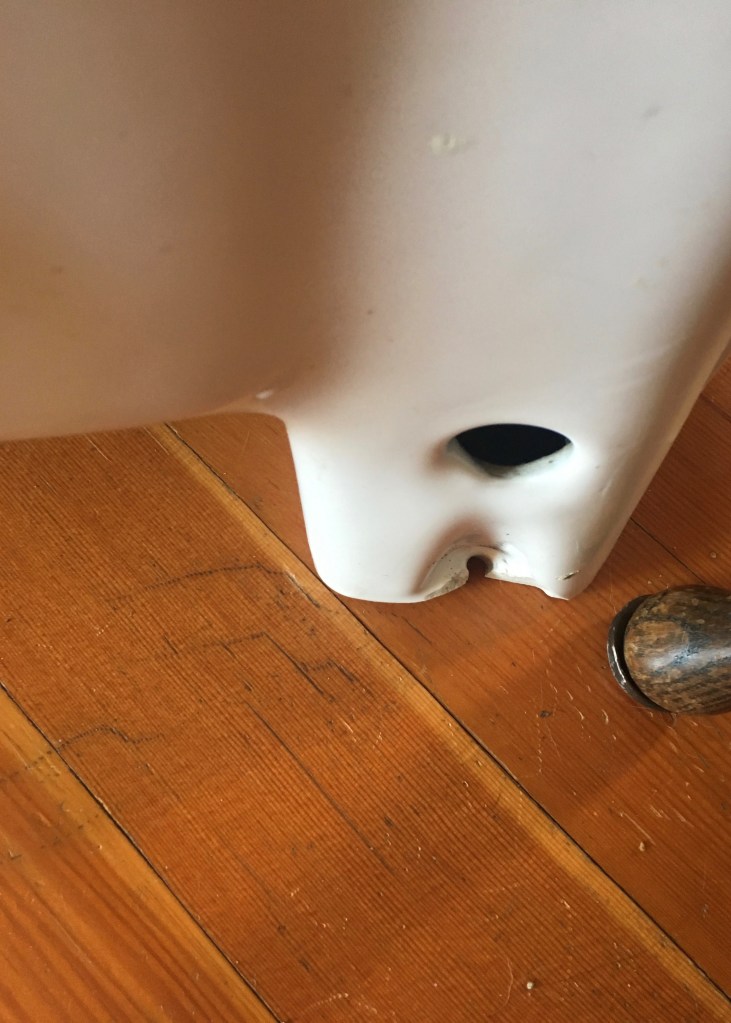
I knew that the toilet had a tiny hairline fracture on the base, but it was not affecting how it was holding water and I figured if anything did go wrong, I could spring for a new toilet — probably my favorite Kohler one — down the line. The sink was falling off the wall in the original bathroom, so I worried that would be an issue, but during demo, I realized the bracket holding up the sink had missed the backing in the wall and was hanging loose in the old lathe and plaster. Doh!
So with that in mind, I brought all the fixtures back inside once the painting was done and reinstalled them. I did pretty much the same thing to install the toilet as I when I installed one in the other bathroom, but since the toilet was all one piece already it was even easier here. Yes the sticker was still on though!
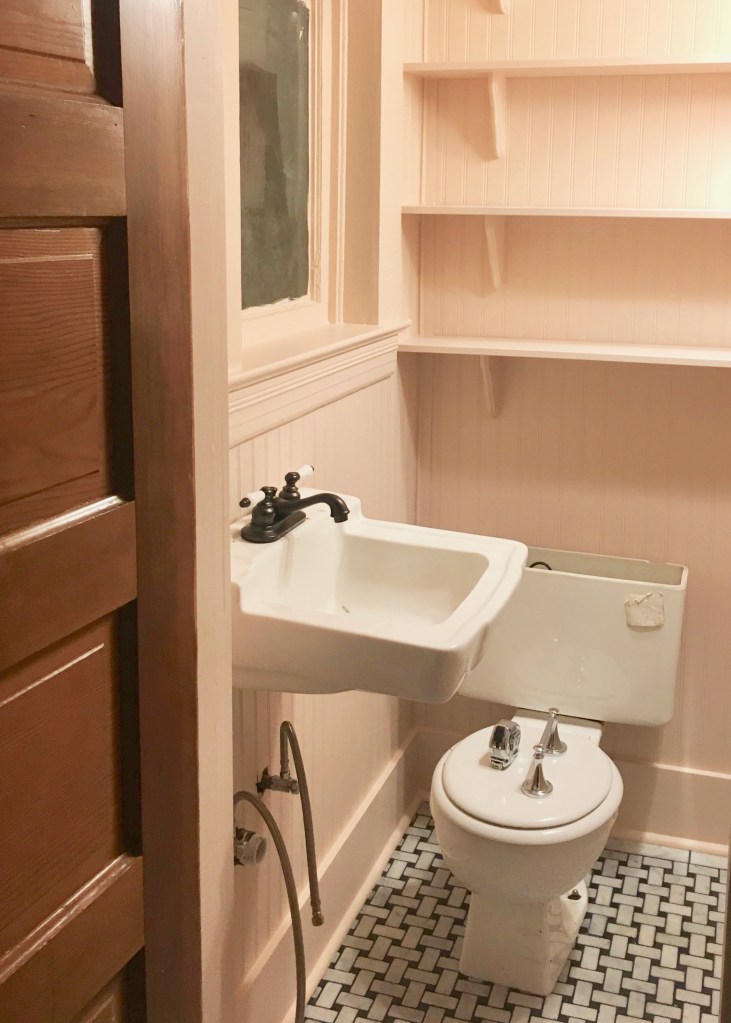
The sink installs onto a bracket on the wall and then is screwed into the wall through the porcelain. Definitely use a wrench and arm strength to tighten these screws, because I didn’t and the force of my impact driver broke the sink a little bit in the corner! Dang it! But… I didn’t know it yet, but the sink was destined for something else.
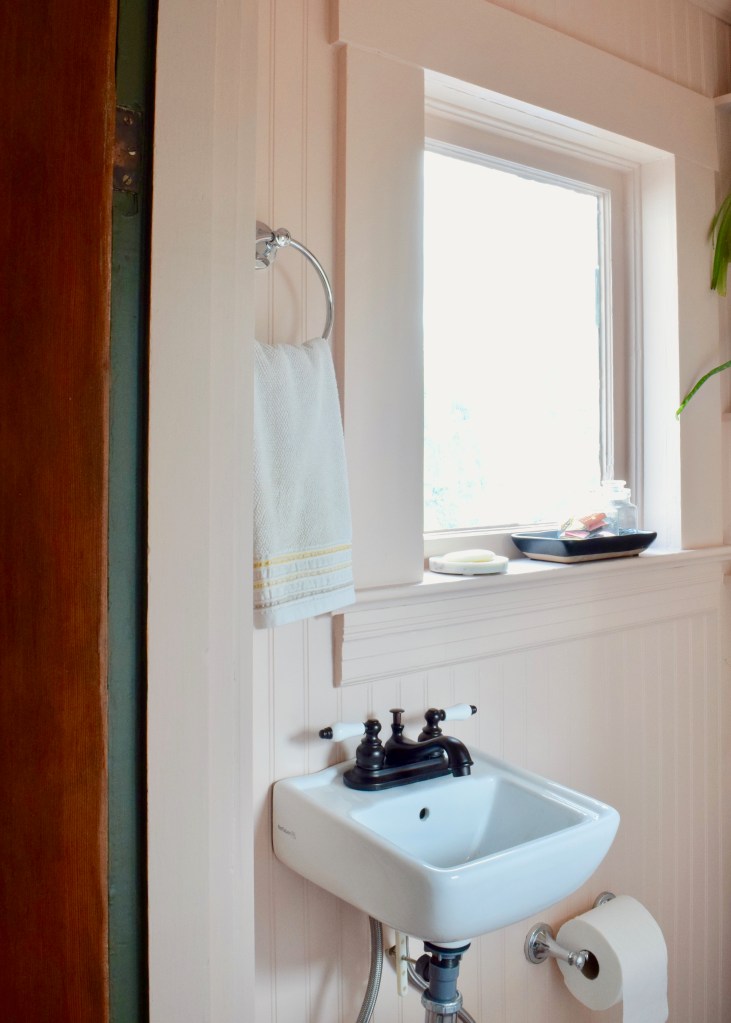
On the other side of the room, I had space for a medicine cabinet beneath one of the sconces. The original main bathroom had a cute mid-century mirror that I’d saved after we demo’ed that space. I loved the patina of the mirror, the antique spotting on the glass, and wanted to repurpose it in another room in my house. I’d gotten the lovely original mirror from my childhood bathroom and installed that in the main bathroom instead, so this one was still floating around. I sprayed it with a matte black spray paint and it came to life as an entirely new piece. I few screws into a stud in the wall cavity and this piece was as good as new.
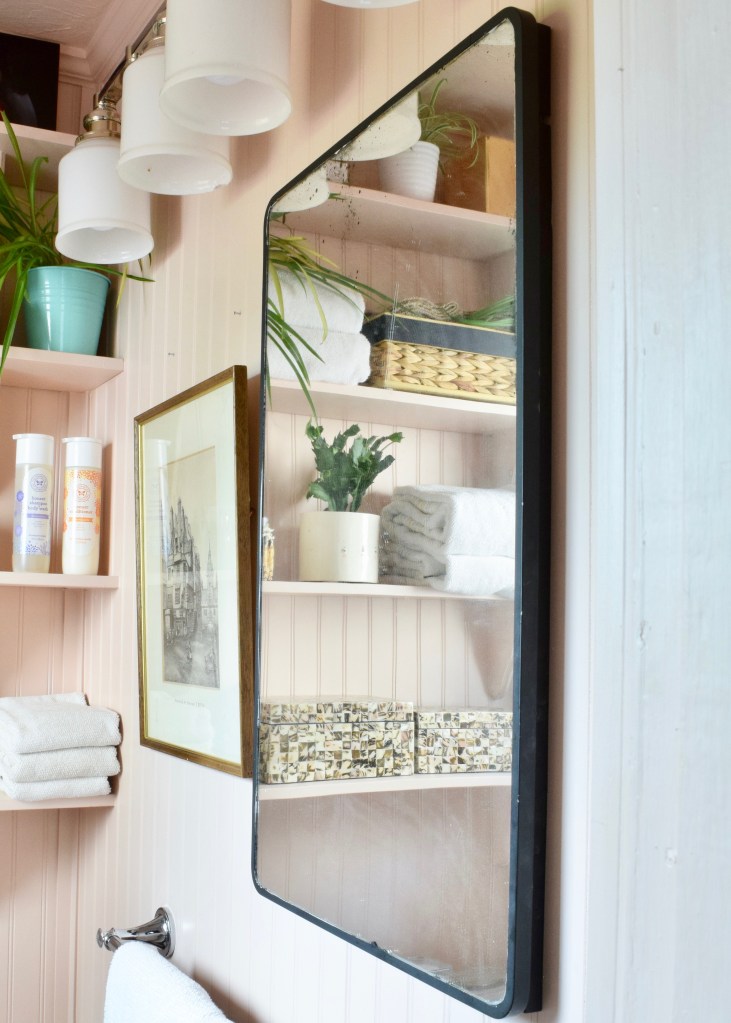
There was one problem though… if I stood in front of the mirror, I could barely open it! With my back pressed up against the sink I could only open the mirror about half-way before it hit my face.
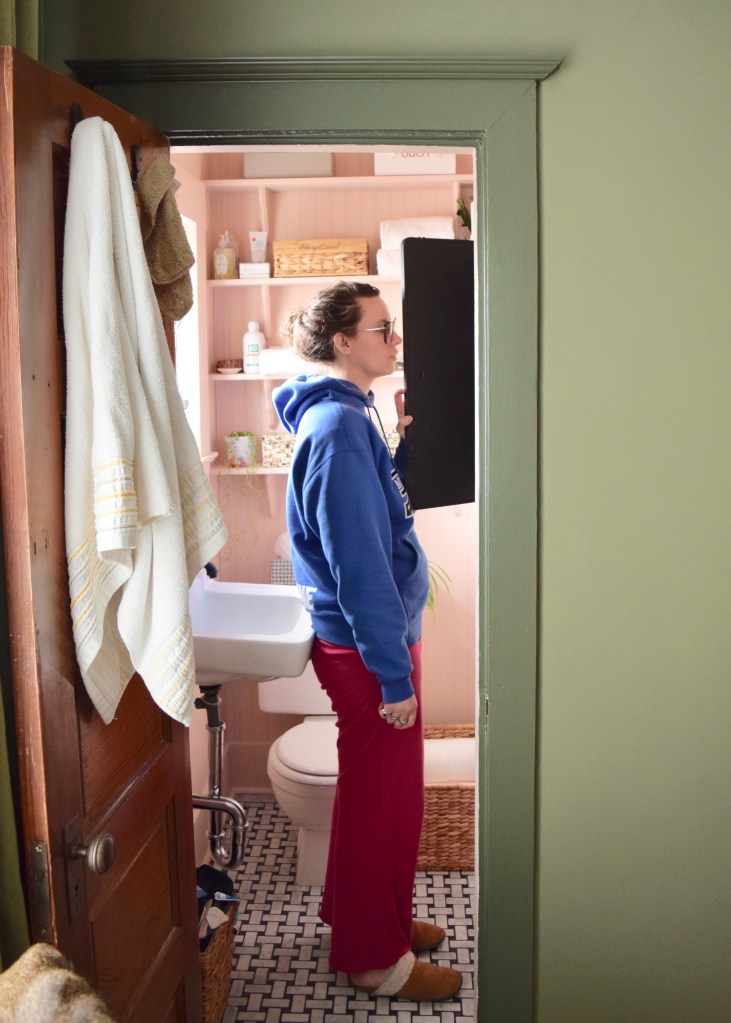
If I wanted to open it all the way, I ended up leaning alllllll the way back to peer inside. Whomp, whomp, whomp.

It really wasn’t the mirror’s fault though either. The sink suddenly felt too large. I’d adjusted the location of the sink so the bracket could be installed into the wood backing (thus preventing the sink from falling off the wall again!) and now it was even closer to the toilet. Whereas before I’d scooted around the sink to pop a squat, now I felt like I was sitting directly beneath the sink. And it was not good. My cute little bathroom felt super awkward!
So after a week or two of that too large sink, I hopped onto Wayfair and started looking for a tiny sink to replace it with. I landed on this one which is just about 12″ x 12″! Although I’d recently watched Young House Love replace their tiny bathroom sink with a larger vanity, I knew that in my space this was the way to go. When the sink arrived the difference in sizing was instantly obvious and almost laughable! This change was going to increase the space in the tiny bathroom by so much!
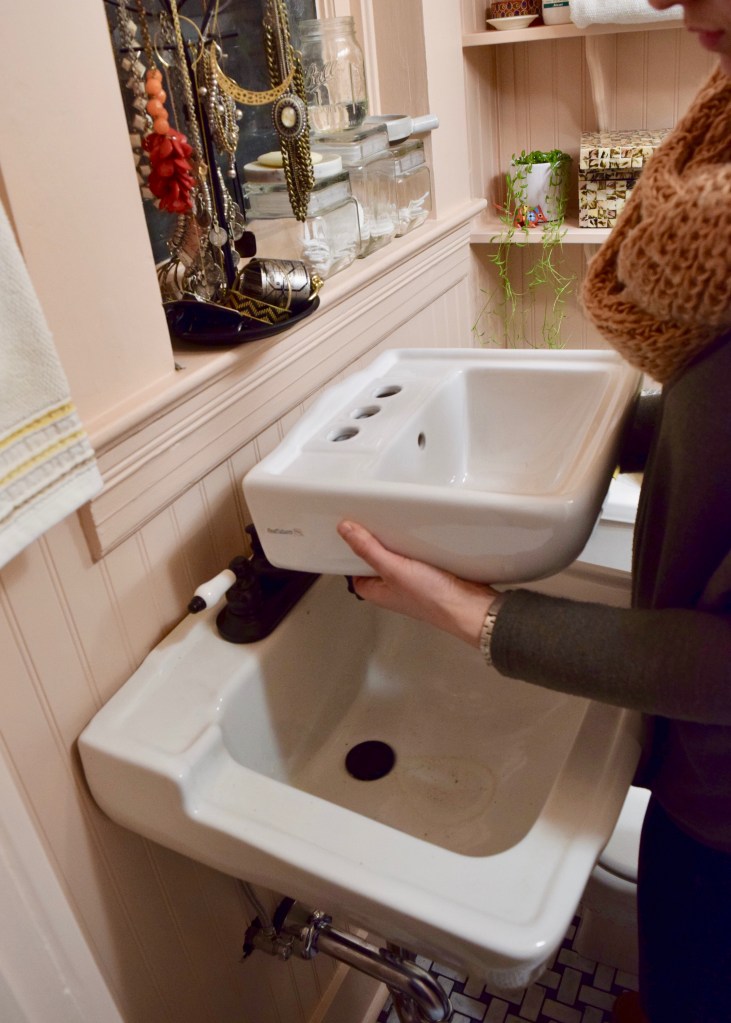
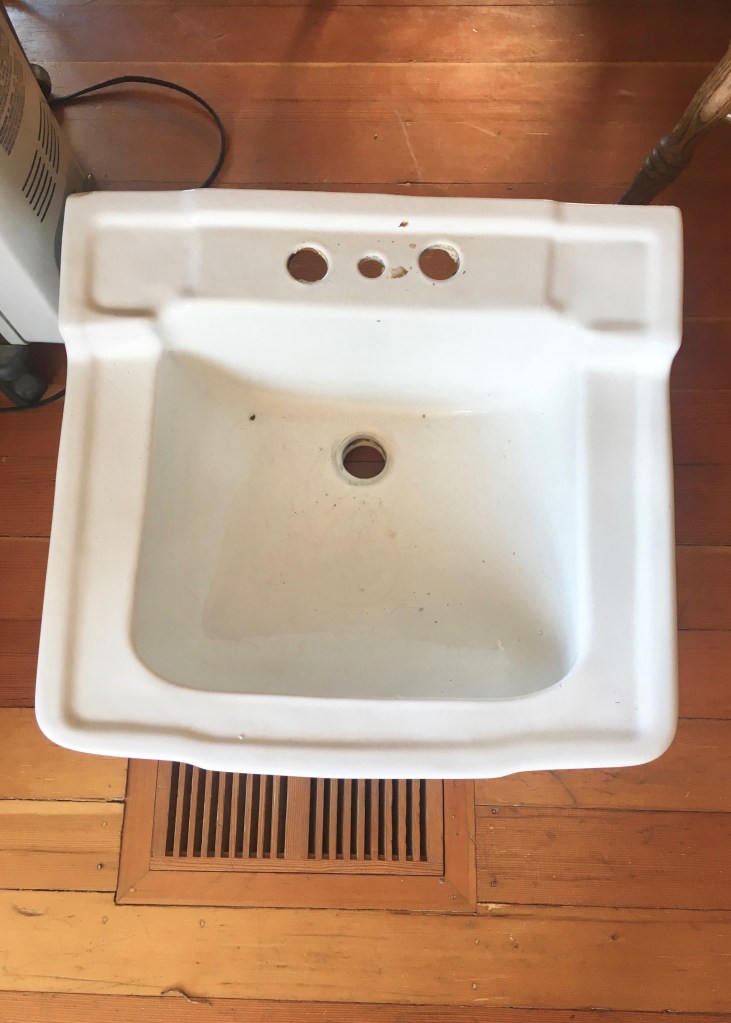
I uninstalled the original sink and snapped a quick pic of it to post on Facebook Marketplace. Then I placed it on the curb with a free sign and within a day, it was gone!
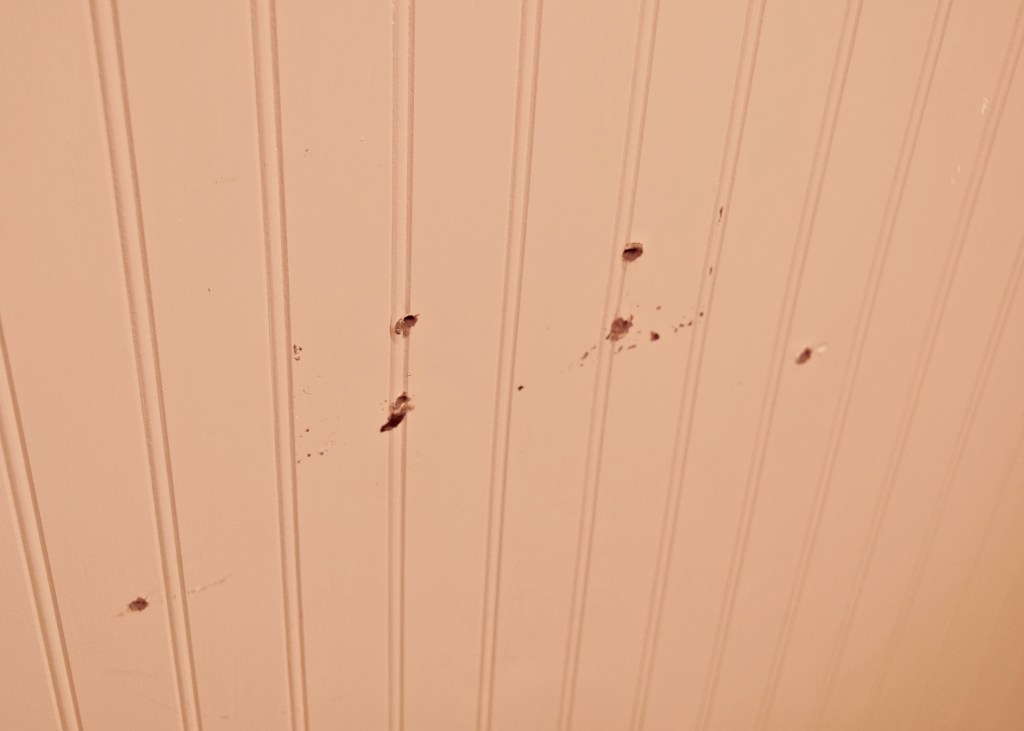
It had, however, left it’s mark on the new bathroom. My pretty new beadboard was full of holes that the new sink wasn’t going to cover up. Oh well… I grabbed some sand paper and sanded the holes and then used wood filler to clog up the holes. Then, more sanding and a bit of touch up paint. It doesn’t look perfect, but in the end, the patched holes actually make the new beadboard feel older, like it had a purpose and has been there over a longer period of time. I’d not above a little wear and tear on the newer things in my home, if it makes it feel like there’s a history to it!
Once the new sink was installed and the faucet hooked up, I was in love. It was tiny, but adorably so and functioned just perfectly for washing hands and getting ready in the mornings. Plus, the new smaller sink wasn’t all up in my grill when I tried to use the toilet. It was perfect! Plus, it allowed for enough room for me to install the toilet paper holder and the towel ring from the affordable set I’d bought at Home Depot too. This bathroom was starting to look legit and, more importantly, functional!
And yes, I did finally pull the sticker off the toilet tank! Now this room just needs final touches and some styling and it will be a completed space that feels in the spirit of this 1909 house without costing a fortune! All good things. Mostly, I’d just glad I’m not walking into this space any more!
It feels like the perfect place to get ready in the mornings and the eastern light shines through the window ever so nicely. I can’t wait to show you the whole reveal next week, but in the meantime, enjoy this sneak peek!

And be sure to check out all the other people working on the One Room Challenge! So much amazing inspiration is out there for your own projects!

What do you think of my new tiny sink? Would you go for a sink that small or do you need a larger sink to get ready? Have I been able to hit the right note in this space to make it feel like it works with an old 1909 home?

LOVE IT!
The small sink was definitely the way to go! Love this transformation!
Thanks Ashley! I agree, it makes the space so much better!