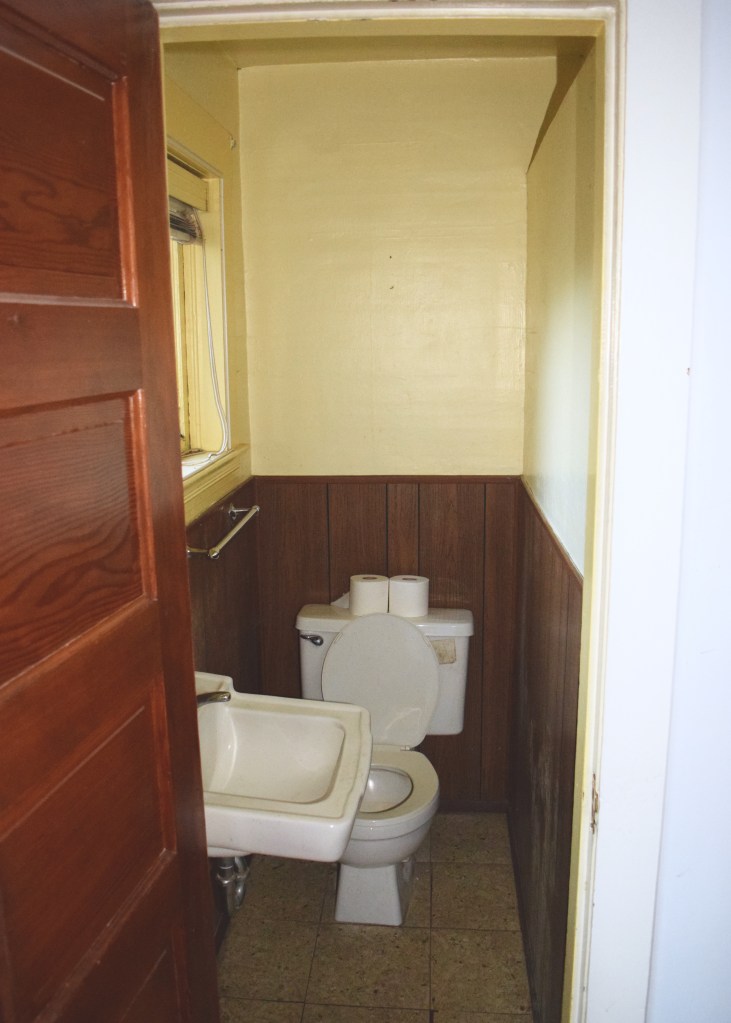
Once I had wrapped up the drywall in my bathroom and installed the tile the room was ready to take the next steps towards function! I knew that the drywall scraps and odd corners would be difficult to touch up, so I decided to switch gears and use beadboard to transform the space and make my Sharp Objects bathroom dreams come true. Beadboard was signifcantly less time consuming and less dusty than trying to tape and mud and repair all the drywall / lathe & plaster in the small space!
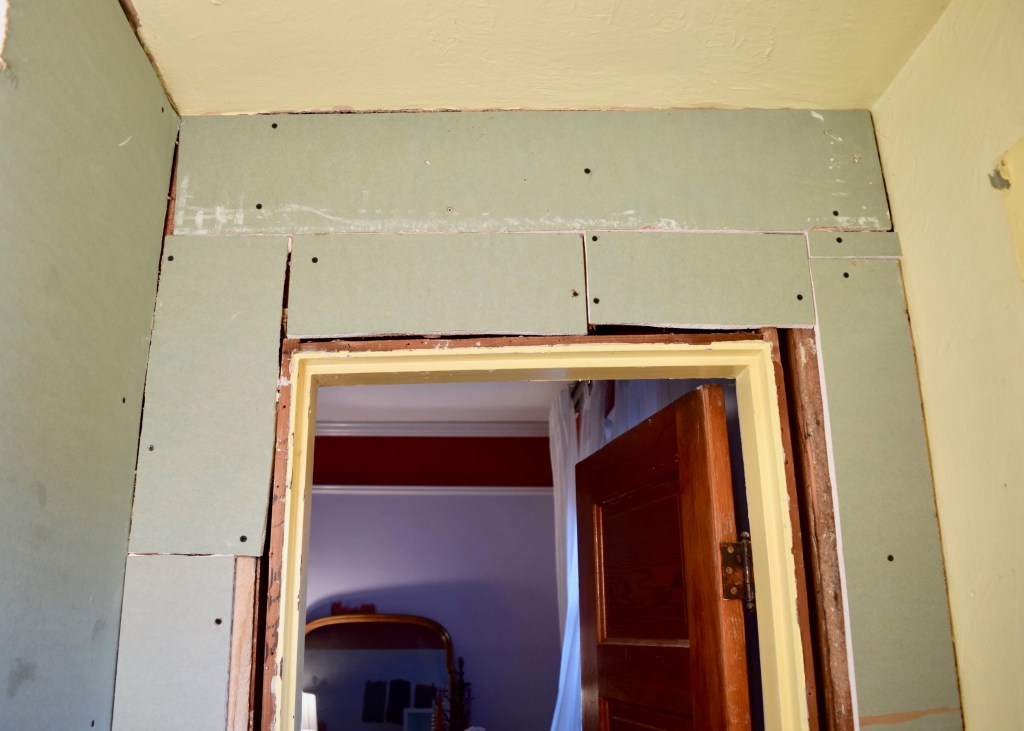
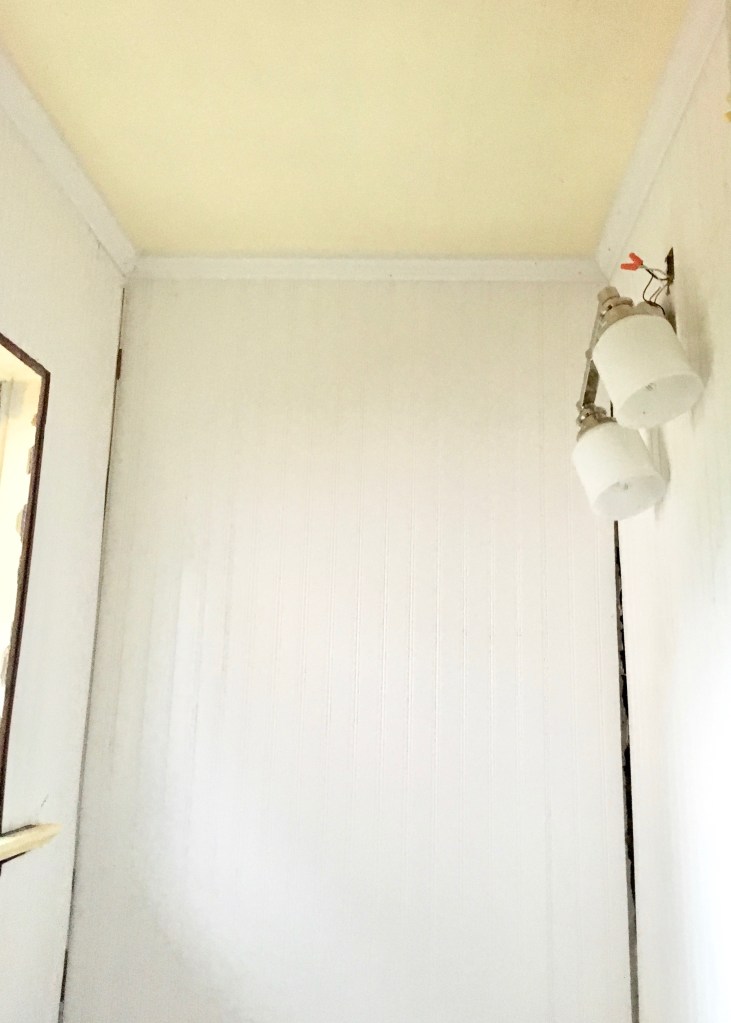
Those of you with eagle eyes will have noticed from last week’s post that I was able to start installing the beadboard around the time I finished the tile. Here’s that snipit picture showing the one back wall of beadboard up. Sometimes, you just can’t wait any longer, right?

I used simple MDF sheets of beadboard from Home Depot, because they were the least expensive and I wanted to keep costs down as much as possible since this space is “temporary.” If this bathroom was more of a long term space I would have used wood plywood panels or individual beadboard planks. But, since I plan on turning this room into a full bathroom (flipping the shower from the current main bathroom into this space), when I eventually turn the dormer into a bathroom, short term solutions work well.
The back wall of beadboard was the most difficult to install because it was extraordinarily difficult to get the piece into the room. It had to fit through the small door and then squeeze into the entire back wall space while not bending or snapping. After that it was just a matter of cutting the boards to size and chopping out holes for lighting and switches and then a whole lot of nail gunning! I did also have to remove the trim around the window which I’d then have to reinstall. Immediately after I finished this project using a borrowed nail gun and air compressor from my neighbor, I bought myself a battery powered nail gun when Home Depot was having a huge sale. The difference between the ease of use is phenomenal and I adore my new nail gun! Now I need another trim project…!
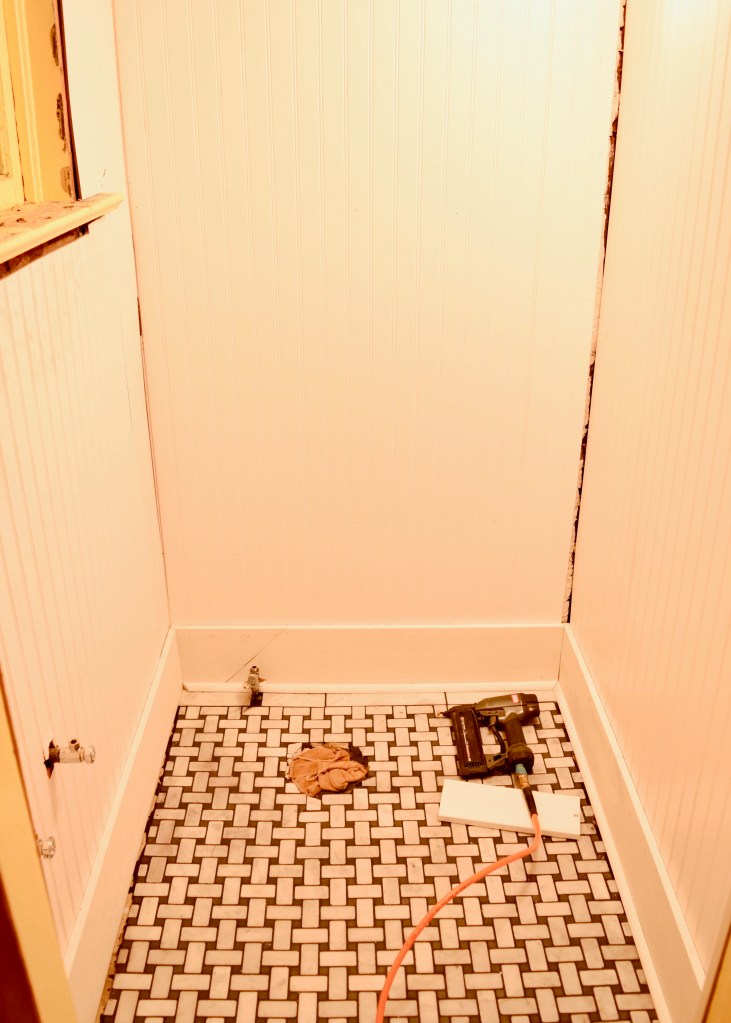
After the beadboard was nailed up to the walls, I was ready to attack the baseboards. I used the same 8″ flat stock for baseboards that I’d used in my main bathroom, but skipped the decorative trim piece on top. I had over purchased my baseboards originally and was able to use scraps for the whole space! Then it was time to add the finishing touch of quarter round (which ironically, I’d skipped in the main bathroom). This was also scrap pieces left over from the kitchen (which I promise to finish and show you soon!). So yay! Free baseboards!
Before the quarter round was added, the rough edge of the bathroom tile was obviously apparent and it looked pretty terrible. But when I was calculating how much tile I had and laying out the space, I realized as long as I installed quarter round the edge would be hidden and I could get away with my minimal amount of free tile.
Once it was installed, the edge was completely hidden and it looked great! You can see below how the quarter round on the right has all been nailed in, hiding the edge and the left side of the quarter round is lifted, not nailed in yet. It was a TIGHT fit to get the tile to work in the space with clean finished edges, and I’ll admit, it’s not perfect, but it’s a million times better than the space before!
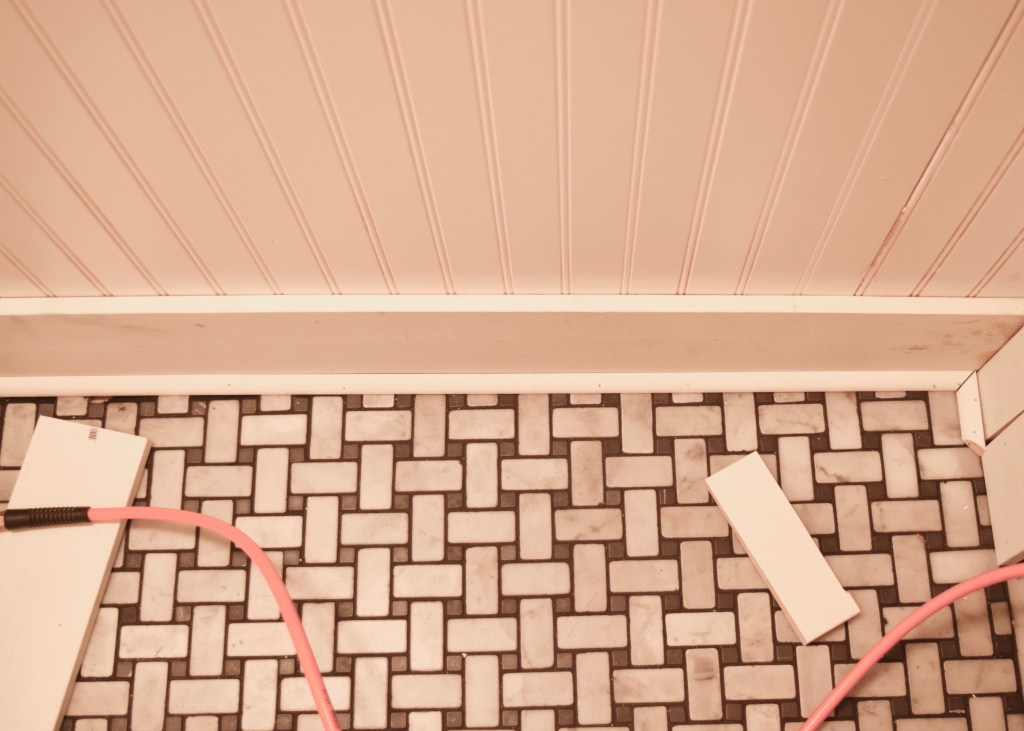
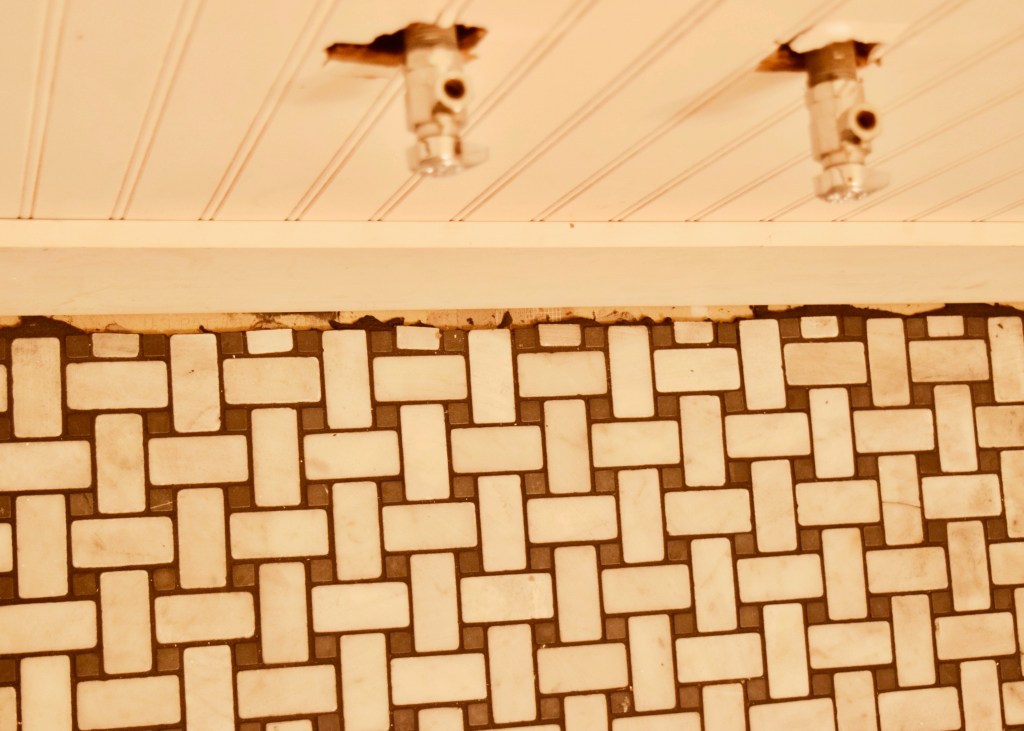
After the baseboards were complete, it was time to address the ceiling as well. The beadboard edge didn’t align perfectly with the not-level ceilings (old house problems!) and so I needed something to hide that edge and create a finished look. I picked up some simple crown moulding from my favorite wood store here in Portland, Woodcrafters. I picked up one 16′ length which gave me just enough to finish off the space. But then, I miscut a piece and rather than try to feather in two pieces along such a short length of ceiling, I bought another 8′ length and cut it to size. It was under $60 for all that crown and now I have a bunch leftover, but I do curse that mistake!
I’d never cut crown moulding before and spent some time googling to figure out how to do it. I found a handy guide that explained all these angles the chop saw needed to be at in order to make angled cuts to the crown when lying flat on the saw. The measurements were insane! 31.6°?! How?! I took a cheat sheet I found out to my saw, determined to somehow make it work, and discovered that my saw handily marked and locked to the crazy angles. Perfect! With that guide, and one miscut, I was able to get the crown up and finish off the ceiling! The corners of the room still had the same gap that that was now hidden by crown at the ceiling, but I had a plan for that too.
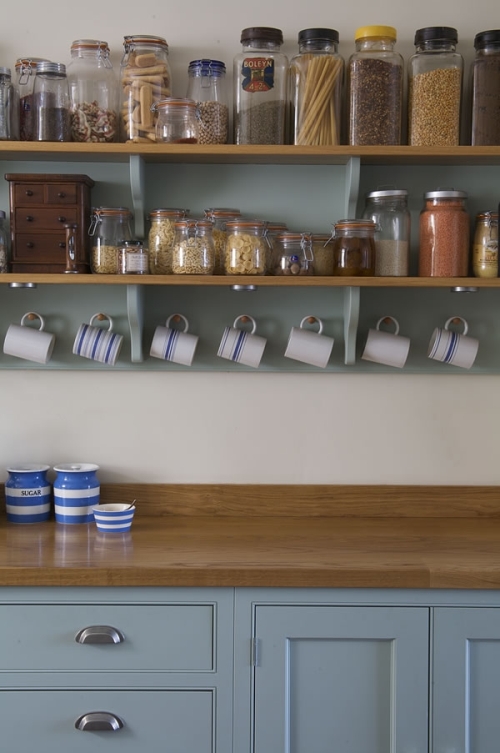
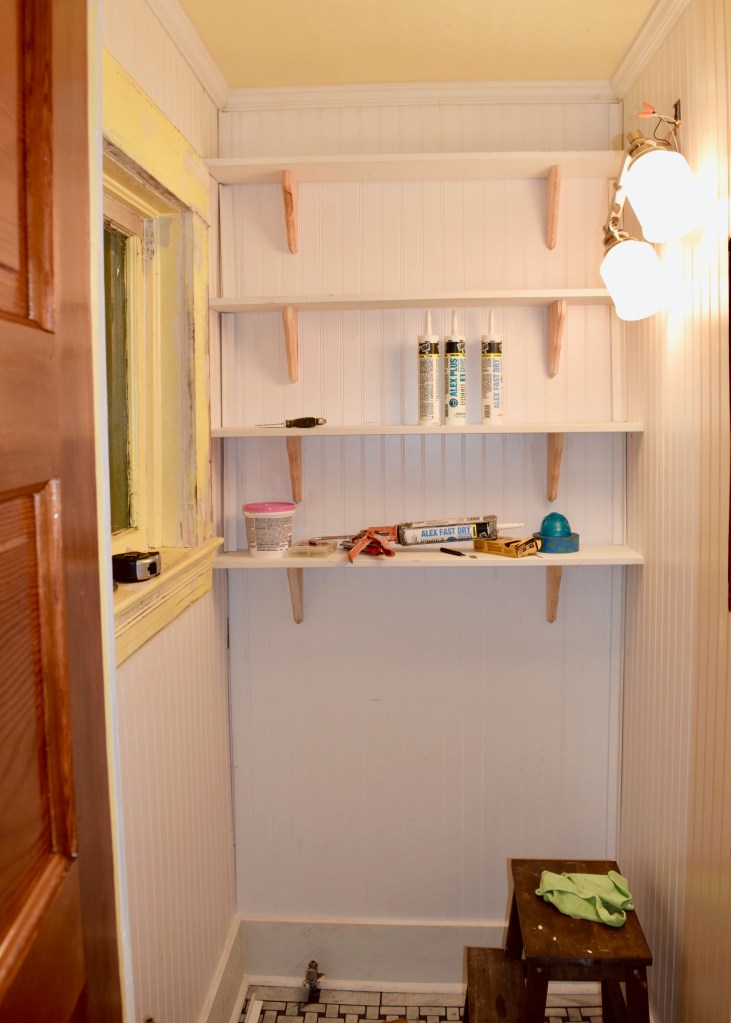
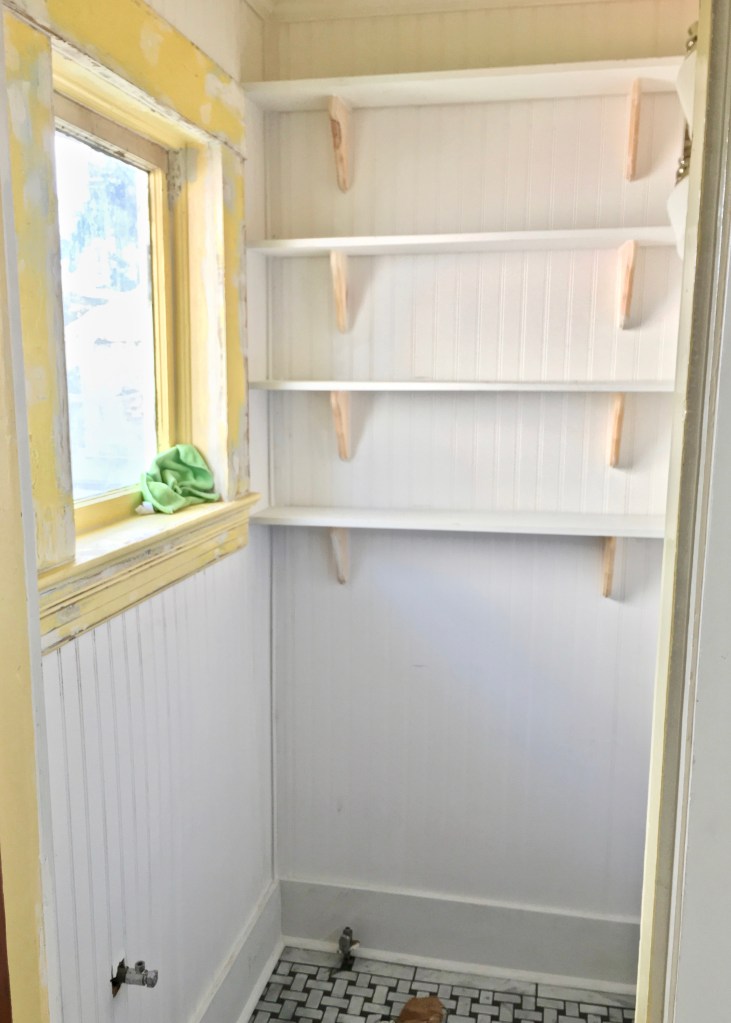
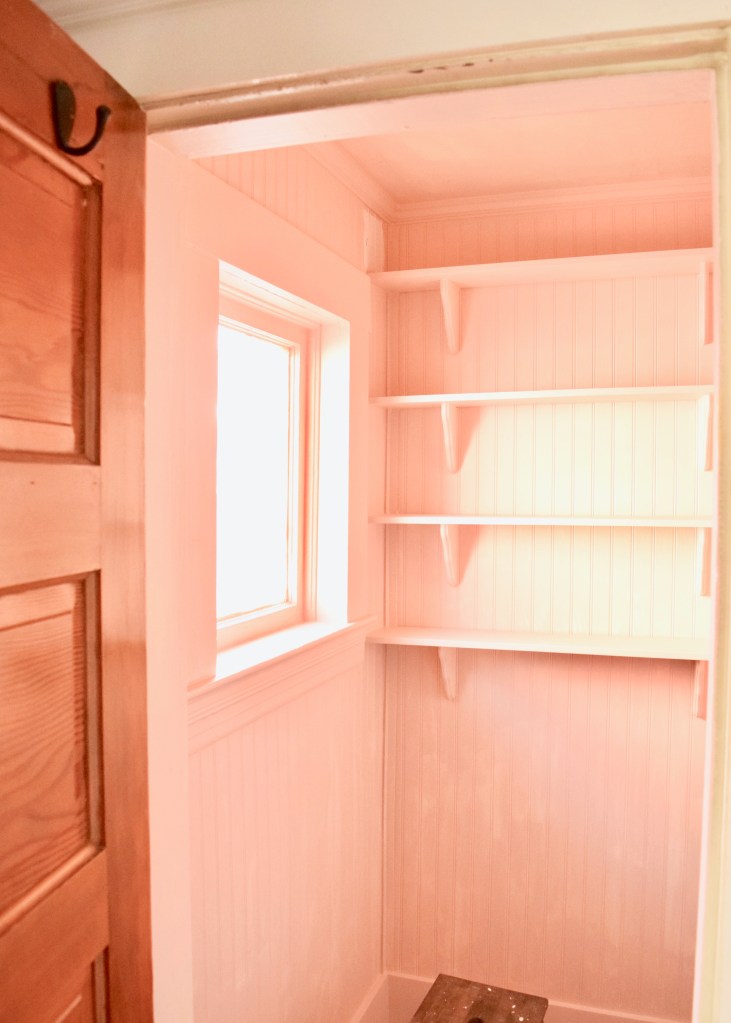
Before I could address those corners, I had something else to tackle. I knew that my little Master Bathroom needed to pack in storage while still looking good, but for a while I wasn’t sure the best way to achieve this. After searching around for inspiration, I found this image which I shared when I kicked off this project. I loved how the simple wooden brackets supported the shelves. It looked elegant, old-world, and inexpensive, a wonderful, and rare, combination!
I set out to create something similar in my space. I found these incredibly inexpensive brackets from Home Depot for under $4 each. I calculated I could fit 4 shelves in my space and bought 8 brackets. I bought another 16 foot length of 8″ flatstock (having exhausted my reserves on the baseboards) and carefully cut four boards to the length of my bathroom back wall. I then measured out the distance between my shelves (settling for 14″) and marked up my wall with bracket locations. The brackets slipped over screws drilled into the wall. That was supposed to secure them, but they still tilted and moved a bit. I added a few 2″ nails with the nail gun to further secure them to the wall, just in case! Then all that was needed was slipping the shelves on top. I left a 1/4″ gap behind the shelves so they’d extend into the room just a tad more (and allow me to place deeper items on top of them) and then nailed them into the shelf brackets and side walls with the nail gun. Suddenly it felt like the room had character!
I needed to address the corners of the room still though. I bought corner pieces that were intended to trim out outside corners, but flipped them around to use on my inside corners. I’m a rebel! See how big and ugly that gap in the corner between the panels of beadboard looks? Yuck.
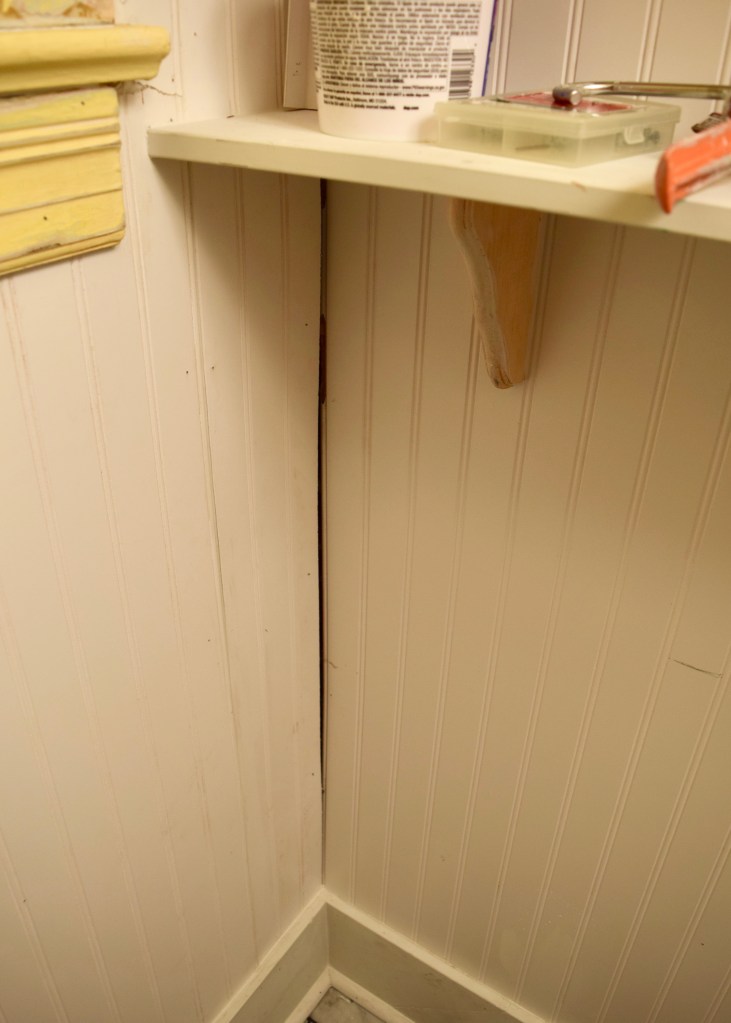
I cut a corner piece to length and nailed it into the corner. Instantly, it looked way more finished and – strangely – more historical. I was just glad to not have a gap!

I cut the rest of the corner pieces to length, carefully measuring between each shelf and lined them up. I figured it was easier to do this now after I’d installed the shelves than to try to notch out the shelves around the corner pieces if I’d installed them first. (I’d also nailed the window trim back up!)

Once I’d cut all my lengths, I simply nailed the pieces into the corner, easy, peasy.

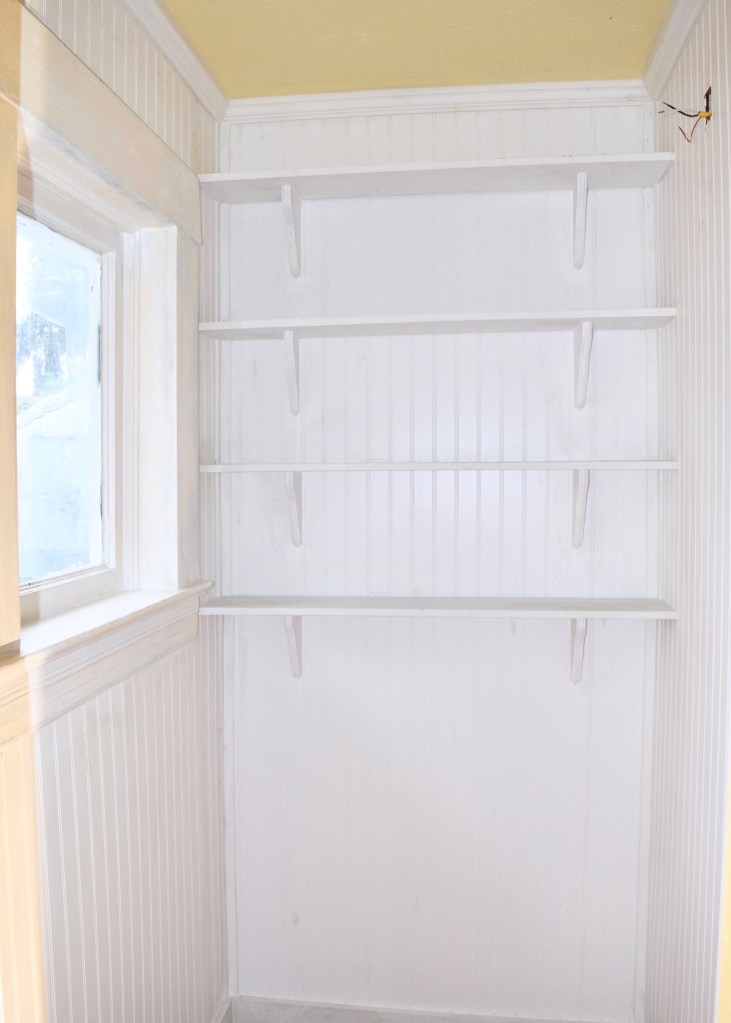
After all the trimwork was installed, it was time to get caulk-happy. SO MUCH CAULK. I caulked all the edges of the shelves, filled in all the nail holes, caulked the window trim, caulked the crown, caulked the baseboards. SO MUCH CAULKING. But, damn, it was looking good in here!
So good, in fact, it was time to prime! Wooopeee! I covered my newly tiled floors with rosin paper and slapped Zinsser’s No-VOC primer over everything. When it was done, you guys, I almost second guessed myself. Should I leave this room white?! It was simple… clean and maybe even historically accurate?

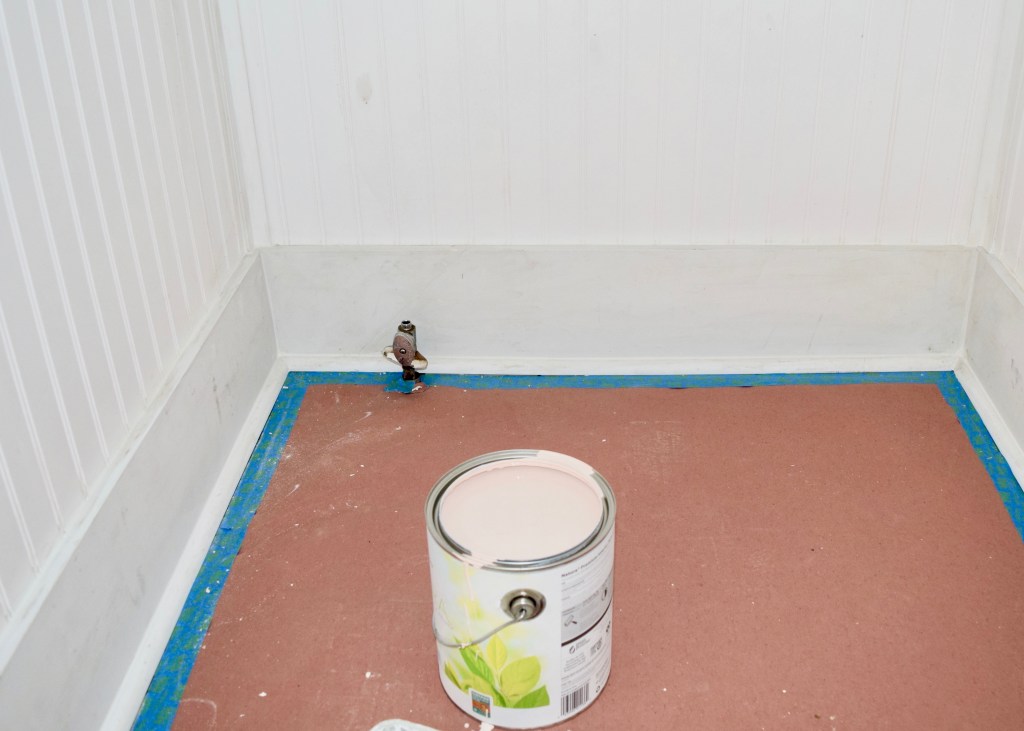
But no, in the end I decided to go with my original design plan and pick up some pink paint. Afterall, this was a tiny bathroom, where if not here should I have some fun?! White paint with black and white floors would be boring, I told myself. But still… it was looking pretty good!
The pink I chose for the space was Benjamin Moore’s Pink Beach, which is the perfect pale shade of calamine lotion. It’s not too pink, nor is it fleshy. It’s simply excellent. At night, compared with the white primer, the pink is a barely noticeable hue. I picked up a can of Benjamin Moore’s Natura in Satin which is my preferred paint and sheen. The Natura brand is no-VOC, no-formaldehyde, and uses special no-VOC pigments as well. There is no off gassing smell and the light color paint is thick and easily applied.
Once the first coat was complete, the space really started to come together though! I couldn’t get enough of the color! It did feel old-world. Historical and somehow more beautiful than I expected. It really was the perfect shade of pink, definitely not too pink, subtle and muted enough to feel truly old. Basically the opposite of the bold, coral I’d chosen for the exterior of the house!
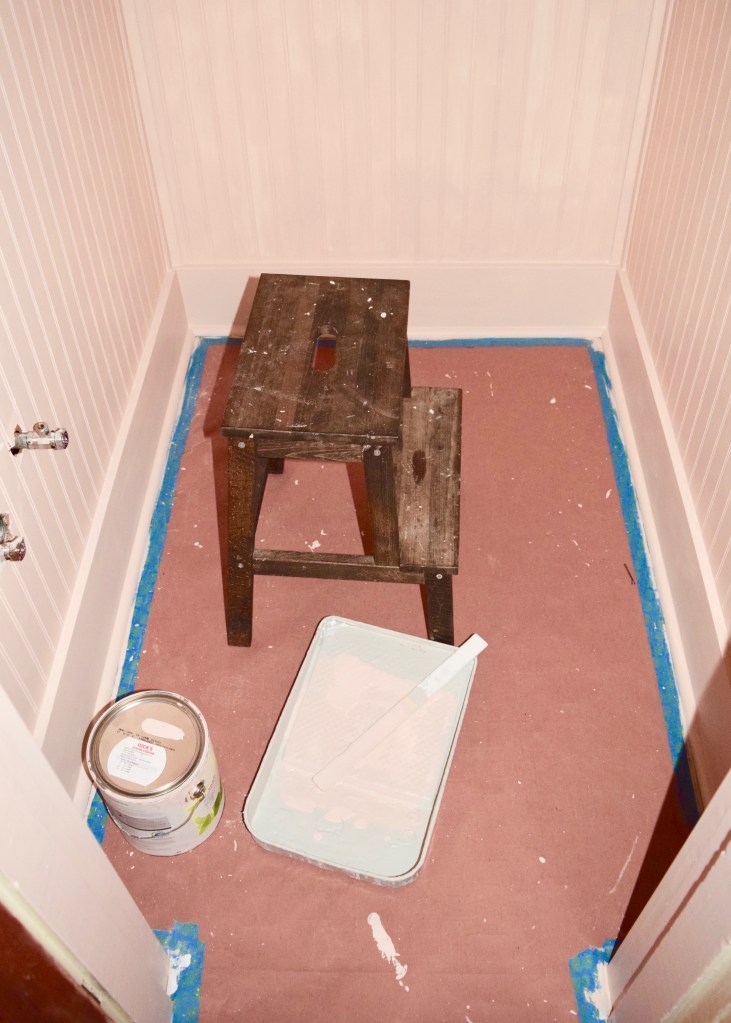
With one coat complete that night, I was ready to attach the second coat the next morning and finish off any patchy pink areas. Because of the beadboard and all the trimwork and because it was such a tiny room, I ended up forgoing a roller and brushing out the entire space! I even painted the ceiling by hand in the same shade (it’s such a tiny space, no sense in breaking up the color). The shelving looked great and the entire space felt like an old 1900s pantry, just like my inspiration! Of course, I’d be filling those shelves with linens and bathroom needs rather than dry goods, but the feeling was conveyed so beautifully!

I got ready to do the second coat the next morning and ohmygod I just couldn’t fall more in love. In the morning light, the room glowed pink, like something out of a movie. The light is incredibly flattering and made my skin look amazing and I felt like Glinda the Good Witch from Wizard of Oz!

The window allows just the right amount of light into the space and boy was I astounded by the beauty of this little room. It’s so hard to believe this little space looked like this not that long ago! It was so dark and dingy!
Now it’s light, bright, and glowing! It feels intentional, like it was always this way! And most importantly, it feels like it belongs to this 1909 house. The space speaks to the character of the old house and I just adore it. The color looks good with the old, stained wood doors and I can’t wait to pull up that rosin paper and see how it looks with the black and white tile floor!
Boy am I pumped to get the plumbing fixtures in here and style out those shelves! Designers love open shelving!
Have you ever transformed a small space? What were your small space storage solution spaces? Could you live with only open shelving as your primary linen / bathroom storage? Would you ever paint your bathroom pink? Let me know what you think of how this little room is coming along in the comments below!
I’m chugging away on my little One Room Challenge. Be sure to check out the other projects too.


You are so talented Laurel! Love how it looks!
Thank you so much Nicole! It’s coming together!!
This looks fantastic! You’re doing a great job, and I enjoy all your updates!
Smitty
Thank you! It’s coming along nicely!!
I can’t believe the transformation. A totally different space.
It certainly feels that way!
Enjoying reading this SO MUCH. And love the new look. Mama Bear
Thank you MamaBear!!
Hi neighbor!
Great fun to see how you reworked your tiny bathroom.
You are making me think about my kitchen that had 60+ year old cabinets.
Thanks so much! A little paint can go a long way on cabinets. I painted my 40s kitchen cabs and they’re hold up pretty well!