All the details on my new English-Inspired Cottage Garden & Organic Vegetable Garden, ORC – week 8

All the details on my new English-Inspired Cottage Garden & Organic Vegetable Garden, ORC – week 8

I am so excited to share these pictures with you because the transformation of Berrybrier’s front yard is blowing my mind! The space is now so much more beautiful and functional! This project took so much work though and certainly didn’t happen overnight. Hours and hours and hours of weeding went into clearing the garden. Then I moved a ton of my existing plants, added more plants, and laid all the stone path. It’s so wonderful to see it all come together just as I first imagined, it’s completely transformed the whole look of the house. Let’s take a closer look!

Continue reading “All the details on my new English-Inspired Cottage Garden & Organic Vegetable Garden, ORC – week 8”

Progress in the Garden, ORC – week 3

Progress in the Garden, ORC – week 3

This has been an interesting week in the garden. I feel like I’ve done a lot… but also not very much? I think the work I have done is a lot less backbreaking, so perhaps I’m literally feeling a difference in my body. I’m not as sore! I think its a transition time for the garden too. The early spring flowers are fading, but the summer flowers aren’t quite up yet. It’s been cool again too. I’m hoping in the next week, when we have some glorious sun and temps in the 80s, the garden will start popping again!

Continue reading “Progress in the Garden, ORC – week 3”

Weeding and Transplanting in the Front Yard for my Cottage Garden, ORC – week 2

Weeding and Transplanting in the Front Yard for my Cottage Garden, ORC – week 2

Oh boy, this is one post, but so many hours and days and weekends of work! I feel like I’ve been weeding this garden for 6 months and gooooodness I am freakin’ exhausted. I started doing a thorough weeding of the garden back in December shortly after I had a giant pile of wood chips delivered from a local tree trimmer. I tried to get all the roots so the weeds would stay gone. I thought I’d be done in a weekend, maybe two if I didn’t work too many hours. Boy was that a huge underestimate. I worked in the yard at least one day almost every weekend for the next 2.5 months. I’d weed a section and then sheet mulch it. Then I’d move on to the next area. Some spots were fairly quick, but some were packed with teensy tiny bulbs that I knew would be able to push through the mulch in the springs. I was sifting the dirt some days to get all those tiny 1/4″ bulbs. Ugh. It was endless! And the worst part? I’m still working on it. Sure, now I’m doing other things in the garden too, but I never actually finished weeding everywhere!

Continue reading “Weeding and Transplanting in the Front Yard for my Cottage Garden, ORC – week 2”

Finally, Finally, Finally the Main Bathroom Reveal!

Finally, Finally, Finally the Main Bathroom Reveal!

Boy, oh boy, has this post been long overdue. I’ve been itching to share final reveal shots of the the main bathroom at Berrybrier. If you follow me on instagram (see the sidebar! Or the very bottom of the page if you’re on your phone) you may have seen my instastories a few weeks ago which heavily featured finishing off the bathroom. There were a few little tasks like hanging the hand towel ring, spray painting the toilet paper stand, and making the shower curtain that I needed motivation to work on. So thanks to all those who messaged me for the encouragement! Now… shall we check out some shots of the room?

Continue reading “Finally, Finally, Finally the Main Bathroom Reveal!”

One Room Challenge: Week One – Master Powder Before Pictures and Inspiration

One Room Challenge: Week One – Master Powder Before Pictures and Inspiration

First off, hello to all of you new to this blog! I’m so excited to be guest posting as part of the One Room Challenge this Spring 2019. I’m Laurel and I’ve been working on my house — which I named Berrybrier after the brambles of blackberries and raspberries in the backyard — since I bought it in Summer 2017. It’s been a huge project full of ups and downs and I’ve been living here throughout it! I painted the house a happy, salmonberry, coral pink color and finished a DIY gut reno on the Main Bathroom all by myself. I am currently working on the Kitchen as well as the other main spaces! Click around and check out the progress while you’re here!

Continue reading “One Room Challenge: Week One – Master Powder Before Pictures and Inspiration”

The Downstairs Bookshelf

The Downstairs Bookshelf

Happy New Year everyone! I hope you had a great holiday and got a chance to relax and spend time with family and friends! I spent my break at my parents house eating way too many waffles and drinking hot buttered rum. Lots of hot buttered rum! While I was down in the Bay Area, I also installed a project for a private client of mine. We’re about 95% done with their home and once we finish I can’t wait to go down and photograph the project to share here on the blog. It’s always such fun seeing things come to life from idea to specs to reality! Back home I’ve just been sorting through things trying to purge some of my belongings and trying to find a place for the too many books I accidentally bought at the local used bookstore in my parents’ town.

Speaking of bookshelves, back when I shared how I style my bookshelves full of books I mentioned I’d share my downstairs bookshelf, which, though it has many books, definitely holds a lot more “things” too! This bookshelf is a hand-me-down from my parents which my mother surprised me with when I moved to Berkeley. It needs refinishing and I’ll probably paint it black when I finally get around to painting all the things I want to paint black like my china-cabinet-turned-pantry and dining table. For now though, the bookshelf is a rusty brown shade that I rather dislike. Styled full of pretty things, however, it’s not so bad!

Bookshelf | Land of Laurel

The bookshelf sits tucked in the corner of the main living area next to the dining table and slider door. It fits this spot pretty perfectly and gives this spot some definition and meaning!

Dining Room | Land of Laurel

These days, Finley the Fig Tree hangs out in front of the slider about 3 feet in front of the bookshelf. She tends to hide the bookshelf from view a little bit, but it was the only place to put her!

Living Room | Land of Laurel

Anyways, this bookshelf is more styled than my stuffed-with-books shelf upstairs. This shelf holds all my pretty vintage books, too many of which I bought only because they looked nice (Shhh! Let me have my addiction!). It also holds my collection of German steins (somewhat touristy in taste) as well as a few plants (see above about addictions) and knick knacks.

Bookshelf | Land of Laurel

I can rarely let a surface stay empty so I nabbed a picnic basket I had to sit on top of the shelf and flanked it with two plants. I’d rather these plants live in a different color container, but these were already planted, so I stuck with what I had. Below that, a vintage collection of children’s stories is propped up with inexpensive candlesticks. On the eye level shelf is my collection of steins which I frequently pick up a flea markets and garage sales. I’ve always got an eye out for them. They usually have some sort of interesting pastoral or forrest scene both painted and embossed on them so they’re textural as well as colorful! Below the collection is a shelf with a few stacks of books, a heavy goat bookend I got from my Oma and a Burros Tail succulent I picked up on my birthday last year at a greenhouse in Half Moon Bay.

You’ll notice that these objects are all fairly symmetrical and centered on the shelves. This is very me. I love symmetry! If this shelf was located somewhere else I’d probably use less symmetry to keep things more interesting. Because this is a one-off bookshelf off-centered in a corner, a little lot of symmetry keeps things more orderly.

Bookshelf Upper | Land of Laurel

A lot of my viney plants ended up on this bookshelf. I’ve helped them grow in and around the things on the shelves and they don’t seem to mind sprucing things up a bit! This shelf below is my favorite. The plant really took off and loves that I’ve wound it around the items on the several shelves! Plus I love the stacks of red and blue books with little car on one stack and small box on the other. The car is actually a Christmas ornament my mother gave me, it’s a little truck of fruit though so I keep it out all year round. The box is also from my Oma and is full of little labeled rocks she picked up around Europe in the 1980s.

Lower Bookshelf | Land of Laurel

Below this shelf are just rows of books – tall ones on the bottom, short ones on the shelf above that. This photo made me realize that last shelf was put on crooked and has been crooked for nearly seven months. Whoops!

Bottom Shelves | Land of Laurel

So that is how this bookshelf is looking! Still holds a lot of books, more so than a lot of styled shelves on the internet, but holds a lot of less practical things as well! Hope that inspires you to straighten up your shelves and make them look nice too.

Happy New Year! Also, shout out to Steve!


Bungalow Bathroom

Bungalow Bathroom

So before I talk all about my new home, the Duplex, I want to wrap up the one room I felt looked totally finished at the Berkeley Bungalow. No, it wasn’t my bedroom. It was the bathroom. The room that felt totally me. The room where the art was hung. Oh wait — you don’t remember the art being hung? Let me fill you in.


Remember how the bathroom looked when I first moved in? Gorgeous, but it needed a few finishing touches to bring it to life. Boy do I miss that house. The Duplex needs… let’s just say… a little more work. The Berkeley Bungalow’s bathroom got a shower curtain and plant stand with a peace lily to start.


Bathroom Litter Box


The space worked. The litter box did the room no favors. Overall it was not a bad start. But let’s take a look at how things were right before I moved out…


Bungalow Bathroom


Painting the plant stand was the first step towards creating a plan for the room. I decided to embrace the gold I’d accidentally incorporated with the Target shower curtain. I then later switched out the old vinyl shower curtain liners with some healthier, washable polyester ones. I searched for storage and ended up with some clear glass jars. Finally I added some plants and painted some IKEA pots to make the space a little bathroom jungle. The finishing touches involved adding art and a full length mirror!

I switched things up and moved my jewelry into the bedroom, freeing up one corner for yet another plant. Yay! This guy does well in low light and humid conditions. Perfect for a bathroom! The framed art above I bought in Milan in 2013 and popped into an IKEA frame. It’s Gerolamo Induno’s 1862 Forebodings. I really liked the piece in person and bought the print at the museum store. It depicts a girl sitting on a bed starting to either get ready for the day or ready for bed. It seemed fitting for the room where I do just that!


Bungalow Bathroom Afters | Land of Laurel


The other side of the room got a full length mirror from IKEA which I really wanted to paint gold (of course!), but never got around to it. A hanging IKEA planter from the towel rack incorporated yet another plant and I added a vintage 1950’s tourism poster of Berlin above the plant stand and towel rack to call this side of the space done!


Bungalow Bathroom After | Land of Laurel


This room was always bright and sunny. The natural daylight made even the toilet look cute. The plants I put on top might have helped a bit though too.


Bungalow Bathroom Toilet | Land of Laurel


On the counters, I switched out the wooden soap holder for a red ceramic one I picked up for a few bucks at Target. The red tied into the red on the tub and added some contrast with the glass jars I’d bought at World Market.


Bungalow Bathroom Afters | Land of Laurel


The space finally came together and I was sad to leave it. The bathrooms at the Duplex leave much to be desired. But I’ve long since gotten used to the idea that the Berkeley Bungalow might be the nicest house I’ll ever live in. So instead of dwelling on the idea of cleaning my sheet vinyl floors again (do they ever get clean?!), I’ll just day dream of baths in this room. Heck! I’d pay rent just to live in this bathroom!


Bungalow Bathroom Afters


How’d I do on the list I made for this space? Pretty decent, I think!

  • Find the perfect glass storage jars
  • Add a piece of furniture to place a glass of water or a book on when I take a bath
  • New shower curtain
  • Necklace holder
  • Soap dish
  • Moved it into my bedroom Better jewelry storage, perhaps building an earring holder??
  • Add some plants in small pots on top of the toilet back
  • Paint the plant stand gold to go with the shower curtain
  • Somethings aren’t meant to be find a better way to hide the kitty litter box
  • Organize the vanity cabinet to better contain everything I hide away down there
  • Hang art
  • Even more plants?!
  • Take so many bubble baths!


So, that there’s the end, folks. That’s the last Berkeley Bungalow post. Now we’re in Portland. Home of the endless options for delicious food. I’ll shock you with the comparison of this room to my new bathrooms and start listing ideas of how to spruce those guys up soon! Get ready for some to do lists and painting shenanigans!

Planting Fred the Fish

I planted succulents in Fred the Fish!! He looks amazing!! I am so excited to share this with you today. Fred has finally become his true self. His awesome self. Oh, Fred, how I love thee!!! I might be a little too excited about this!

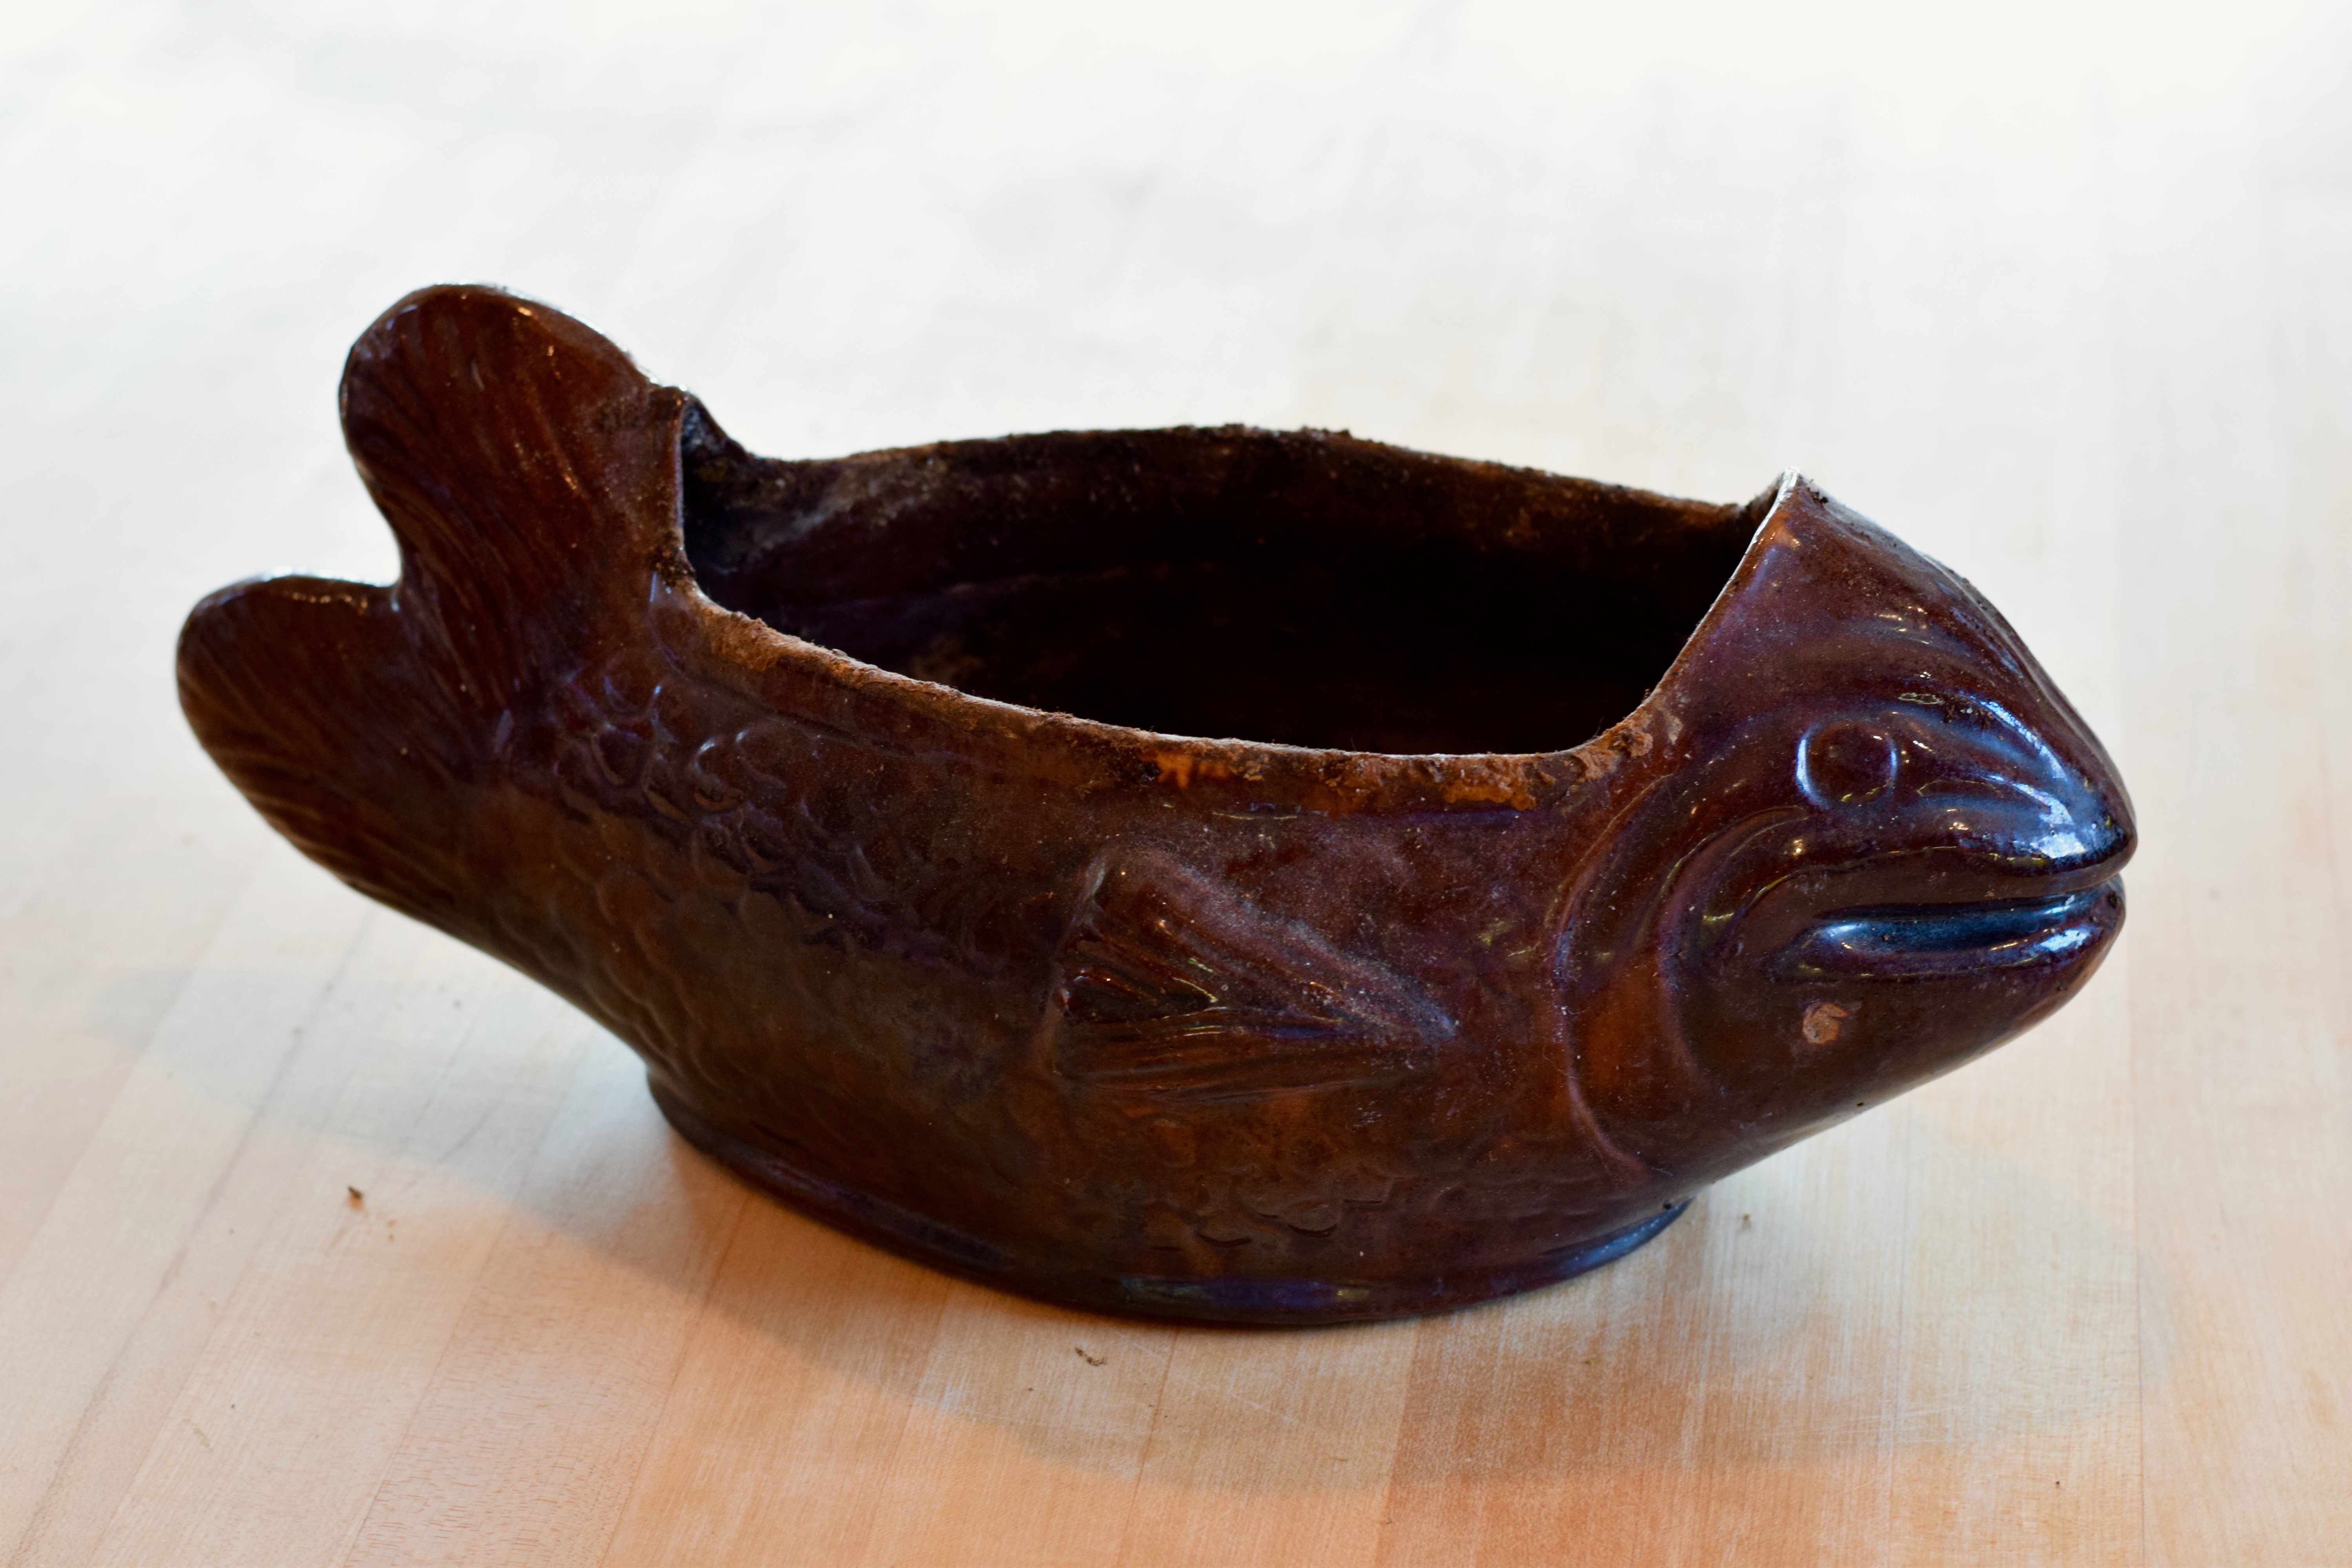
As you might remember I got Fred from a pile of my grandmother’s belongings after she passed away in April of 2014. He was a dirty brown fish complete with chips in his cheeks and an ivy plant that had outgrown his capacity. Once I’d repotted the ivy and cleaned him up he was looking like this. Brown, ugly, chipped, dirty, sad. It was time to let his true potential shine through!

FredCleanedUp

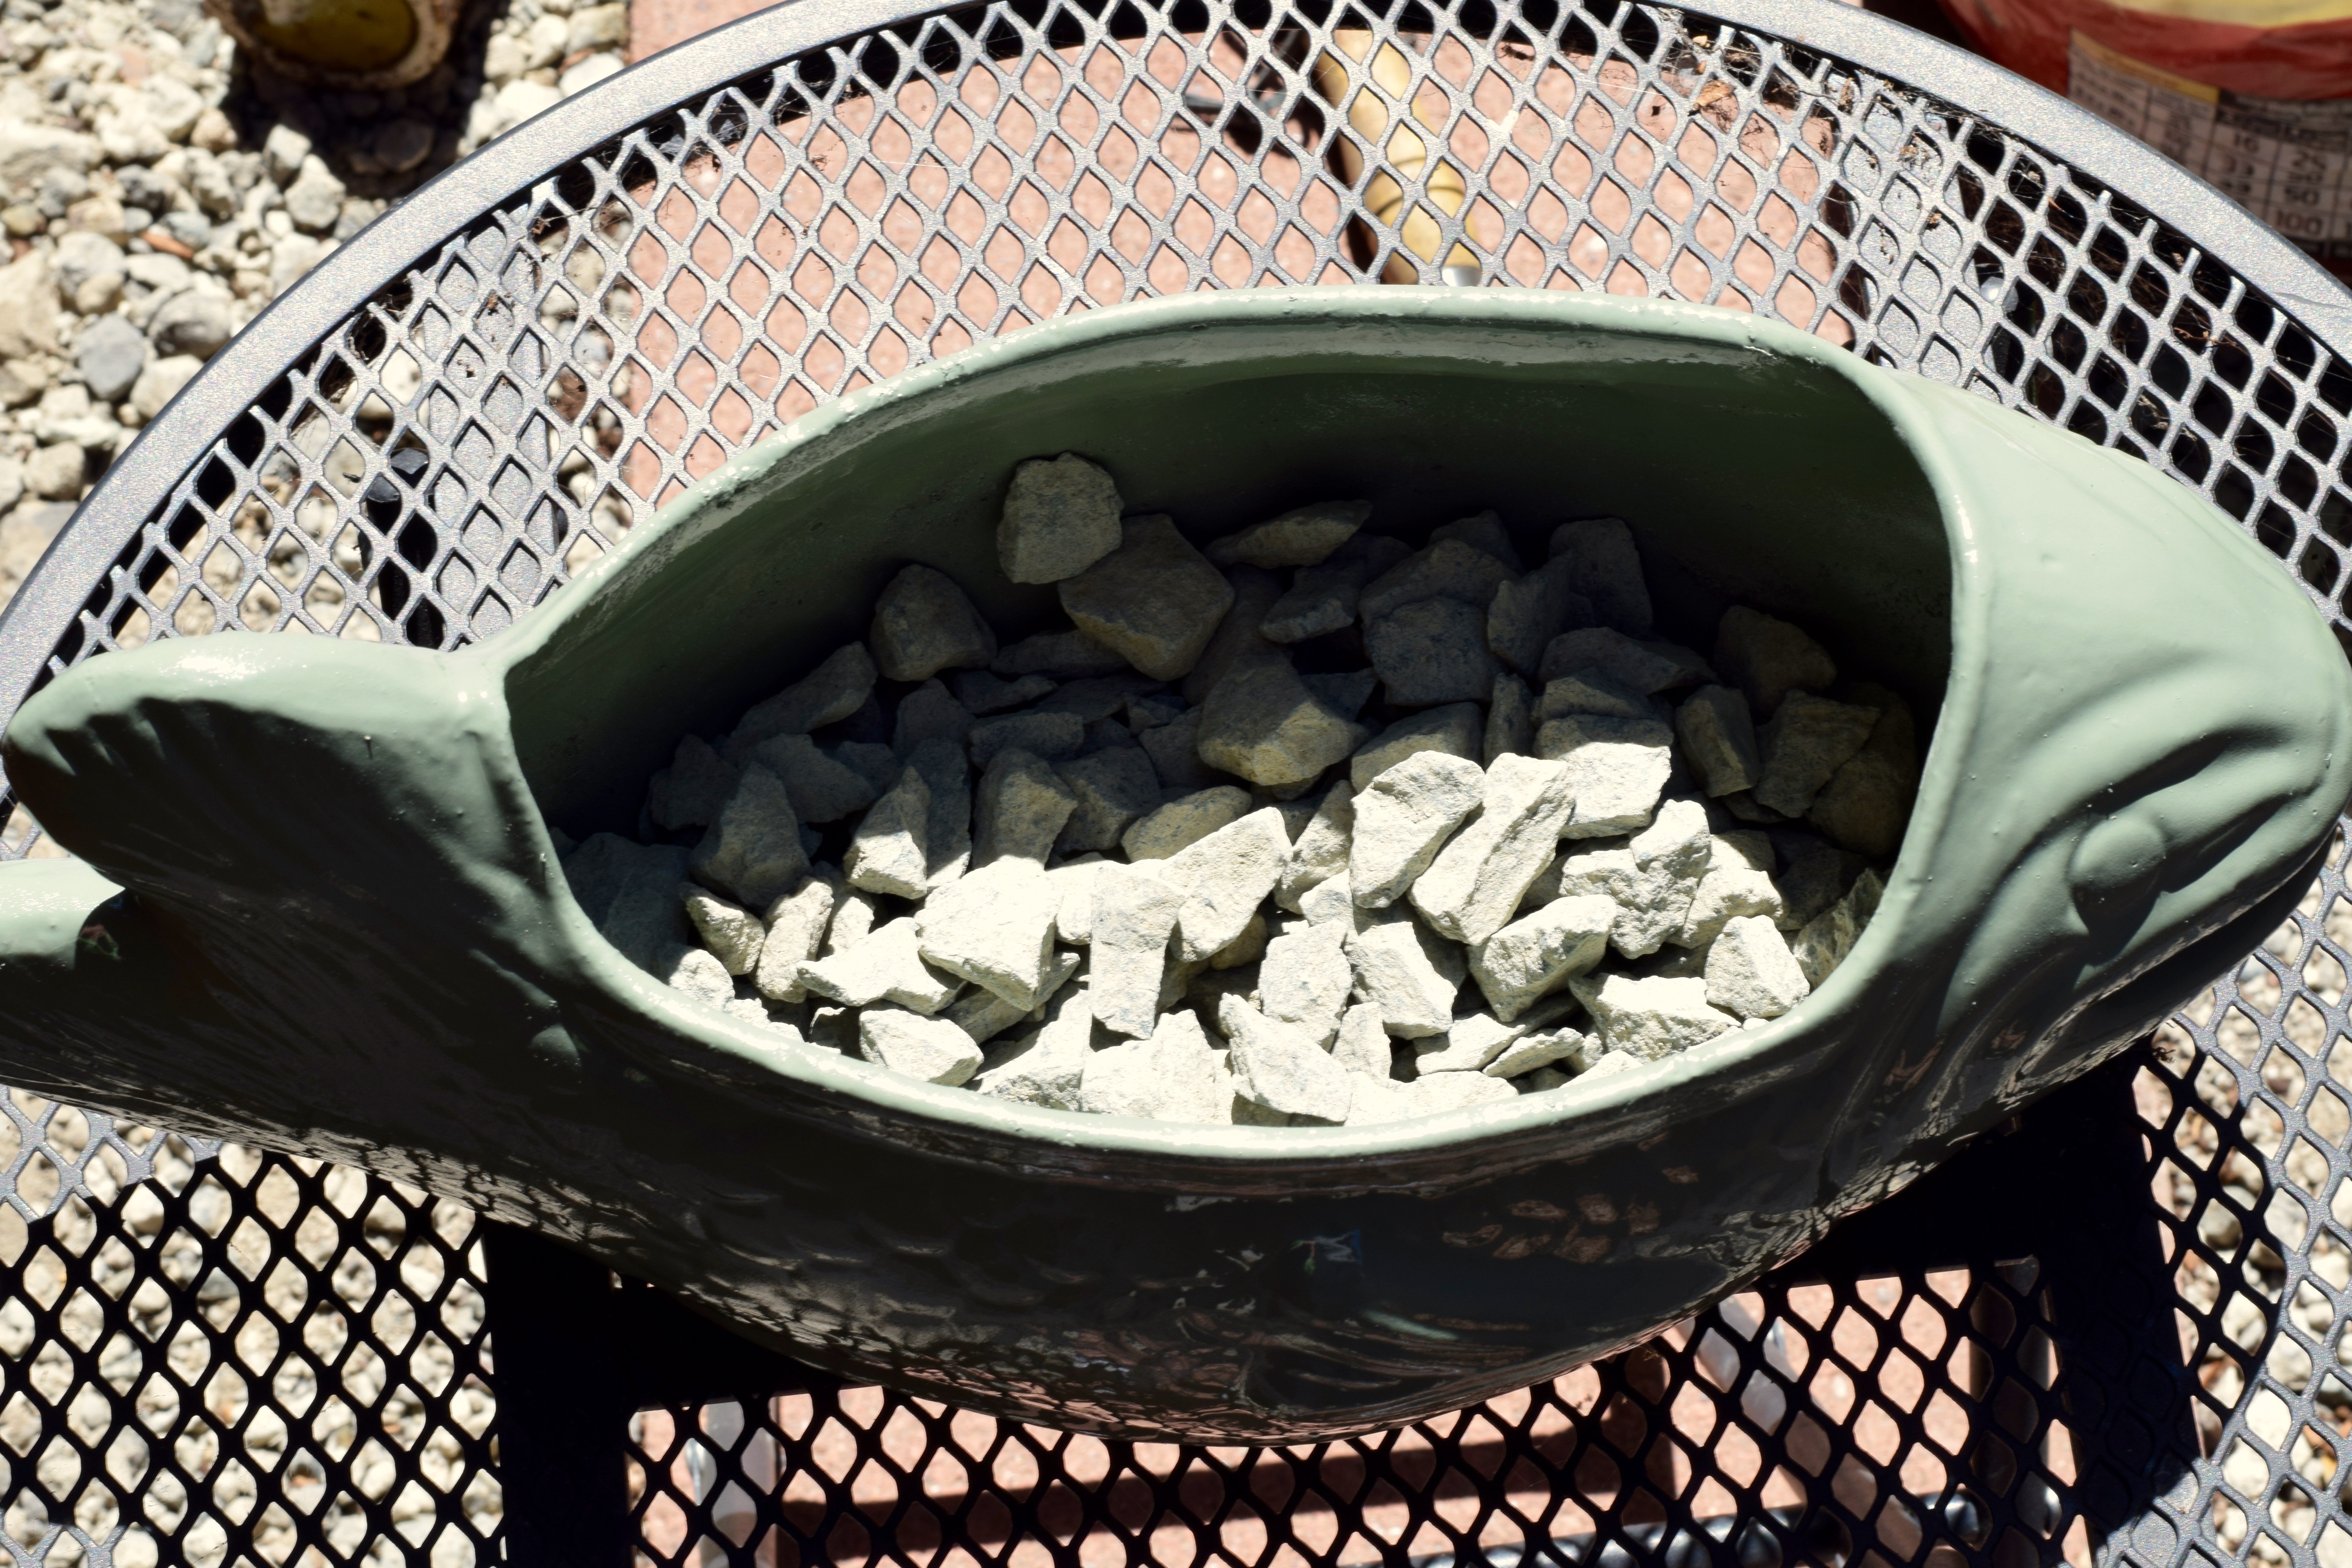
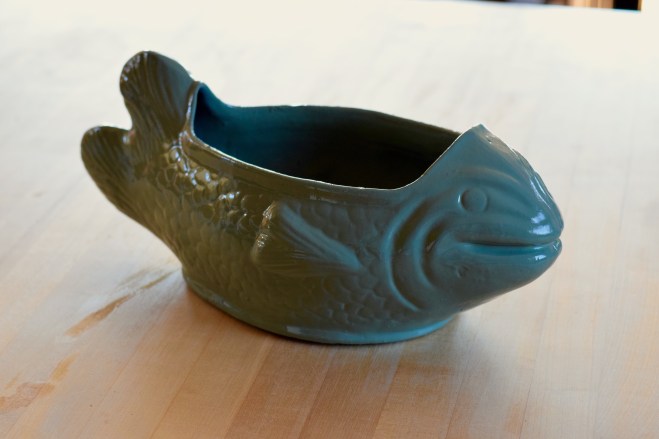
I turned to Rust-oleum’s Sage Green Gloss spray paint to help me turn him around. Now the ivy is gone, the chips are disguised, and he glistens with a glossy coat of sage green paint. Beautiful!

PaintedFred

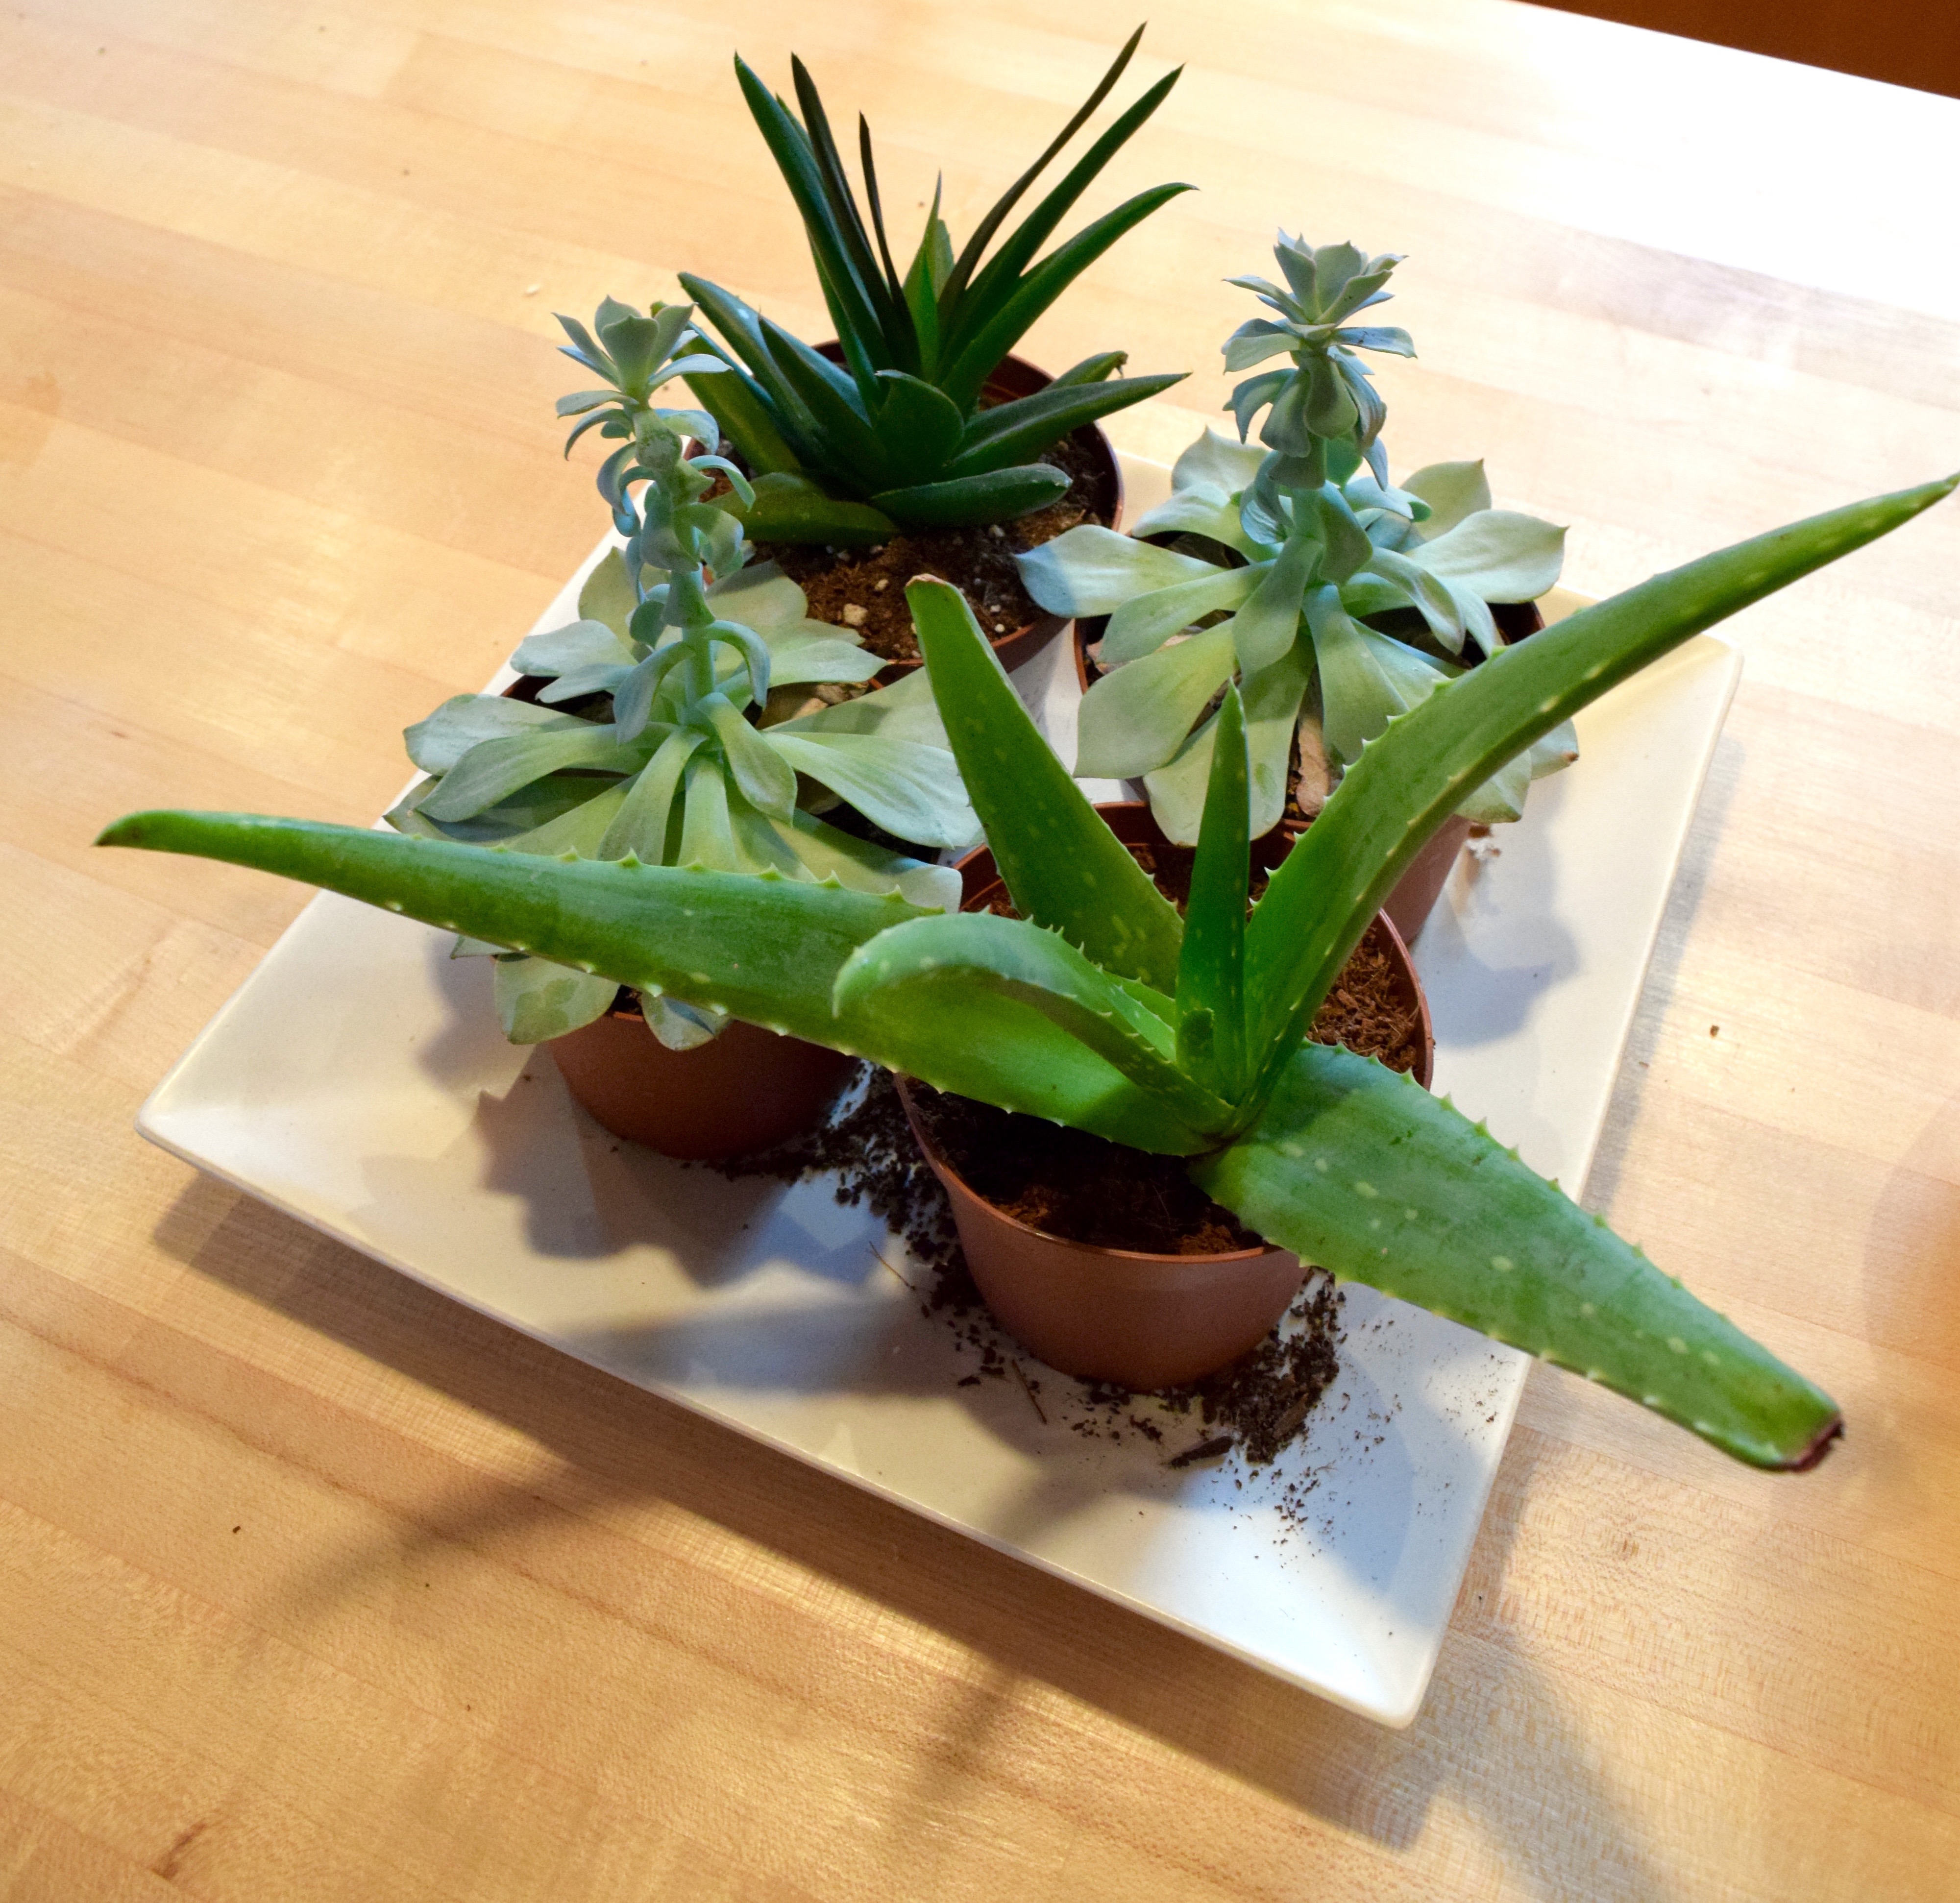
He was by no means done though. Months ago, I mean, seriously, months ago, I was wondering through IKEA and saw their succulents which we only a couple of dollars each. I bought four with Fred in mind. Then I left them in my bathroom and ignored them completely except for the occasional watering. Now that Fred was looking all spiffy, it was time to plant them!!

PrePlantedSucculents

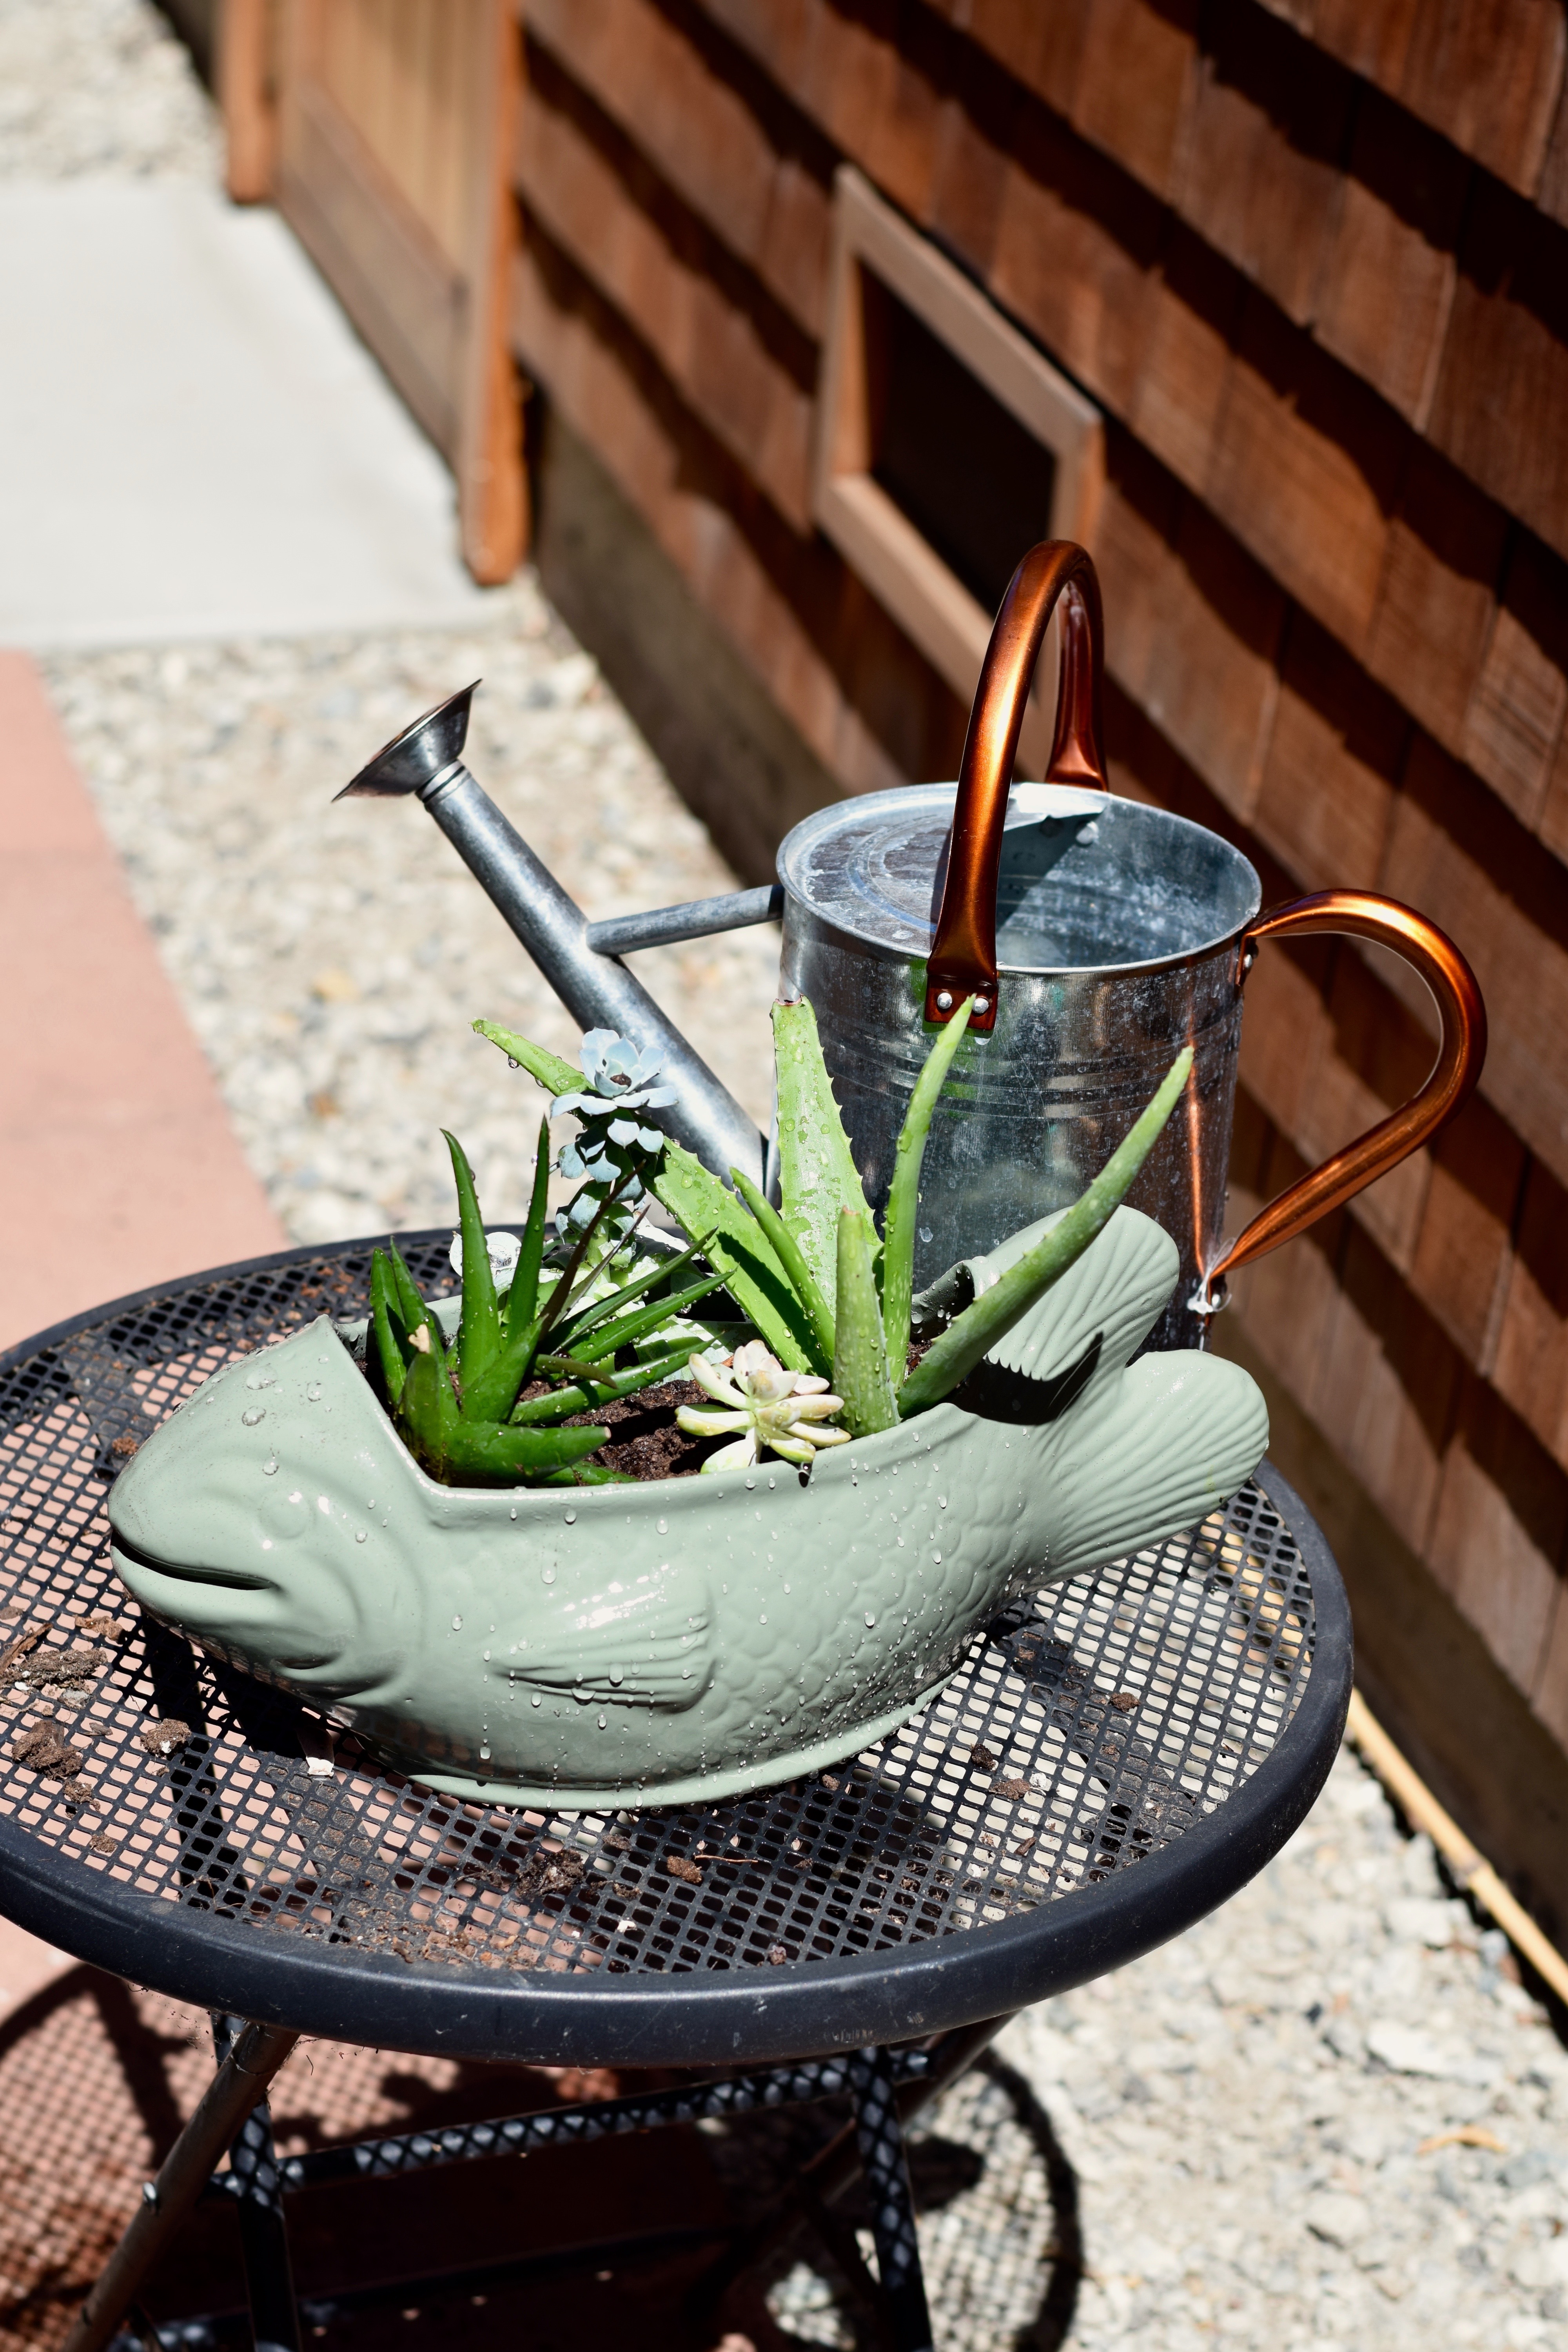
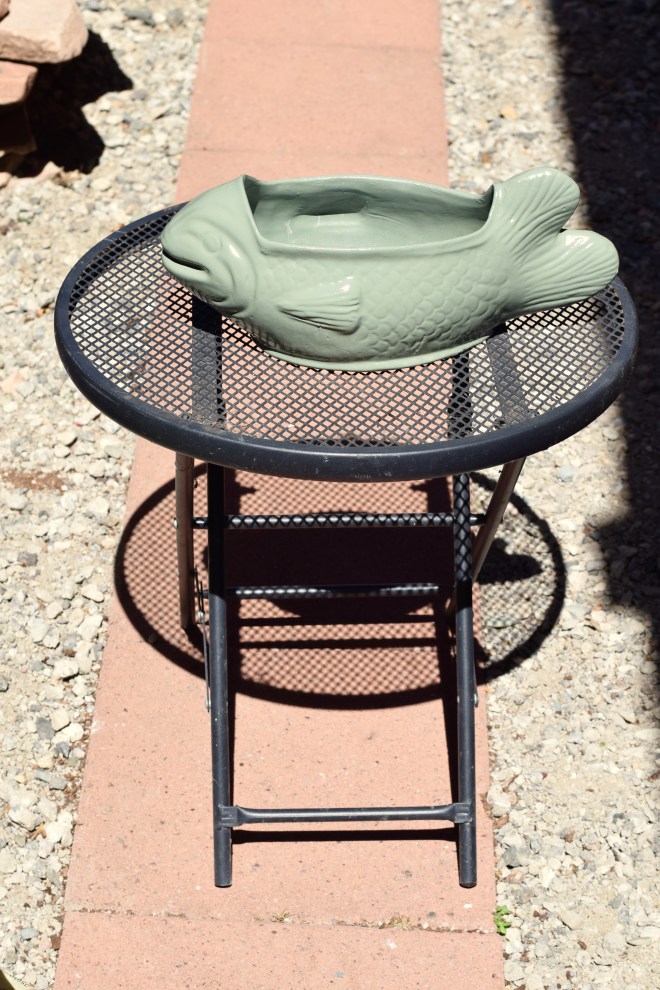
I took Fred to the five foot wide stretch of space between our house and our fence and set up my make-shift potting area. First, I stole the little round side table from our courtyard and plopped Fred down on that. Then I got out my gardening gloves and spade.

FredtobePotted

Before I could break out the succulents, I needed to add good drainage. I grabbed a handful of course gravel and dropped it into Fred’s basin.

DSC_0463

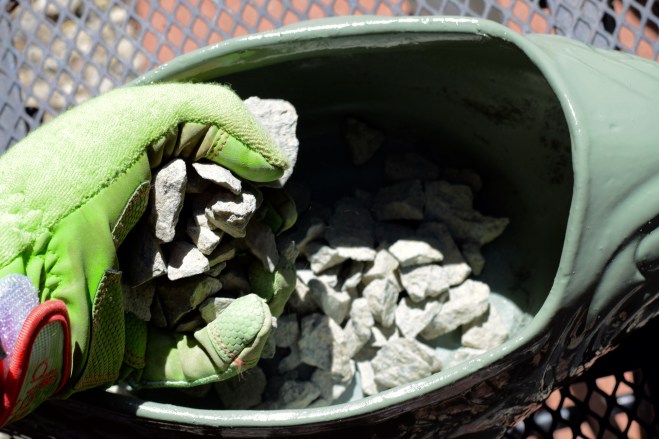
Because succulents hate standing water (as do most plants…) I made sure to layer in quite a bit of gravel. This way if I accidentally overwater, I won’t kill them. Hopefully! 🙂 You can see here, I certainly wasn’t shy with the gravel. He’s about 3/8 full of gravel. Not a ton of room for soil, but succulents do o.k. in shallow areas.

FredFilledWithGravel

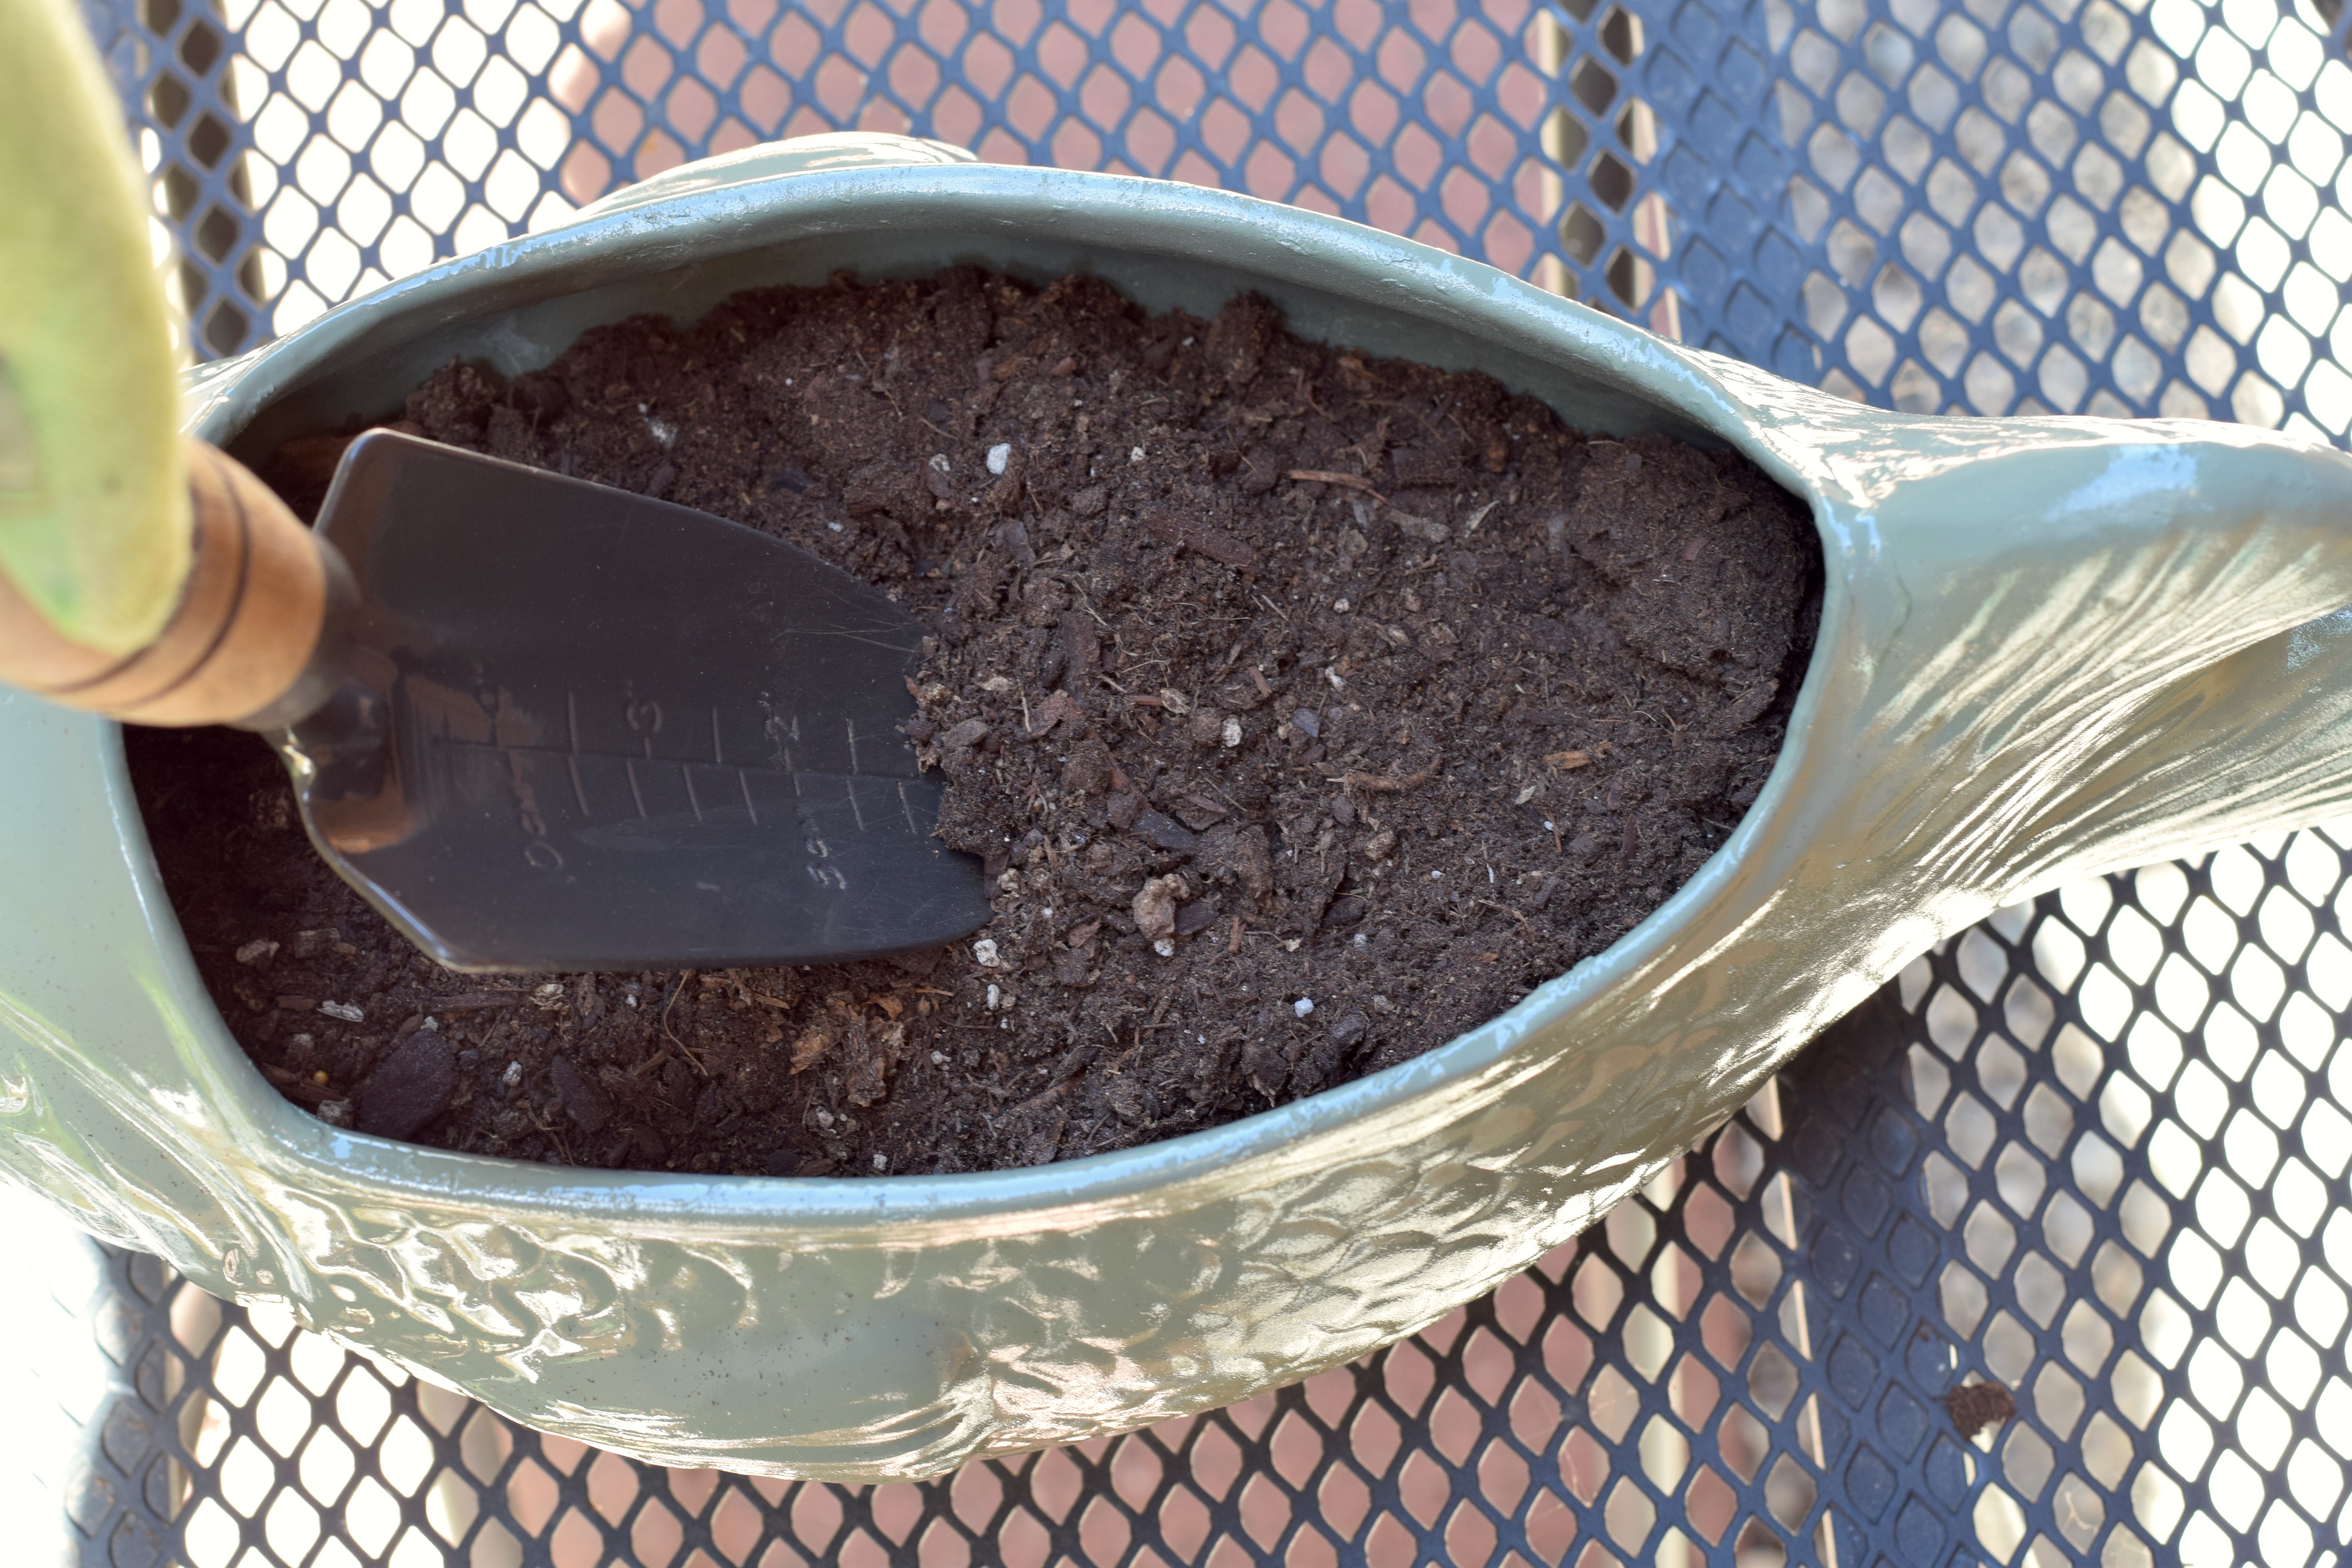
I then layered in the dirt! Which makes me happy, because suddenly Fred went from sad and empty to full of promise! Dirt means growth! Growth means plants! Hopefully plants would survive! You can see there was about 2 inches of dirt over the gravel. Enough to poke into a bit for the succulents, but still enough room for me to add more after placing them.

DirtyFred

Also sidenote — I LOVE these pink and green gardening gloves I got at Home Depot. So happy! So bright!

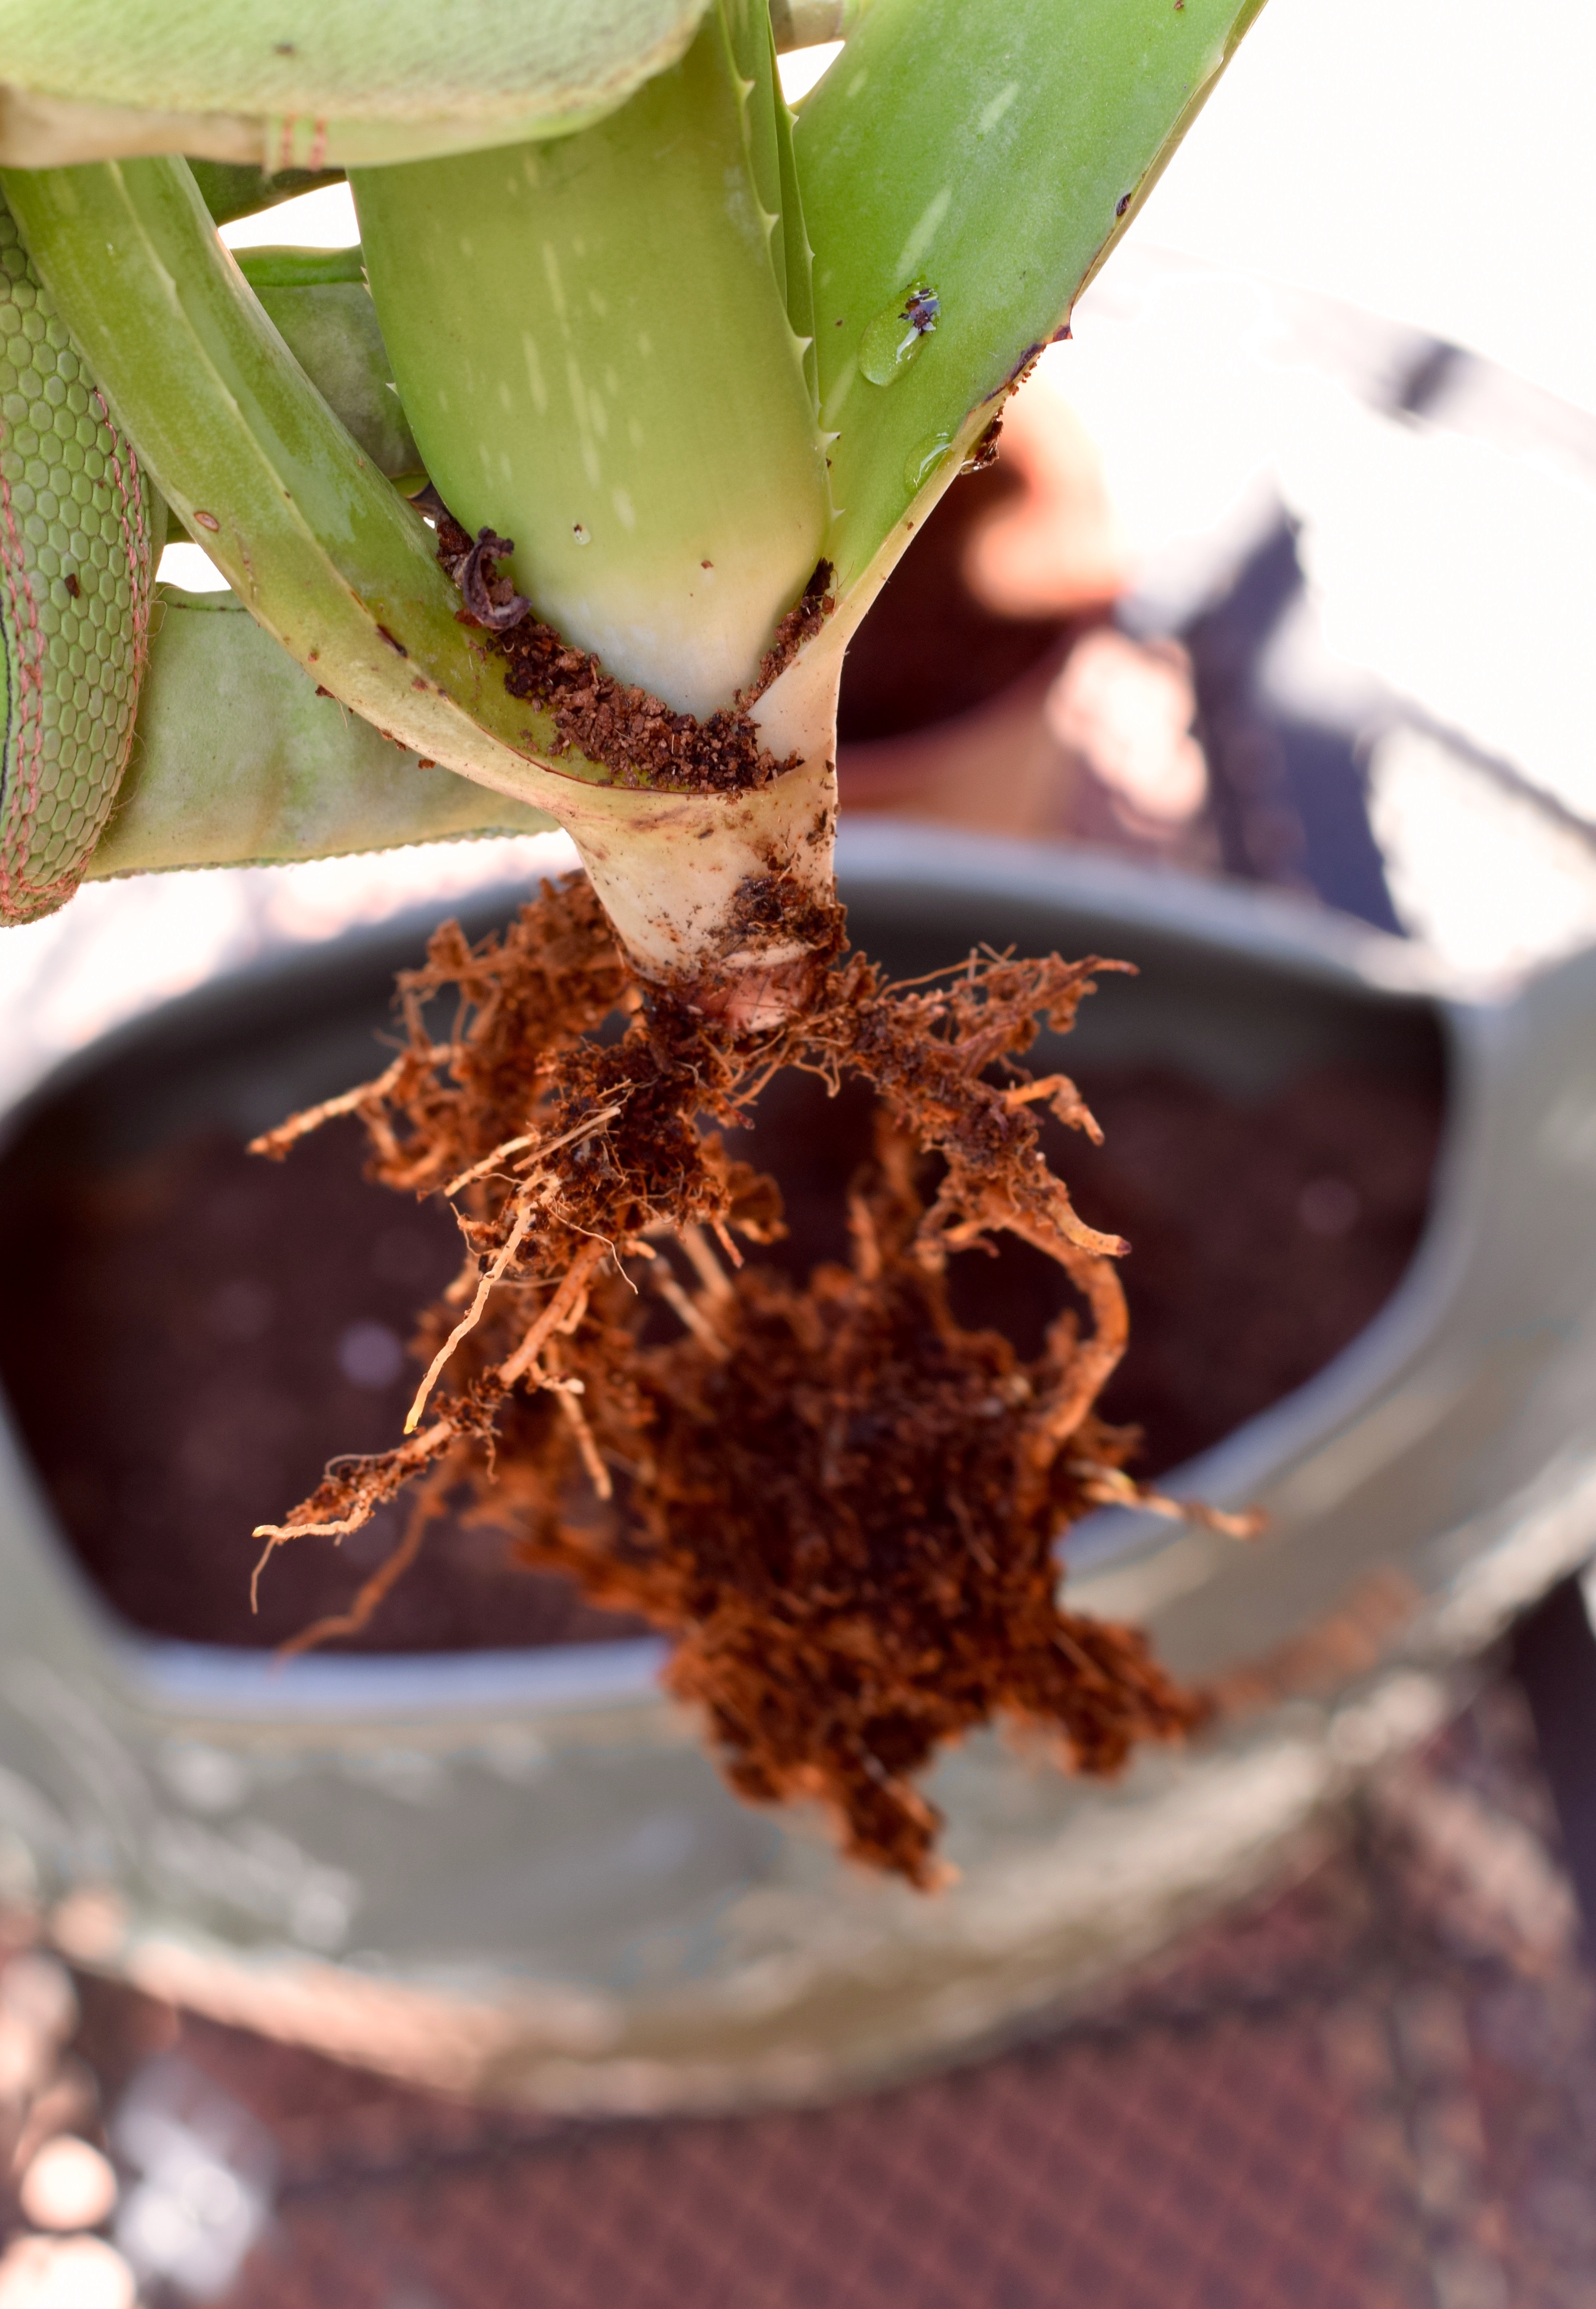
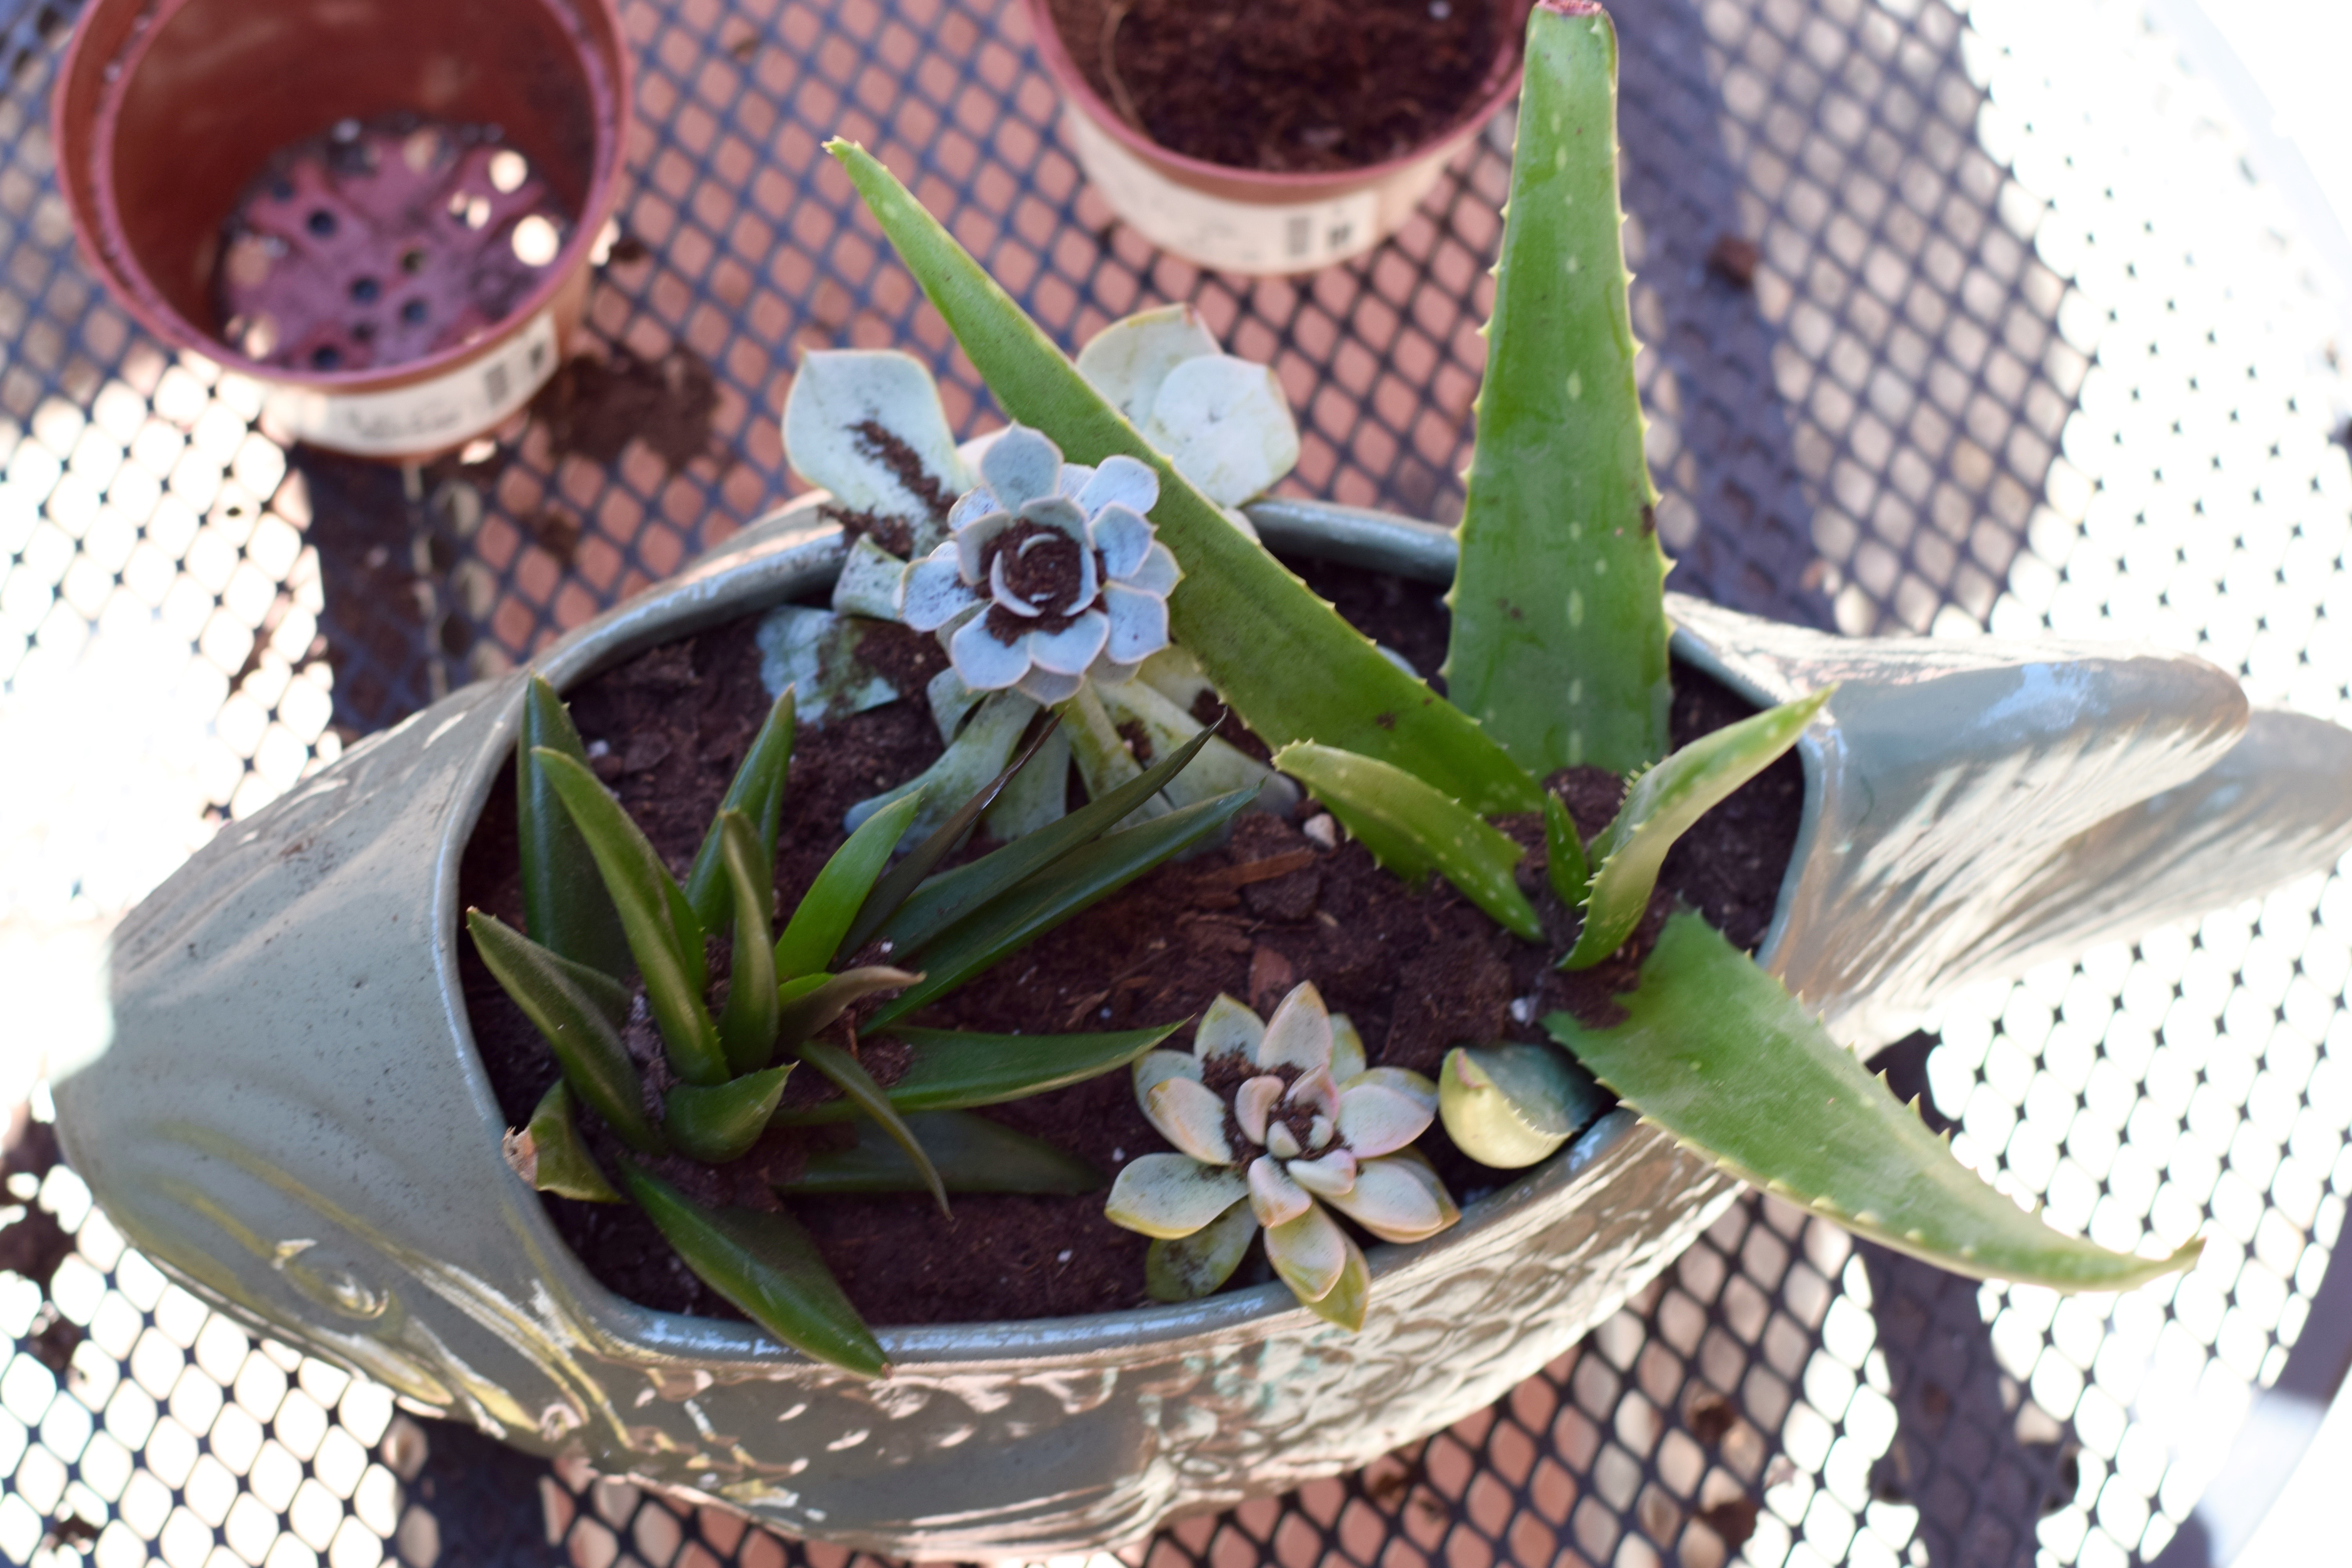
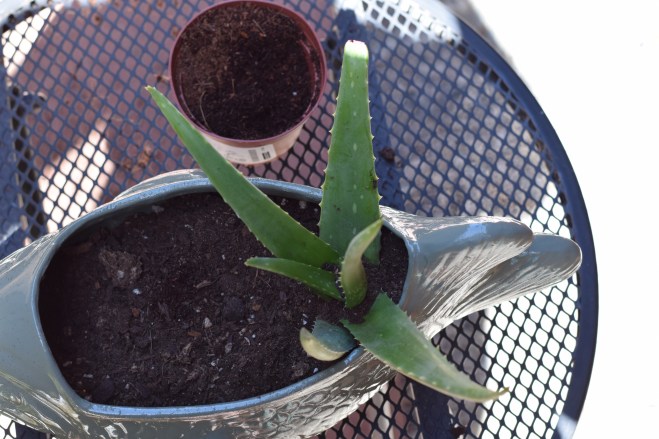
Now that it was finally time to plant (can you tell I am pretty much the least patient person in the world?!), I decided to start with the largest succulent first. I took the succulent and gently squeezed it out of it’s container. Then I crumbled off the dirt into my potting soil bag until I could see the roots. This one I can actually name. It’s Aloe Vera, friend to all who burn easily. Don’t you dare try breaking off some of this guy for your sunburn though!!

FirstSucculent

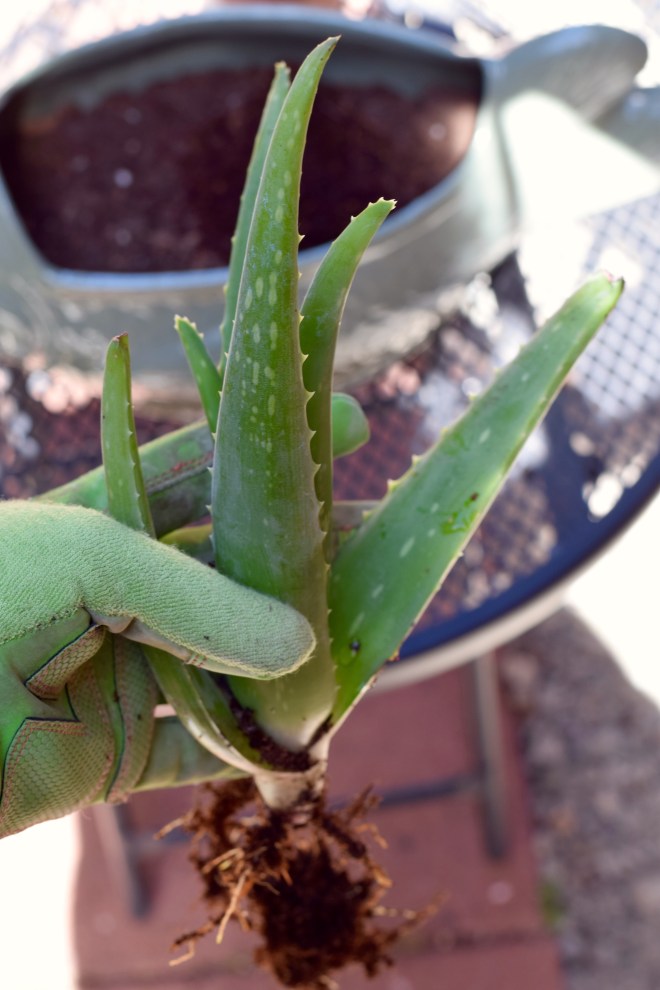
I was actually surprised that the root balls of these succulents were so small. It explained why they weren’t looking particularly fantastic. This taller one had been pretty flimsy in the plastic temporary pot. I’m assuming it wasn’t very healthy. Anyone know why succulents would do this?

Rootball

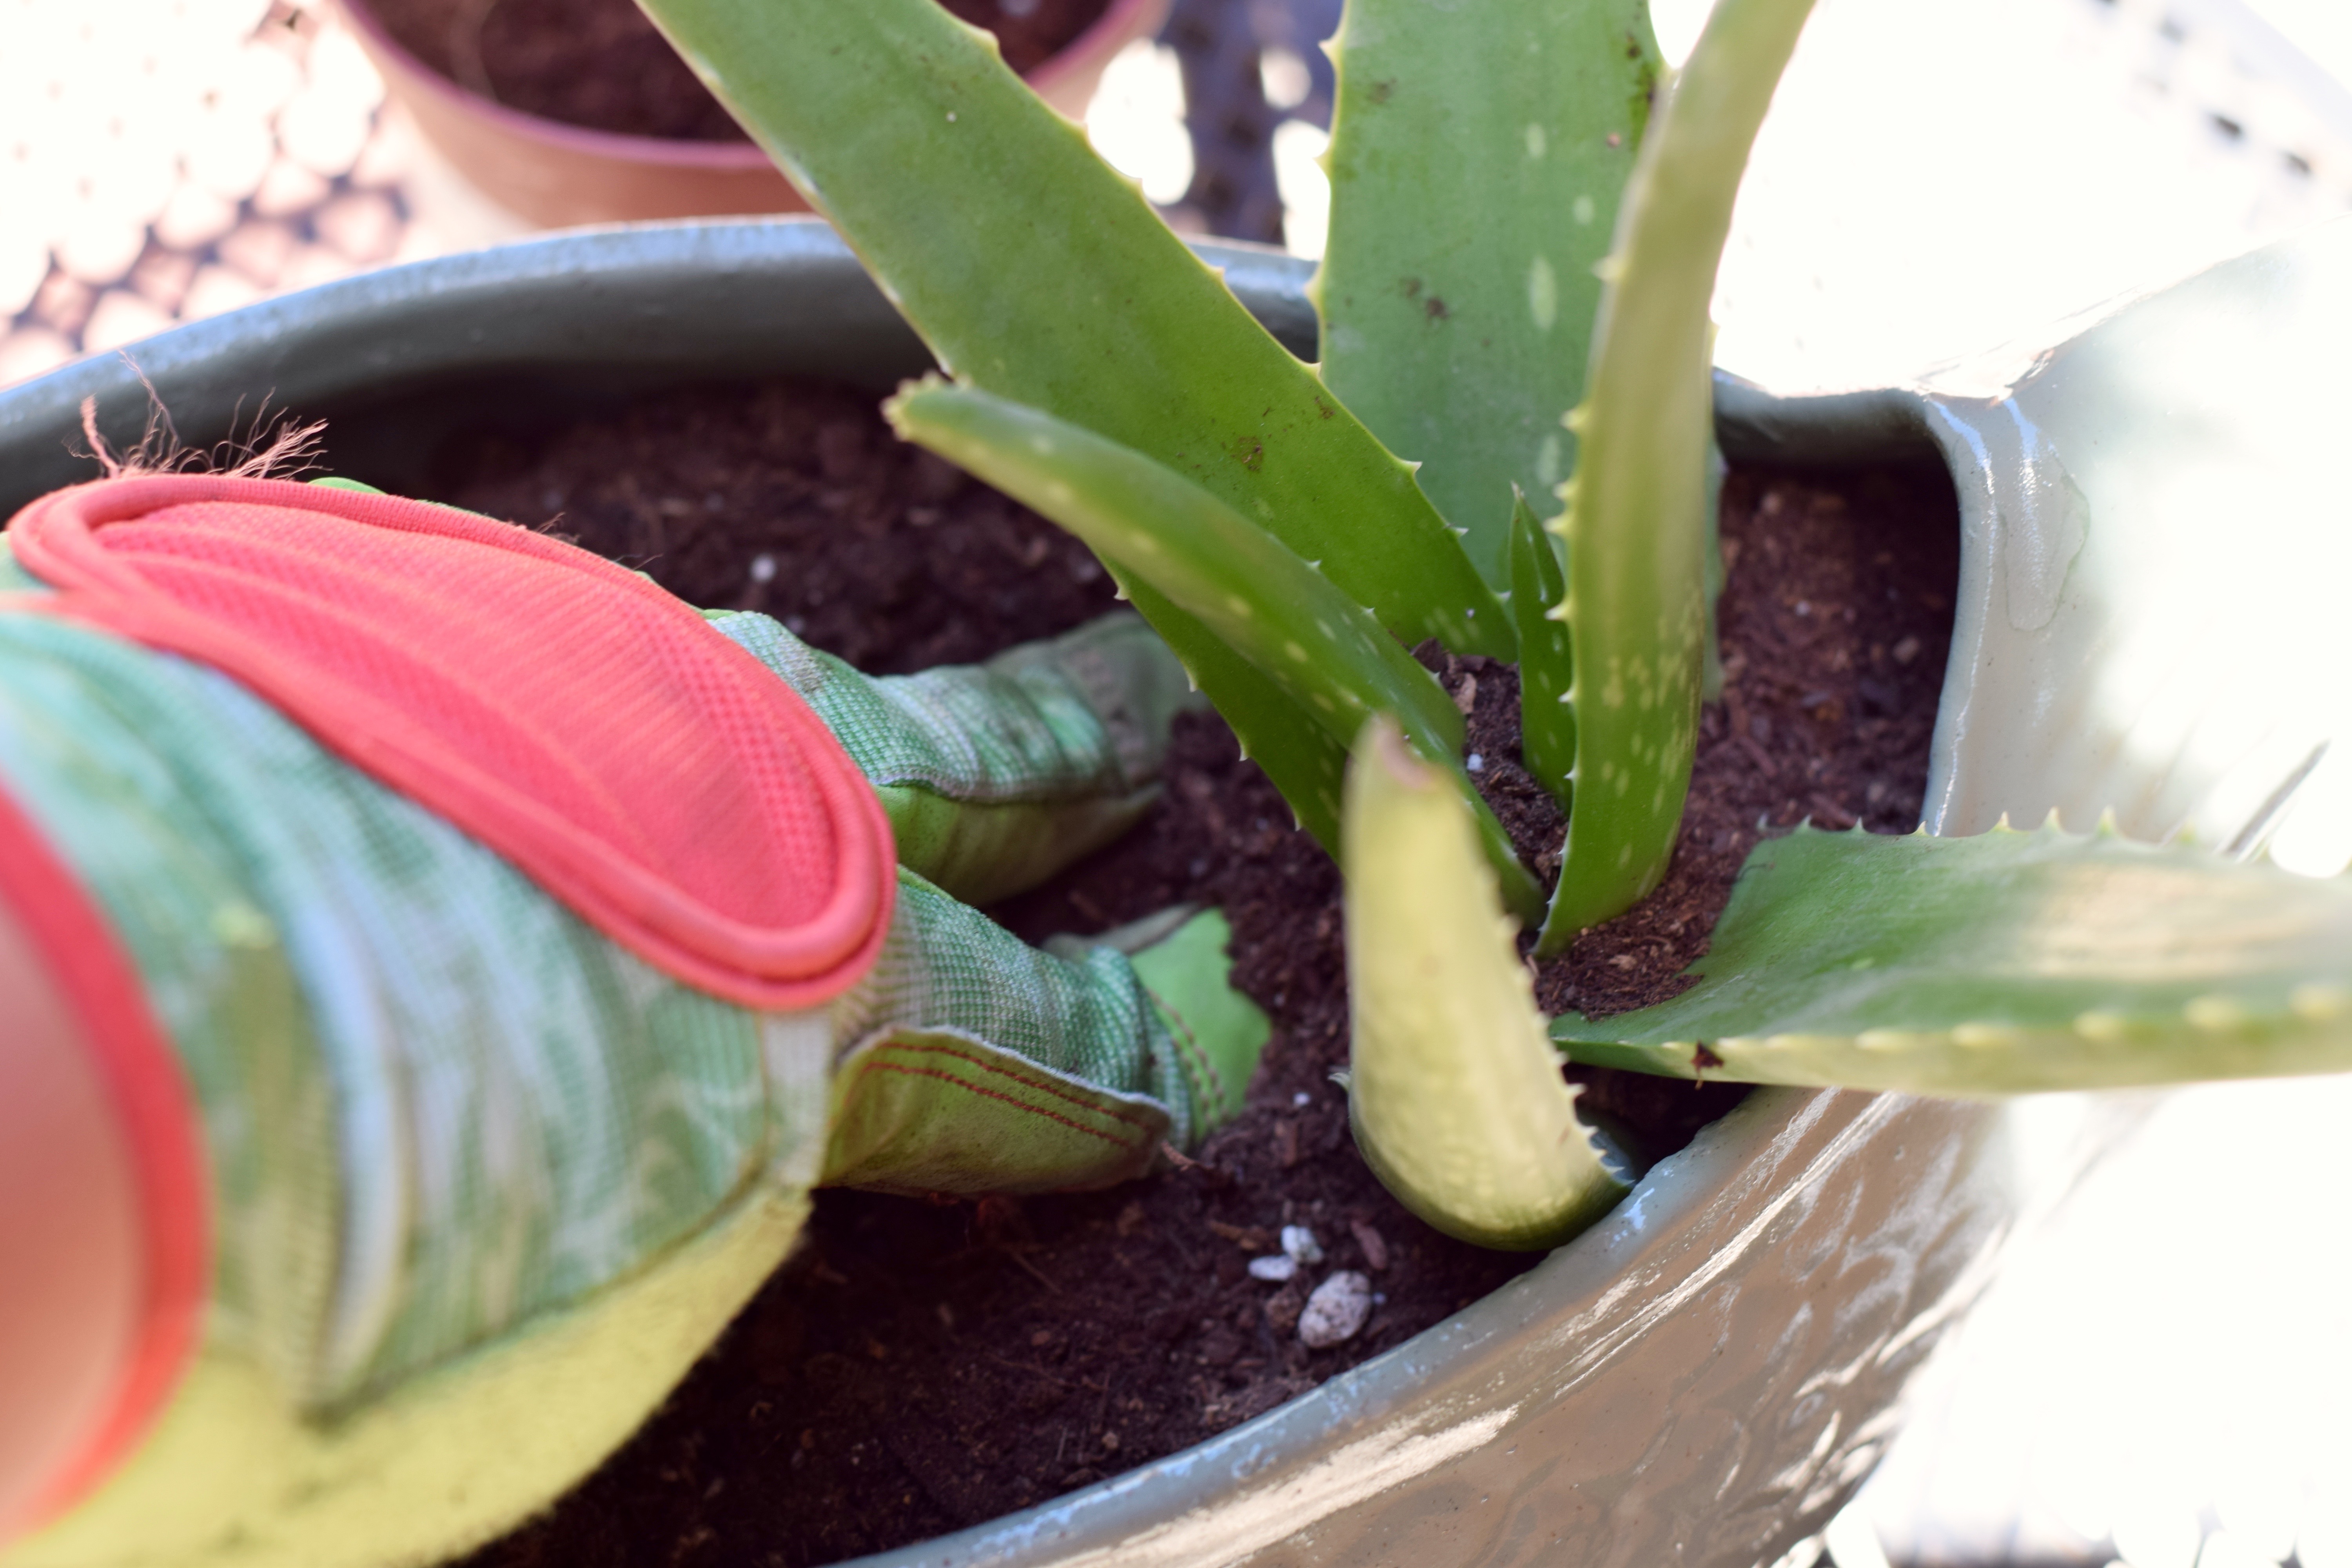
I placed the succulent into Fred’s basin, carefully spooning more dirt in around him, and gently pressing it down around the succulent with two fingers.

Planting Aloe Vera

At this point, there was too much soil in between the arms of the aloe vera. I later scooped most of it it out with a finger. Fred was pretty cool with the Aloe sticky out of his lower back. This is totally a new look. I’m going to make something similar out of cardboard for myself and copy that trendsetter!

DSC_0490

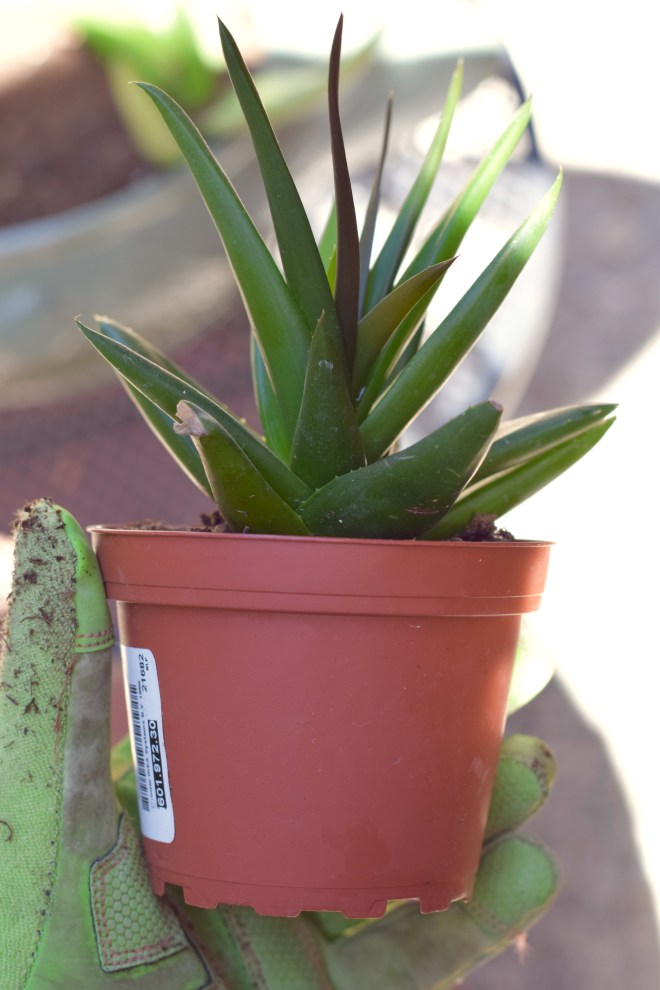
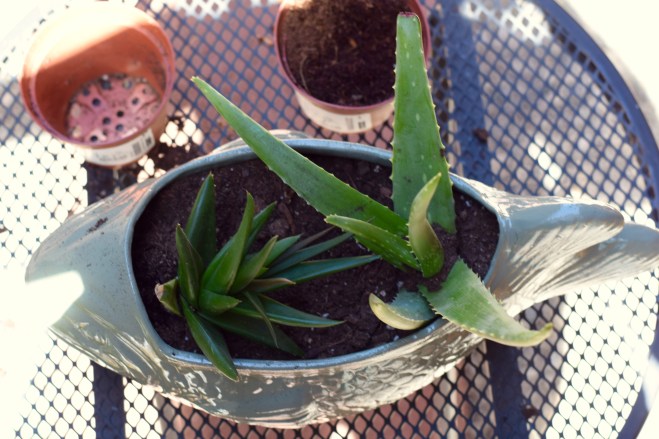
The next guy was also spiky like the aloe plant, but shorter. I decided this prickly little lady needed to stand opposite her taller friend.

PricklyLittleLady

Two plants in, Fred the Fish was looking good!! Gah! It makes me so joyous! I’m such a plant nerd.

two in Fred

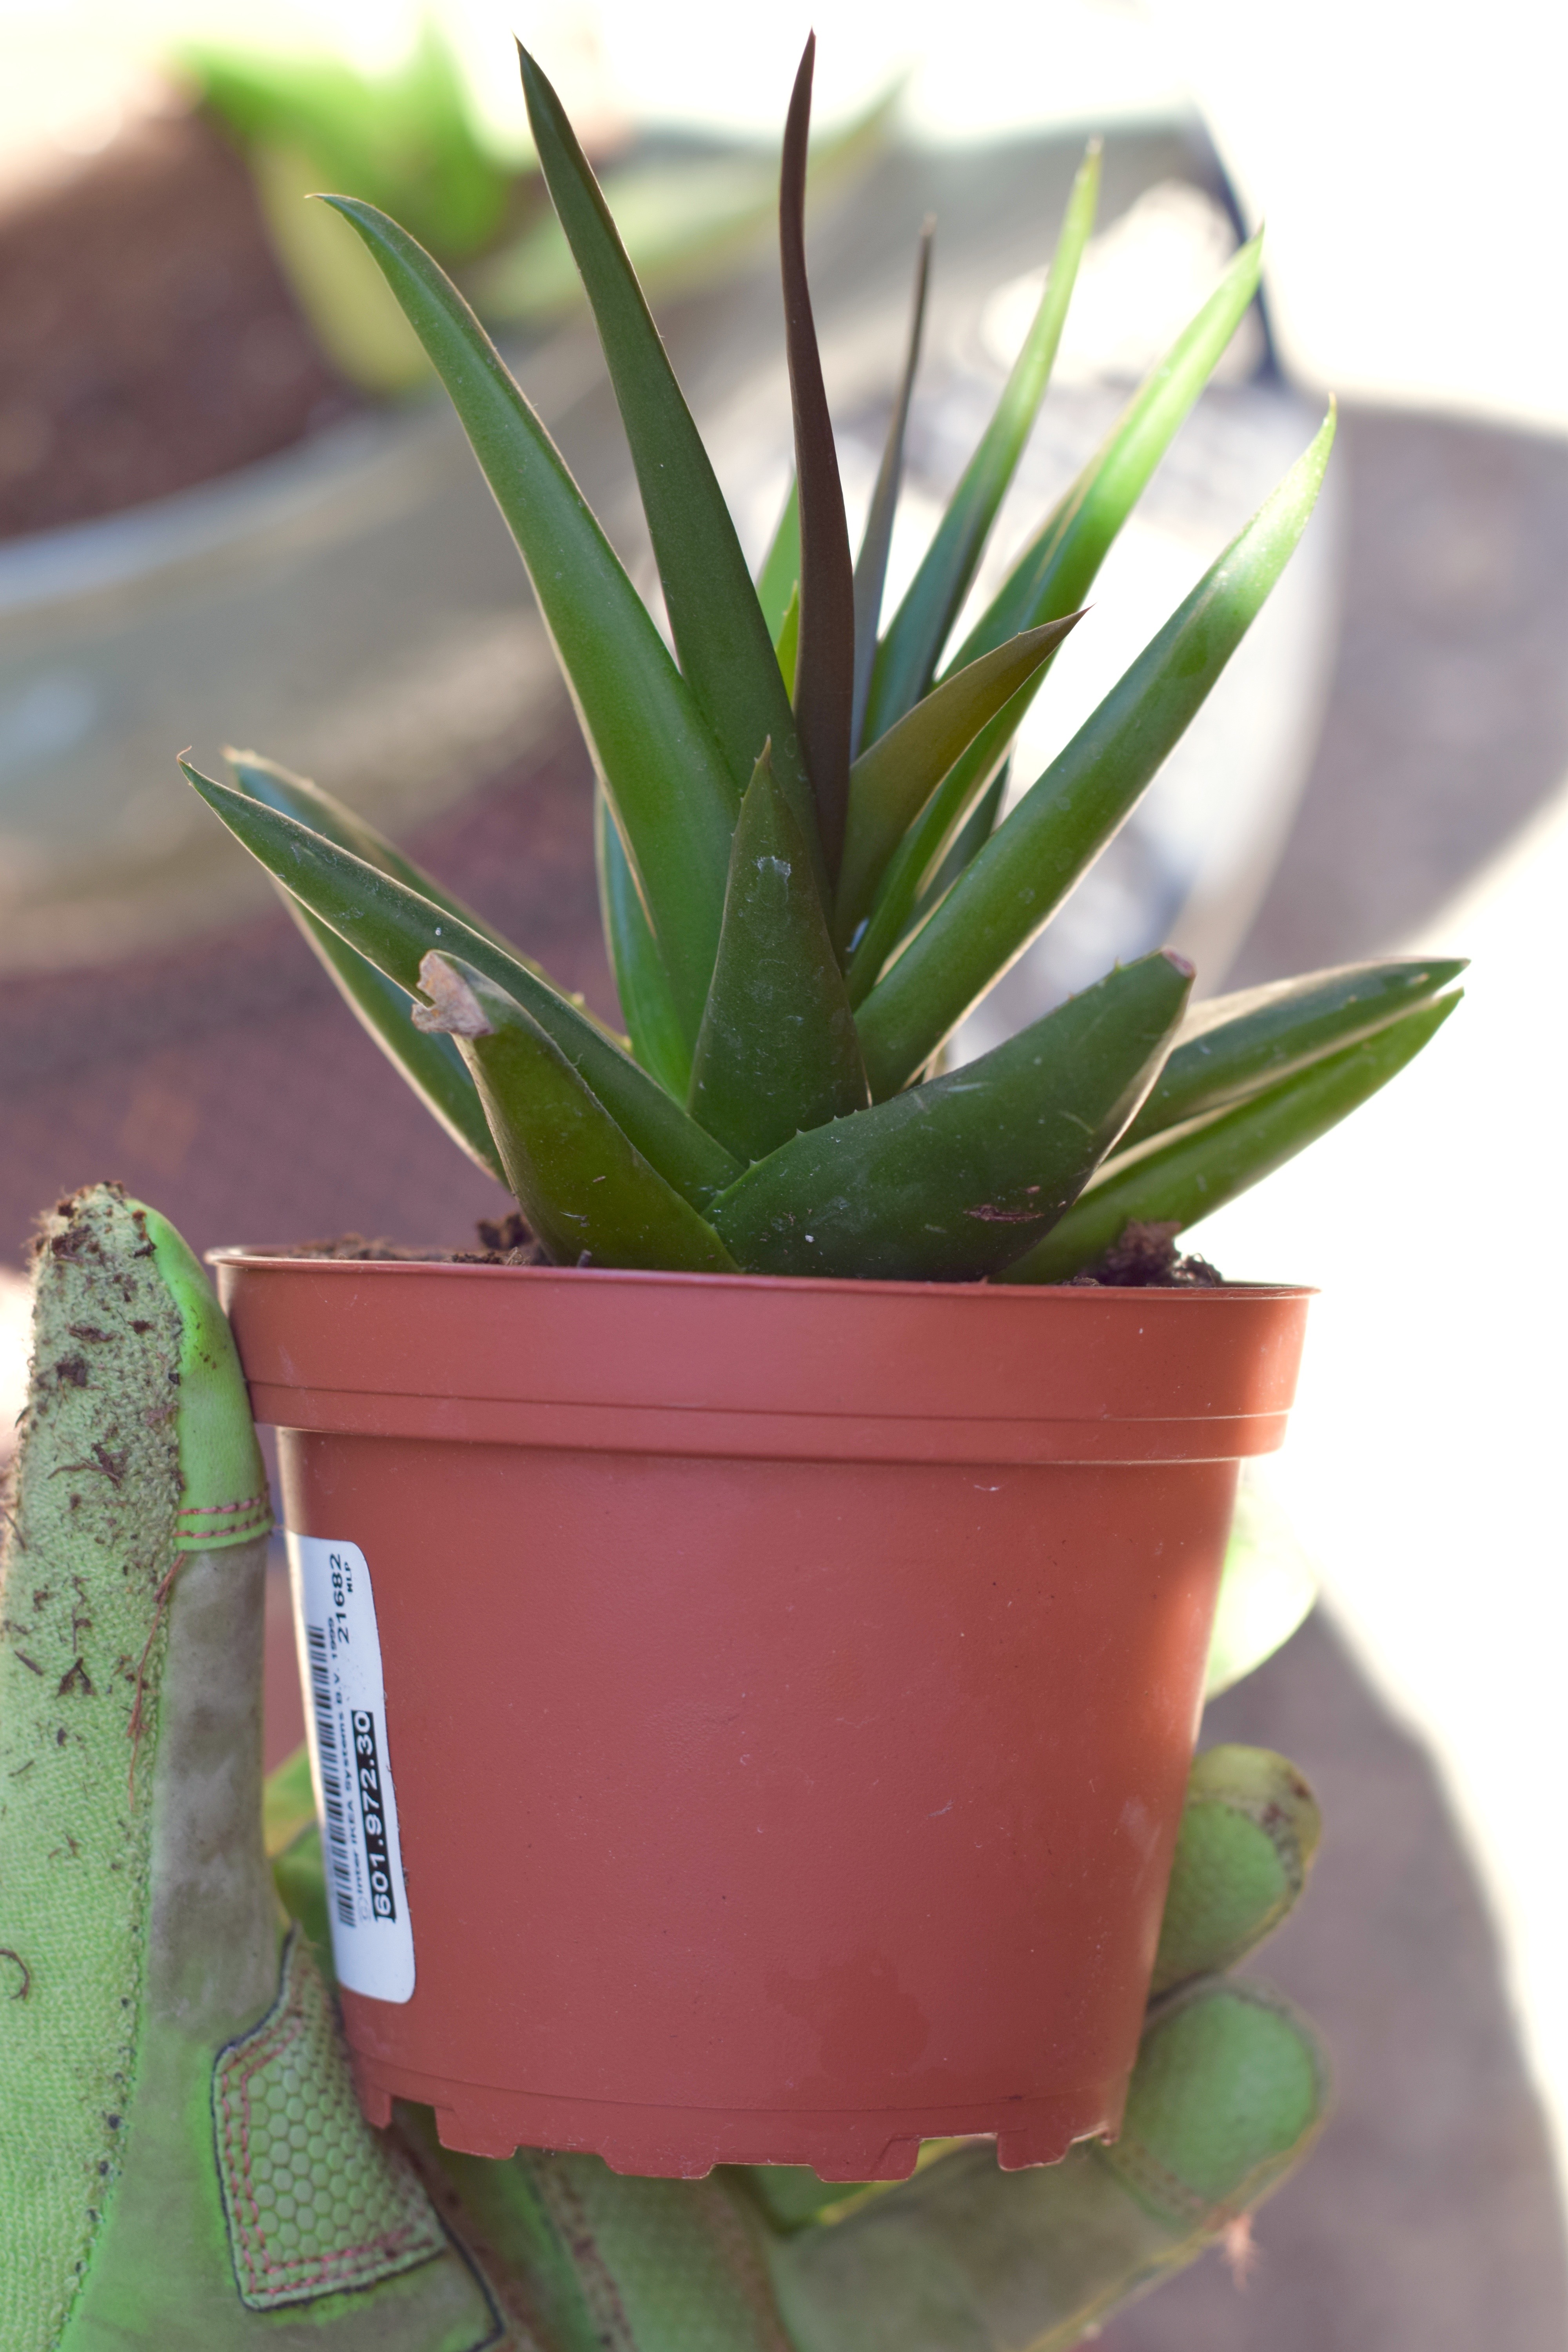
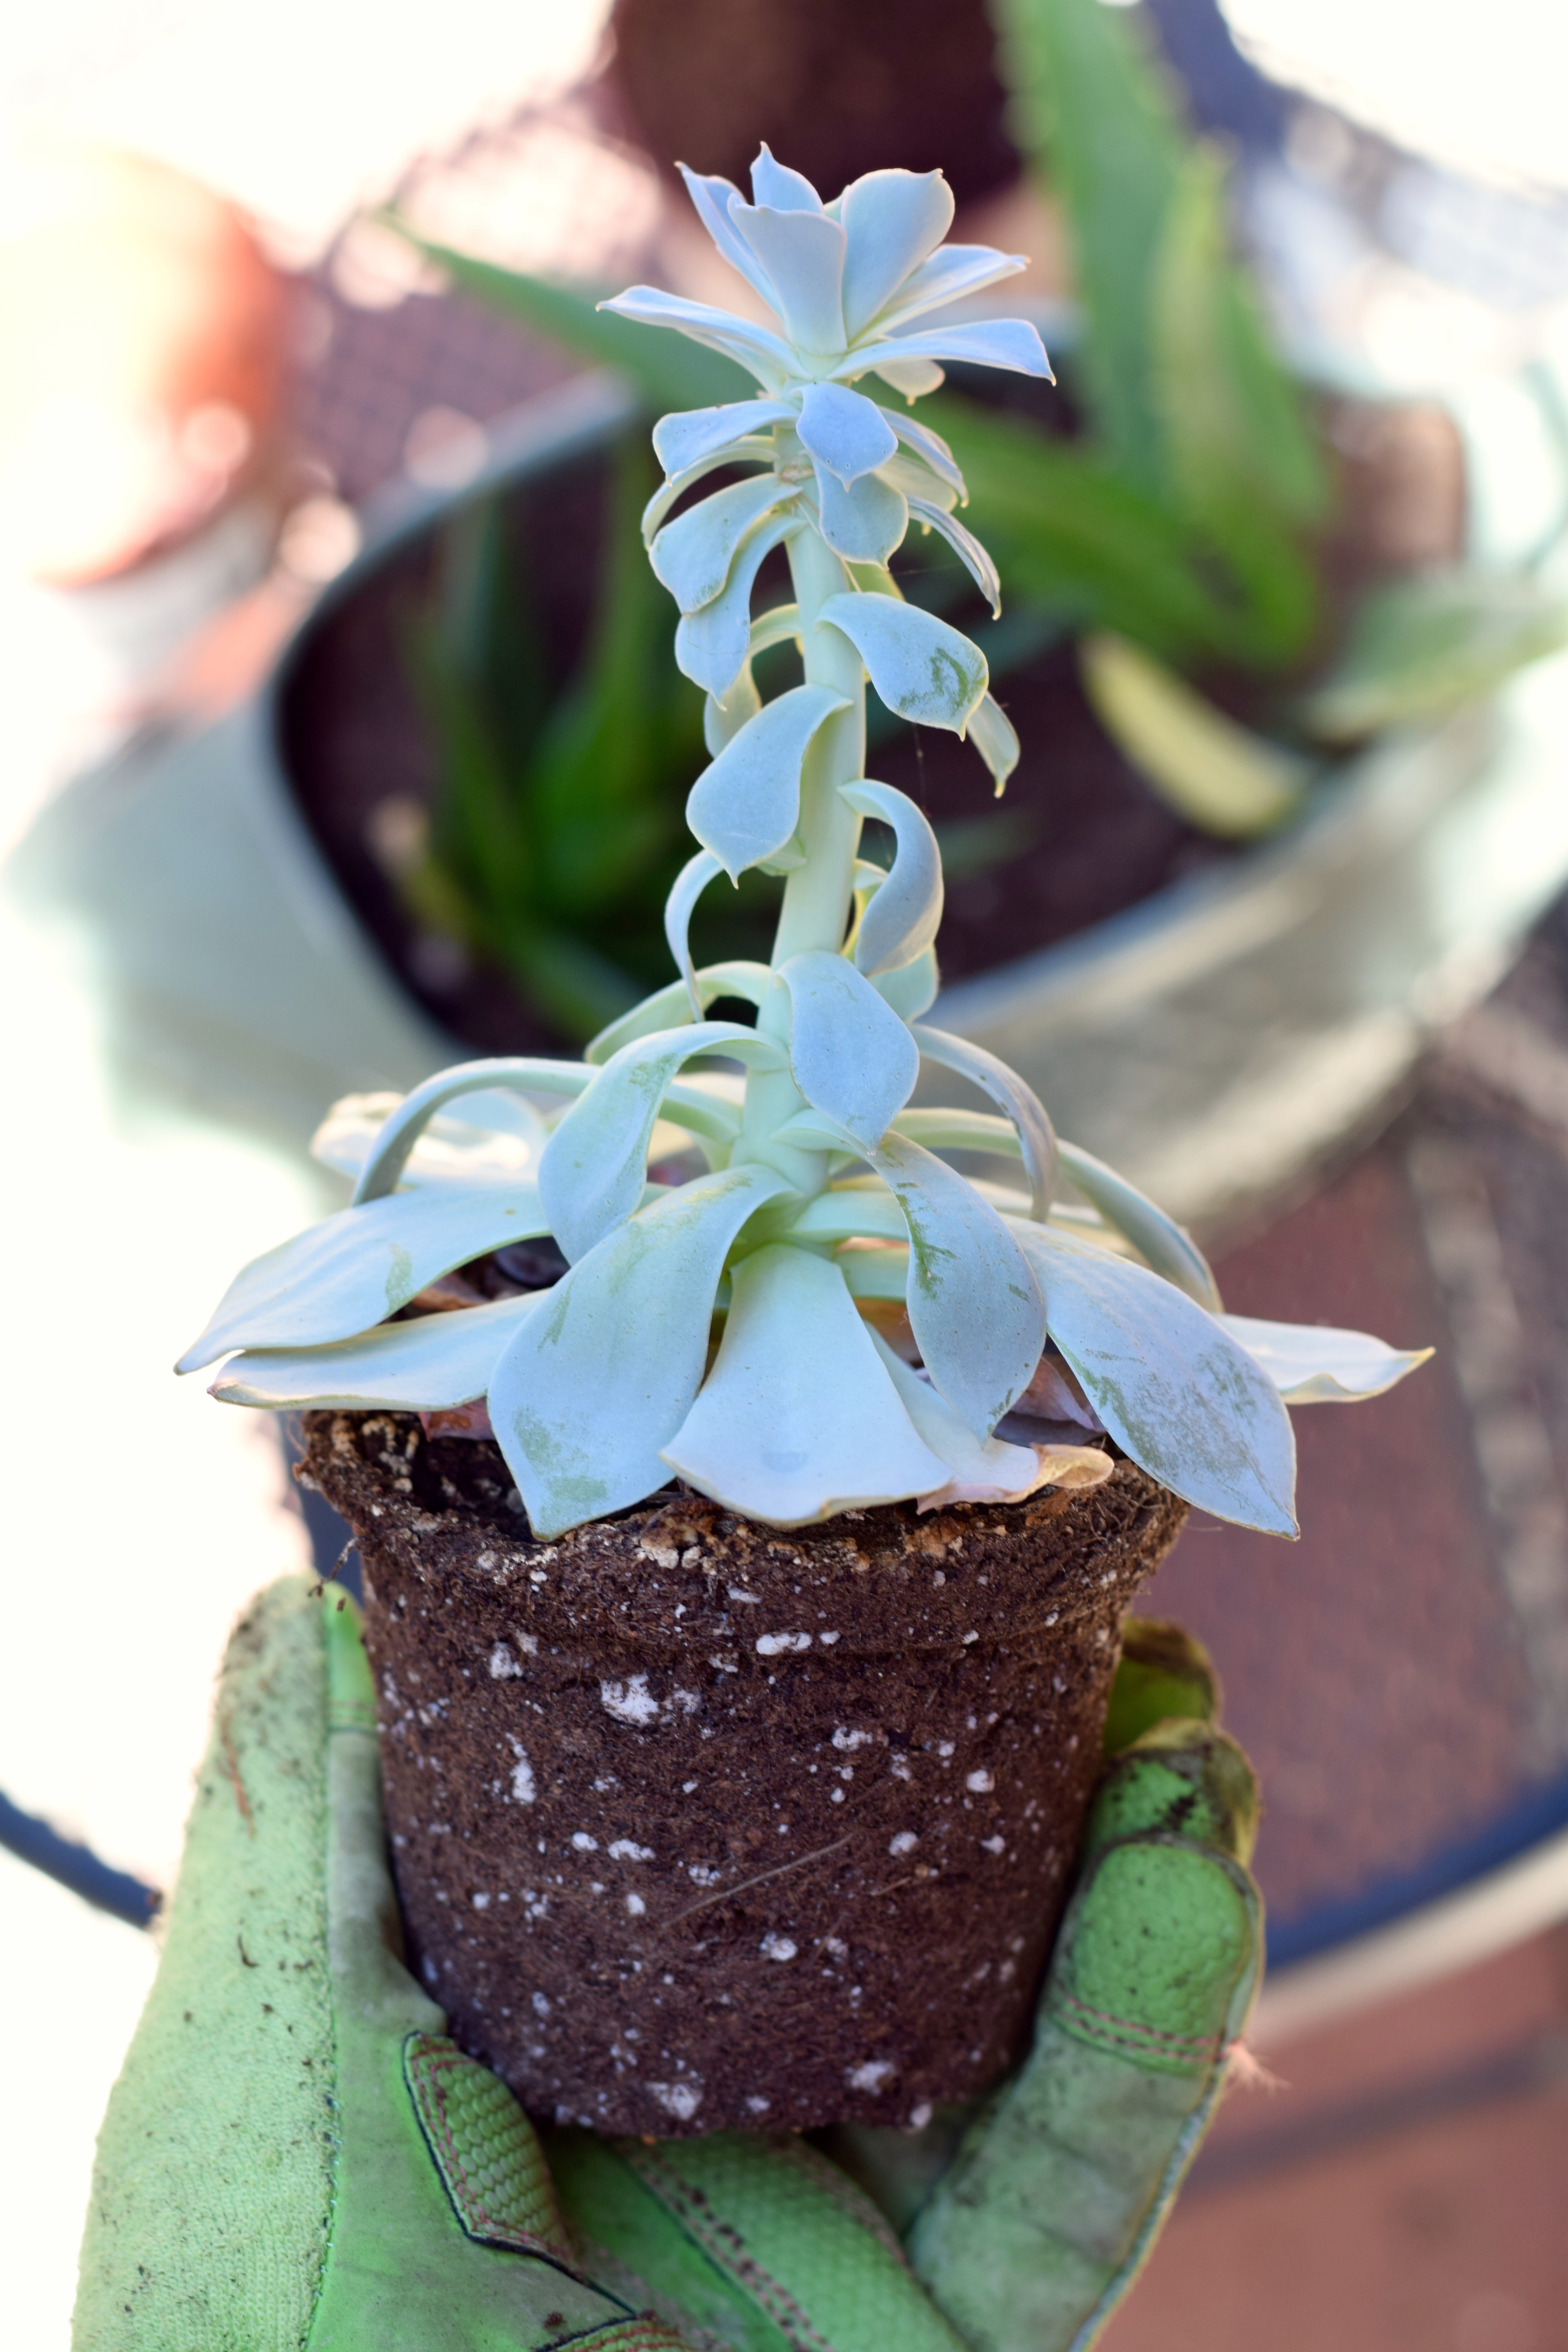
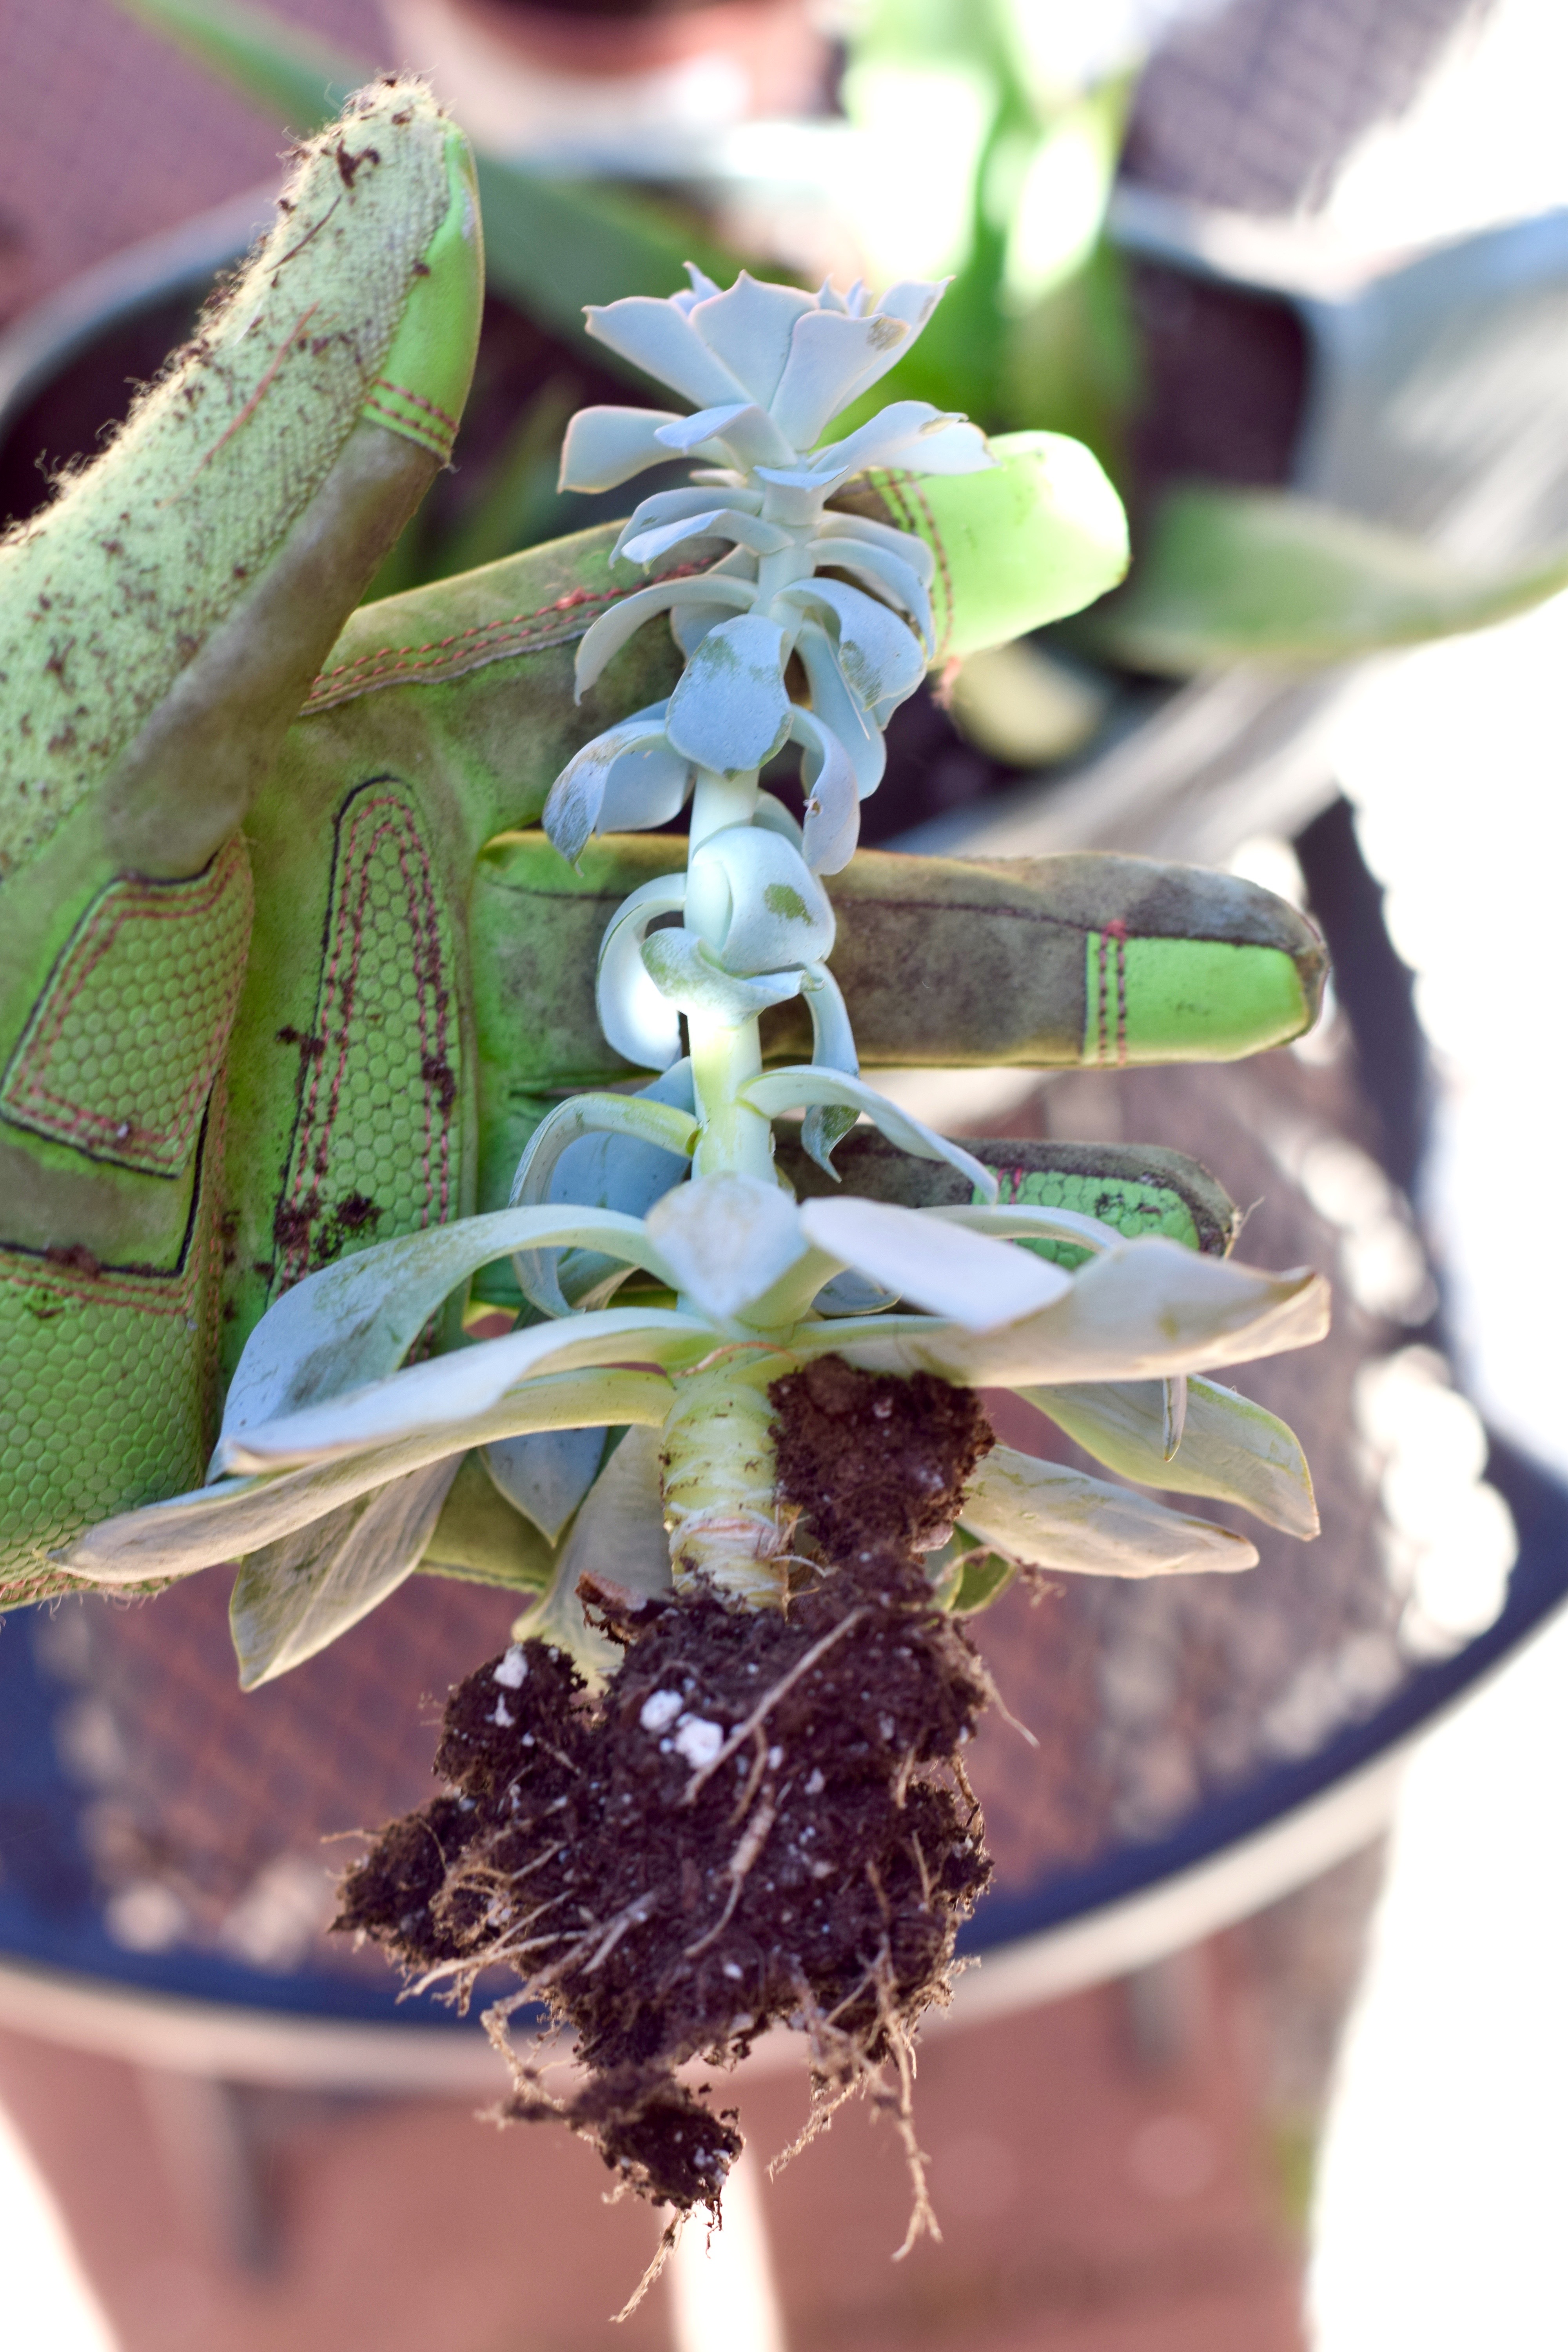
The next plant — another succulent about whose name I have not clue– started out really short, but several months in my bathroom later, had grown into a long skinny thing. I’m assuming this was due to the lack of natural light in my bathroom? Maybe they are supposed to look this way… Who is good with plants out there??

SuccyTwo

Its rootball looked a bit bigger though! Thank goodness.

SuccyTwoRoots

Still not great though right? This is the one that looks the worst these days. I mean, it certainly doesn’t look bad, but when I get my Sherlock Holmes on and look a little closer, I notice some not so nice spots. Survive little succulent! Survive!!! I can only hope and pray…

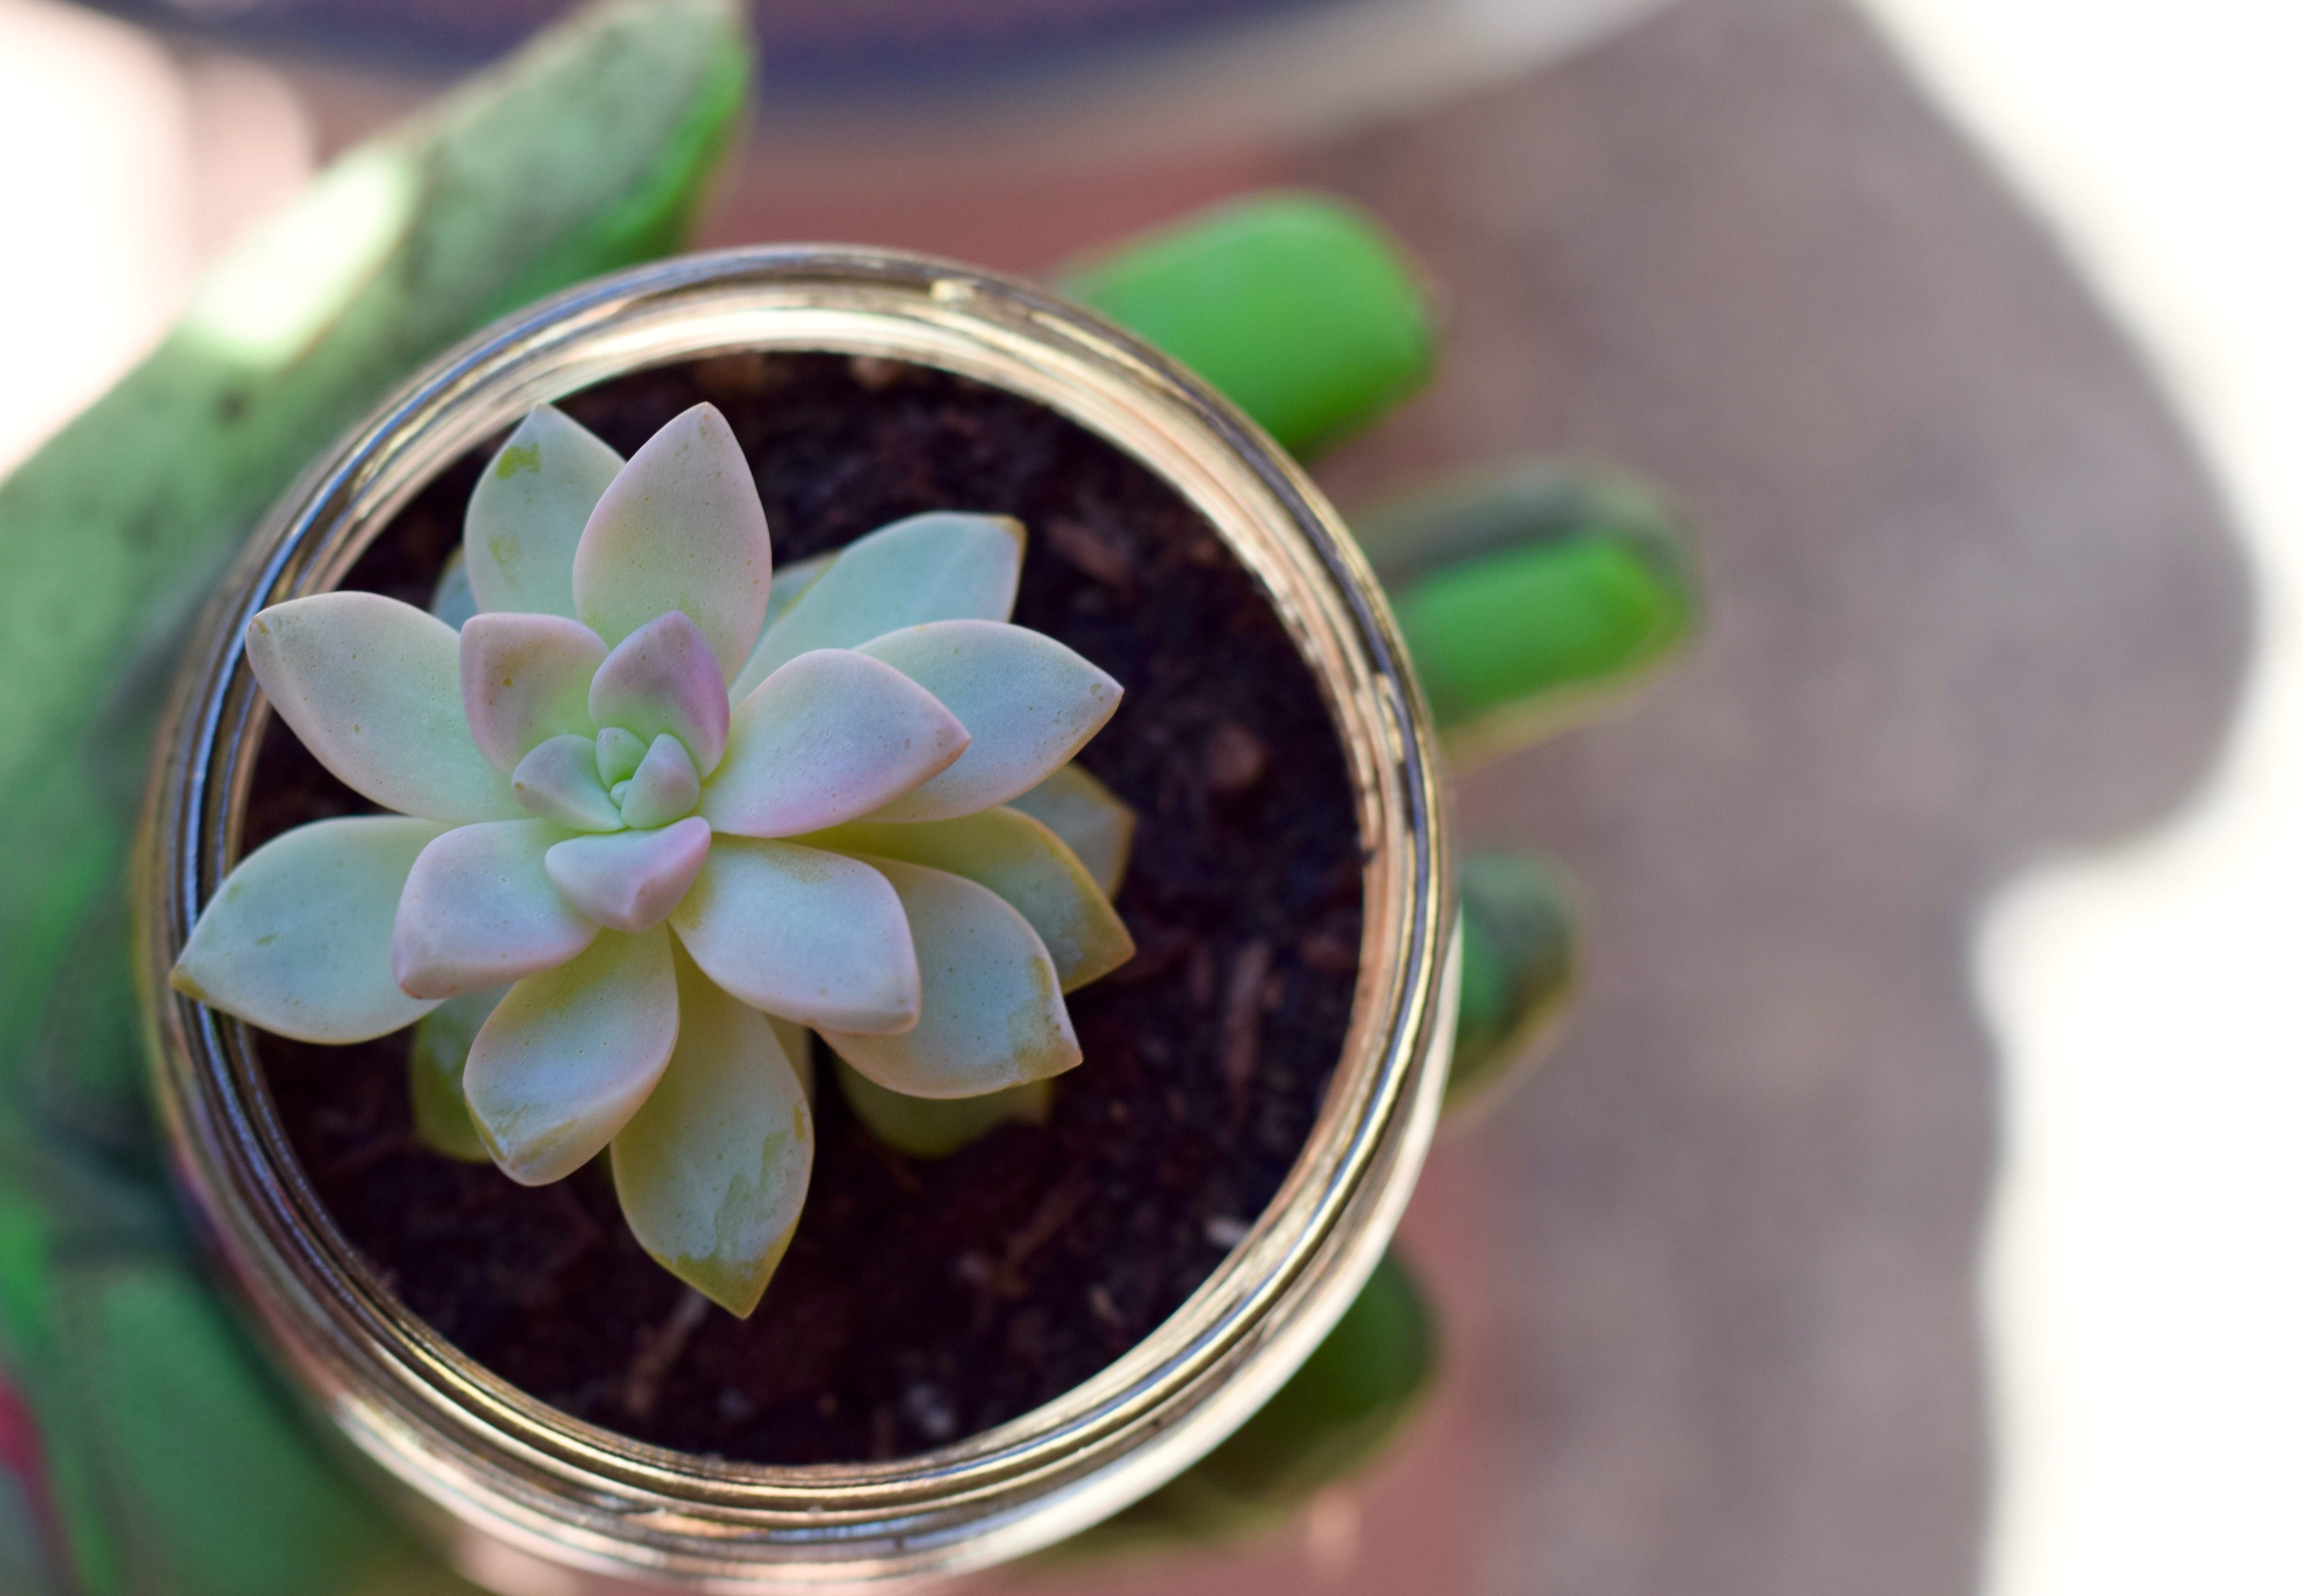
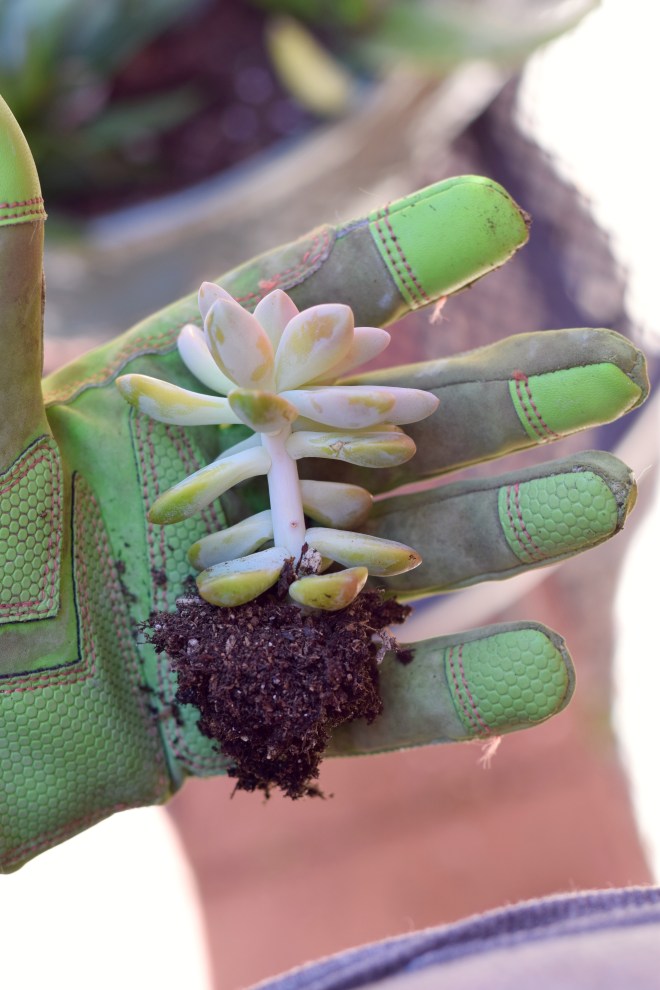
Finally, the last succulent was one I’d actually saved from the driveway. We have hens & chicks (the plants not the animals) lining our driveway and every now and then they get a little beat up. This one I saw sitting out there on the concrete all by his lonesome self. He must have come off the larger plant when it got brushed with a car wheel or something. I planted him, with the help of my good friend Hannah, into this salsa jar someone brought to our housewarming party.

DSC_0510

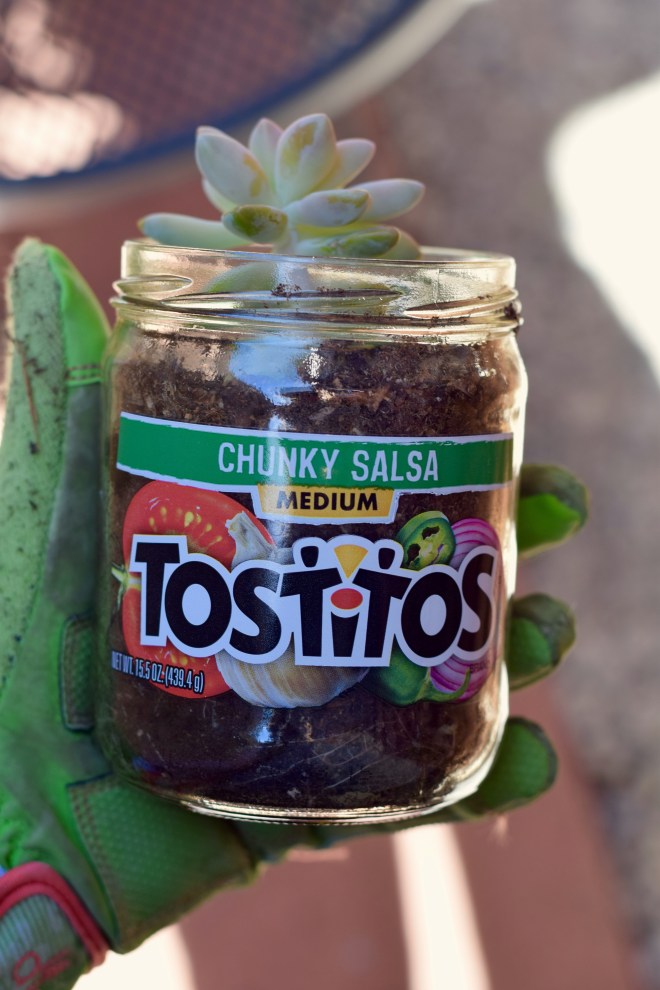
He sat in my kitchen window for the next couple of months, getting lots of sun. This guy was the smallest by far, but definitely healthier than the IKEA ones. He epitomized small but mighty!

smallbutmighty

And look at that root ball!! Such a baller! Hahahaha. At least I make myself laugh. 🙂

Baller

After I planted this fourth guy, Fred was pretty full. I topped the Mr. Fish off with more potting soil, again pressing gently, but firmly down around each succulents. Fred was looking good, guys! A little dirty due to the planting, but getting there!

Fredwith4Succulents

You can totally tell how super bright it was the day I planted everybody in Fred. I think it was about 90 degrees that weekend. Yay September in California! To clean things up, I gave Fred a good dowsing with water lovingly admired him glistening in the sun like a new mother looking at her tiny babe before bringing him inside.

Wet Fred

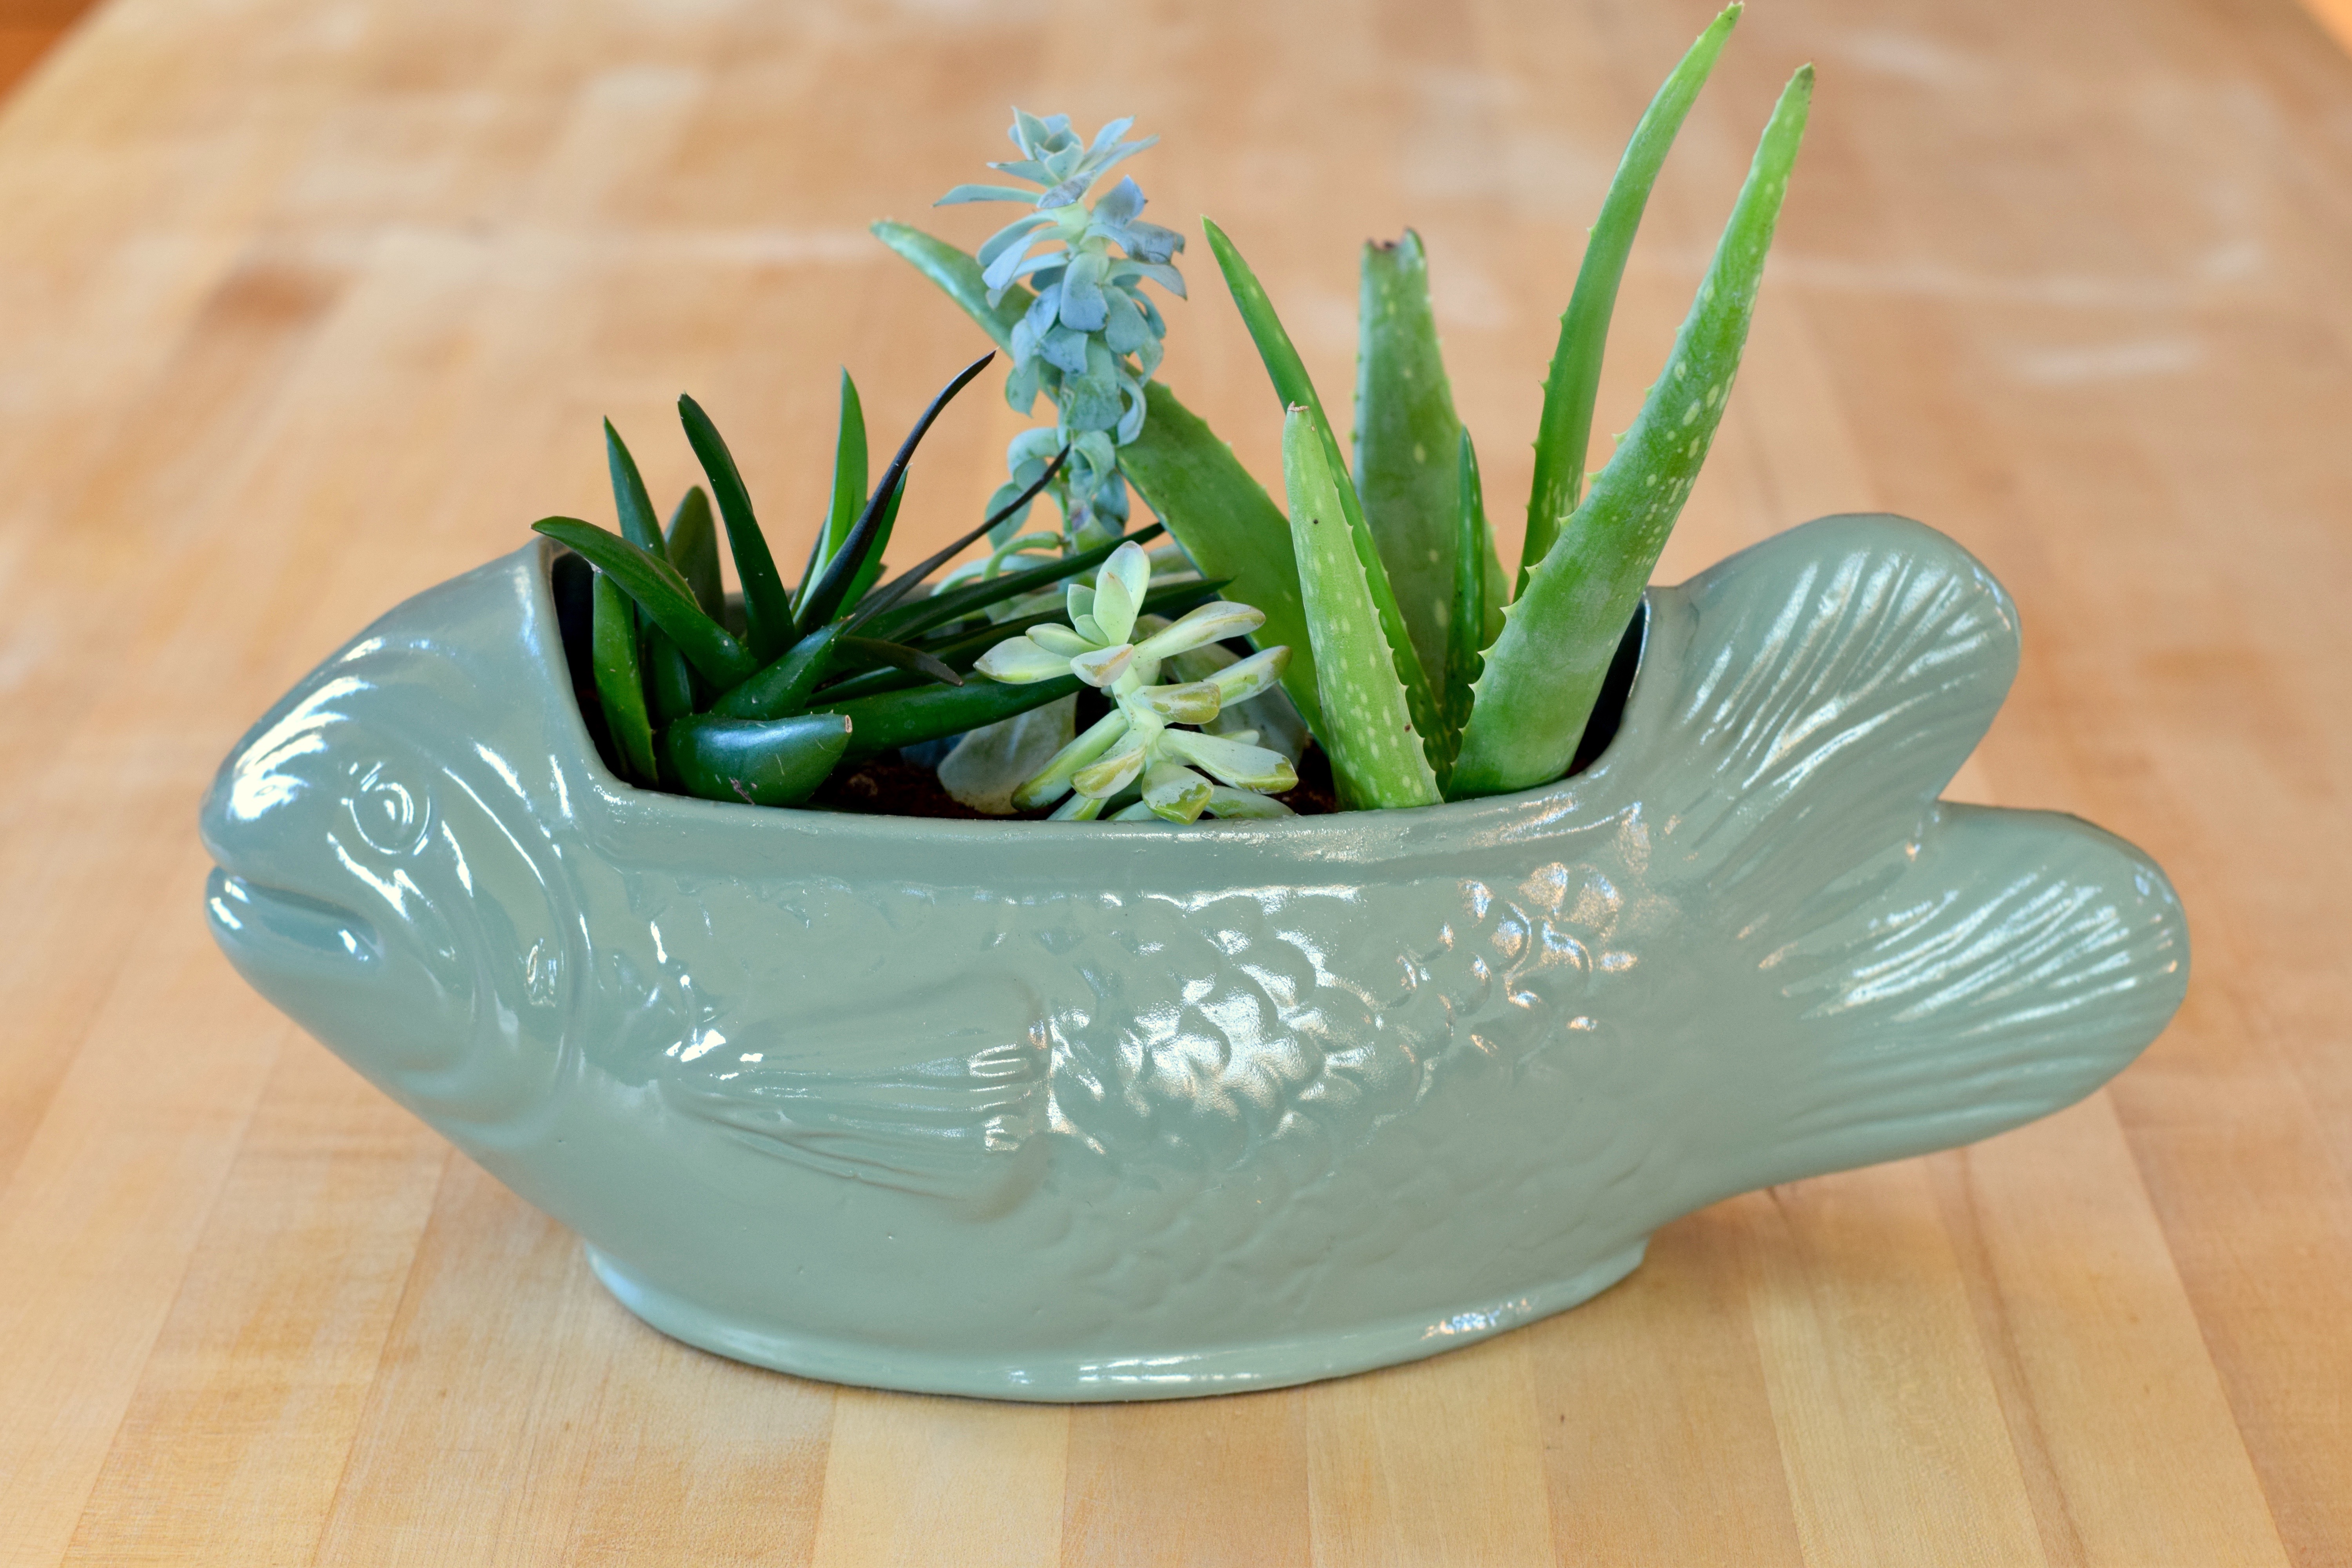
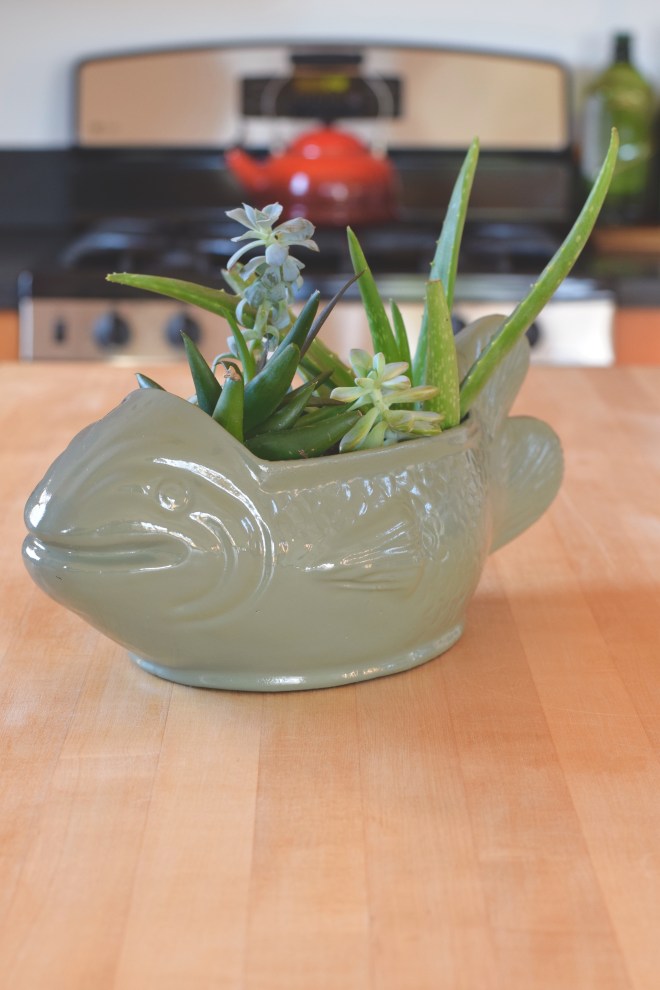
I brought Fred the Fish inside and let him sit in the kitchen for a couple weeks before I took the rest of these pictures. I wanted the succulents to get a chance to root and root they did! They look so good! Fred the Fish looks fantastic! I am so not biased at all. I just love how he looks in the kitchen!

FredFinished

Remember what he looked like before?!

FredCleanedUp

And look at him now! The green is such a nice color. It’s really the perfect sage-y grey-green. It looks fantastic with the butcher block on our island. Such a nice change from the brown!

FredFromtheSide

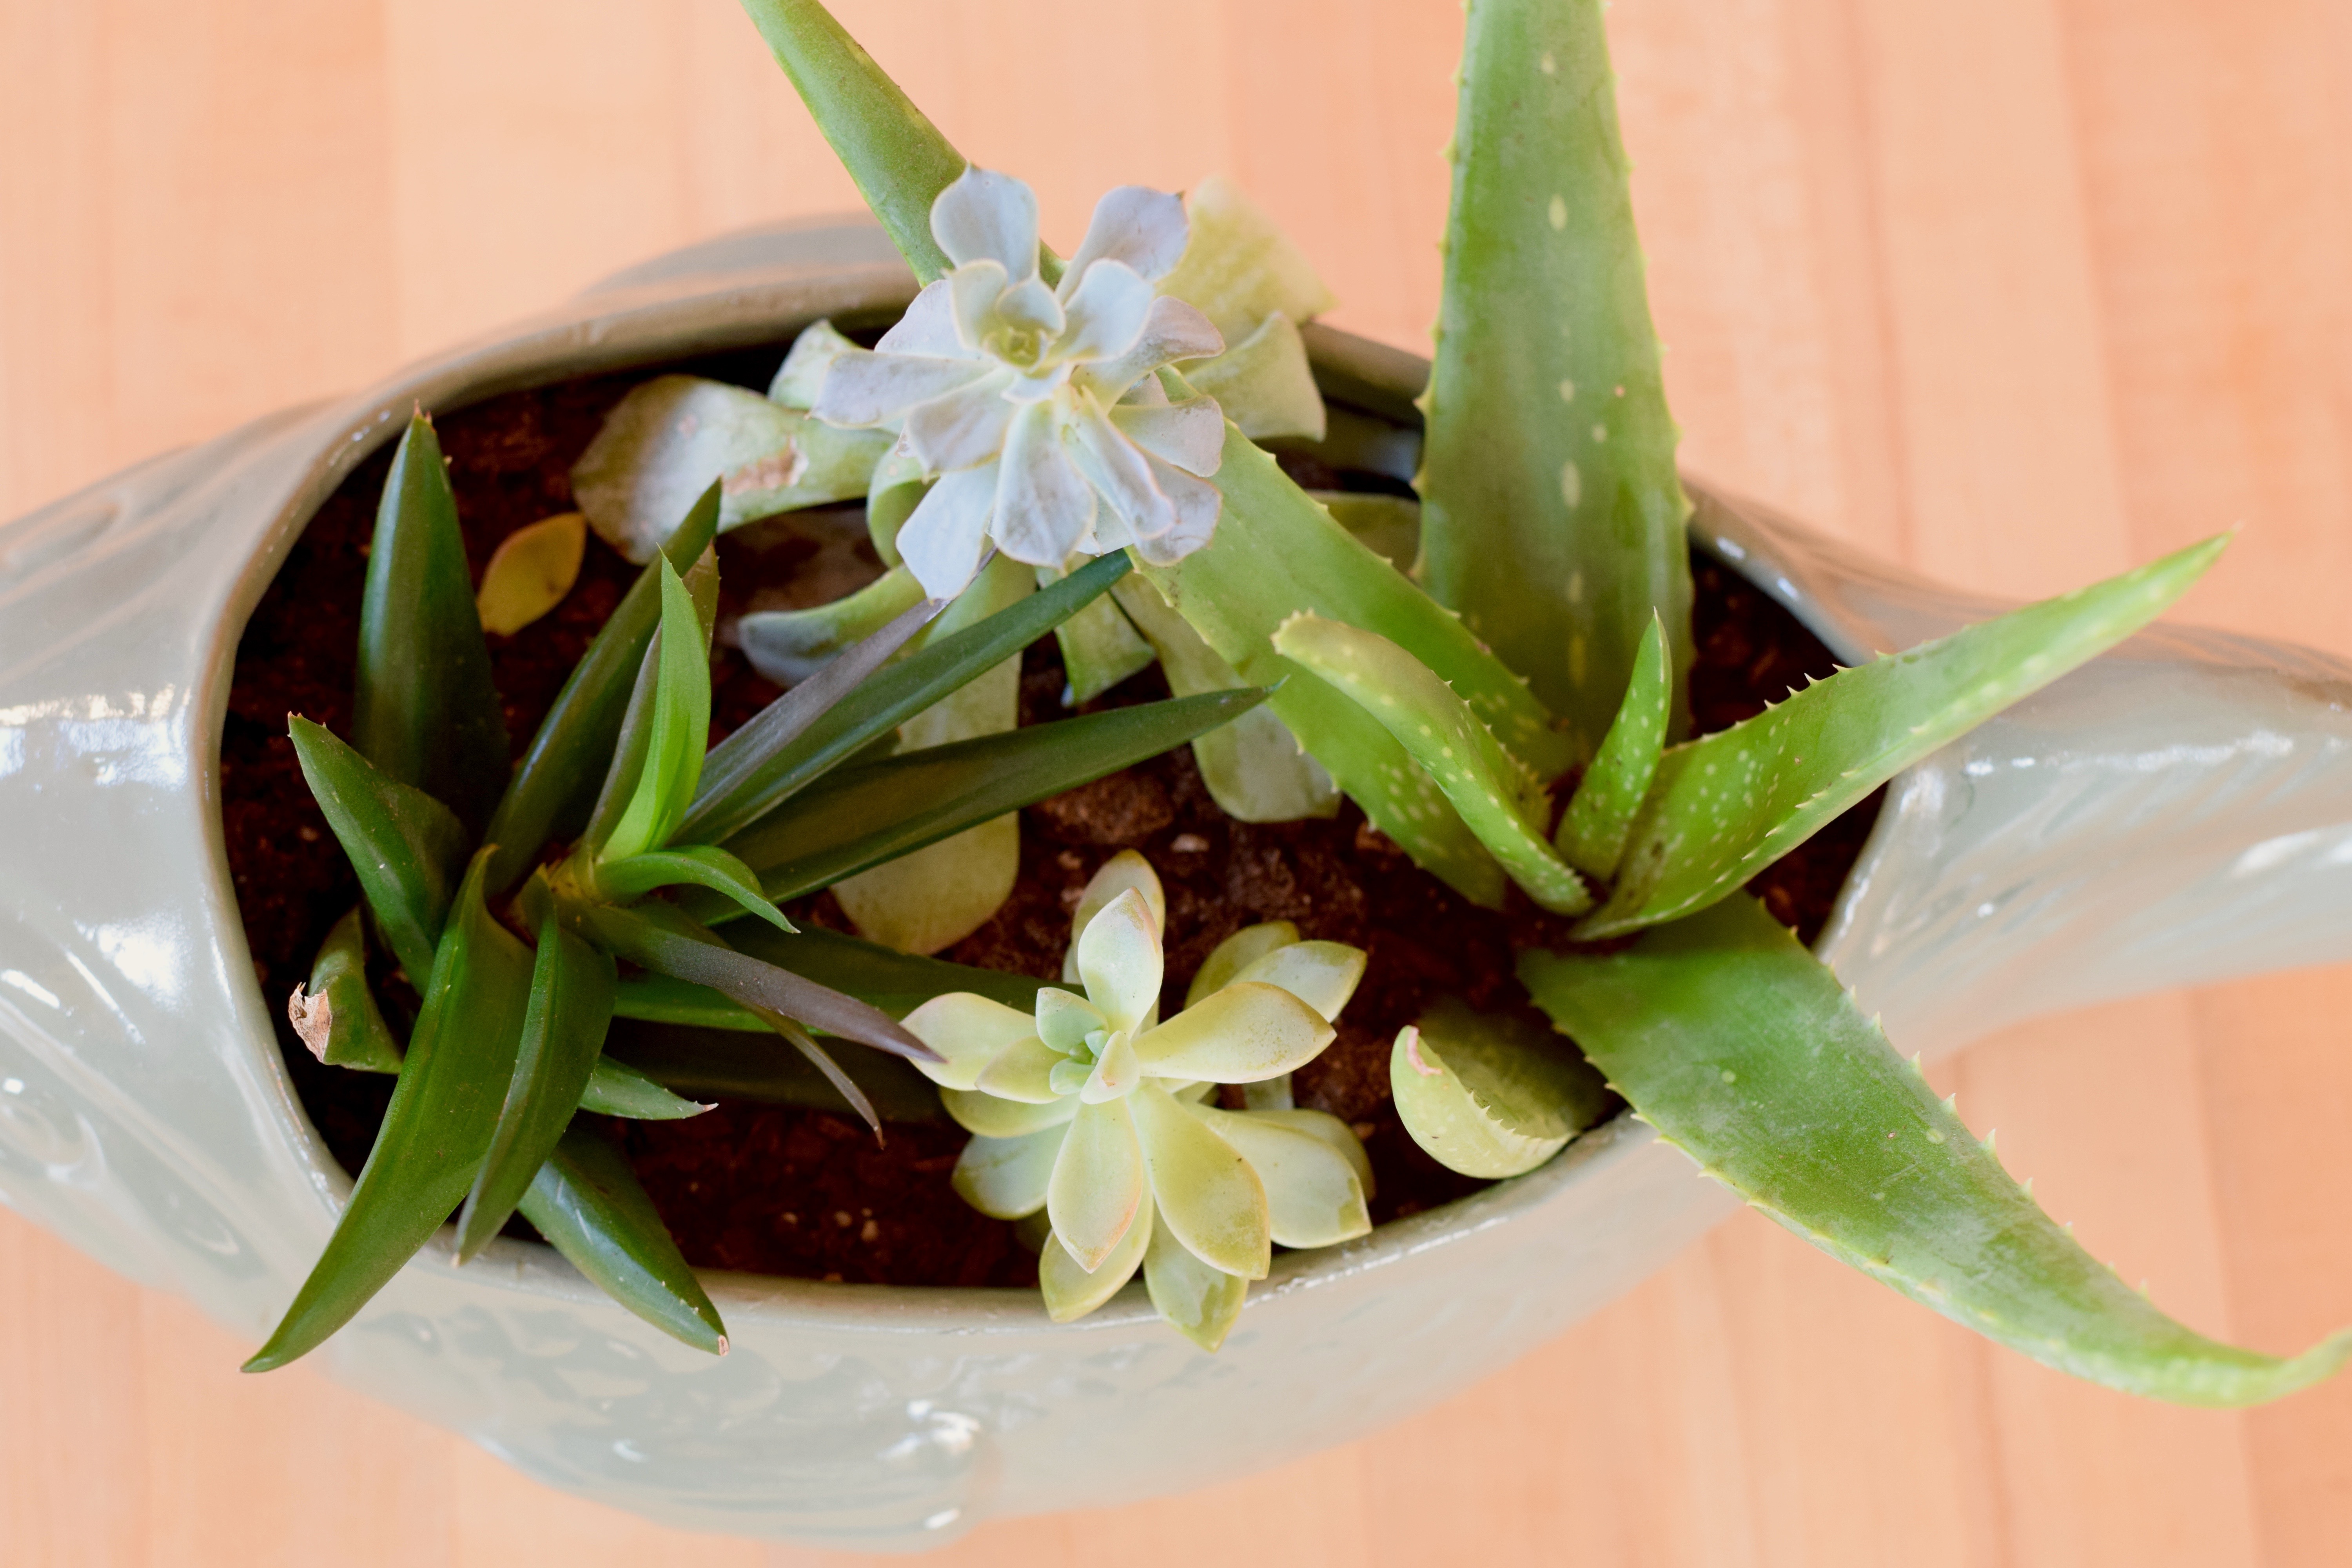
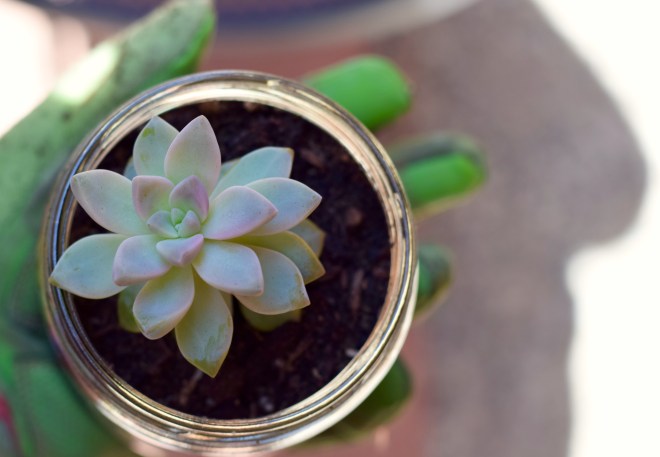
From above the succulents are just shining! They have rooted more firmly and no longer give when I tug on them gently. I hope they grow out a bit. I’d love to have time pooling over the side just a little bit more. Luckily the shapes of the succulents and their varying sizes gives a lot of texture. They aren’t falling over the edges, but the definitely stick out over them from above!

DSC_0270

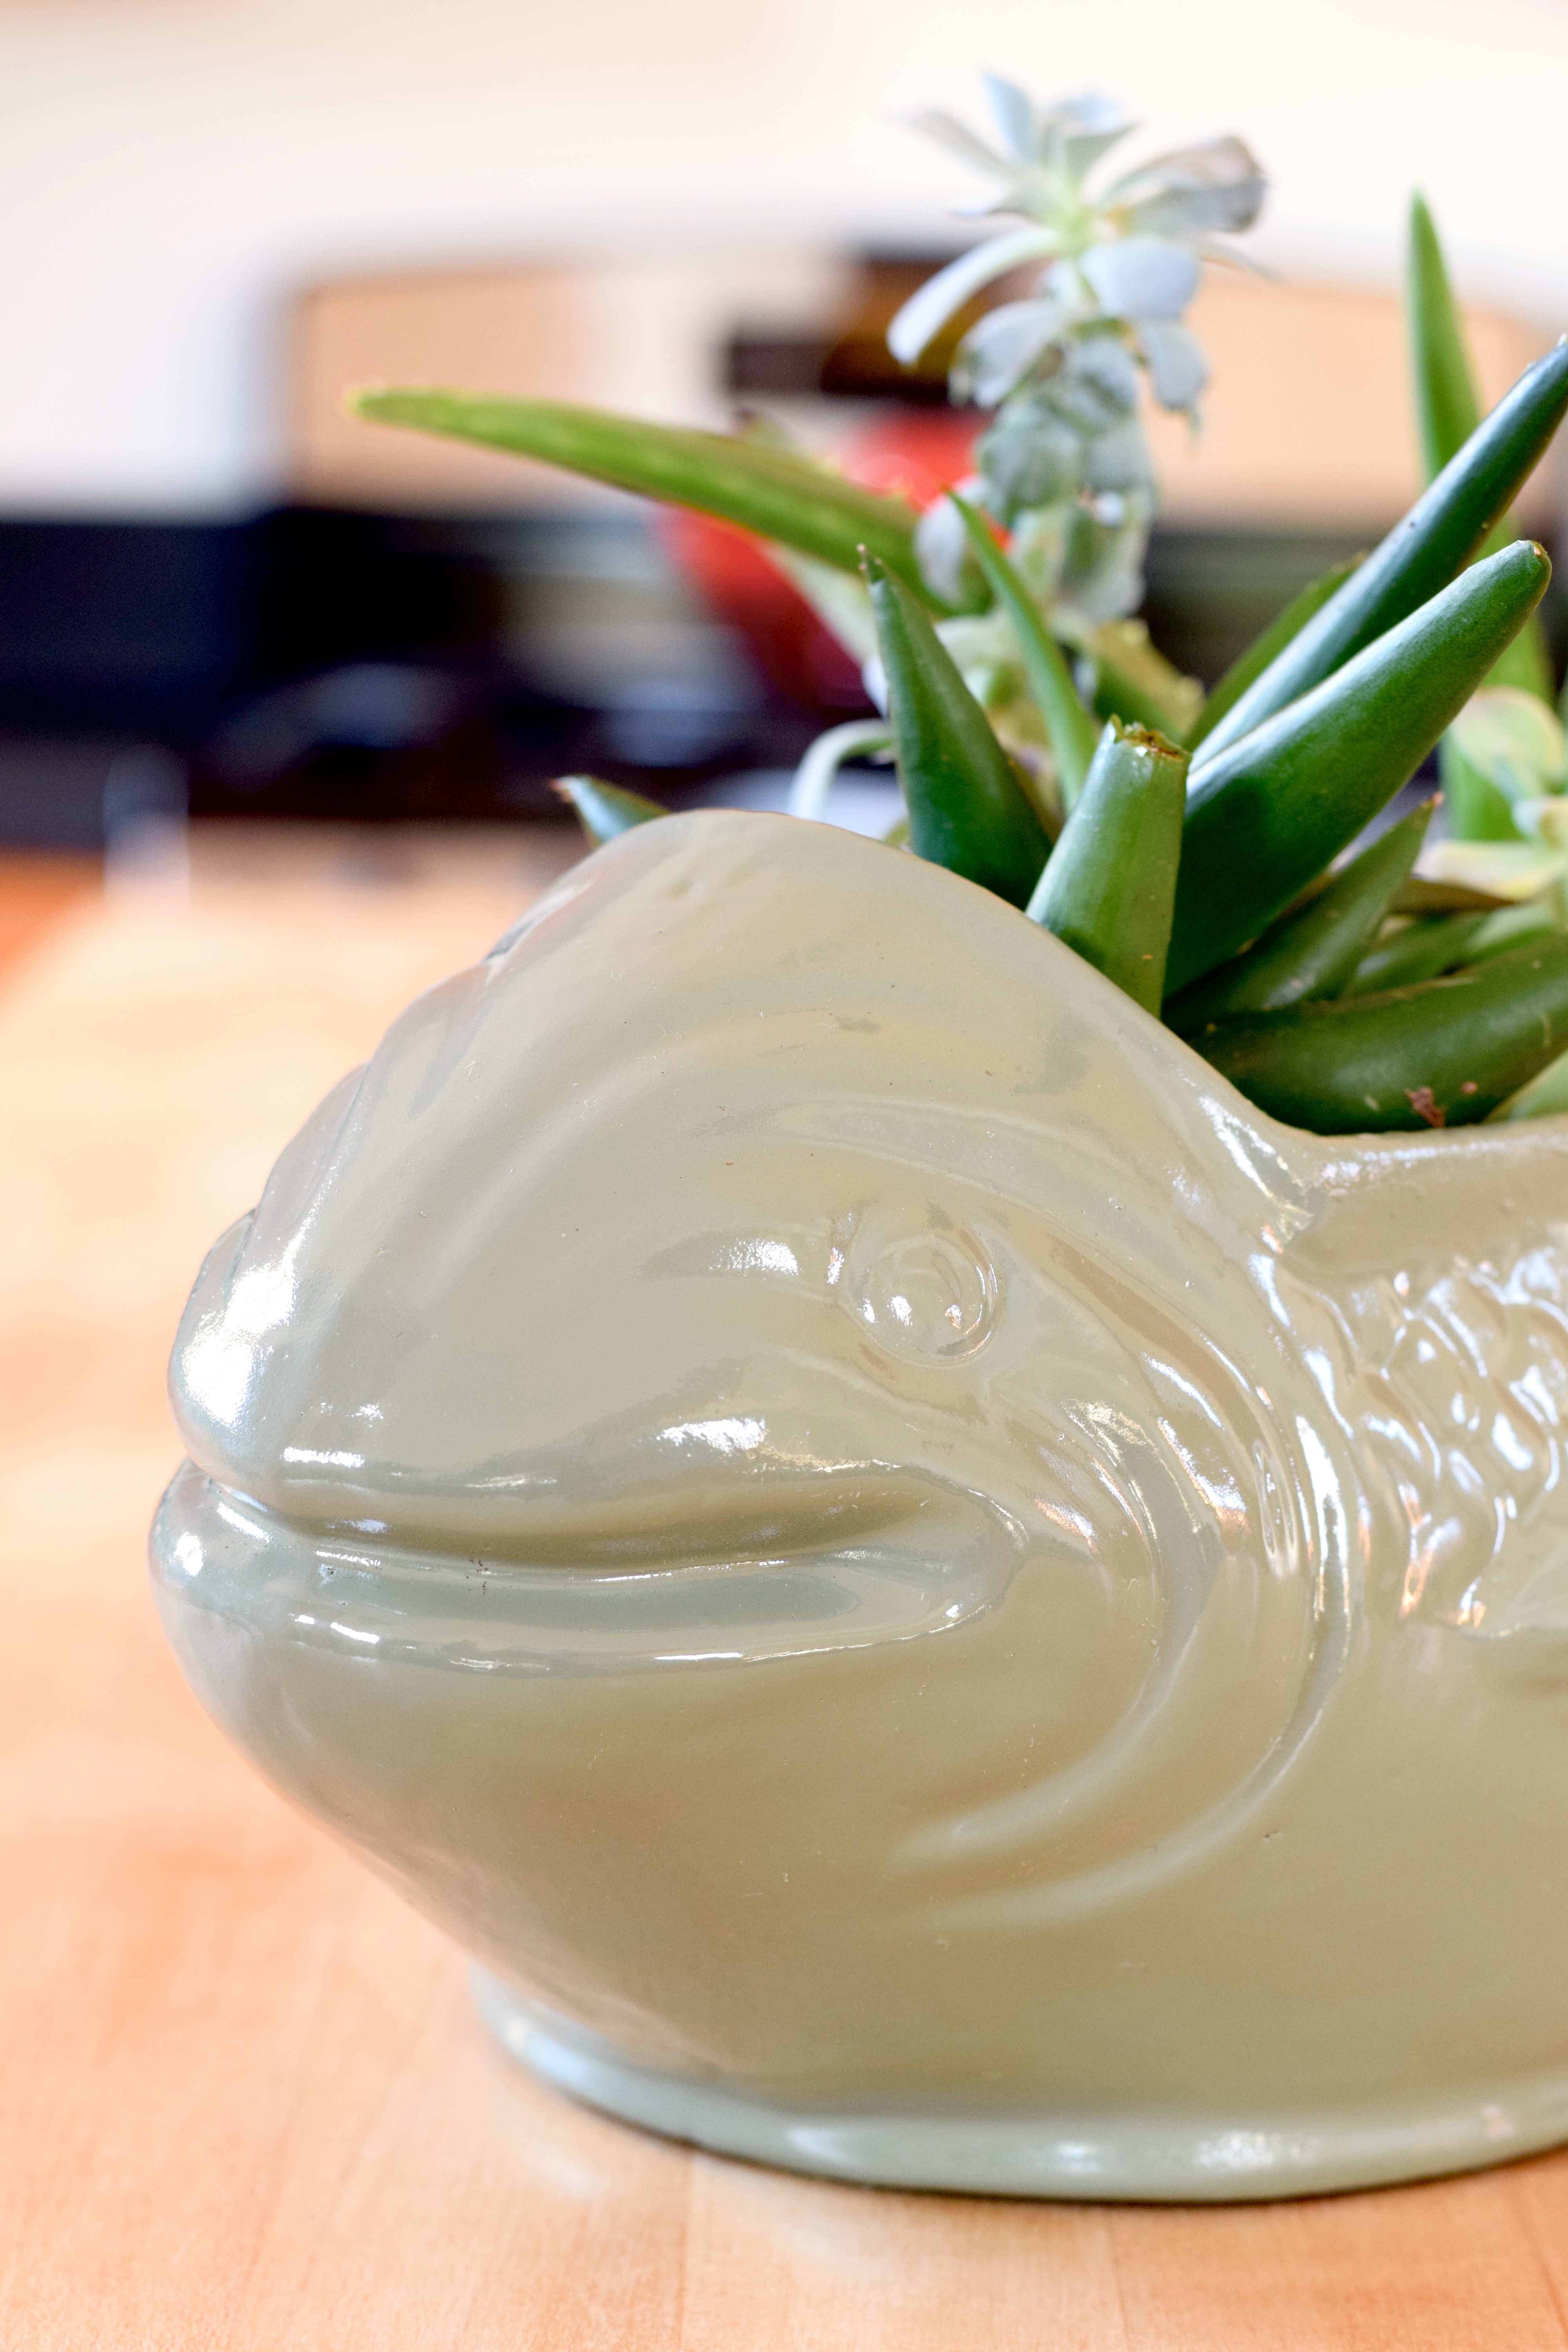
Oh my god, you guys, have I mentioned that I LOVE HIM? Just look at that glossy face! Look at the glint in his eye! He’s so beautiful!!

GlintinHisEye

I get to walk into my house every day and look that beautiful face! I am so happy with how he turned out. It’s wonderful to have this piece of my grandmother in my life every single day. It’s the first thing I see when I walk into my house. I couldn’t be more pleased. It’s so bright and happy. I love that the succulents show off the shape of the fish more. It looks so inviting! You can actually tell he’s a fish. I envisioned him pretty much exactly like this and he turned out so well. This is definitely an accomplishment for me, because everything I design in my brain is so perfect, reality can sometimes be a little disappointing. Frequently when I’m crafting or cooking. Hahaha. 🙂 Not with Fred though! Fred the Fish, I could marry that guy. Maybe I’ll just give him a smooch and see if he turns into my prince. Oh wait — that was a frog wasn’t it? Oops!

Do you have something of your grandparent’s that you’ve revitalized and use everyday? Do you have Fred the Fish’s twin? Let me know what you think.