Oh boy, this is one post, but so many hours and days and weekends of work! I feel like I’ve been weeding this garden for 6 months and gooooodness I am freakin’ exhausted. I started doing a thorough weeding of the garden back in December shortly after I had a giant pile of wood chips delivered from a local tree trimmer. I tried to get all the roots so the weeds would stay gone. I thought I’d be done in a weekend, maybe two if I didn’t work too many hours. Boy was that a huge underestimate. I worked in the yard at least one day almost every weekend for the next 2.5 months. I’d weed a section and then sheet mulch it. Then I’d move on to the next area. Some spots were fairly quick, but some were packed with teensy tiny bulbs that I knew would be able to push through the mulch in the springs. I was sifting the dirt some days to get all those tiny 1/4″ bulbs. Ugh. It was endless! And the worst part? I’m still working on it. Sure, now I’m doing other things in the garden too, but I never actually finished weeding everywhere!
The biggest area I have yet to weed is the vegetable garden area where the formidable creeping thistle reigns king. I am intimidated of this weed. I am procrastinating attacking this weed. I need to get this weed weeded ASAP, so I can plant my veggies. I also need to transplant the peonies that are here to new spots spread throughout the garden. I waited too long on that last one though. Now the peonies have buds. I’ll be waiting until they’re done blooming to transplant. They’re right where the edge of the path will go too, which means the vegetable garden path will be more like parallel lines of un-connected stones for a while yet.
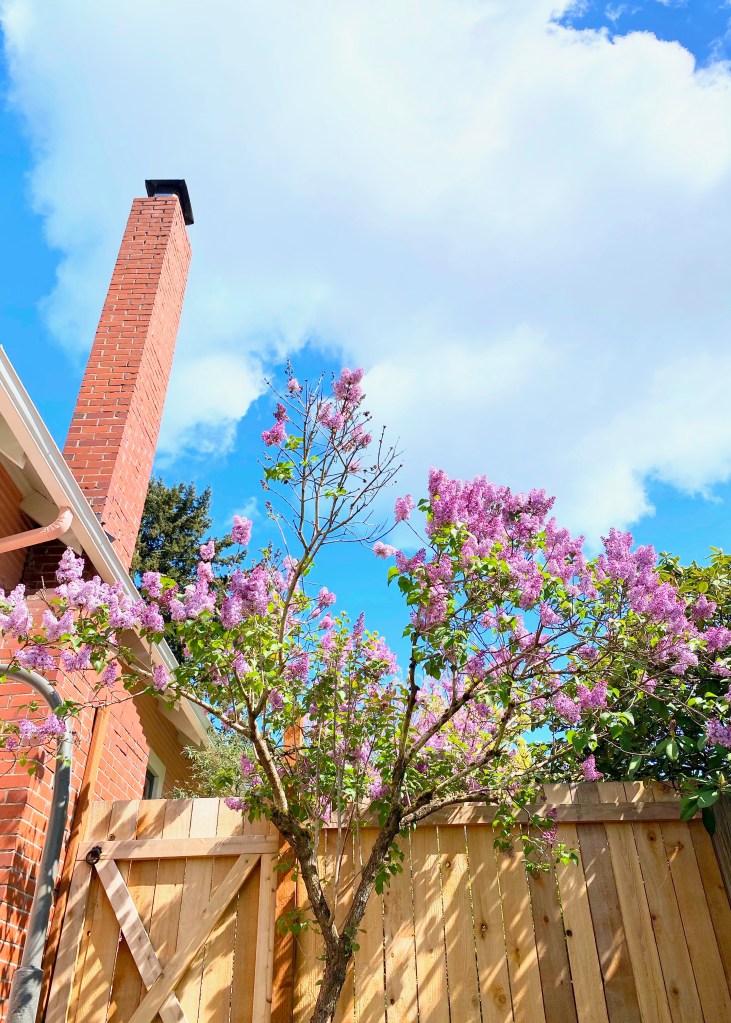
The best part of this zone of the yard is this giant lilac bush that I limbed up into a tree this spring. It’s absolutely gorgeous and smells heavenly!
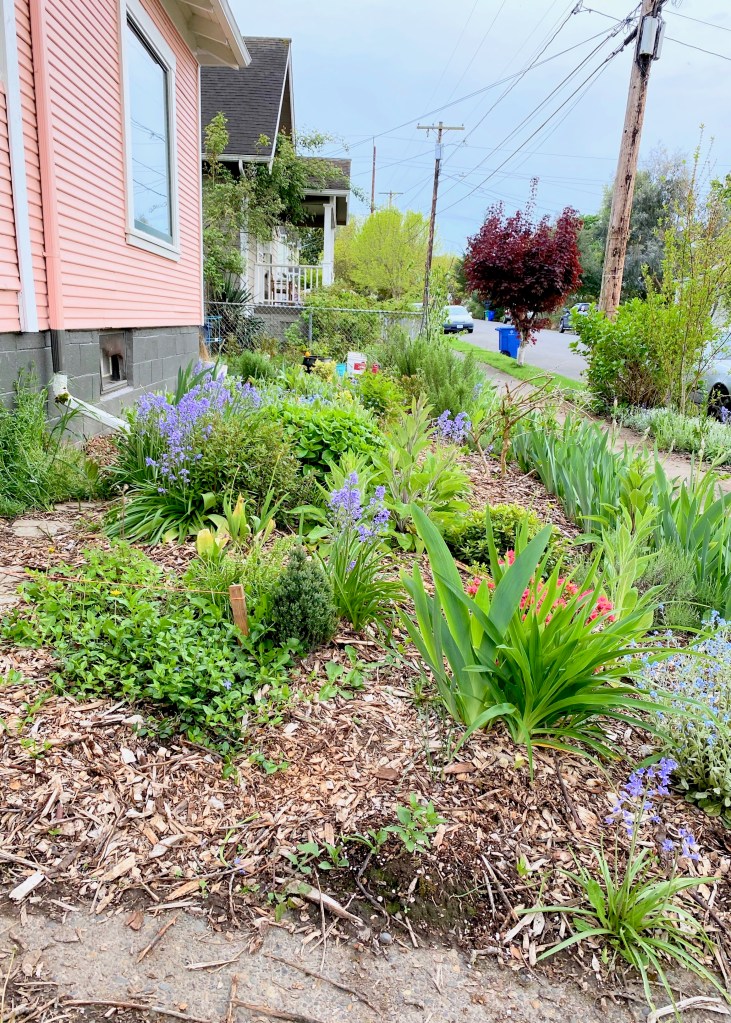
I did want to chat about the progress I have made so far though, because the changes have not been insignificant! Let’s dive in. Remember my whole design plan? It centers around creating a stone path that bisects the front yard parallel to the house. Ironically, this is also the line where I’ve added a bunch of plants over the last few years before I had a concrete plan for the garden. They all have to move.
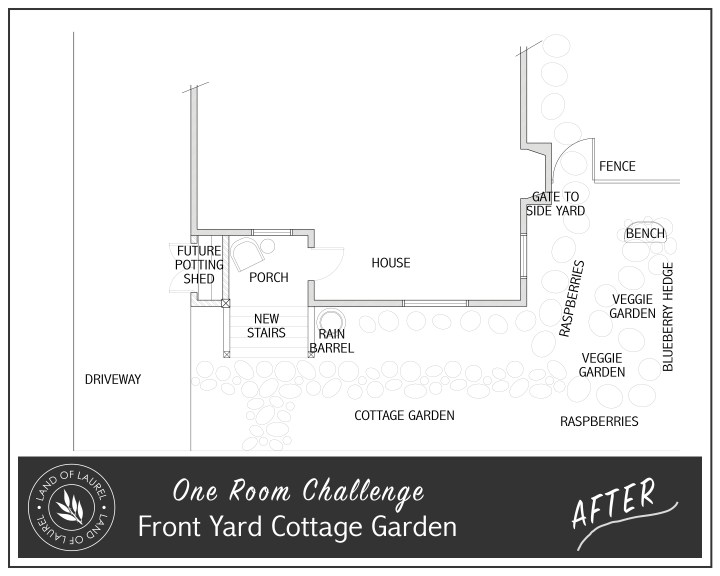
This is what the garden looked like earlier this spring. I did a rough layout of the new steps and main path with some stakes and orange string I had on hand. This gave me a guide to know what needed to move (everything on the string and two feet to the right of it).
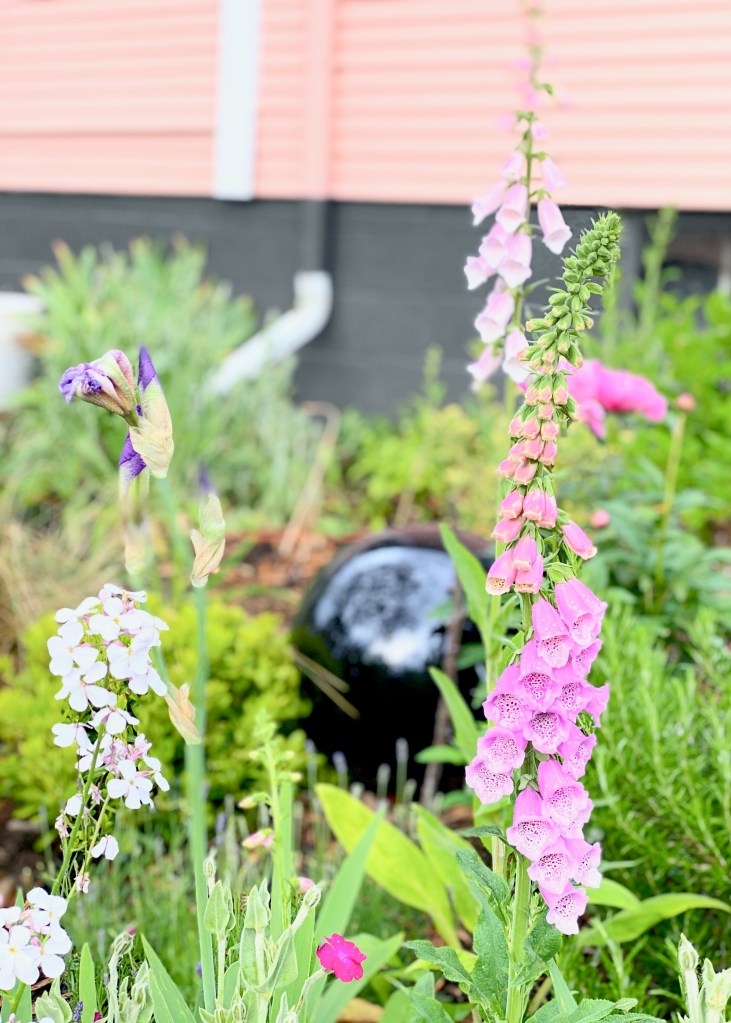
I started transplanting when I had time over the last month or so. The foxgloves are also mid-bloom so I am waiting for them to finish before transplanting as well. They’re just too pretty to rip out of the ground right now!
I’ve also been diligently moving plants out of the space where the new steps will be located. This is what it looked like earlier in the spring.
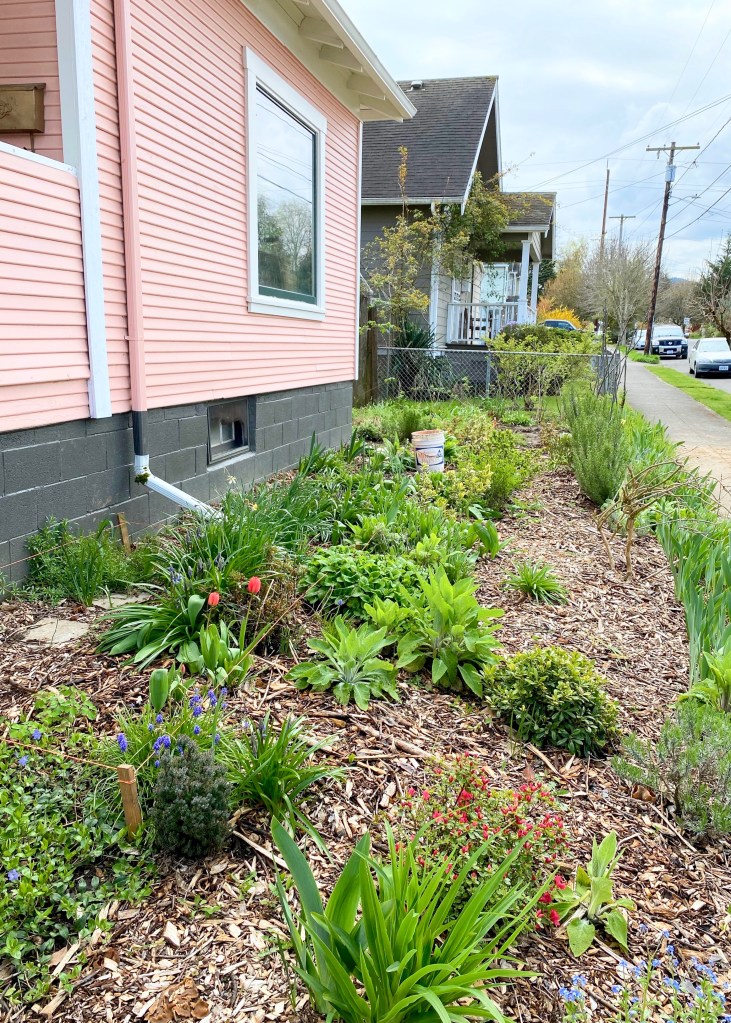
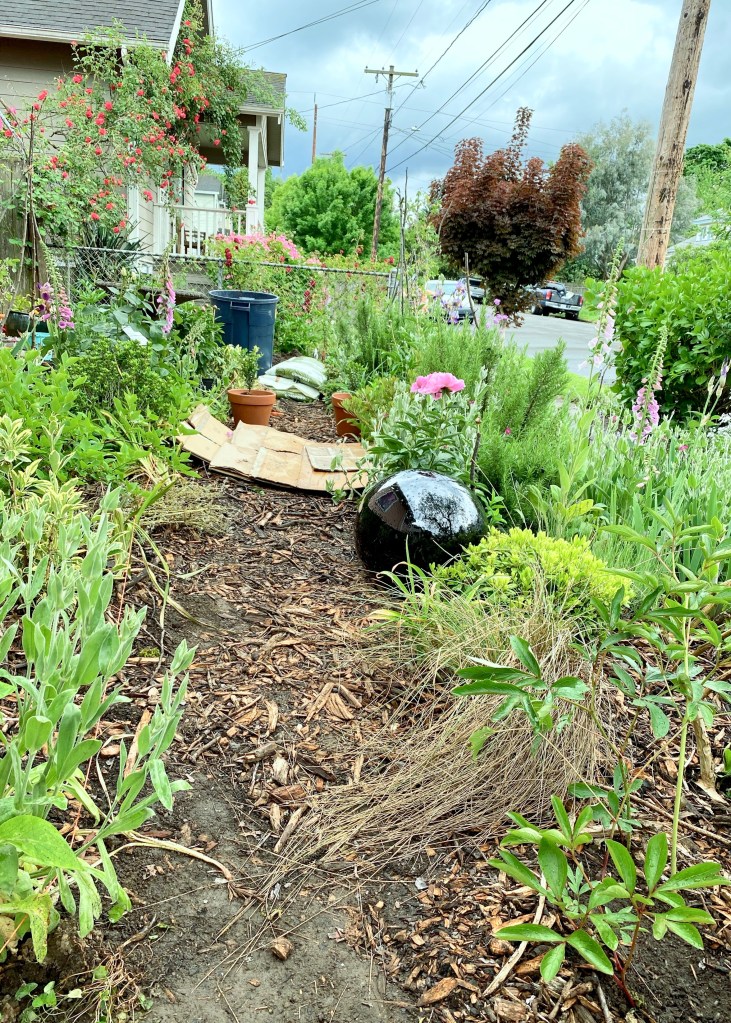
And here is that same view now! You can actually see a path. Better for sure, but still a ways to go. Once the irises, floxgloves, and columbines finish their blooming I’ll move them into good spots for next year. In the mean time, it’s a bit of a waiting game. That cardboard is all for my sheet mulching and you can see my bin for weeds and my bags of compost in the background too, because this is absolutely in progress still!
While this may not seem like a ton, it’s been a great amount of work! Moving things to the right spots and making sure there’s a nice balance of evergreen plants and perennials is time-consuming. Once most everything is moved I get to lay the stone path and I am so excited for that!! It think it’s going to be really amazing.
I’ve been stalking craigslist and facebook marketplace as of late, looking for fun vintage treasures for the garden too. I nabbed this birdbath a few weekends ago. I’ve placed it right at the corner where the main path forks to go into either the path to the side/back yard or into the vegetable garden. I’ve planted a bunch of different flowering plants at its base and can’t wait to see them fill out in the next month or so! I’m not going to show you the birdbath yet, but just imagine it bursting with daffodils at the base come next spring!

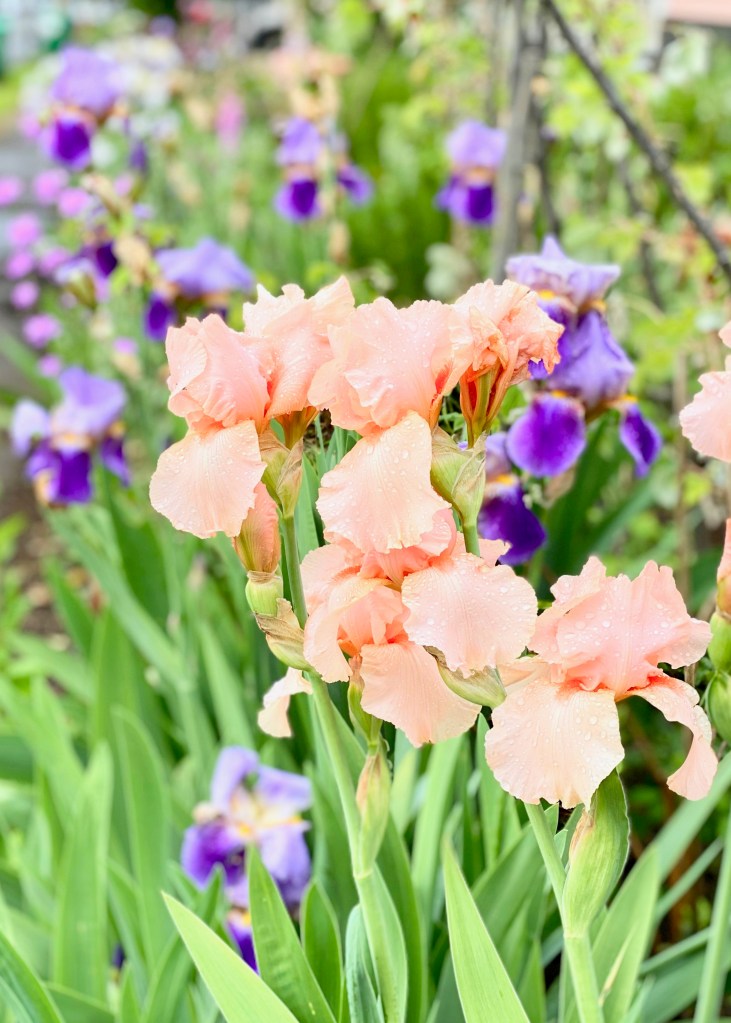
I thought I’d also chat real quick about some of the other plants I do have in the garden. I’ve been lucky that there were many lovely plants hidden in the weeds when I first bought the house, though I’ve added quite a few one or two or three at a time over the last few years. The house came with five varieties of irises which is so fun too! There are normal purple ones and this fun purple and white one.
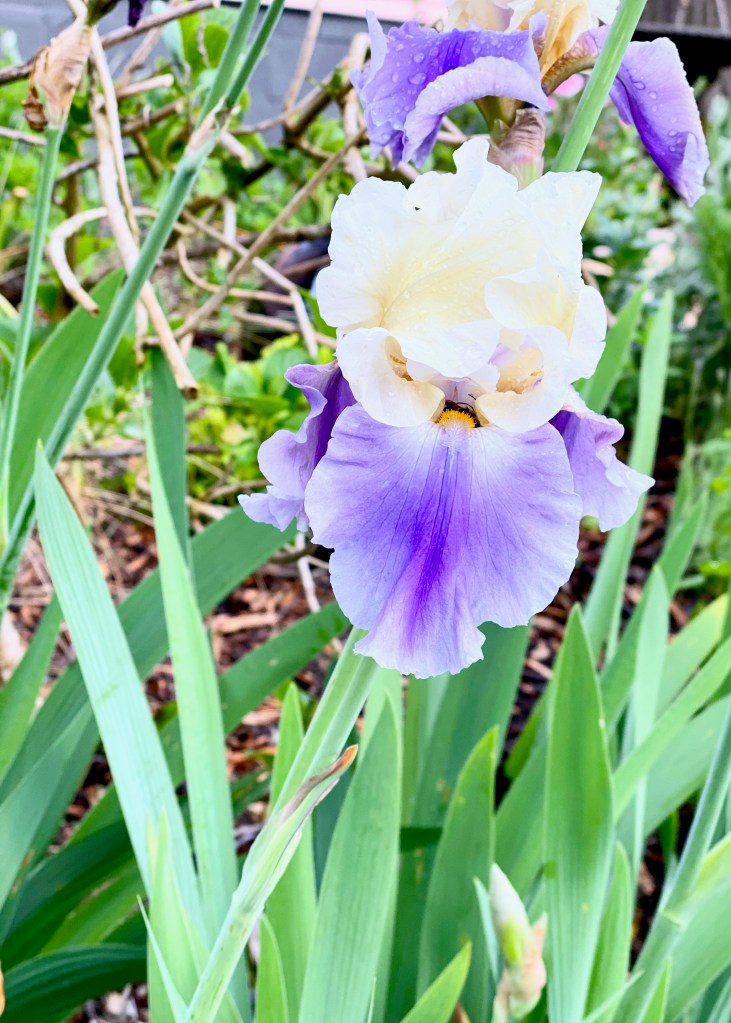
But my favorite is definitely this peachy-pink one! They are gorgeous and smell just amazing to boot!
I’ve also chosen to transplant many good plants from the backyard to the front yard over time. To keep track of what I have bought, I always make sure to take a picture of the plant with its label or pot. I put all the pictures in a folder on my computer sorted by area of yard (front, back, side). When I need to reference what something is exactly, I just scroll through the folder. It’s great for keeping track of different varieties of plants.
I thought I’d make a quick list of what came with the property and another list of what I’ve bought. The list of what’s come with the property is definitely more vague since I have no idea what the varieties are of these guys.
- Day Lilies
- Large Blue Hydrangea
- Bleeding Heart
- Columbine
- 5 varieties of Irises
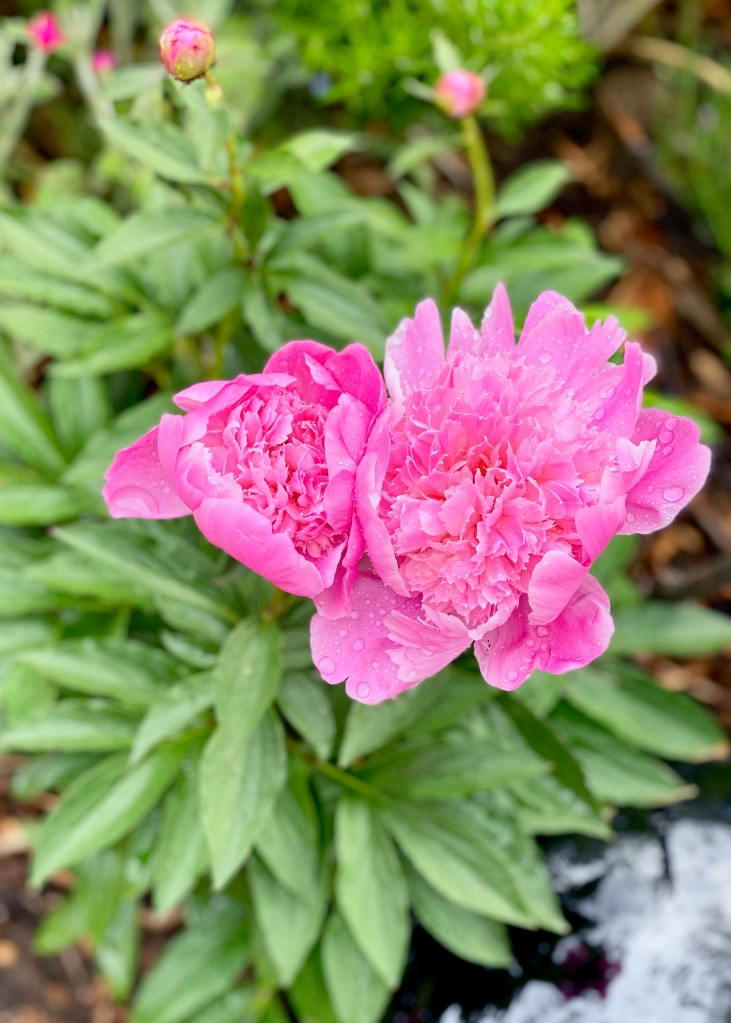
- White Peonies
- Red Lilies
- Dame Rocket
- Wild Violets
- Forsythia
- Light Pink Mini Climbing Roses
- Lilac
- Light Pink and Medium Pink Foxglove
- Mint
- Creeping Jenny
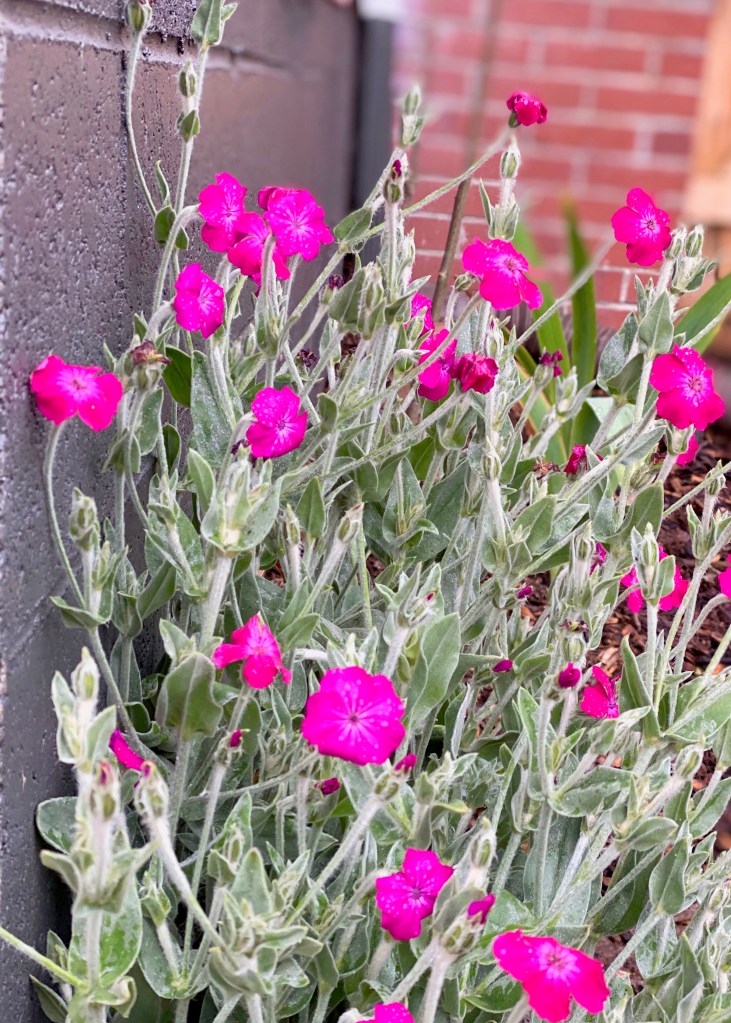
- And many, many plants I cannot name like this guy below. I love its pink flowers and how it spreads easily.
And now, some plants I’ve bought or been gifted (either over the years or quite recently).
- Rosemary
- French Lavender
- Lavender
- Peonies
- Dahlias
- Gladiolus
- Creeping Thyme
- Blue Star Creeper
- Creeping Myrtle
- Dwarf Red Star White Cedar
- Yuletide Camelia
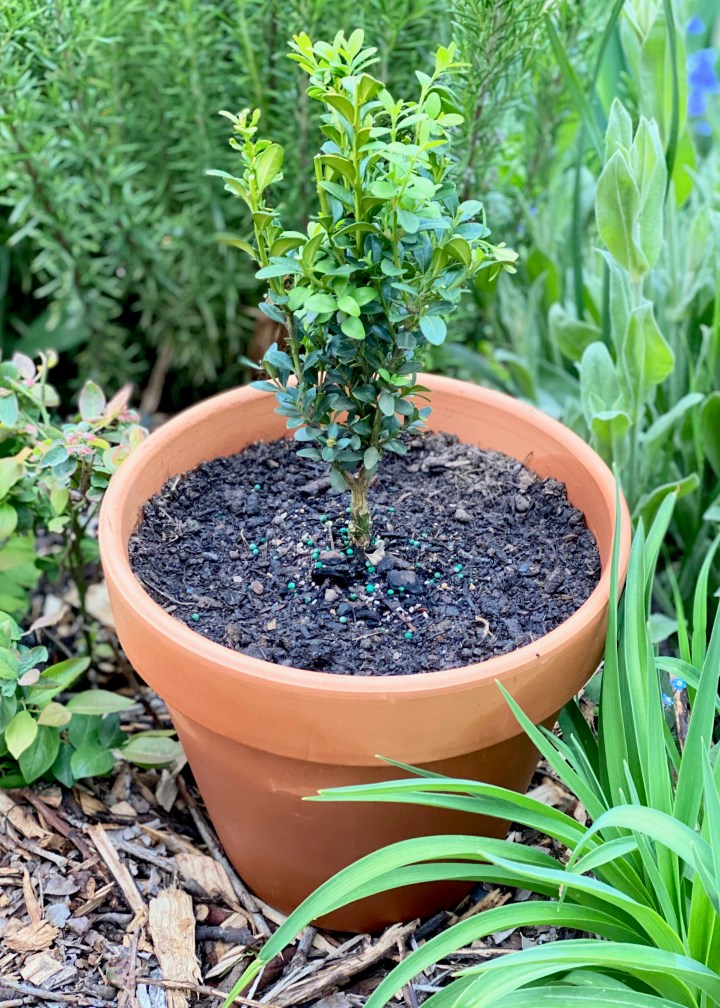
- Green Mountain Boxwood
- Raspberries
- Eleganza Series Yellow Hybrid Tea Rose
- Polynesian Punch Fionbunda Rose
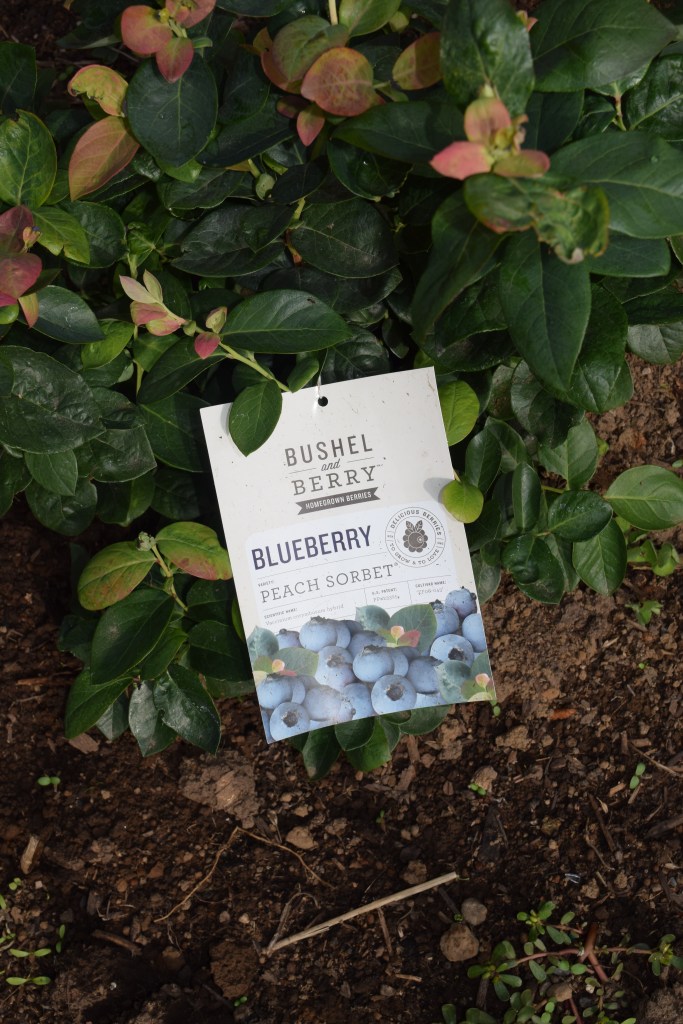
- Pink Sorbet Blueberries (evergreen!)
I’ve even tried my hand at creating some small boxwood topiaries for that curated English garden look. I definitely want to mix some shaped plants into the more natural flower filled chaos of the beds. These guys are just tiny, so I’ll be letting them grow all season and trimming them again in the early fall.
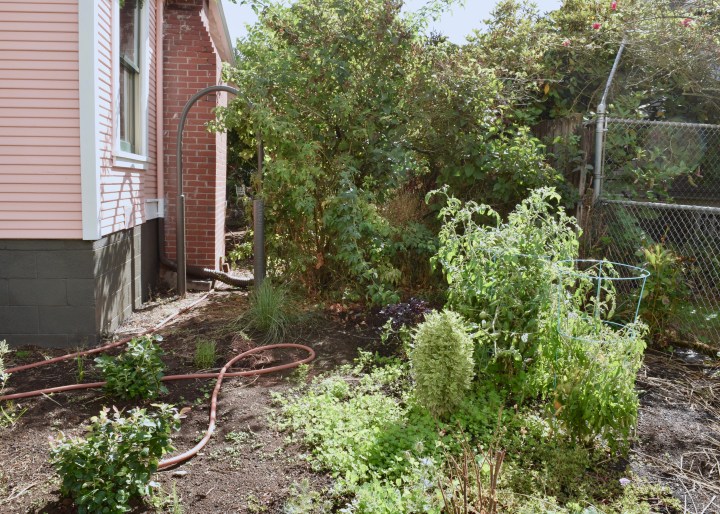
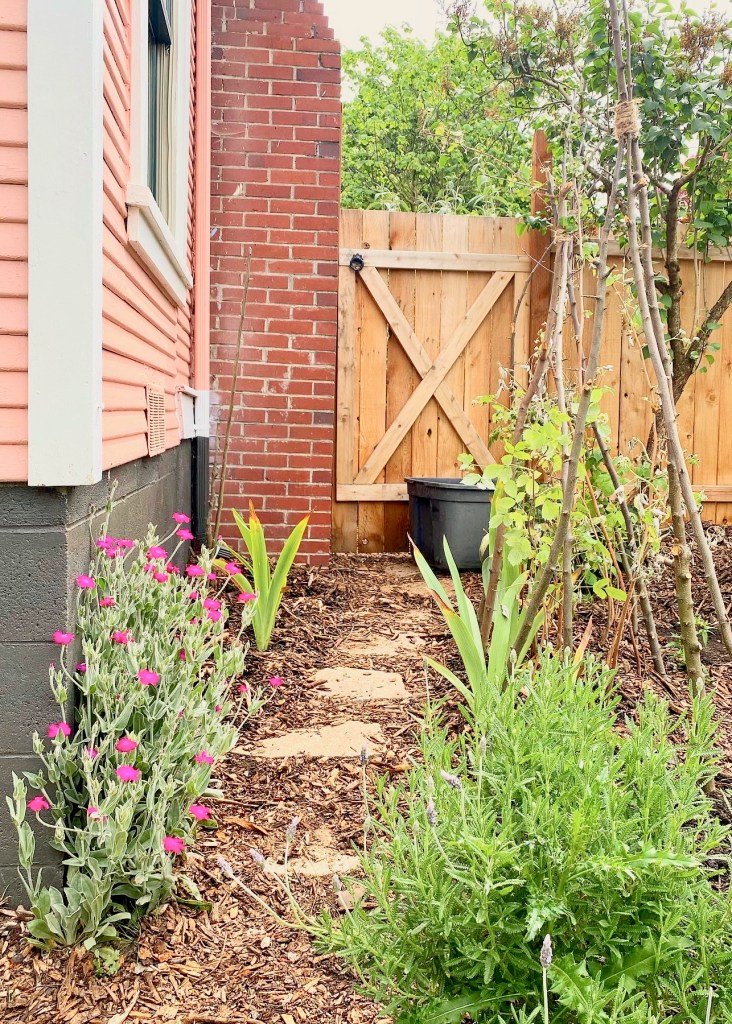
Finally I wanted to show you one little corner of the garden that I’ve “completed.” There’s still lots of growing to come over the next few months as it fills in, but I spent this past weekend knocking out this area and I’m so pleased with the results. This is what it looked like when I bought the house.
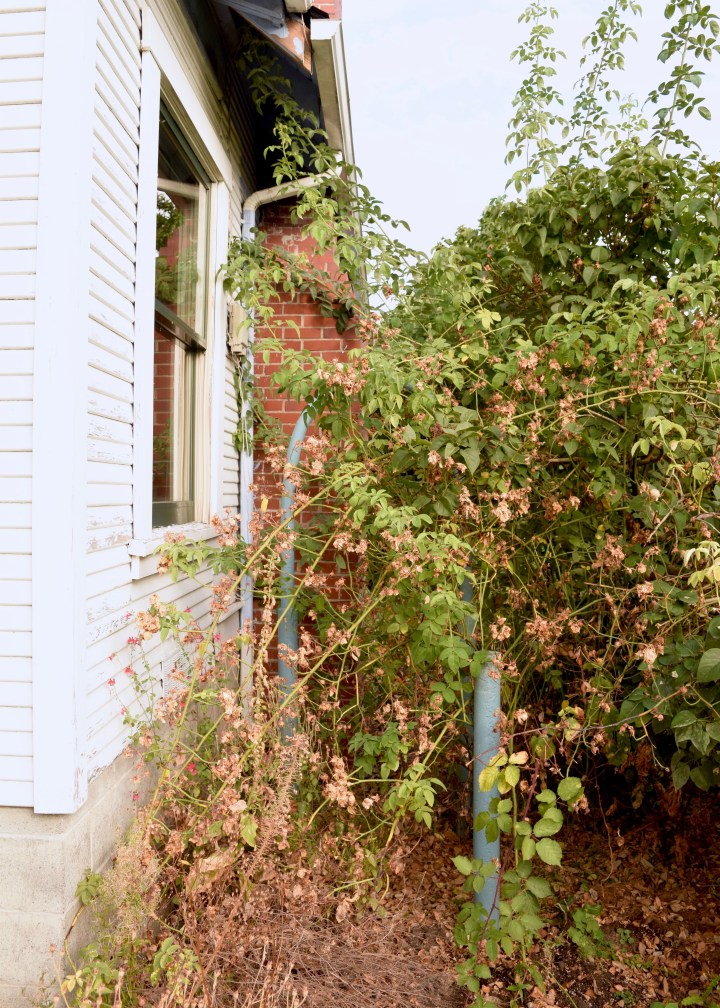
And this is what it looked like in 2018 after the house was painted and I added a few random plants to the yard.
There were several things that needed to be done here: 1) that arch and post needed to go! 2) the slope needed to be graded to meet the bottom of the gate which leads to the side (chicken) yard and slope back down to the front of the garden, 3) grading needed to slope away from the house as well for drainage, 4) plants needed to go in, 5) a visual barrier / separation between the vegetable garden and the path needed to go in.
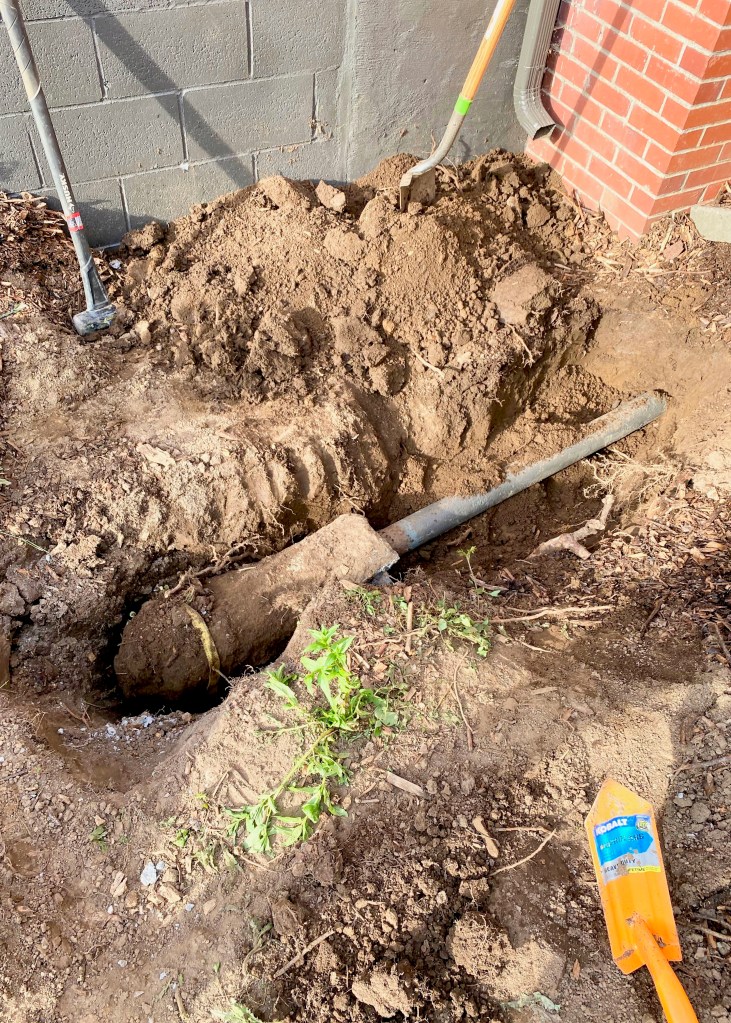
The first thing I did was dig at these posts. I dug mostly in the front of the posts, but also made a shallow ring all the way around them. Then we attached the post and arch to my friend Erik’s truck with long ropes. I video’ed the results and posted to my instastories if you want to see it live in my highlights! It was not a quick process at all. We did it on an 84°F day and it took several hours of digging and pulling with the truck. And we broke multiple ropes.

But we also got the arch totally out! The truck pulled it and the concrete that surrounded the posts from the ground and then we cut it into 3 pieces and put it in Erik’s yard where it will rot until he gets another renovation dumpster (shhhh, don’t tell him), because I honestly can’t move the dang thing alone. The post however, didn’t really have anything for us to grip onto to pull it out entirely. Trust me we tried, and tried, and then I gave up, but Erik decided we should keep trying, and then we tried and tried some more. And then I convinced Erik that now it was loose, I could just dig a shallow grave and bury it. So that’s what I ended up doing.
Once that was buried, I was able to knock out the grading, mulching, and planting the next day. In the bed next to the house there are tons of dahlias, gladiolus, and irises. It’s going to look spectacular throughout the season. There’s space for a wheelbarrow to pass through and then on the other side of the path I created a nice raised hump for a row of raspberries. I used branches from trimming my apple tree in February to make these tri-pod trellis to support the vines. If they start to get too crazy, I’ll string some thin rope along the trellises to keep them in, but I don’t expect to get to that stage any time soon.
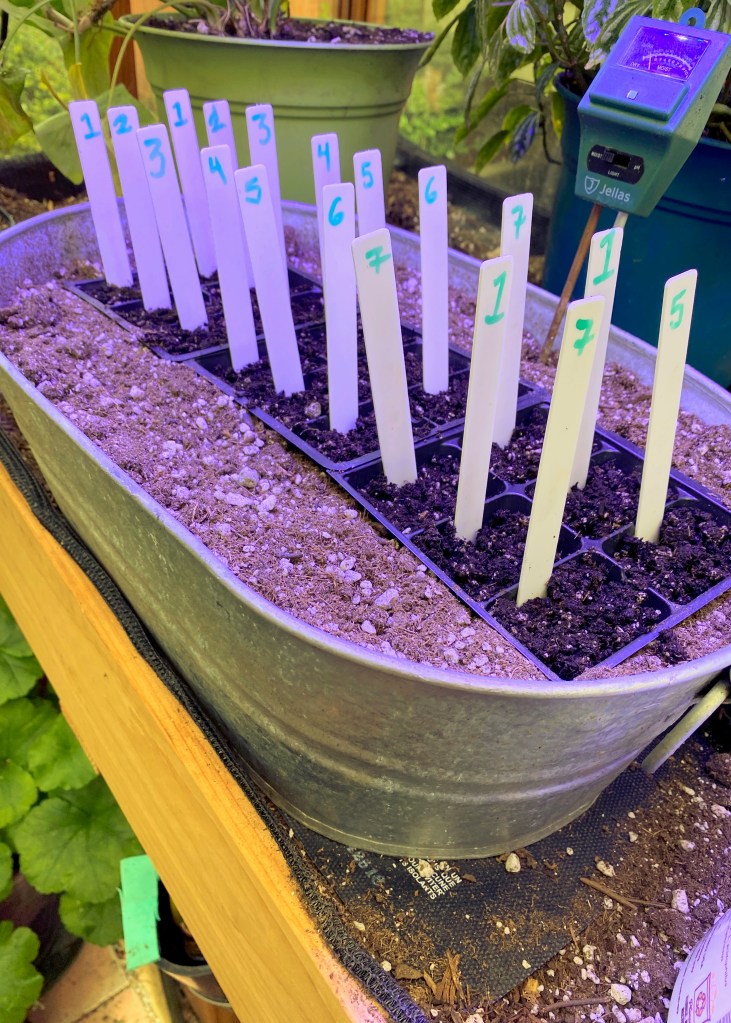
One of the other things I began in the garden actually started in early-March! I began germinating seedlings in my cousin Ted’s greenhouse. Here they are all freshly planted in a larger bin that’s on a heating mat. I label all my seeds by number so I can reference them easily and reuse the labels for years to come. I just print out a sheet with the legend and keep it close.
They looked like this about a week later. This was my first time starting seeds and it has been so exciting to watch them grow!
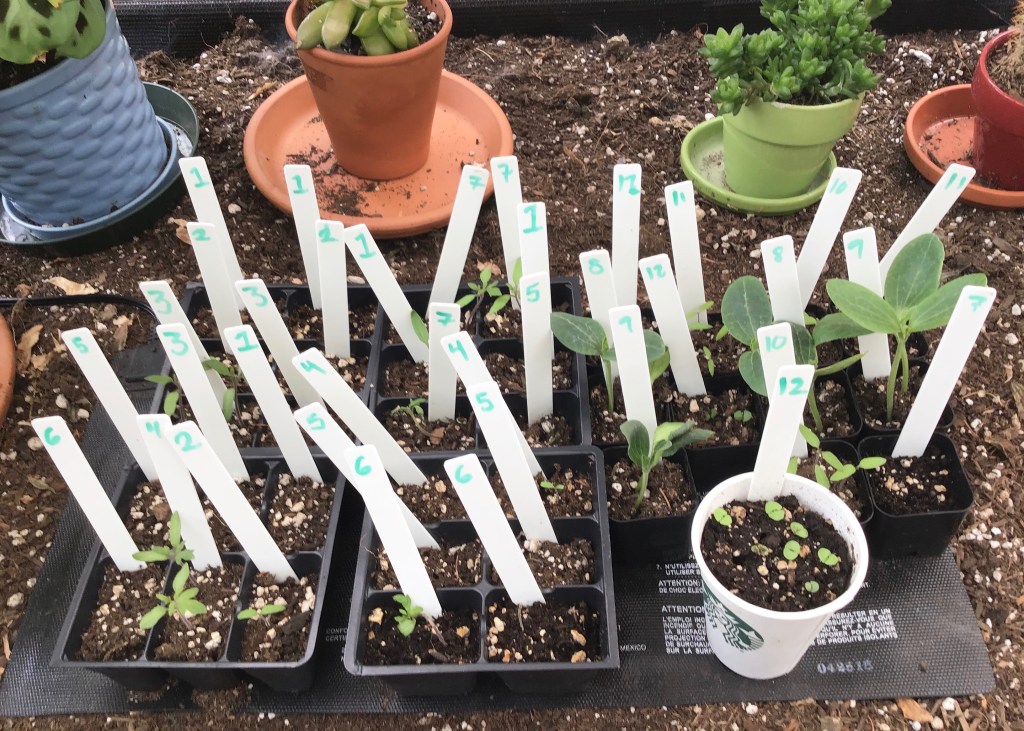
Now they’re all bursting at the seams and dying to be planted. It’s been wet, cold, and rainy this week, but I am hoping to finally finish weeding the vegetable garden area and plant these veggies! Then we need a good blast of warm weather to really get them going. Fingers crossed for a nice hot summer!
So that’s my a little bit of this and a little bit of that garden progress! Maybe next week I’ll be able to lay the main path? If I get the veggies in the ground, that’s what will be next on my list of things to tackle. Well, that and rebuilding my entire front steps, which I also need to start ASAP! Don’t forget to check out what the other One Room Challenge participants are up to here. There’s some truly amazing work being done and I am so excited to see how everyone’s spaces turn out.


Wow Laurel!!! Amazing work! You are such a hard worker and so inspiring. Can’t wait to see the house in person next time!
Aww thanks Nicole!! Can’t wait to have you come visit when things normalize again!
Gonna gain some muscle with all the weeding and heavy lifting!
Heck yes! I really hope so.
Jeez- I thought I’d been kicking butt in the garden, then I had to read THIS!
😉
Nice work, Laurel.
Thanks Jennie!! This garden is a monster but I’m sure you’re kicking just as much butt at your place too!!
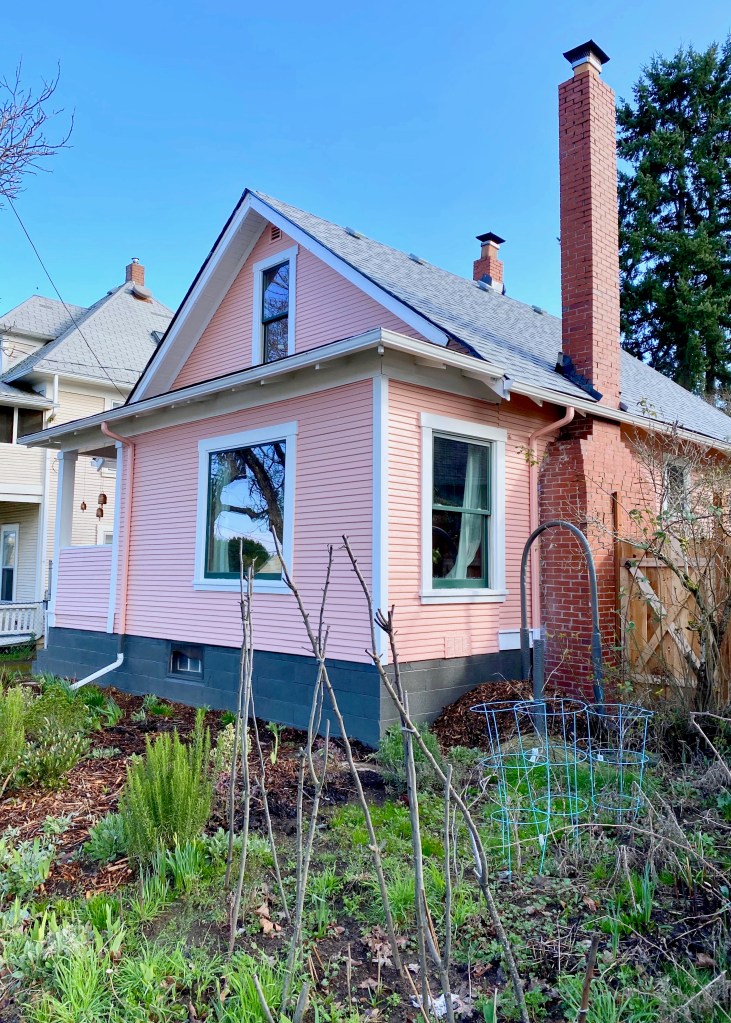
Your pink siding is already so adorable – it’s gonna look even more magical with this amazing flower garden
Awww thank you!! I think the flowers are soo charming against the coral-y pink house! I’m in heaven!
So impressed, Laurel. Not only with the amount of work you have done and are doing, but how sweet and almost magical the yard is with a blueberry hedge and a raspberry lined walkway. It sounds like a fairy tale. Nice job!
Awww thanks Aunt Chrisy! I’m so excited for it to all come together. It’s going to be such a rewarding change.
The gray/silver foliage plant with the bright magenta flowers is Rose Campion, a self-seeding short-lived perennial, but usually once you have one, you’ll always have some.
Yes they seem to spring up every year! I love them!
Loved the article! The part about storytelling resonated with me.
Visit Landscape Lighting Designer Encinitas!