We Ate Our Way Through Portland – PART I

I skipped out of work last Friday grinning like a fool in excitement. On Saturday, I hopped on a plane to Portland, Oregon with my good friend Nicole! It was time for an adventure. And time to relax. But mostly? It was time to explore!


I was going to compile a big list of things we did in Portland, but then I realized, we mostly just ate. So instead of a big What We Did In Portland post, here’s a combo, What We Did Ate in Portland post. Because honestly, no one’s going to care what we did when you see pictures of what we ate!


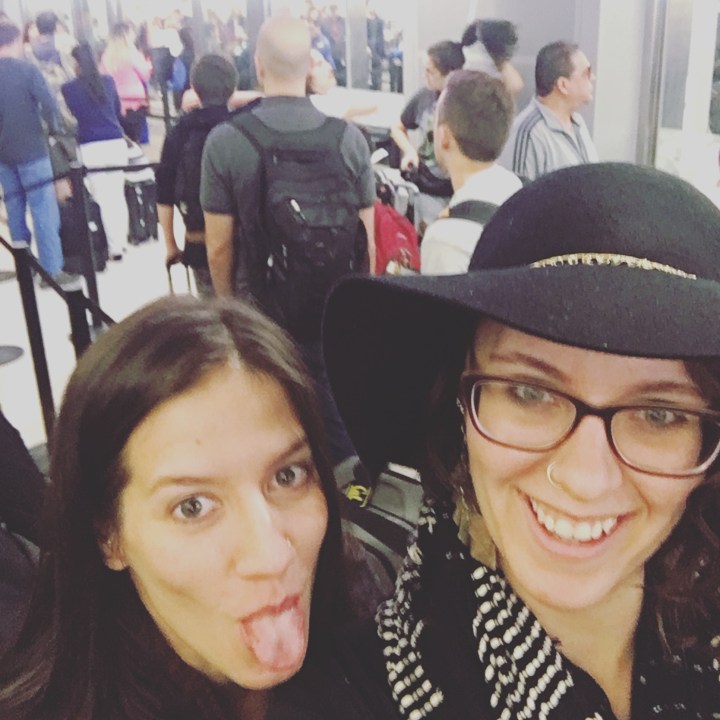
We left Saturday morning very early. I set my alarm for 5:15am. I planned to call Nicole at 5:30am to make sure she was awake. The Girl-Who-Never-Sleeps deserves another 15 mins, I figured. But, before I could call, Nicole was texting me. Yay! Both awake. I grabbed some toast with jam, threw on some clothes and called an uber. We we’re going to meet at the 19th Street BART station, but I was feeling lazy and didn’t want to walk to BART. I arrived 20 minutes early instead. Oops! But, really, that’s not atypical for me when I travel. I love punctuality! Nicole arrived with 2 minutes to spare and we took the BART train to SFO and hopped on our flight. We were exactly on time (like Nicole likes it) and I didn’t break out in hives stressing about not being an hour early! So any day that doesn’t begin in hives is a good one. 🙂


At The Airport | Land of Laurel


When we arrived in Portland Nicole’s awesome, interior designer friend, Nikki, picked us up at the airport. I knew I liked Nikki within minutes because she introduced me to the term “Pet-ophile” when talking about how she and her boyfriend Scott like to stare at dogs at the park and daydream about having one of their own. Which is exactly how I feel about every dog/cat/chicken I’ve ever met. I could tell we were going to be on the same page. From now on I shall refer to myself as a “pet-ophile” whenever possible. Because it’s hilarious!


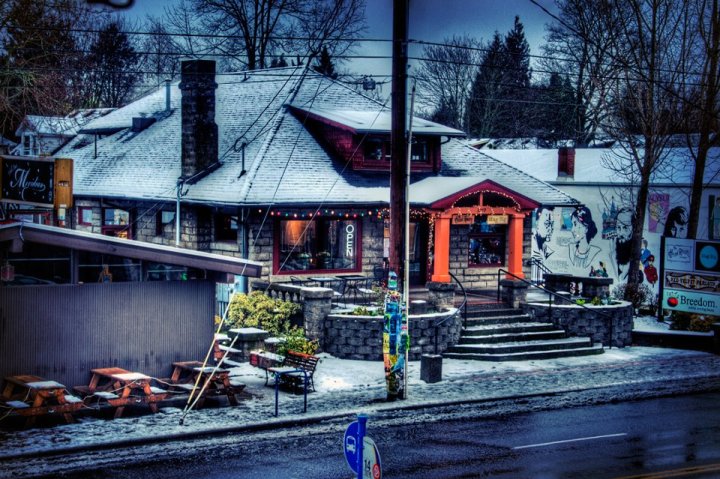
Nikki drove us back to her house where we were staying and I met her boyfriend Scott who quickly became the funniest person I have ever met. Every other sentence out of his mouth was a joke and I don’t think I’ve ever laughed so much in my life! Nicole and I put on contacts and then we piled back into Nikki’s car (sans Scott) and headed to Hawthorne Street. We started out in a relaxed fashion, walking down Hawthorne and popping into any shop that caught our fancy like Lounge Lizard (oh my god, thrifting in Portland is so much better priced!), sipping at a mead tasting at Mead Market (oh, yes, now I’m daydreaming of beekeeping!), and wandering further. We considered stopping at Jam on Hawthorne for brunch, but a 45 minute wait had us walking further (though now I’m looking at their menu and my stomach is growling). I wanted to stop at some food trucks, but Nicole convinced me to venture further. We ended up at the perfect place! The Hazel Room was not only adorable, but so delicious! I found this picture just googling it, and now I’m wishing we’d been there in the snow. Look how adorable!


Winter-Hazel-Room
via


Nikki got the Vegetarian Bee Gees biscuit and gravy (I know, right, she’s also a vegetarian. Like she wasn’t already awesome!), and Nicole and I began the first of many shared meals, splitting the Rose Tea Crepes and Bubble & Squeak with a sunny side up egg.. We almost skipped the former, but we were so glad we didn’t as it was AMAZING. So good, you could really taste the rose-i-ness. Plus it was smothered in whipped cream and anything with whipped cream is my favorite. The Bubble & Squeak was maybe a bit healthier (okay, a lot healthier) with potatoes and veggies, but not nearly as exciting. Once we devoured our meal (literally took Nicole and I less than ten minutes to finish everything), we began meandering further down the street significantly more satisfied.


We stopped at nearly every shop, never buying a thing, but touching everything. It was fun to explore. Portland has some really cute vintage shops, thrift stores, and paper goods stores. We had a blast! We then ventured over to Division Street walking down 37th through a gorgeous residential neighborhood. There we stopped at Artifact which had lots of cool vintage clothes and furnishings. Nicole almost bought shoes. Since we were in the neighborhood, we couldn’t help but hit up the famous Salt & Straw. The Sea Salt with Caramel Ribbons was flat out the best ice cream I’ve ever tried in my life you guys!


Sea Salt
via


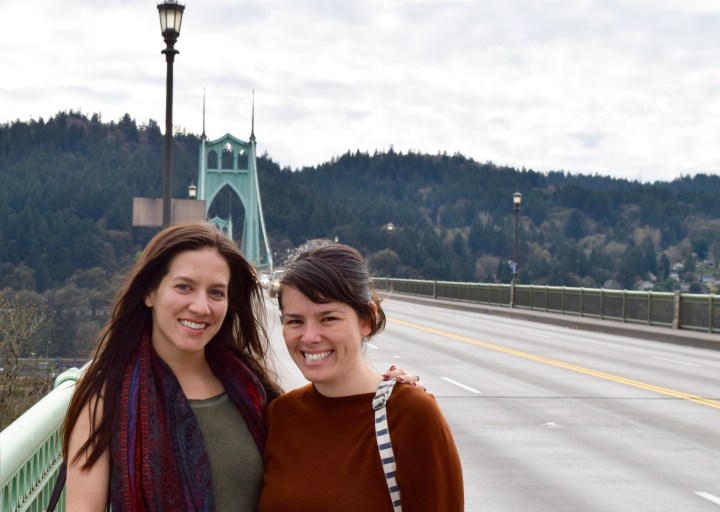
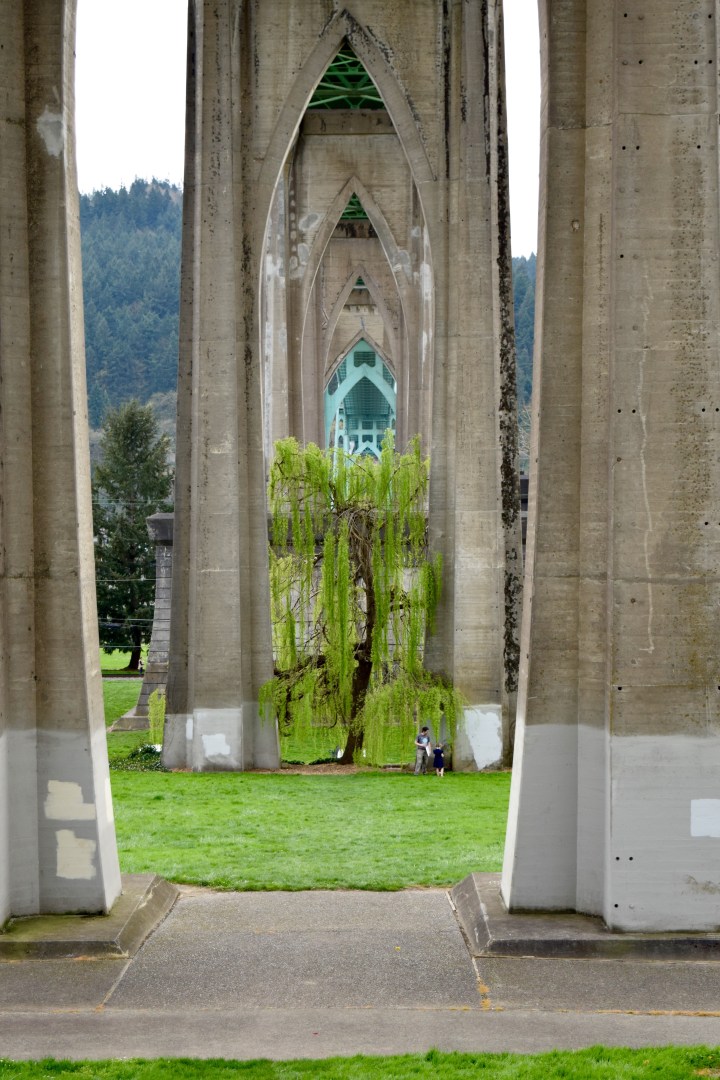
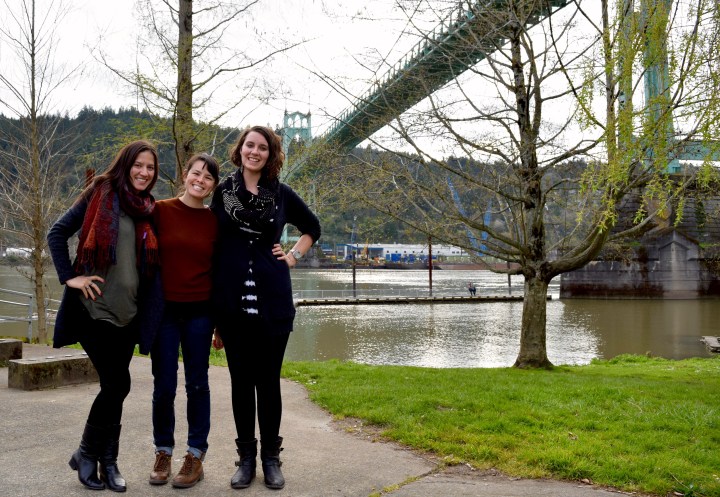
Then we walked back to Nikki’s car and drove along the Willamette River to the St. John’s Bridge. It was a gorgeous day, but at this point, clouds had started to roll in. We wandered through the shops in St. John’s (while I relived every St. John’s moment from my newest favorite kid’s book Wildwood), before walking out onto the bridge a bit. I snapped this pic of Nicole and Nikki and then we headed down to the park under the bridge.


St. John's Bridge | Land of Laurel


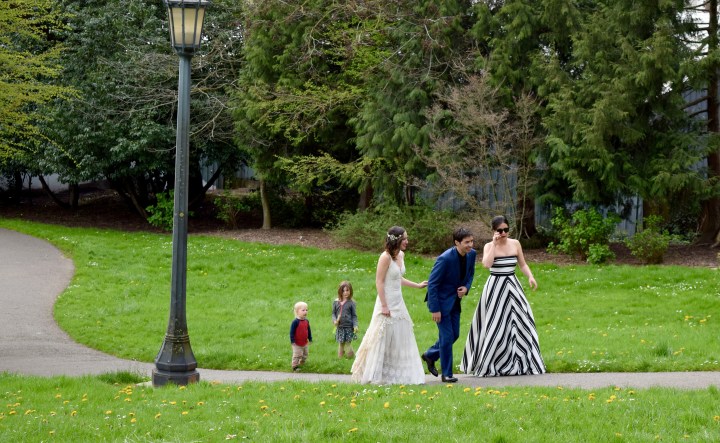
When we got to the park below, a wedding had just taken place! Naturally, I stalked the happy couple a bit.


Wedding Under the St. John's Bridge | Land of Laurel


But the gorgeous bridge took up plenty of my attention. The architecture was amazing. Modern gothic and bee-ay-yoo-tee-full!


Beneath St. John's Bridge | Land of Laurel


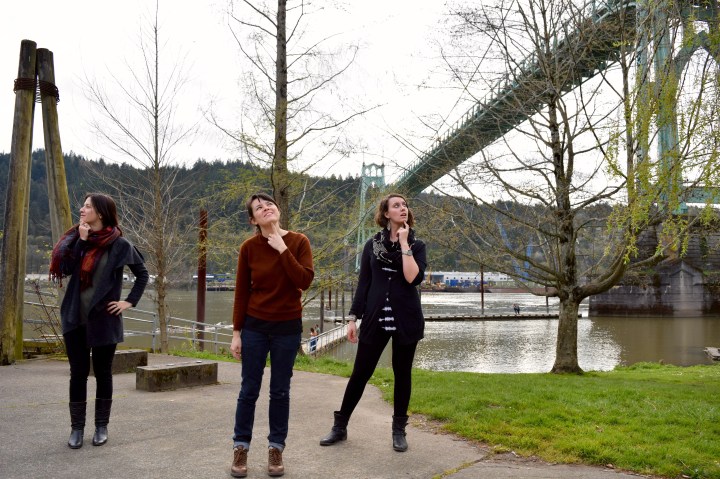
We decided to try and take a few pictures of the three of us while we were there so I propped my camera up on a wooden post and set the time. Fifteen pictures later we got one that was pretty cute.


St. John's Bridge Friends | Land of Laurel


…as well as some fairly amusing outtakes!


Laughing Under the St. John's Bridge | Land of Laurel


Posing Beneath the St. John's Bridge | Land of Laurel


Regardless, we had fun! And we were exhausted. We headed back to Nikki’s to relax after a long day. We stopped by Green Zebra Grocery for cheese, soup, and a baguette before crashing on Nikki’s couch and watching a dolphin documentary on Netflix, Dolphins: a Spy in the Pod. The documentary was hilarious and involved spy-creatures. Everything was “the first time this has ever been recorded” and we learned all about urogenital slits. Yup, you read that right. We headed to bed early.


We woke up the next morning, Sunday, and headed to Milk Glass Market for breakfast. There was a bit of a line, but as soon as we ordered a table opened up. Nicole and I got excited and over ordered: Fig & Anise Panini with goat cheese, Bread pudding with marscapone and jam, a snack hard boiled egg, and a Biscuit with tomato marmalade, and cheese. Scott got a cinnamon roll that he graciously shared. We basically rolled out of there! The decoration of the space was super cute! I wish I’d snapped more than a quick and dirty iPhone shot. Check out their website for awesome brunch space ideas. I just love those bread boards.


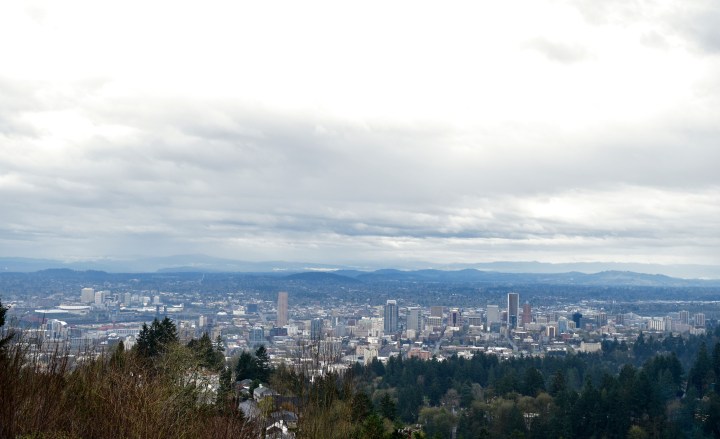
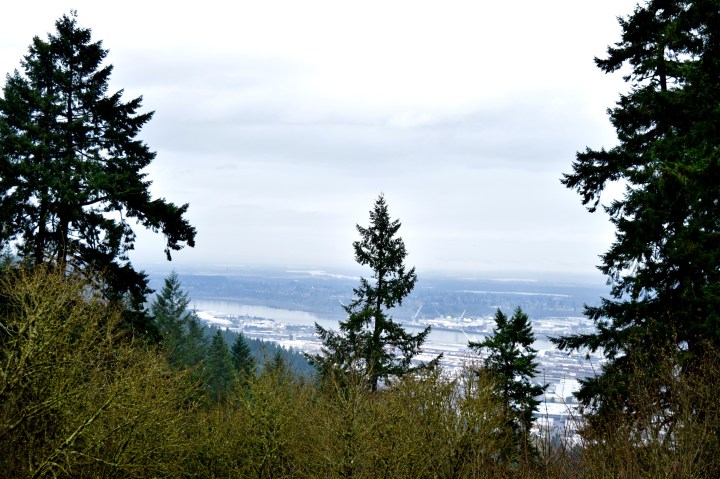
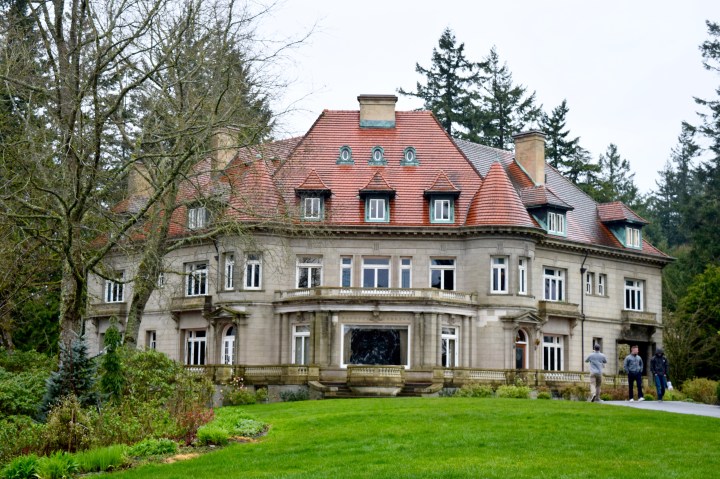
After breakfast we jumped into Nikki’s car and drove up to the Pittock Mansion. This was another Wildwood spot and I was excited. I love big houses and I cannot lie, (those other brothers can’t deny). We pulled up and parked. It was gorgeous! The weather was misty, but no rain yet. The views from the Mansion were incredible. You could see the entire city of Portland as well as the surrounding forests and hills.


View from Pittock Mansion 1 | Land of Laurel


I loved seeing the ship yards through the trees.


View from Pittock Mansion 2 | Land of Laurel


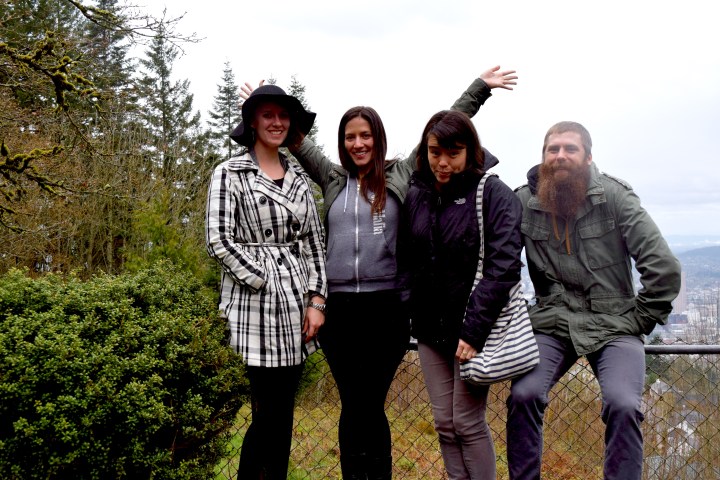
We tried to take a picture of ourselves in front of the view, but it started raining and the water droplets on my lens made Scott a little fuzzy. We managed to squeeze in a semi-normal shot.


At Pittock Mansion | Land of Laurel


The Mansion itself was beautiful too, but honestly, nothing man-made holds a candle to nature.


Pittock Mansion | Land of Laurel


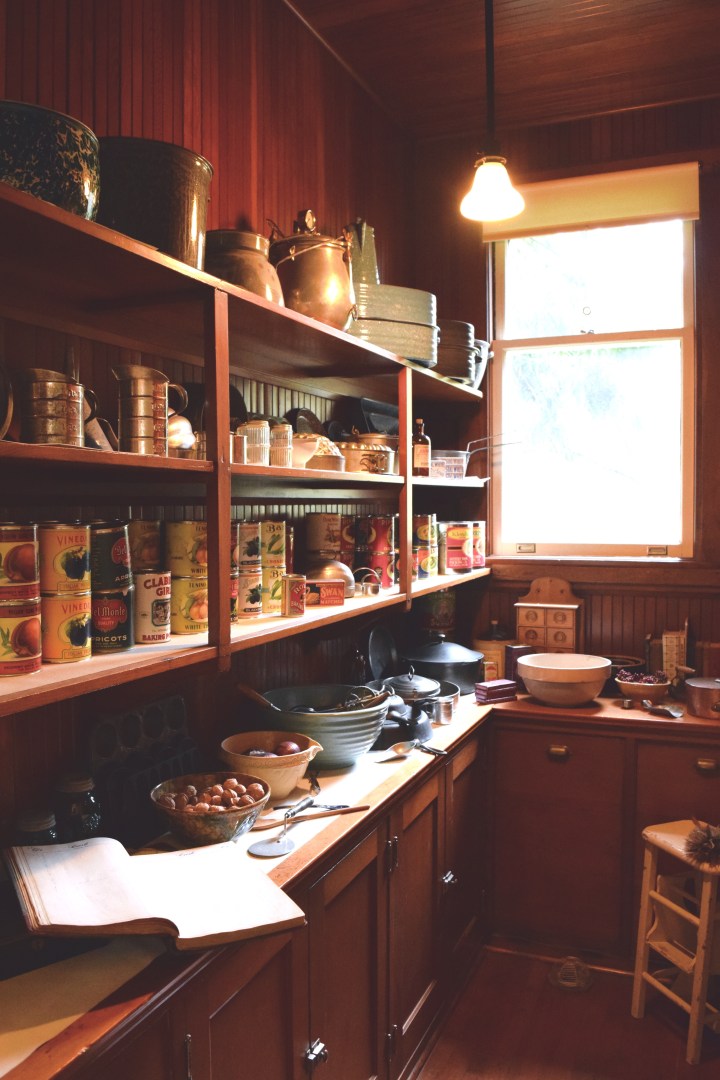
Inside were gorgeous rooms and furniture. The museum collected furnishings to showcase different styles of the period rather than preserving a moment in time. My favorite room? The pantry!


Pittock Pantry | Land of Laurel


Outside again, Scott tried to scare us…


Scott Scary | Land of Laurel


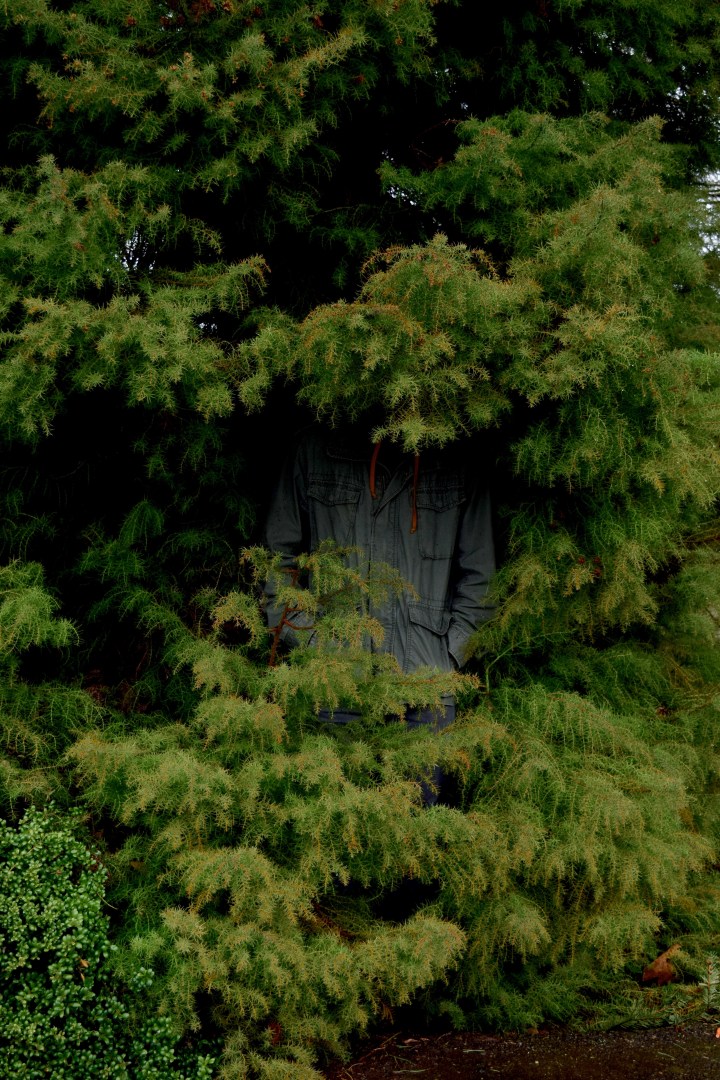
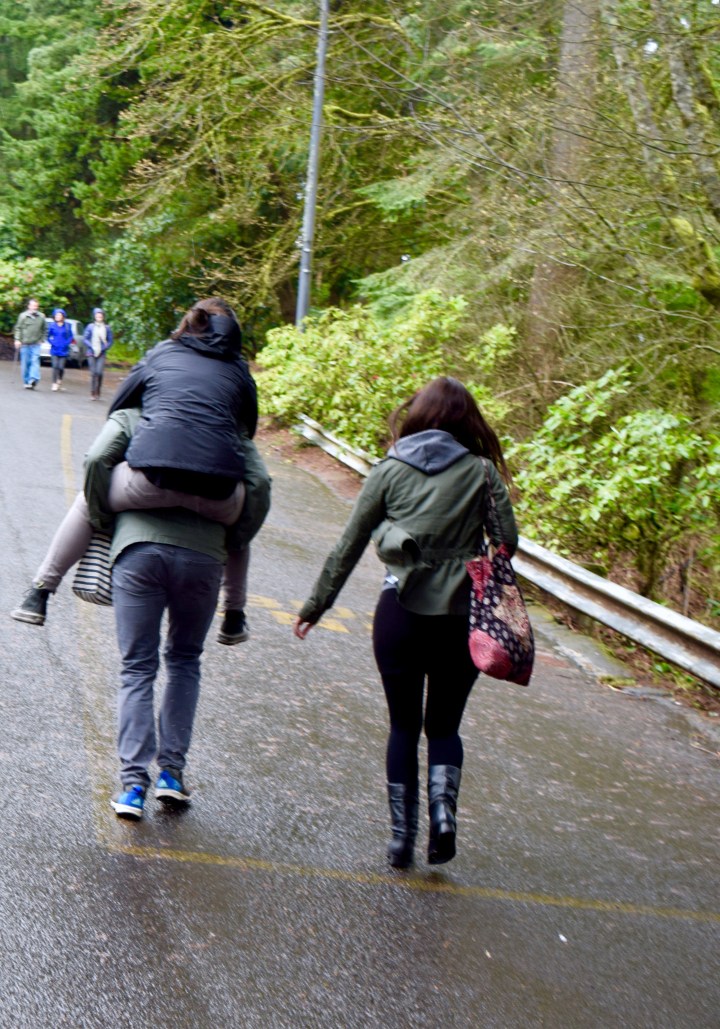
…it did not succeed. Then Nikki hopped on his back and they raced Nicole up the hill towards a trail head.


Scott and Nikki | Land of Laurel


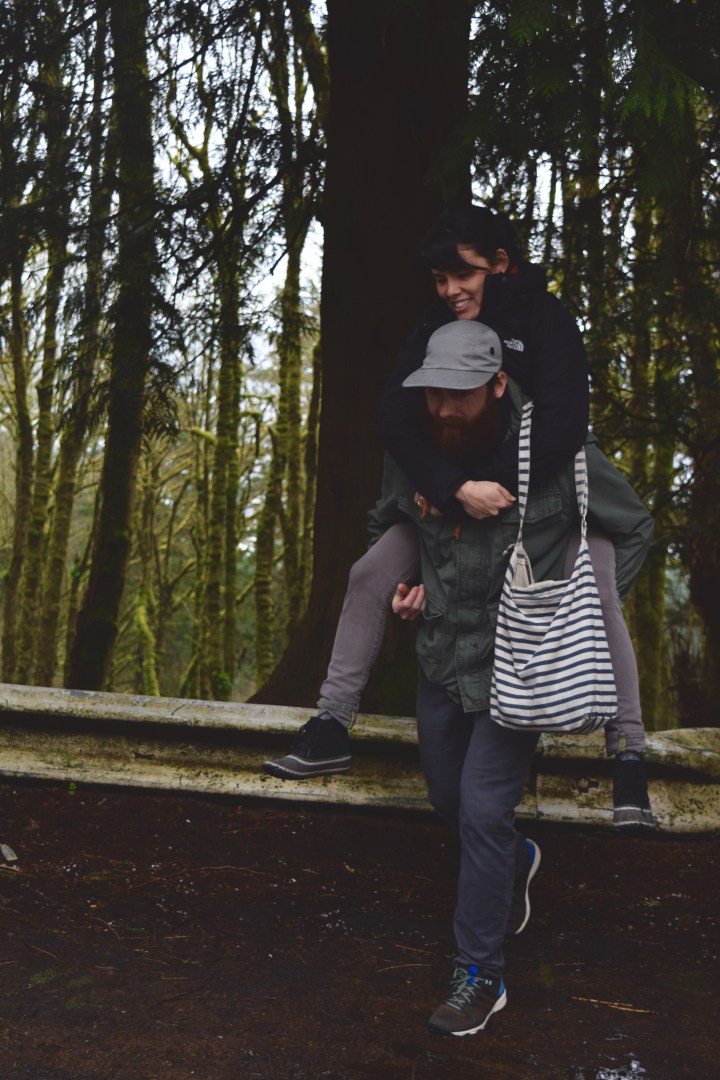
Surprisingly, Nicole lost.


The Race | Land of Laurel


The trail was ridiculously muddy, so we didn’t hike it, but Scott ran down the trail a little ways. Hi, tiny Scott!


Tiny Scott | Land of Laurel


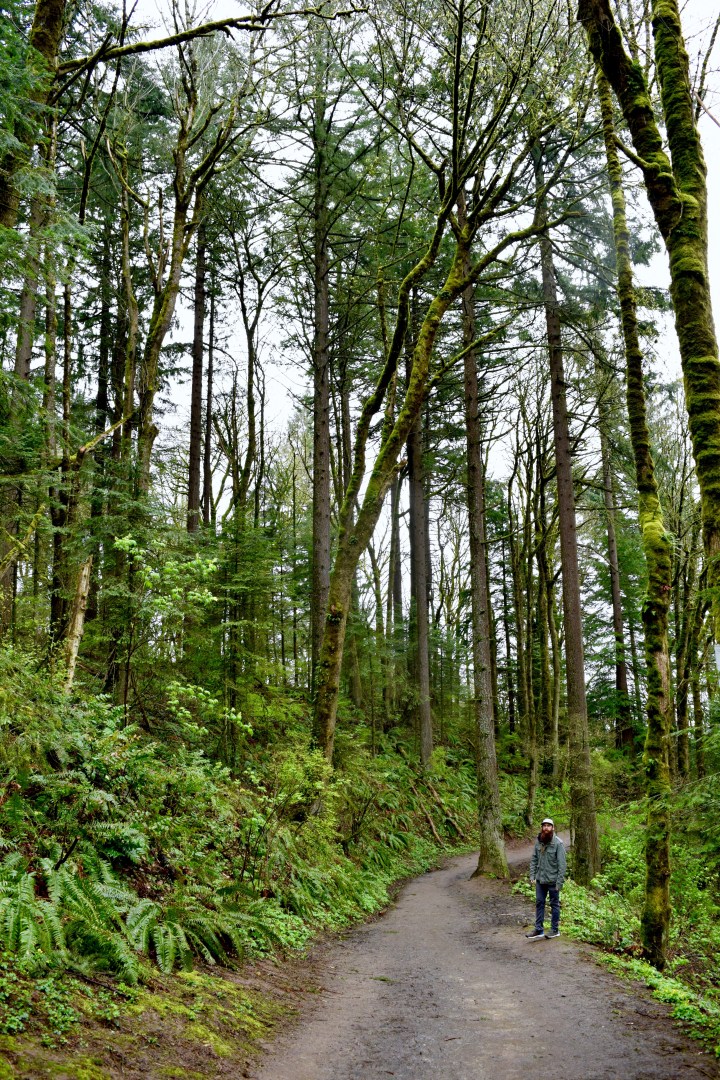
The forest was lush, green, and gorgeous here. It looked like a fairy tale forest. I kept expecting Hansel & Gretel or Snow White to show up! As long as we avoided the Big Bad Wolf, I was happy.


Lush Forest | Land of Laurel


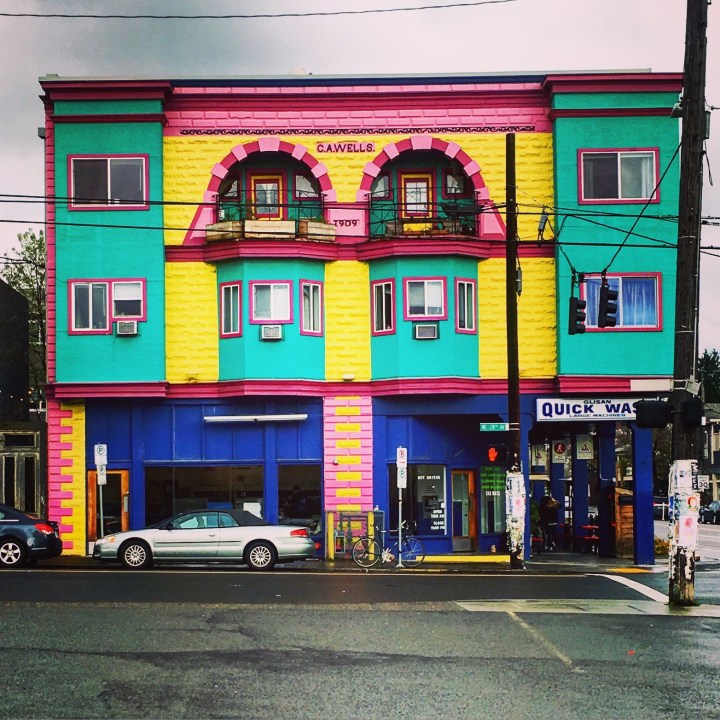
After a bit, we once again climbed into Nikki’s little Honda Fit and drove down the hill. We parked on NW 23rd Street and shopped a bit. We only popped into a few stores, compared with the previous day’s visit-all-the-stores! attitude, this was more chill. Which I’m sure Scott appreciated. We soon got hungry, jumped back into the car and headed to Dove Vivi. We got there right when it opened at 4pm. Actually, we arrived at 3:50pm and took pictures of the building across the street to kill time, before heading in. Look how colorful the building was though! I loved that Portland was full of treasures like this.


Dove Vivi Neighbor | Land of Laurel


At the restaurant, we ordered halfs of the daily special Mushroom pizza, the Corn pizza, and the Blue Thyme pizzas.Yum. These had cornmeal crusts, which I don’t recall ever eating before, they were crunchy and mouthwateringly good. We chatted up the waitress, enjoyed our meal, and laughed like banshees at everything. Even when Scott paused in cracking jokes, we found something to giggle over. Like the fact that Dove Vivi classified all their beverages and threw in this at the end:


Also Milk | Land of Laurel


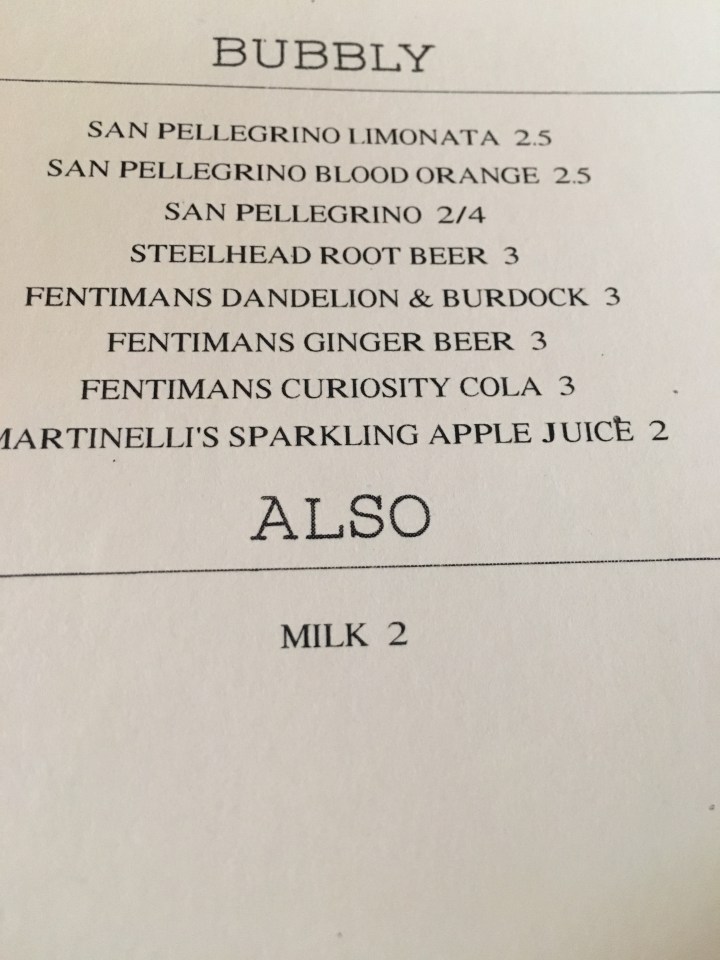
“Also… Milk” became a bit of an inside joke for the rest of the trip. We would say it randomly, frequently. We did a bit of research following this and discovered that Milk is the Oregon State Beverage. If you think that’s weird, you’re correct, but, as it turns out, more than ten states have milk as their state beverage! So strange!


We ended the night with fruity drinks at The Alibi  a tiki bar. A delicious way to finish off a busy weekend! Nikki and Scott had work the next day. Nicole and I were on our own! Time for adventures! I’ll talk more about what we did ate in my next post.


How was your weekend? Take any trips? Have  you been to Portland before? Did you eat everything?? I’m still so full you guys…

Happy Holiday Garland

Happy Monday everyone! I wanted to share this fun garland I made with all of you. I worked on this before Christmas actually and finished it about two weeks before hand. I never showed our holiday decorations though, because I was too busy celebrating! This garland is just so fun though, I think it deserves a shout out.


On the Sunday after Thanksgiving, my mother and her three sisters got together to make holiday crafts. This isn’t a family tradition, but something new this year, and we all loved it! My Aunt Chrisy ended up not being able to make it, but my mother and her two other sisters got together at my Aunt Karolyn’s in Davis for a little holiday magic. My cousin Kelly and I decided to crash the party too! Because I am a planner, I got incredibly excited and started scrolling through Pinterest to see what kind of inspiration I could find. Crafting is basically my own personal Pinterest-Challenge. I fell in love with several ideas, but the one that truly captured my heart was this. It was just so colorful and happy! I knew instantly that it was perfect and I had to try to make it. Yes, it’s not very Christmas-y, but that was what I inherently loved about it! The garland is bright and exciting and could be used for absolutely any holiday or celebration. Multi-use decorations? Count me in!


First I headed to Joanne Fabrics to pick up some supplies. I debated which colors to use before settling on light blue, teal, yellow-gold, yellow, bright magenta, baby pink, maroon, lime green, forest green, white, and neutral beige. I tried to coordinate my colors so there was a darker and a lighter version of each hue. I added the neutrals in because I didn’t want the color to be too overwhelming. I got 1/4 yd of each of my colors, and a 1/2 yard of the white and neutral. In the end, I had way too much fabric, especially of the neutrals. I’d suggest getting only 5″ strips of fabric for anyone planning on trying this. That’s less cutting for you too! The fabric on the bolts was doubled over, so in the end I got 9″ wide and 96″ long strips of each color except the neutrals.


Colorful Felt | Land of Laurel


I decided to make my life easy and simply cut my fabric down the middle until I had two long strips of felt approximately 4.5″ wide. Then I cut my long strips into 3/4″ pieces. I ended up with a ginormous pile of colorful felt strips. So happy and bright!


Pile of Felt | Land of Laurel


I then took strong, white embroidery thread and a needle and got down to stringing my garland together. Because felt is so easy to puncture, I used a nice big blunt needle. I started with a big knot in my thread. Then I took a piece of felt from my pile and quickly found a good way to string them together.


Stringing Together a Garland | Land of Laurel


I took each piece of felt in my hand…


Felt in Hand | Land of Laurel


… and then pinched it in the center like so.


Pinched Felt | Land of Laurel


Then I took my needle with my other hand and stabbed it through the pinch fabric pulling it through both sides of the pinch.


Needle in Felt | Land of Laurel


I wanted my garland to be extra strong for years to come, so I then threaded that needle back through the pinched felt a bit higher than the original hole. Here you can see the two strings coming out the one side of the felt (one attached to the needle, the other to the rest of the garland) and the small white stitch on the pinched fabric.


Second Time Through Felt | Land of Laurel


I pulled the embroidery threat tight which pinched fabric together more and then pulled the felt strip to the rest of the garland. Once it the felt strip was tightly pushed against the garland, I threaded a third stitch, taking the needle and pushing it through the center of the pinch and up.

Third Stitch | Land of Laurel


This kept the fabric pinched, but left the thread and needle coming from the center of the strip, ready for the next piece of felt.

Ready for the Next Strip | Land of Laurel


You guys, I did this about ten million times over the course of two weeks.


Next Piece | Land of Laurel


Since I was using doubled over strings of embroidery thread about one yard long, I would periodically run out of thread. When I got to that point, I would thread my needle through the last three felt strips twice and tie a big knot. I would cut off any excess thread. Then, with my new length of thread, I’d go back through those three strips of felt again. Basically, my transition points between thread lengths are super, duper strong rather than being weak points! I’m hoping this will help the garland last for years to come!


Still Going | Land of Laurel


I planned to hang my garland across the front windows in the living room. The windows are huge and I wanted the garland to hang down each side as well! It took forever to get the length I needed for this, but it was totally worth it! The process of threading the strips of felt became oddly addicting and almost meditative. I sat at the island and worked on it. Then I sat in bed and threaded felt strips. I made my garland while watching TV, waiting for food to roast in the oven. I made my felt garland before bed, before breakfast, after dinner, first thing in the morning, and last thing at night. It was a HUGE time suck, but all the supplies for my garland cost less than $15.00 and it’s much stronger than anything you’d find for that price in stores!


In the end, I was able to stretch it across our big living room windows. It looked lovely. This is kind of a terrible iPhone picture, but it really shows how long this thing was when I finished!


Garland Across the Windows | Land of Laurel


The felt garland also looked great when I wrapped it around myself. Haha! It was like swimming in a sea of happy, bright, fun, and exciting color!


Finished Garland | Land of Laurel


I am so pumped for this garland! It’s perfect for the upcoming Valentine’s Day, for Easter, for Birthdays, for any and every occasion! I’m so glad I went with the colorful option rather than doing holiday colors. I have so much felt left over, I plan on making another similar garland in all neutral colors! Anyone else tried something like this?

Scrappy Headboard

Hello everyone! Hope everyone has had a wonderful first couple weeks of January! I can’t believe how fast the month has been going. Please excuse my radio silence; I’ve been trying to re-find my footing post-holidays! It’s been a crazy few weeks. Crazy good for the most part. But now — on to the good stuff.


Because my bedroom is on the first floor of the house, people always place their coats and bags in there when we have a party or people over for dinner. I don’t mind at all – in fact, my inner show-off likes to have people parading through that room. Plus it means I really truly have to clean up in there on the reg. Which, for me, is a much needed incentive as I tend to let things (clothes) pile up. By far, what people comment on the most after going into my room is my headboard.


New Bedding | Land of Laurel


I built my headboard while I was home for the summer during college. I used entirely scrap wood my dad had piled up (maybe this piling is genetic?) in the garage. It was a great way to get rid of some of the left over wood in a fun and useful way. Plus, some of the scrap wood was high quality walnut or cherry. The kind of wood you don’t want to just lie around forever! While I’d seen others use scrap wood to make headboards, most people seemed to be trimming it in, laying it horizontally, or cutting it into the outline of a more traditional headboard. I hadn’t seen anyone really let the mismatched wood take the point of focus. I wanted the scrappiness of the wood to take center stage. I wanted it to be obvious that the wood was collected and different.


I started by going through the wood in my parents’ garage. I wanted pieces that not only differed from each other, but were also different lengths and widths. Most of all, I wanted wood boards that had character, that looked like they’d live an entire life as something else. I found what I could, but when I first started grabbing, I realized many were looking quite similar.  You can see here that several boards were about the same length and width. That wouldn’t do!

Pre-Cut Wood | Land of Laurel


Once I’d laid out all the planks I needed for my new headboard, I marched several to be cut. Some I wanted shorter, some I wanted to rip two or three inches off to make two boards and break up some of the monotony. The whole dream for this was variation, differences, a story. To do this, I enlisted the help of a table saw… And my father. At the time, he felt I wasn’t to be trusted alone with a table saw. Silly man, I may be ridiculously clumsy, but I’ve never seriously injured myself! At the time though, I appreciated the help. I marked exactly where I wanted each board width ripped and handed those off to him, while I used a chop saw to alter some of the lengths. You can see here, how uneven I wanted these cuts. The boards were not being ripped right down the middle!


Ripping Boards for a Headboard | Land of Laurel


Once we’d made all our cuts, the boards showed so much more variation! It was exactly like I’d pictured, everything different, each plank it’s own story. My clear favorite was – and is to this day – the wide grey board with a knot hole missing from it. That was the kind of character I was hoping for! Now it was just time to figure out what order they would rest in. Again, I wanted contrast, short next to long, wide next to skinny. There needed to be some flow as well and I made sure to pay some attention to symmetry. I wanted to make sure the headboard wasn’t tall on one end and short on the other!


Scrap Wood Headboard | Land of Laurel


Once my boards were all cut and an order had been decided upon, I numbered them all with a pencil and brought them inside. I lined them all up against a straight object (a window seat in this case), and began the process of fastening them all together. There are a variety of ways I could have done this, but the whole idea at the start of the project was to use only things left over from other projects. So I grabbed a two by four and cut it’s length to match the width of my headboard. I did this twice so I ended up with two matching two by fours.


Scrap Wood Lined Up | Land of Laurel


I wish I had more pictures, but I worked on this project so long ago, I didn’t take them with a blog in mind! These pictures were all taken with an old point and shoot camera too, so excuse the graininess! You’ll have to imagine this next part. I laid both of my two by fours horizontally, perpendicular to the planks of scrap wood. One board I placed close to the top and one closer to the bottom. Then I took a bunch of left over drywall screws, got out a drill, and drilled a screw through the two by fours and into the scrap wood over and over and over until each piece of scrap wood was held on by two screws. Once the whole thing was held together, I took my new (and heavy!) headboard back outside onto the sawhorses.


I wanted there to be variation and character in the planks, but this was, first and foremost, a headboard. Which meant it needed to be smooth, without splinters to catch on linens, hair, or my skin! I got out an electric sander and went to town! I evened out the wood board transitions and made sure nothing was left to catch on anything. After I finished this, I missed some of the natural scratches and lines on the boards though. What to do? How to fix this?


If you ever want to beat something up, this is the project for you, my friends. I took out a hammer and some nails and bolts and started going to town. I made little divots by laying the bolts and nails down on the boards and then hammering them. It was actually really fun! I’ve heard you can also use bicycle chains and pretty much anything else you have laying around to give wood some character.


Then, once my boards were nicely beaten up, it was time to stain! Still outside, I took out a can of dark mocha stain left over from another project (aka free!) and gave the entire thing two coats, waiting between coats as directed on the can. After I wiped down the second coat of stain I went back and dripped additional stain on a few places on the headboard. I was hoping to add a bit more personality to the wood in this way as well. The spots of extra stain became much darker and some combined to create organic shapes.


After the stain had dried, cured, and off-gassed outside for several days, I brought inside and leaned it up against my bed. My bed was a birthday gift when I was twelve. At the time, I was completely enamored, but several years later, I was over the cold, silver metal and modern look. It had come from IKEA and had held up well, but just wasn’t my style anymore. I tried to find a picture of it and I did manage to – the picture is just old and showcases my crazy high school bedroom in all it’s holiday finest! Bet you never thought you see something this exciting! Look at that plate holder turned CD rack, the headboard in the center of the room, the extreme mess… so glad I’ve grown up! Haha!

High School Bedroom | Land of Laurel


Anyways, the metal headboard? Out! The bed itself? Totally reuseable. In fact, I placed my new scrap wood headboard directly in front of the old metal one and held it in place with eye hooks and twist ties! Now, you can hardly tell the old metal bed lives underneath that gorgeous scrap wood headboard! Plus, my new West Elm bedspread hides all those metal bed legs. Bam! Whole new look! Cost? Absolutely free. Pretty good deal if you ask me!


Garden Trellis Bedding | Land of Laurel


Have you made a headboard before? Or repurposed scrap wood to make something new and unexpected? It was a fun challenge to make something like this for absolutely nothing!

Little Guy for a Long-Time Friend

There is a thrift store pretty close to my house. It’s about a half-block out of my way when I’m walking home from BART after work. I won’t say what it’s called, because, to be perfectly honest, it’s not all that great of a thrift store. (Seriously where are the best furniture/accessory thrift stores in the Bay Area? Do you know??? TELL ME!!) Every now and then I’ll stop by though and see what’s there. I whole-heartedly agree with Katie from Bower Power that all thrift stores have a strength zone. This thrift store’s strength is clothes and toys. Neither of which I need much of. But, sometimes, walking home from work, a girl’s gotta see what’s what.

A few weeks ago, I’d strolled through the entire store and saw a pretty cool lamp. I liked its shape quite a lot– simple, rounded, contemporary– but I didn’t really have a place for a single lamp. I returned to browsing, and then, standing across the room, I noticed there was a second, matching lamp! The first lamp had a brother!  They were marked at $10 each and they were a hideous brown color. HIDEOUS. Now, $10 isn’t exactly pocket change for a lamp that probably doesn’t even work, but I thought, “Hey, why not?” I needed lamps for our living room which has some horrible (sorry roommates!) glass side tables, but nothing on them to give them more presence. So I hopped on those lamps like a tiger on a steak!

As I was walking to the check out — gripping my lamps by their necks like strangled chickens (is that simile graphic enough?!), I happened upon a small nightstand with fun curvy lines. What was this?? About a month before this, I’d actually spent the day thrifting (and donut snacking!) with my friend Hannah looking for a nightstand to make-over for her bedroom. Hannah wanted something with good lines, some fun turned elements that she could paint a fun color. We had gone to several places (remind me to write about how to spend an entire way thrifting and snacking through Berkeley and Oakland!), but hadn’t found anything that suited her needs. I set my lamps down on the nightstand, guarding these treasures like a dog, and pulled out my phone to text Hannah this picture.

Thrift Store Lamps and Nightstand

Hannah, of course, loved it, and for $10 dollars, she’d take it. I happily danced the rest of my way to the checkout and bought all three finds. At this point, I actually walked the rest of the way home carrying my new strangled chickens lamps. I then grabbed my car and headed back to the thrift store, because as much as I like to test my upper body strength, there was no way I was going to try carrying the nightstand home!

As I was loading the nightstand into the car, I cursed myself for my rookie mistake. I had not thoroughly looked at the nightstand before I bought it. The little guy wasn’t solid wood like I’d assumed. It was a mix of plywood, cheap pine, and MDF. Ugh. Plus, there was pretty bad moisture damage to the plywood back legs. Why hadn’t I taken a closer look?! Grrrr. I cursed myself. But, I had already bought it and the store didn’t take returns, so I decided to pretend to be an optimist and make the best out of the situation.

When I got a chance to work on the nightstand, I accessed the state of the piece, and concluded that I and the world of DIY could save this little guy. From the front, he actually looked pretty dang good!

Nightstand front view

From the side you could start to see some of the moisture damage…

Nightstand Side View

And from behind, you could completely access the damage. 😦 He definitely wasn’t a looker, this little guy!

La Chanelle

P.S. I tried to look up La Chenelle, but when it wasn’t immediately obvious, I gave up. I’m lazy like that. Let me know if you’ve heard of them?

When I zoom in, you can see that these back legs did NOT look good. I was worried…

Moisture Damage Legs

But back to the little guy’s DIY: first I wiped him completely down with an old wet projects sponge I keep around for this express purpose. Then I grabbed a pair of slip joint pliers and tightened the bolts that hold the pretty legs on. The front legs are by far my favorite piece of this dresser and I was happy they were so easily attached and not damaged like the back ones!

Tightening the legs

Oddly, once I turned him over the little guy had staples everywhere. I assume they once held something on, but at this point they were worthless and annoying.

Staples

I removed the staples in a quick minute with a pair of needle-nose pliers.

Needle Nose Pliers Staples

And yes, my pliers are pink. My father bought them for me. Apparently he thought I’d prefer that… Crazy old people! Just kidding. 😛

After that, I gave the little guy a decent sanding where needed. The sides were a bit bumpy towards the bottom from the moisture. A little sanding cleaned them up though. Once he was sanded, I got out my wood glue. Elmer’s = life long adhesive ❤

Wood Glue

Because I am not known for my poise and restraint, I just squeezed a ton of wood glue on the crappy looking parts.

Wood Glue on Leg

I’d picked up these small clamps the last time I was at Home Depot, so I decided to put them to use. Where the plywood had expanded and split from the moisture damage, I glued and clamped.

Wood Glue and Clamp

This held the plywood together in a position more similar to what it’d originally been. Since plywood is really just strips / pieces of wood glued together, I figured this really wasn’t any different. Plus, what did I have to lose? I left nightstand upside down and clamped like this overnight.

In the meantime, I turned my limited attention span to the drawers. That hardware was coming off! Hannah wanted to replace the pulls with some fun knobs from Anthropologie or World Market.

Nightstand Drawers

I placed the drawer fronts towards the ground and unscrewed the hardware. This is a really easy fix if you ever want to update a piece of furniture. New knobs add so much personality! Removing the hardware from these drawers took less than five minutes.

Unscrewing Nightstand Pulls

Once the hardware was unscrewed, the pulls popped right off. Super easy! There was some guck on the drawer fronts though, so I wiped that right off with a sponge. After that, except for the wholes, you couldn’t even tell there were once pulls on these drawers!

Guck under Hardware

I left everything and pretended I have a life outside of DIY for  a bit. The next day, I pulled the clamps off back legs of the little guy. They looked SO MUCH BETTER you guys! They looked almost totally normal and I knew with a coat of paint, you’d hardly notice at all. Except for the gaping holes! But whatever! I’d regenerated plywood! This was too exciting / such a freakin’ relief for me to worry about the gaping holes!

Reglued Plywood

Remember what they looked like before?!

Moisture Damage Legs

SO MUCH BETTER!!! Once I’d finished my twirling my happy dance around the courtyard, I decided to do something about those minor huge gaping holes in the little guy’s back legs. With that in mind, I tossed open my big canvas painter’s cloth and pinned it up to protect the courtyard area. I grabbed my wood filler and started filling in the scratches and gaps on the nightstand.

Wood Filler

I wear gloves and a mask when I do that because wood filler smells like cancer Seriously. it stinks stinks stinks!

Applying Wood Glue

While I was at it, I filled the holes from the drawer hardware as well.

Wood Filler on Hardware Holes

Make sure you lump a whole bunch of wood filler in holes like these. You want it to be bumpy now so you can sand it down to smooth later. Once I’d filled the biggest scratches and gaps I waited for the wood filler to dry, then sanded the entire dresser again, making sure the spots I’d wood filled were nice and smooth.

Sanding Wood Filler

Then I wiped the nightstand down again, but this time I used liquid deglosser. Since the little guy wasn’t solid wood I hadn’t wanted to sand him too hard and I thought this would be good in the nooks and crannies of the nightstand’s details that are always so hard to sand down!

Liquid Deglosser

After that, he was looking pretty good and I was ready to paint!!! I’m actually always ready to paint. I love painting! Before I could get anywhere near the little guy, I needed to tape off some areas. I didn’t want to paint the sides of the drawers, because this can mess with the opening and closing glide. I taped the edges of the drawers and used one of my roommates’s old issue of The Economist to cover the larger areas.

Prepping to Paint Nightstand

The little guy was looking pretty decent actually. I was so relieved that I’d managed to save the moisture damaged nightstand. Now, with a bit of primer and paint, I didn’t expect to notice the little guy’s humble beginnings at all!

Have you ever saved plywood from moisture damage? Did it work? Are you as excited as I am about saving this nightstand from a watery grave?!

Planting Fred the Fish

I planted succulents in Fred the Fish!! He looks amazing!! I am so excited to share this with you today. Fred has finally become his true self. His awesome self. Oh, Fred, how I love thee!!! I might be a little too excited about this!

As you might remember I got Fred from a pile of my grandmother’s belongings after she passed away in April of 2014. He was a dirty brown fish complete with chips in his cheeks and an ivy plant that had outgrown his capacity. Once I’d repotted the ivy and cleaned him up he was looking like this. Brown, ugly, chipped, dirty, sad. It was time to let his true potential shine through!

FredCleanedUp

I turned to Rust-oleum’s Sage Green Gloss spray paint to help me turn him around. Now the ivy is gone, the chips are disguised, and he glistens with a glossy coat of sage green paint. Beautiful!

PaintedFred

He was by no means done though. Months ago, I mean, seriously, months ago, I was wondering through IKEA and saw their succulents which we only a couple of dollars each. I bought four with Fred in mind. Then I left them in my bathroom and ignored them completely except for the occasional watering. Now that Fred was looking all spiffy, it was time to plant them!!

PrePlantedSucculents

I took Fred to the five foot wide stretch of space between our house and our fence and set up my make-shift potting area. First, I stole the little round side table from our courtyard and plopped Fred down on that. Then I got out my gardening gloves and spade.

FredtobePotted

Before I could break out the succulents, I needed to add good drainage. I grabbed a handful of course gravel and dropped it into Fred’s basin.

DSC_0463

Because succulents hate standing water (as do most plants…) I made sure to layer in quite a bit of gravel. This way if I accidentally overwater, I won’t kill them. Hopefully! 🙂 You can see here, I certainly wasn’t shy with the gravel. He’s about 3/8 full of gravel. Not a ton of room for soil, but succulents do o.k. in shallow areas.

FredFilledWithGravel

I then layered in the dirt! Which makes me happy, because suddenly Fred went from sad and empty to full of promise! Dirt means growth! Growth means plants! Hopefully plants would survive! You can see there was about 2 inches of dirt over the gravel. Enough to poke into a bit for the succulents, but still enough room for me to add more after placing them.

DirtyFred

Also sidenote — I LOVE these pink and green gardening gloves I got at Home Depot. So happy! So bright!

Now that it was finally time to plant (can you tell I am pretty much the least patient person in the world?!), I decided to start with the largest succulent first. I took the succulent and gently squeezed it out of it’s container. Then I crumbled off the dirt into my potting soil bag until I could see the roots. This one I can actually name. It’s Aloe Vera, friend to all who burn easily. Don’t you dare try breaking off some of this guy for your sunburn though!!

FirstSucculent

I was actually surprised that the root balls of these succulents were so small. It explained why they weren’t looking particularly fantastic. This taller one had been pretty flimsy in the plastic temporary pot. I’m assuming it wasn’t very healthy. Anyone know why succulents would do this?

Rootball

I placed the succulent into Fred’s basin, carefully spooning more dirt in around him, and gently pressing it down around the succulent with two fingers.

Planting Aloe Vera

At this point, there was too much soil in between the arms of the aloe vera. I later scooped most of it it out with a finger. Fred was pretty cool with the Aloe sticky out of his lower back. This is totally a new look. I’m going to make something similar out of cardboard for myself and copy that trendsetter!

DSC_0490

The next guy was also spiky like the aloe plant, but shorter. I decided this prickly little lady needed to stand opposite her taller friend.

PricklyLittleLady

Two plants in, Fred the Fish was looking good!! Gah! It makes me so joyous! I’m such a plant nerd.

two in Fred

The next plant — another succulent about whose name I have not clue– started out really short, but several months in my bathroom later, had grown into a long skinny thing. I’m assuming this was due to the lack of natural light in my bathroom? Maybe they are supposed to look this way… Who is good with plants out there??

SuccyTwo

Its rootball looked a bit bigger though! Thank goodness.

SuccyTwoRoots

Still not great though right? This is the one that looks the worst these days. I mean, it certainly doesn’t look bad, but when I get my Sherlock Holmes on and look a little closer, I notice some not so nice spots. Survive little succulent! Survive!!! I can only hope and pray…

Finally, the last succulent was one I’d actually saved from the driveway. We have hens & chicks (the plants not the animals) lining our driveway and every now and then they get a little beat up. This one I saw sitting out there on the concrete all by his lonesome self. He must have come off the larger plant when it got brushed with a car wheel or something. I planted him, with the help of my good friend Hannah, into this salsa jar someone brought to our housewarming party.

DSC_0510

He sat in my kitchen window for the next couple of months, getting lots of sun. This guy was the smallest by far, but definitely healthier than the IKEA ones. He epitomized small but mighty!

smallbutmighty

And look at that root ball!! Such a baller! Hahahaha. At least I make myself laugh. 🙂

Baller

After I planted this fourth guy, Fred was pretty full. I topped the Mr. Fish off with more potting soil, again pressing gently, but firmly down around each succulents. Fred was looking good, guys! A little dirty due to the planting, but getting there!

Fredwith4Succulents

You can totally tell how super bright it was the day I planted everybody in Fred. I think it was about 90 degrees that weekend. Yay September in California! To clean things up, I gave Fred a good dowsing with water lovingly admired him glistening in the sun like a new mother looking at her tiny babe before bringing him inside.

Wet Fred

I brought Fred the Fish inside and let him sit in the kitchen for a couple weeks before I took the rest of these pictures. I wanted the succulents to get a chance to root and root they did! They look so good! Fred the Fish looks fantastic! I am so not biased at all. I just love how he looks in the kitchen!

FredFinished

Remember what he looked like before?!

FredCleanedUp

And look at him now! The green is such a nice color. It’s really the perfect sage-y grey-green. It looks fantastic with the butcher block on our island. Such a nice change from the brown!

FredFromtheSide

From above the succulents are just shining! They have rooted more firmly and no longer give when I tug on them gently. I hope they grow out a bit. I’d love to have time pooling over the side just a little bit more. Luckily the shapes of the succulents and their varying sizes gives a lot of texture. They aren’t falling over the edges, but the definitely stick out over them from above!

DSC_0270

Oh my god, you guys, have I mentioned that I LOVE HIM? Just look at that glossy face! Look at the glint in his eye! He’s so beautiful!!

GlintinHisEye

I get to walk into my house every day and look that beautiful face! I am so happy with how he turned out. It’s wonderful to have this piece of my grandmother in my life every single day. It’s the first thing I see when I walk into my house. I couldn’t be more pleased. It’s so bright and happy. I love that the succulents show off the shape of the fish more. It looks so inviting! You can actually tell he’s a fish. I envisioned him pretty much exactly like this and he turned out so well. This is definitely an accomplishment for me, because everything I design in my brain is so perfect, reality can sometimes be a little disappointing. Frequently when I’m crafting or cooking. Hahaha. 🙂 Not with Fred though! Fred the Fish, I could marry that guy. Maybe I’ll just give him a smooch and see if he turns into my prince. Oh wait — that was a frog wasn’t it? Oops!

Do you have something of your grandparent’s that you’ve revitalized and use everyday? Do you have Fred the Fish’s twin? Let me know what you think.

Fred the Fish

This is it. This is the first real blog project post at Land of Laurel. Are you excited? I am excited! Maybe a little too excited. It might be the pint of Three Twins Organic ice cream I just finished, but I’d like to think these butterflies in my stomach are from blogging excitement! Let’s just keep our fingers crossed I don’t have food poisoning. Again… 🙂

Before I dive in and talk about Fred the Fish, let’s put him in a little context. Fred is not just any Fish. Fred is a very special Fish. To me, at least. And here at Land of Laurel that’s what matters. 🙂 When I was growing up, I lived on the eastern side of the Caldecott Tunnel, but my grandmother– who we called Oma– lived in Berkeley, CA, the same town I live in now. I have many dear memories of Oma; she had a huge presence in my life. Oma was born in Germany in the 1928. She survived the war and its aftermath, eventually immigrating to the United States in the mid-1950s. She lived with distant relatives in Indiana and soon met the man who would become my Opa! She settled down, had four daughters in quick succession, moved her family to Long Island, put four kids through college, then followed those four kids to California. The Oma I remember growing up was an impeccably dressed and mannered woman who read the New Yorker, New York Times, and toy catalogs with no discernment of difference in quality. Oma would babysit my sister and I after school on Wednesdays; she would host sleepover weekends; she taught me how to make Käsespätzle. It is from her I inherited my skills in organization & punctuality, appreciation for a great view & a good park, and drive for perfection. My Oma passed away in April of 2014 after suffering from Parkinson’s Disease for several years. Although it was hard on me and my family, it was the right time.

LaurelsOma

Now, this post is not supposed to be a sad story! My Oma lived an amazing, exciting life and enjoyed every minute of it. She loved her family, her daughters and eight grandchildren especially. She meant so much to us and everything in her life and home was full of meaning. After she died, her things were passed on to my mother and her sisters, but after they’d gone through everything, I got the chance to pick a few things for myself before everything was donated. One of those things was Fred the Fish.

FredinOmasTime

Continue reading “Fred the Fish”

Hey there! Hi there! How do you do?!

I have read blogs for years and years. I love reading through archives and watching blogs evolve over time. So very few people start with a strong “Hello!” But that’s what I wanted to do! Soo…

HELLO!! Thank you for reading Leaves of Laurel! I am so glad you clicked and found yourself here. My name is Laurel and I run this shindig. I live here in Berkeley, CA where I enjoy the sun and warmth year round. I love cruising around this town on my bike whether I’m heading to my favorite donut place or playing Tetris with my organic Berkeley Bowl groceries in my basket. If I’m not working on a project I spend weekends in beautiful Santa Cruz with members of my huge family.

LaurelonBike

Click through more posts to learn about making-over old nightstands, painting my grandmother’s fish planter, Fred, & planting succulents in him, baking fudge pies, and so very much more!