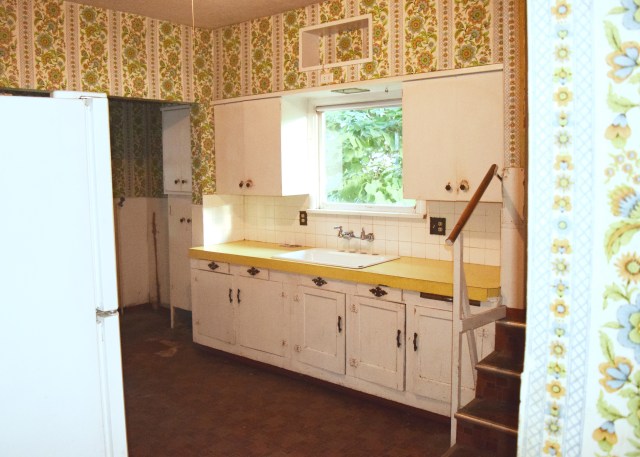
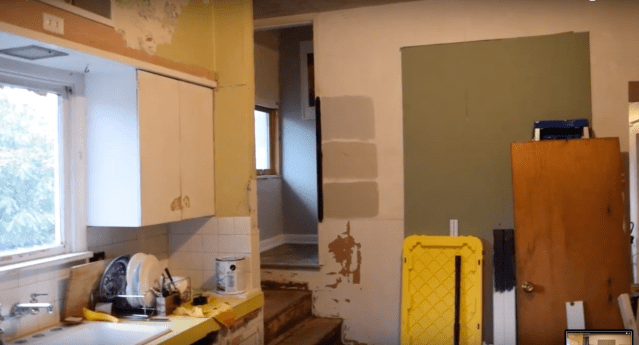
I would love to gut and completely reconfigure my kitchen, but right now my savings are focused elsewhere! So in the meantime I’ve begun Phase 1 of the kitchen renovation. This Phase is to hold me over until I can do a Phase II gut renovation and really move things around. Phase I includes a lot of cosmetic updates that have a big visual impact, but smaller financial impact: removing the sheet vinyl, refinishing my hardwood floors, painting the cabinets, and painting the walls. But while I’m elbows deep in those projects, I’ve still got kitchen planning on the mind. I’ve been pinning tons of inspiration of old kitchens and kitchens with old vibes, so when I’m ready to renovate, my vision for the space simply needs to be detailed out. In the meantime, I’m ready for Phase I to transform the space so it no longer looks like this hot mess!
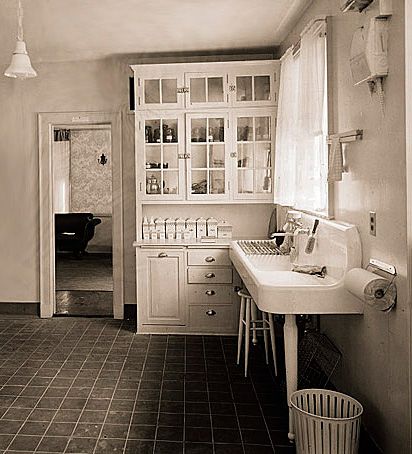
Since I ultimately want my kitchen to speak to the age and historicism of my 110 year old home, I spent a lot of time looking for images of 1920s kitchens. This one below shows so many elements I’d love to bring into my own kitchen. Can we just talk about high backed kitchen sinks? I know that inset sinks are all the rage these days and they’re FAR easier to clean than a drop in sink which sits on top of the counter, but can someone please explain to me why high-backed sinks ever went out of style? The splash guard alone is so amazing! Never worrying about water getting behind the sink and damaging the grout / caulk where your backsplash meets the counter? Count me in. I have been on the hunt for the right restored sink for a while now. I love the aspect of the built-in dish drain rack too! So cute! I will probably place mine on top of the counter rather than having exposed legs though since storage is always an issue here at Berrybrier. Another wonderful thing about this picture is it shows a glass hutch in a kitchen. Something I loved about the kitchen when I first moved to Berrybrier. I’m also very curious about what the cabinet on the left held since it looks very similar to modern day pull out trash drawers!
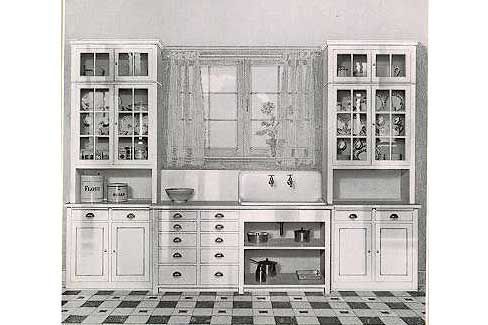
This is just a sketch below, but again, it really drives home some of the aspects of early 1900s kitchens that I want to incorporate in my future kitchen and preserve in my existing one. Here’s a high-backed sink shown placed on top of a counter with a cabinet below. I’d choose a closed lower cabinet for myself (my cats seem to think it’s such a fun game to play in open cabinetry), but the almost-symmetry here interests me. Again, the glass hutch makes an appearance, here as a duo framing the window. I love it!
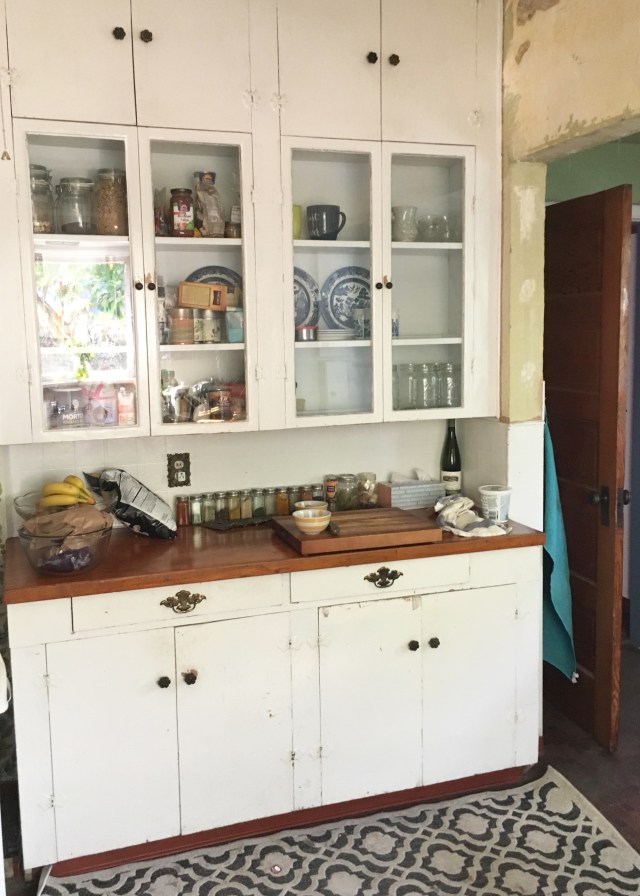
When I bought Berrybrier, one of the most charming things in the entire house was the glass cabinets in the kitchen. I adored them! They struck such a lovely vintage note and as a designer, I was so excited to have some shelving to style out! Within just a few weeks of living there, I filled the shelves with my things I used most frequently (note these aren’t styled at all). Even with the rest of the kitchen in chaos, I wanted to be able to use these dreamy cabinets. So seeing those kitchen above with their glass hutches makes me want to keep this aspect in a future kitchen. I loved the idea of a hutch with glass doors way back when I lived at the Duplex in Portland, so this is a nice continuation of that theme.
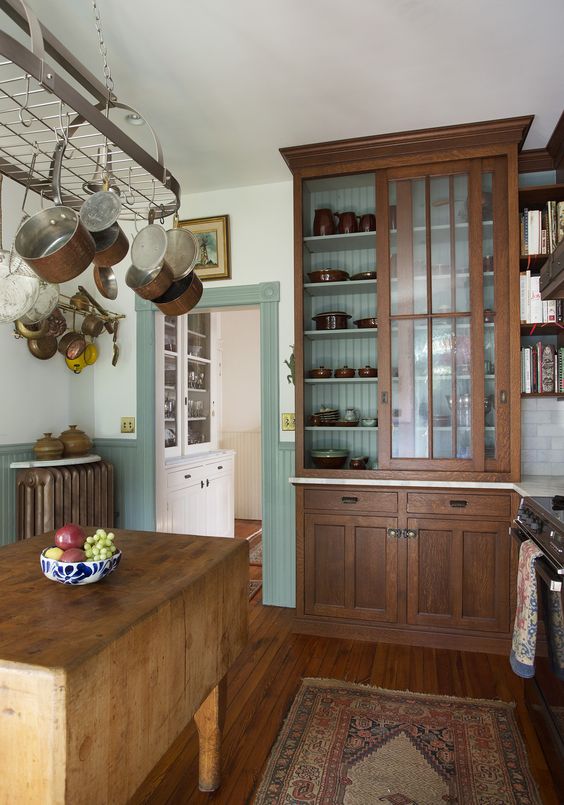
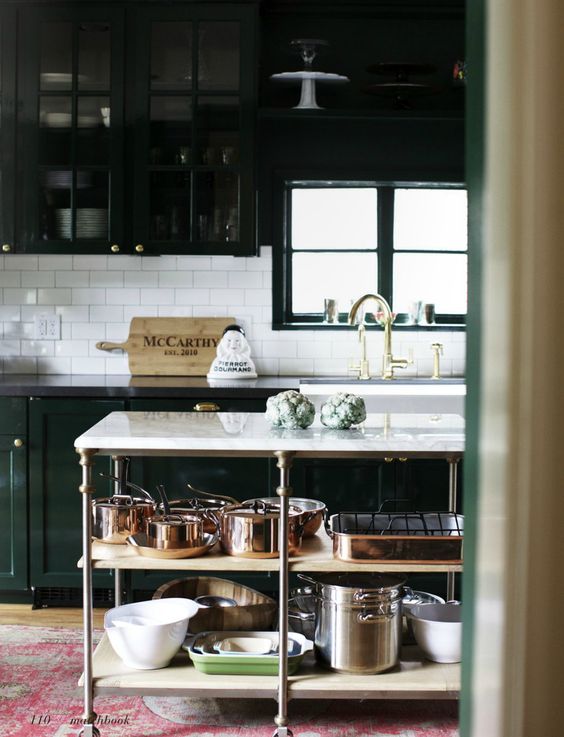
Okay, let’s get into some modern inspiration now. I loooove this image below which has so many amazing take-aways! First, the trim color obviously makes me ten kinds of happy since I love a bold trim paint. Second, the pot rack over a small island is exactly the kind of smart storage solution I need in my own space. And finally, look at that hutch. I mean, god help me, that thing is gooorgeous! I love the paneling on the lower doors, the beadboard, the accent color, the fact the the glass doors are sliders. They seem to not have a ton of storage needs however, since the cabinets hold a collection of vintage ware rather than every day necessities. While we’re taking design tips here, please note the picture hanging above the door. Such a cute and creative way to make use of high ceilings! I am 100% doing that in my kitchen now and for Phase II!
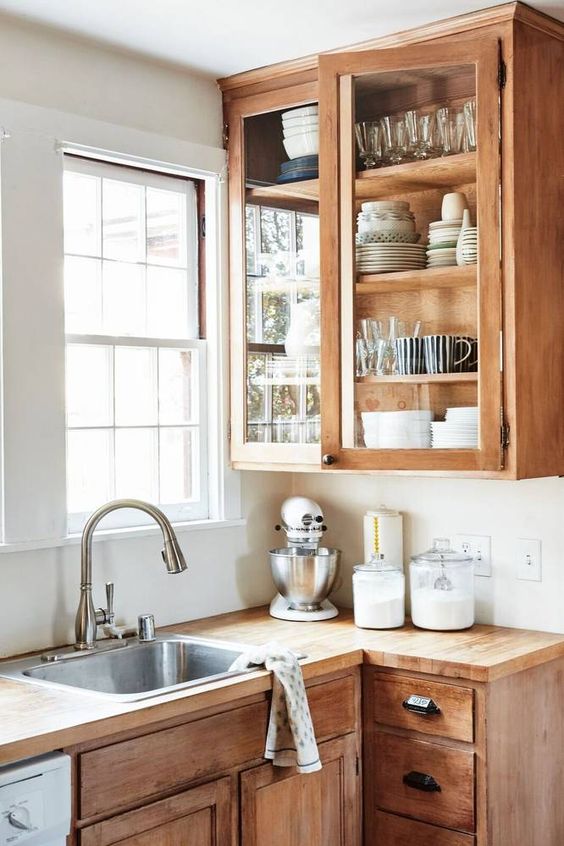
This image intrigues me with the wood counters on wood cabinets look. It feels so vintage and folksy doesn’t it? This type of simple kitchen cabinet feels like it gets to the heart of my house. It’s not fancy, but it strikes a note of casual, antique charm. Should I do wood cabinets with a buncher block counter? Butcher block counters would be super affordable and this makes them feel so fetching in a non-farmhouse-y way.
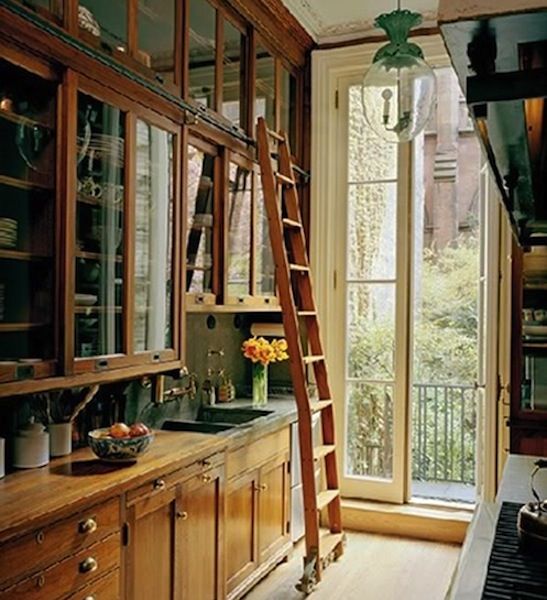
My kitchen has the 9′ ceilings and since it’s a smaller space they feel even higher. I’ve alway dreamed of a library ladder in my kitchen (or library!) and this feels so practical for upper storage too. If I could find away to make this work (and be reasonably affordable!) in my Phase II kitchen I would just about die every time I walked in and saw it! The down fall of these is that they take up a lot of space and constantly need to be shuffled around and out of the way. They work best on straightaways, like the one here in this galley style kitchen, so with my kitchen split onto three walls, it might not make sense. But! I admire it just the same and take a lot of other inspiration from this picture. Again, we see sliding glass cabinet doors on the uppers. We’ve established that I am HERE for that! But have you noticed what else repeats? Stained wood cabinets with wood countertops! Am I doing this you guys?! I really love this stylistically. Is it super practical? Probably not. Will I ever be able to install crownmouling without a butt load of caulk and paint to make it look right? No… the cabinets and crown themselves would definitely need to be professionally installed. Not exactly a moment for savings there. Hmmm…
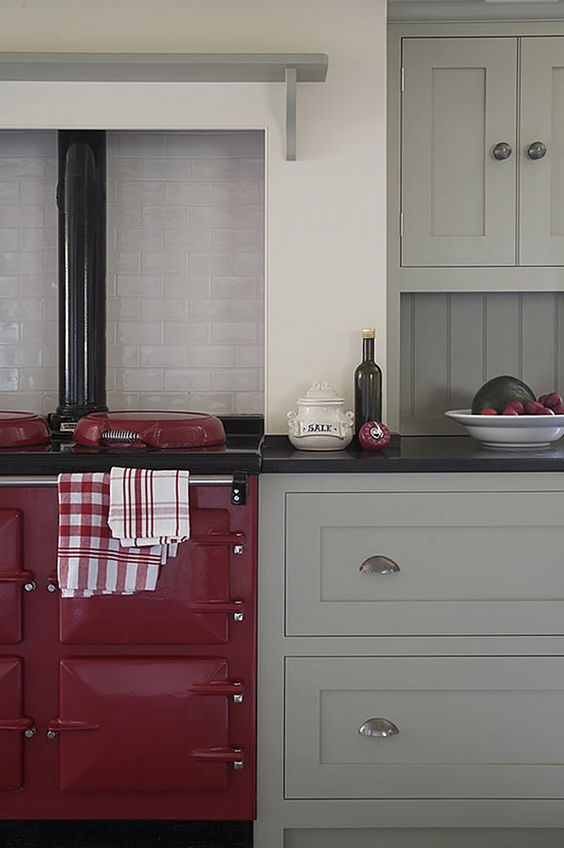
There are a lot of very formal traditional kitchen out there, stunning ones, and I love them all. But that kind of traditional formality doesn’t really work in my more modest house, which is why I’m looking for more casual traditional inspiration. This image below tiles that together well. I love the elements like the v-groove backsplash and the simple inset shaker style cabinetry. The knobs and bin bulls are simple without intricate ornamentation and the shelf above the range utilizes an affordable, simple wooden bracket.
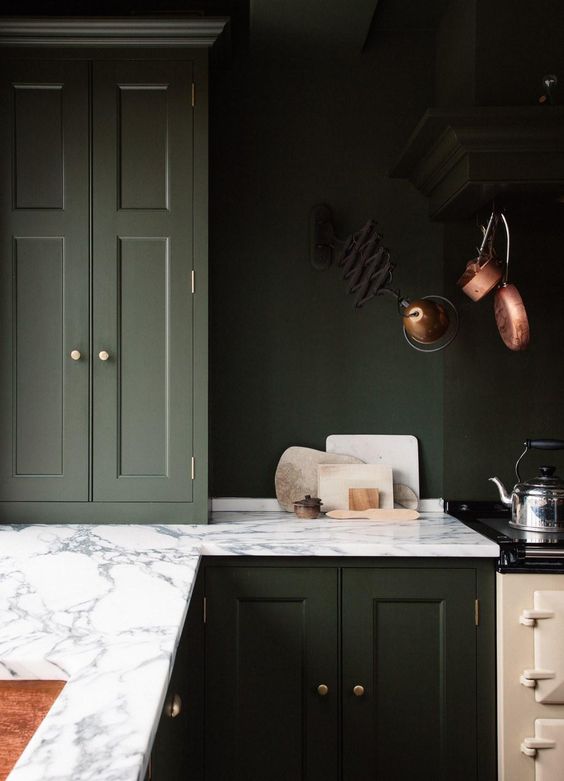
This kitchen is stunningly gorgeous and the deep green painted cabinets are calling my name. The woodwork here is a bit more formal and complex, but the hardware remains simple, which I like. I’m also a sucker for an upper cabinet that comes down to kiss a countertop. Such a simple, stunning detail. The green tied with copper and brass accents makes a strong argument for painted cabinets as well! Marble countertops would be a wondrous luxury, but one I’m unlikely to afford anytime soon.
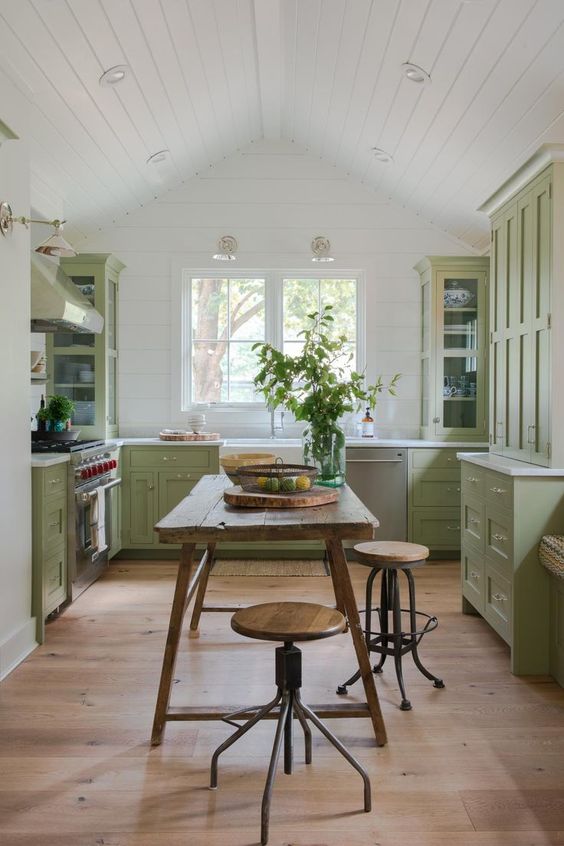
My kitchen is not quite big enough to have a proper island, and I don’t love the modern concepts of islands in every kitchen. Older kitchens had freestanding tables, sometimes counter-height, but often with chairs. In my space, however, I don’t have space for a true dining table. But an old wooden counter-height table with a few stools that could be tucked underneath would be a great place for guests to perch while I cook. Considering the current favored place to sit is the stairs, this would be a nice upgrade! This kitchen appears to be a bit wider than mine, but has a similar layout with a skinny table through the middle. I love how this table ties this recently finished kitchen in and makes it feel like part to the past. It’s clearly a well-loved antique and is the showstopper of the whole space. Maybe I can find something like this for my own?! It would be an amazing touch. Or is it possible to build something with this much character using reclaimed woods?
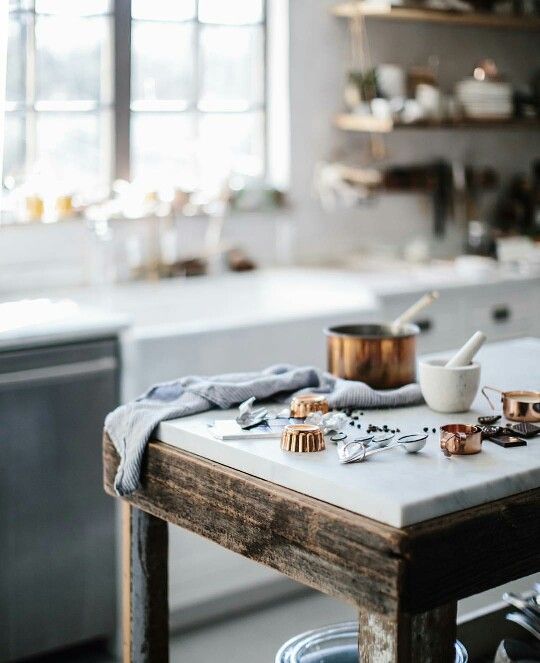
Since marble countertops on the perimeter are more of a pipe dream than any sort of reality, maybe the island is a better place to make that dream come true. A remnant slab could make a great small, freestanding island top! This one sits on a rustic, reclaimed wood base which almost looks like something I could actually build.
Or, to simplify, there’s always the option to buy a freestanding island. There a lot of metal islands with marble top readily available online. This one comes with shelves for storage, which would be a wonderful addition since I live with someone who seems to own every baking utensil, pan, and toy. As a packrat myself, I’ll admit I never seem to have enough space for my cooking items either! A freestanding island or table of some sort is definitely a component of the Phase I kitchen renovation.
Then there’s the stairs. I have to admit, it’s been a year since the kitchen floors were finished and almost a year since the stairway was completed, but I never finished restoring the wood on the kitchen steps! I was in such a hurry to redo the floors I didn’t want to waste any more hours working on the steps that looong weekend. And then I just kept putting it off. A few weeks ago my roommate was gone for a long weekend and I planned to finish the steps while she was out, but then I was in such a rush to work on some other things and realized there was no point in stressing myself out even more trying to squeeze in refinishing stairs. So where the stairs enter the kitchen they are still half-stripped, half-sanded; and the landing still has sheet vinyl on it! I’ll get on finishing up that project…eventually. But let’s talk about what the stairs could look like in Phase II. I’d really love to open up the stairwell to the kitchen and add a wood railing instead. It would make the stairwell feel so much bigger! I could raise the ceiling above the stairs in the kitchen so the header height was more than 5’9″ and not having a tight U-turn framed with walls would make bringing furniture to the second floor much easier. For reference here’s what it looked like in February 2018, before the kitchen floors were refinished. This is a screenshot from the video I shared last week of the whole house during this crazy time! That door in the right of the picture used to be at the stairs, separating the stairway!
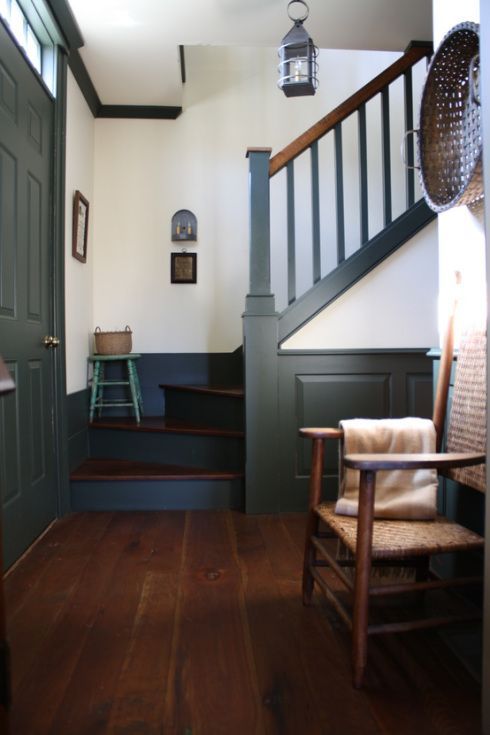
This picture is my inspiration for what the kitchen stairs could be in Phase II! I love the mix of the wood railing with the painted post and balusters. The dark risers look a bit like mine too, right? This little stairway is simple, yet stunning! I love the details of the small art pieces and open space on the walls too.
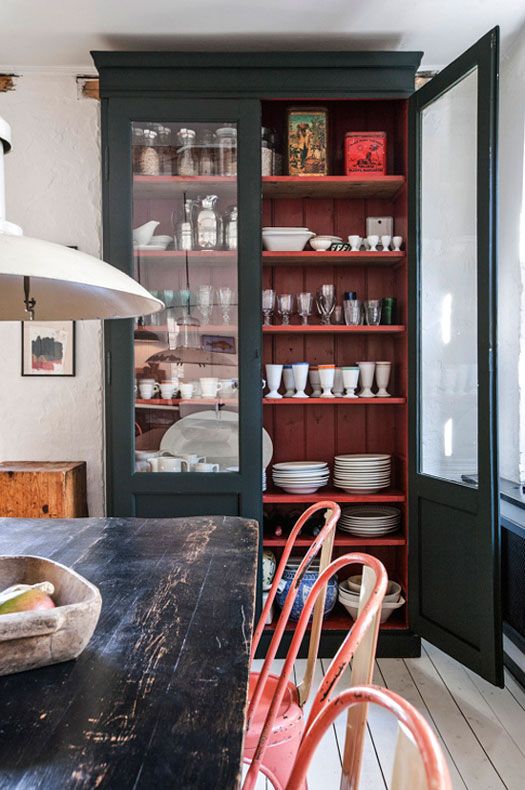
Part of Phase I will definitely be a hutch. Since I have this one I brought with me from the Duplex, it just might finally be time to paint it to work best in the new space! I could paint it black to match the cabinets and then add the same cabinet hardware as the cabinets and I could add a fun pop of color on the inside like this below. If you scroll all the way up, one of the first kitchen inspirations has a pop of color inside the hutch too. I think this is just so fun. And for those of you worried I’m painting an antique, I am definitely not. My hutch is almost definitely from the 1980s!
So, that’s a whole lot of ideas and inspiration, what am I actually doing for Phase I? Well, I made you a mood board, so check it out below! First up, all the cabinets will be painted Benjamin Moore’s HC-190 Black. I’m going to add reclaimed V-groove wainscoting that I was gifted from my Uncle Scott’s Uncle Dan and Aunt Sherry who live in Portland and work in construction. It’s exciting because this wainscoting doesn’t look brand new, it’s aged and full of marks and history. SO MUCH BETTER than brand new. The image on the mood board is from Emily Henderson’s Portland Master Bathroom renovation project. A gorgeous shot that really shows how a deep color can bring this wainscoting to life. It’s going to look even more amazing painted Benjamin Moore’s 1498 Forest Floor, which is the same color I painted the bathroom that’s off the kitchen and will continue to use on the trim throughout the rest of the house. The final color is Benjamin Moore’s Palladian Blue which is the color I painted my pegboard which I made for the kitchen at the Duplex. I’ll be utilizing the pegboard again in my new kitchen and I think it’s such a fun and unique combination when used with the moody dark green! I’ve also replaced the cheap hallow core slab backdoor with an antique half-lite door to let more light in to the kitchen. The door will also be painted Palladian Blue. I’m debating also using this color on the inside of my hutch! Either that or a pale, pale pink / calamine lotion color.
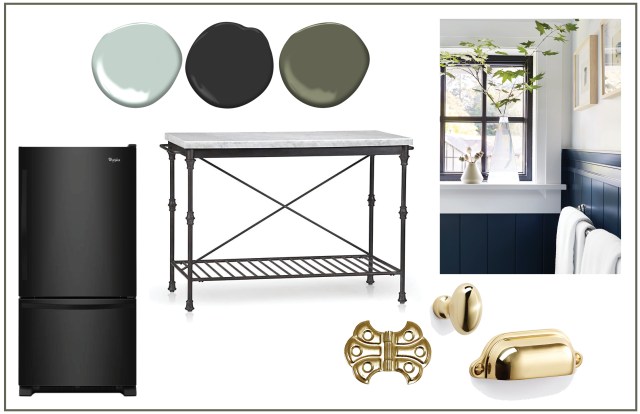
Wainscoting Inspiration | BM Palladian Blue | BM Black | BM Forest FloorIsland | Bin Pull | Knob | Hinges | Refrigerator
There’s more though: my fridge (which came with the house) bit the dust in June 2018, so I replaced it with a black one which ties into the black of the the kitchen cabinets, allowing the fridge to blend in rather than stand out like a stainless steel or white one would. Plus, black appliances are back, haven’t you heard?! I love this marble topped island from Crate and Barrel. It’s simply gorgeous and ties in a bit of an old world element, doesn’t it? I’d buy it in a second if it wasn’t over $1000. Plus my dad got a slab of butcher block and is building an island / baking table for my sister which will likely land in my kitchen for the time being. I’ve been hunting at all of the Rejuvenation Factory Sales for new hardware for the kitchen and snagged a bunch of these knobs and bin pulls in unlacquered brass for a steal! I bought as many as were available as I’m hoping to hunt down some cabinet door latches at one of their future sales and reuse all this hardware in the Phase II kitchen. FYI, the bin pulls I got aren’t quite these, mine are no longer sold, but these are equally beautiful. The hinges are from Hardware Hut and also incredibly affordable (though let me tell you, they’re about half the size I thought they’d be! Always, always check dimensions!). So that’s the Phase I kitchen plan! It’s been chugging along and hopefully my pictures can be recovered so I can show you the journey I went through along the way.
Have you ever done a Phase I renovation to tide you over for several years until you could tackle a much larger renovation of the same space? This one is such a transformation since the space was quite dilapidated – despite the charm – when I bought Berrybrier! Please tell me your thoughts on my direction. Are you on board for this look? What would you choose from the inspiration photos for Phase II? Should I eventually do wood cabinets or painted? So much to think about, are you excited? I am excited!

Marble table would be perfect for tempering chocolate
And rolling out pastry dough!!
I love the double wood! Super cute!!! I have pinned similar (the same) inspo shots! 😉
I love the double wood too! I think that’s where I’m leaning!
Fun blog, found a link from apt therapy. Previous owner put butcher block counters in the kitchen in the MIL part of our 1880s house. I would never recommend it around water unless you are obsessive about upkeep. Ours are stained black around the sink from water damage and sanding hasn’t helped. They will need to be replaced. We have used paperstone in 2 houses now and it’s amazing. You can fabricate yourself, unlike stone, it holds up incredibly well and any damage is easily sanded out.
Thanks for the rec! I’ve used paperstone on projects for a few clients! It’s a great product. You’re right – butcher block or wood counters definitely require an immense amount of diligence around water
that bin on the old kitchen hutch in your photo of a 1920’s kitchen would most likely have held flour
Ohhh I bet you’re right! -xo, LO