Resource Portland Event with Kush Rugs

Resource Portland Event with Kush Rugs

I had the pleasure last week to attend Kush Rugs‘ Resource Portland event. The team at Kush invited me to join a number of designers from mainly outside of Portland as they toured and met with a number of Portland, Oregon based product design companies. It was an amazing day filled with so many wonderful people! I learned so much about the various companies Kush chose to feature and today I’m going to share the highlights of the day with you!

Continue reading “Resource Portland Event with Kush Rugs”

One Room Challenge: Week Three – Installing Marble Basketweave Tile

One Room Challenge: Week Three – Installing Marble Basketweave Tile

It’s lovely to have a concrete plan for a space before you dive into a project. That’s why people hire interior designers! When you’re working on your own space it’s a lot easier to make decisions as you go… but doesn’t always create the best results. That’s why this One Room Challenge is so nice! I’ve got my plan and am slowly making progress. It also encourages me to actually finish the project, rather than getting it to 90% and leaving it there. Ha!

Continue reading “One Room Challenge: Week Three – Installing Marble Basketweave Tile”

Laying 1″ Hex Tile in the Bathroom

Laying 1″ Hex Tile in the Bathroom

I thought walls were a huge step, but, baby, I’m falling head over heels for my tiled floors! The floors were something I’ve just been dying over for months. I found dozens of complicated multi-colored tile floor patterns that I wanted to try, before finally settling back down and going with a clean, classic, and readily available option from Home Depot (my home away from home). I’m still saving those ideas of fun multi-colored patterns for the future though! There’s still the upstairs dormer bathroom and that has got to take shape eventually… so finger’s crossed! My inspiration for this room just got me all kinds of giddy about the tile I’d picked, but seeing it finished is even better!

img_0129

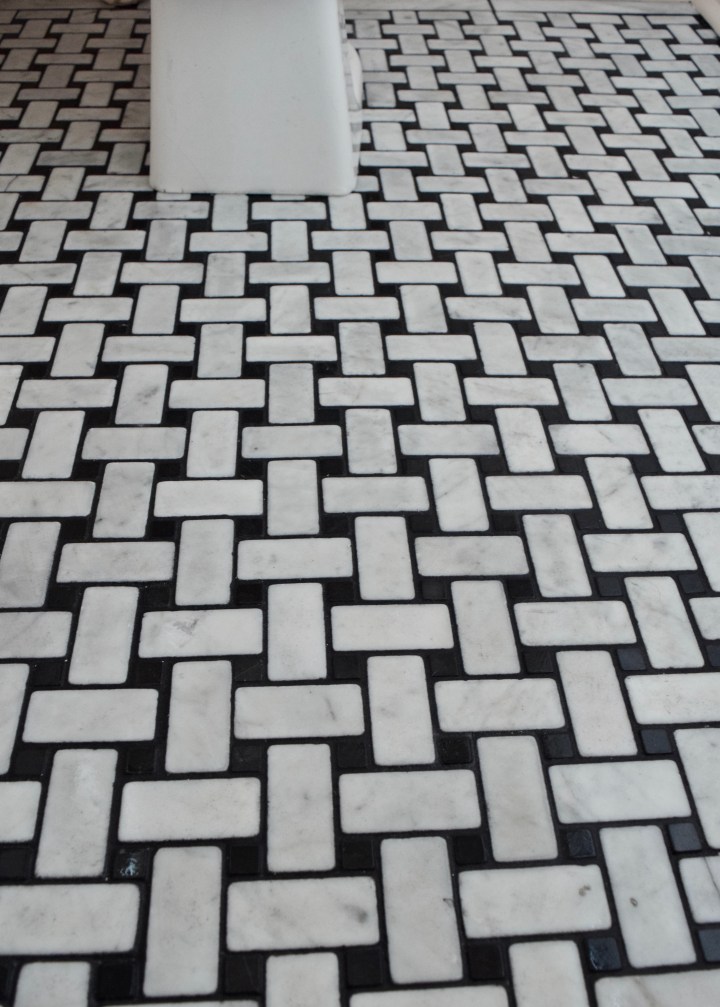
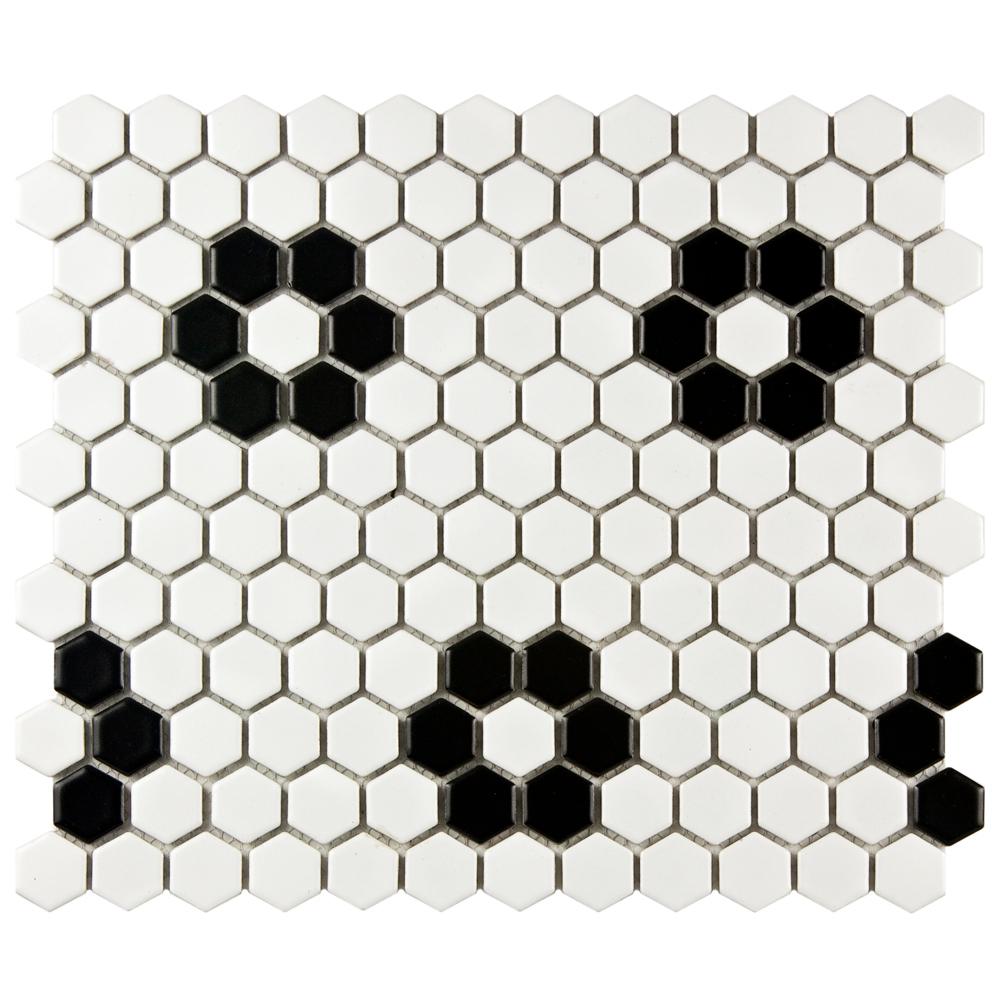
I bought three cases of the tile at $53 bucks per case. I ended up returning an entire case of the tile in the end and only using the first two cases, or about 18 SF of tile. Saving that extra money was almost as exciting as the tile itself! And I’m allllll about my tile! I picked this tile for the spacing of the flowers. You can get options with more or less space between the flowers, but I preferred this since it had enough that you’d easily see the flowers in the small bathroom, but not enough that you’d feel dizzy! Here’s the shot from the website showing the tile in all it’s ungrouted professional photo glory.

matte-white-and-black-low-sheen-merola-tile-mosaic-tile-fdxmhmwf-64_1000.jpg

Including the tile, here was my short Home Depot shopping list compiled here for you. That’s it! Tiling isn’t so bad, y’all.

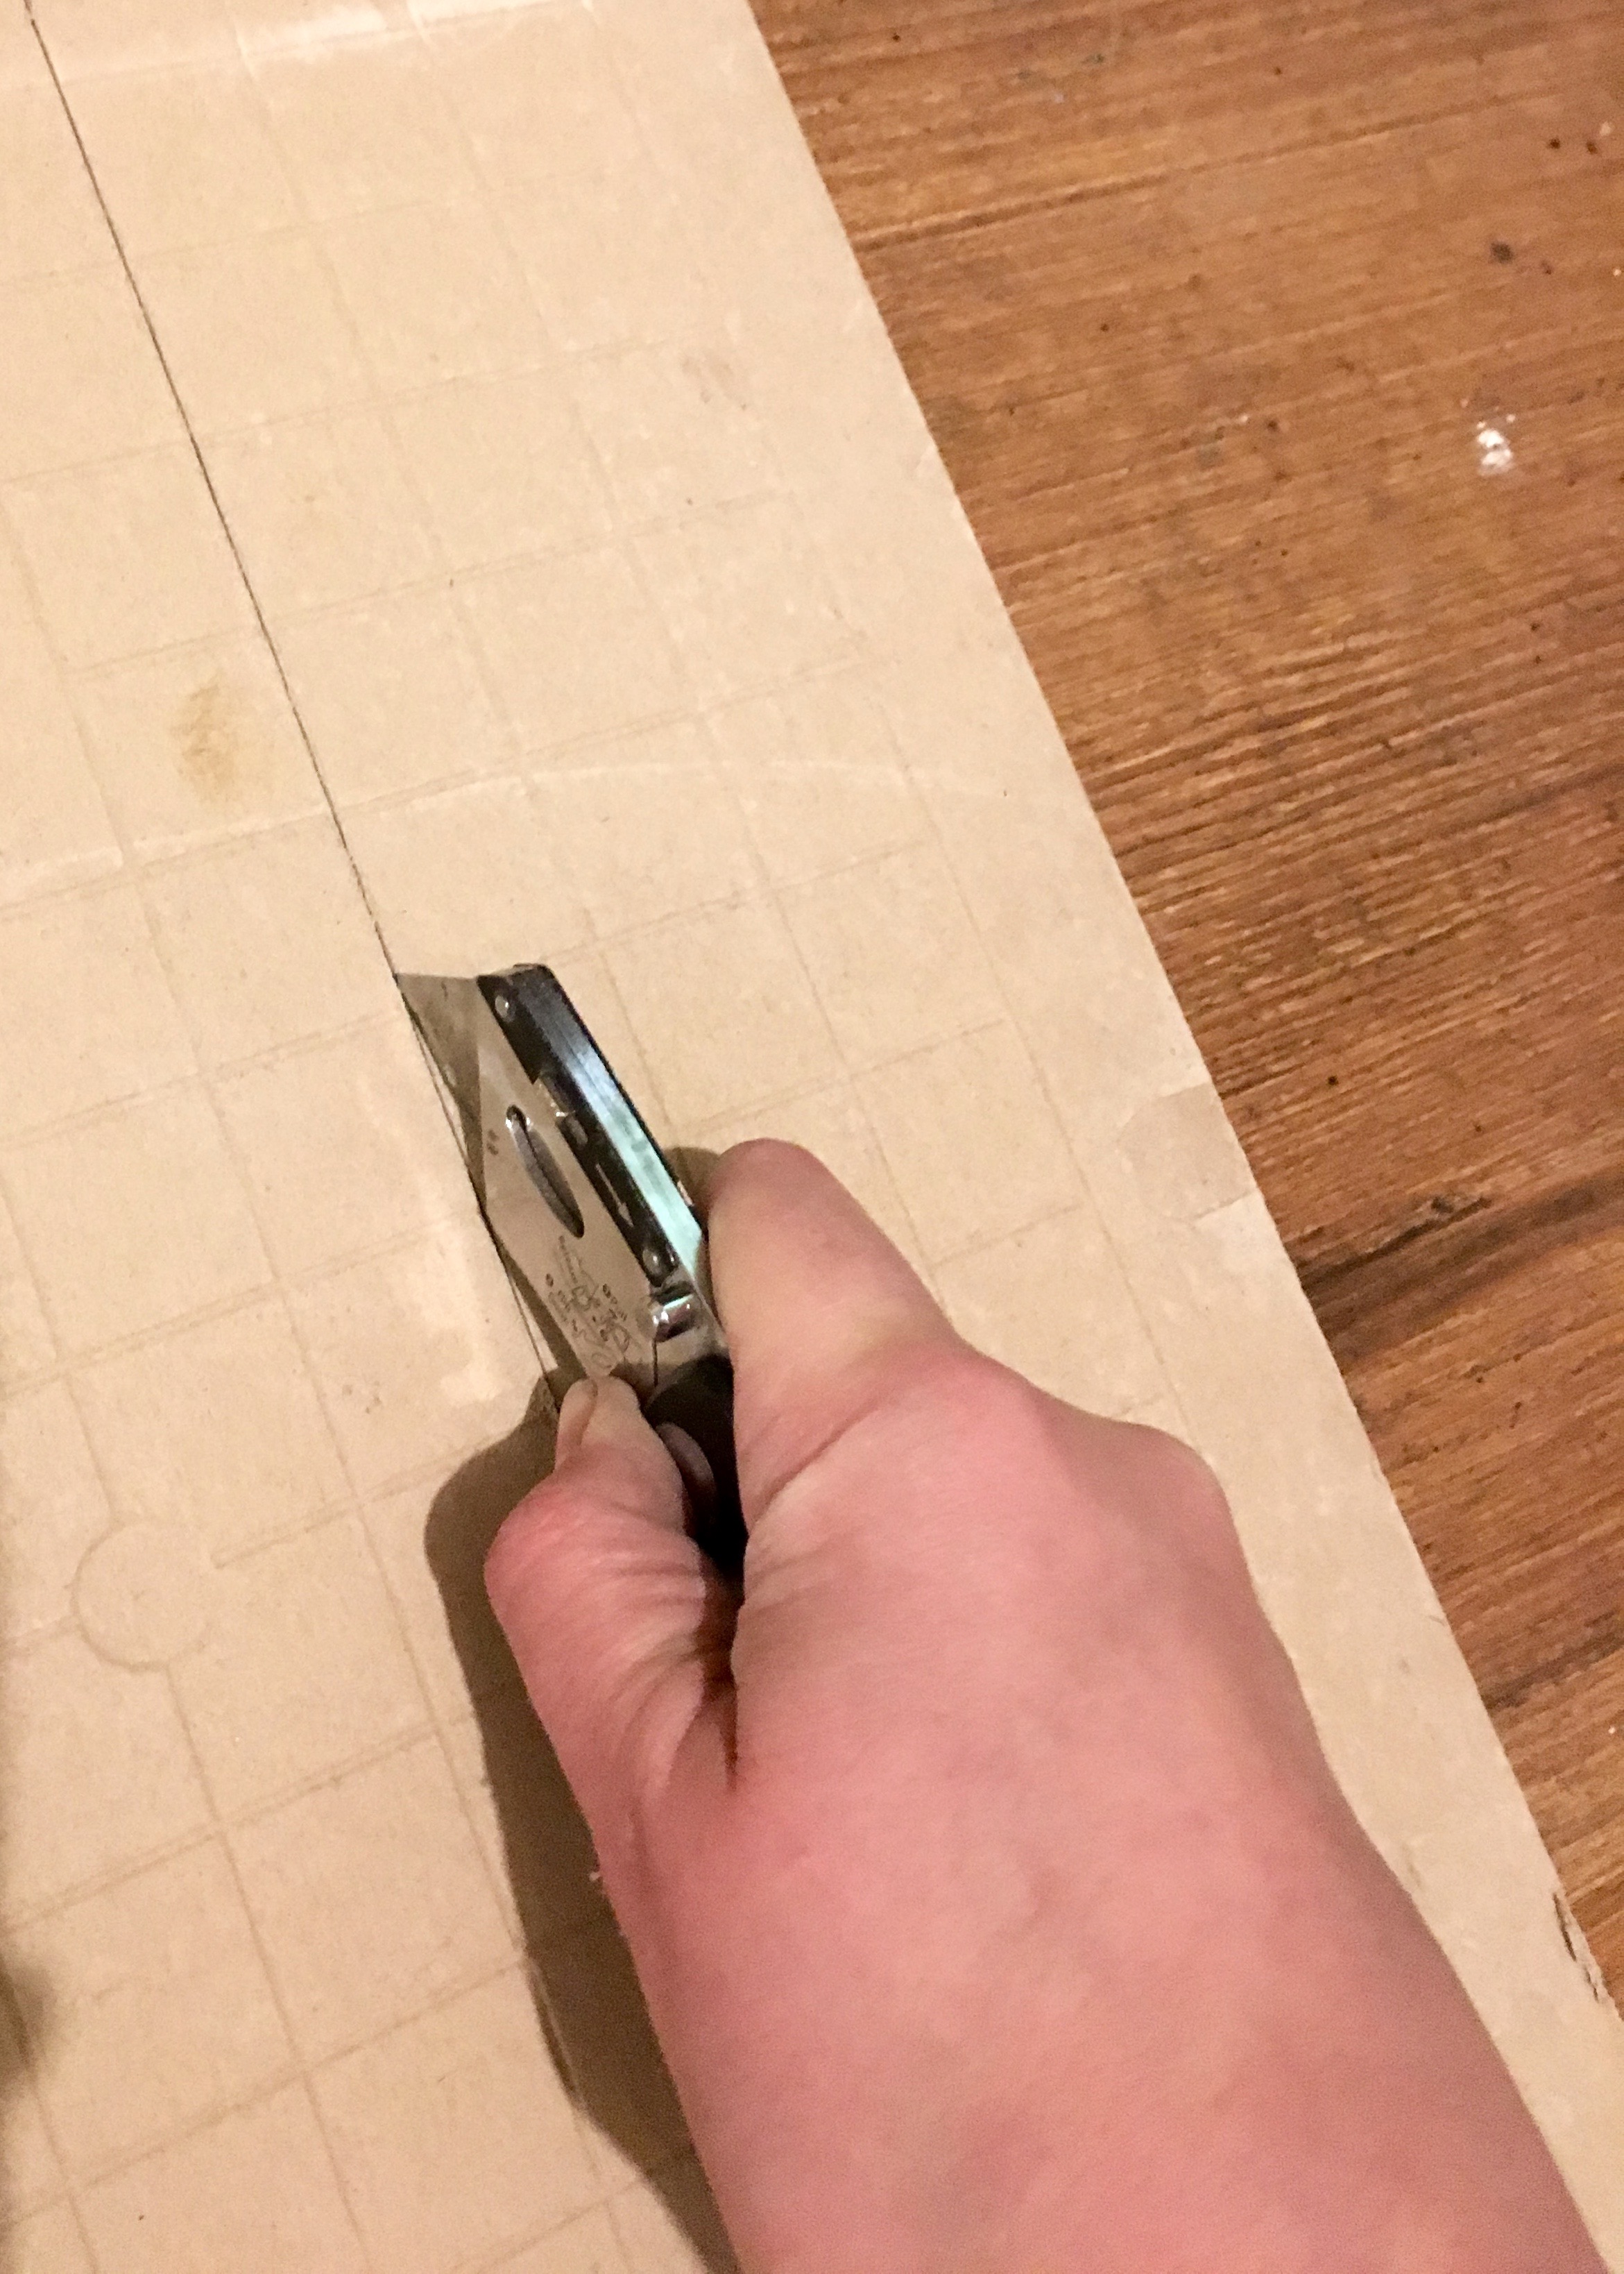
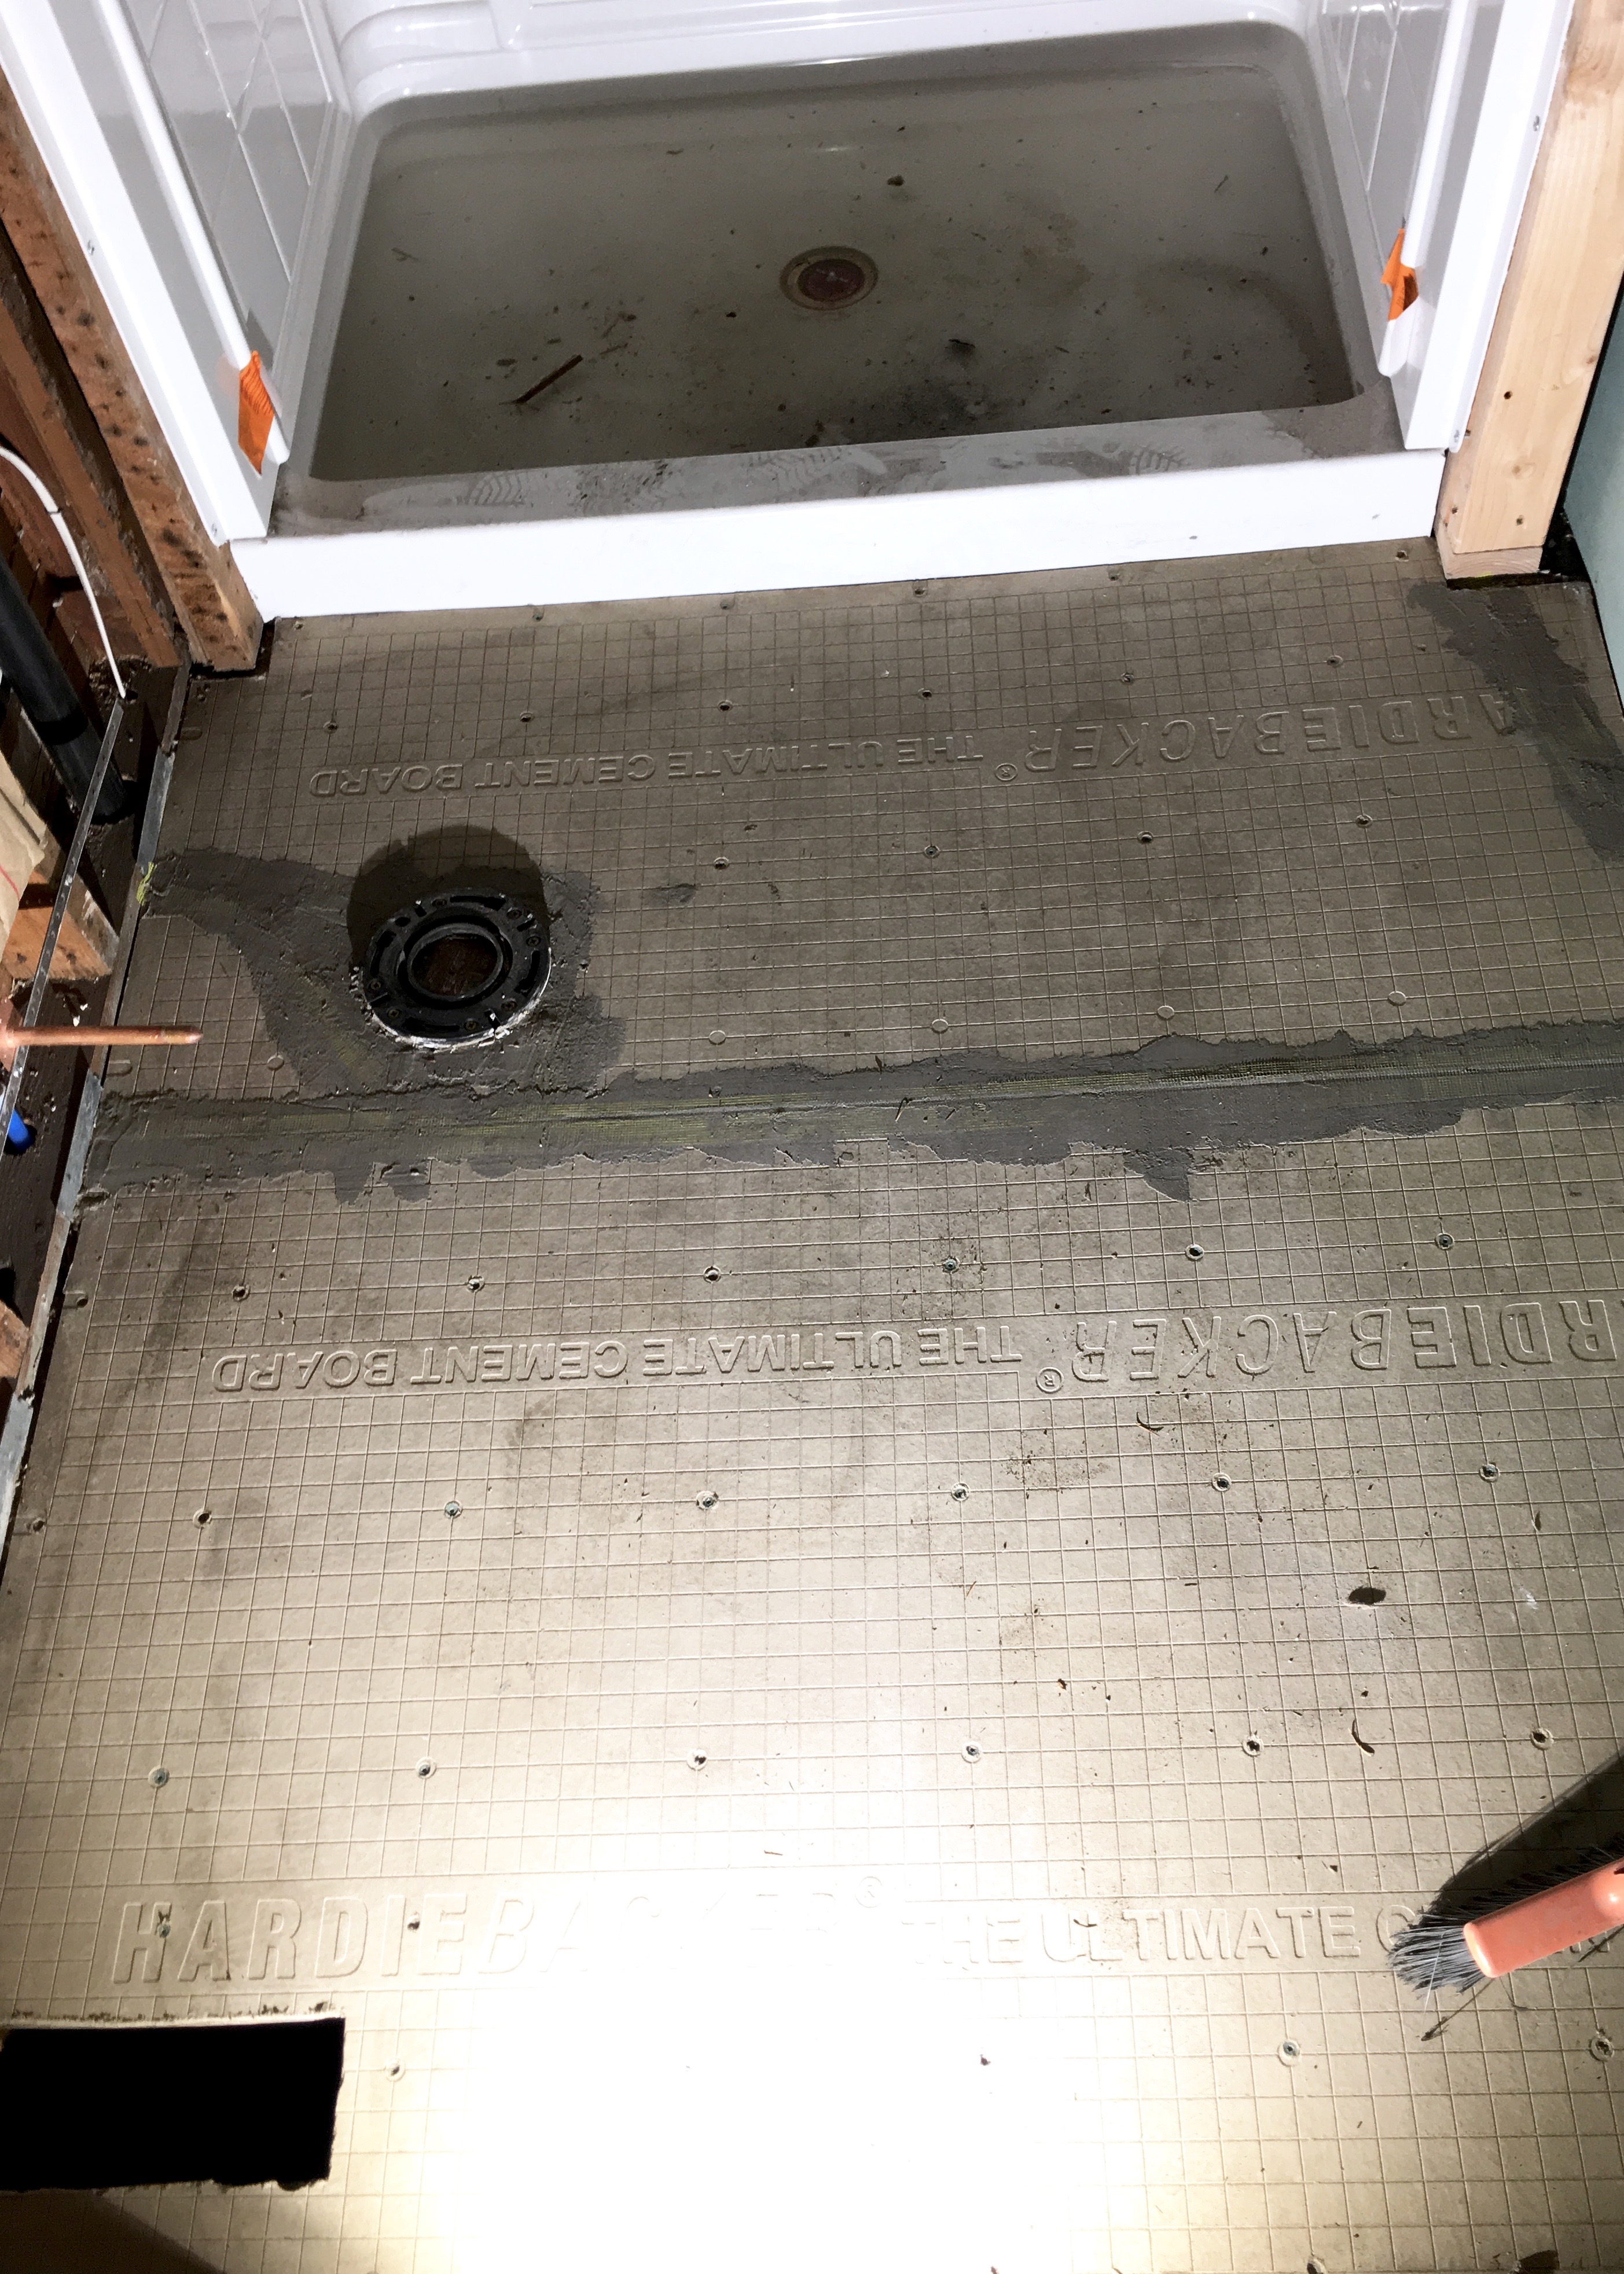
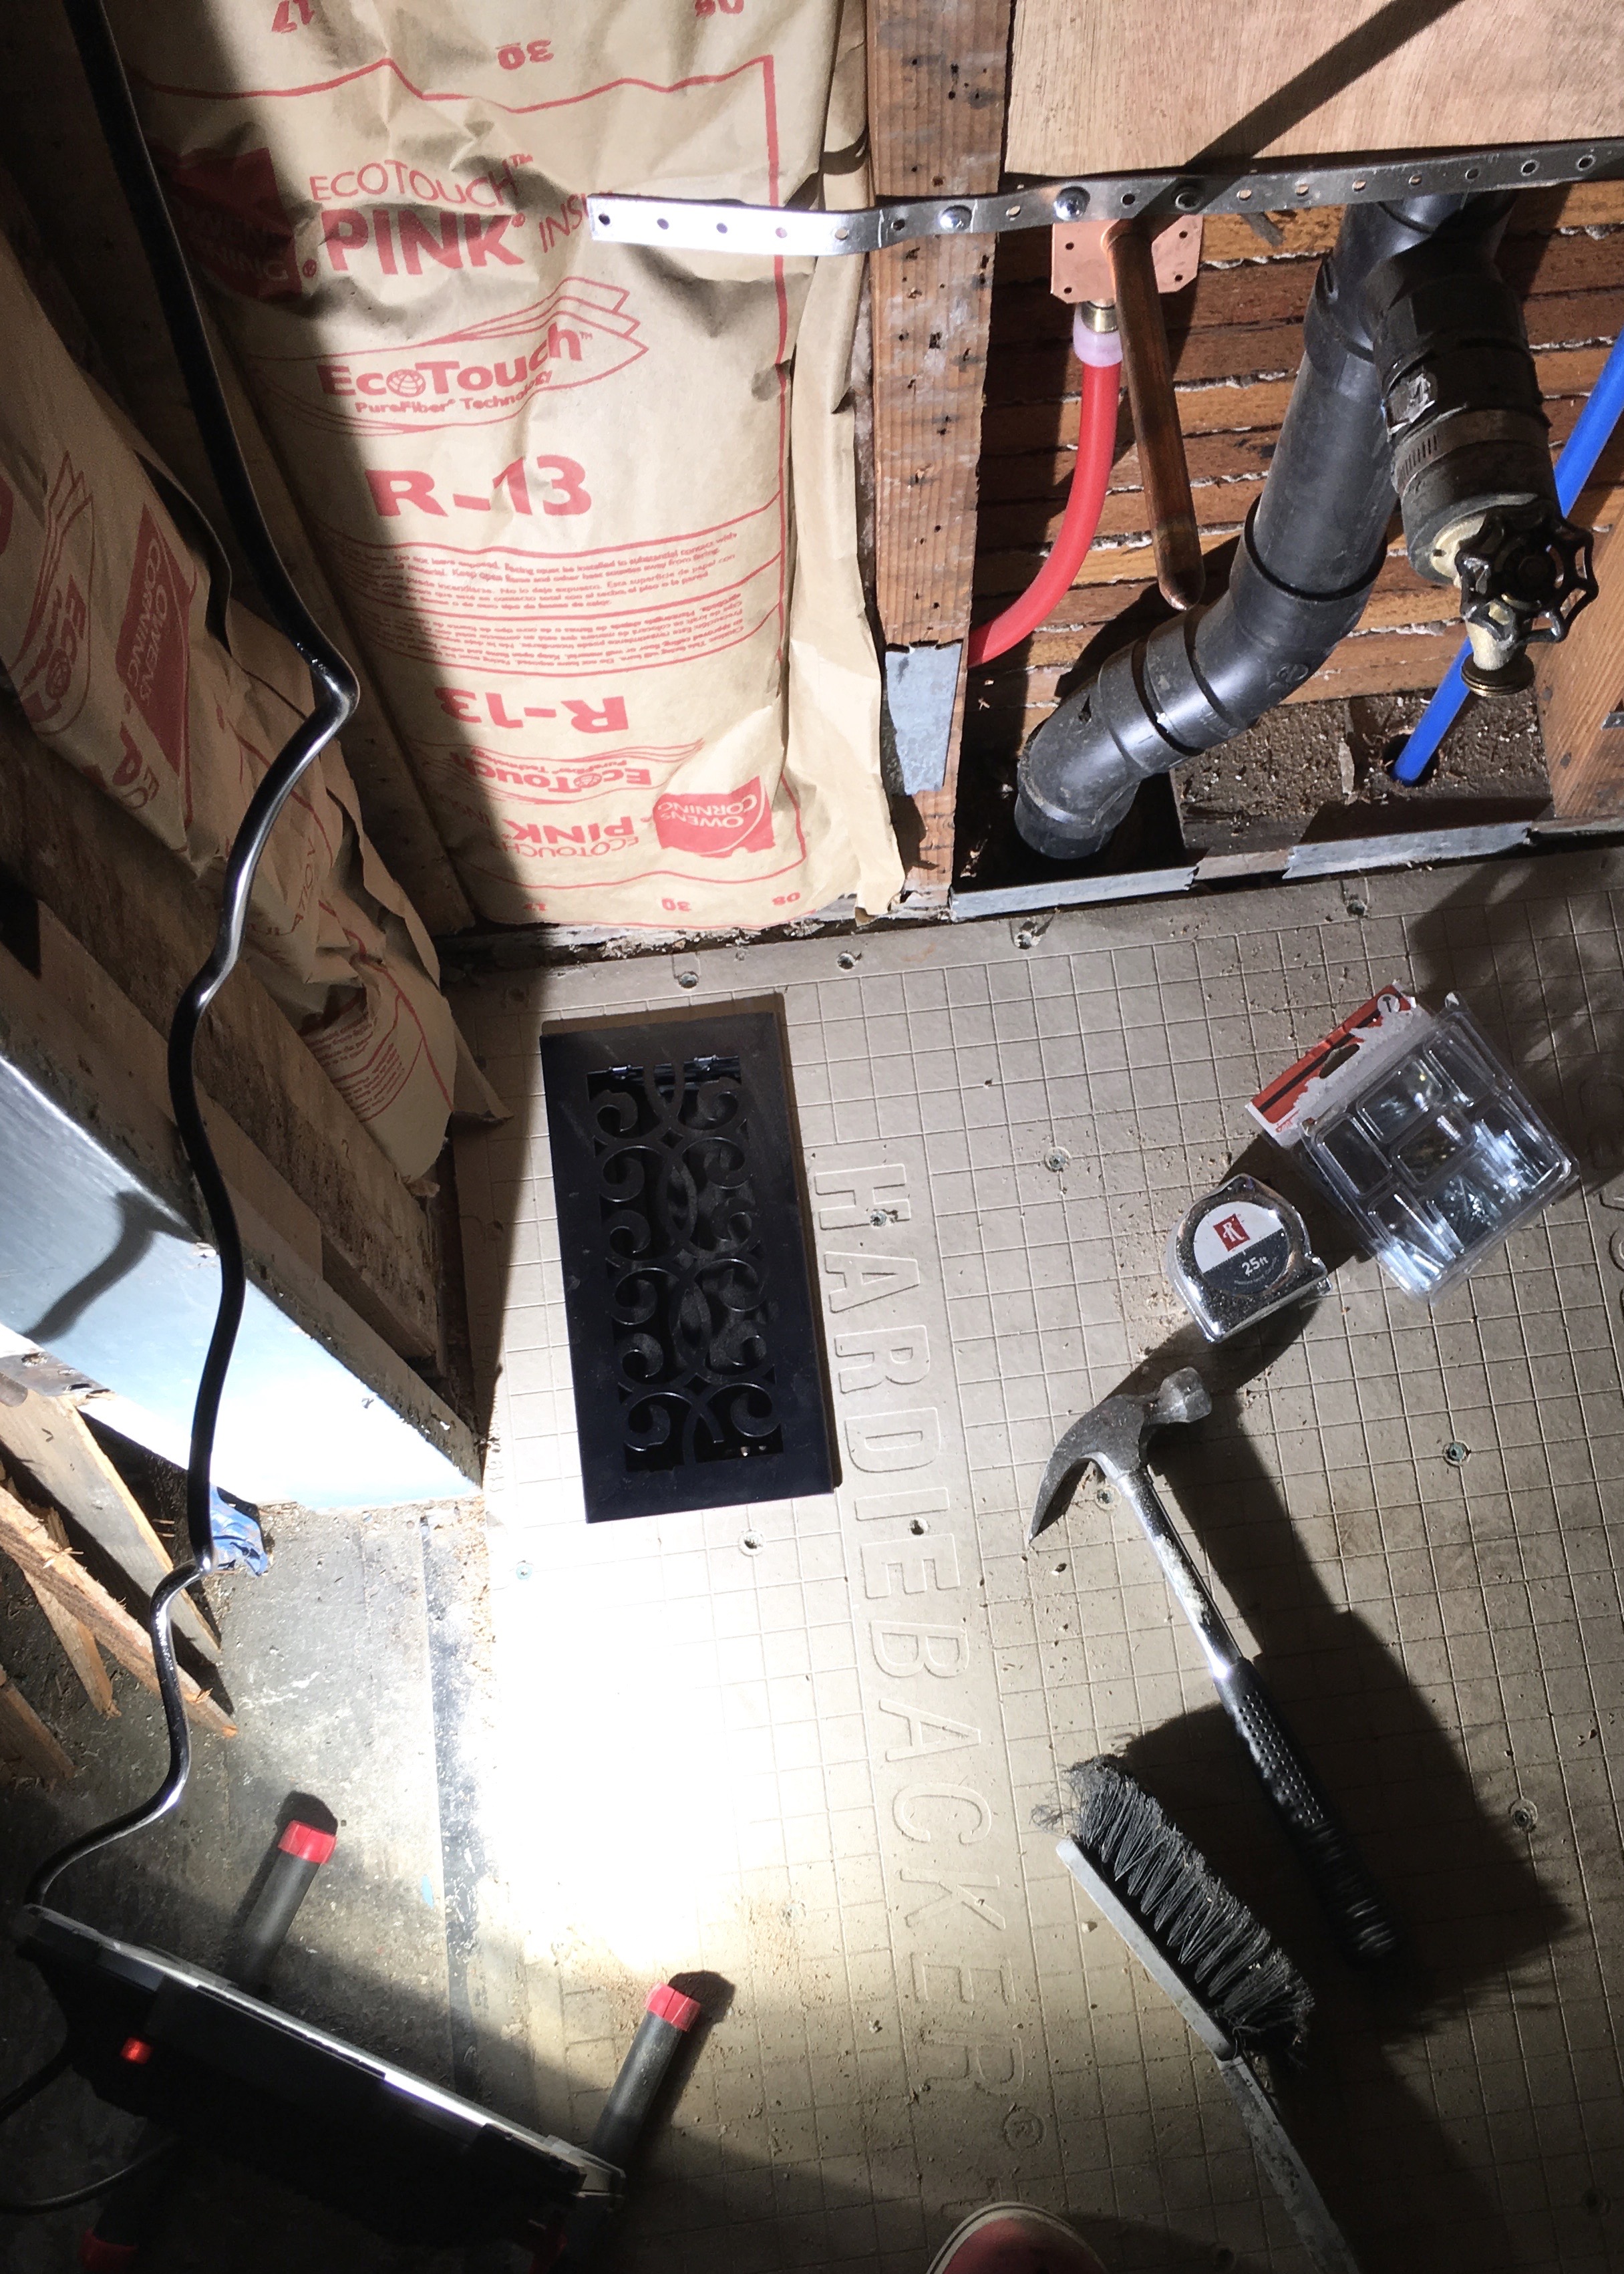
Once I gathered the supplies and completed the prep work in the bathroom I came home from work one night in mid-November ready to tile! I finally turned on my ancient furnace which helped keep the house above freezing, which was a refreshing change. After that, I went ahead and dry laid all my tile so I could assess how it would fit in the space. I used this dry lay to also take the tile nippers out and make all my cuts. Luckily with 1″ hex tiles, a quick nip will cut through the tile pretty neatly. Not every one was perfect, but plenty were good enough!

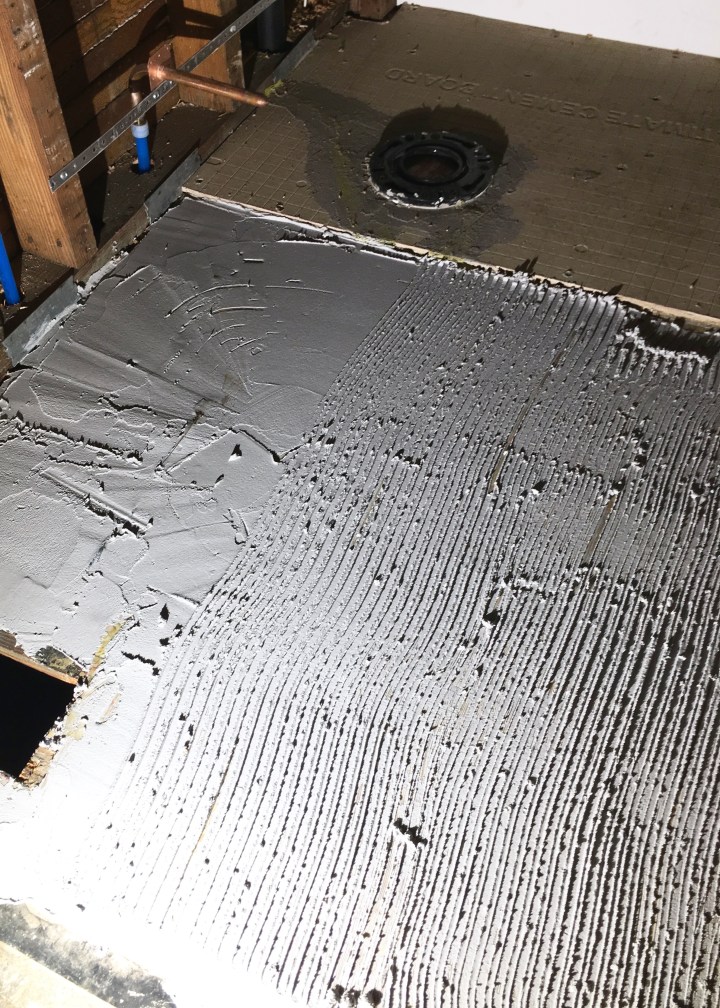
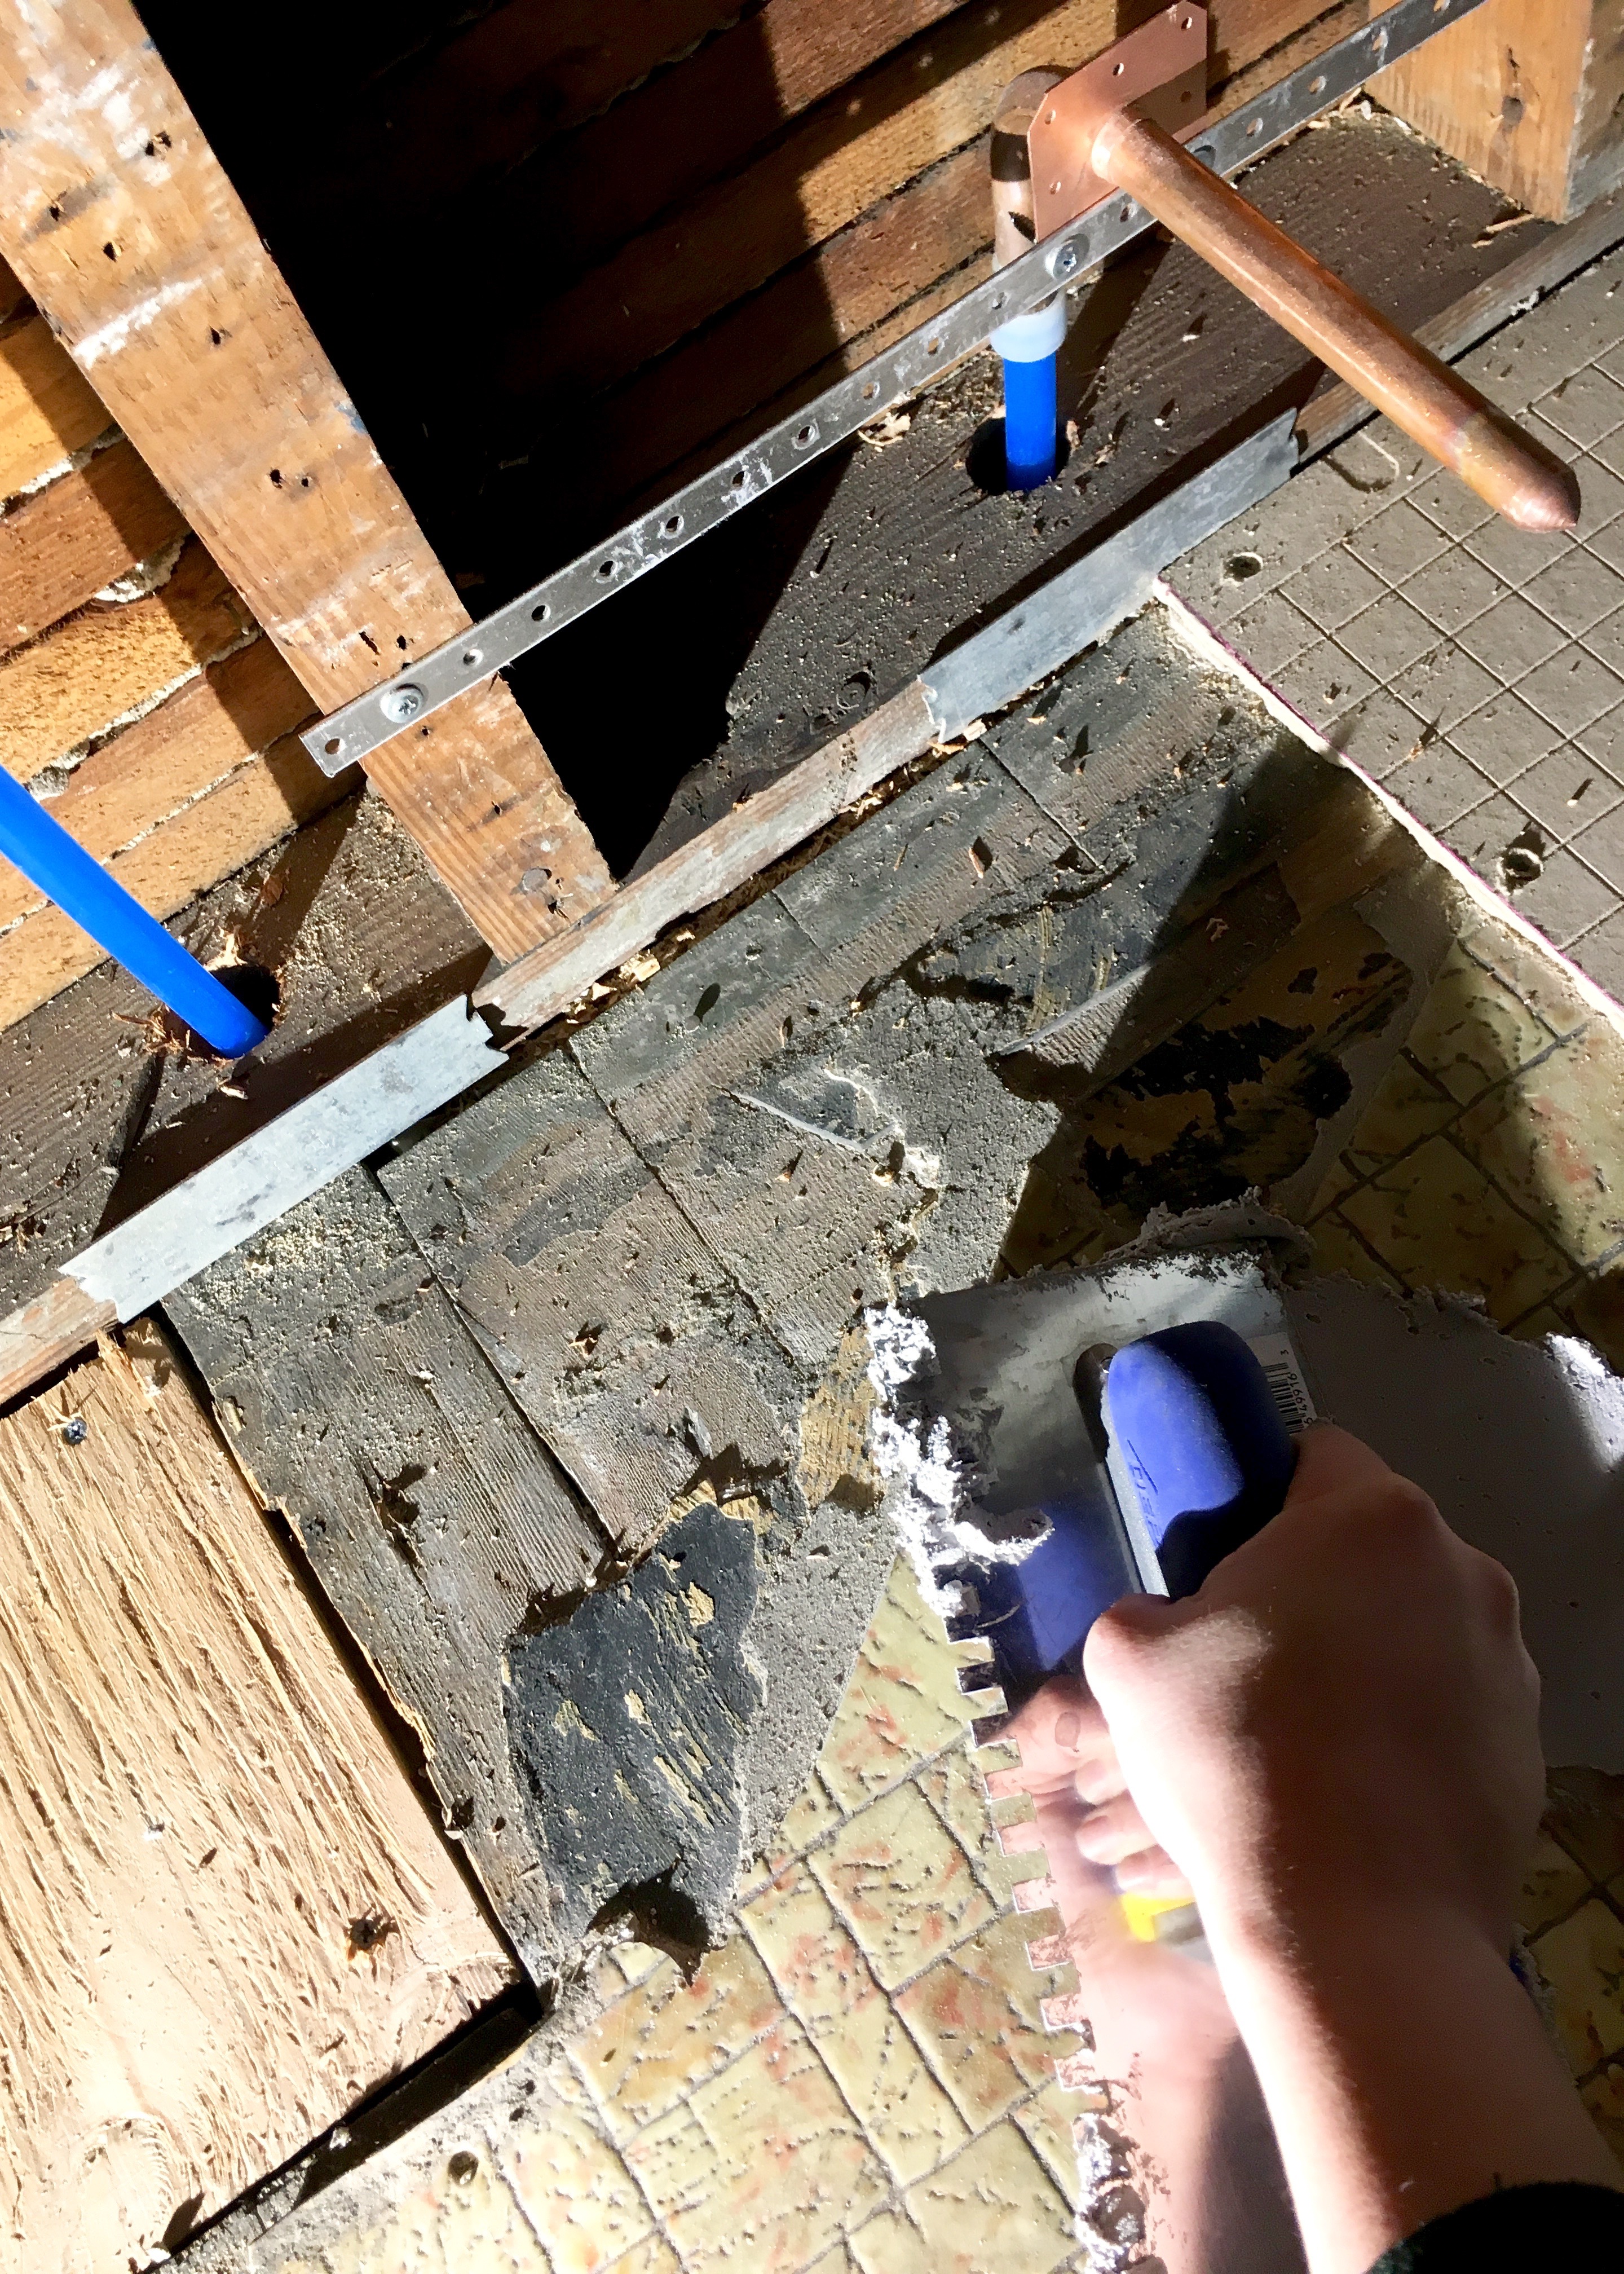
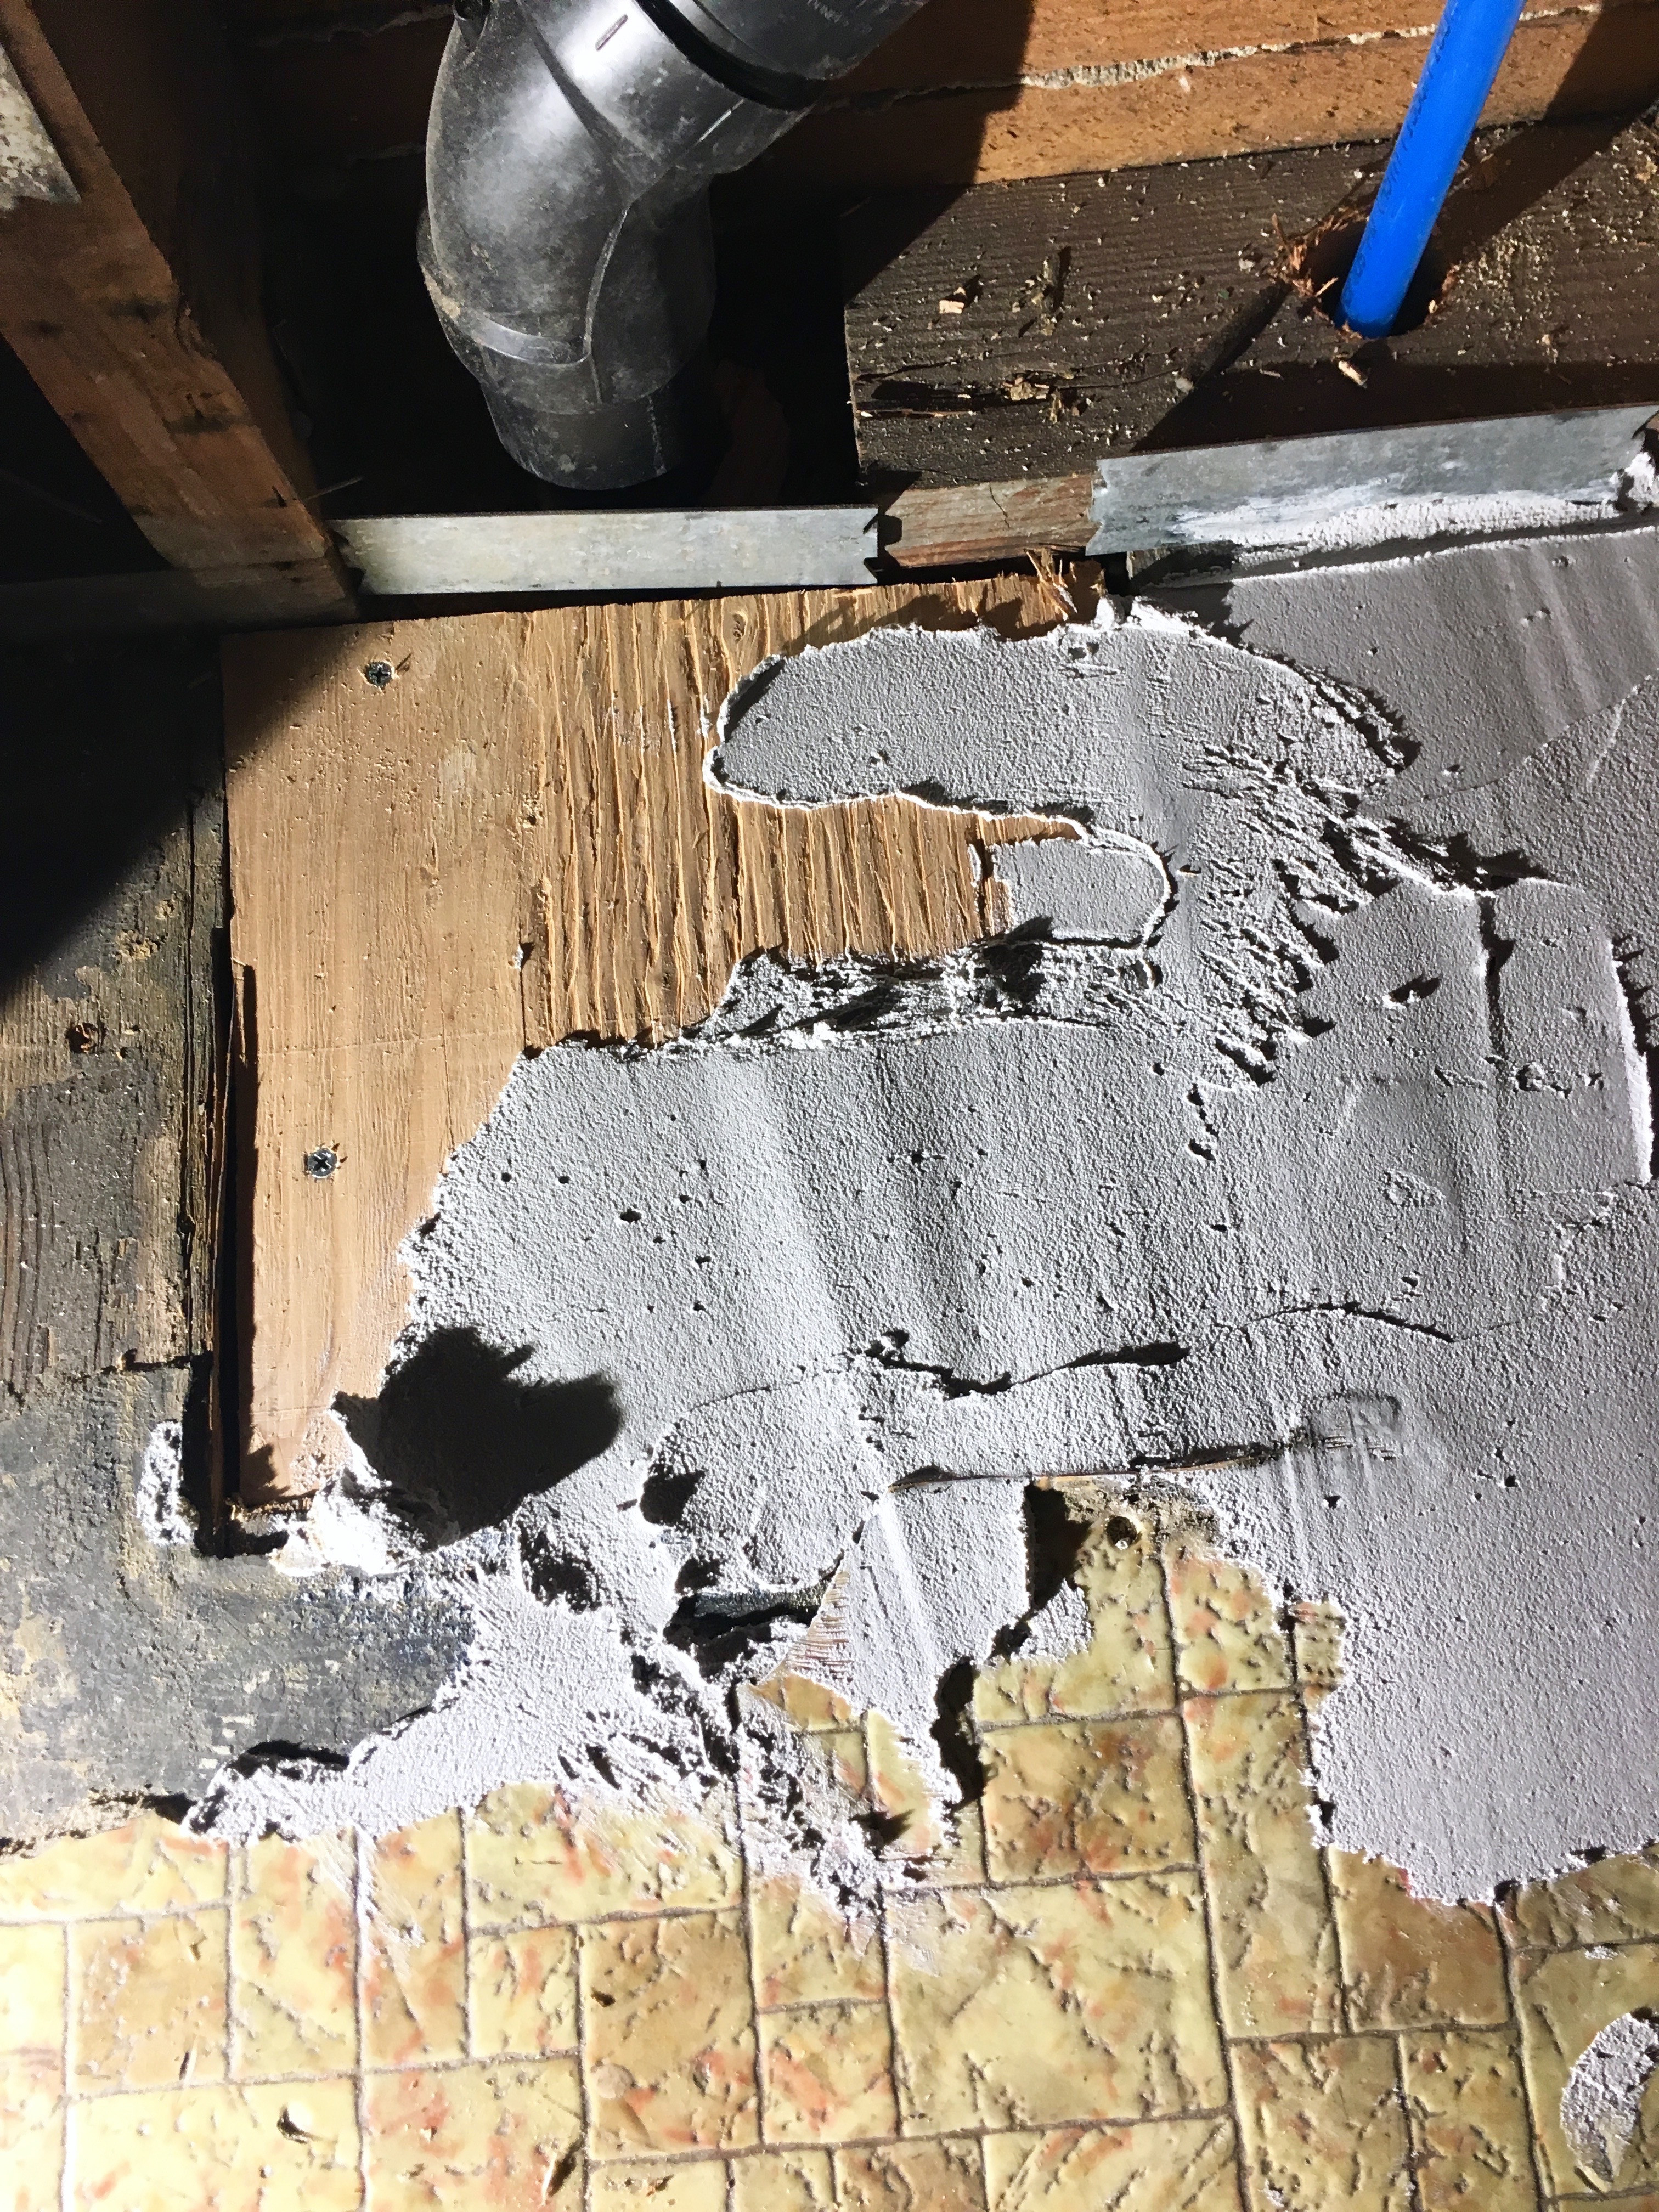
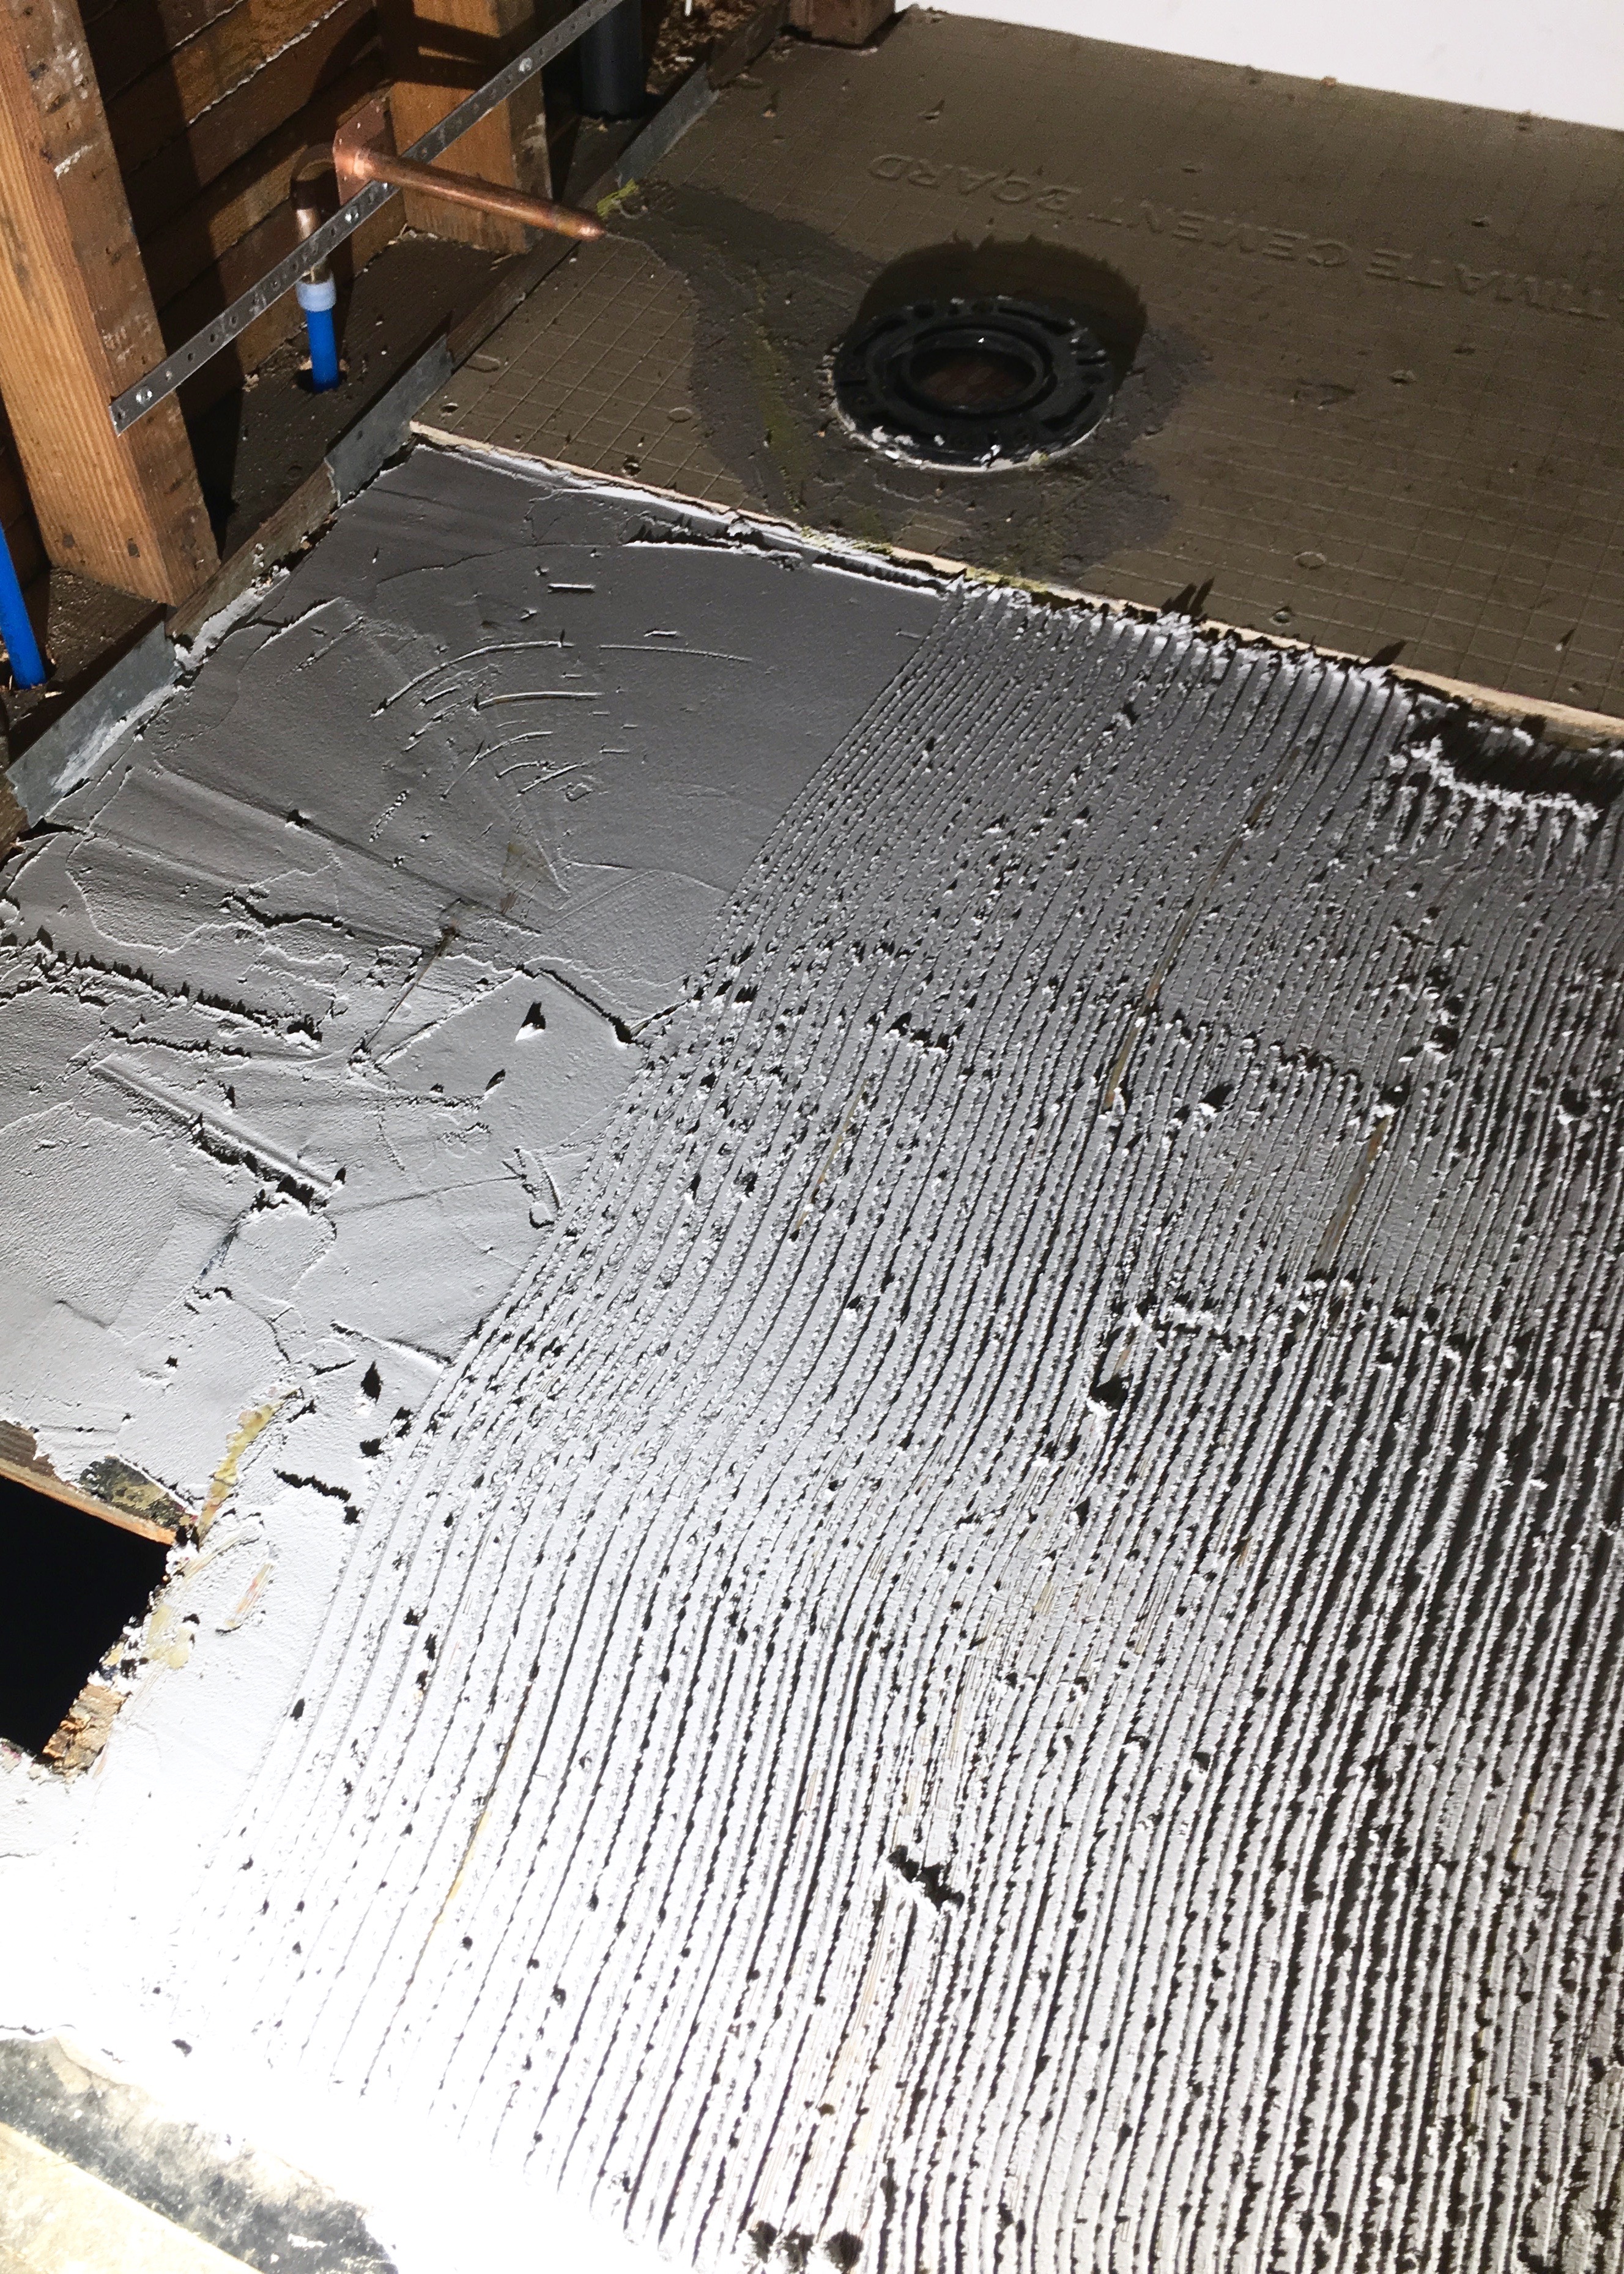
Then it was time to start setting the tile. I carefully picked up my dry laid tile and stacked it sheet by sheet in order of how I’d place the sheets. I made a pile of all my cut tiles I could pull from as needed. Then I popped open my thinset container and used the flat side of a thinset float to spread out a thin coat (about 1/8″) before making grooves with the v side. This is the same process I’d used to lay the HardieBacker during prep. Then I had to actually lay the tile! It all started off smoothly.

First, I spread my thinset about 14″ deep across the back end of the floor by the shower pan, made my grooves, and laid a sheet of tile. Then I back filled any cut tiles and moved on to the next sheet in the row. I did this for the first and second rows without issue. It started to get warmer in the bathroom as the furnace heated the house and as I worked my way across and down the bathroom floors, my thinset started drying at the edges before I could lay the next sheet. Not dry-dry, just drier… I tried working faster and faster, laying the tile as quickly as I could. The room felt hotter and hotter as my efforts increased in speed. By the time I finished I was sweating heavily and the last sheets had a couple spots where the spacing didn’t feel perfect. After tweaking them to make them better, I began to clean up and realized it wasn’t just the little bathroom that was hot. The whole house was oddly warm. I checked the newly installed thermostat: 86°F. Apparently the thermostat went rogue and decided it should feel like a tropical island in November in Portland, OR! So if the tile’s not perfect perfect, I blame the thermostat!

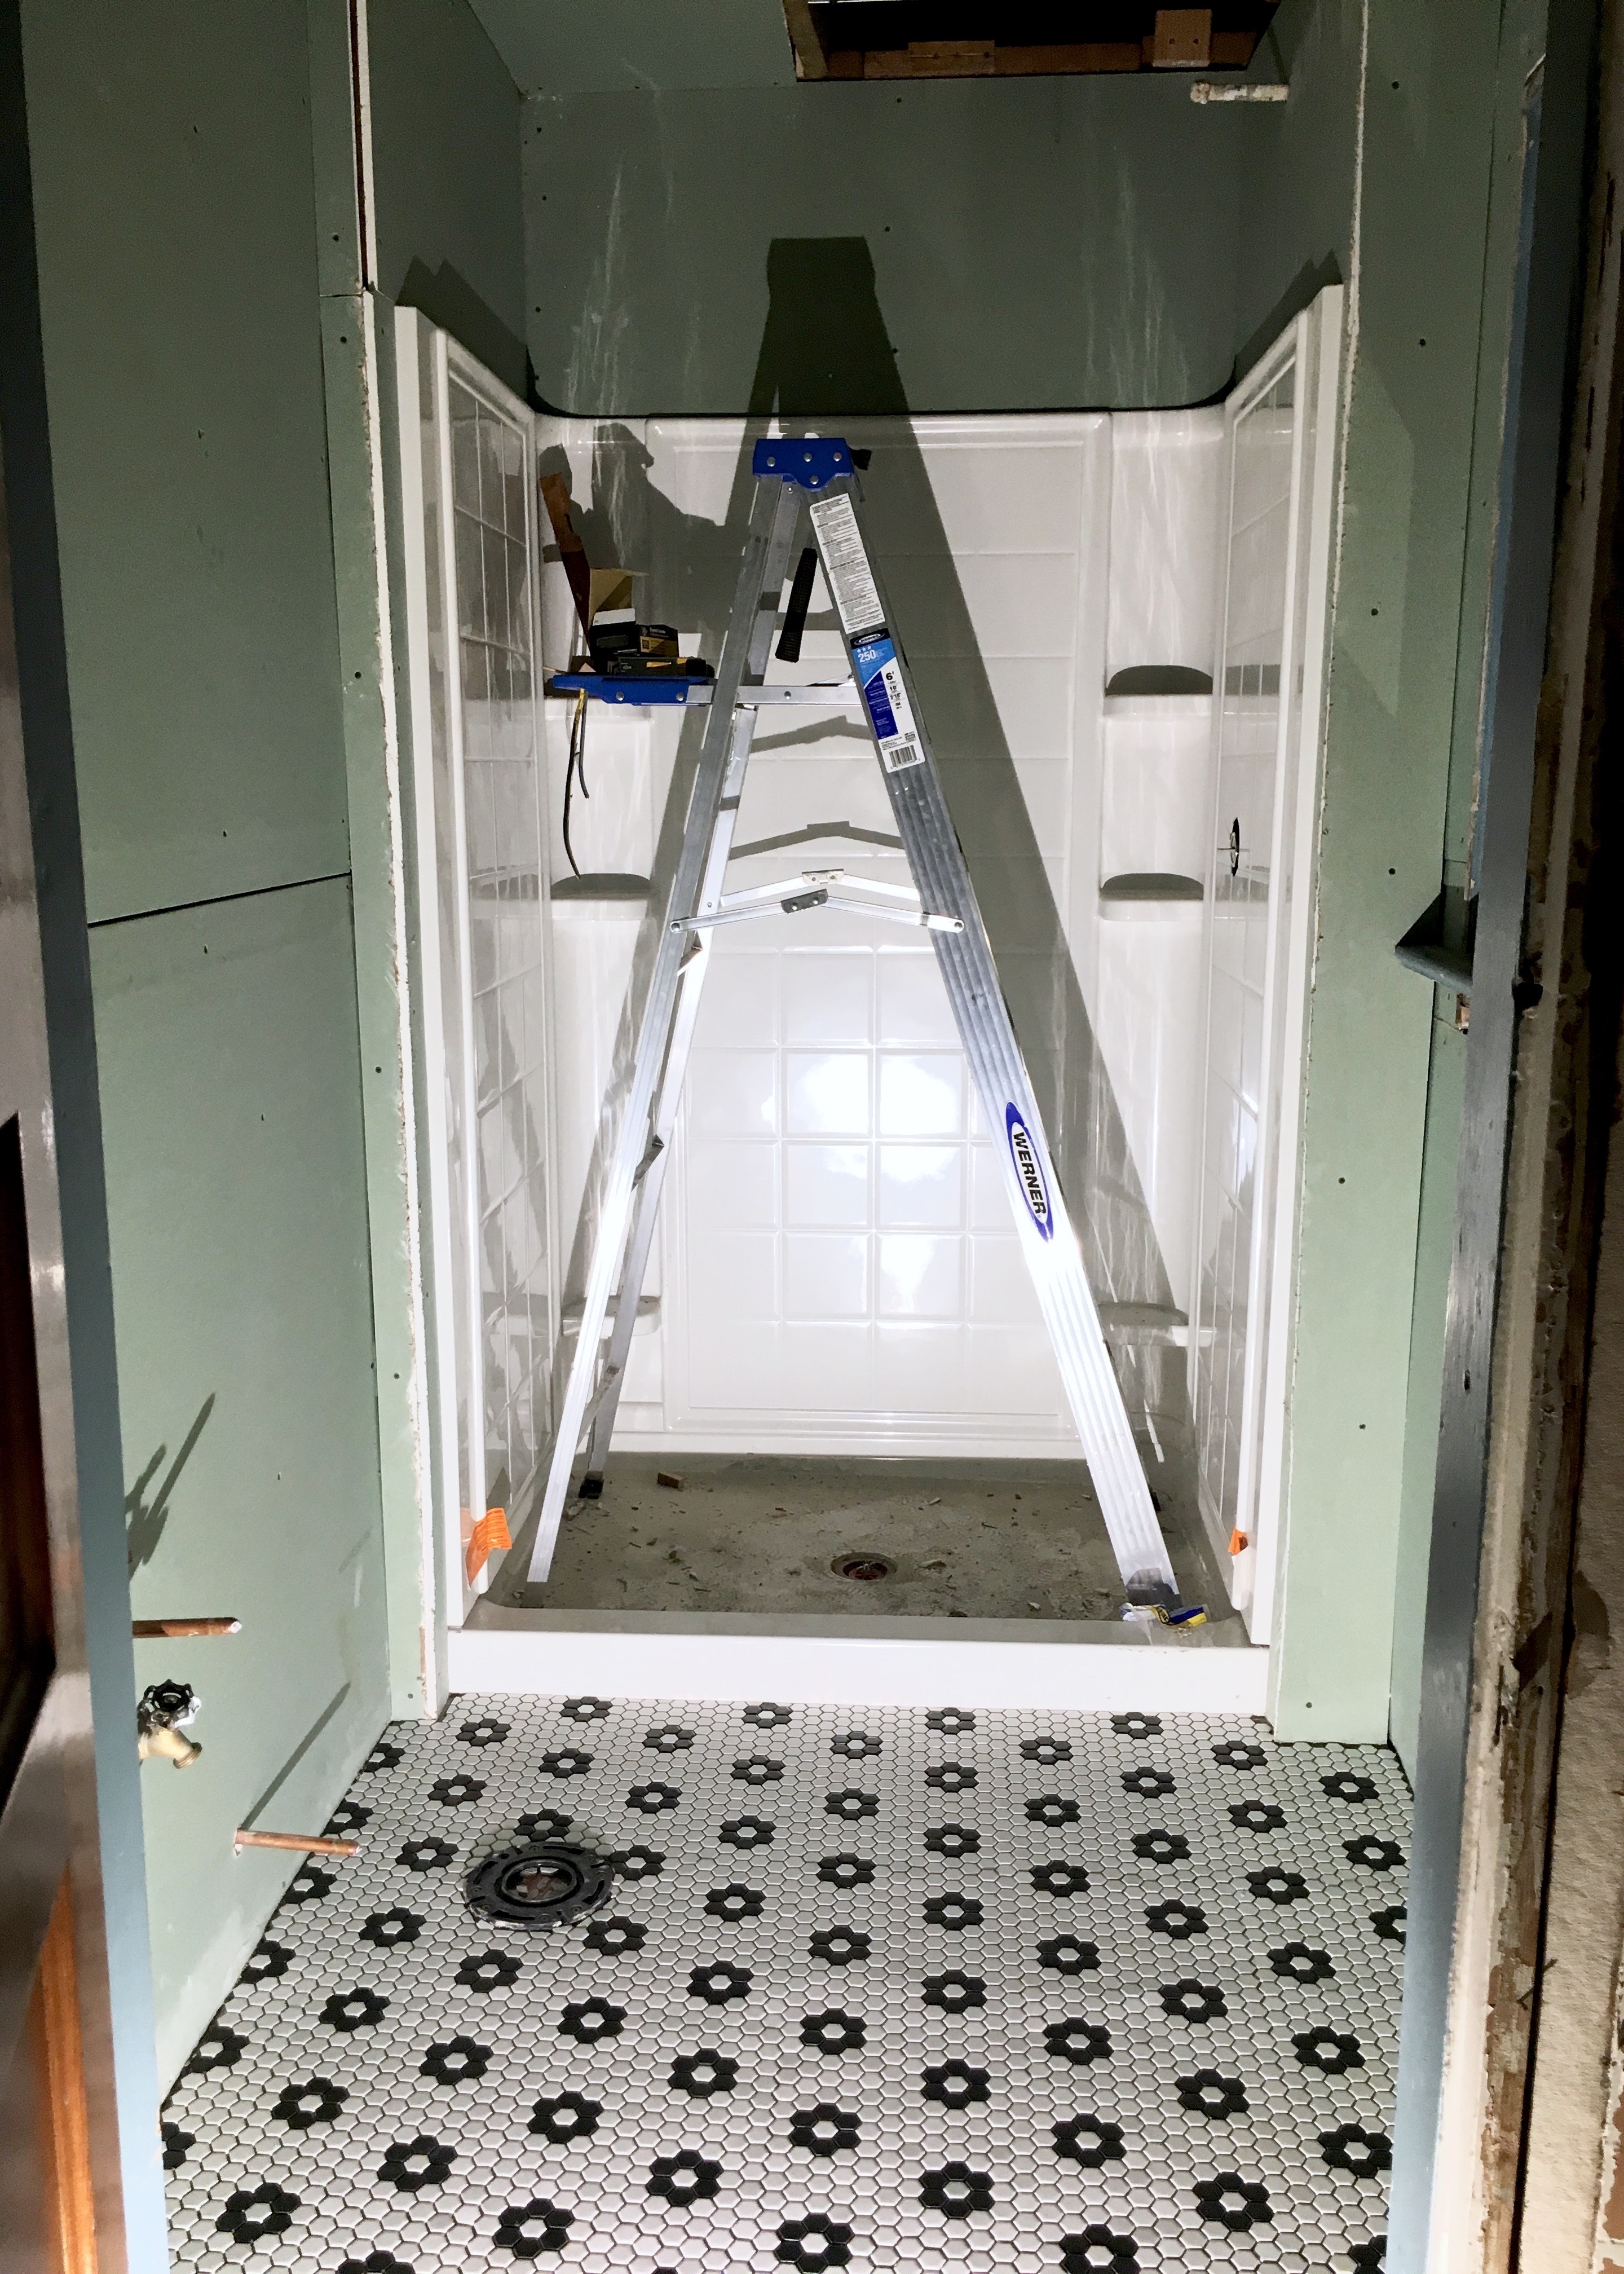
In all, the dry lay and then wet lay of the tile took most of the evening for even just this small room. I was pretty excited to return the next day and finish up with grout! I left the heater on at a more reasonable 70°F temperature to keep the tile and thinset warm enough to set fully overnight. but already things were looking pretty good! I wish I’d taken more pictures of the ungrouted tile, but I’m a terrible blogger and an undivided focus DIYer, so I only took this one overall shot when I finished.

Berrybrier | Ungrouted Tile.jpg

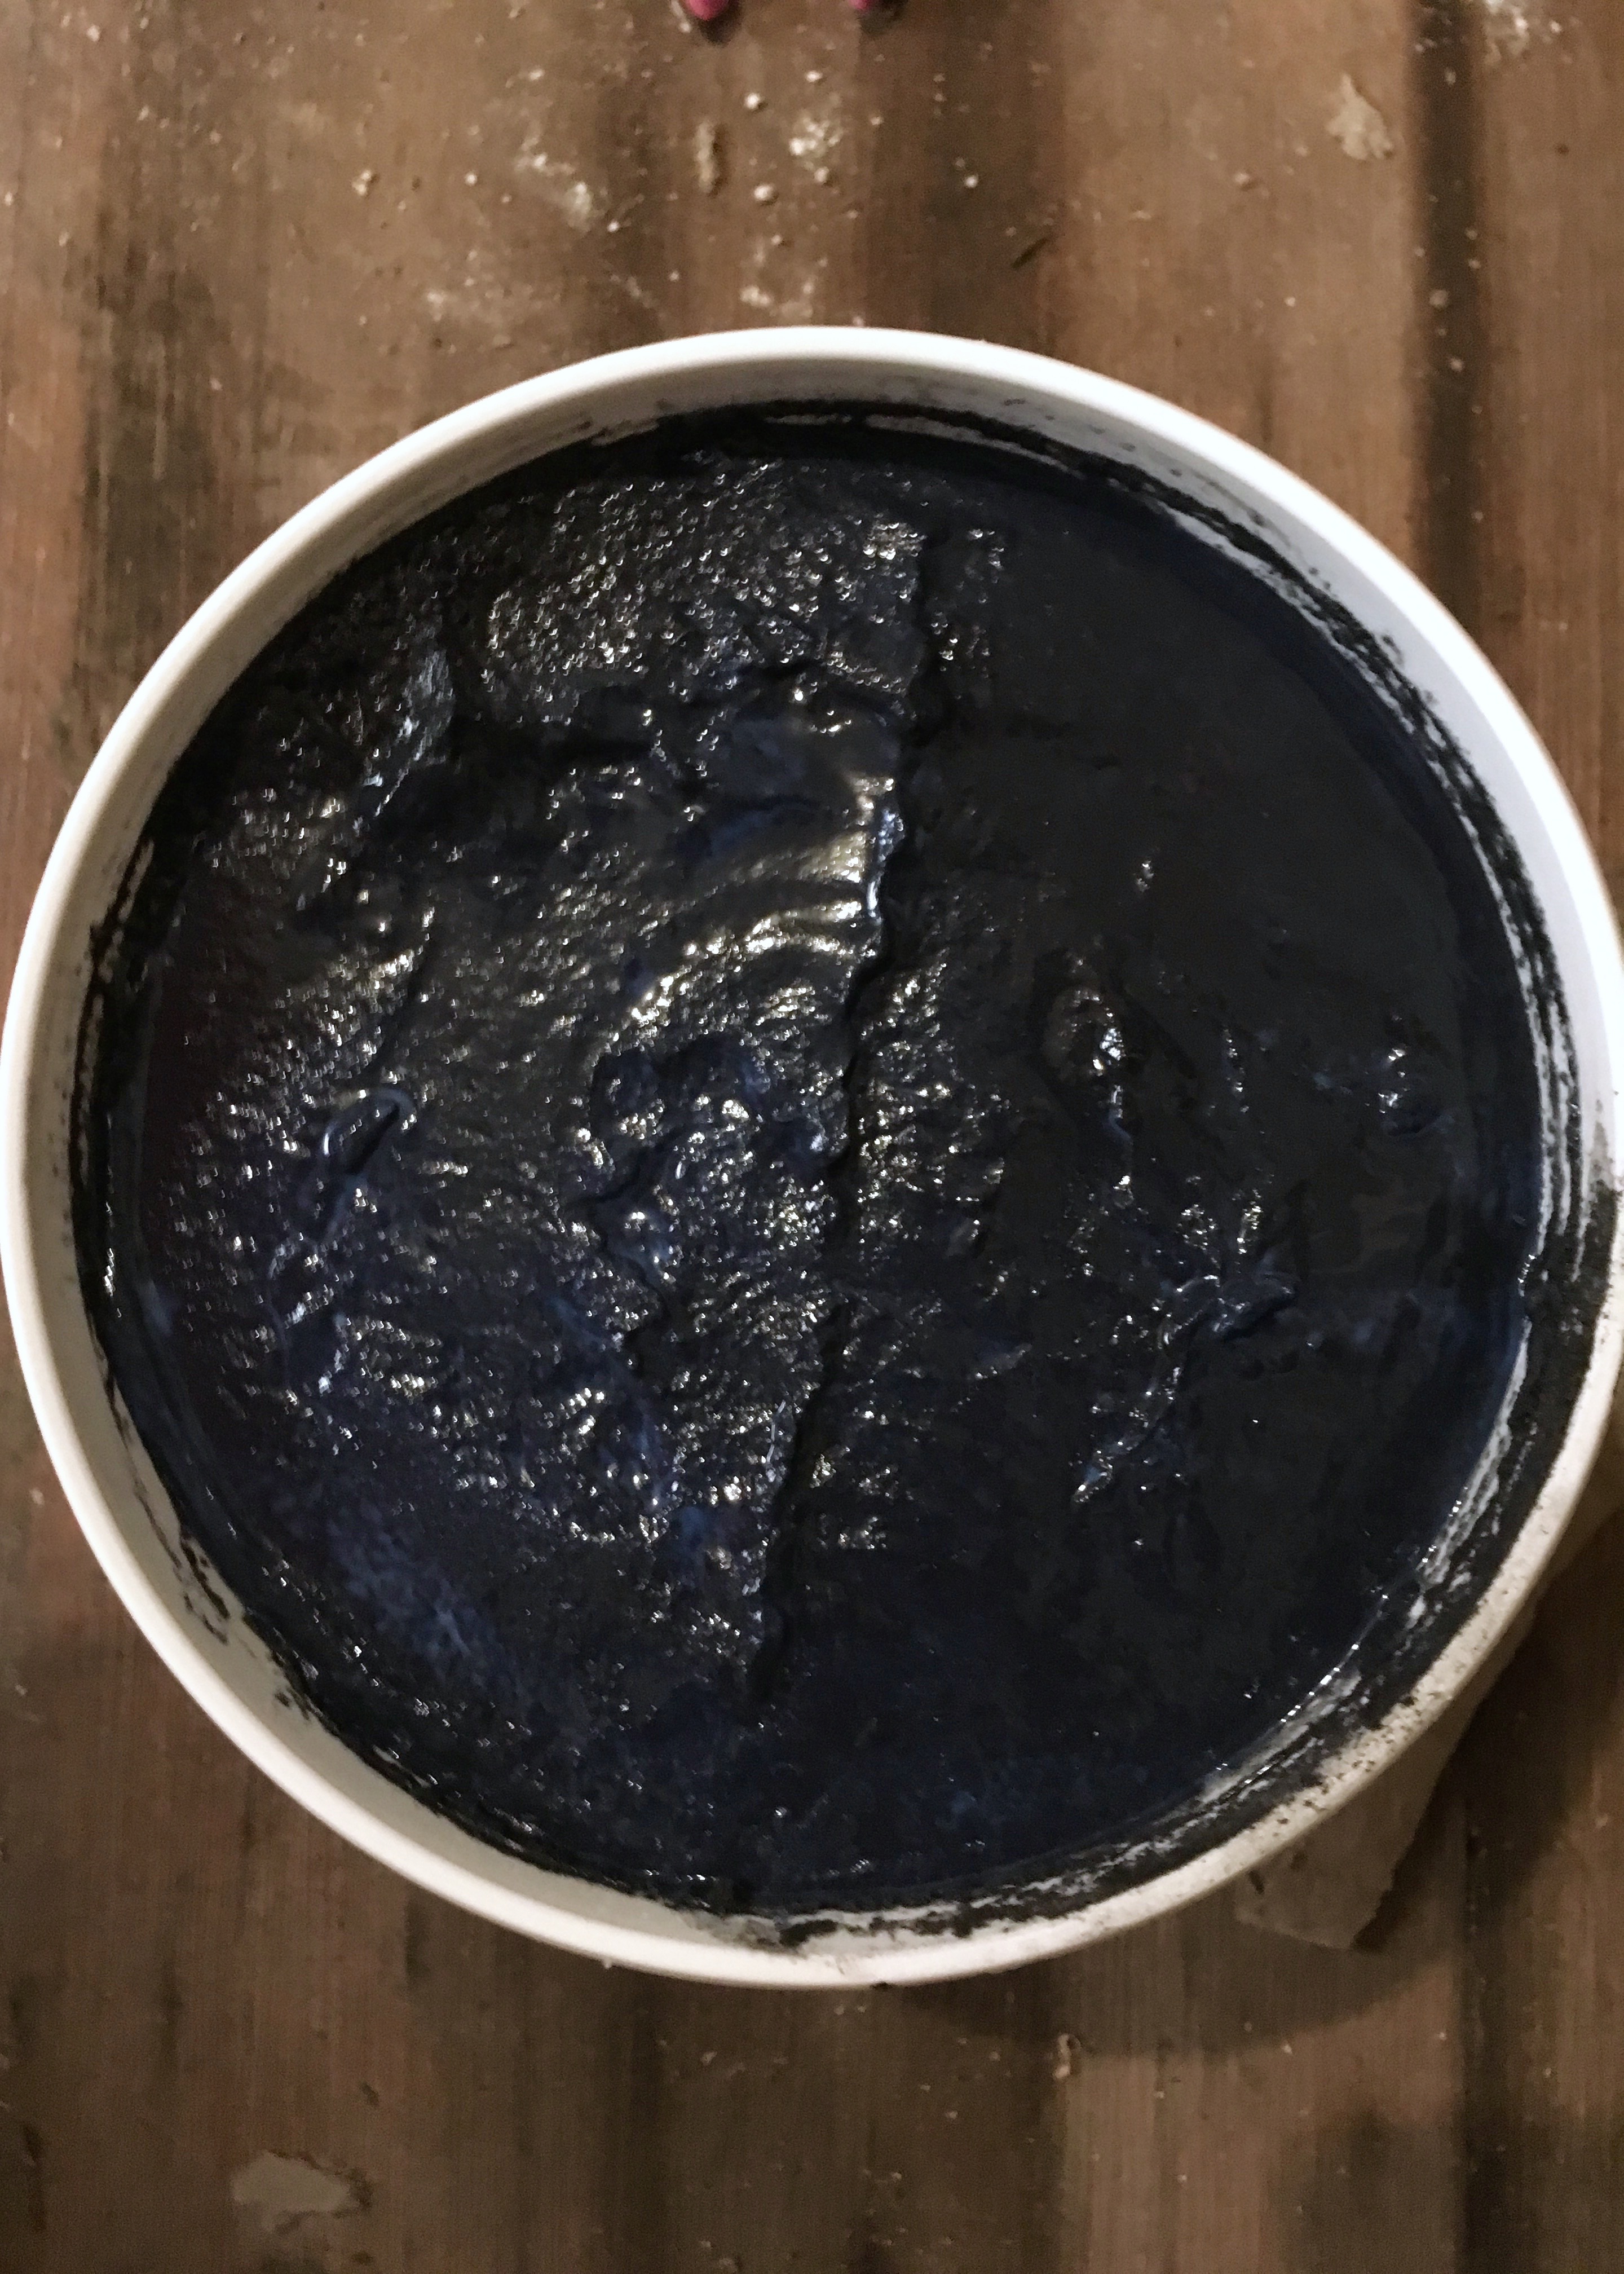
The next evening, grouting I was much better though! I poked any thinset to make sure it was fully set in place (it was!) and double checked the heater was at a more reasonable temperature (it was!), before cracking open my pre-mixed grout. You can get mixable grout for cheaper than the Fusion Pro stuff I used, but I didn’t want to worry about mixing multiple batches or making it the wrong consistency. I figured for my first time grouting, I’d take the easier approach. Also, I’m lazy. Ha! I debated white, grey, and black grout options, but ultimately, picked up a gallon of the charcoal which is the black Fusion Pro option. Black hides the most, I decided, and dingy grout is no one’s friend! I got a little nervous when I opened the container though, because it looked kinda blue! Also shout out to my filthy partially sanded kitchen floors photobombing below.

Berrybrier | Fusion Pro Grout in Charcoal

Once I actually started grouting, the grout looked more black. That was better! Whew!

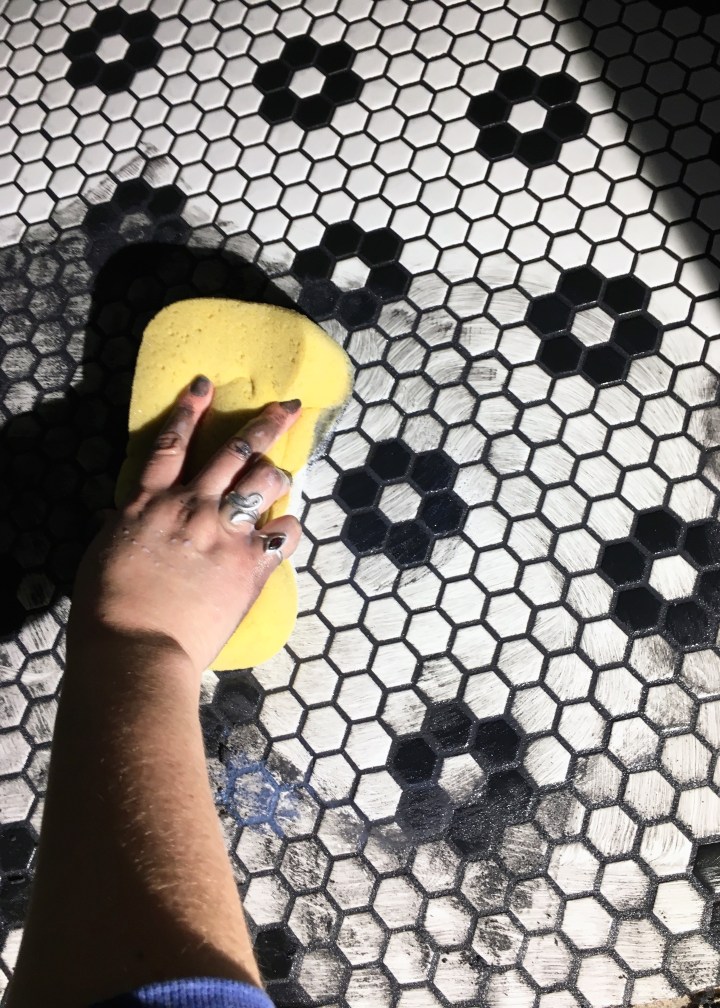
Grouting was easier than laying the tile, just take the grout float and smoosh grout into the open space between the tiles, smoosh over a few times to make sure the gaps are fully filled. After smooshing, wipe away the excess and you’re left with something that looks a little crazy. You have to let the grout set a minute or two before wiping up the excess though.

Berrybrier | Groat Float

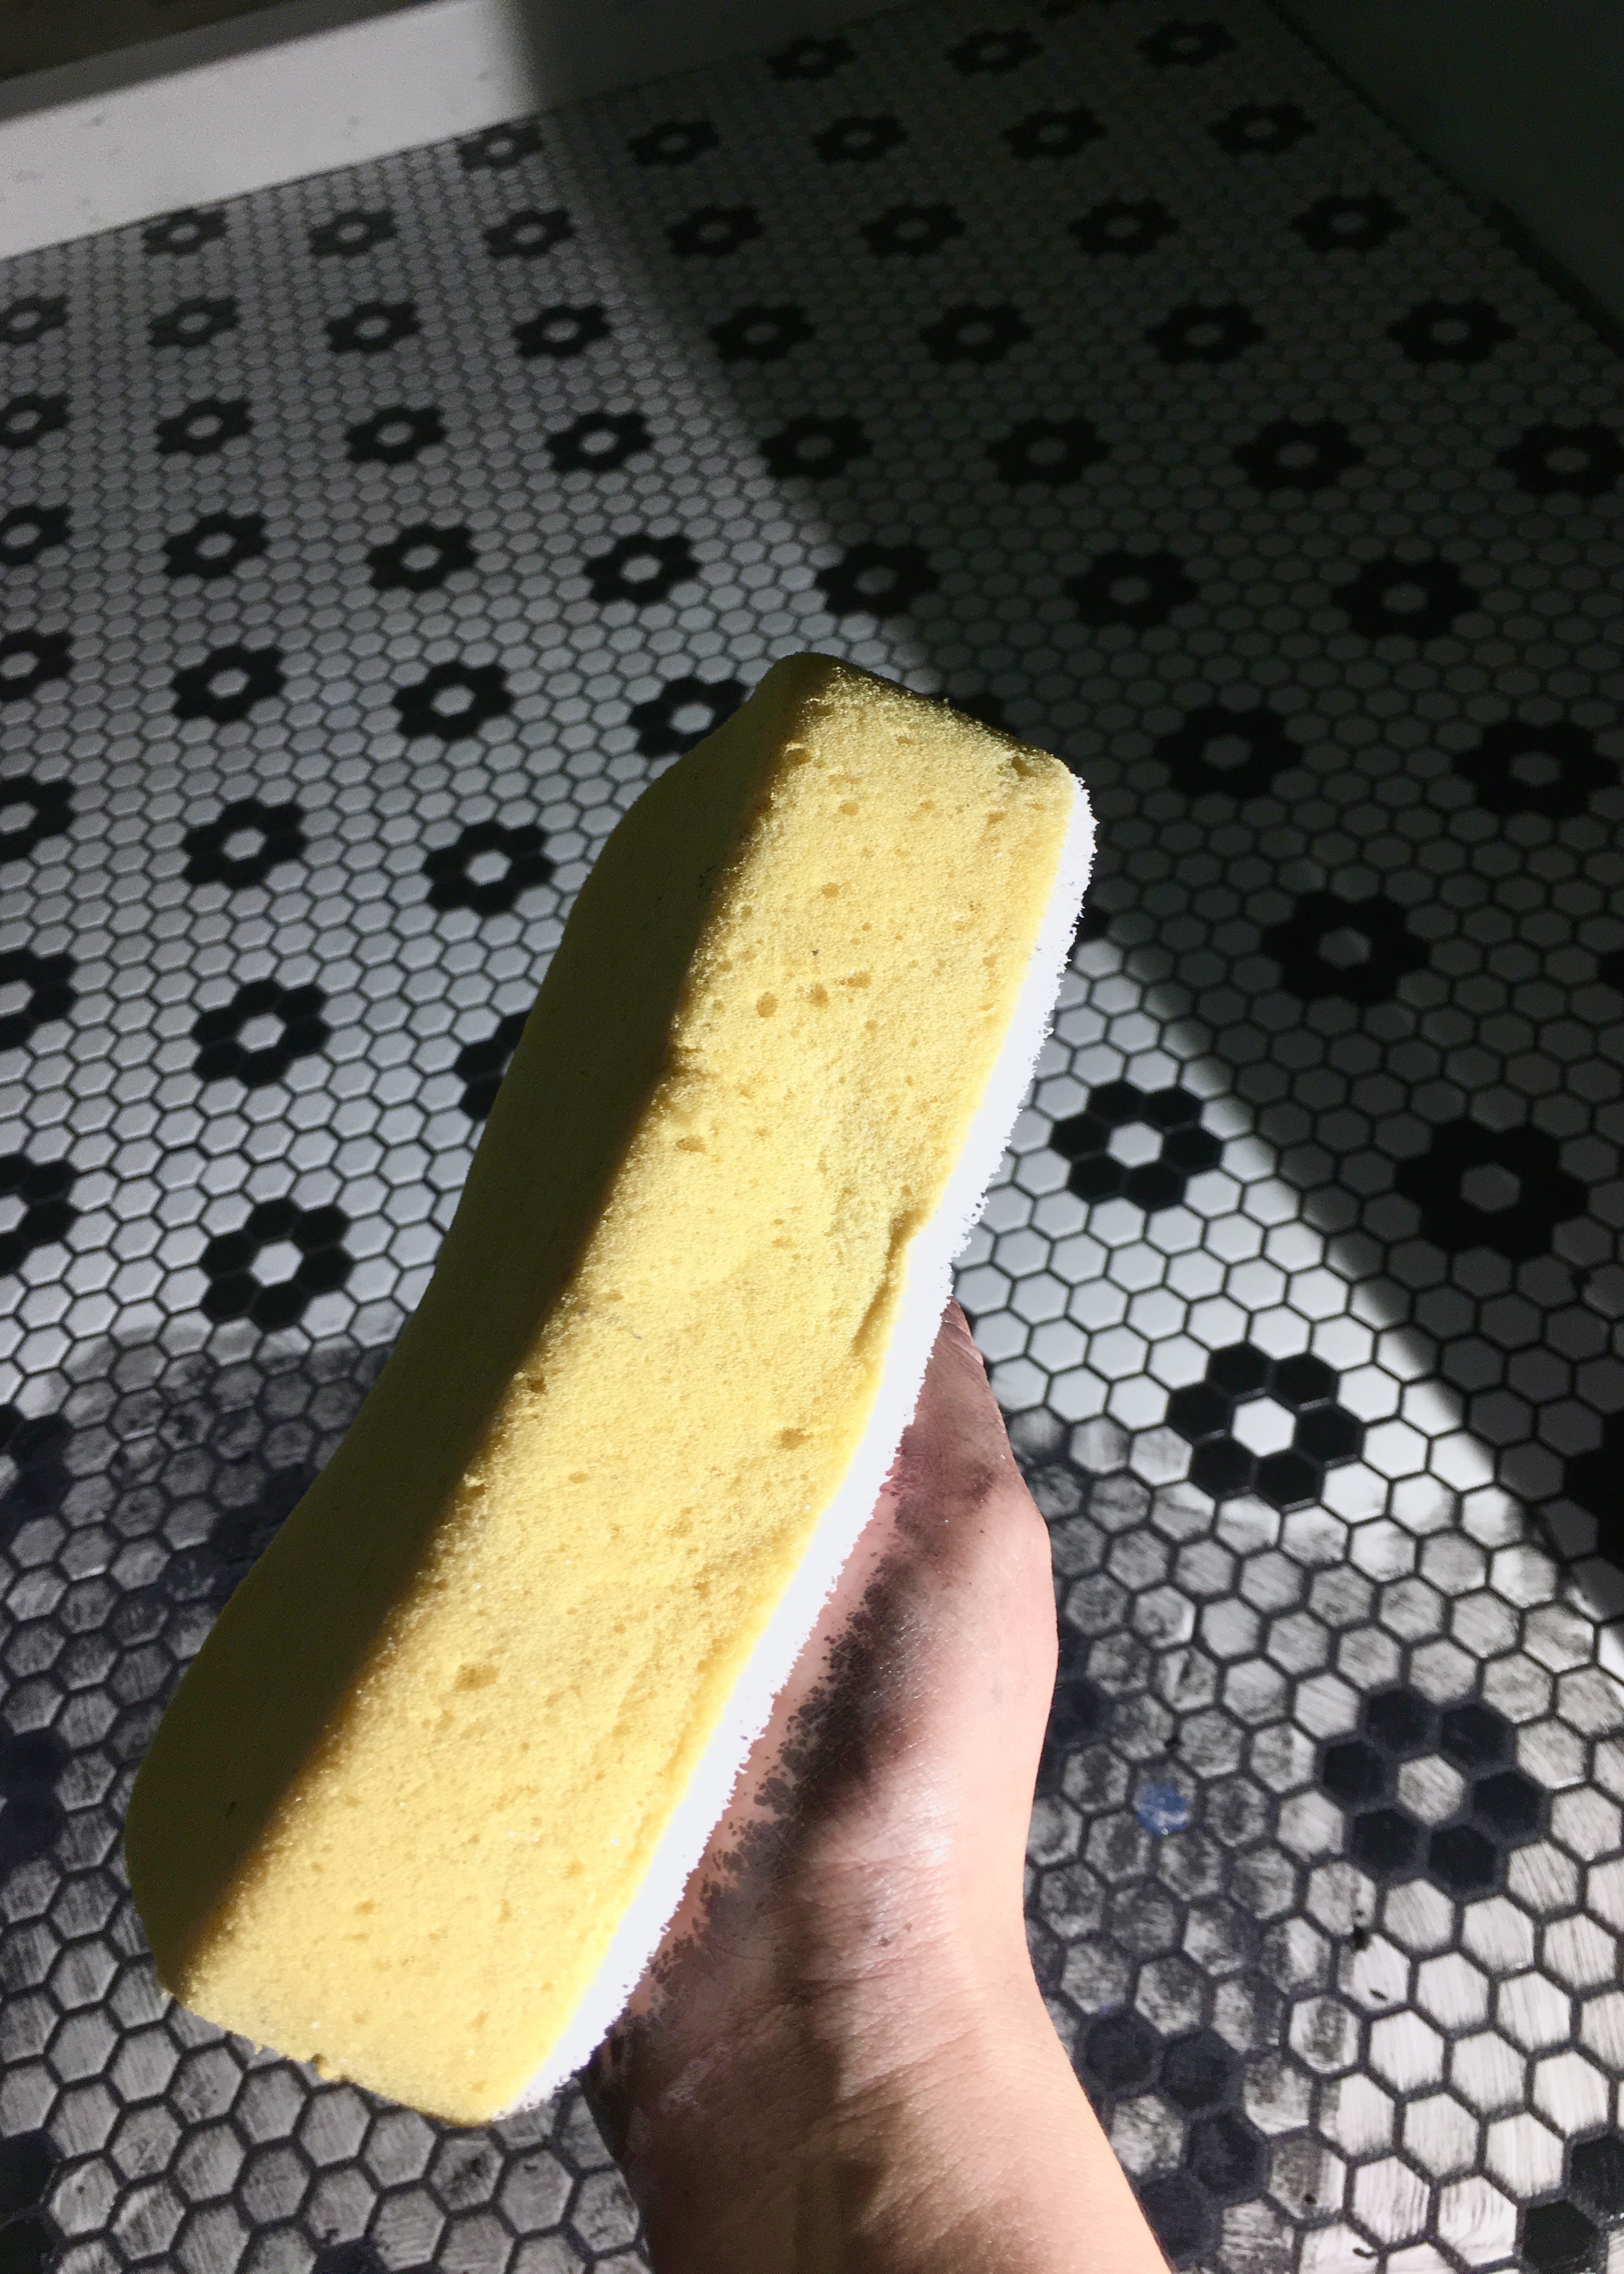
But then you just dip a sponge like this in some warm water and ring it out really well and wipe up the excess grout. This sponge helpfully had a more abrasive side I could work at any tough spots with.

Berrybrier | Grouting Sponge

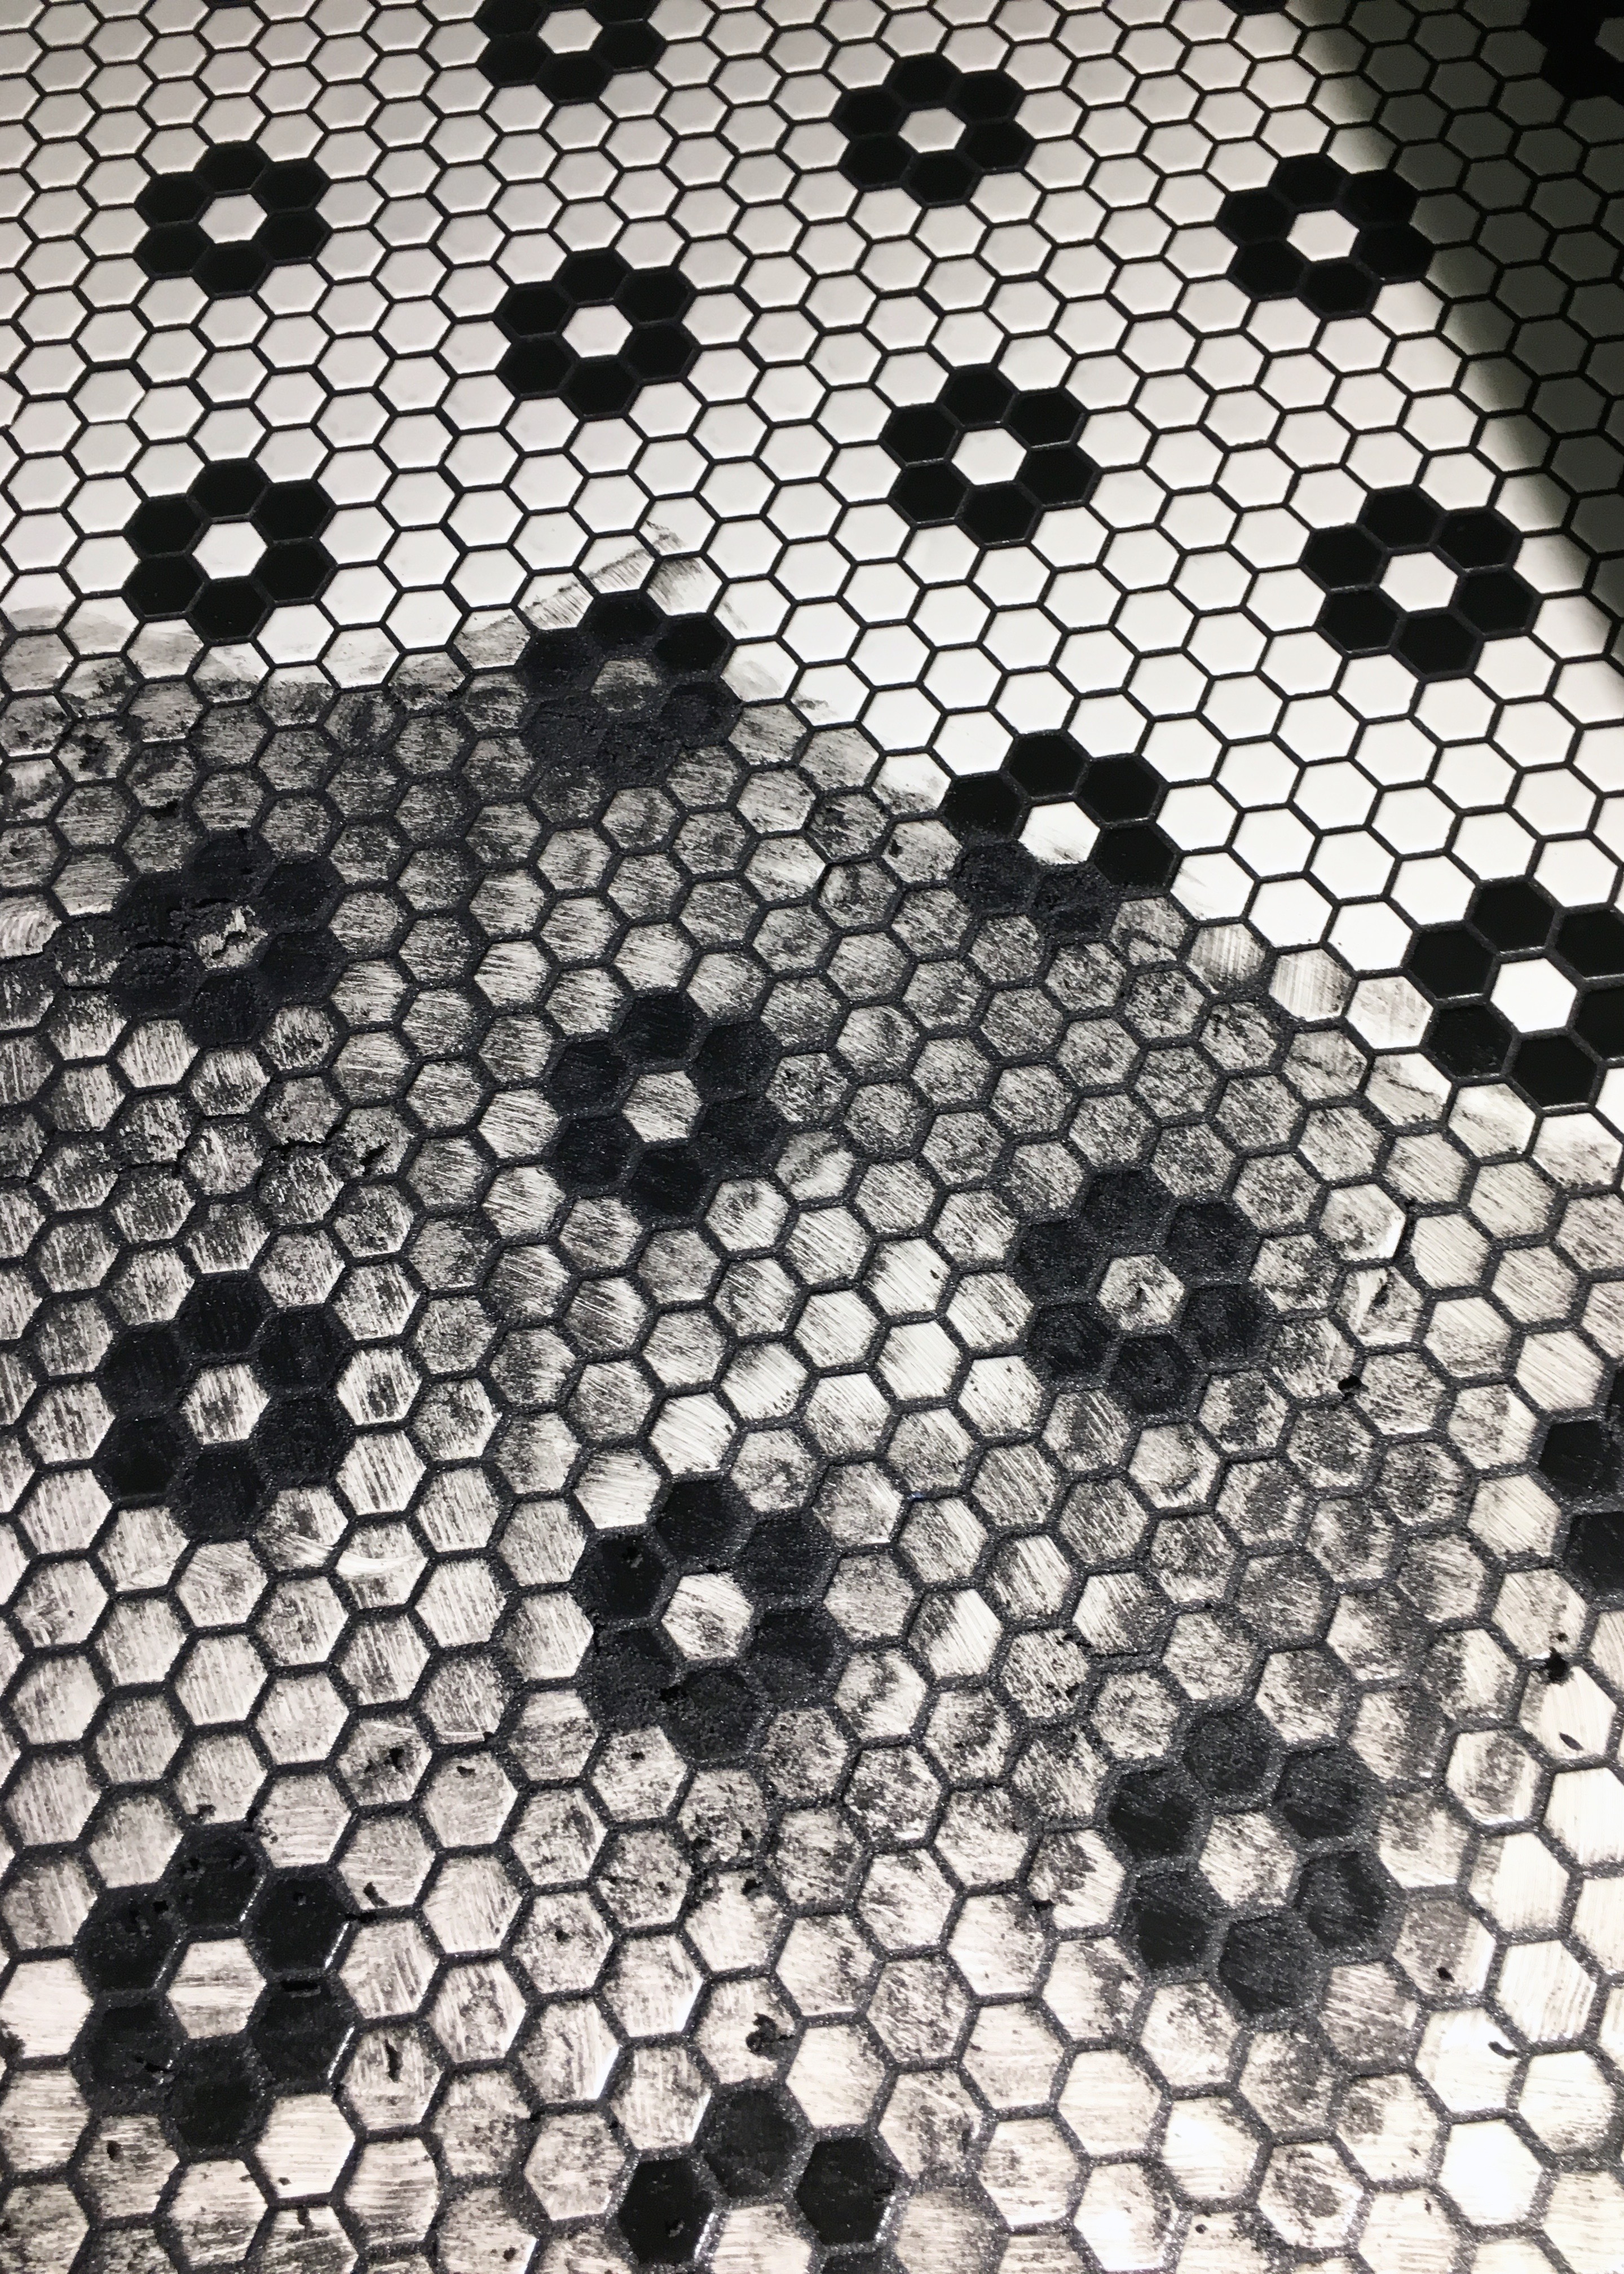
As I wiped with the damp sponge, it started looking like a real floor pretty quickly! If any water started to pool, I wiped it up with sponge and rung out the sponge again before making another pass.

Berrybrier | Wiping Grout

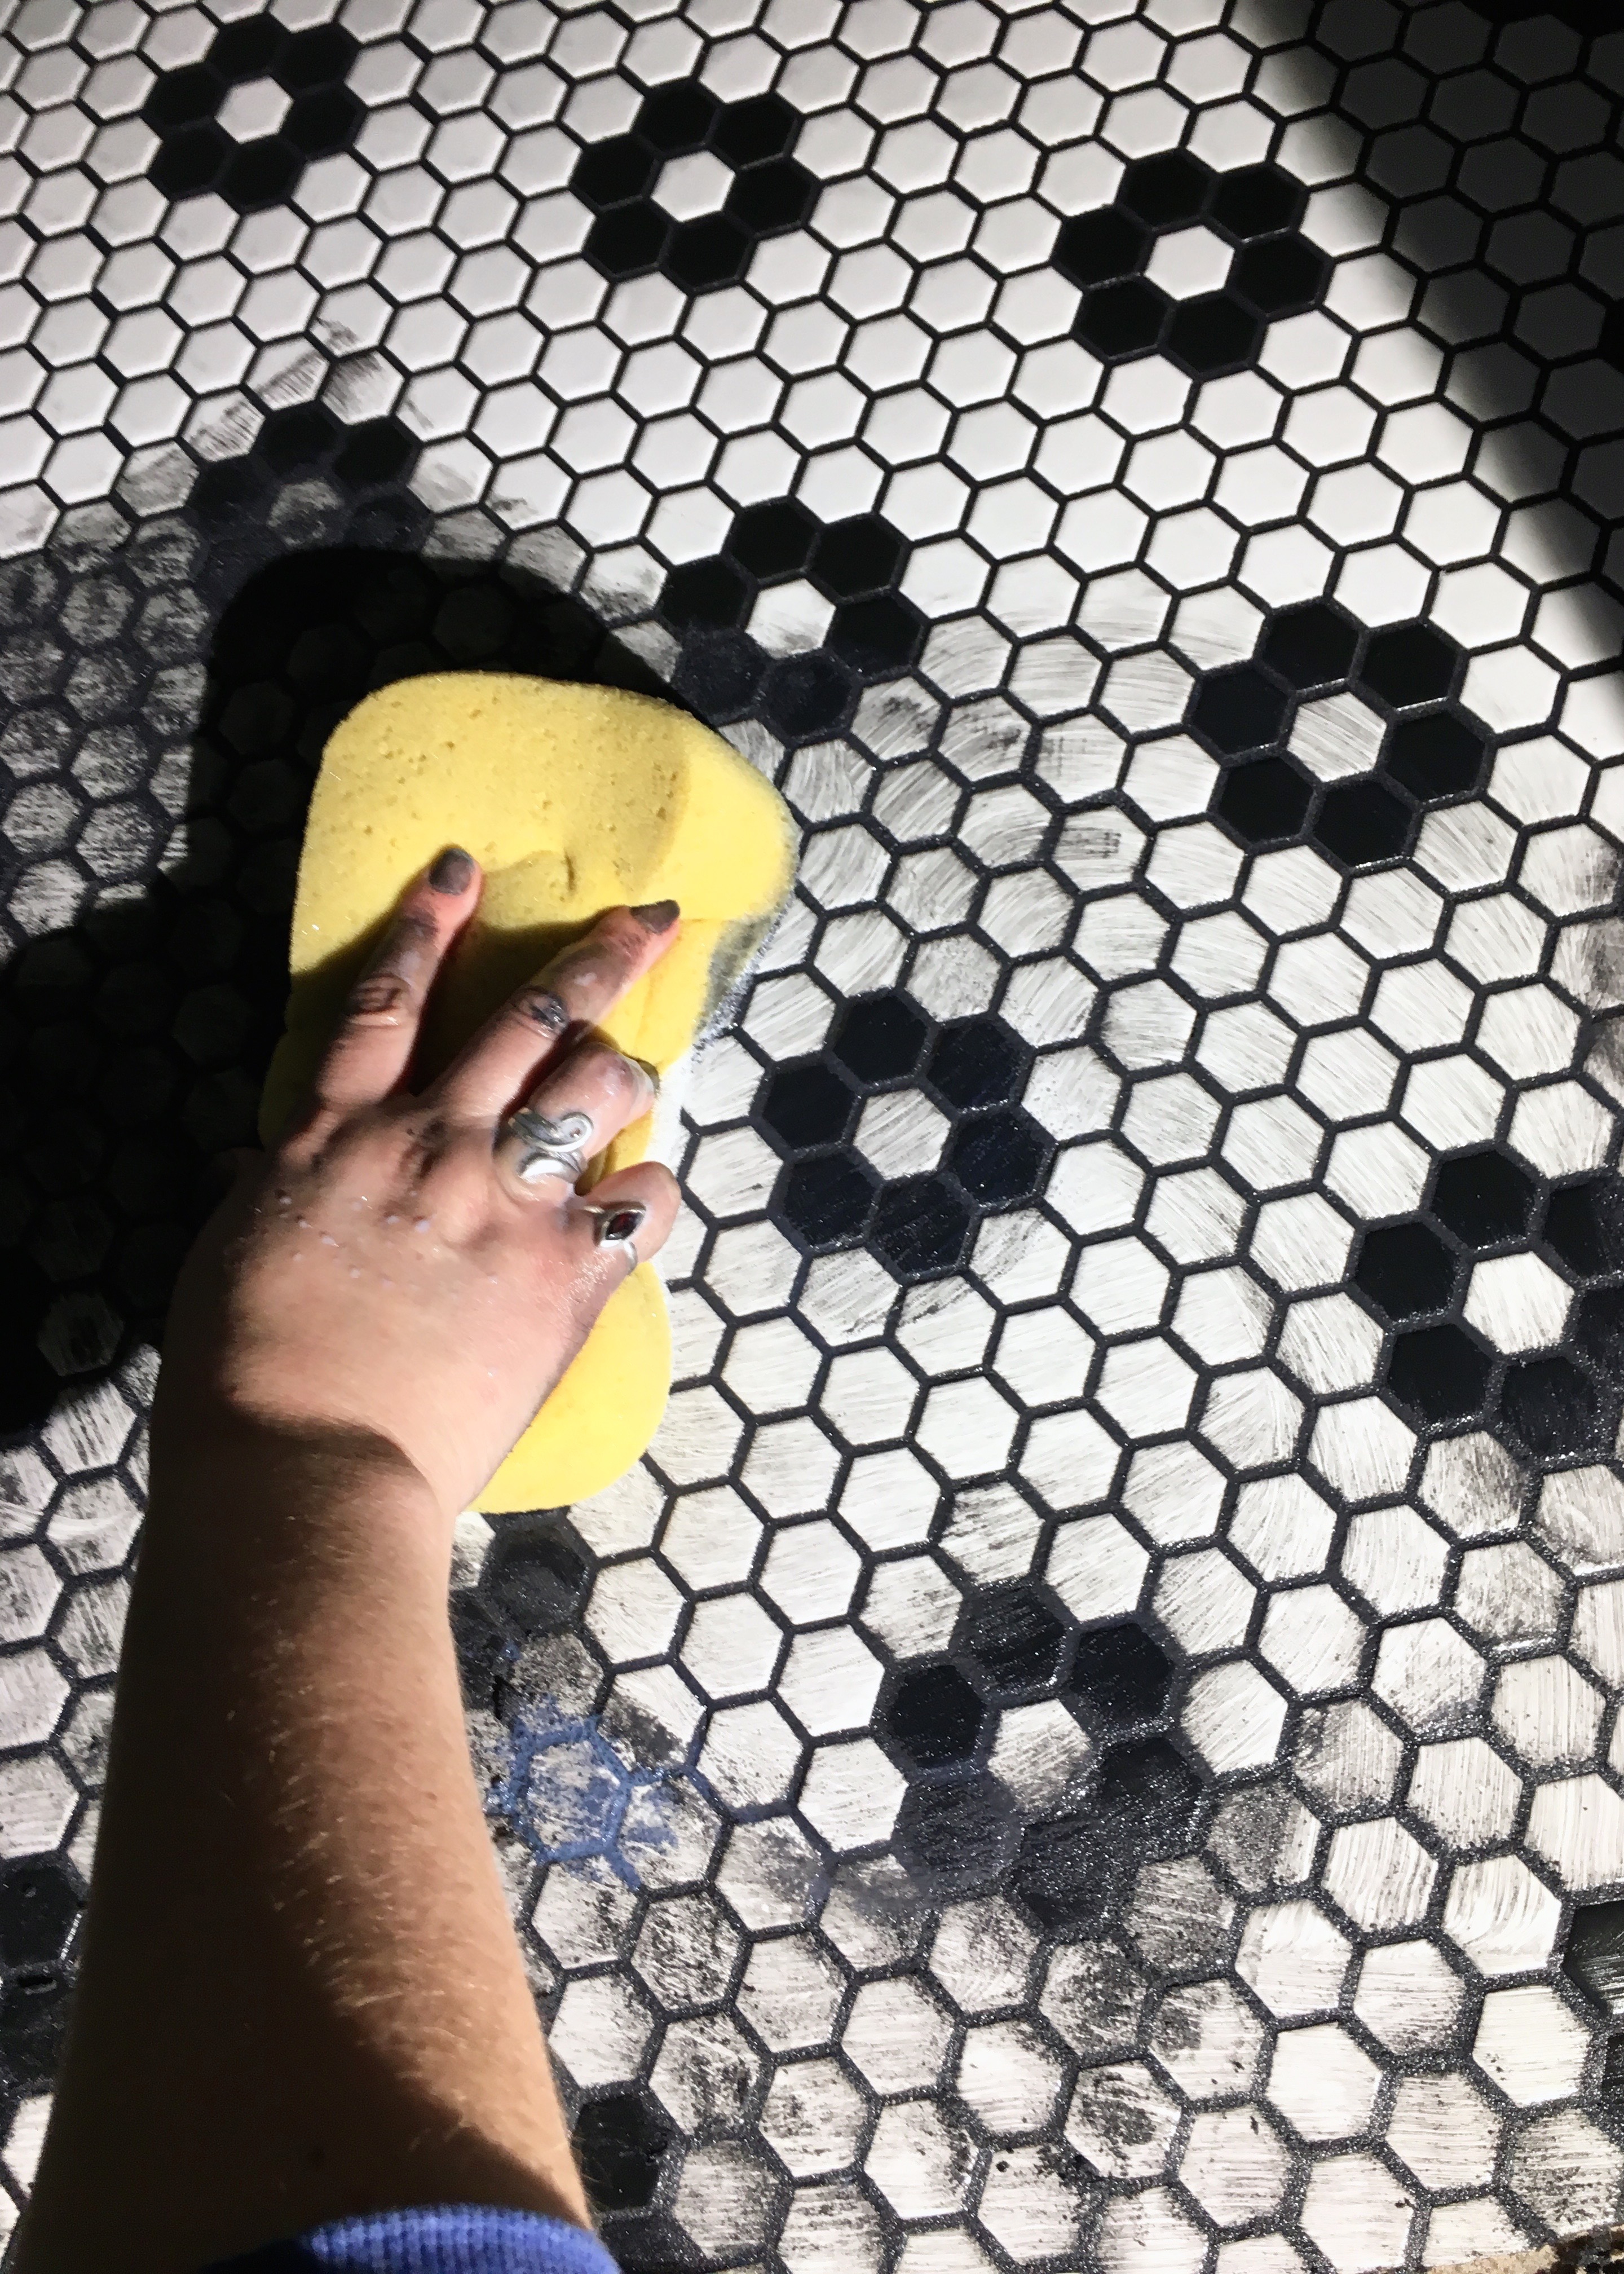
After the first wipe down, it looked better, but it definitely needed another go round. By getting the majority in the first pass with a slightly more than damp sponge, I found a damp sponge could get nearly all the rest of the grout haze on the second pass.

Berrybrier | Grout Cleaning

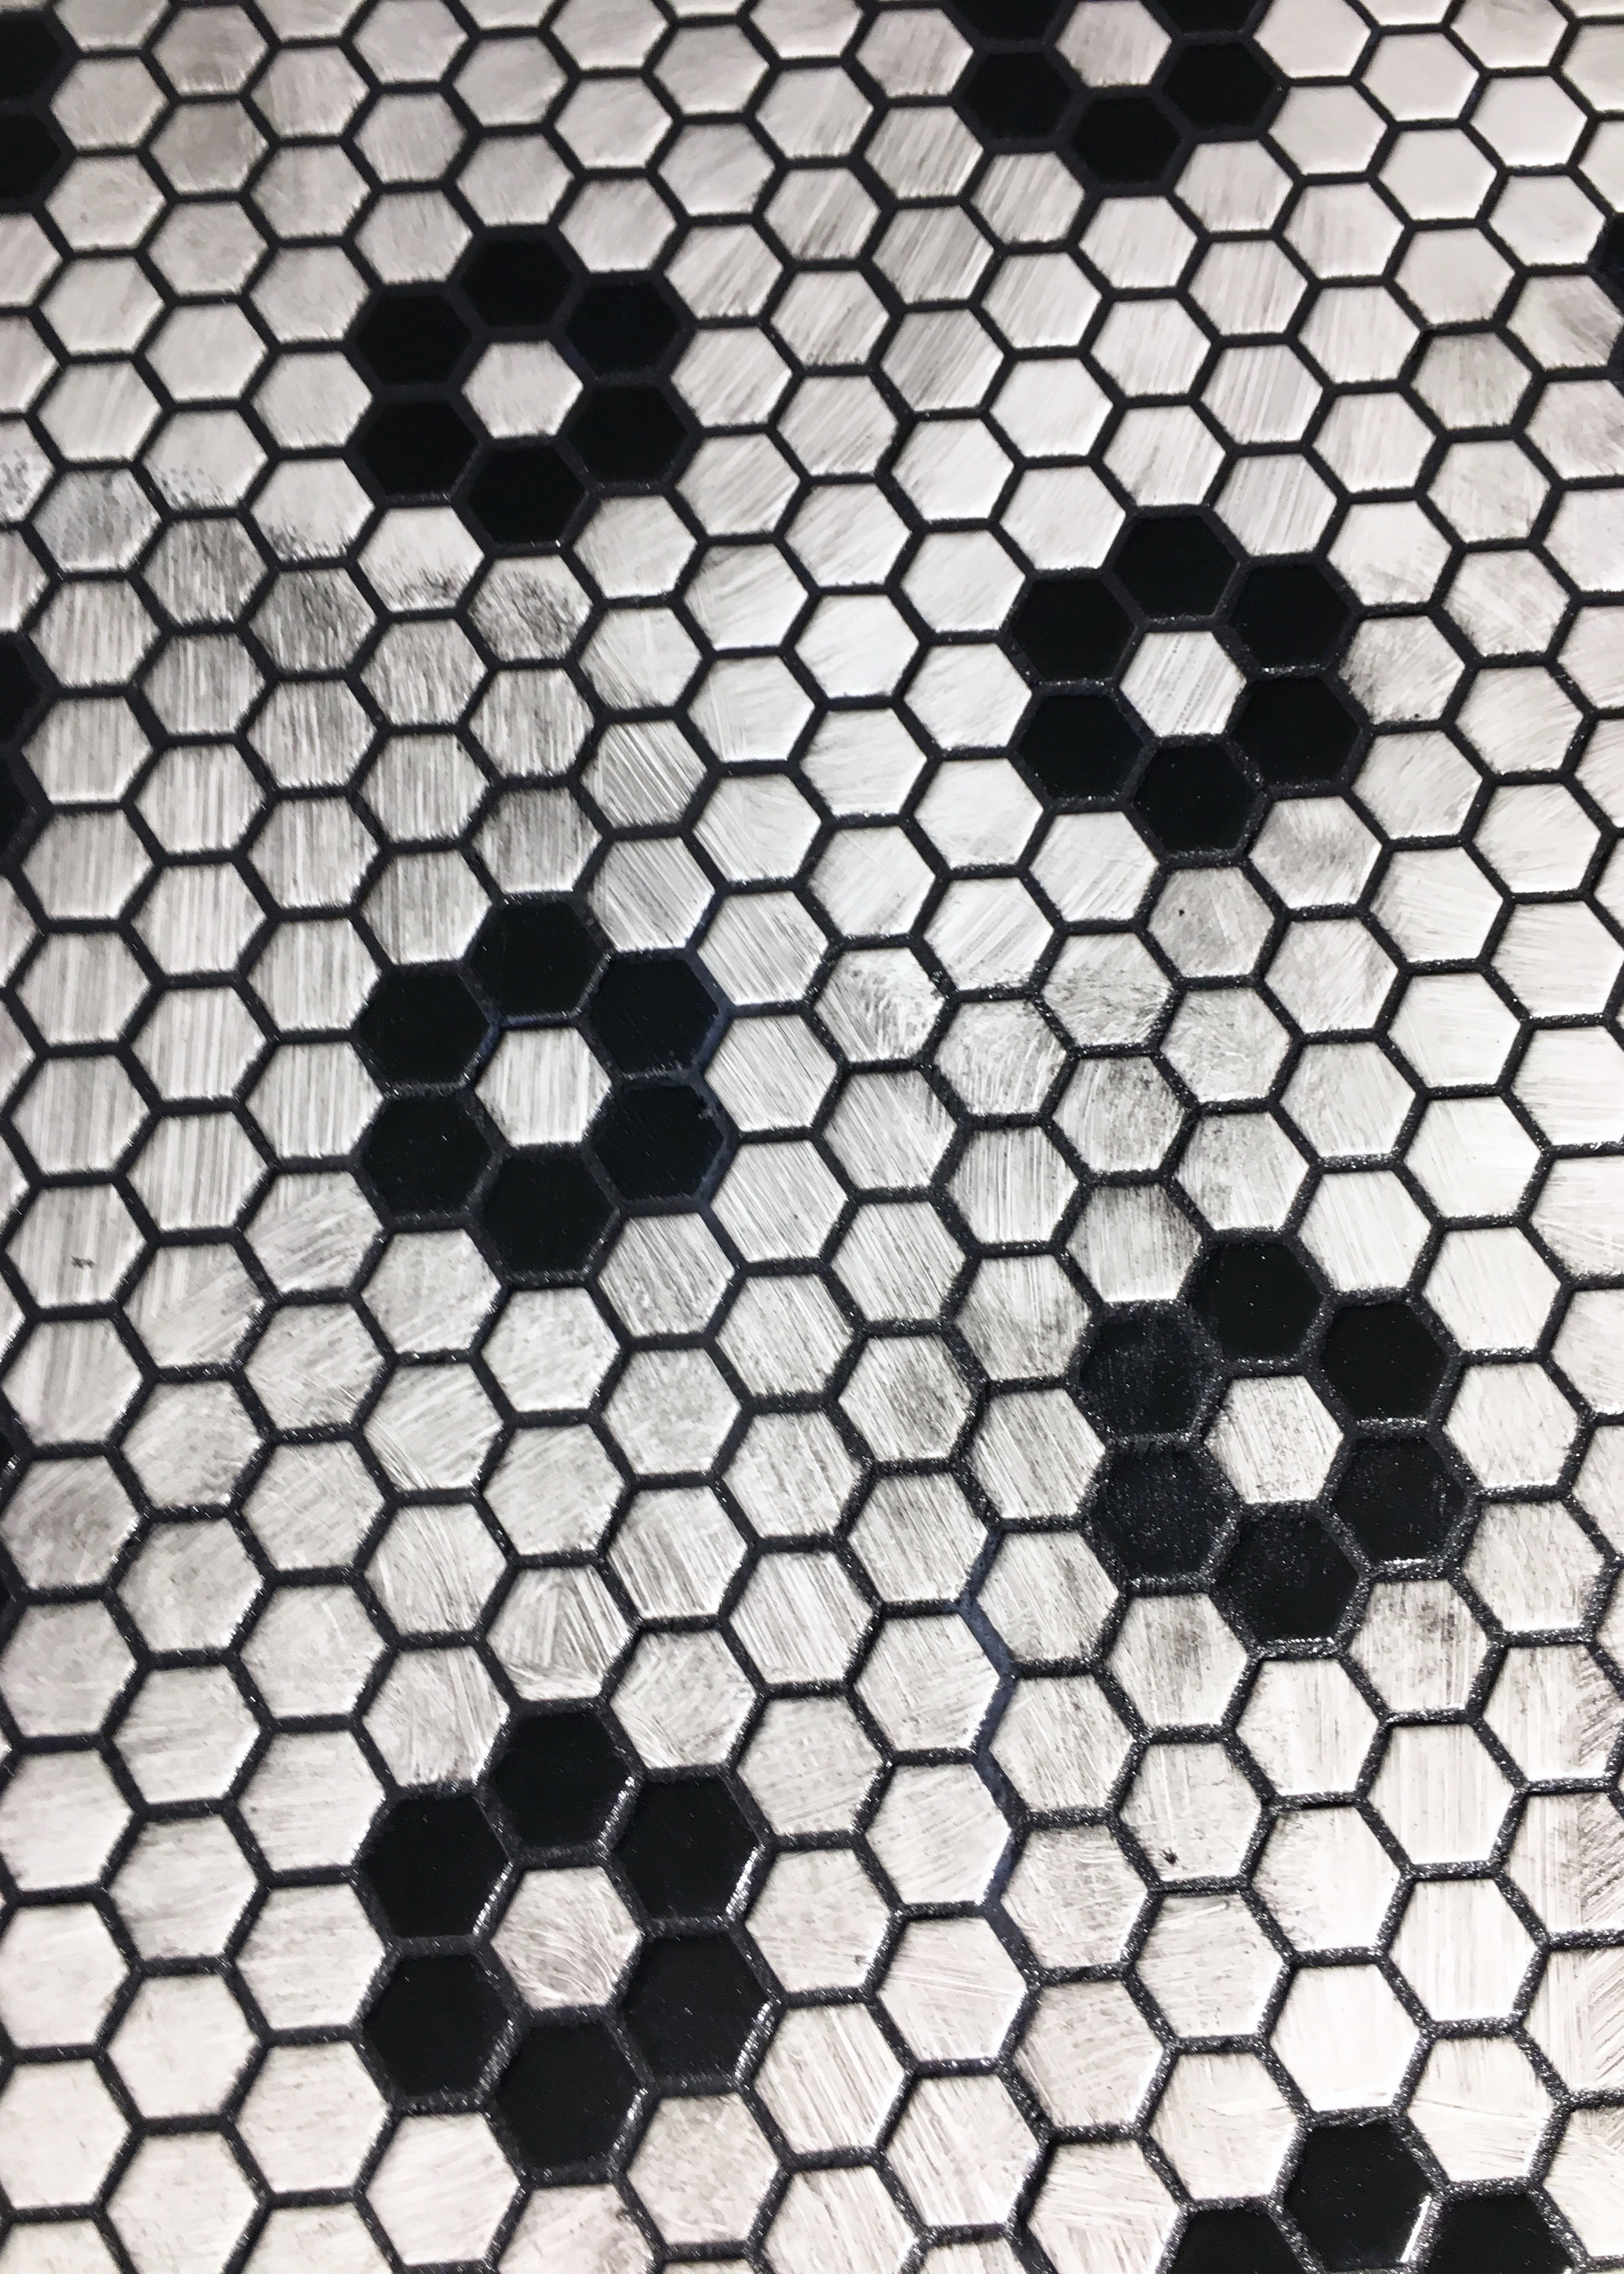
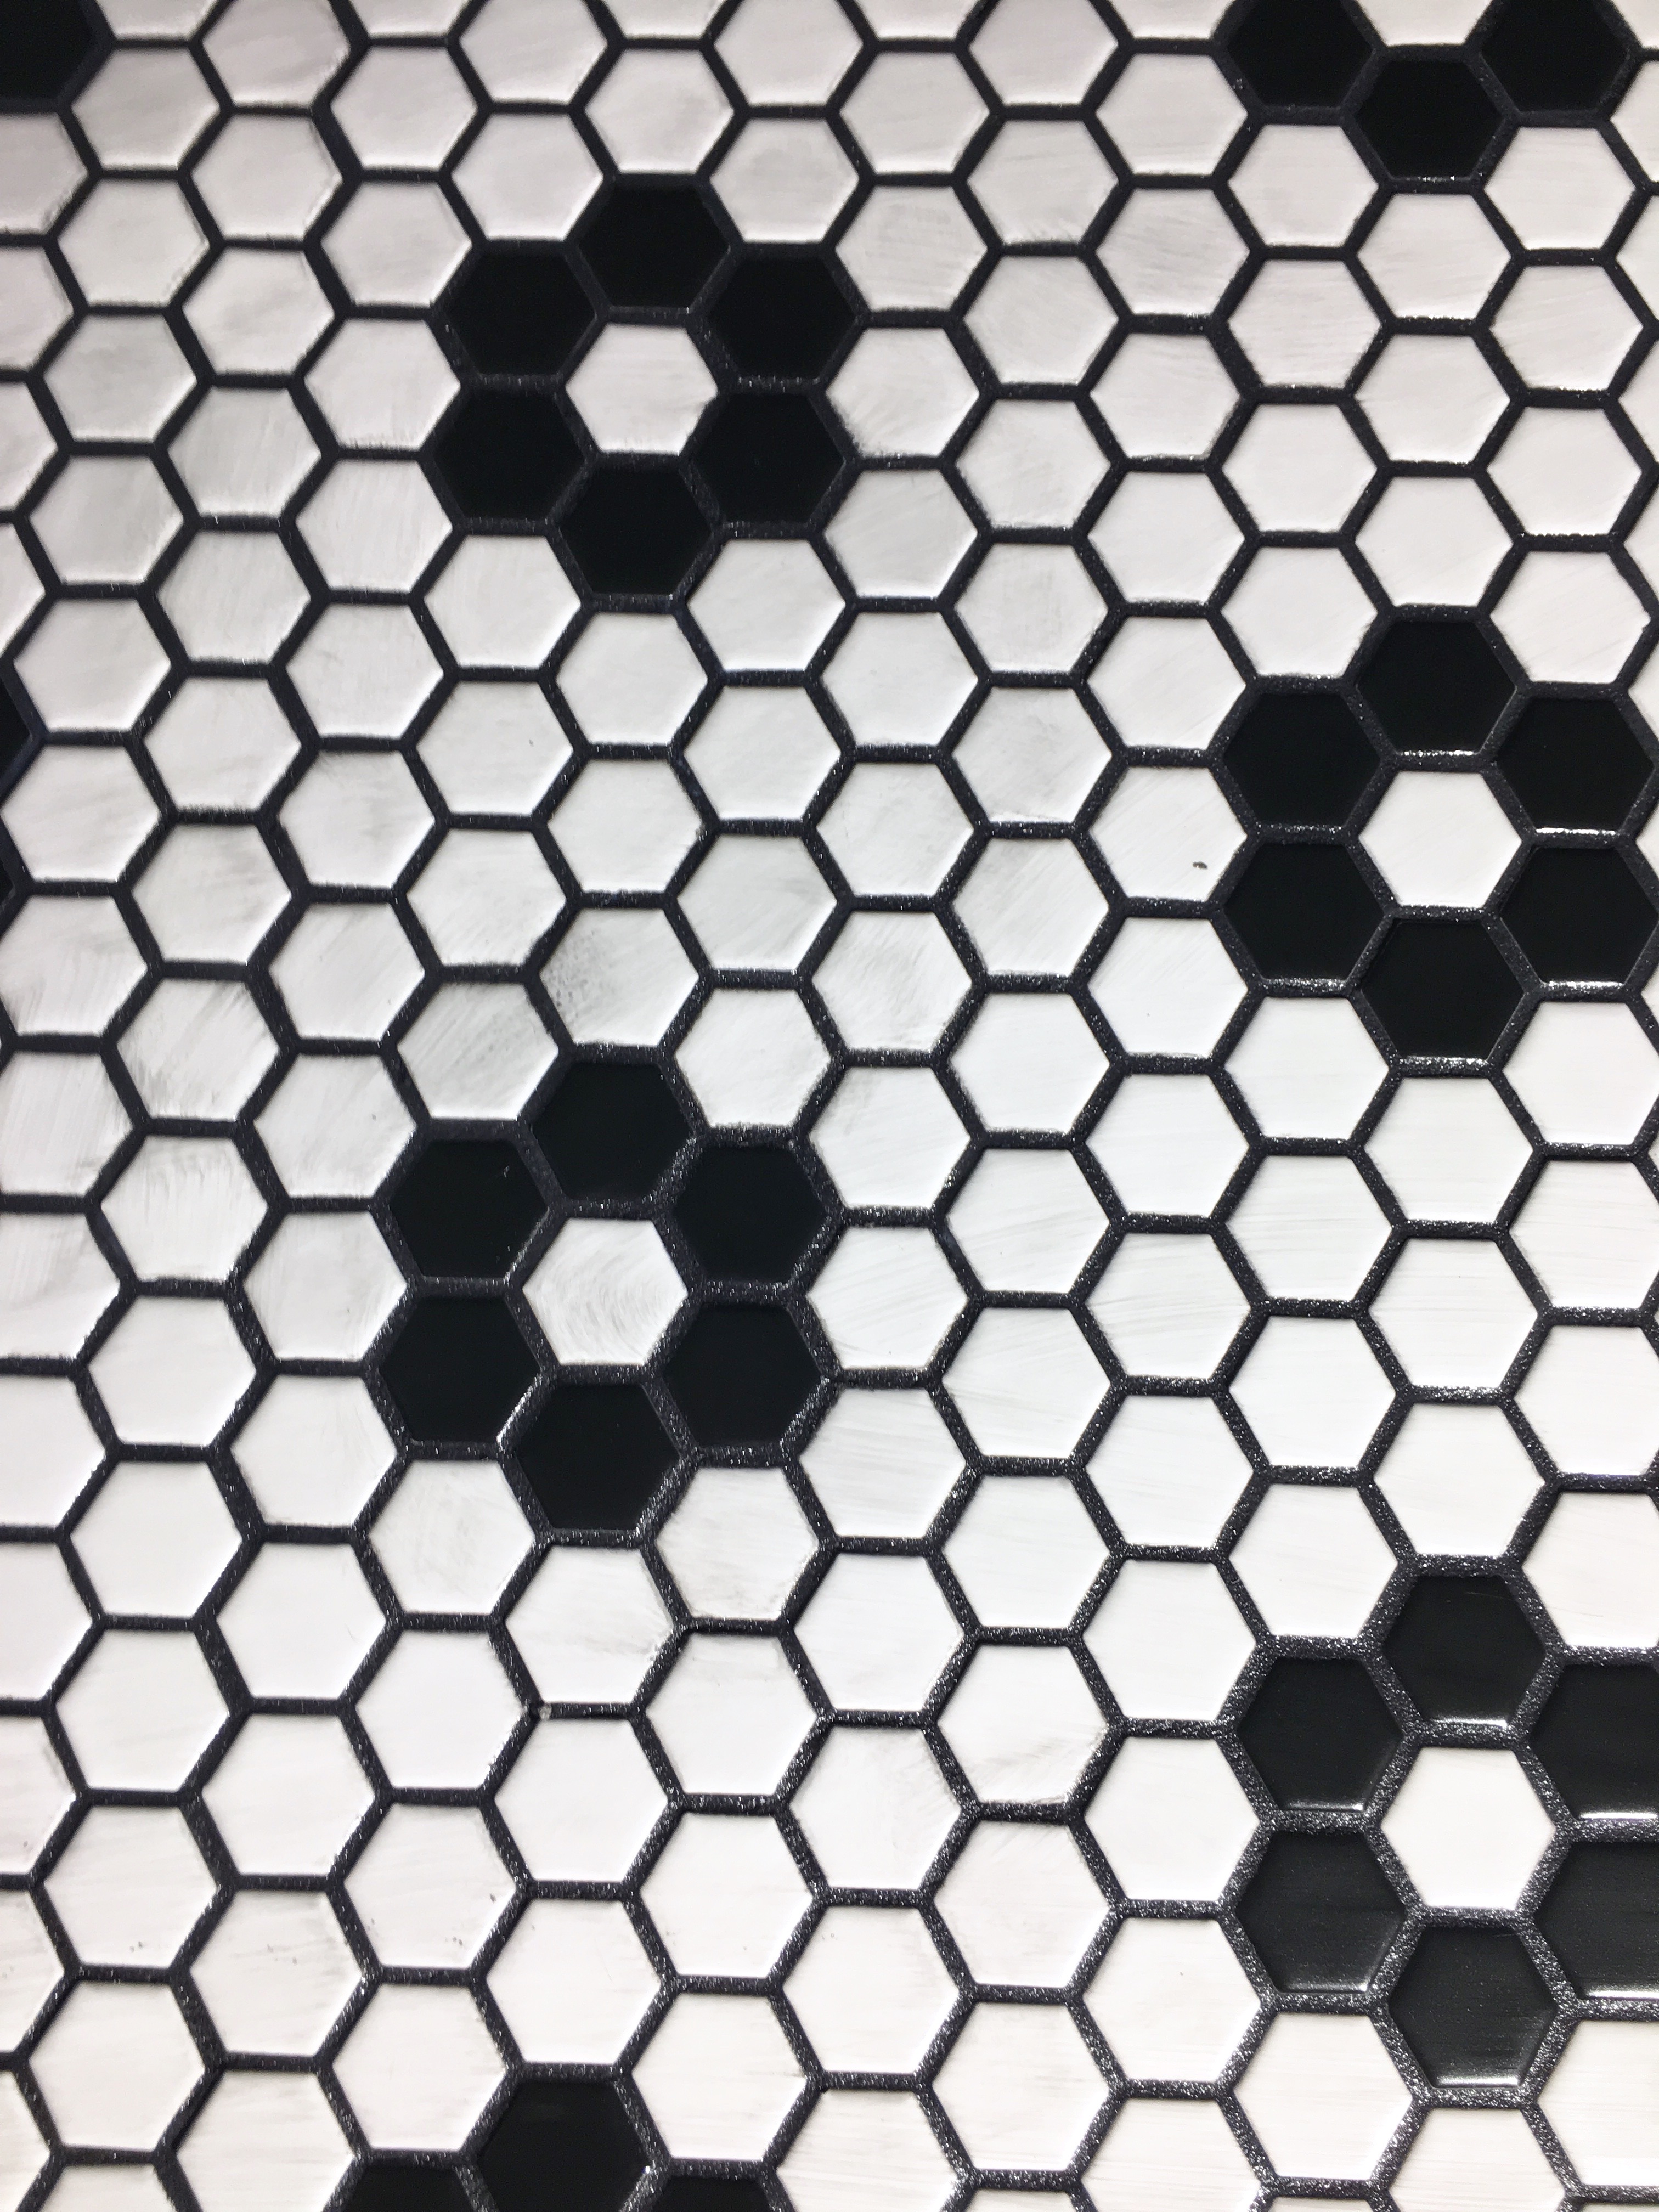
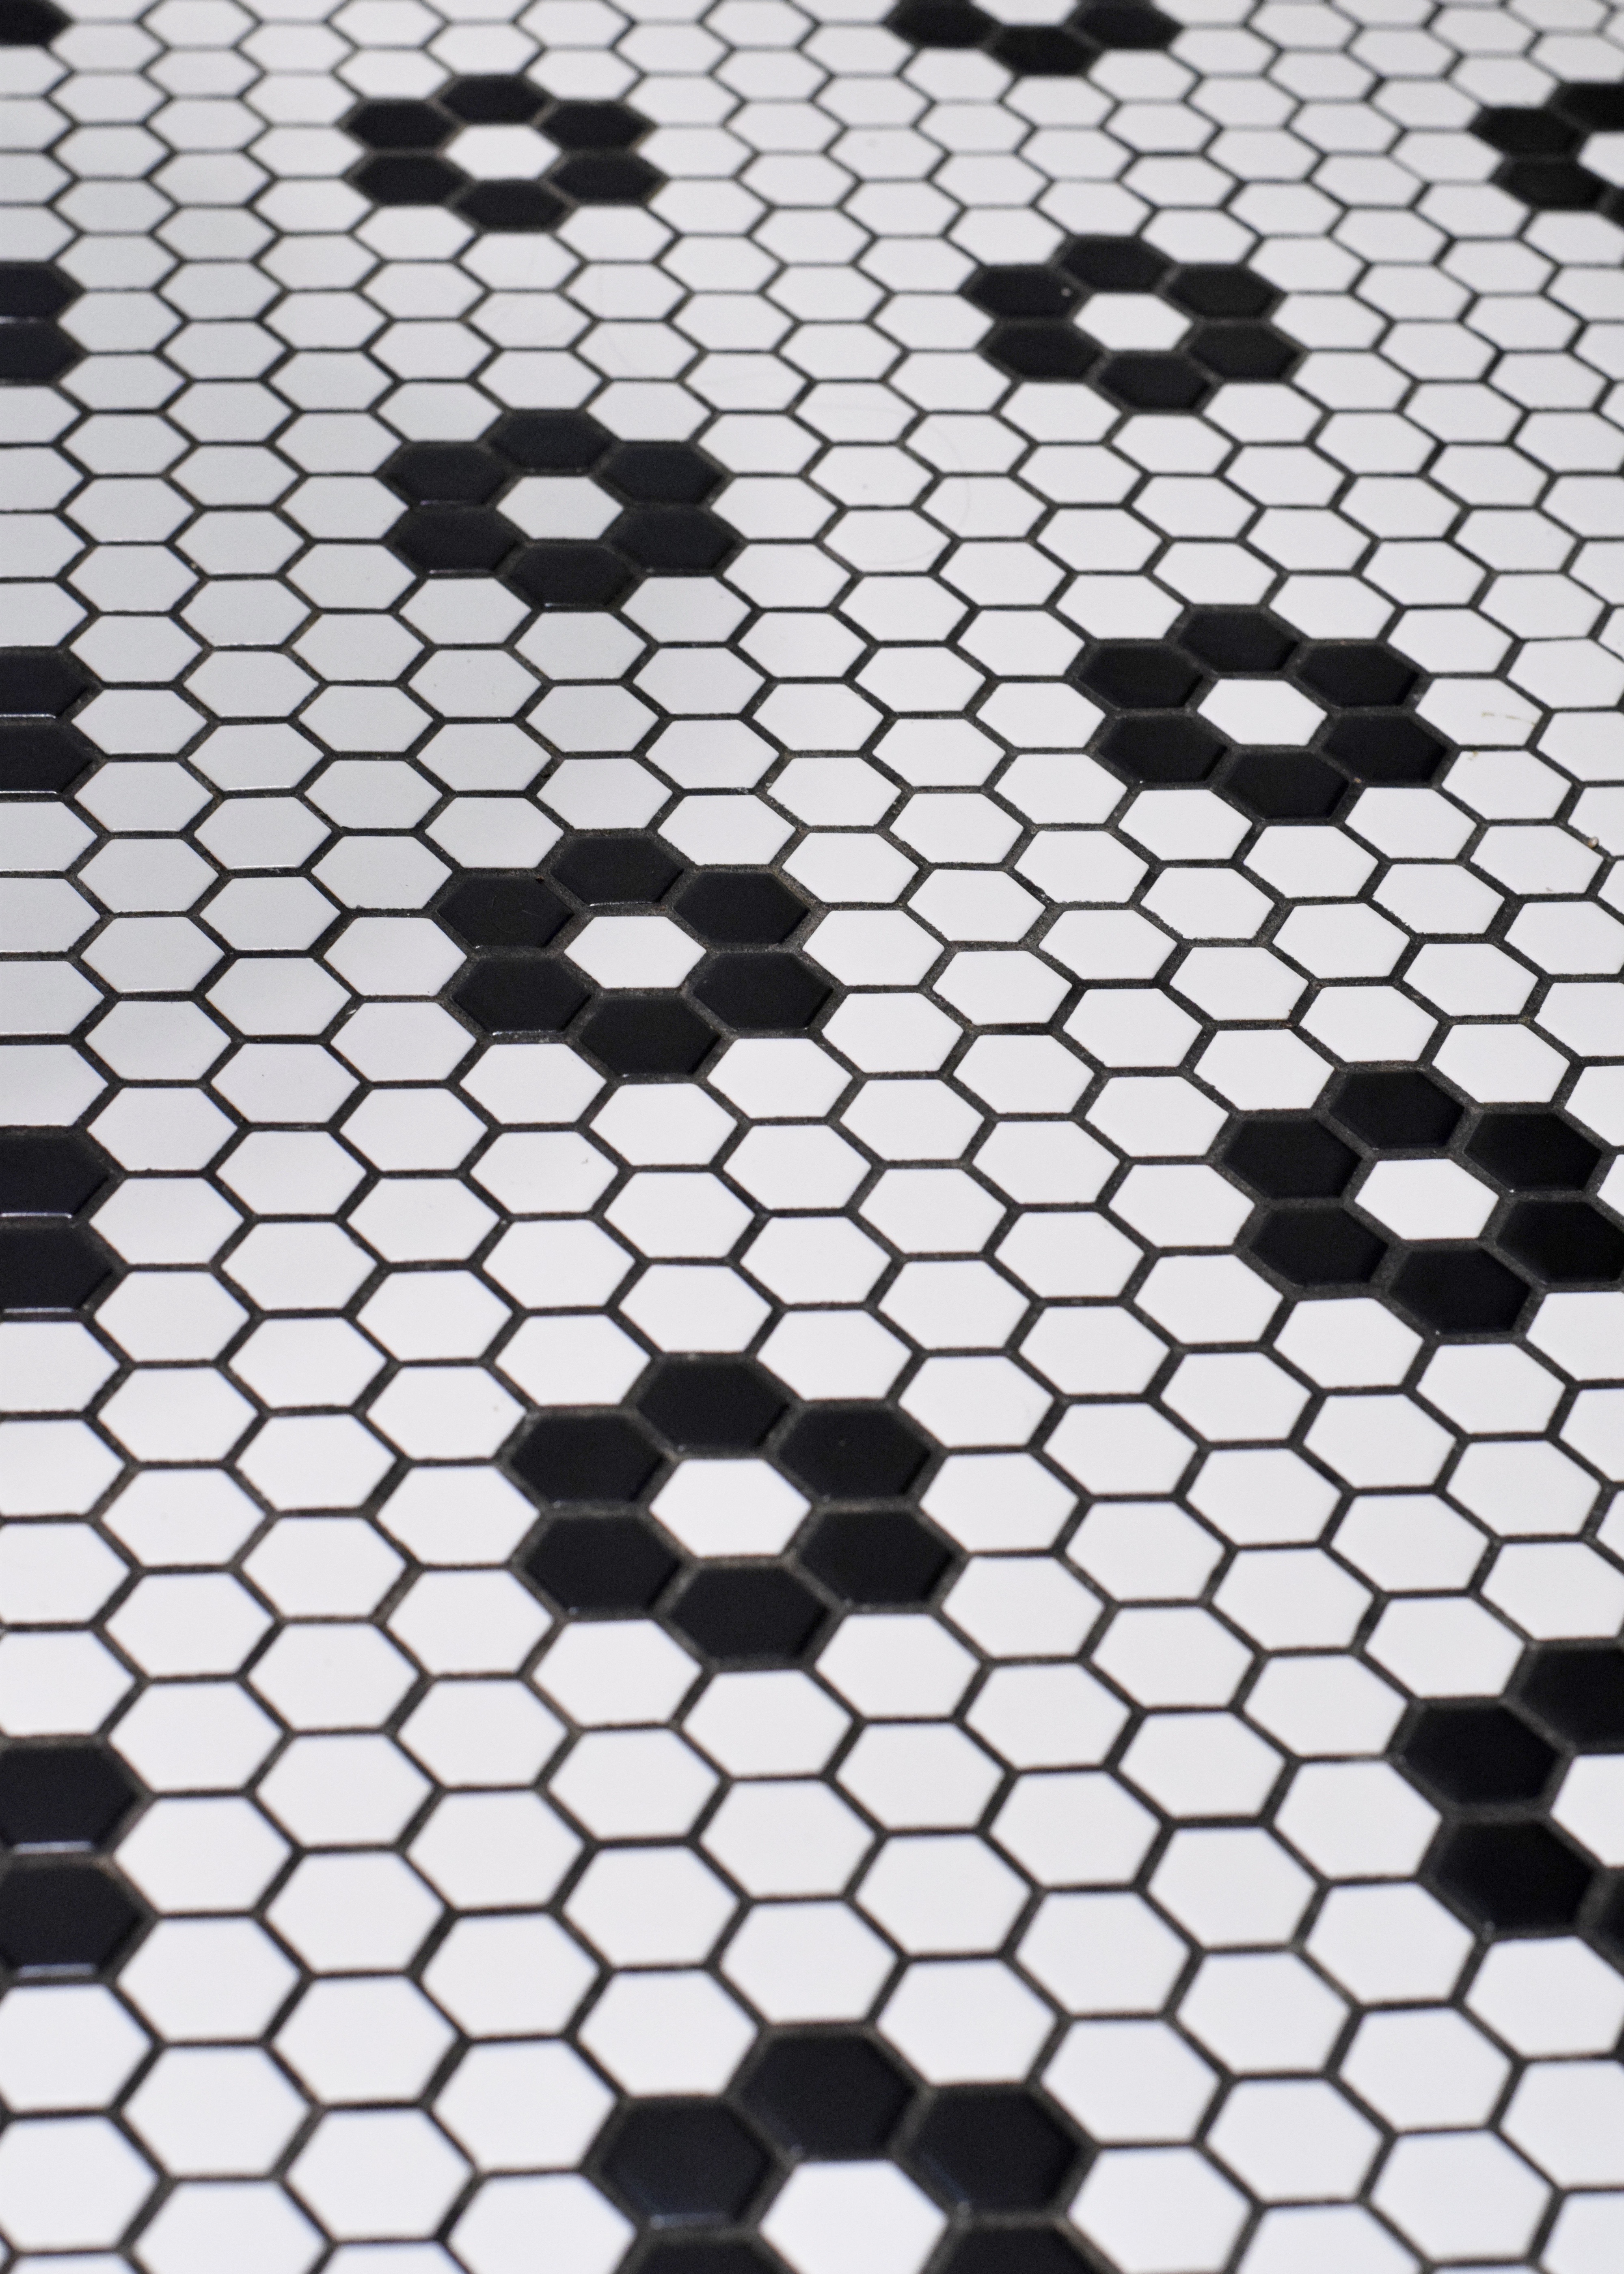
That second pass got 95% of the grout haze and all of a sudden the floors looked DONE! It was momentous for sure! I’d not had a proper bathroom in a long while at this time and no bathroom meant I couldn’t actually stay at the house since there was no where to shower! Sure there was still some grout haze on the tile, but I would get that after the grout and tile set fully. It was really looking close to done in here. Walls, tile, who needs paint and toilets anyways?

Berrybrier | Freshly Grouted Tile

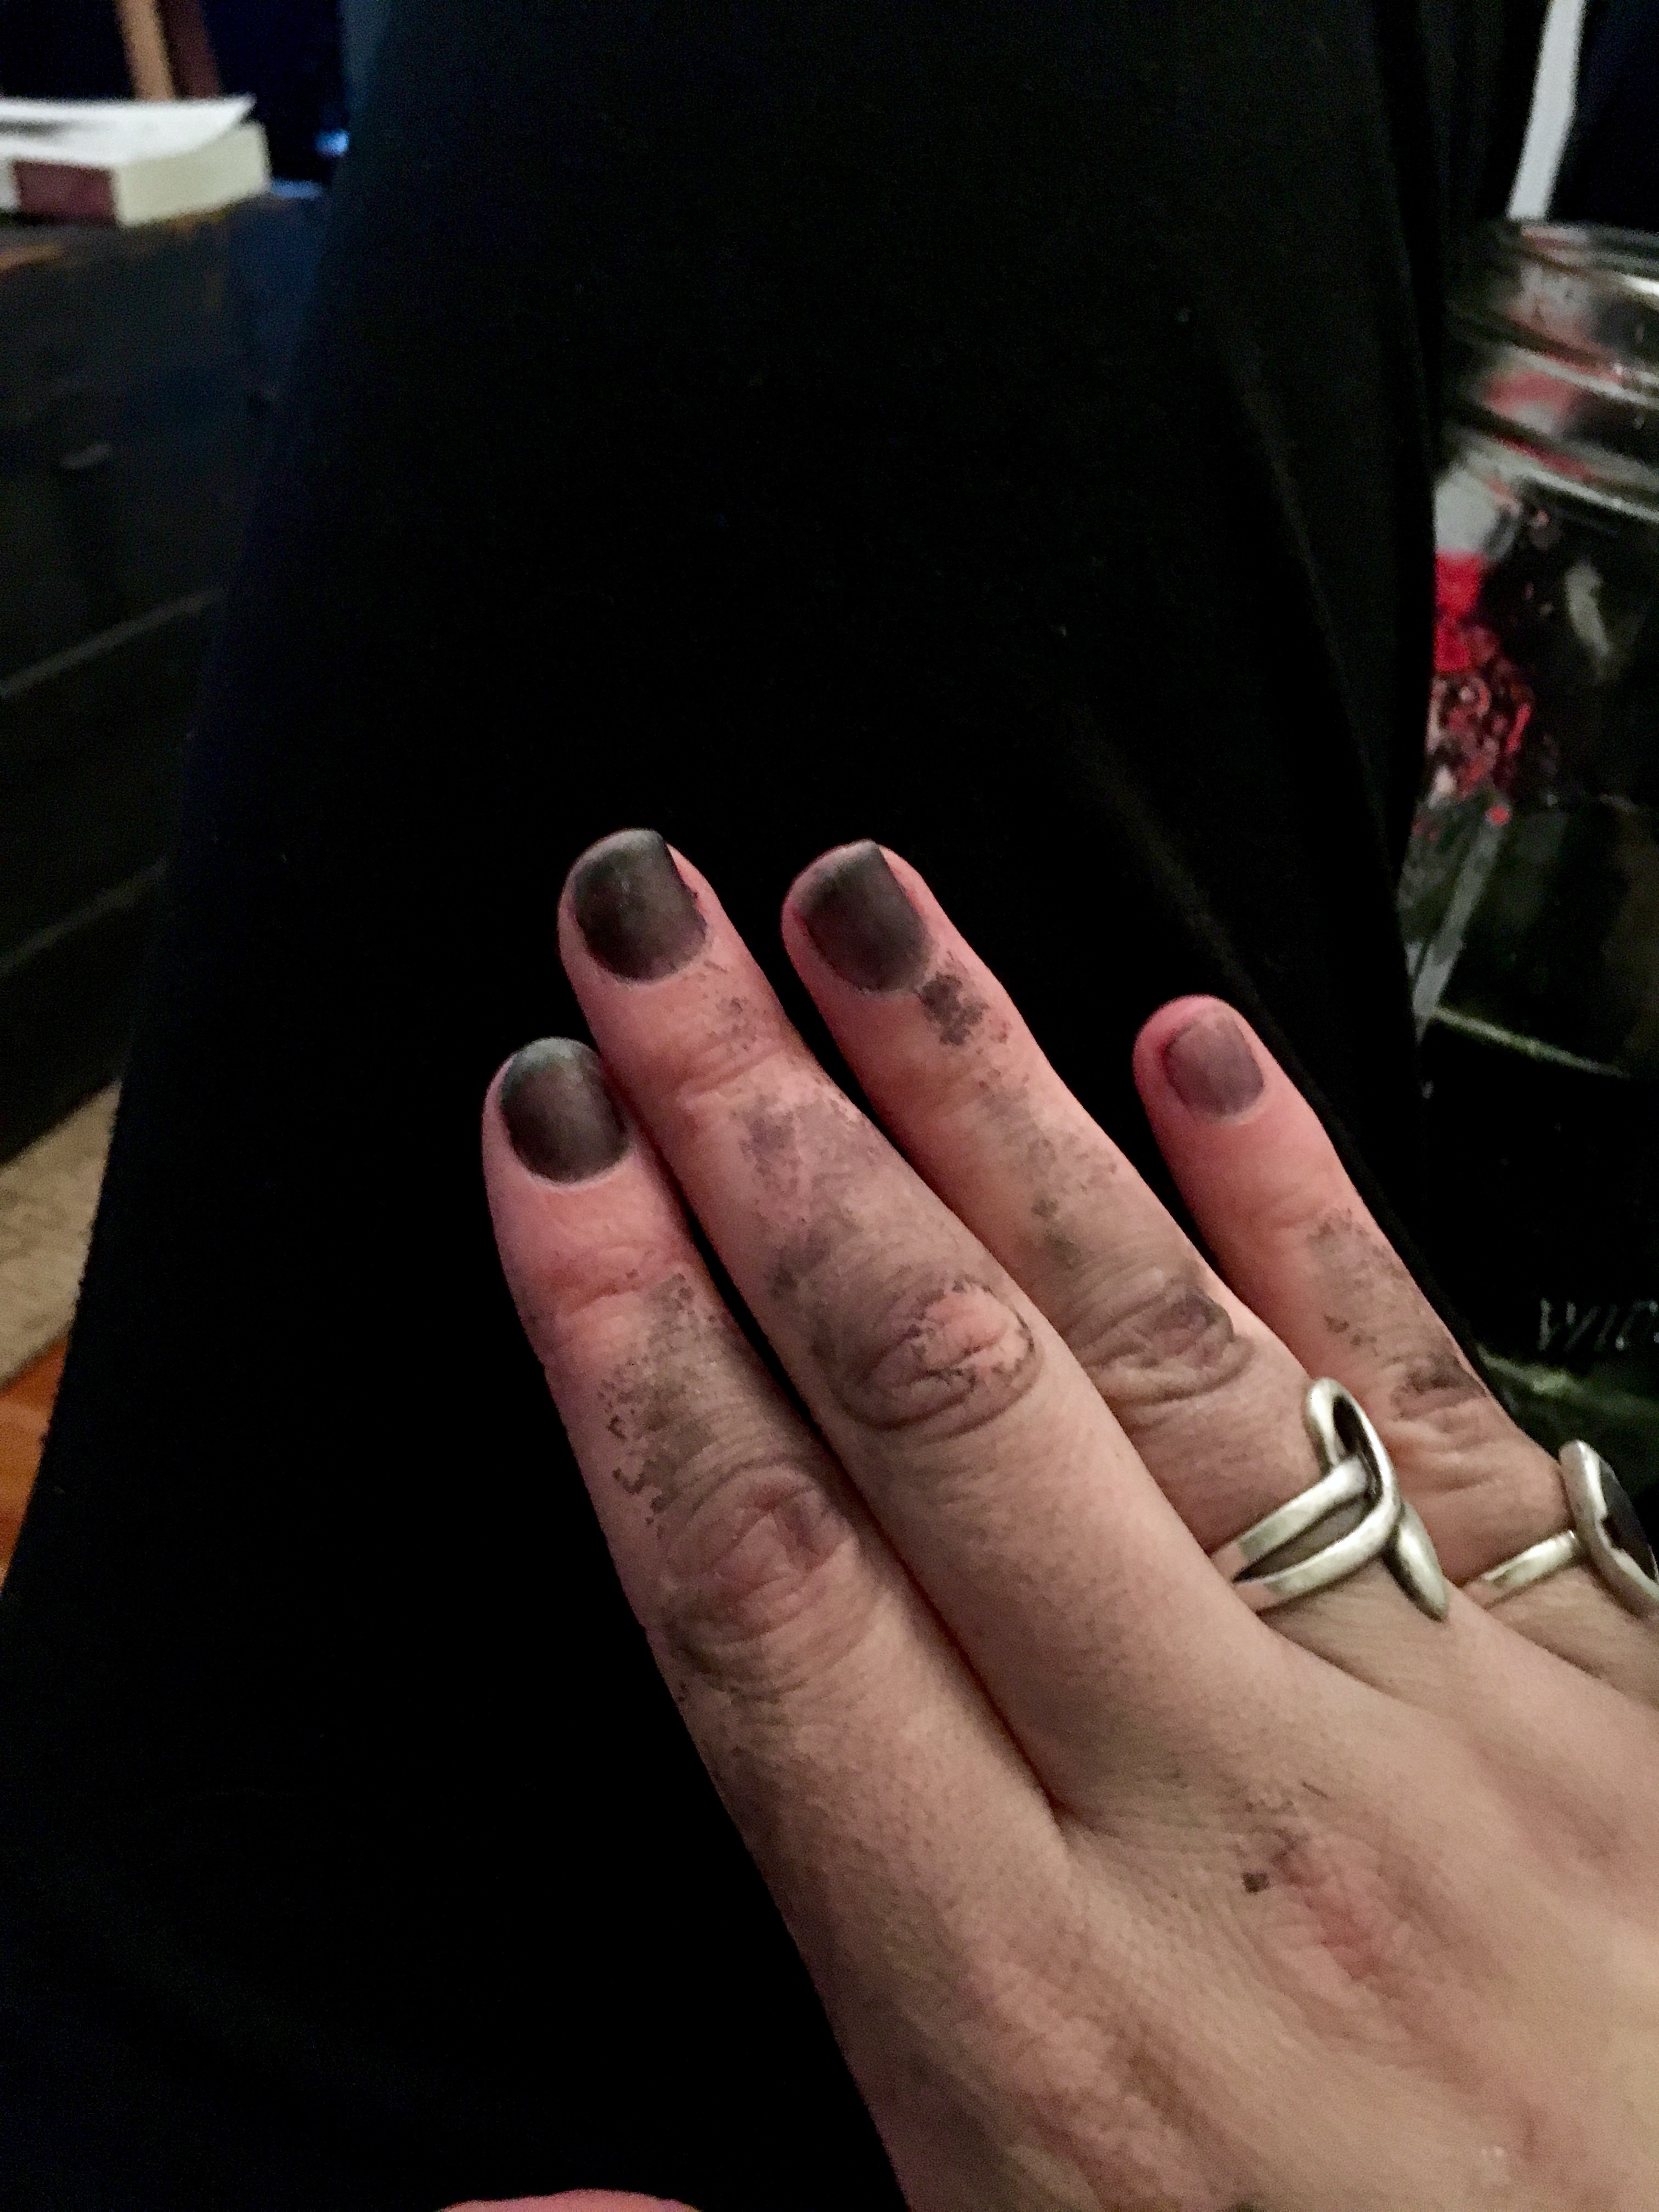
There was one casualty of the grouting though: my hand. If you’re using dark grout, wear gloves! The grout stained my hand and finger nails and no amount of soap and water could get it off. After a week though it slowly faded away… thankfully!

Berrybrier | Grout Hands

This felt like a small price to pay for floors that made me want to drool with happiness! I adored the high contrast look and classic feel. The dark grout was practical, but also seemed more contemporary. Overall, this project was a 2 night success! 5 out of 5 stars, would recommend. Significantly easier and less annoying than drywalling. And arguably, way more fun to pet! Because petting tile is a thing right?

Berrybrier | 1

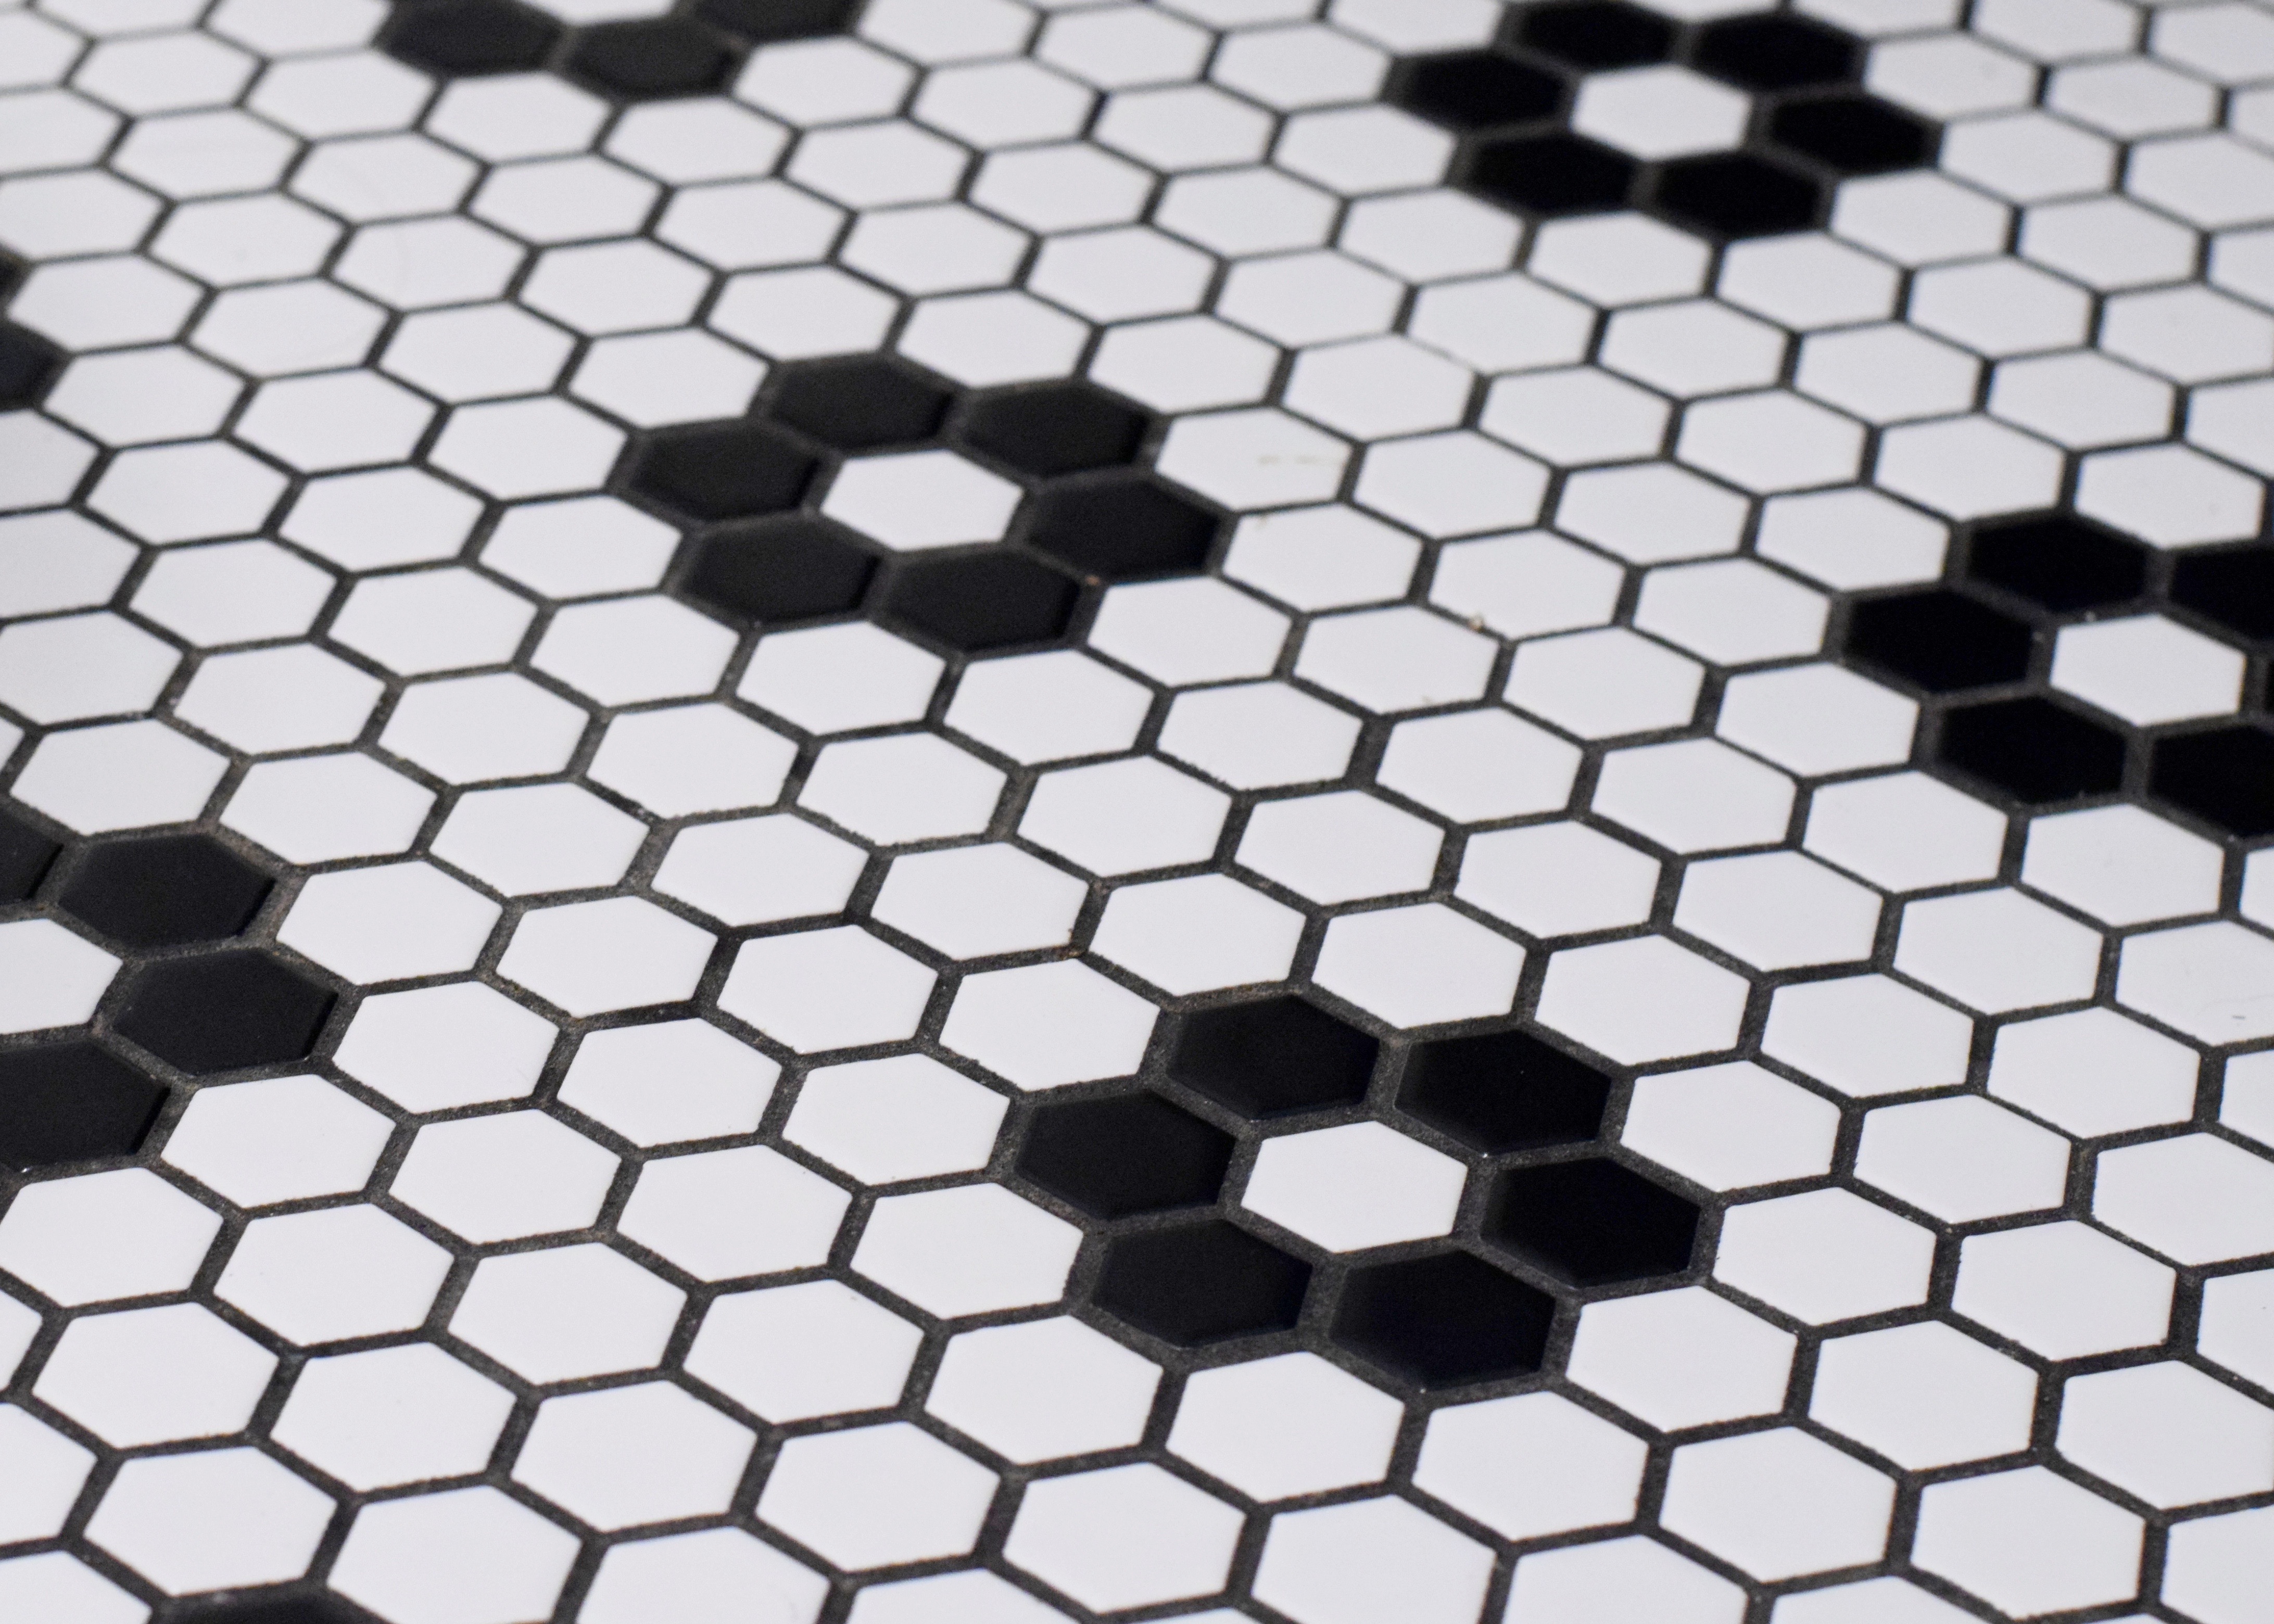
The high contrast floors feel so clean and classic don’t they? I just love black and white floors. Gwen’s kitchen floors makes me drool with envy. Black and white can go modern or traditional. Here I think it walks a nice middle line, just like me. This floor also reminds me of my Oma who had black and white hex floors in her Jack and Jill bathroom at her house in Berkeley. Hers was white with black dots only, forcing you to make the flowers with your brain. Something I have many memories of staring at that floor and doing! It’s funny how little things like this can remind you of someone. 20 years later, I’m still staring at hex floors. And loving it!

Berrybrier | White and Black Hex Flower Tile Floors.jpg

Have you ever tiled anything before? Did you think it was a difficult or easier DIY project? I really enjoyed it and can’t wait to tile more things soon! If you’re getting ready to tile, better check that thermostat though. Can’t have another one going rogue!

Tiling Prep and Relocating a Heater Vent

Tiling Prep and Relocating a Heater Vent

Gotta keep chugging through this bathroom renovation to get to the pretty afters ya’ll! It’s a big change! But before I can show you that fun stuff, let’s go through the nitty gritty of the renovation. This is a real life blog. Let’s look at the ugly.

Before I could go much further in my bathroom, I needed to get a few things done. Post-insulation, my next step really should have been to drywall, but that was going to take more than just one set of hands, so I turned to the next item on my to-do list: prepping for tile! The original disgusting and uncleanable sheet vinyl floor was doing no one any favors. It wasn’t as bad as the kitchen (which was somehow disintegrating), but boy was it gross.

img_9039

Here’s a close up picture from demo so you can appreciate it EVEN MORE! IMG_0154

It was gross and it wasn’t staying. I had debated one hundred different mini-hex tile patterns before setting on a much more simple option from Home Depot. This shot of the overall bathroom palette really showcases the tile too. That high contrast has me all kinds of giddy!

img_0129

Before tile, comes prep though. It was time to conquer those vinyl floors! For that I headed out for more supplies. I picked up the following at Home Depot one evening.

First I cleaned out the bathroom of tools and random junk and swept the entire space to start with a clean slate! I measured my concrete board and cut of the excess length using a box knife again. If I could go back I would have used a circular saw and speeded things up, but at the time I didn’t own one. By going over the cut a few times with a box knife I was able to create a weak point which allowed me to then snap that section off.

Land of Laurel | Cutting HardieBacker

Then I had to cut a hole for the toilet. First I measured where that lined up on my sheet of concrete board and drew an outline. I took out my drill and drilled some holes in each of the corners.

Land of Laurel | Drilling Hardiebacker

Then I took out the box knife again to cut the rest of the hole out. Spoiler alert: I still snapped the HardieBacker in an unfortunate place that wasn’t my intention . Oh well! Just another seam to cover! That first piece was fairly easy to lay down in place though, but before I could move on to the second piece, I had some other work to do!

I originally planned to place a pedestal sink in this room and that sink was going to go right where the oddly almost square heater vent was. Well that wasn’t going to work! When I filed my mechanical permit for my new bathroom vent fan, I added on two quick HVAC ducting tweaks to the permit. This was one of them! I picked up more supplies from Home Depot (I was averaging 2-5 Home Depot visits per week for all of November and December!): a 90° angle turn register box, a couple of flexible angle pieces, and some foil duct tape (actual duct tape!). I used a small battery powered circular saw (borrowed from my neighbor Erik of course!) to cut a new hole the size of the register box in the floor and through the subfloor. Because there is a crawl space beneath the bathroom, I was able to climb around in there and use the new ducting pieces to extend the existing ducting about 1 foot so a new normal sized duct register would be closer to the bathroom entry wall and parallel to that wall.  I secured it all together with the foil ducting tape (NOT regular duct tape!) but waited to attach the register box until the HardieBacker was done.

I was exceedingly proud of myself for extending the ducting too! But then came the hole patching part of this job. I was trying to avoid going back into the basement crawlspace, because it’s gross down there and I hate it, so I was determined to patch the floor from above. I used some clamps I already owned to secure a couple of scrap wood boards in place and aligned with the level of subfloor. Then I just used my drill to tighten some screws through the floor and into those boards.

Land of Laurel | Patching Hole in Floor

I cut a piece of plywood to the dimensions of the missing floor and then screwed that into the new supports as well as an exposed floor joist. An easy floor patch! It seems crazy to put in this effort to move the vent 3″ over, but by turning the vent 90″ and using a modern size I was able to save a lot of floor space. This would have allowed me to have a pedestal sink too, but I later switched to a wall mounted sink and in this spot now lives a big basket of toilet paper.

Land of Laurel | Patched Hole in Floor

Once the floor was patched and the new register vent in (combined a two hour project), I was able to finish laying the HardieBacker! I cut the board to size and noted where the new vent location was. I made sure to dryfit the board before I grabbed the thinset again. I used the flat side of the float to glob a bunch of thinset onto the floor and then smeared it all around.

Land of Laurel | Spreading Mortar

It covered the floor patch job pretty easily and helped mitigate any change in height between my patch job and the existing floor. I then spread the thinset all over a 2 foot deep section of the floor until it was about 1/8th inch thick.

Land of Laurel | Thin Coat of Mortar

A quick switch to the square grooved side of the float allowed me to then make some nice lines in the mortar. This helps to establish some suction once the HardieBacker is laid on top. My grooves didn’t have to be perfect or straight, they just had to be there! See how you can no longer tell where my floor was patched? That’s the end goal! I had laid the piece by the toilet the night before and then returned then next day to do the remaining section. You can see above where I accidentally broke the backerboard trying to cut the toilet hole! Whoops…

Land of Laurel | Making Grooves in Mortar

Once the floor was covered with thinset grooves I was able to take my sheet of backerboard and lay it on top pretty easily. I left the boards in place and allowed the mortar to dry overnight, before returning the following evening to finish up. I took more mortar and smooshed it into the gap between the sheets of HardieBacker, wiping away any excess. Then I cut strips of the mesh tape to length and gently smoothed it over the mortared seam with my hand. The goal is to close the gap and then smooth the thinest layer of mortar over the tape. You can see below too that all this went down before the plumbing inspection was finalized so my new shower pan was full of gross water!

Land of Laurel | Taped Hardiebacker

At this time I also took out my drill and screwed the special HardieBacker screws into the floor. The screws kindly came with a special drill bit so I didn’t even have to worry about that. The HardieBacker needs to be screwed in every foot so further strengthen it’s connection to the subfloor. You can see how many screws that adds up to quickly! Unfortunately, I have the arm strength of a 2 day old newborn child and I couldn’t get any of the screws to recess into the HardieBacker! It was so frustrating, because this is essential to having a nice flat tile floor! I went over to my neighbor Erik’s house where he was working on his kitchen and borrowed his impact driver for an hour. With that, I was able to get all my screws in place with minimal effort. Seriously, ladies and gents, go buy an impact driver. If you ever need to screw anything in, a drill is just not up to the task! It’s better for making holes not filling them. The impact driver prevents me from stripping all my screws and makes screwing things in much easier. After seeing the difference between using my drill and Erik’s impact driver, you can bet your bottom dollar I bought myself an impact driver the next day. Shout out to Jeff Senn at Home Depot who spent a good hour with me debating the best model and brand of impact drivers. I landed on this Milwaukee combo kit which threw in a hammer drill and had some extra oomph to make up for my baby arm muscles. I’ve yet to use that hammer drill though, so perhaps I should have gone with a single tool…

I wasn’t done with the floor underlayment after I got all those screws drilled in though. I had measured during my dry fit of the second board where the new vent location was, but waited to cut it out a until after the HardieBacker was installed. Now it was time to knock this off the to-do list as well! I clued in this time and used a larger 1″ drill bit to make bigger holes in the corner of the vent this time and then cut from those. Then I cut it off from there with a circular saw borrowed from my contractor neighbor Erik.

Land of Laurel | Drilled HardieBacker

It came out much more quickly than using a box knife, I’ll tell ya that! then I got out a good ole hammer and some baby brad nails and drove them through the register box into the wood subfloor, securing it all together.

Land of Laurel | New Floor Register

Luckily it all worked out and then new matte black vent cover I picked up from Home Depot fit perfectly! I was more proud of this duct work than any other work in the bathroom thus far. It felt so very adult to do this quick switch! Woot woot! This room was coming together now!

Land of Laurel | New Vent Opening

And just like that, I felt I could walk barefoot in one more room at Berrybrier! Not needing shoes to protect your feet from gross bathroom floors is pretty amazing, let me tell you! Now this room was ready for tile and drywall and all the other bathroom renovation steps. It felt so good!

Have you ever prepped for tile? Thinking about getting started? You can totally do this. It’s EASY! I was shocked by how easy it was!