When I first moved into Berrybrier, the Master Bedroom was one of the nicest looking rooms in the house. Thus, I filled it with all the junk I wanted out of other spaces (think unopened moving boxes) and largely ignored it.
You guys, this room, my room at Berrybrier, the “Master Bedroom” looked absolutely horrendous for over a year and 4 months. Yup, it took me over a year of doing all the other 20 million projects at Berrybrier, before I thought, “You know what would help you relax and feel more at home in this house? If you actually fixed up your bedroom so you enjoyed being in there.” If I could go back in time, I would have fixed up my bedroom first.
It seems silly to do such a non-priority space first, but realistically, all this room needed was a couple coats of paint. With a little help, I could have had this room completed in a long weekend, creating a small haven for myself amidst the utter chaos that reigned in this house for so long and wore on my body and soul. I really would have enjoyed that and have made a mental note for myself on the next place I decide to go crazy on.
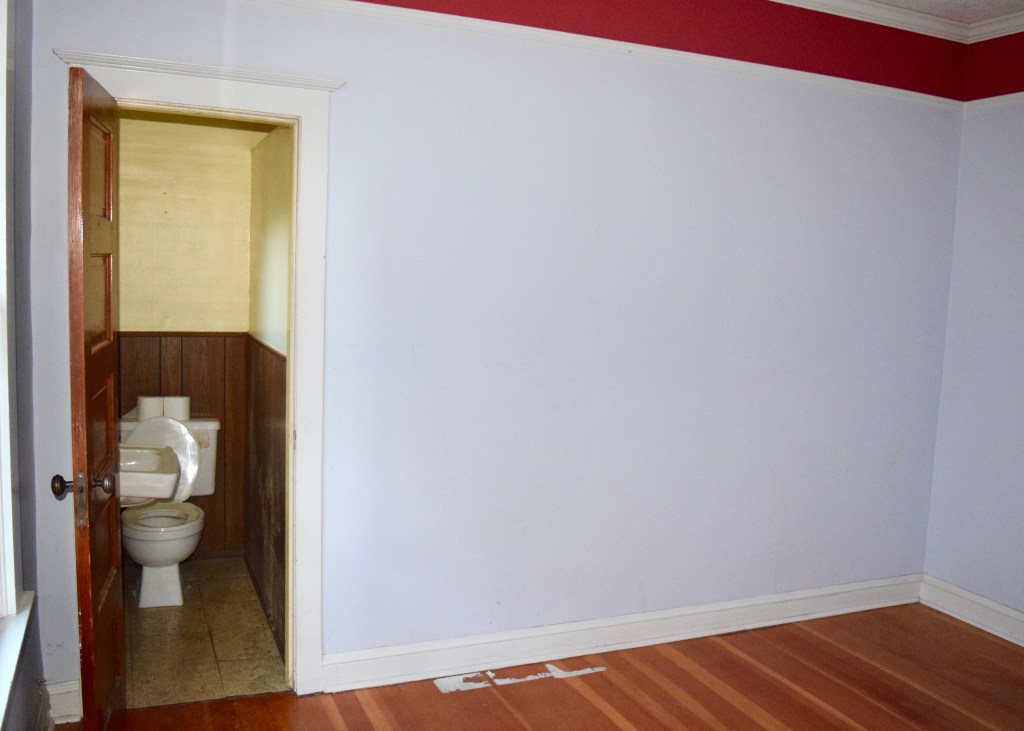
But let’s get back to my bedroom. You remember when I bought the house and it looked like this in here? The bathroom was brown and yellow and fifty shades of gross. The room was better, painted in the last 10 years, but needed cleaning.
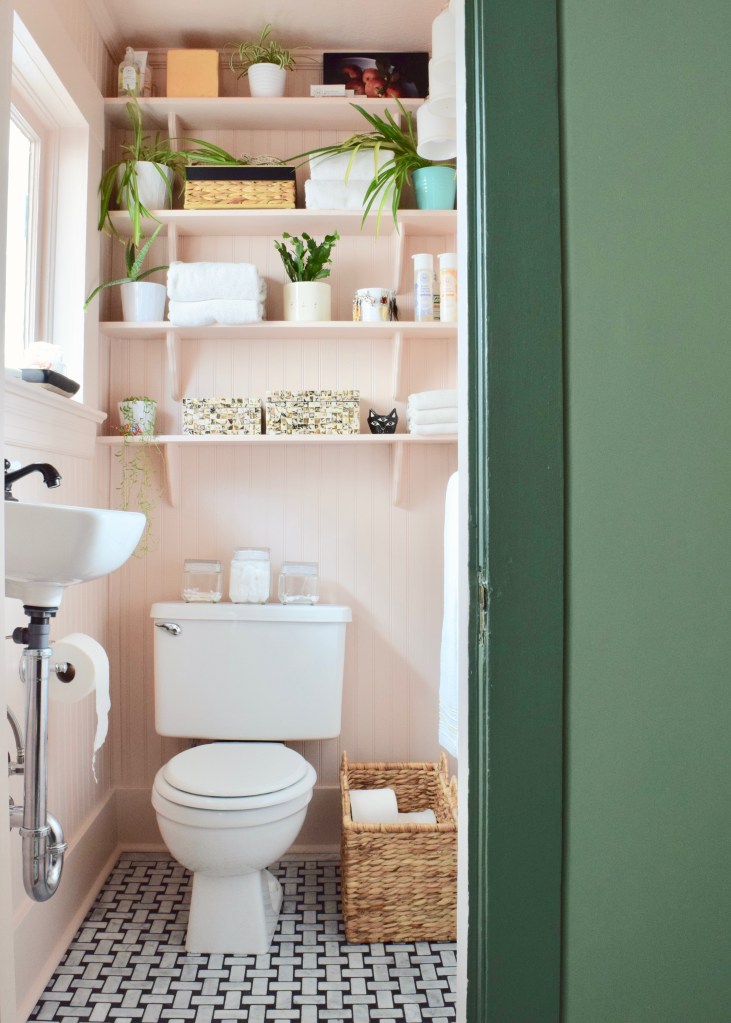
But then I fixed it up the bathroom! A full gut renovation later and that tiny bathroom now glows! It’s one of my favorite rooms in the house. When I shared the photos from that final picture a couple people commented on the sneak peek of the bedroom as well!
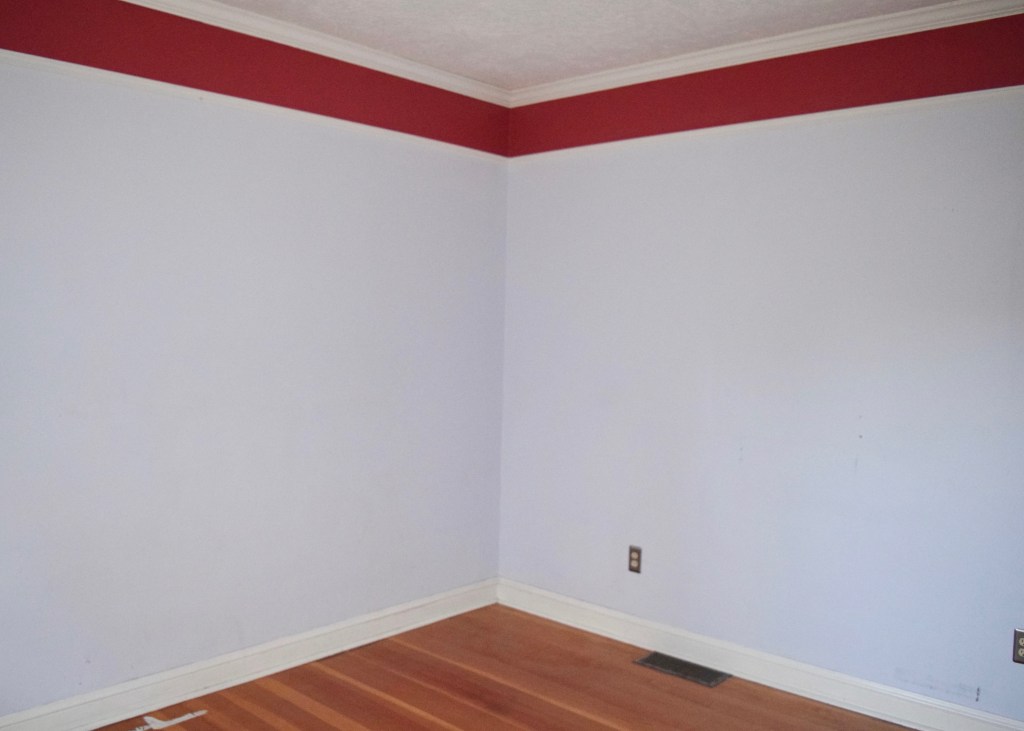
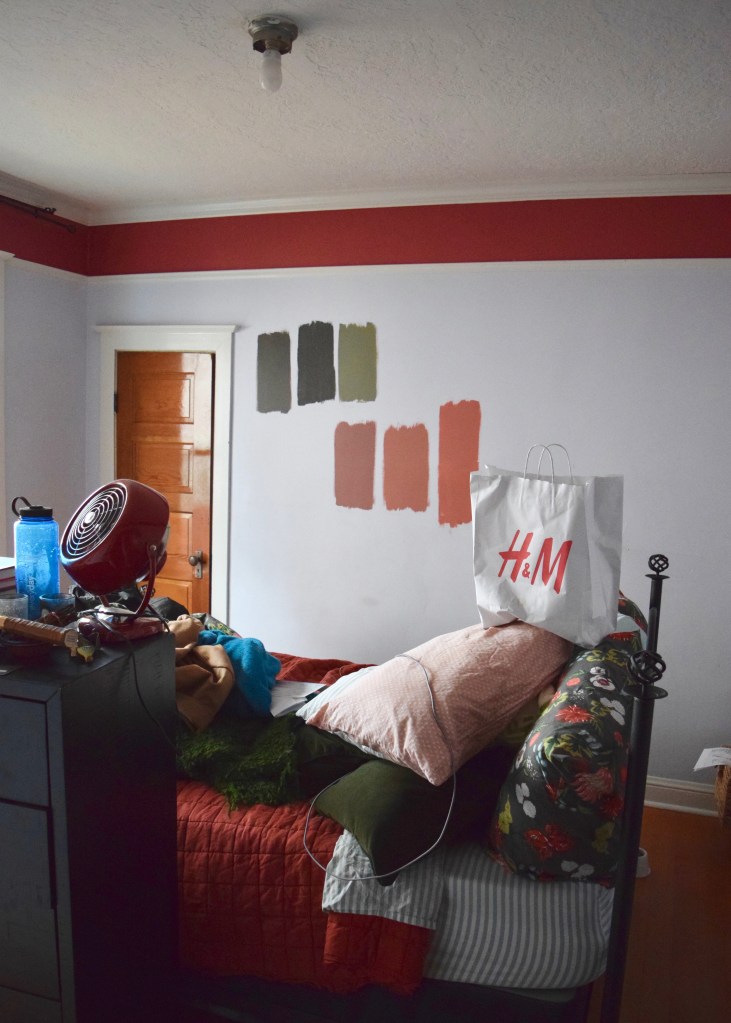
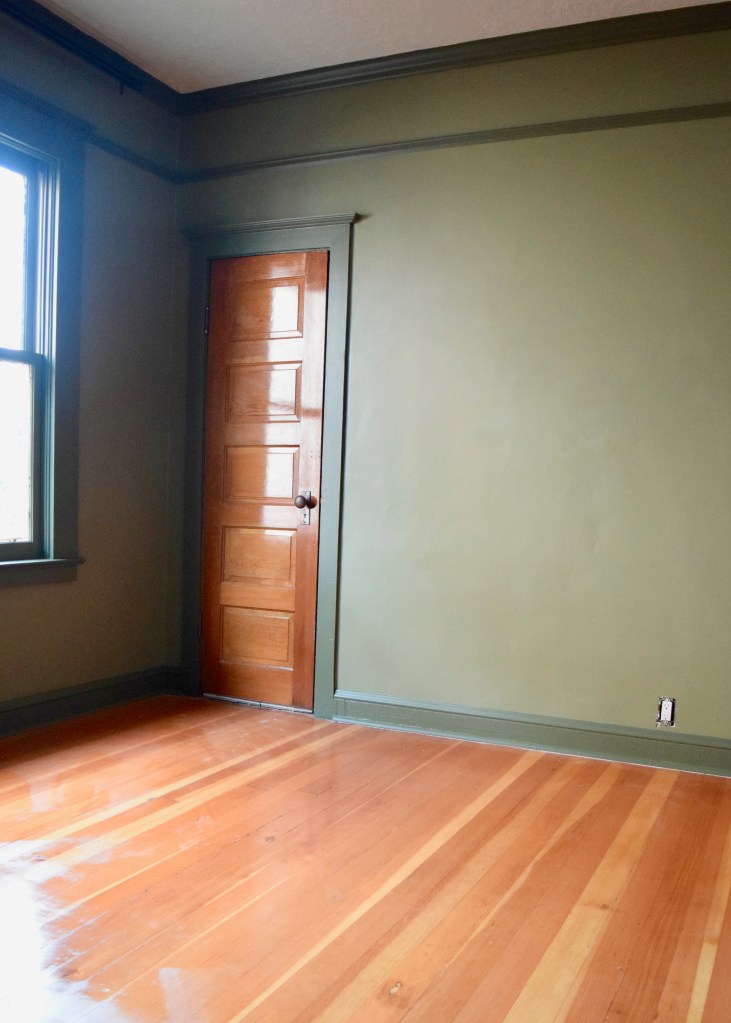
That’s right, ya’ll! We’re going green! Dark green. It’s time to make this bedroom a whole lot more fab. See how sad it is below? This shot is the first thing you see when you walk into the room. There was even a white sticker on the floor. You, know, as one sees on a frequent basis…
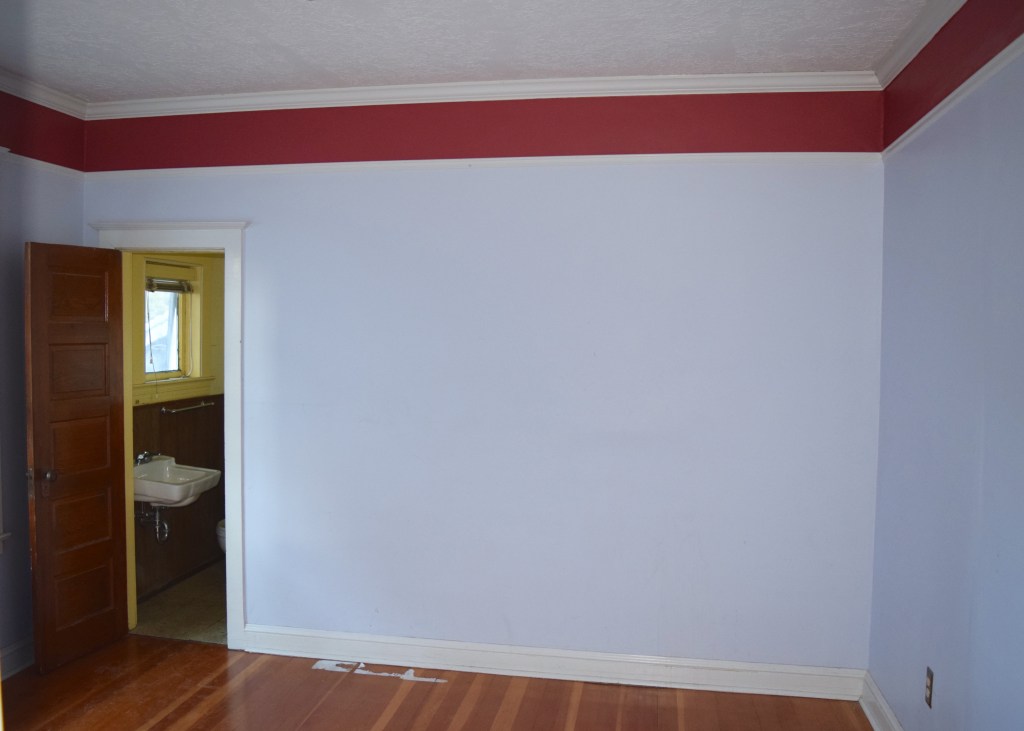
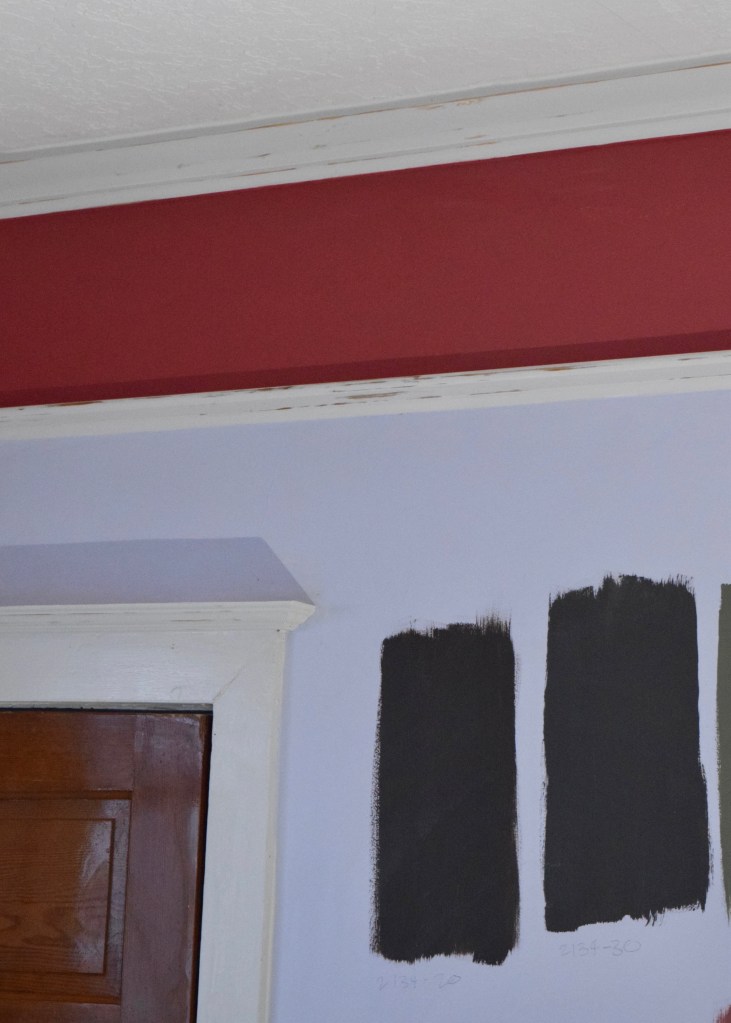
The periwinkle blue and brick red wall paint with white trim felt very Federalist and New Americana to me. Which isn’t really my thing. I wanted to get that totally changed up and get some privacy curtains up on the windows so my neighbors wouldn’t see me changing. I also wanted curtains to hide the just ever so slightly off center window.
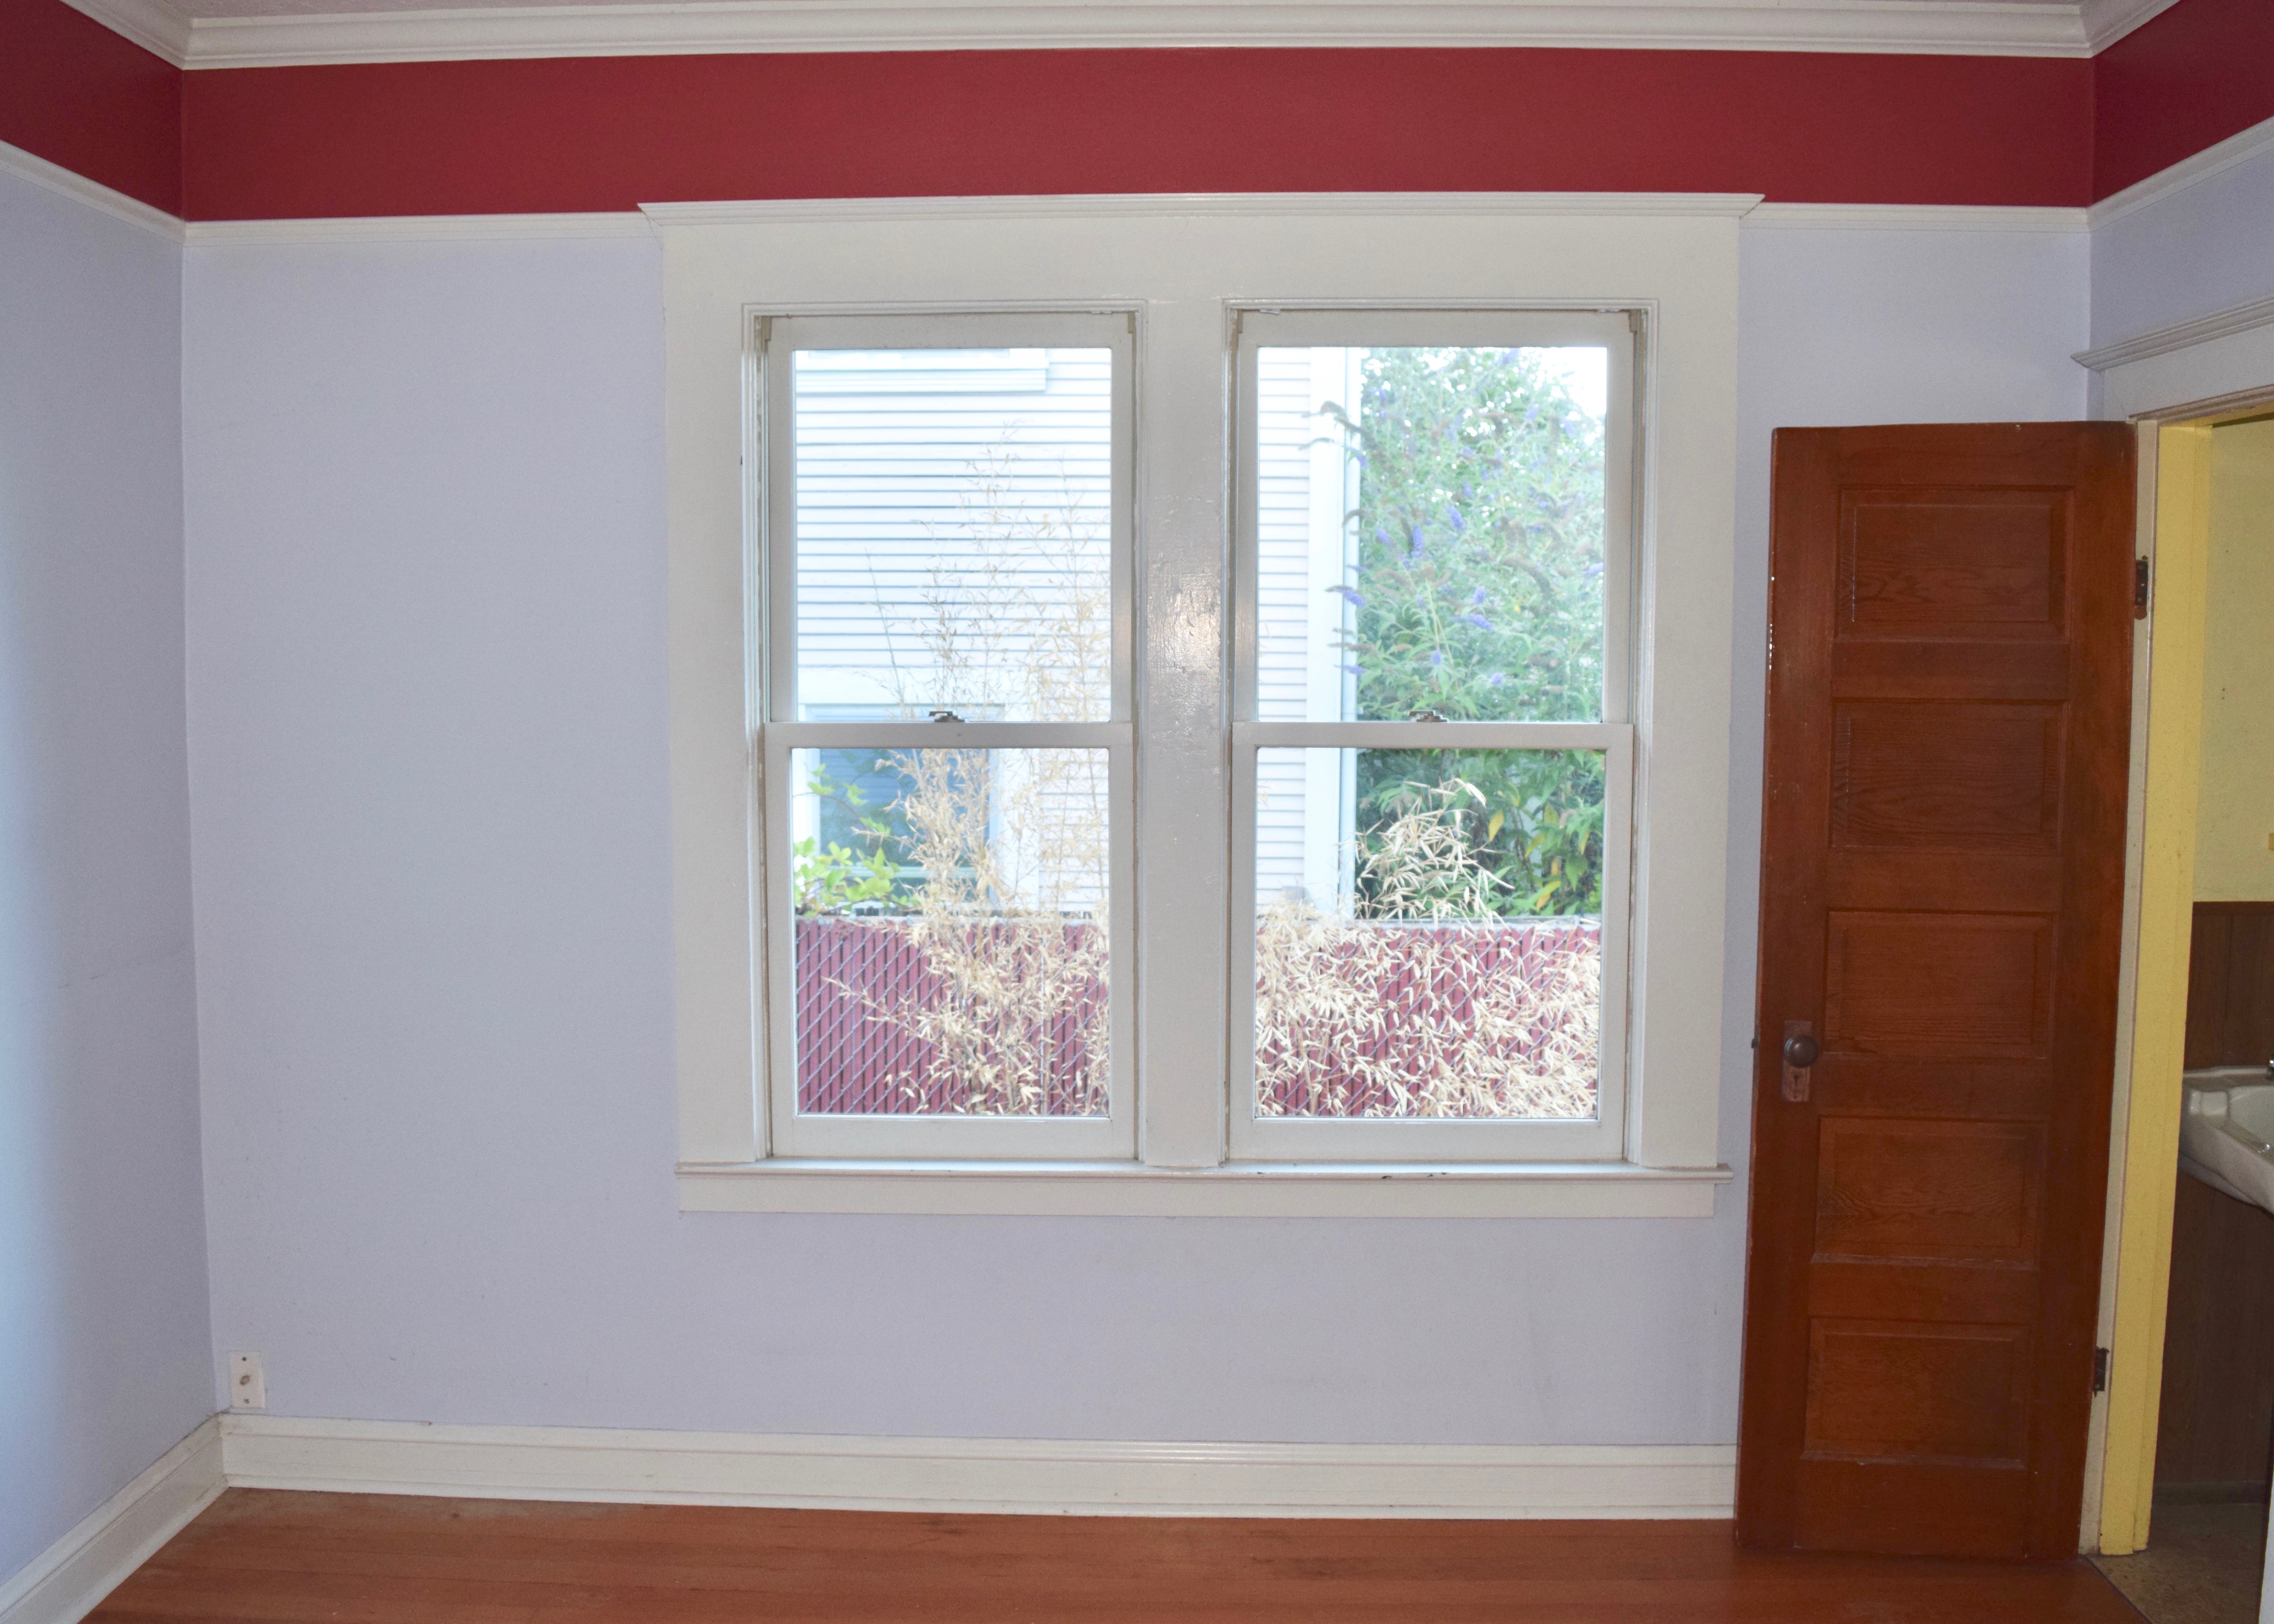
The room is a decent size and even though there is a chimney stack housed in one corner, the room has numerous furniture layout possibilities. This is the door to get into the room, which yes someone decided to make smaller at one point and just cut off 3″ on the hinge side and rehung it. Questionable! But, still, it’s a beautiful, stained, solid wood, 5 panel door. I’m not trading that for anything!
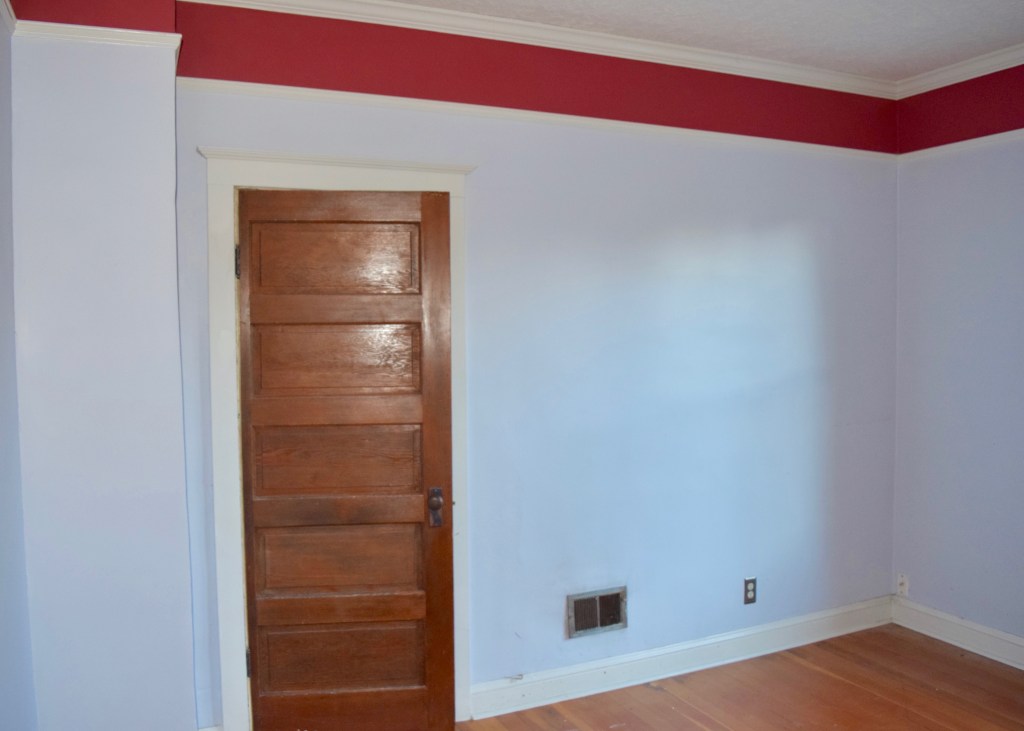
This is the far corner of the room. The outlet placement was excellent for putting a bed on that wall and the vent on the floor is an intake air vent.
When I first bought Berrybrier, this room was on the bottom of the list of renovations, so it became the dumping ground for all my junk. I’d bought a bed for $25 off craigslist when I bought the house and threw it on bedrisers so I could fit some under-bed storage containers below. It was a lewk. And not a good one!
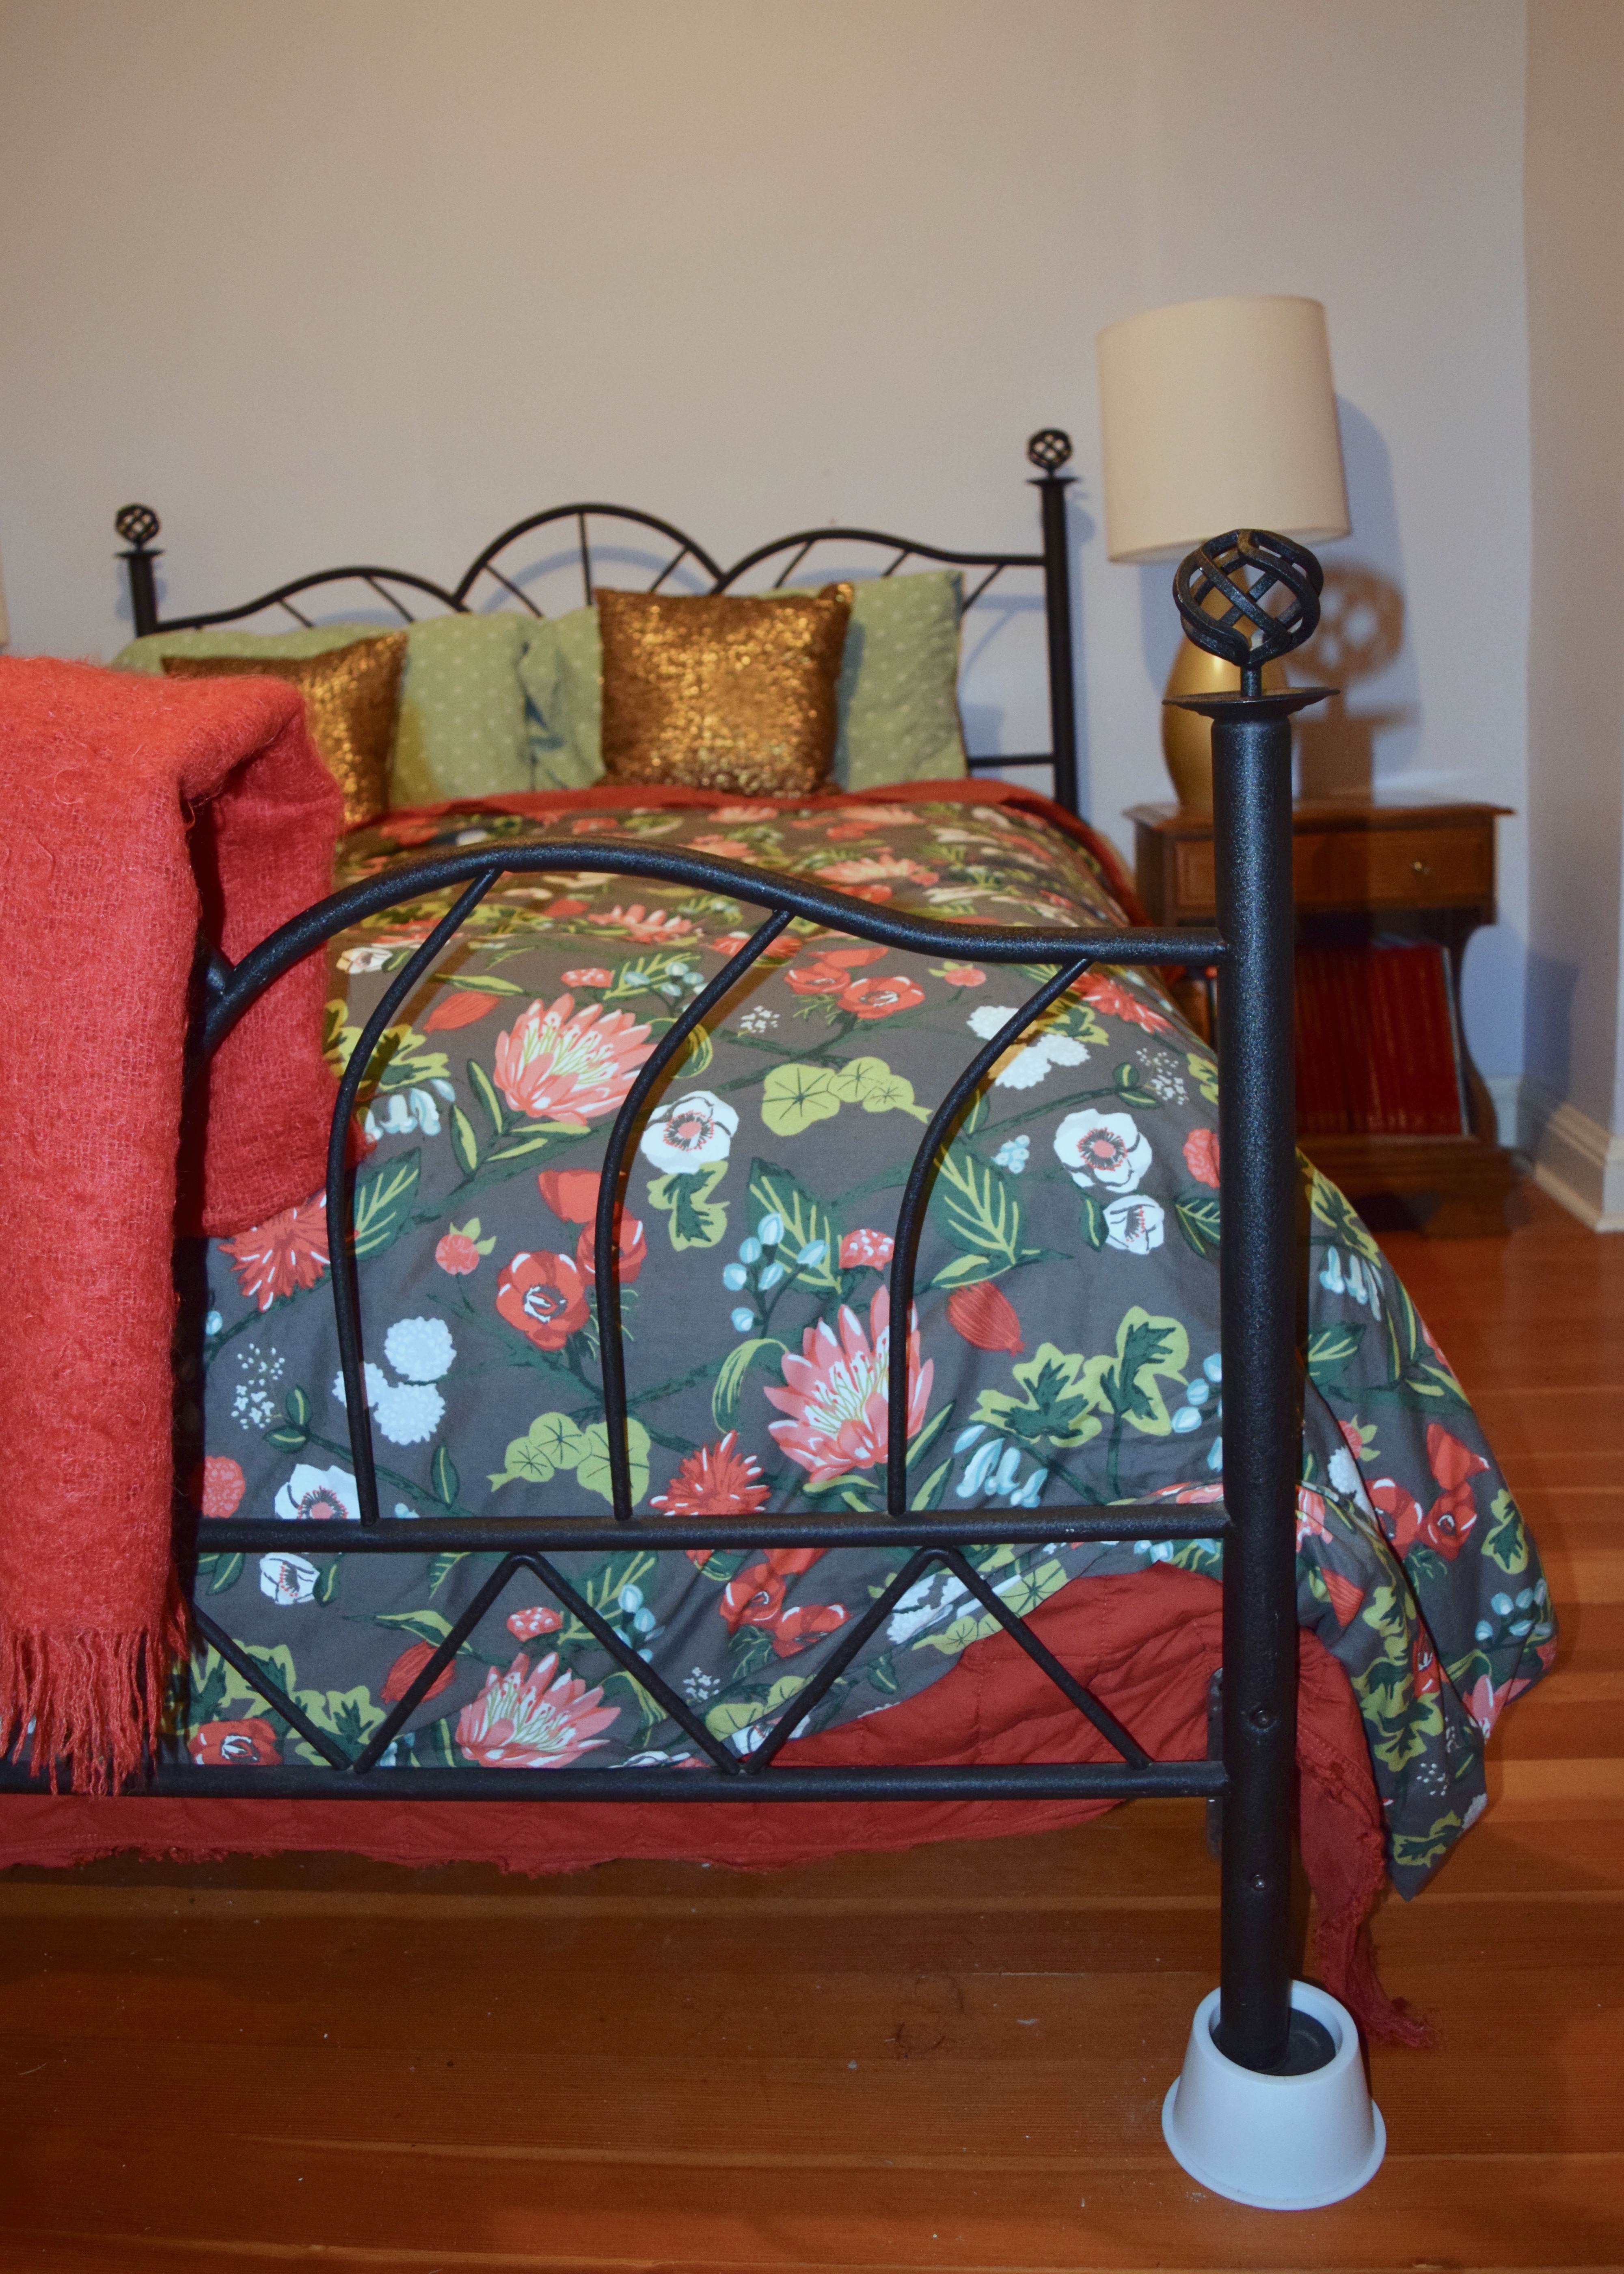
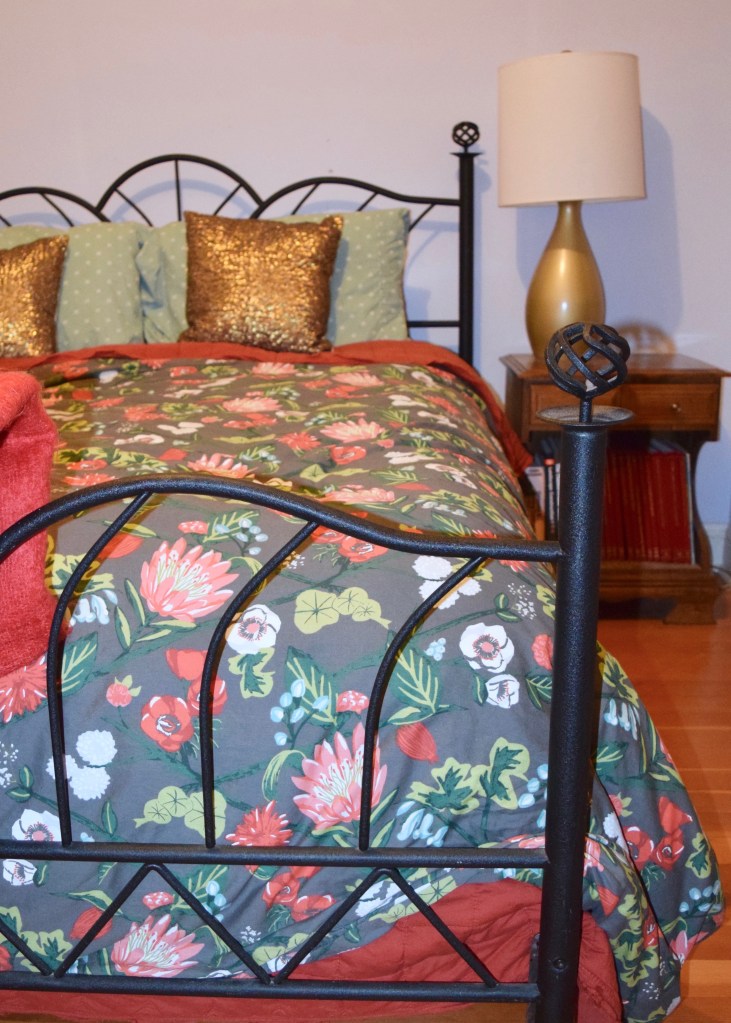
I bought all my bedding from West Elm way back in 2015 and still love it so much. When I first moved it, though, I kept half of it in storage and just threw the main pieces I’d pulled out of boxes first on the bed. I knew that whatever I did with this room, though, the floral duvet comforter would help dictate it. The bed, however, had to go. It was uncomfortable, old IKEA, I think? And it had been modified with random parts of other beds over the years.
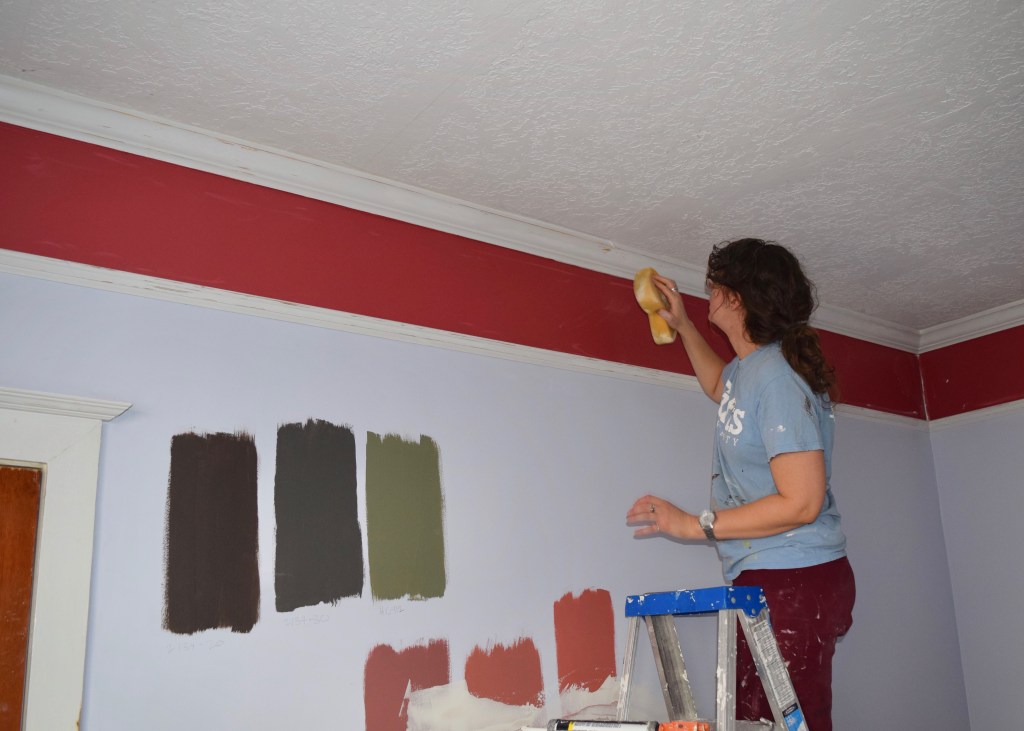
After I’d settled into the house a bit more, I did try to dress up this set up a bit more and hung some art. But that didn’t really do much. Especially once I started swatching colors on the wall. I knew I wanted something dark and dynamic. A terracotta-y red, perhaps?

I ended up throwing a whole lot of colors on the wall. Oh, and guess what? I left the walls swatched like this for 8 months before actually painting this room. I’m super classy!
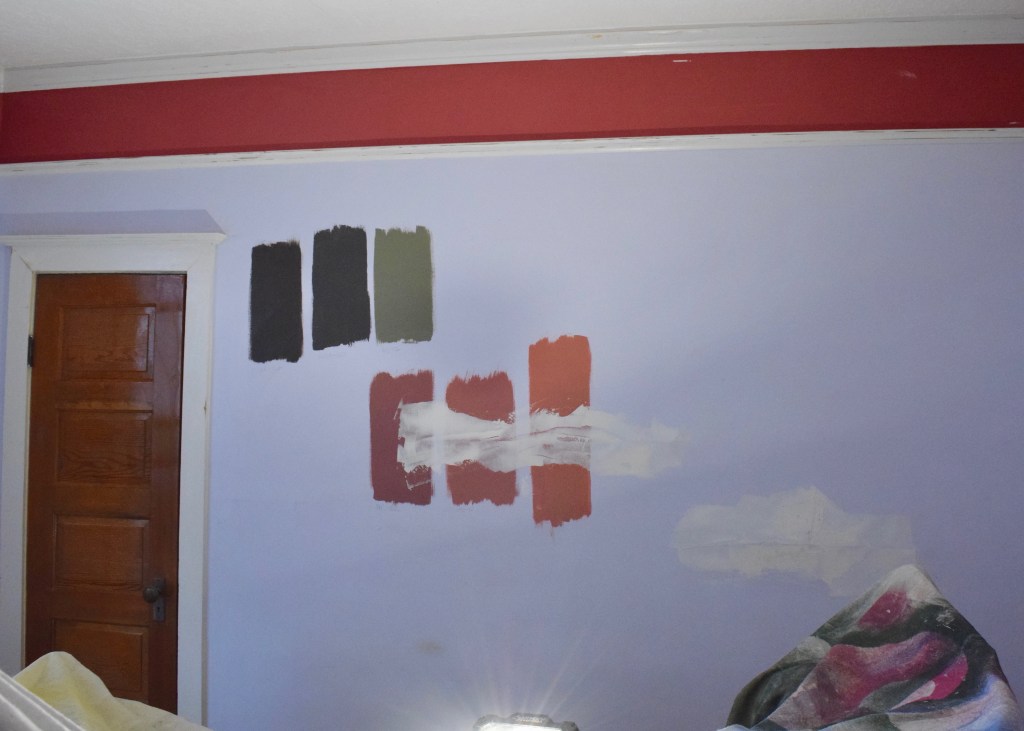
I was debating a charcoal wall and sampled two of those colors, one a bit warmer than the other. Then I looked at three different terracottas before realizing that my floors were so orange it would clash with them. Okay, cool colors. Which cool colors do I actually like? GREEN!!!
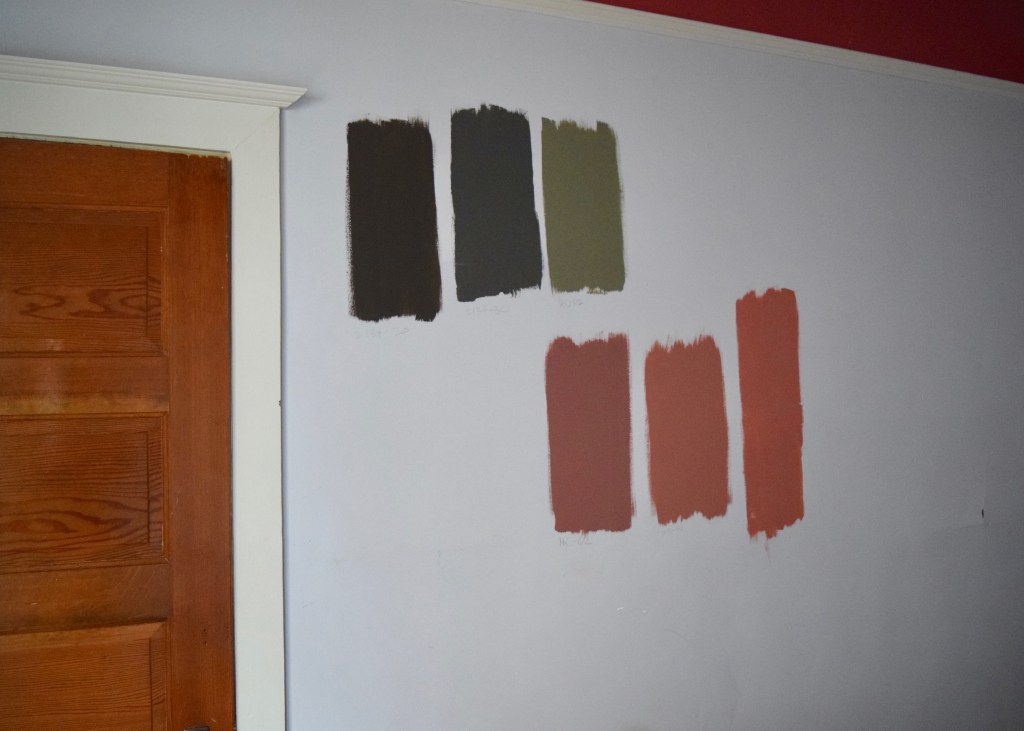
I only swatched two greens, because the second I realized the room should be green, I knew I wanted to continue the green trim color (Benjamin Moore 1498 Forest Floor) from the bathroom and kitchen into here too. The walls and trim could all be the same color, exactly like I did in the bathroom, but that felt repetitive and boring. So what about a very subtle contrast between the dark green trim and walls?
The top color is Benjamin Moore’s HC-112 Tate Olive and the lower color is Benjamin Moore 1490 Country Life which was on the same swatch card as the 1498 Forest Floor trim paint (which is on the trim below).
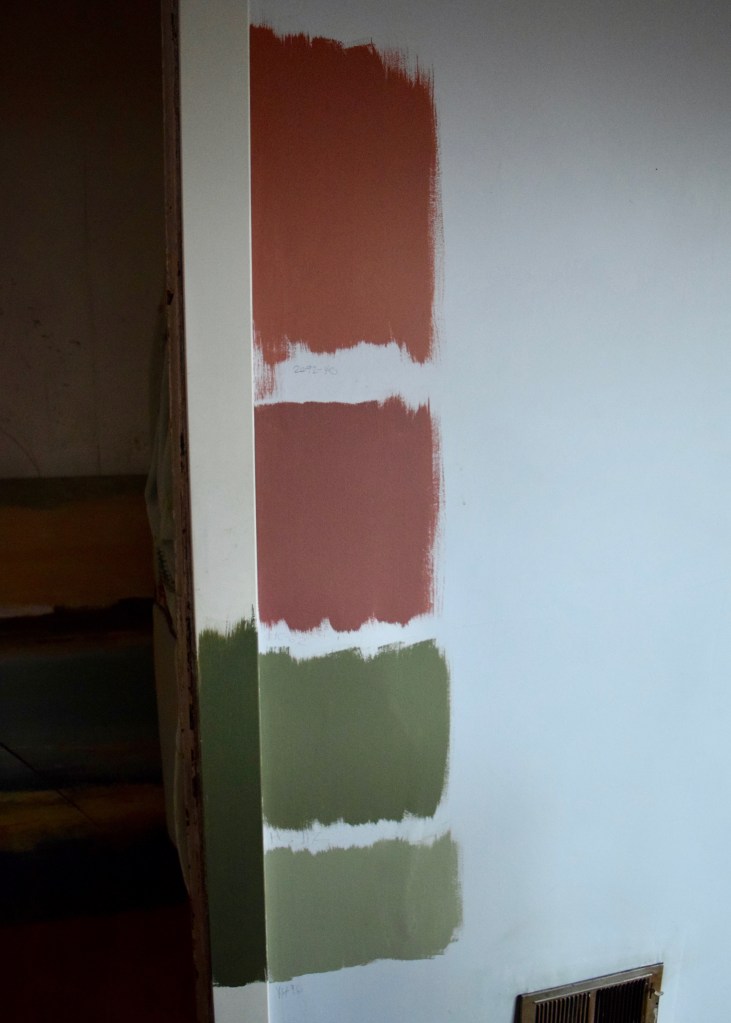
Can you guess what I picked? The top color! I loved the subtle contrast and the depth of tone. Plus it’s one of Benjamin Moore’s historical colors and that always feels kind of cool. I quickly went out and picked up a can of Natura Eggshell in Tate Olive.
Then I had to prep the room for work! I never remove all of the furniture in a room before painting, sure I move the light weight stuff, but for the most part, I just shove everything into the center of the room and throw big drop cloths over everything. Since I knew this would take several days, I left all my bedding on the bed too, so I’d have some place to sleep.
Before I could paint the room the room though, there were a whole lot of dings and repairs to take care of! This included a delightful ceiling patch that needed fixing; a result of the construction on the dormer. Oh yay.
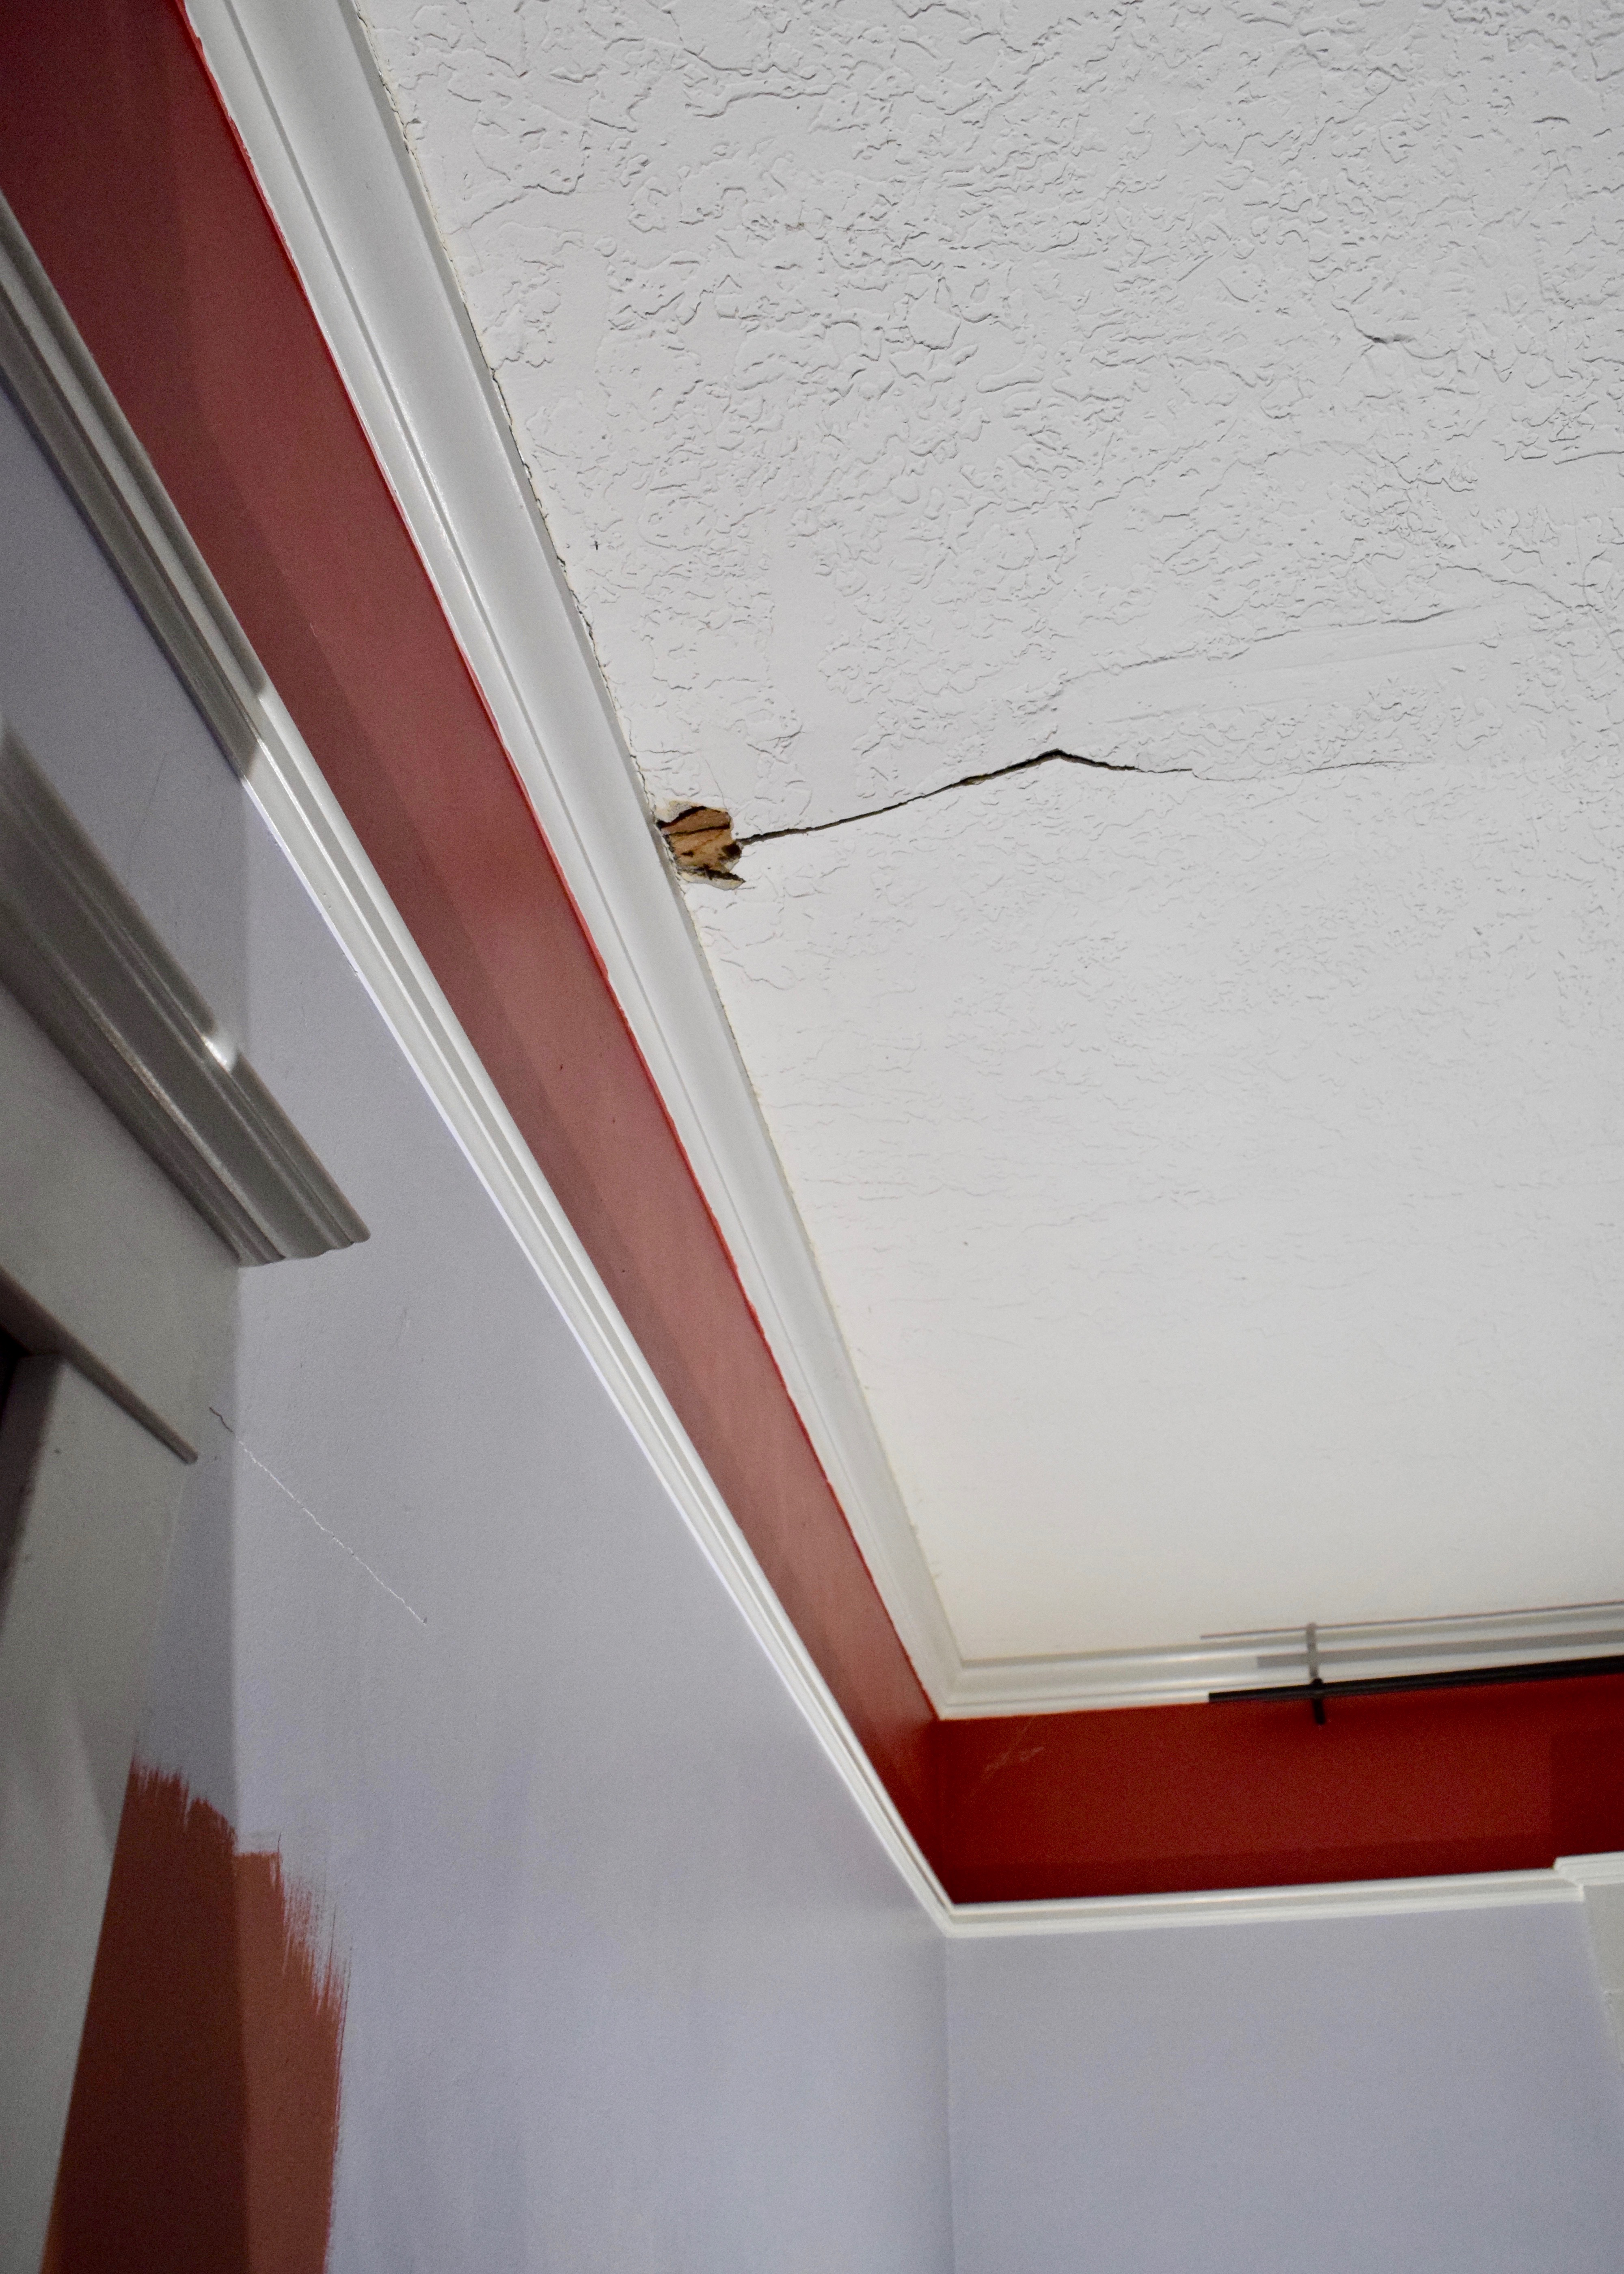
First, I took out a scraper tool and used it to knock and scrape off any loose bits of plaster. This rough, textured ceiling coat is over the original lathe and plaster which I’d guess had a smooth finish like the walls. The textured ceiling is in every room in the house, but I have no idea why the texture was added! It’s rather annoying, sucks up a ton of paint, and shows every repair job super obviously. Once the loose plaster was off, the holes looked MUCH larger! Oh yay!
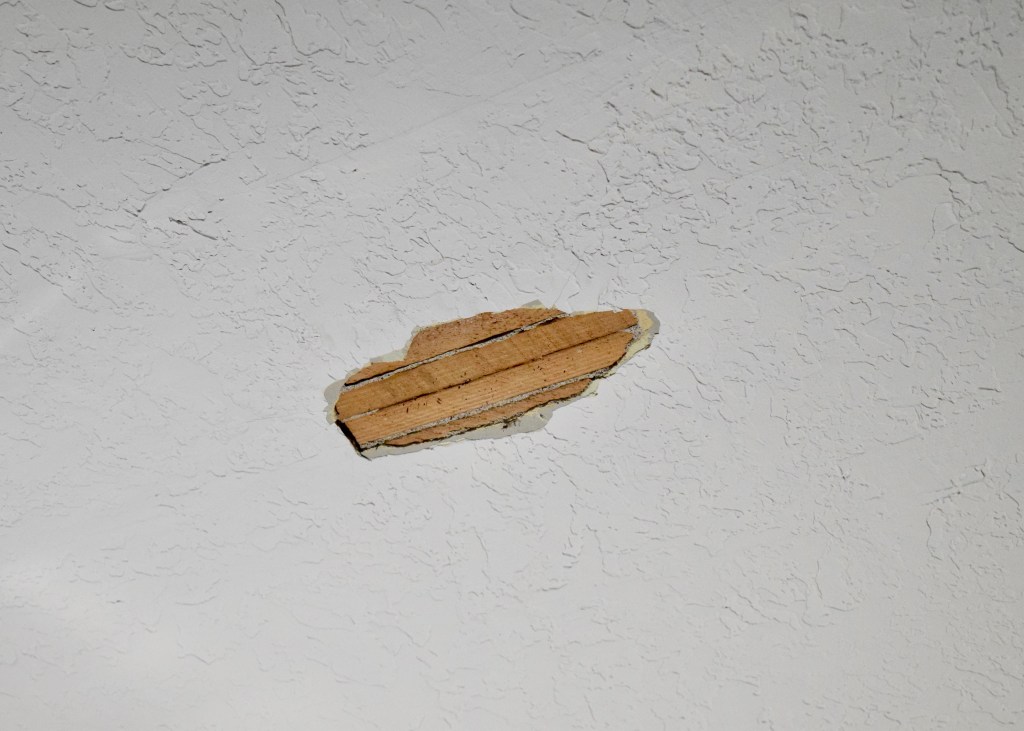
I threw up a layer of mud followed by a layer of pink to white spackle. I tried my best to match the texture of the ceiling, but it’s already been blatantly patched a few times, so I didn’t stress about trying to perfect it.

Once that was taken care of, all of the trim work needed sanding and cleaning. My sister Bronwyn took on that task, doing a quick sand on the gloss trim paint, so the new paint would stick better. A quick wipe down with TSP after sanding made sure there was no residue left behind. Things gotta look rougher before they can look better, right? Note: none of this trimwork is original to the house. It was all added in the last 20 years, and thus does not contain any lead.
I also used the drywall mud I already had out to fill in some uneveness on the walls and patch a small crack.
Then, because, no-prep-work-left-behind! I caulked all the seams of the crown which were gapping at the ceiling in places as the house had settled.
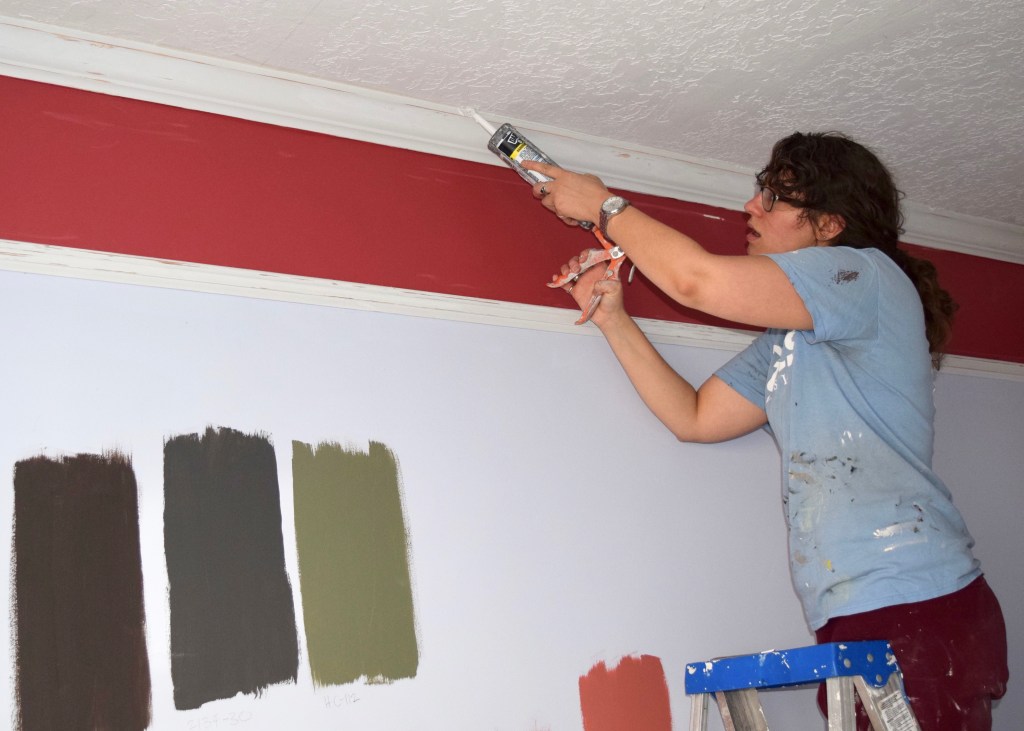
I wipe all my excess caulk with a sponge which ensures what’s left on the wall is only in the areas needed. This is a handy trick that works WAY better than a wet finger. I loathed caulking before I learned this trick. Now I only extremely dislike caulking, so it’s a huge improvement.
Finally, finally, after several days of prep work, it was time to paint! Woopee!!
The Order to Paint Walls, Trim, and Ceilings
- All Trimwork: including crown, baseboards, casings, decorative mouldings, etc. This allows you to no worry about getting the trim paint on other surfaces
- Walls: cut in your paint with a short handled brush, creating crisp edges against the straight lines created by the mouldings, then roll your main wall surface.
- Ceiling: cut in your ceiling around the trimwork, then slowly roll the main surface.
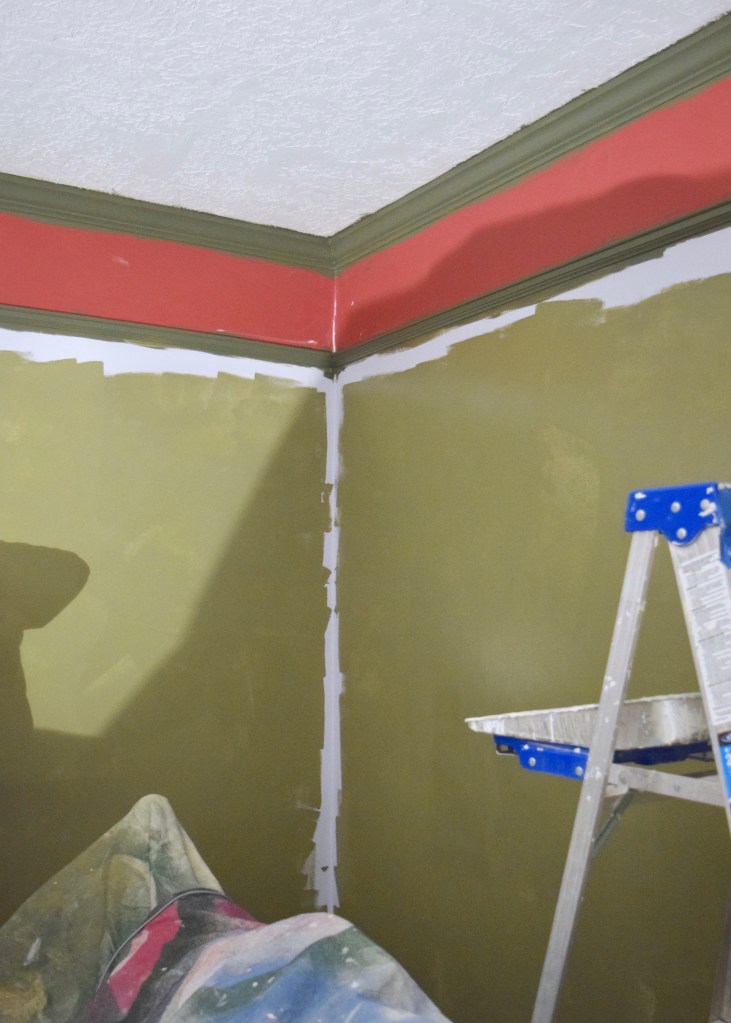
I began in the Master Bedroom with my usual down and dirty method of painting all the trim work first. I find it much easier to get a good coat of paint all over the trim — in and around all the curves, gaps, and edges — if I don’t have to worry about getting trim paint on anything else. It’s very easy to cut in a straight line against flat wood trim later, you see, but difficult to paint a curvy trim piece and get a straight line against the wall. Of course, this method results in a whole lot of crazy that looks like this picture below. BOY DO THOSE COLORS NOT GO TOGETHER!! Can you tell I began working on a ladder first?

Anyways, as I worked my way around the room cutting in all the trim, my trusty assistant and sister began rolling the first coat of paint on all the walls. We both like to use a W paint rolling pattern which helps to get coverage over every bit of wall – particularly if you have textured walls. These are flat thought, so it’s less essential.

Yes, this order of painting things meant the whole space looked like chaos, but the middle never makes any sense anyways.
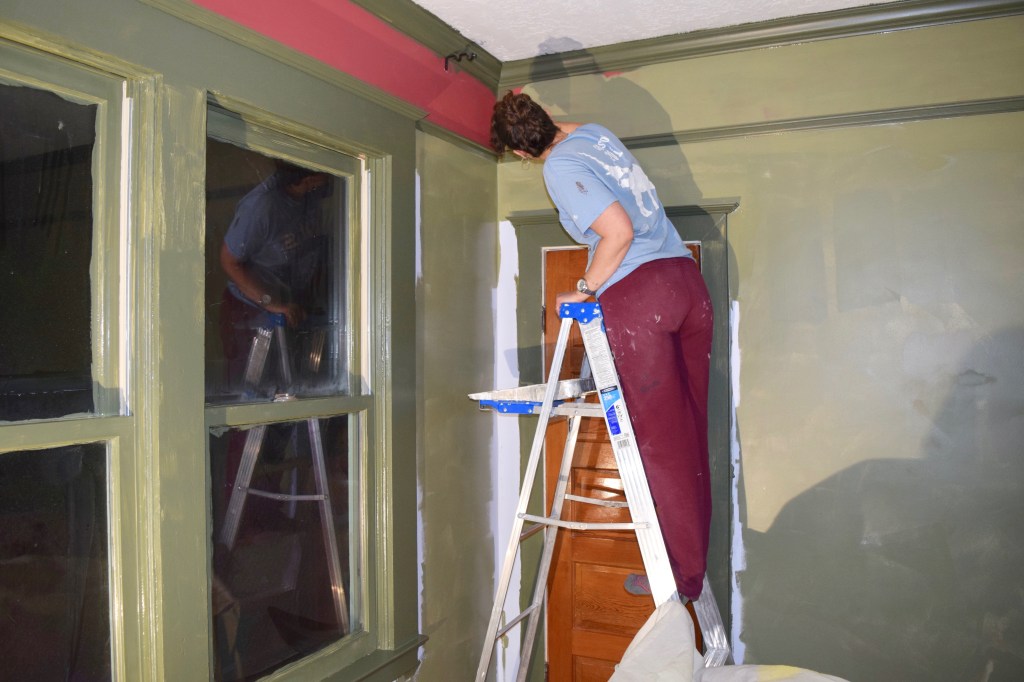
Bronwyn also rolled the tad bit of space between the picture rail moulding and the crown moulding. Then once those coats were dried, I went back and cut in a first coat of wall paint around all the painted trimwork. I use a short handled brush exclusively for all my cutting in and trim painting. I find it much easier to handle and it gives me much more control.

Now it was finally looking like I envisioned with the subtle contrasting greens creating a very traditional take on the modern monotone vibe! Yes, even at this point, one coat half done, I was in love with where this space was going. It was certainly going to be a bit darker, a bit more cave-like than before, but in a cozy, moody way that’s just perfect for a bedroom. I love to sleep and frequently stay up late and sleep in late, so a nice dark space is perfect for me!
After all the walls and trim were painted with two coats, I went and cut in the ceiling paint and rolled the ceiling, careful not to drip or splatter the walls. That was the last step before I could finally bring this room back together!
When day broke after the painting was complete, I had a huge smile on my face. The room was exactly the way I pictured it and the two-tone green looked excellent — by itself, but even better next to the orange-y doors and floors! I needed to reinstall the outlet covers and put the room back together, but for a few minutes I just stood here, so excited and happy by this transformation. It was a lot of prep work and the room took over a week to prep and paint, but now it was glorious!
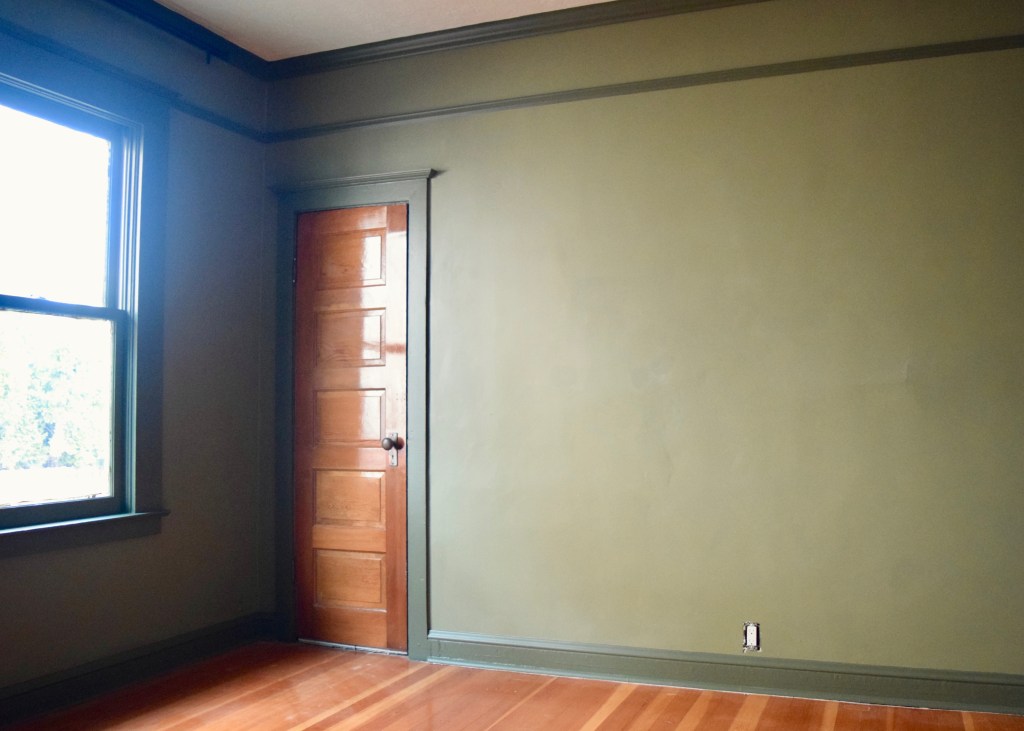
These are slightly different angles, but you can see how different this room looks with paint! It’s darker, but more romantic and cozy. The cool periwinkle color before was slightly hospital-feeling, a decade after it had been first painted, and the room was ready for fresh paint. We all know that view behind the bathroom door has changed a lot too!

I had taken everything out of my room the day all the painting was complete, which is why this room is now suddenly empty. I wasn’t planning on bringing it back in either! I have slowly been gathering new pieces for this space — antiques I’ve found on Craigslist and Facebook Marketplace — and now the room was painted, they could finally be installed in their new home! I hadn’t wanted to bring them in until this room was finally painted. This way, I got to have my own little mini-install and reveal day.
I can’t wait to show you what this space looks like, now that everything has been re-furnished! I’m working on the final touches, updating art, adding ambient lighting, and hunting for that last nightstand… It’s so close to being a completed space, ripe for a reveal!
What do you think of this take on the modern monotone concept? I see walls painted the same color as the trim all the time to make it feel more contemporary and moody. My version feels more traditional, which feels right for this 1909 house. I absolutely love it, though I know a lot of people think I’m completely crazy for painting all my white trim dark green! What would you do? Monotone? Tonal Monotone? Or Team White Trim? Let me know in the comments!

I love love love the two toning of paint and trim AND the color is fabulous. (but green is my favorite anyway-my walls and bedside tables are painted in 2 tone greens.) the floors look amazing with it and the light pink in the bathroom too. I bet you are loving it.
Thanks Lisa!! Yes it’s so amazing to have it feel finally more finished in here! Two tone green forever!
Do your double hung windows have the old cord sash weights? How did you paint the windows so that they didn’t get sealed shut? There must be a trick I don’t know. Thanks for the trim, walls, ceiling paint tips. And for some motivation! Now I want to see it when it’s all put together.
Hey Robin! The original windows in the house were actually replaced in 2003 with double hung aluminum exterior / wood interior windows. I do not have the cords and sashes any more, just the modern equivalent. Most of it is hidden but I have tried to avoid painting the mechanical part of the window as the paint just scraped off. You can really only see it if you look at the windows sideways, but there’s a thin strip of aluminum and off white plastic.
In the past when I’ve painted old original double hung windows though, I’ve just constantly moved them up and down while painting so they don’t get sealed. Like once or twice an hour and between coats. It’s annoying but works .