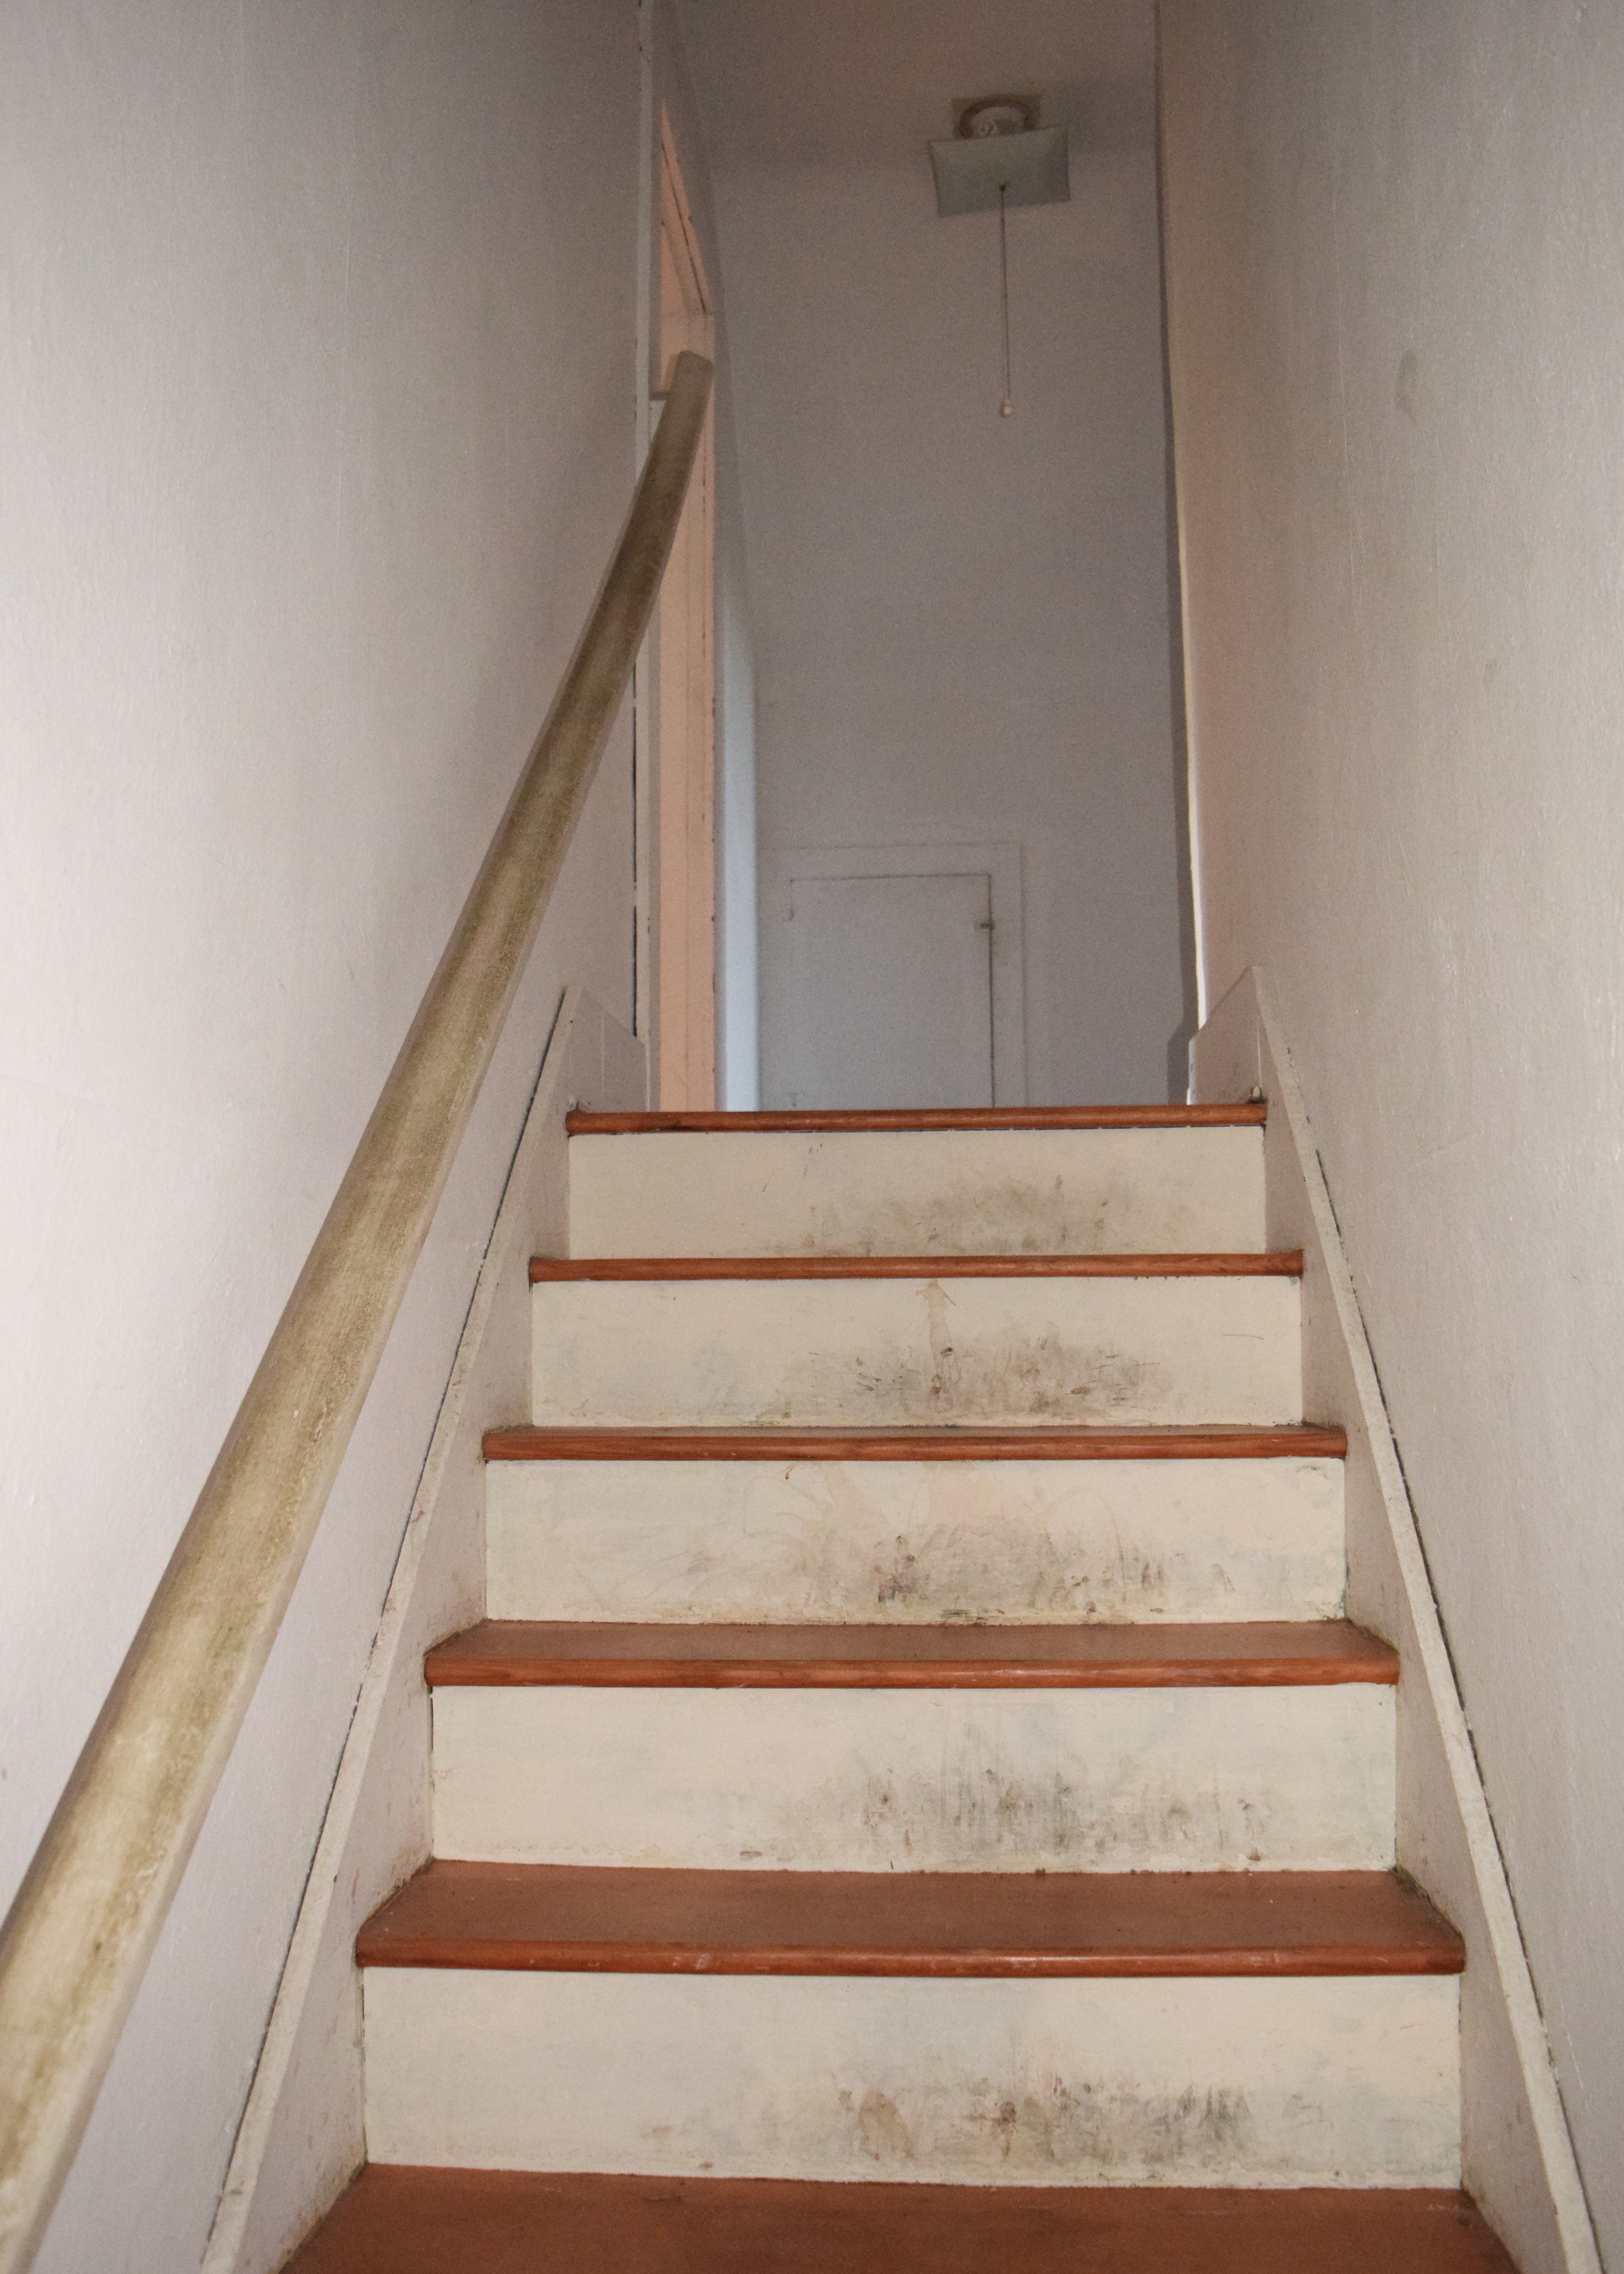
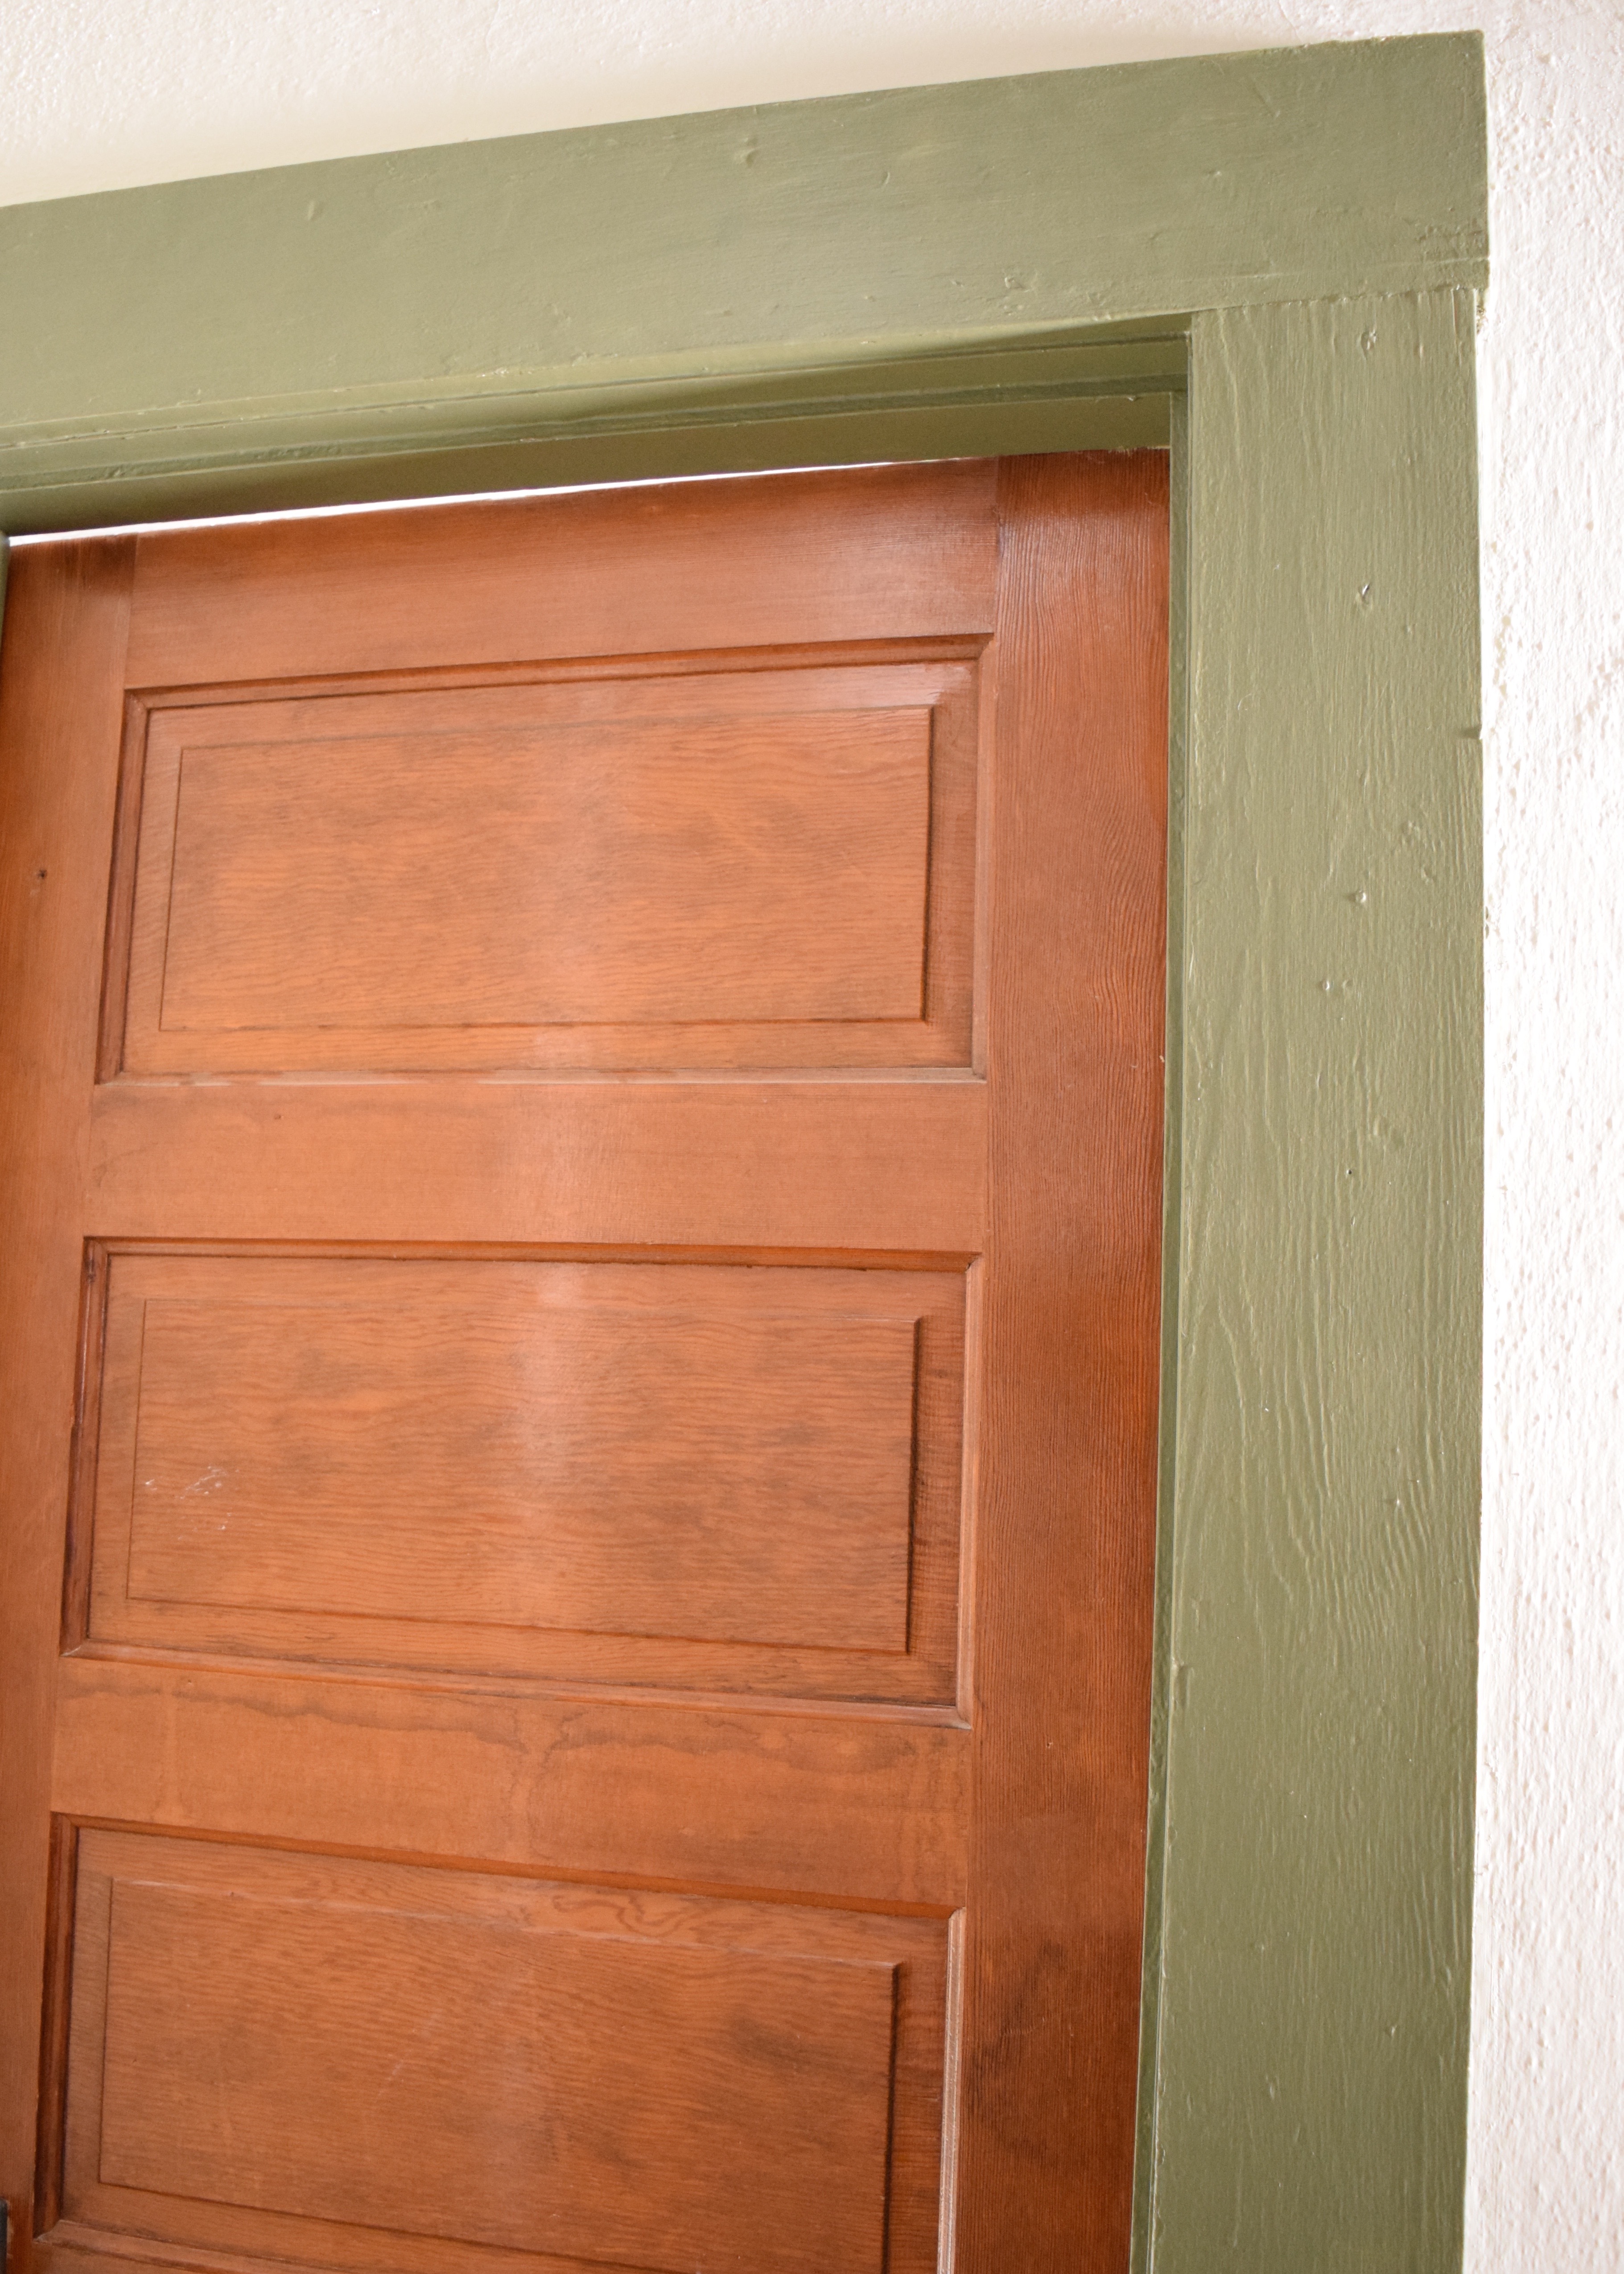
The stairway at Berrybrier has gone through some pretty dramatic changes in the last year. When I first bought the house, this area was dark lit by only a single bulb on a pull chain at the top of the stairs and a small square window squeezed in at the bottom of the stair. That little window had never even been trimmed out and a screen sat next to it waiting to be installed. The stair railing was almost black covered in god knows what and the light fixture wasn’t centered on anything.
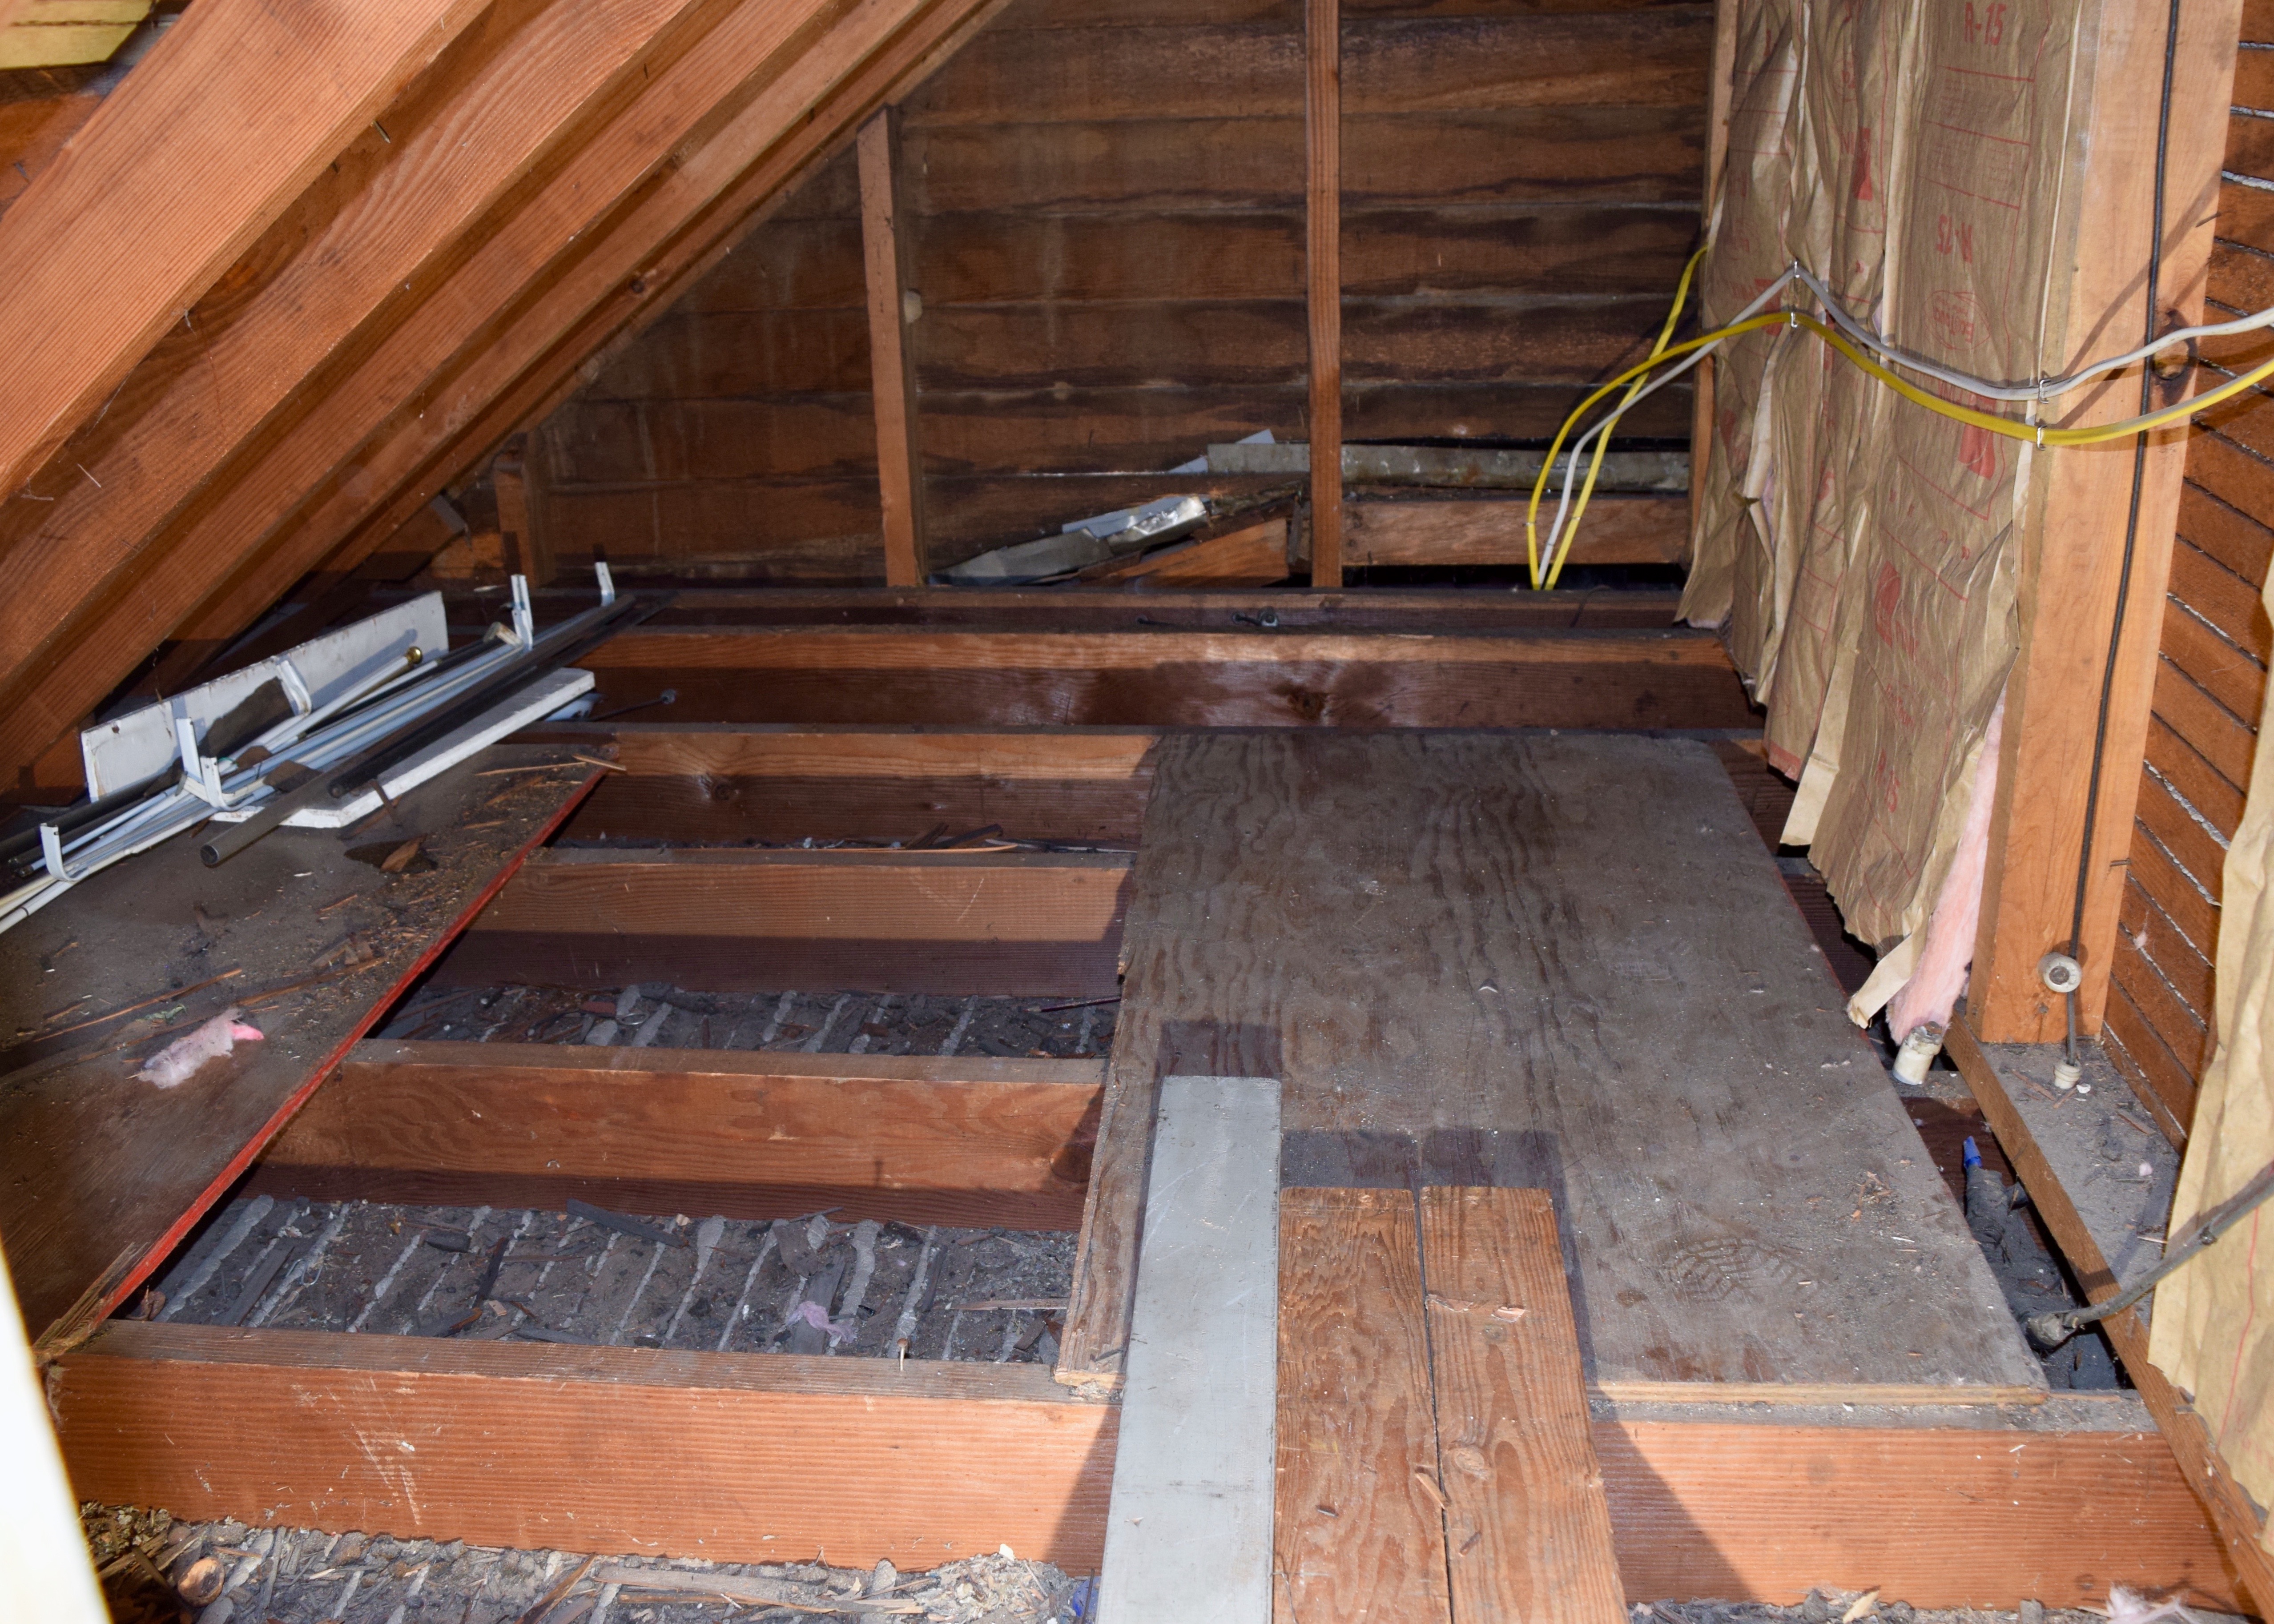
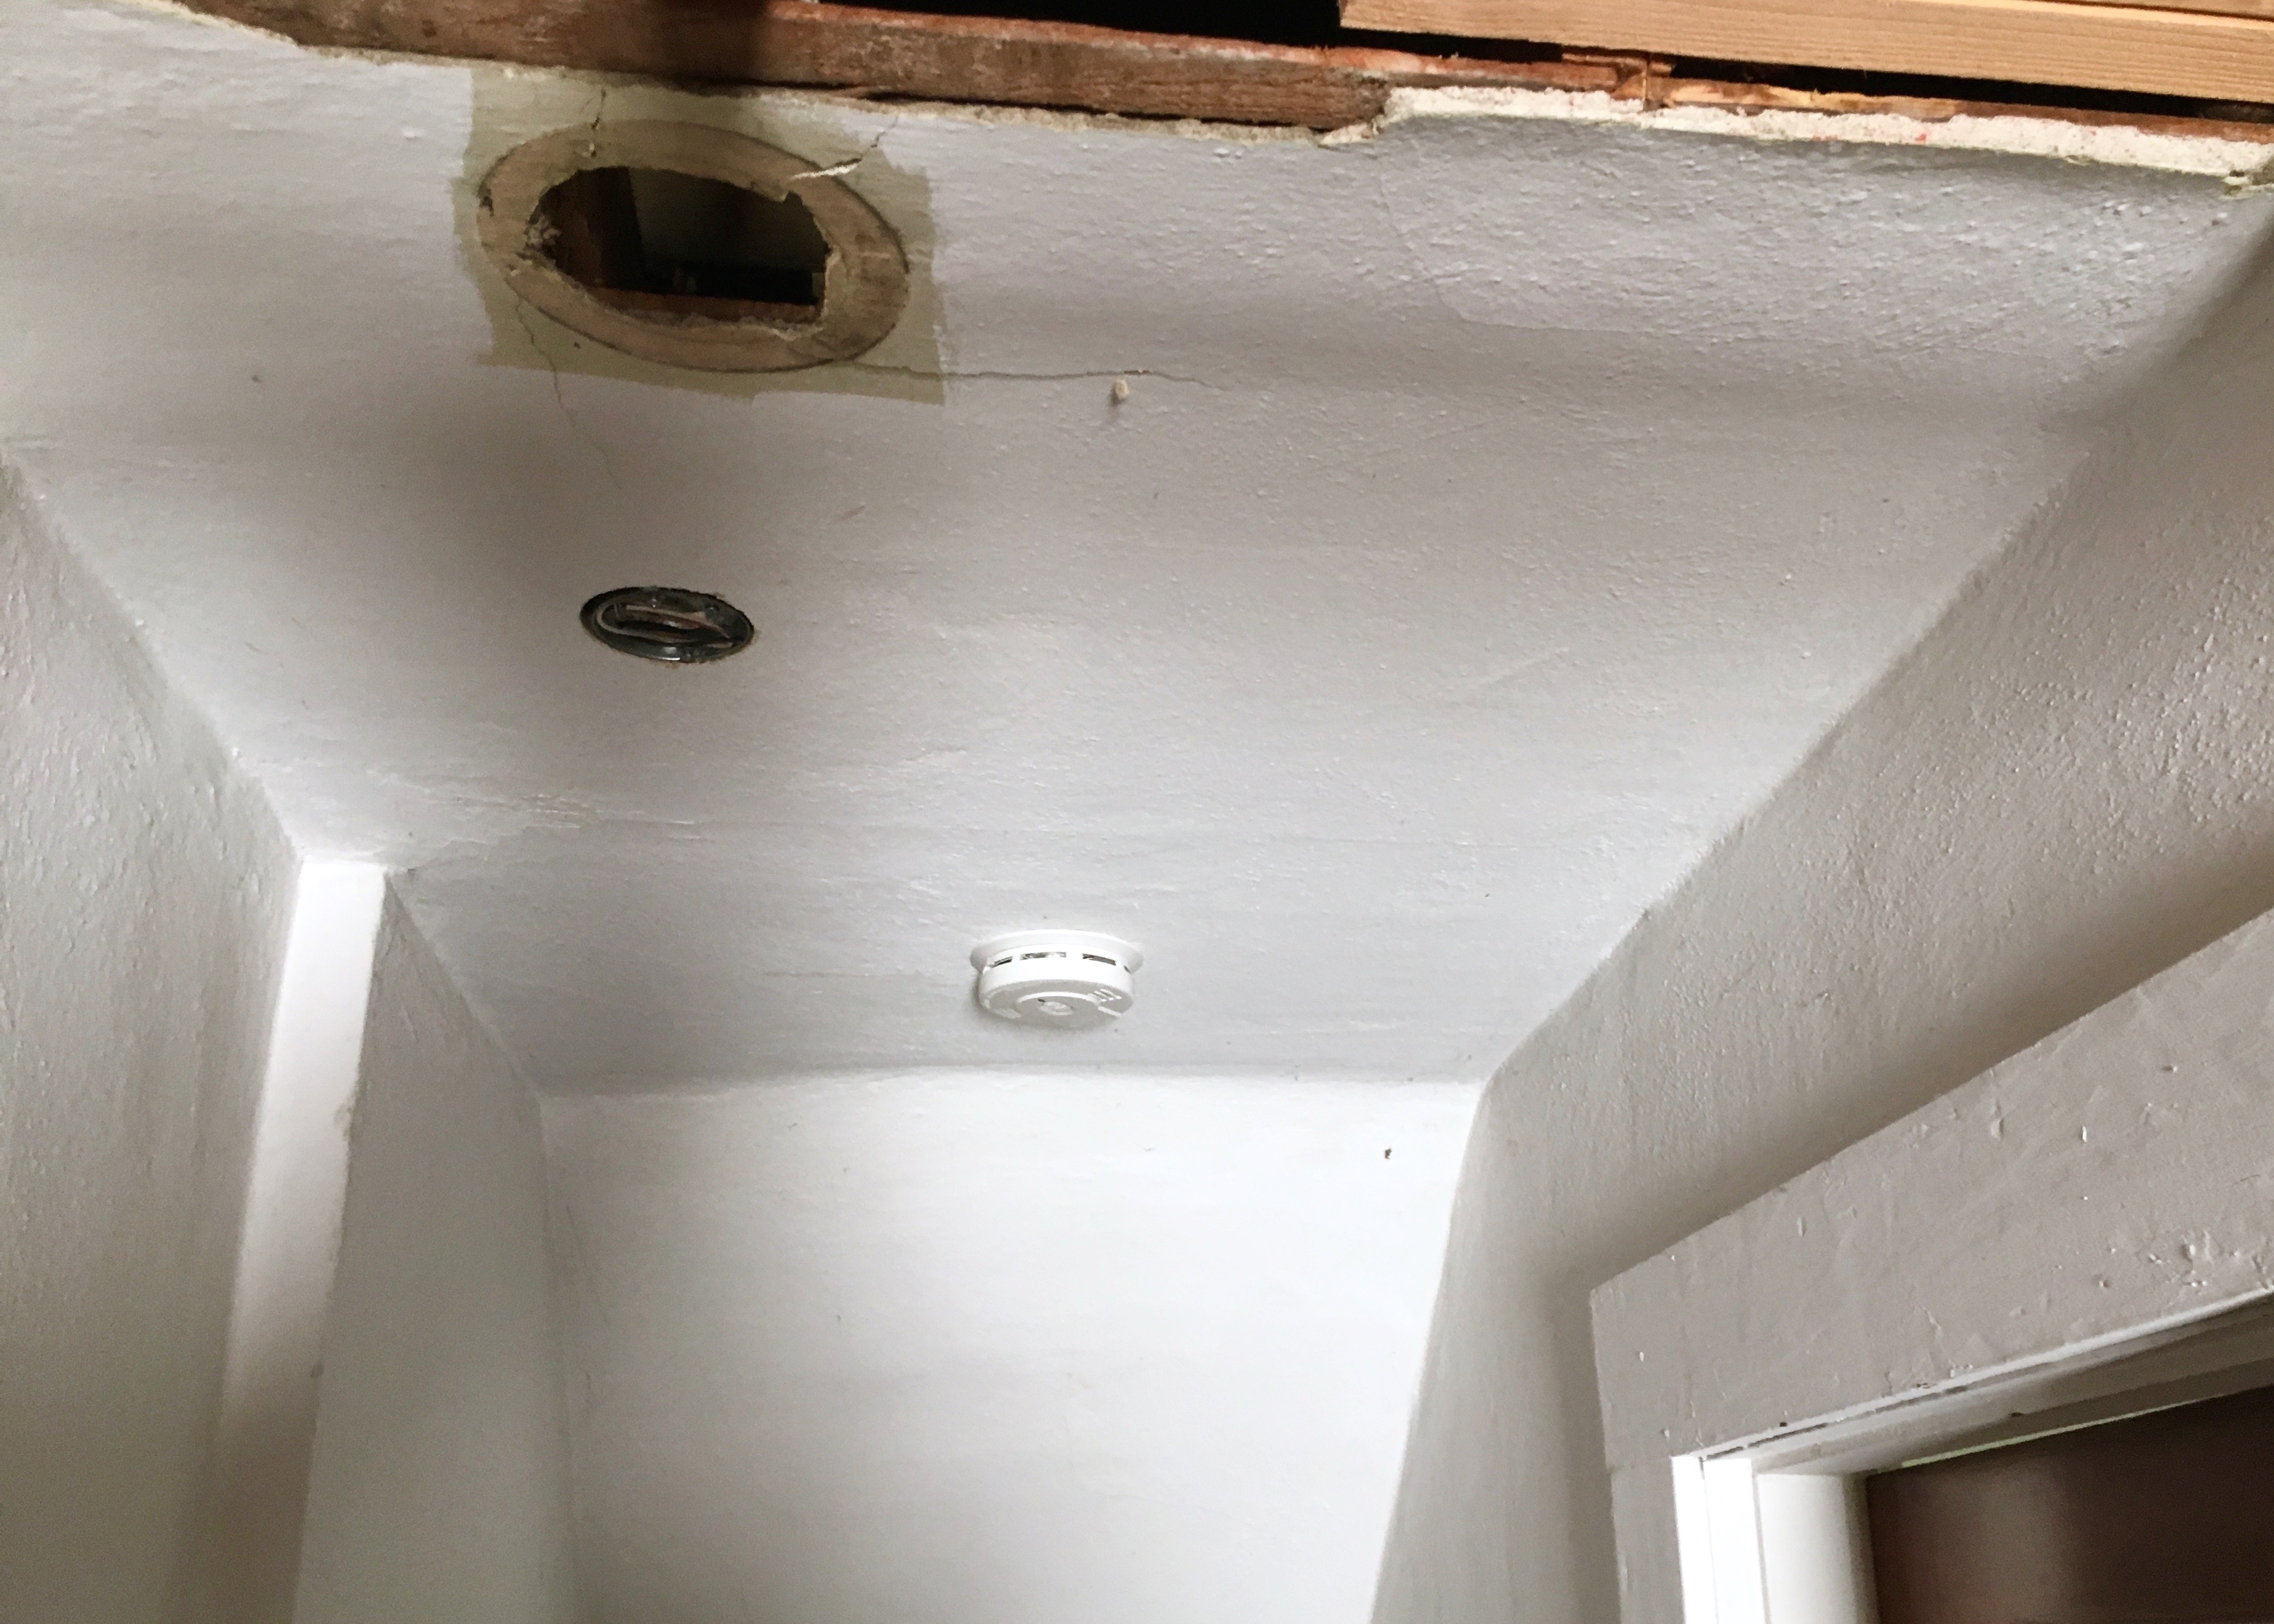
At the top of the stairs was a small crawl door to the eaves of the house which were used primarily for storage. A small trimmed out box in front of the crawl space door contained the ducting which provided heating to both bedrooms.
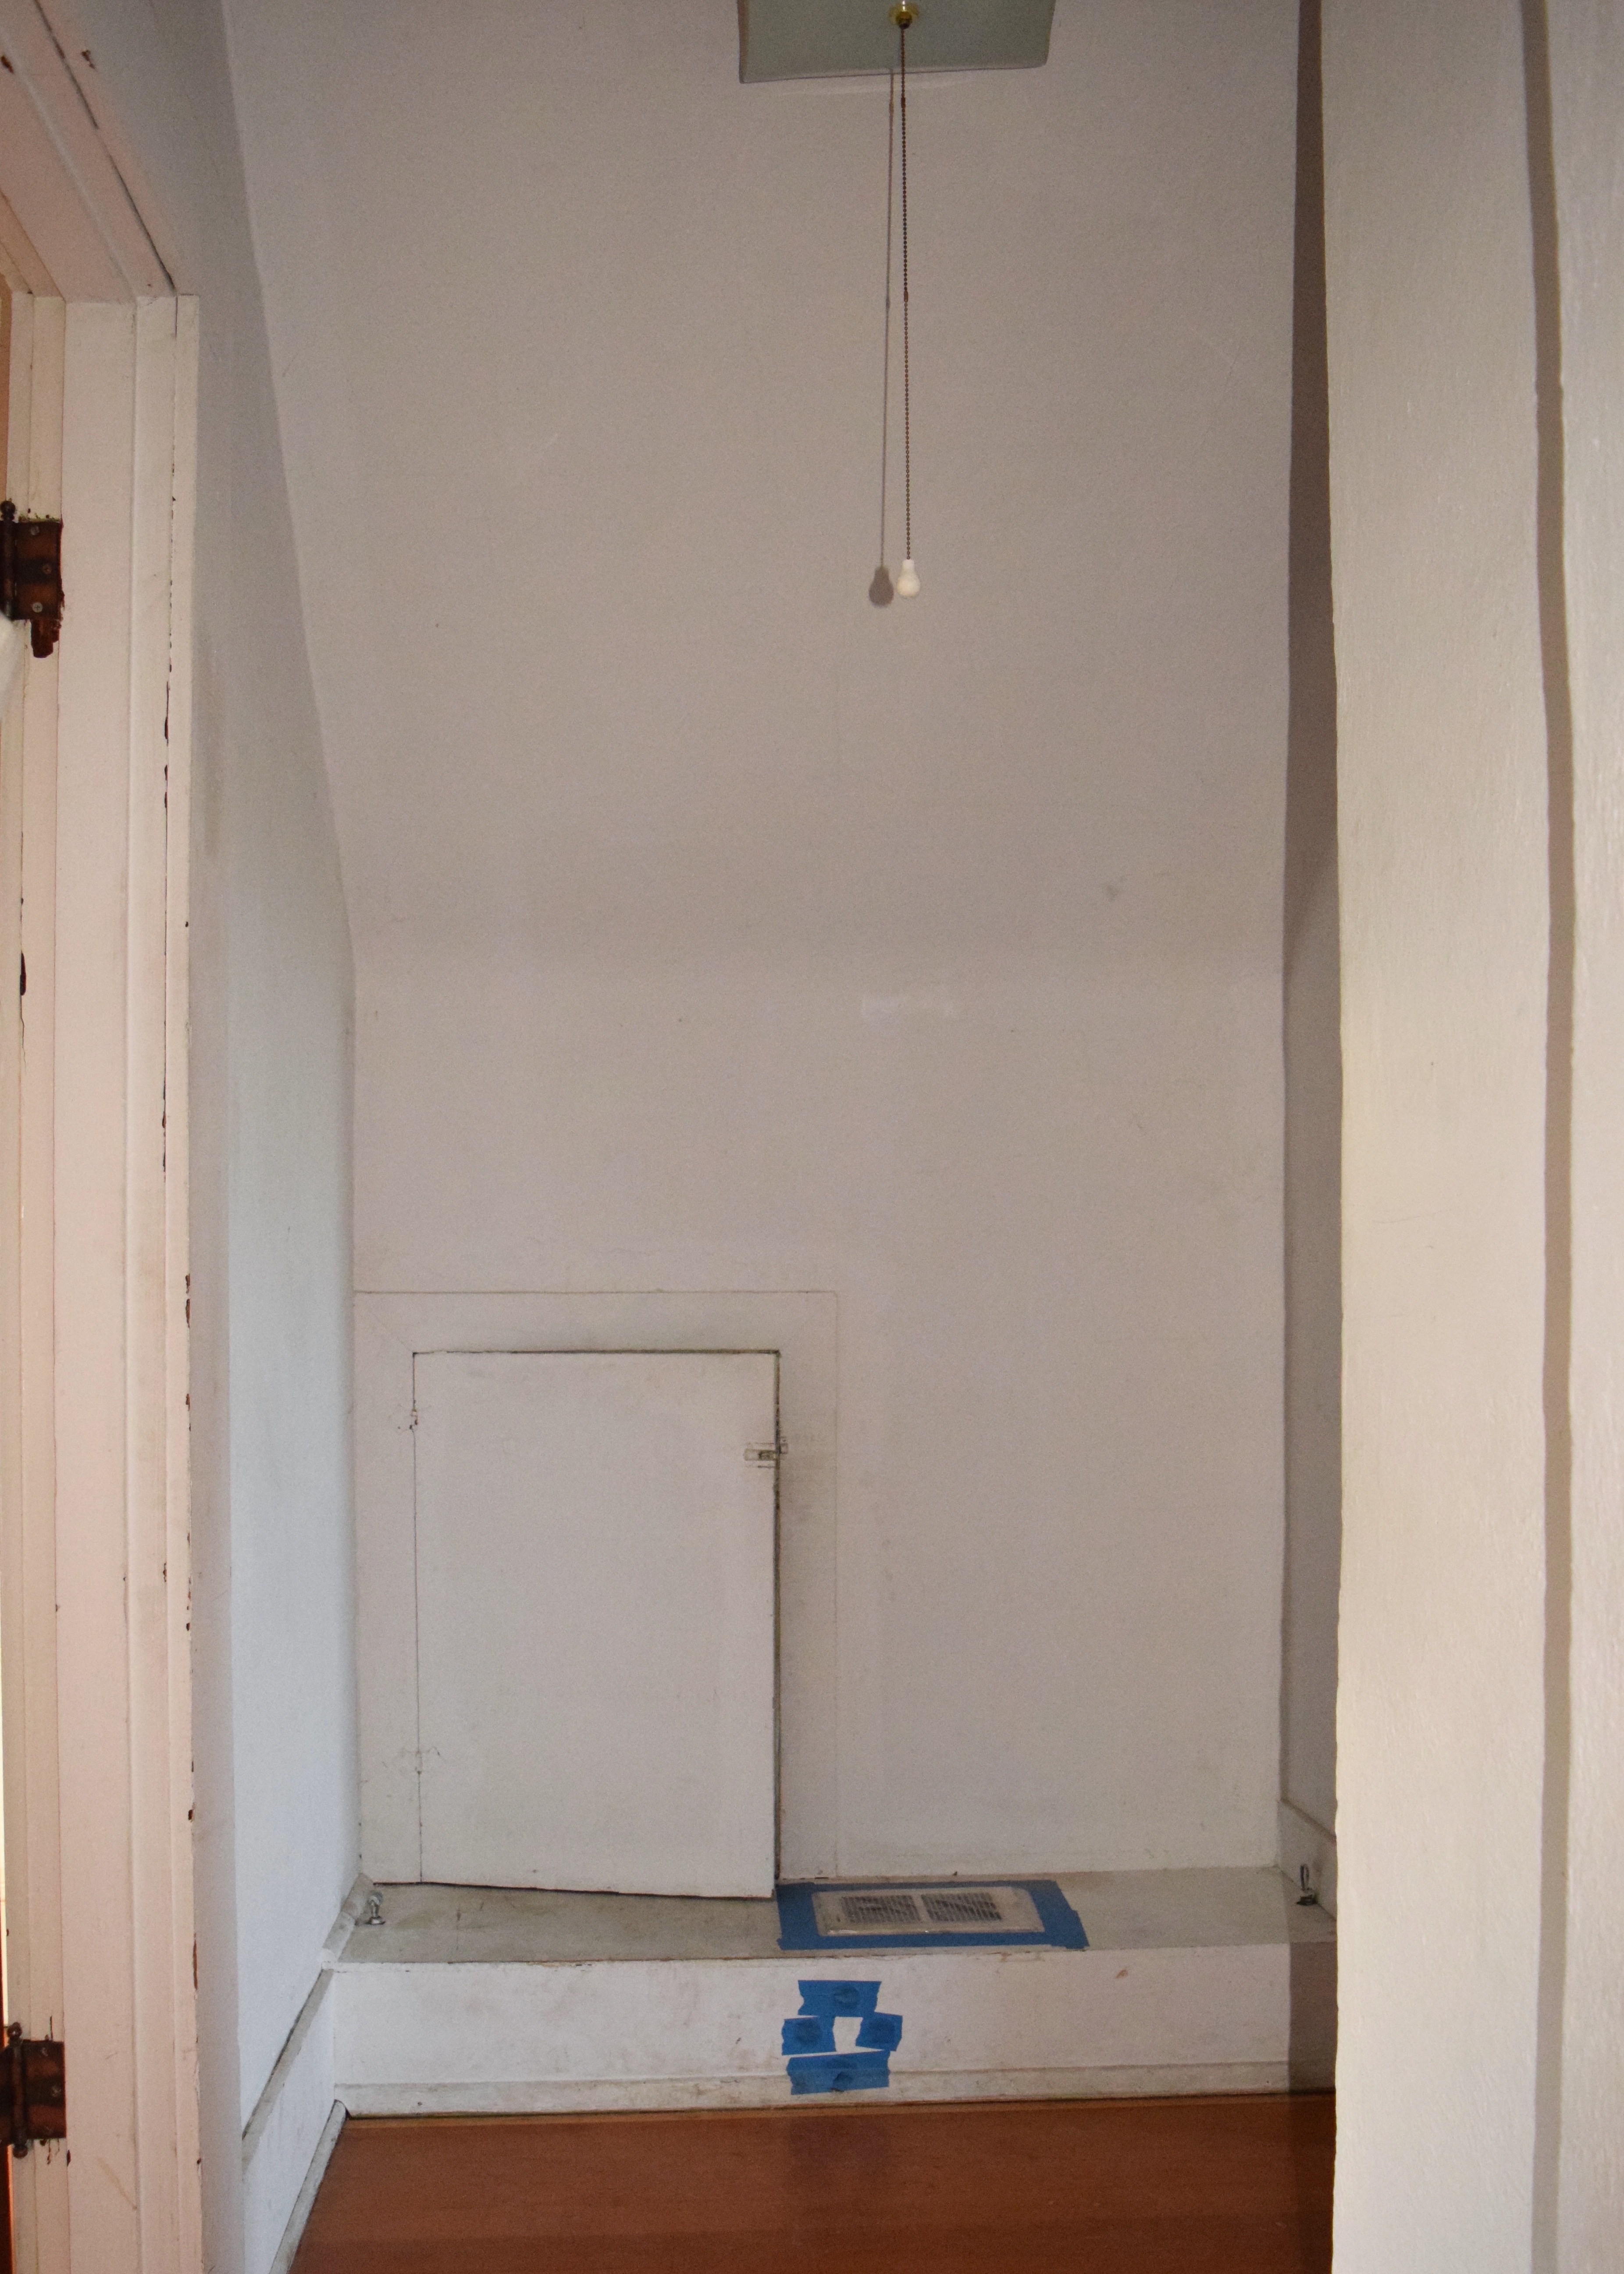
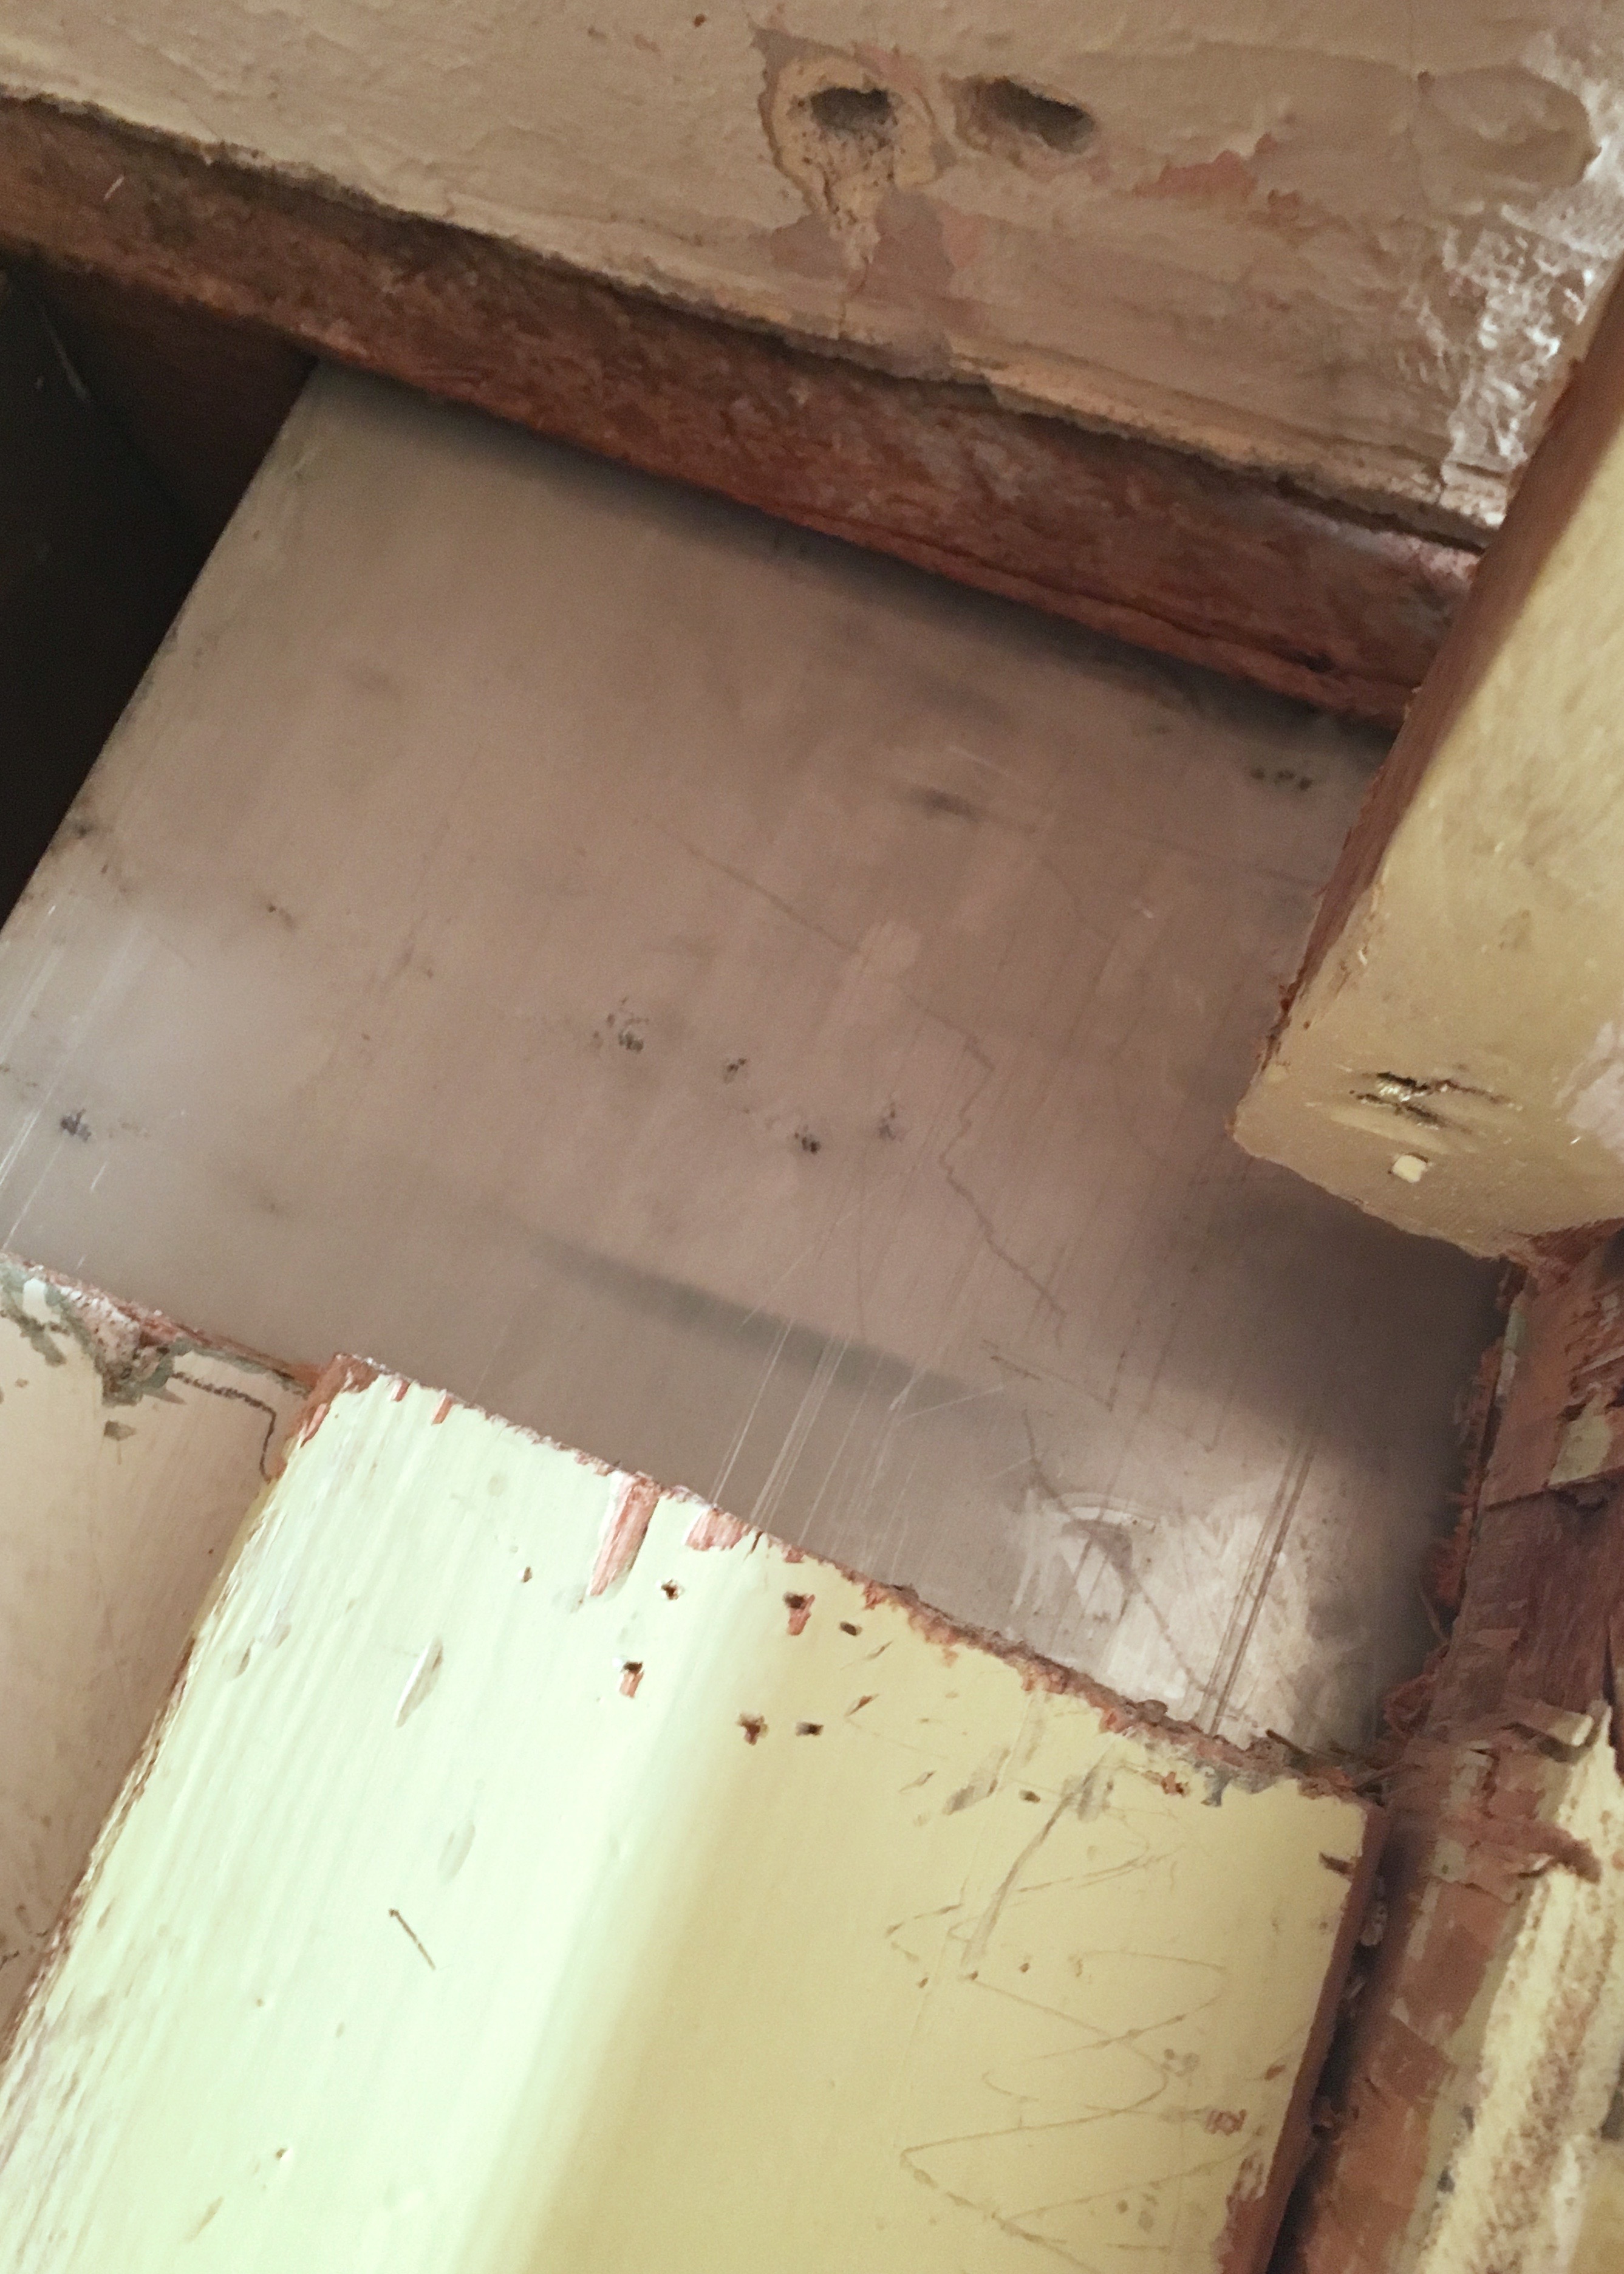
That hidden crawl space was painfully hot in the summer and cold in the winter. The low height (only 54″H on the taller side of the space) meant you were crouching or crawling when in there and never really comfortable. There were plywood panels over the ceiling joists (there used to be more, but the roofers removed them when they put on the dormer for some reason) which provided the floor space. There was also junk from the former owners randomly scattered throughout the space. And yes, those of you with eagle eyes have spotted that my floor joists are only 2x6s. It’s one of those things that just might be getting in the way of my future bathtub.
When I first toured the house before buying it I knew this space between the two bedrooms was very valuable. The house was screaming for a dormer addition that could hold a medium sized bathroom. This would not only add a ton of value to the house, but also provide endless convenience to those two upstairs bedrooms. People sleeping upstairs would no longer have to creep downstairs at night to use the bathroom or get a glass of water; they’d have access to it just a few feet away! This would also help ensure everyone always had access to a toilet in the house and no more fighting over who got first shower! I have big dreams, you guys!
Building a Dormer Addition
One of the first tasks when I moved into Berrybrier was a big one I hired out: installing a new roof. Berrybrier needed new sheathing and new shingles desperately! When I was working with the contractor on that project he was just as excited about building a dormer as I was!
I put together drawings at work showing the addition and got my permit at one of Portland super handy Homeowner’s Nights at the planning office. I had never done exterior elevations and structural plans before so it was a bit of a challenge but the staff at the planning office were super friendly and helpful. I went one evening for a consultation before returning the next Homeowners Night to apply for the actual permit. That first time I sat with an engineer for an hour reviewing my plans and discussing how to make things work for my house and my future goals. Although I applied for the permit use of the dormer as an unfinished storage space, all the planners immediately knew there’d be a bathroom in this space after glancing at the plans!
Once the permit had been granted, my roofer got straight to work and before I knew it the dormer was built and once the house was painted a cute coral color, it was like the dormer had been part of the exterior all along.

I do just really love my pink house.
Updating Electrical & Adding A Remote Switch
When my electricians came to rework the electrical at my house they installed one of the best changes to the stairwell: light switches!
I also had them center the light fixture box in here so it looked more normal in the new space at the top of the stairs. It was a bit of a journey to get there as they accidentally put the box in a random location and had to come back and put another hole in my ceiling. Which meant I now had two holes to patch in my ceiling. Oh joy!
Now there was a light fixture at the top of the stairs and a light switch at the bottom. The one at the bottom of the stairs is a remote switch which saved the hassle of opening up the walls to wire a three way switch and works in exactly the same way. It’s super convenient now!
Painting the Stairwell
The walls at the top of the stairs had been newly built to a higher proportion to allow a full height door into the new dormer. The texture on the rest of the walls of the stairwell was impossible to match. I patched the places I could, tried mixing sand with my paint, but there really wasn’t a great solution here. Long term, I’ll probably have this whole space professionally skimcoated to a flat finish like is used throughout the rest of the house, but for now this is kinda as good as it gets.
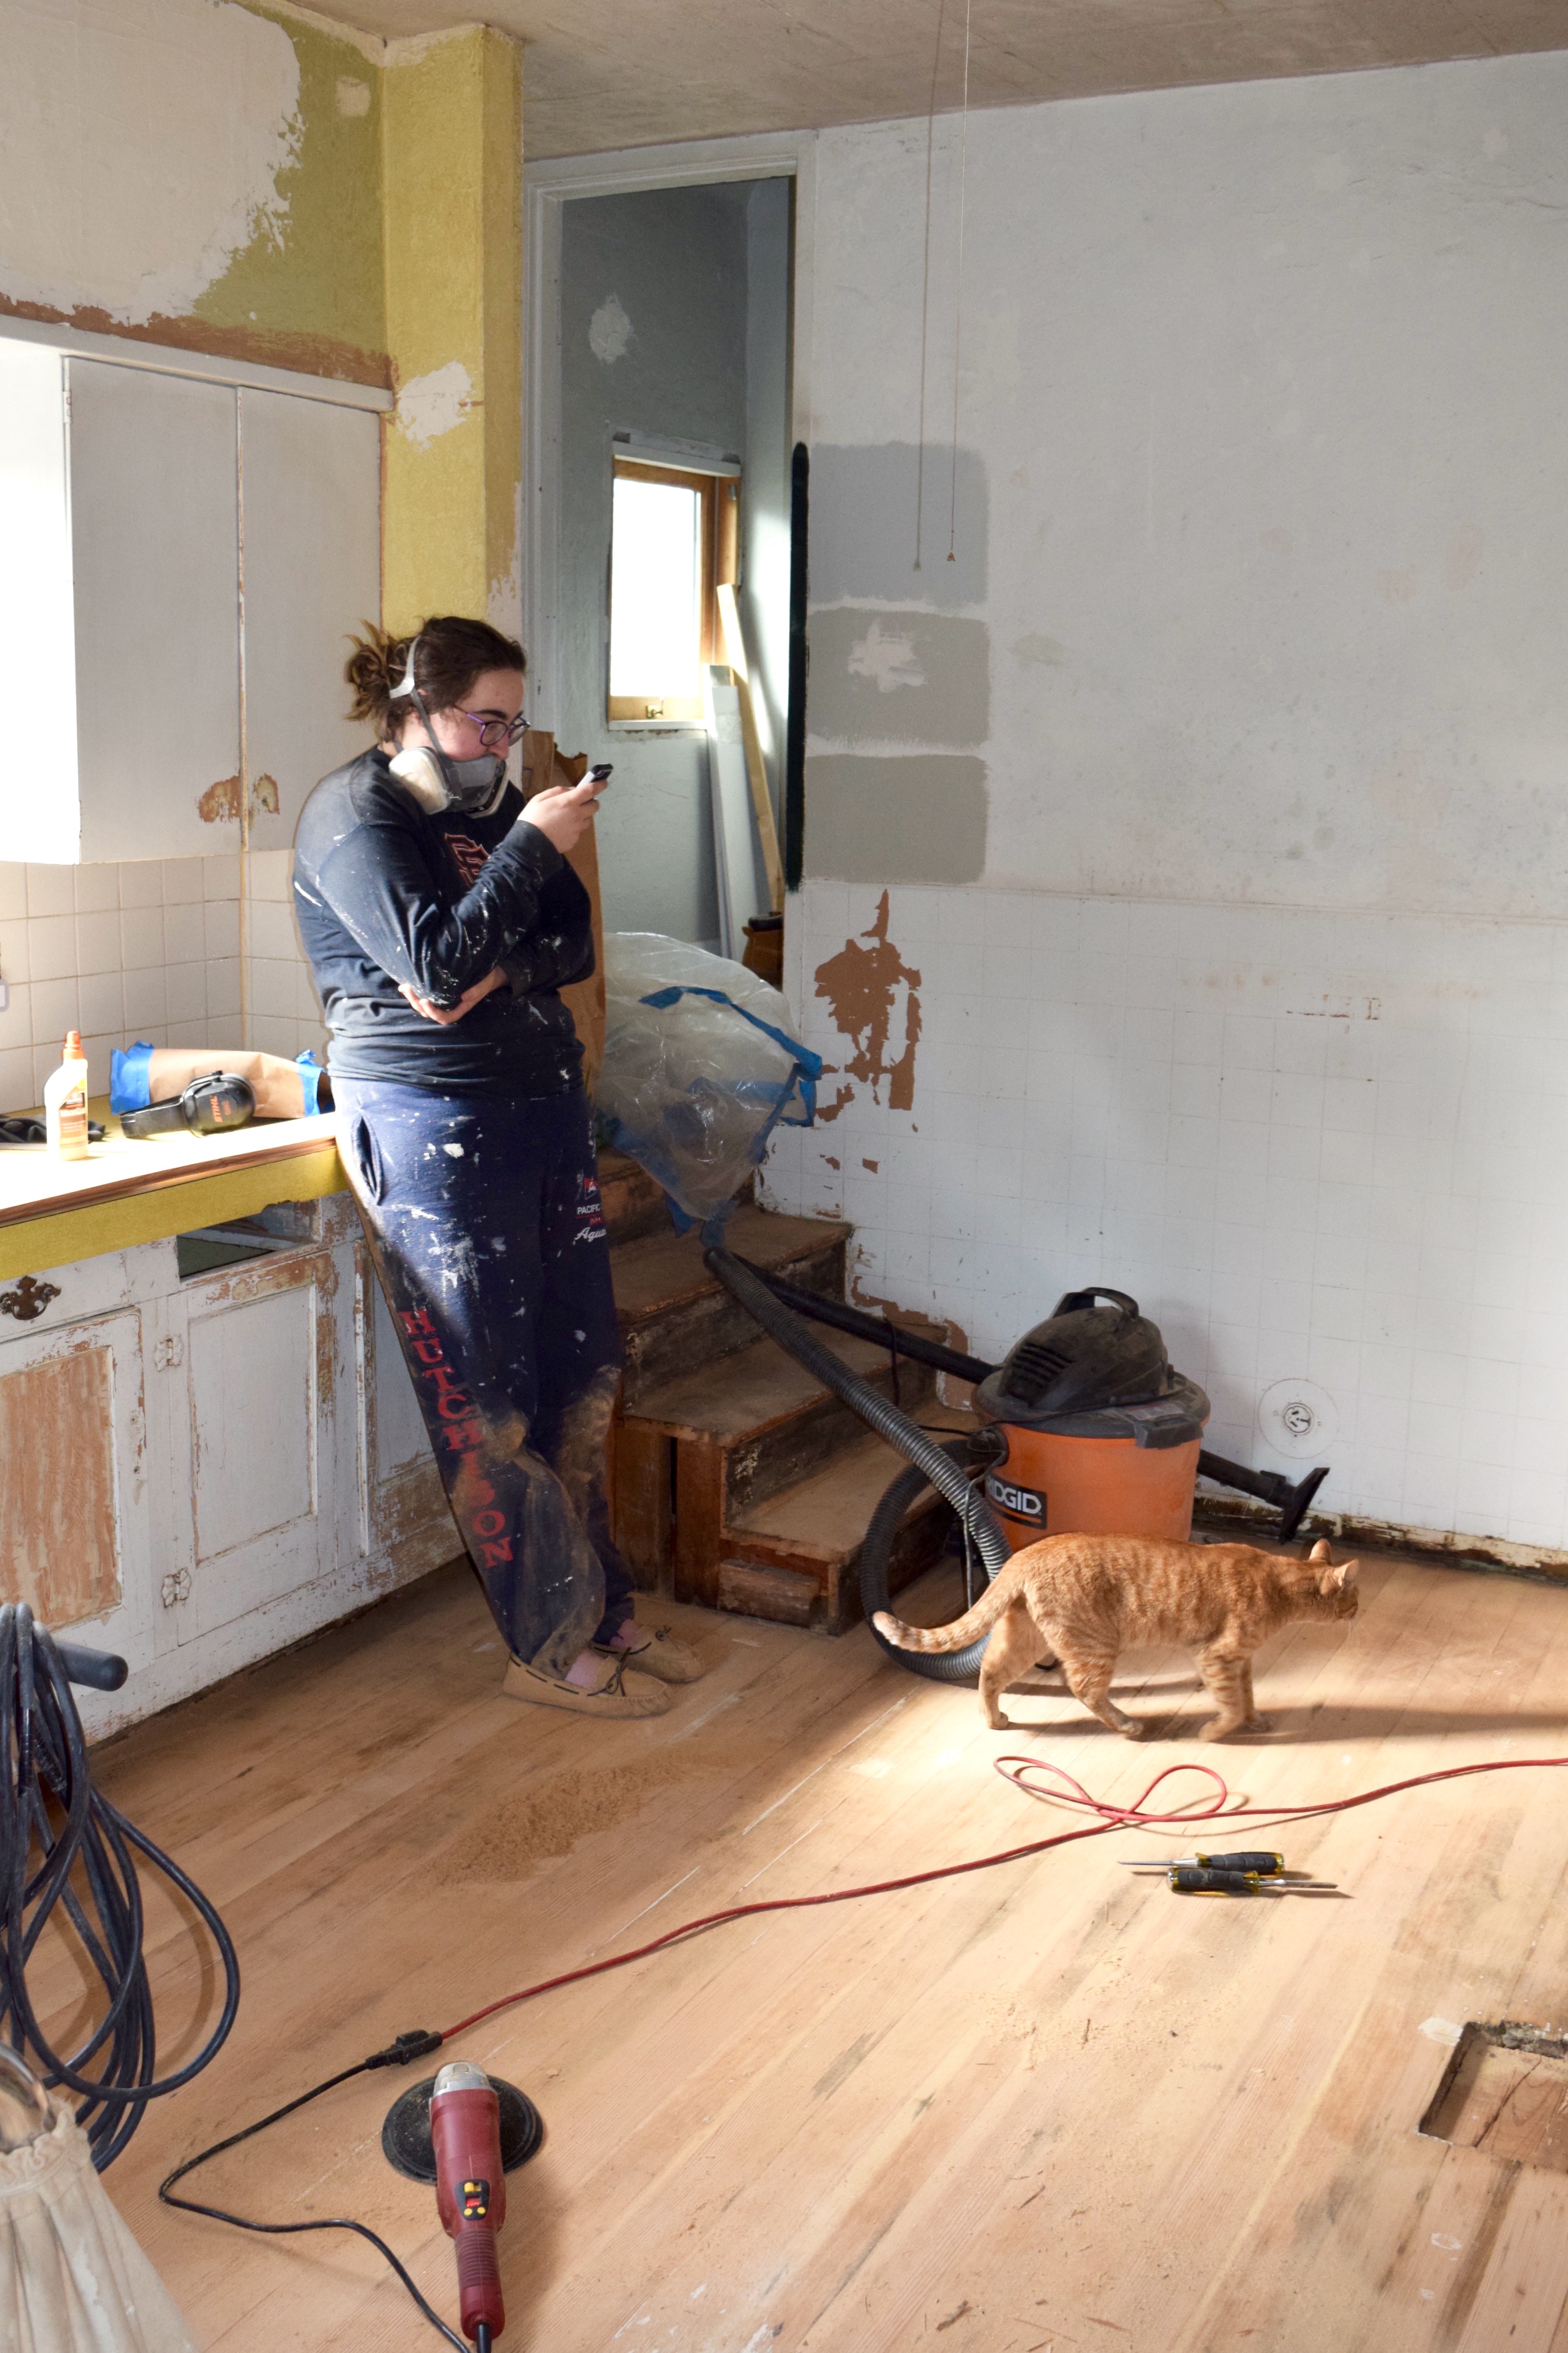
In February 2018 things were getting busy around here as I finished up the bathroom and began working on the kitchen floors. My Aunt Stephanie and Uncle Mike came to visit Portland and asked if there was anything they could do to help around Berrybrier. Ummm free and willing labor? Yes, please!!
Bronwyn picked up some paint and we set them up with all the tools to paint the upper back bedroom and stairwell. I headed to work and when I came home that evening they were putting the final touches on the second coat of paint! I selected Benjamin Moore’s Brushed Aluminum 1485 for the walls after much debate. You can see the colors sampled all over the walls in the floor refinishing post from a couple weeks ago! Brushed Aluminum was the color in the middle. The top option was too grey and the bottom too dark.
I wanted a light taupey color that wasn’t grey or beige or greige! I swatched three colors before landing here. I love the color in the stairwell now since it hits the perfect hue I was hoping for!
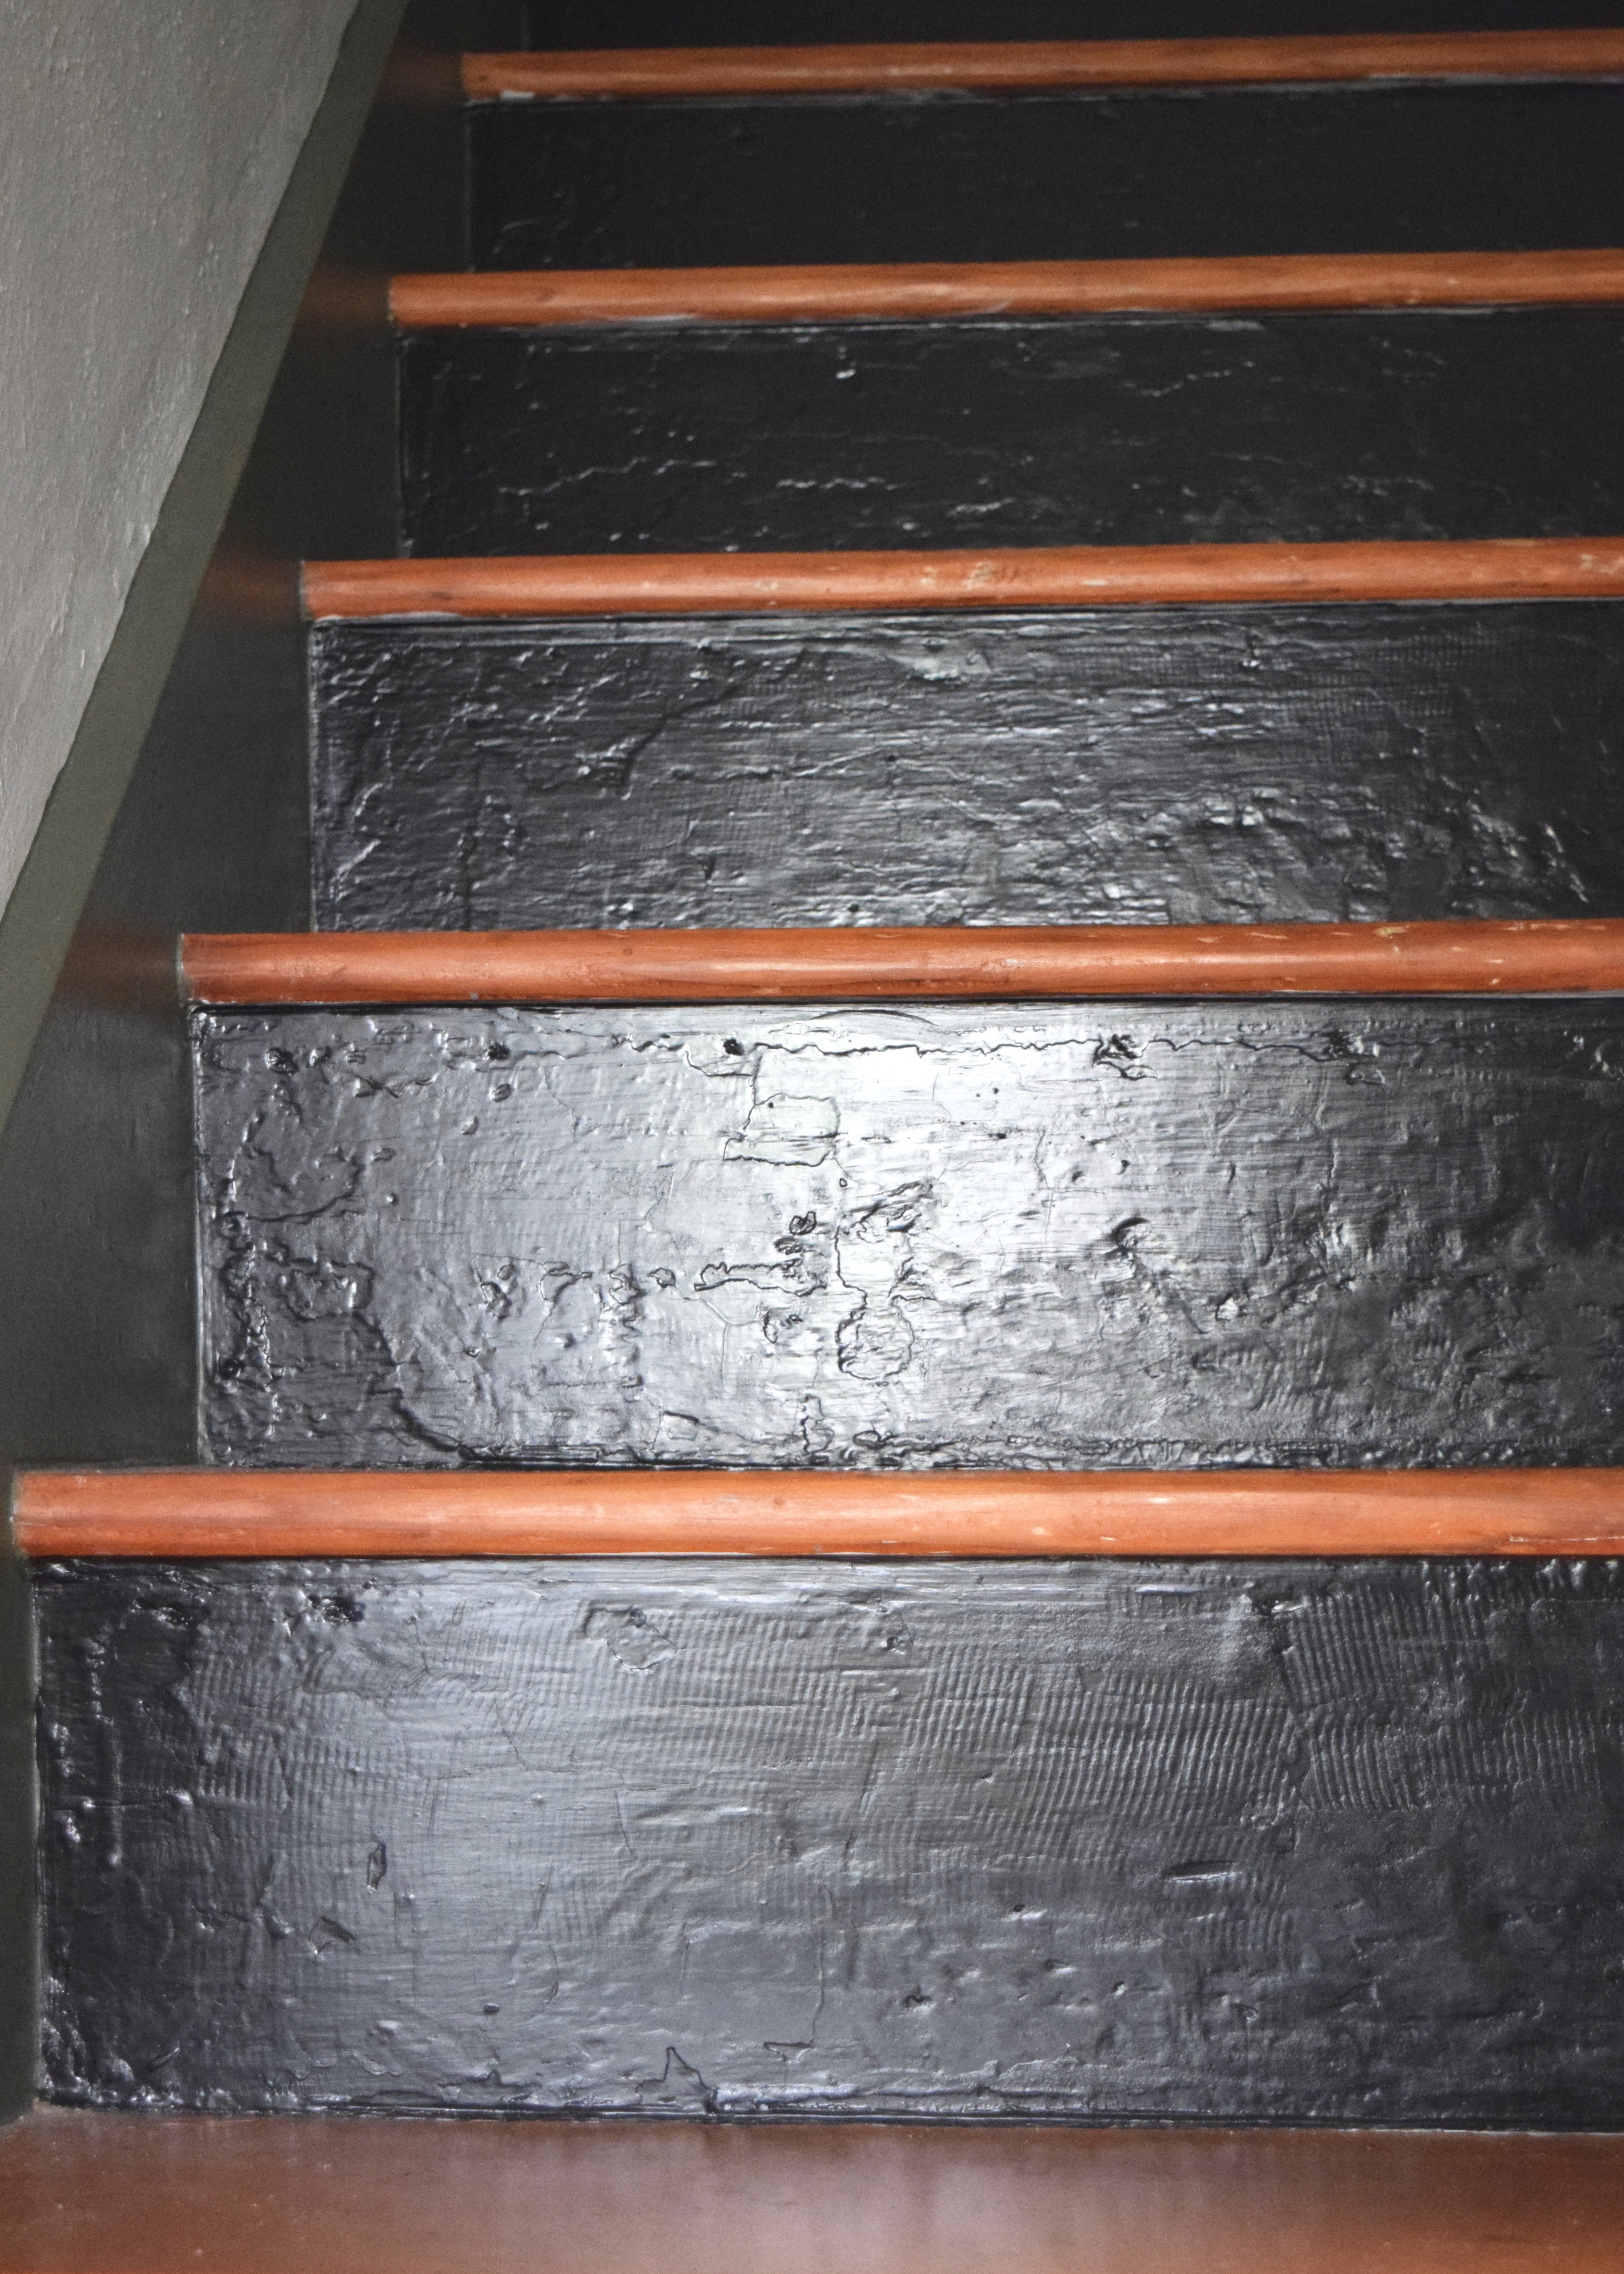
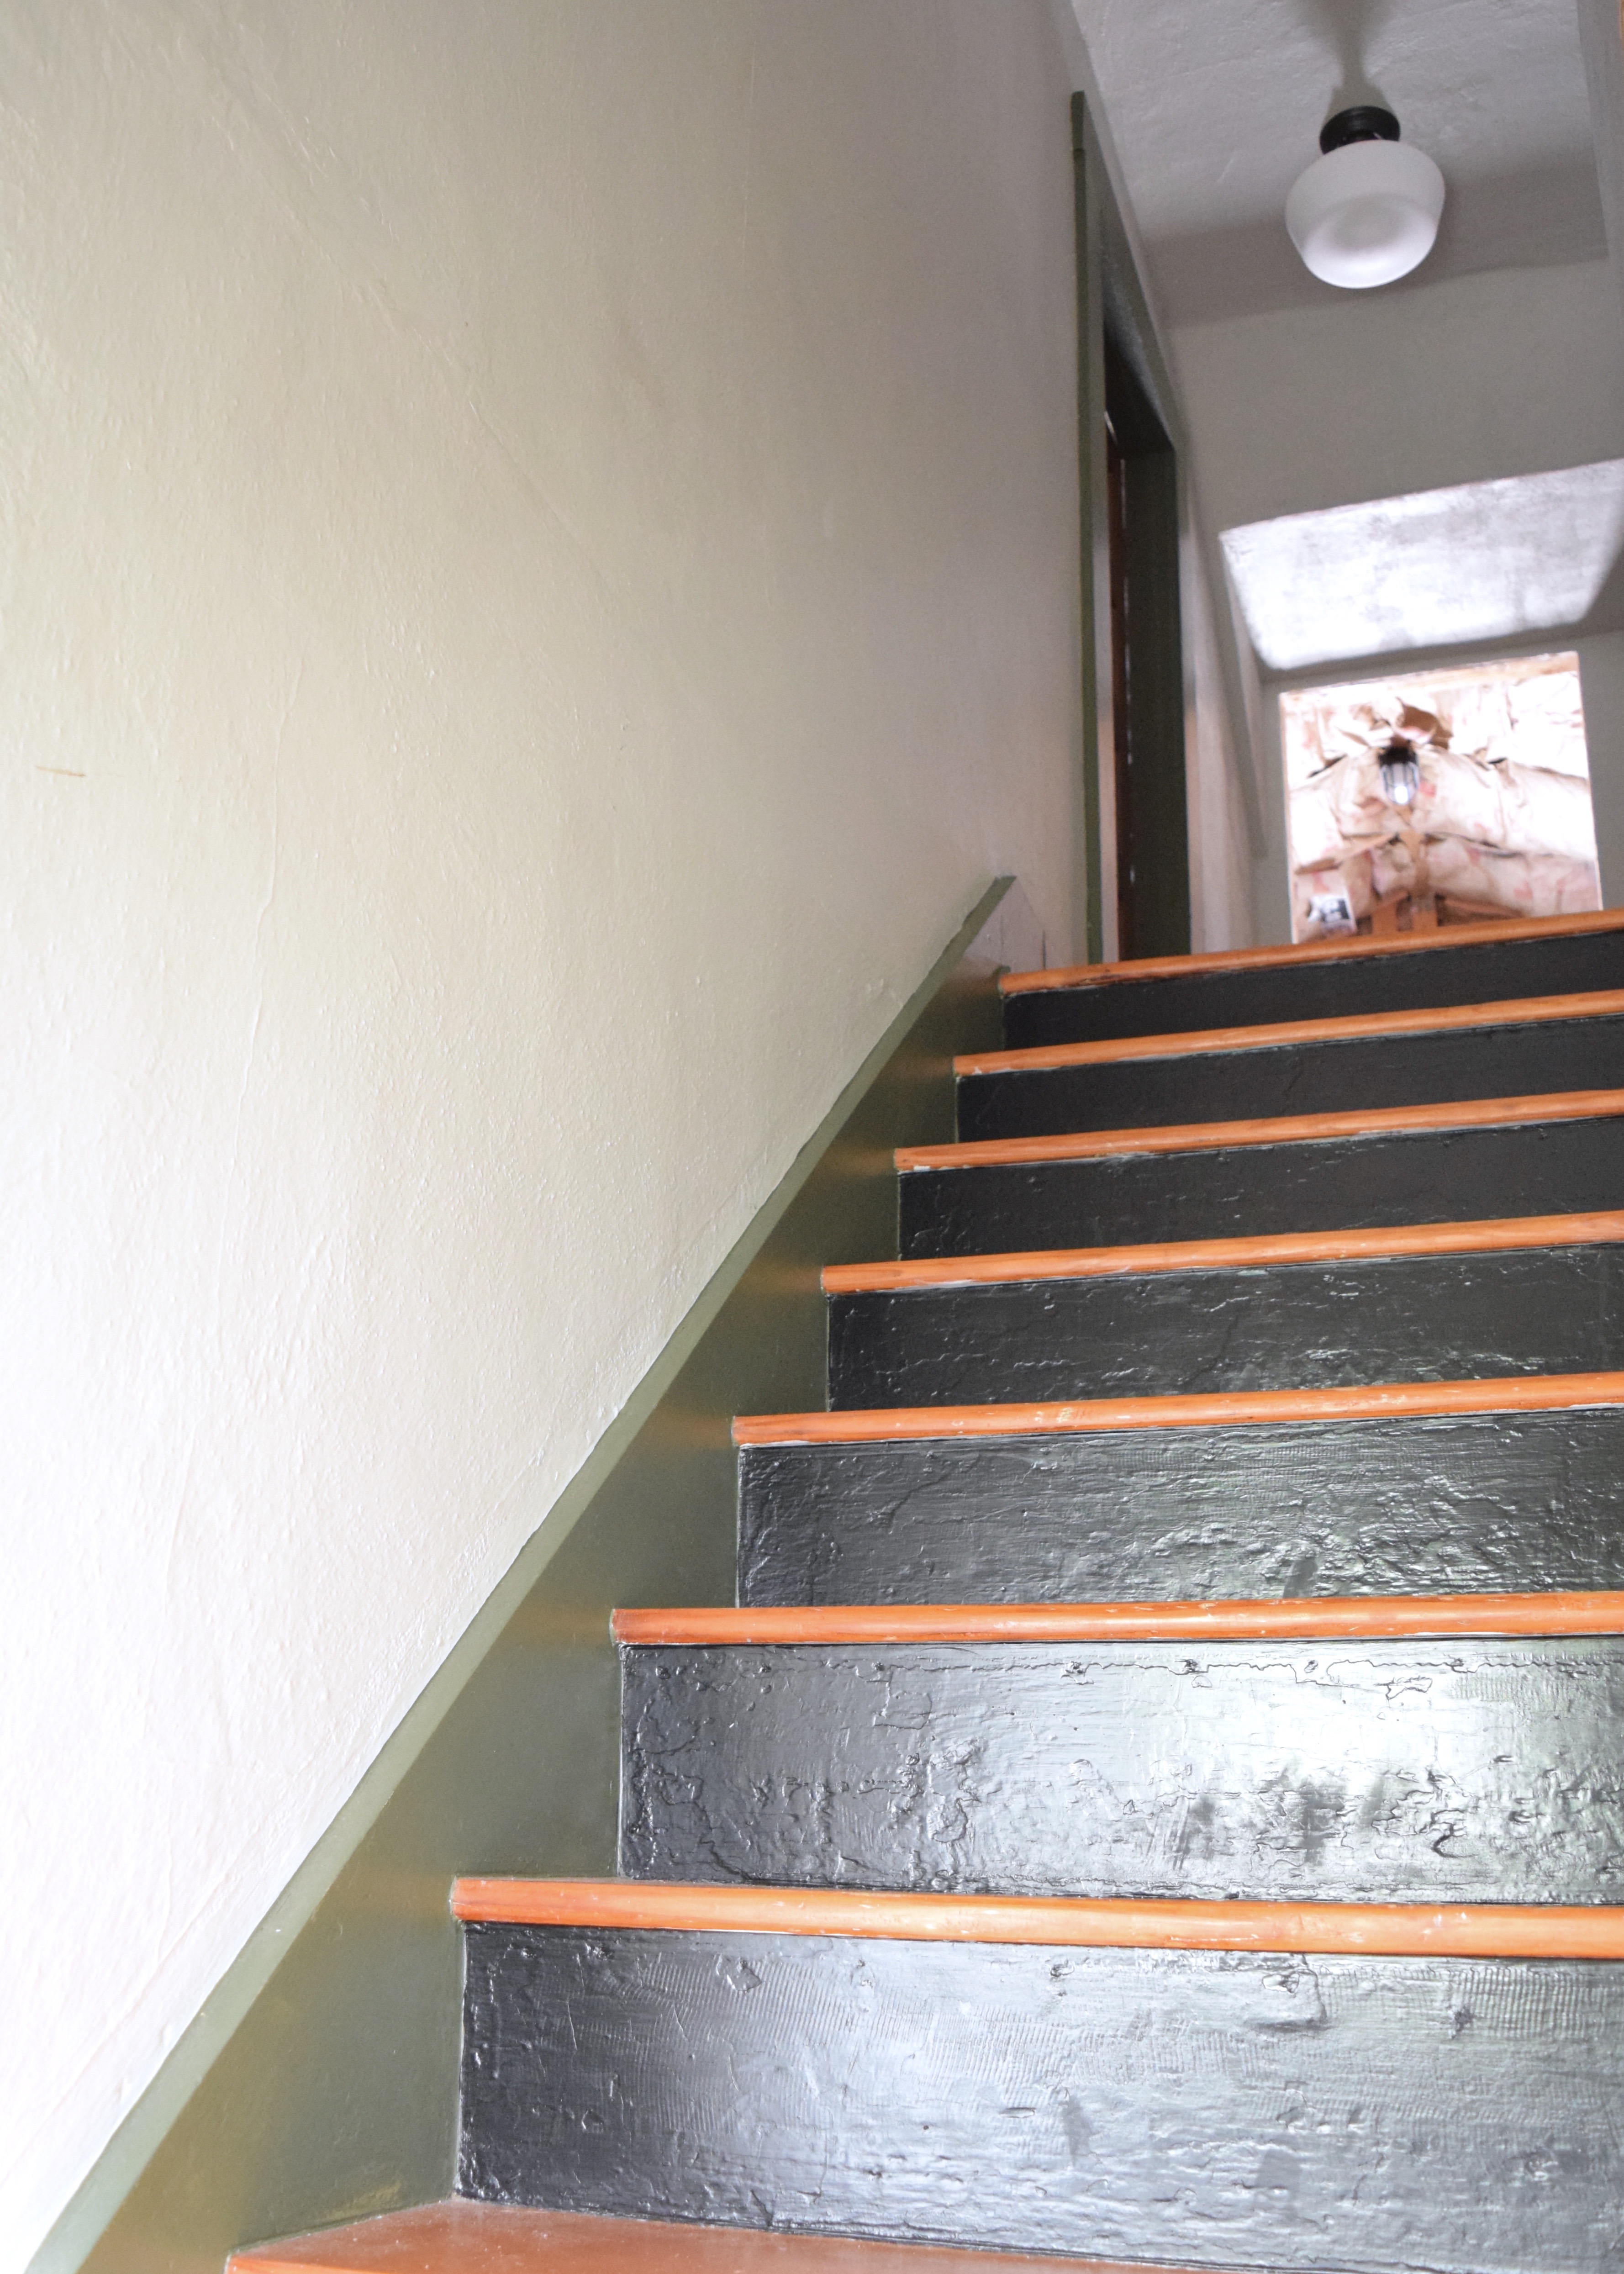
Once my Aunt and Uncle finished painting the walls it was up to me to paint the stair risers and trimwork. They kindly had prepped the trim for me, priming everything with my favorite no-VOC primer. The risers were easy. I knew I wanted them to be black and picked up a can of Benjamin Moore’s blackest true black which is called “Black” HC-190. I was planning on painting my kitchen cabinets the same color, so I splurged on the gallon rather than going for the smaller quart.
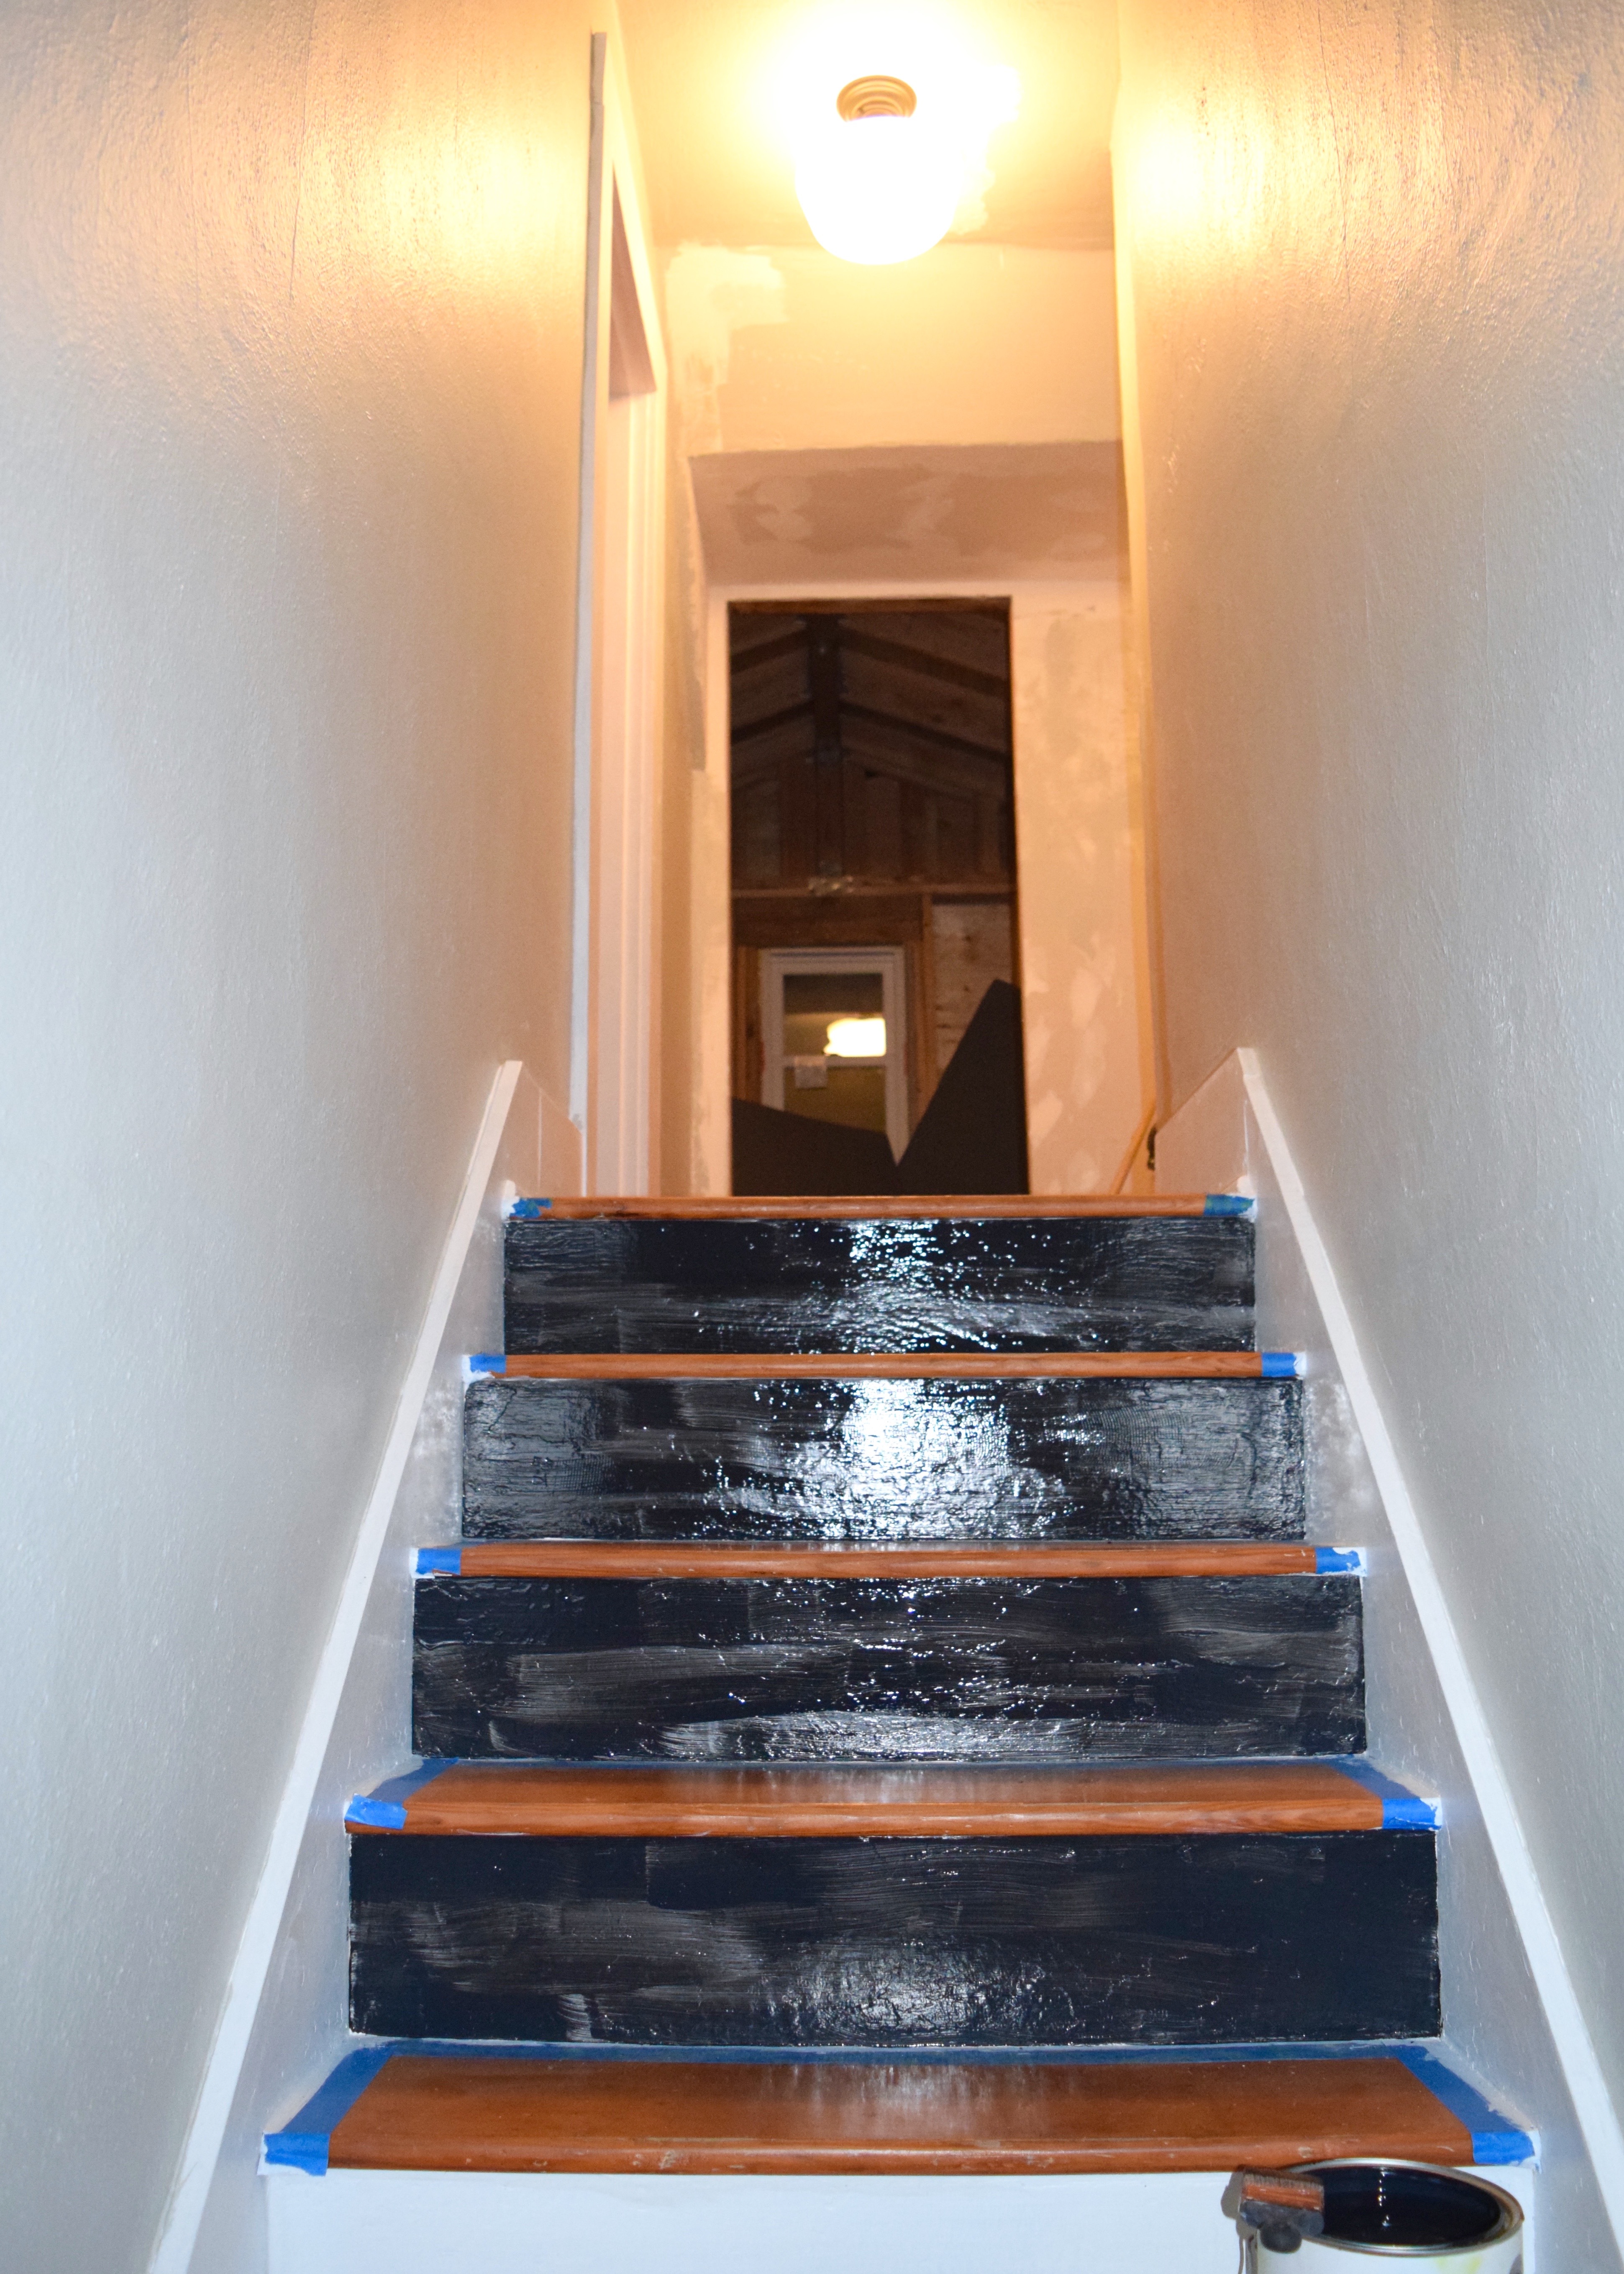
I started at the top of the stairs and worked my way down, painting each riser as I went. It was a quick and efficient process.
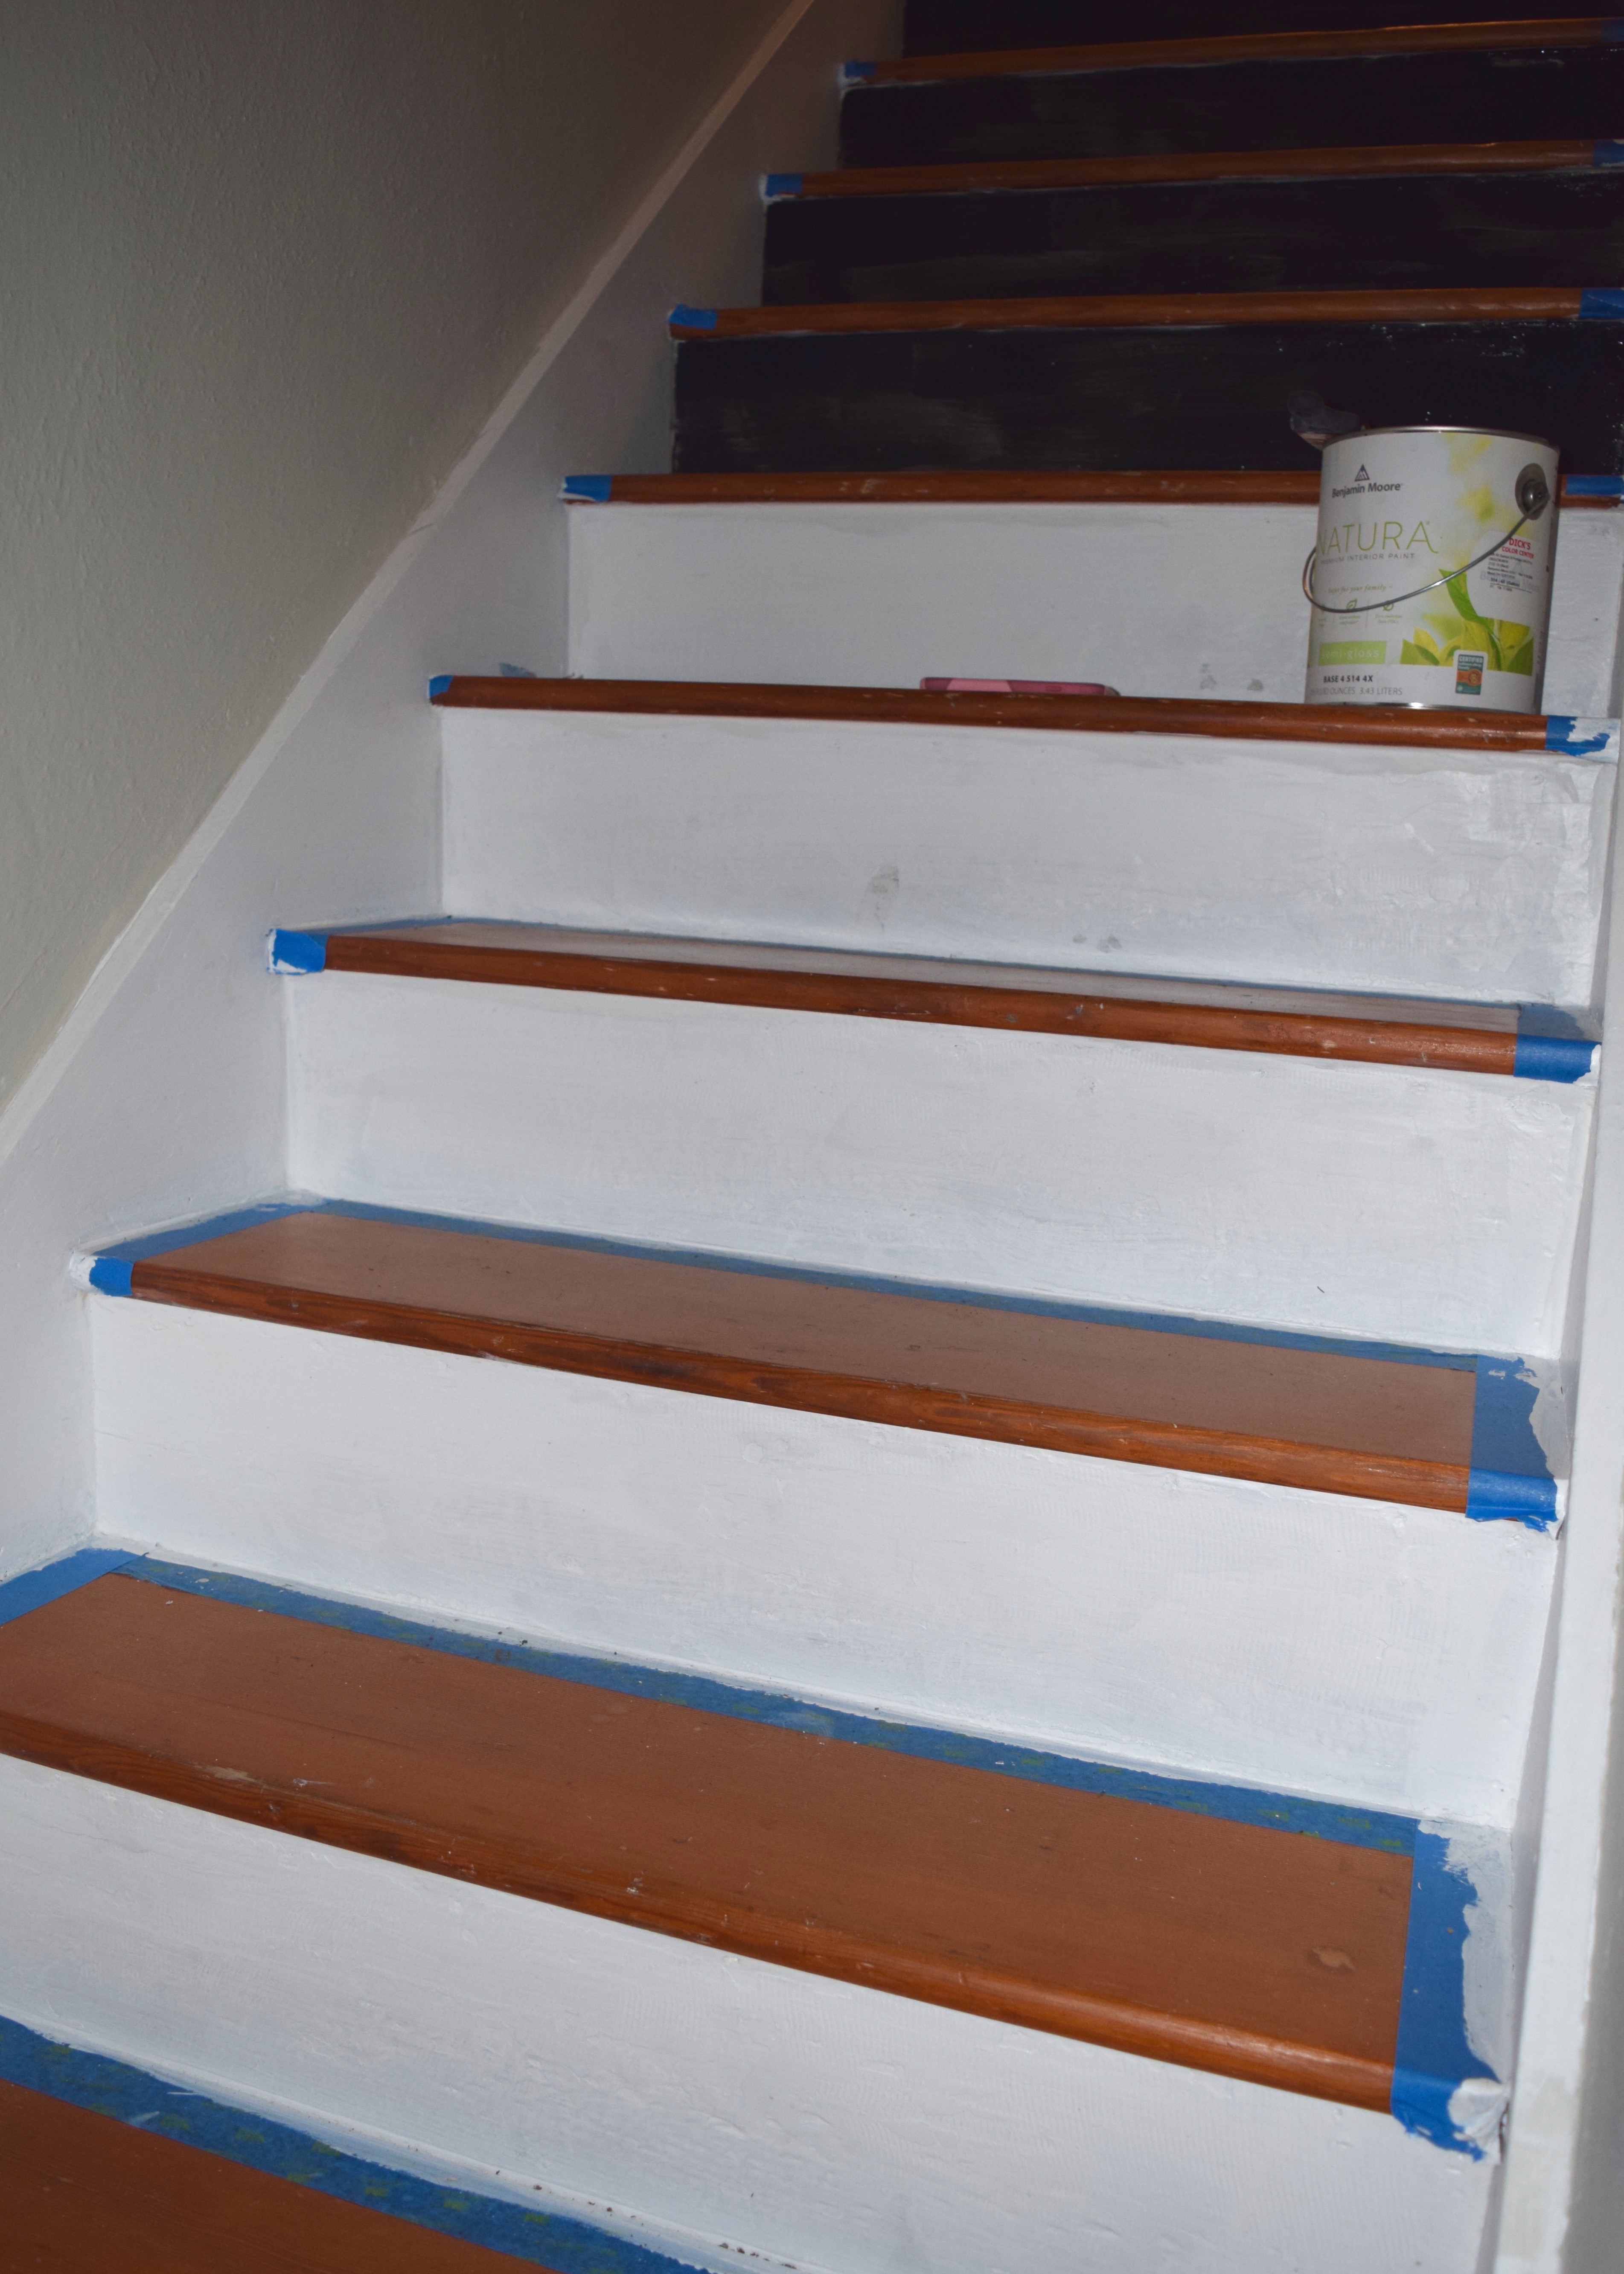
They were heavily textured risers from layers of old paint. I kinda love the look of it. It speaks to the history of the home? It’s like that glimpse of green I see near some of the upstairs baseboards that lets me know the floors were once all painted a dark minty-green: just a hint of the past!
The risers took just two quick coats and were finished quickly in an evening. The risers may have have been quick, but oh boy, did it take me forever to decide on a trim color.
The stairwell was kind of like a test room for the whole house. It was one of the first areas to be painted and those colors were going to wrap into the kitchen, living room, and possibly the dining room too. Which meant some decisions were easy and some exhaustingly difficult. Now I could have just painted the trim white and called it a day. But I didn’t want to do that. See white trim is great for other people, but I’m just not a white trim person. Subtle colored trim? Yes? Bold trim? Yes!! I’m also a designer which means I like to take risks and push things further than many people might feel comfortable doing. There is, however, something completely different about working on your own house rather than someone else’s. At work, it takes me all of 30 minutes to pick a whole house worth of paints for a client. I might have a contractor sample two colors in one or two spaces and then pick the better one in a 5 minute discussion.
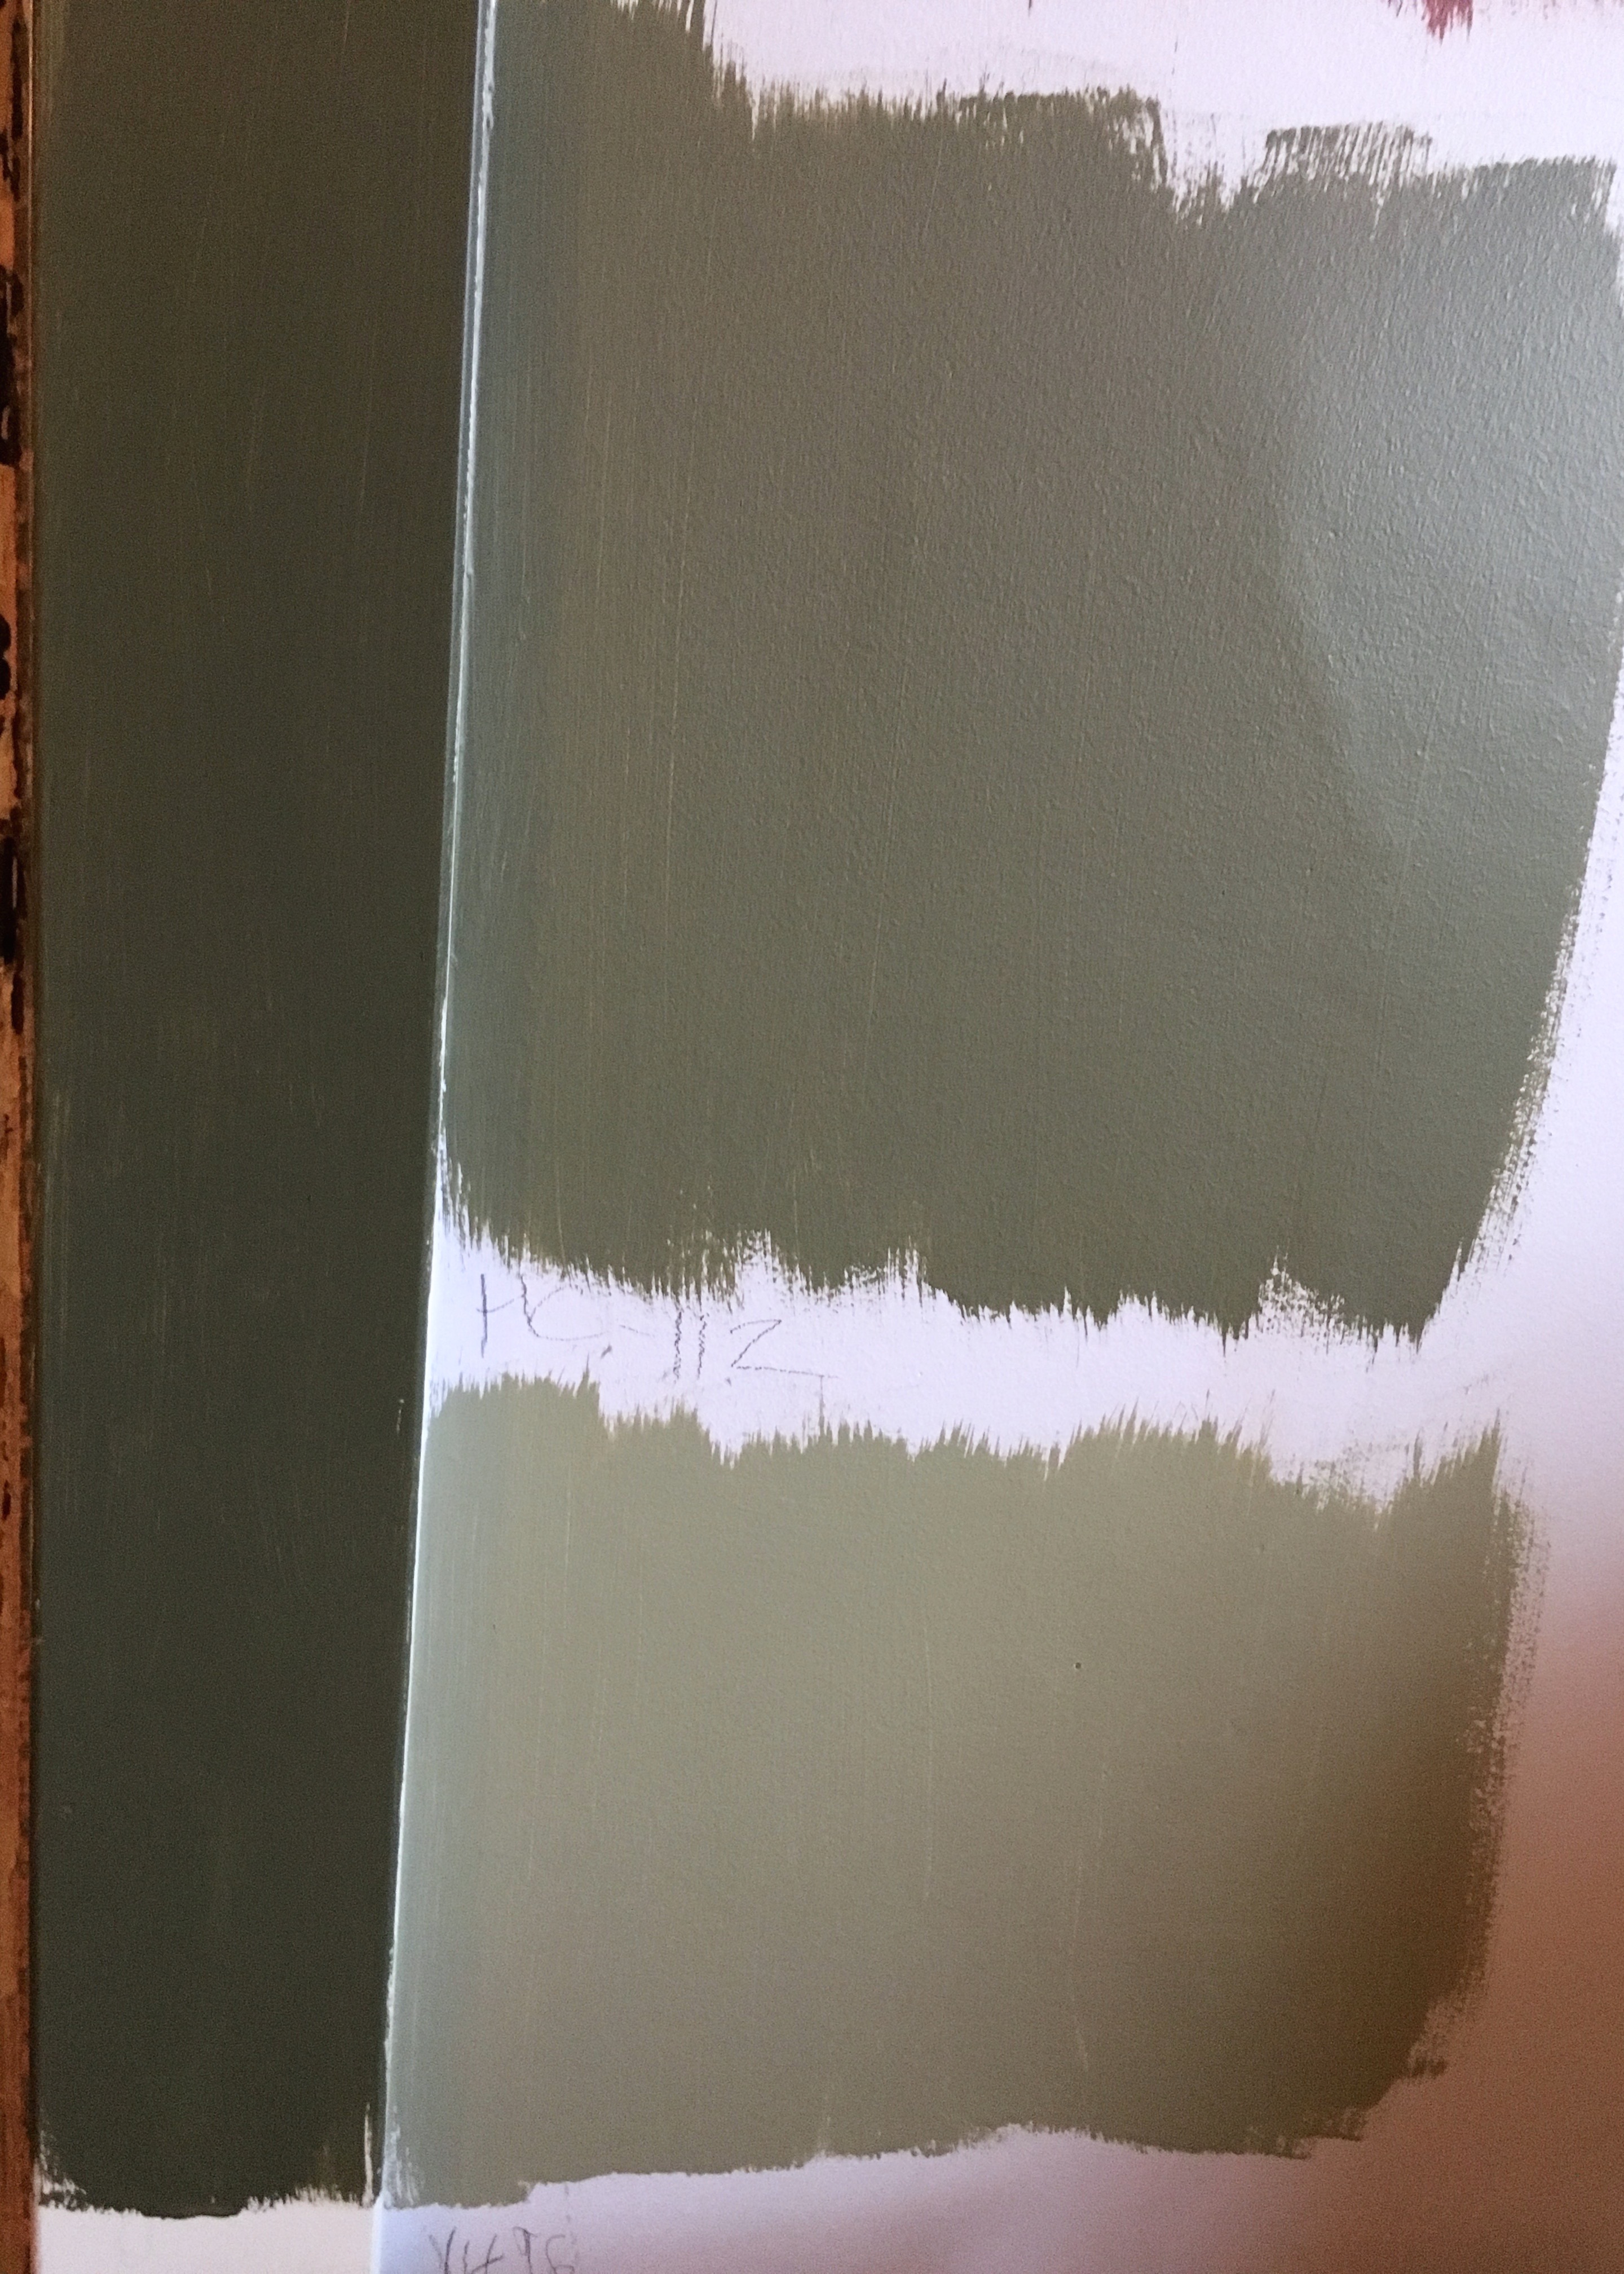
BUT OH MY GOD I FINALLY UNDERSTAND PEOPLE!! The indecision is REAL. It took me MONTHS of pulling colors, searching paints, staring at swatches, debating color options, etc etc etc, before I could finally just pick the color. I swatched two light green colors on the trim to see how they’d look with the wall paint. The bottom one was too light, but the top one was maybe, okay?
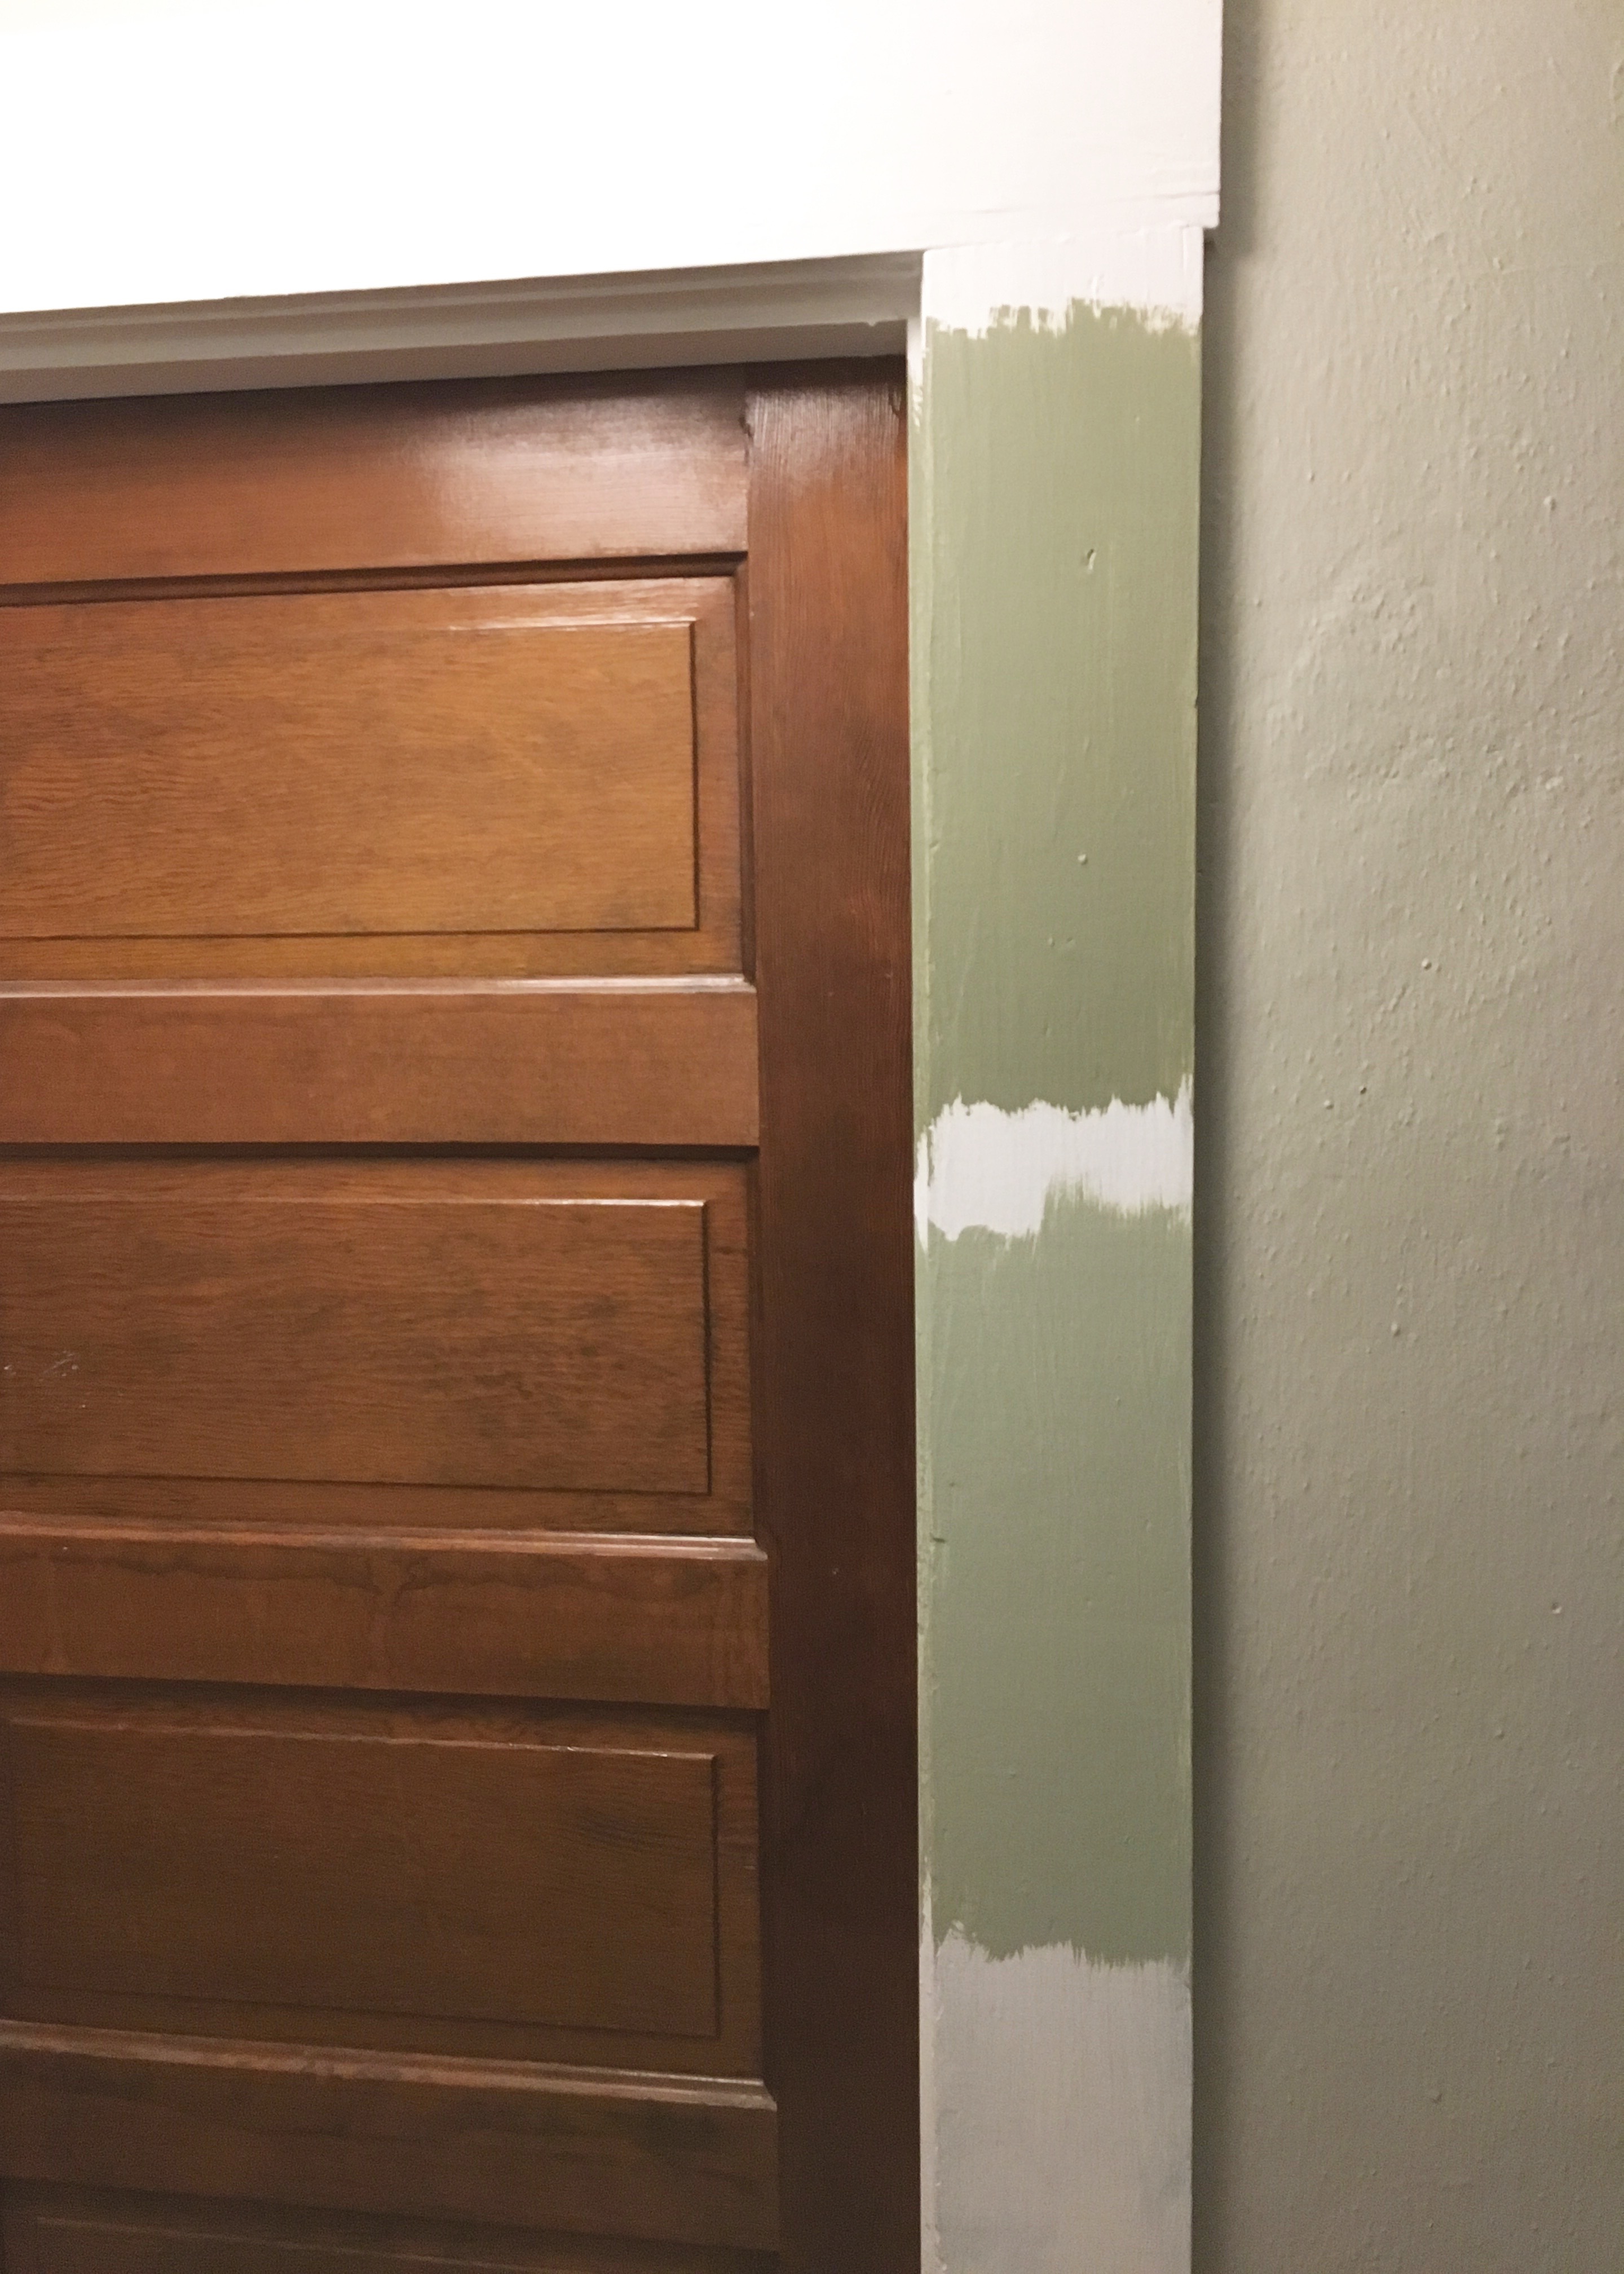
And in the end, it wasn’t even me who picked the trim color. I didn’t go for any of the colors I swatched. My friend and co-worker Kalie – who was my champion throughout much of this renovation journey, cheering me on, settling my internal debates, reassuring me that I was going to survive, and listening to my endless chatter on all things house related – suggested I use the same dark green paint color from my bathroom for the trim throughout the rest of the house. Hmmmm…. now that idea had traction.
I adore the green paint color in the bathroom off the kitchen. It’s just absolutely perfect and the right amount of saturated with just a hint of grey undertone enough to make it feel sophisticated, but not safe or boring. It’s Benjamin Moore’s Forest Floor 1498. It would look amazing on the v-groove paneled wainscot I was planning for the kitchen and it would definitely be a statement.
I decided to go for it and set about one evening painting the trim in stairwell. It went surprisingly well until half way through the first coat I reached down to the paint can to re-wet my brush and my phone tumbled out of my pocket, yanking out my headphones from my ears, and landing in the wet can of paint! Ahhhh!!!! I watched in shock for a few seconds as my phone slowly sank into the paint, before my brain turned back on and I quickly dove my arm into the can of paint and pulled out my phone, now covered in a thick coat of green!
The only thing I could do was wipe off the paint with my paint brush. Benjamin Moore paint is THICK! When that was done I was able to get a damp rag and clean off the rest of the paint. I put some paper towel over my charger and stick it in and removed it a few times and the phone is still working fine today, so whew! Though paint definitely clogged up my speakers, so those are very muffled now.
Back to painting the hallway though. Two nights of work and and it was complete! Or… as complete as a stairwell that’s missing a door and needs some other work done can be! But hey, a million times better than the original look is still a million times better. Right? Yes! Logic. I mean, the cats certainly were in to it.
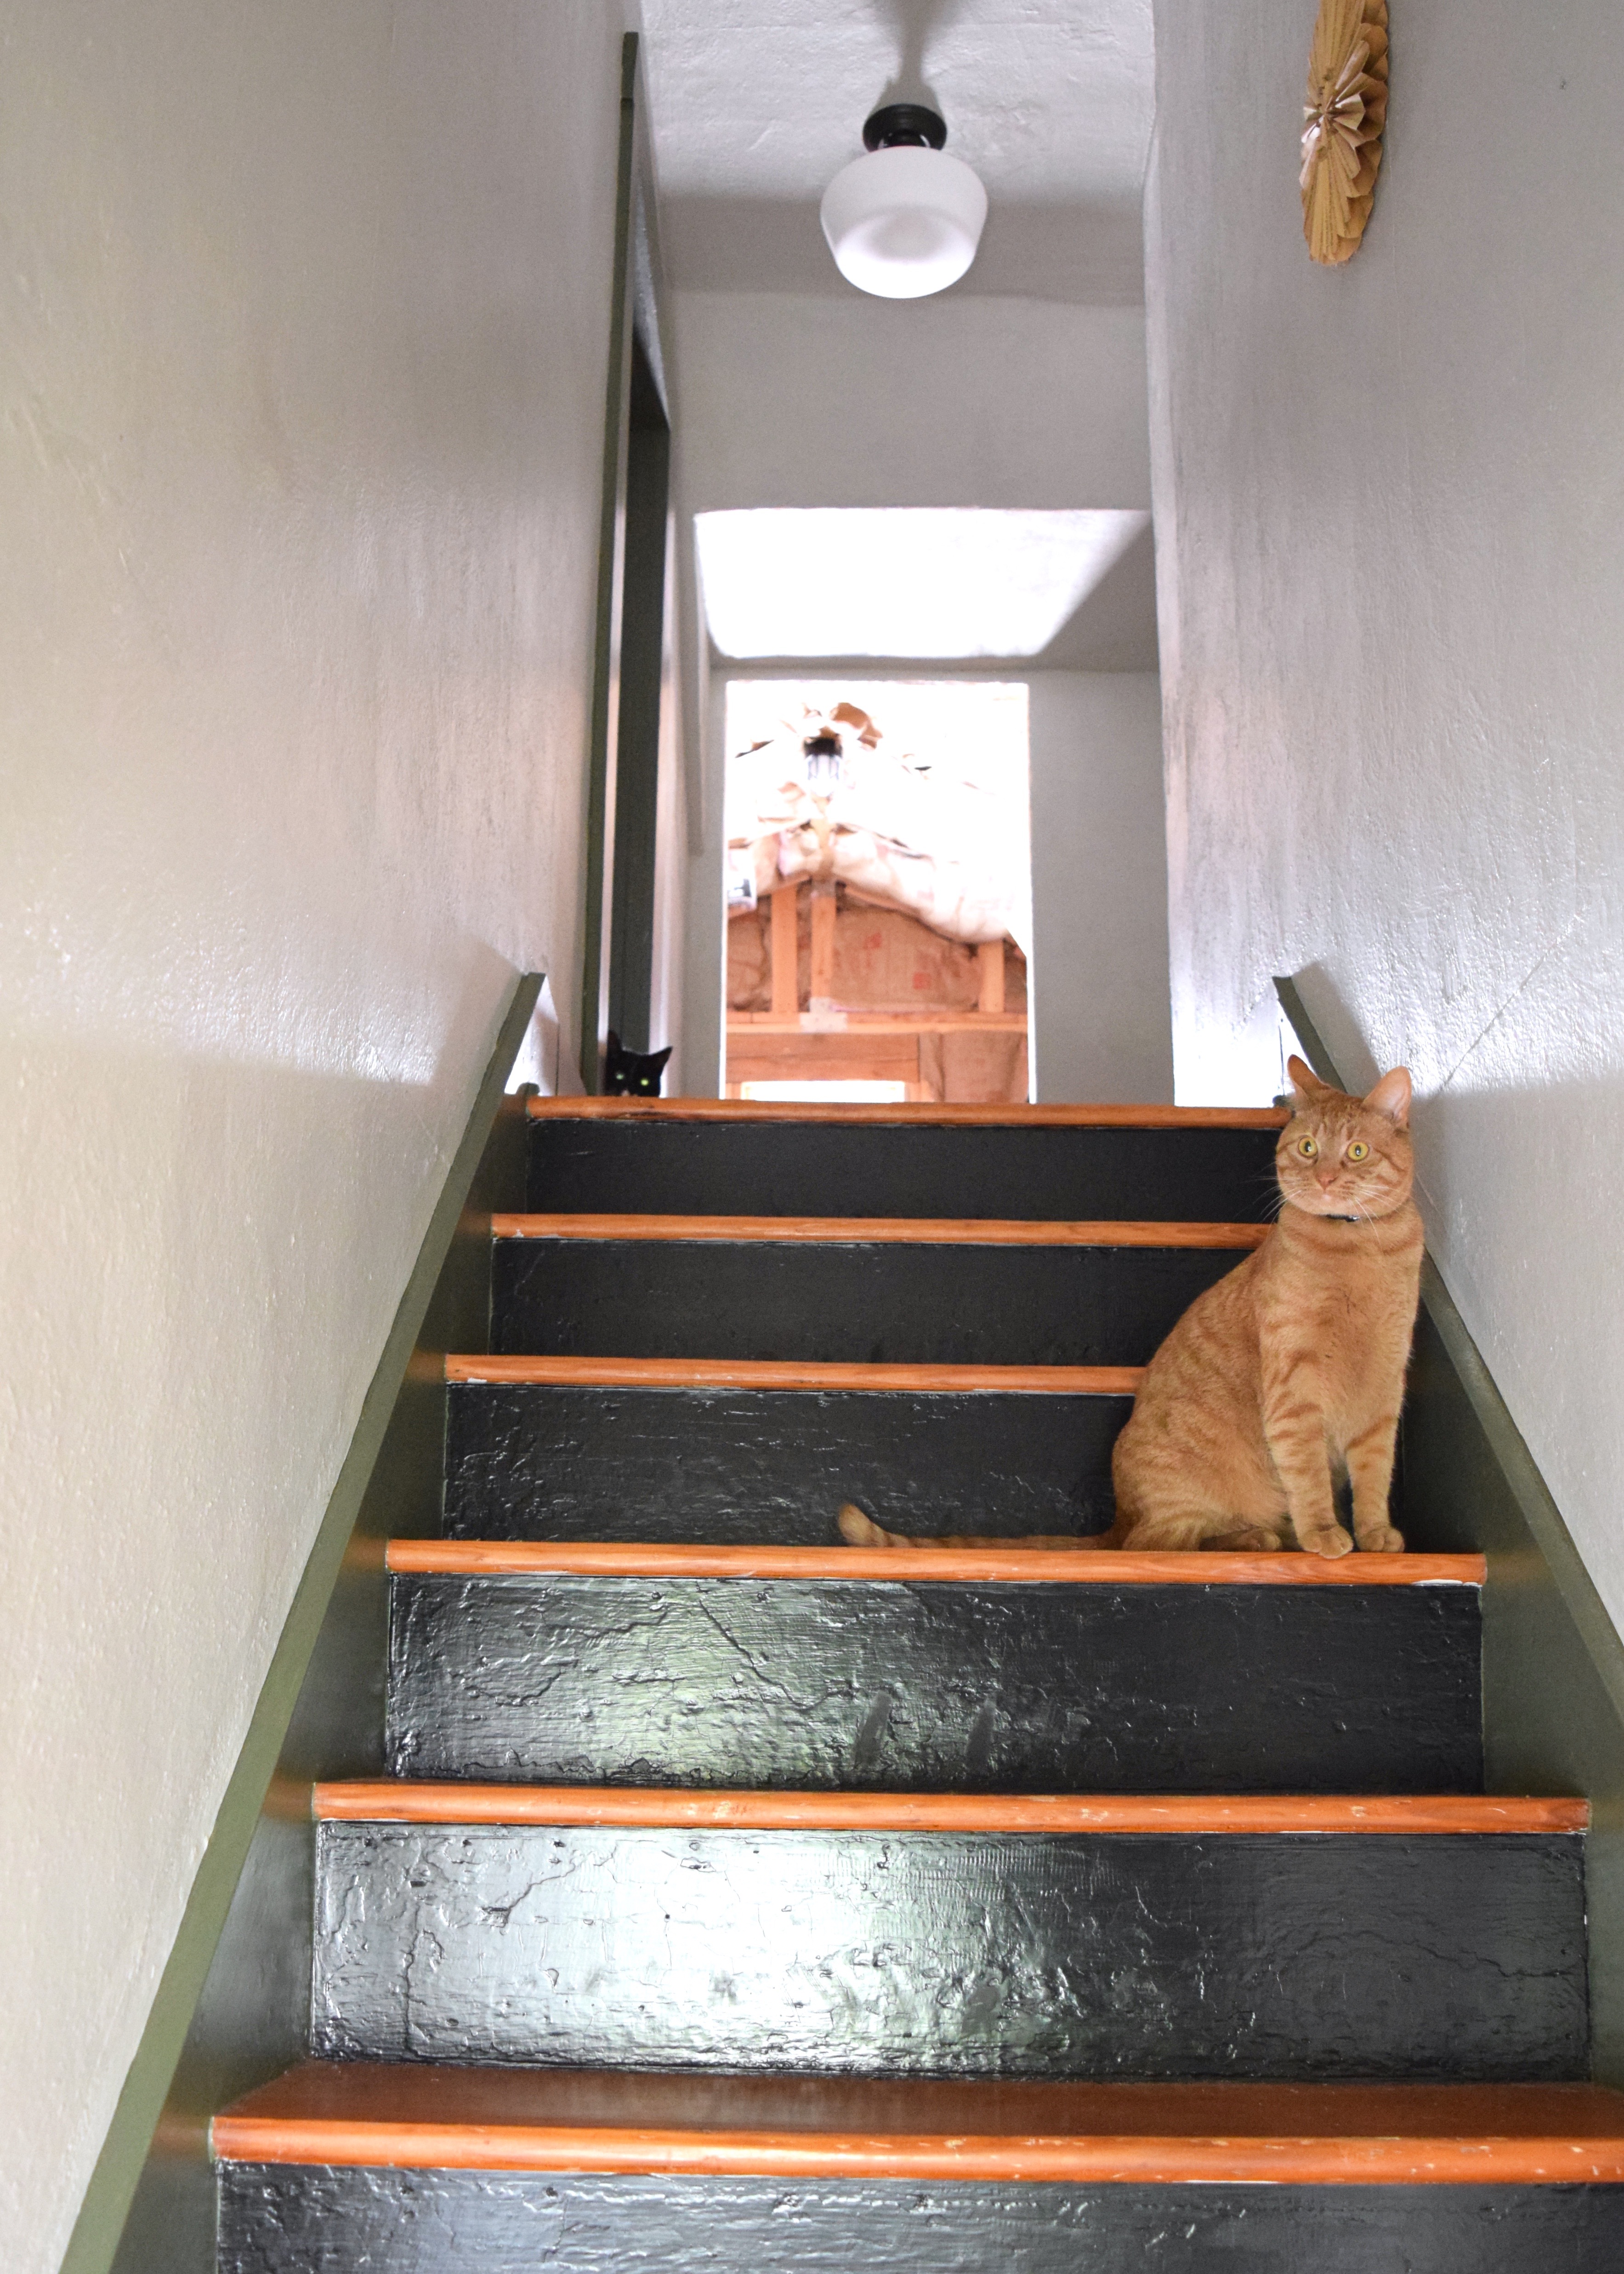
I love how the light pours in from the new window in the dormer to light the upper landing! The taupe tones of Brushed Aluminum really help to bounce the light around too.
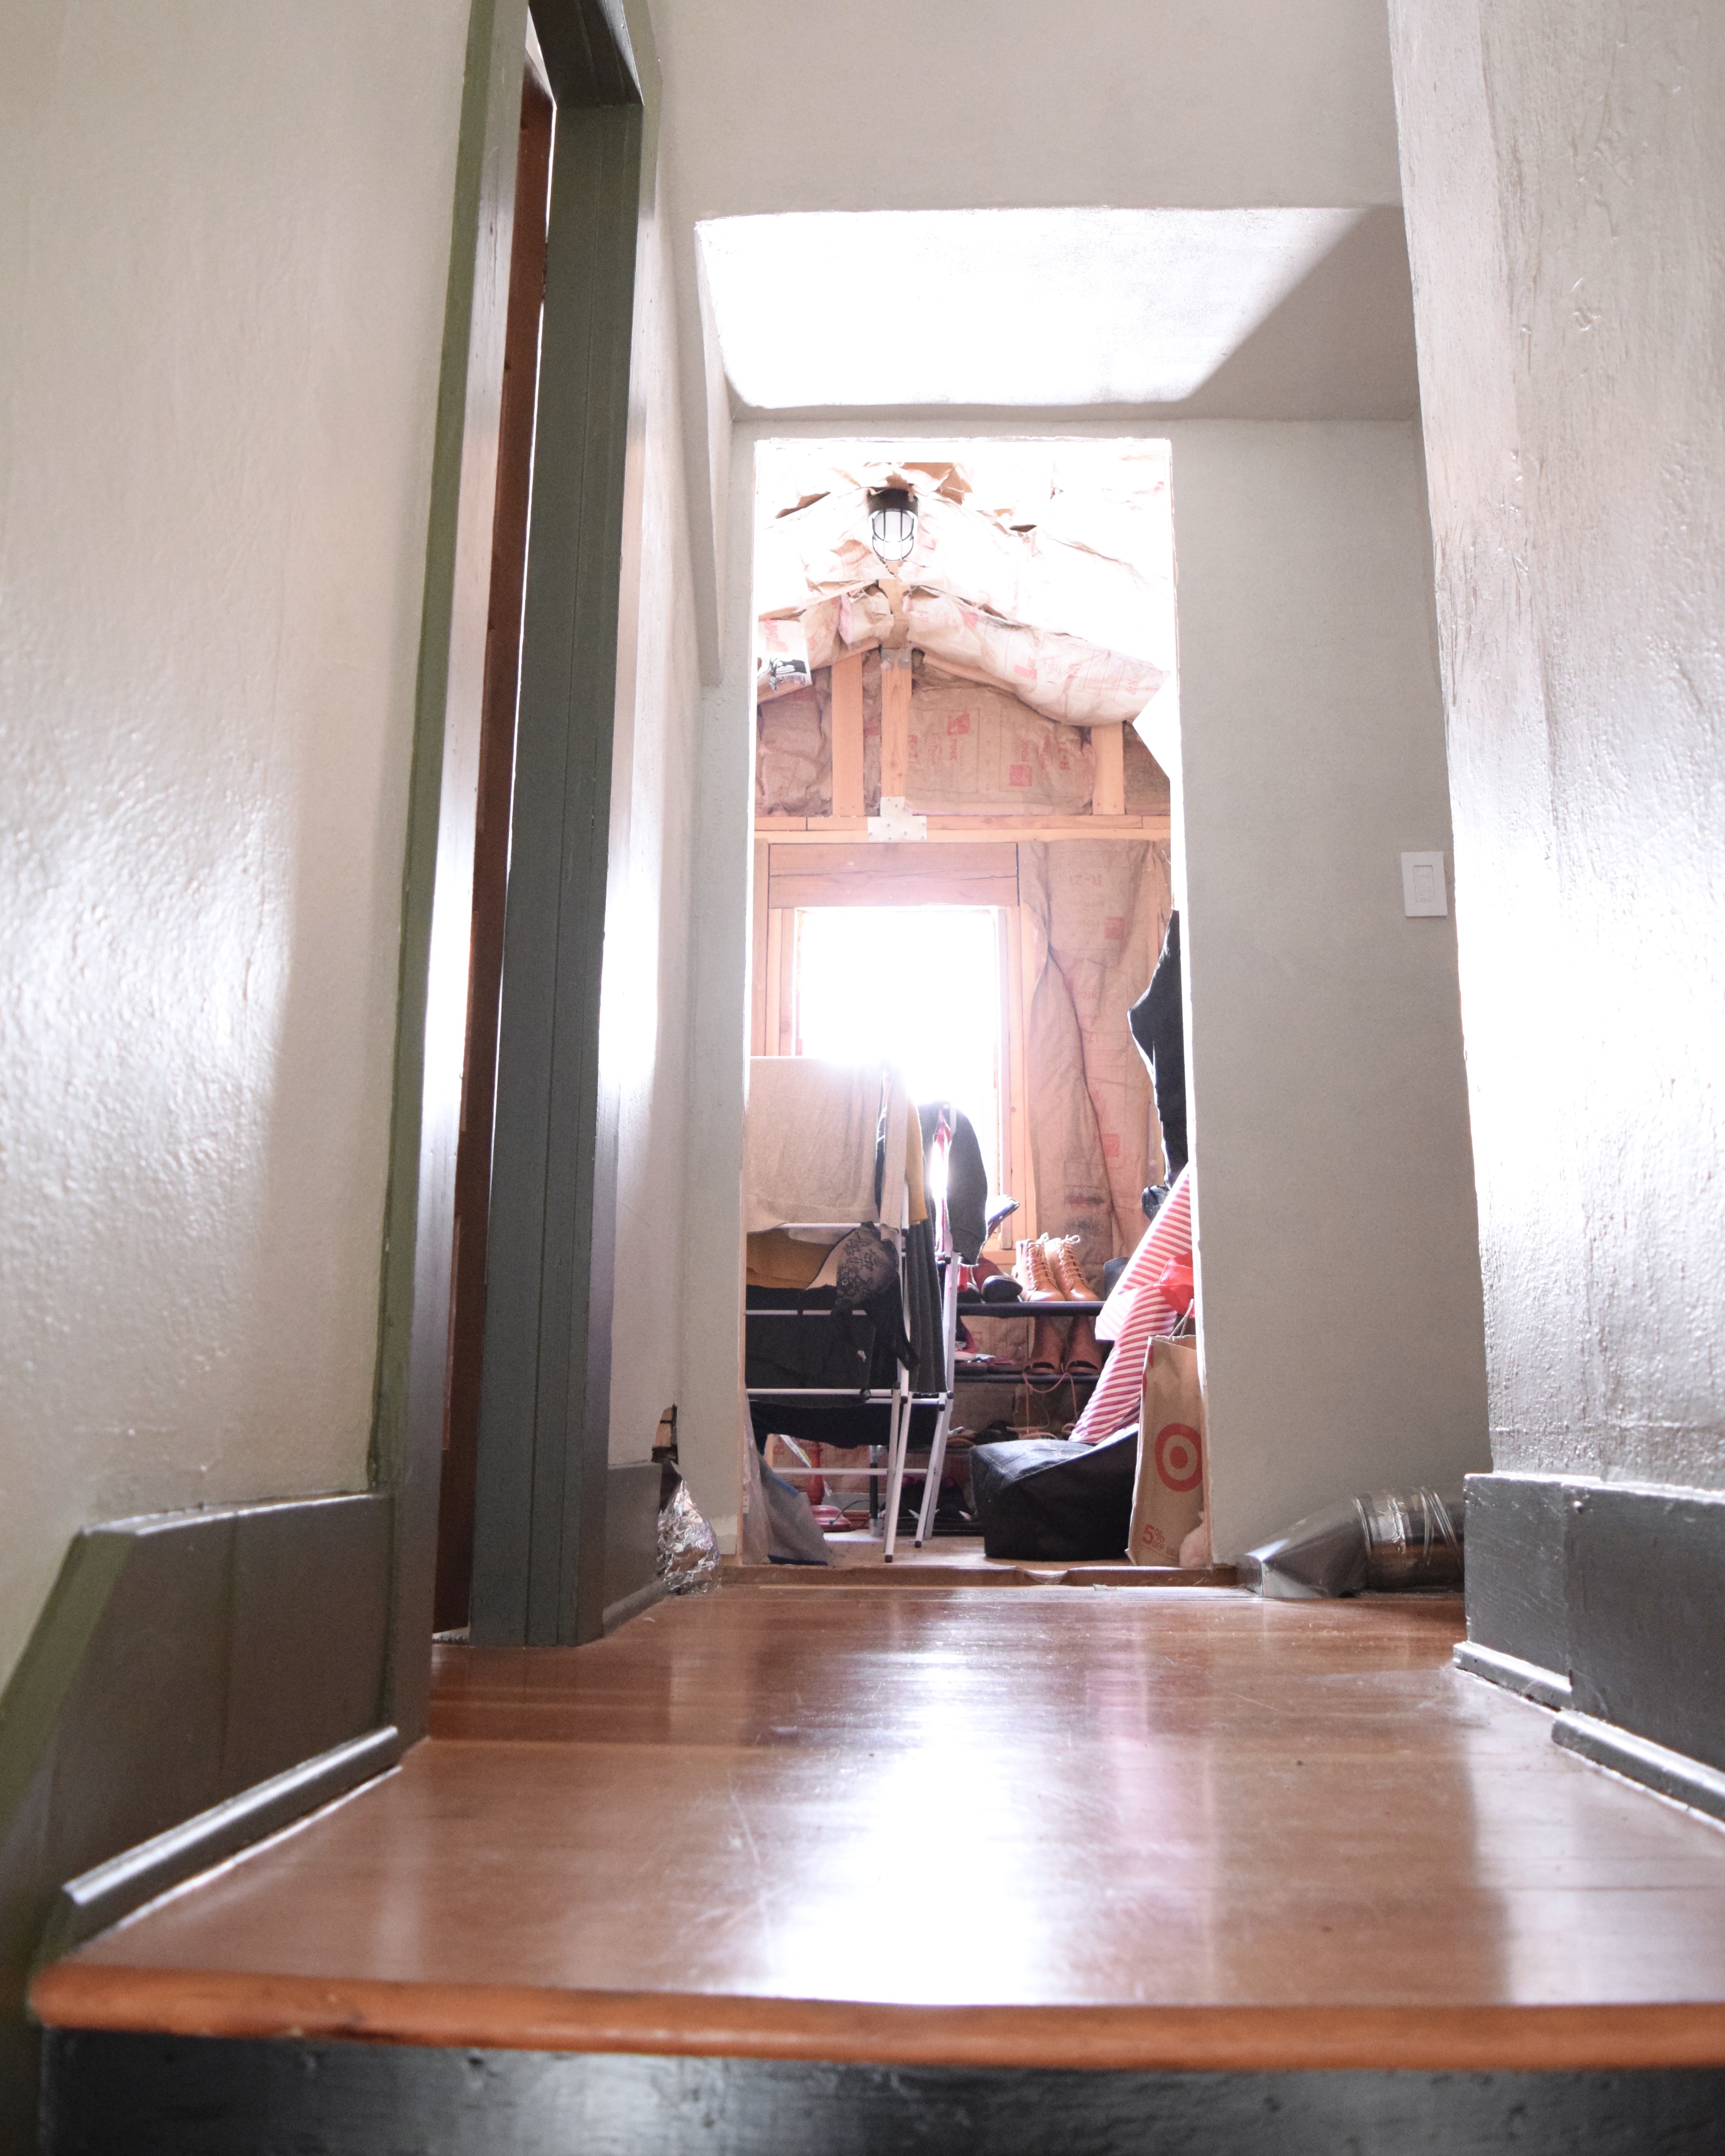
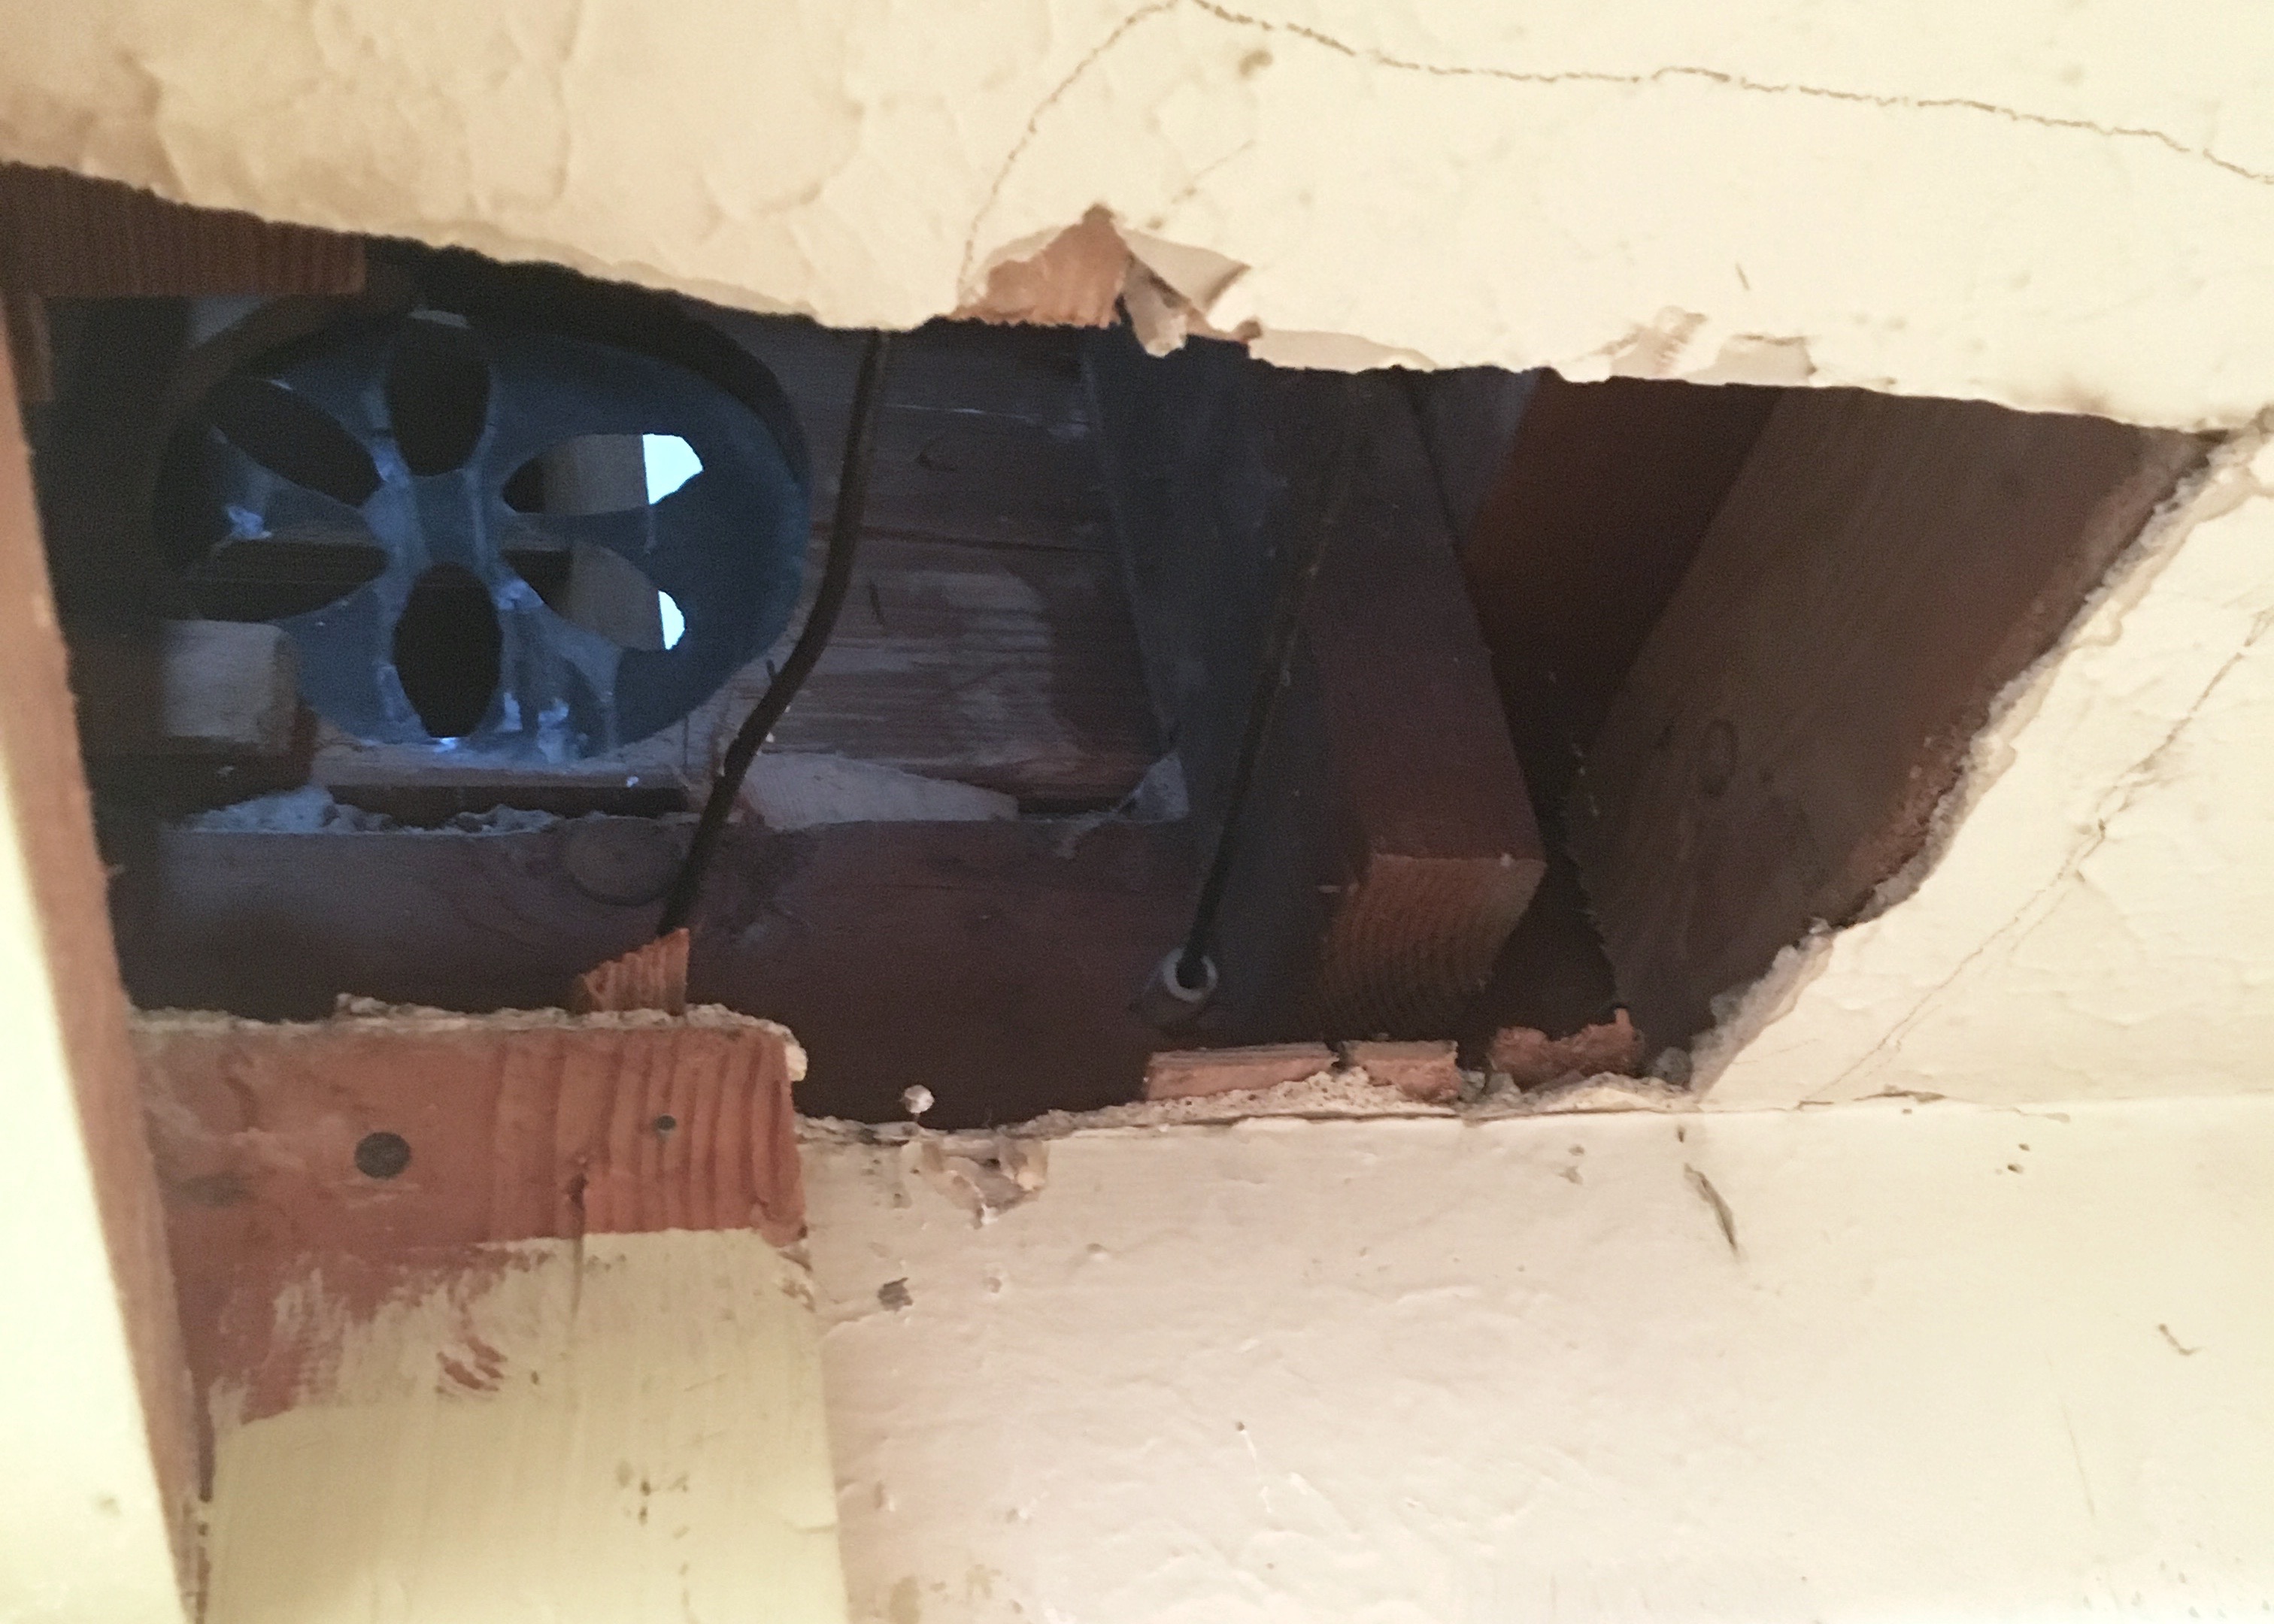
You can see above that there are still some… less that beautiful things that need some attention though: the ducting.
Rerouting the HVAC
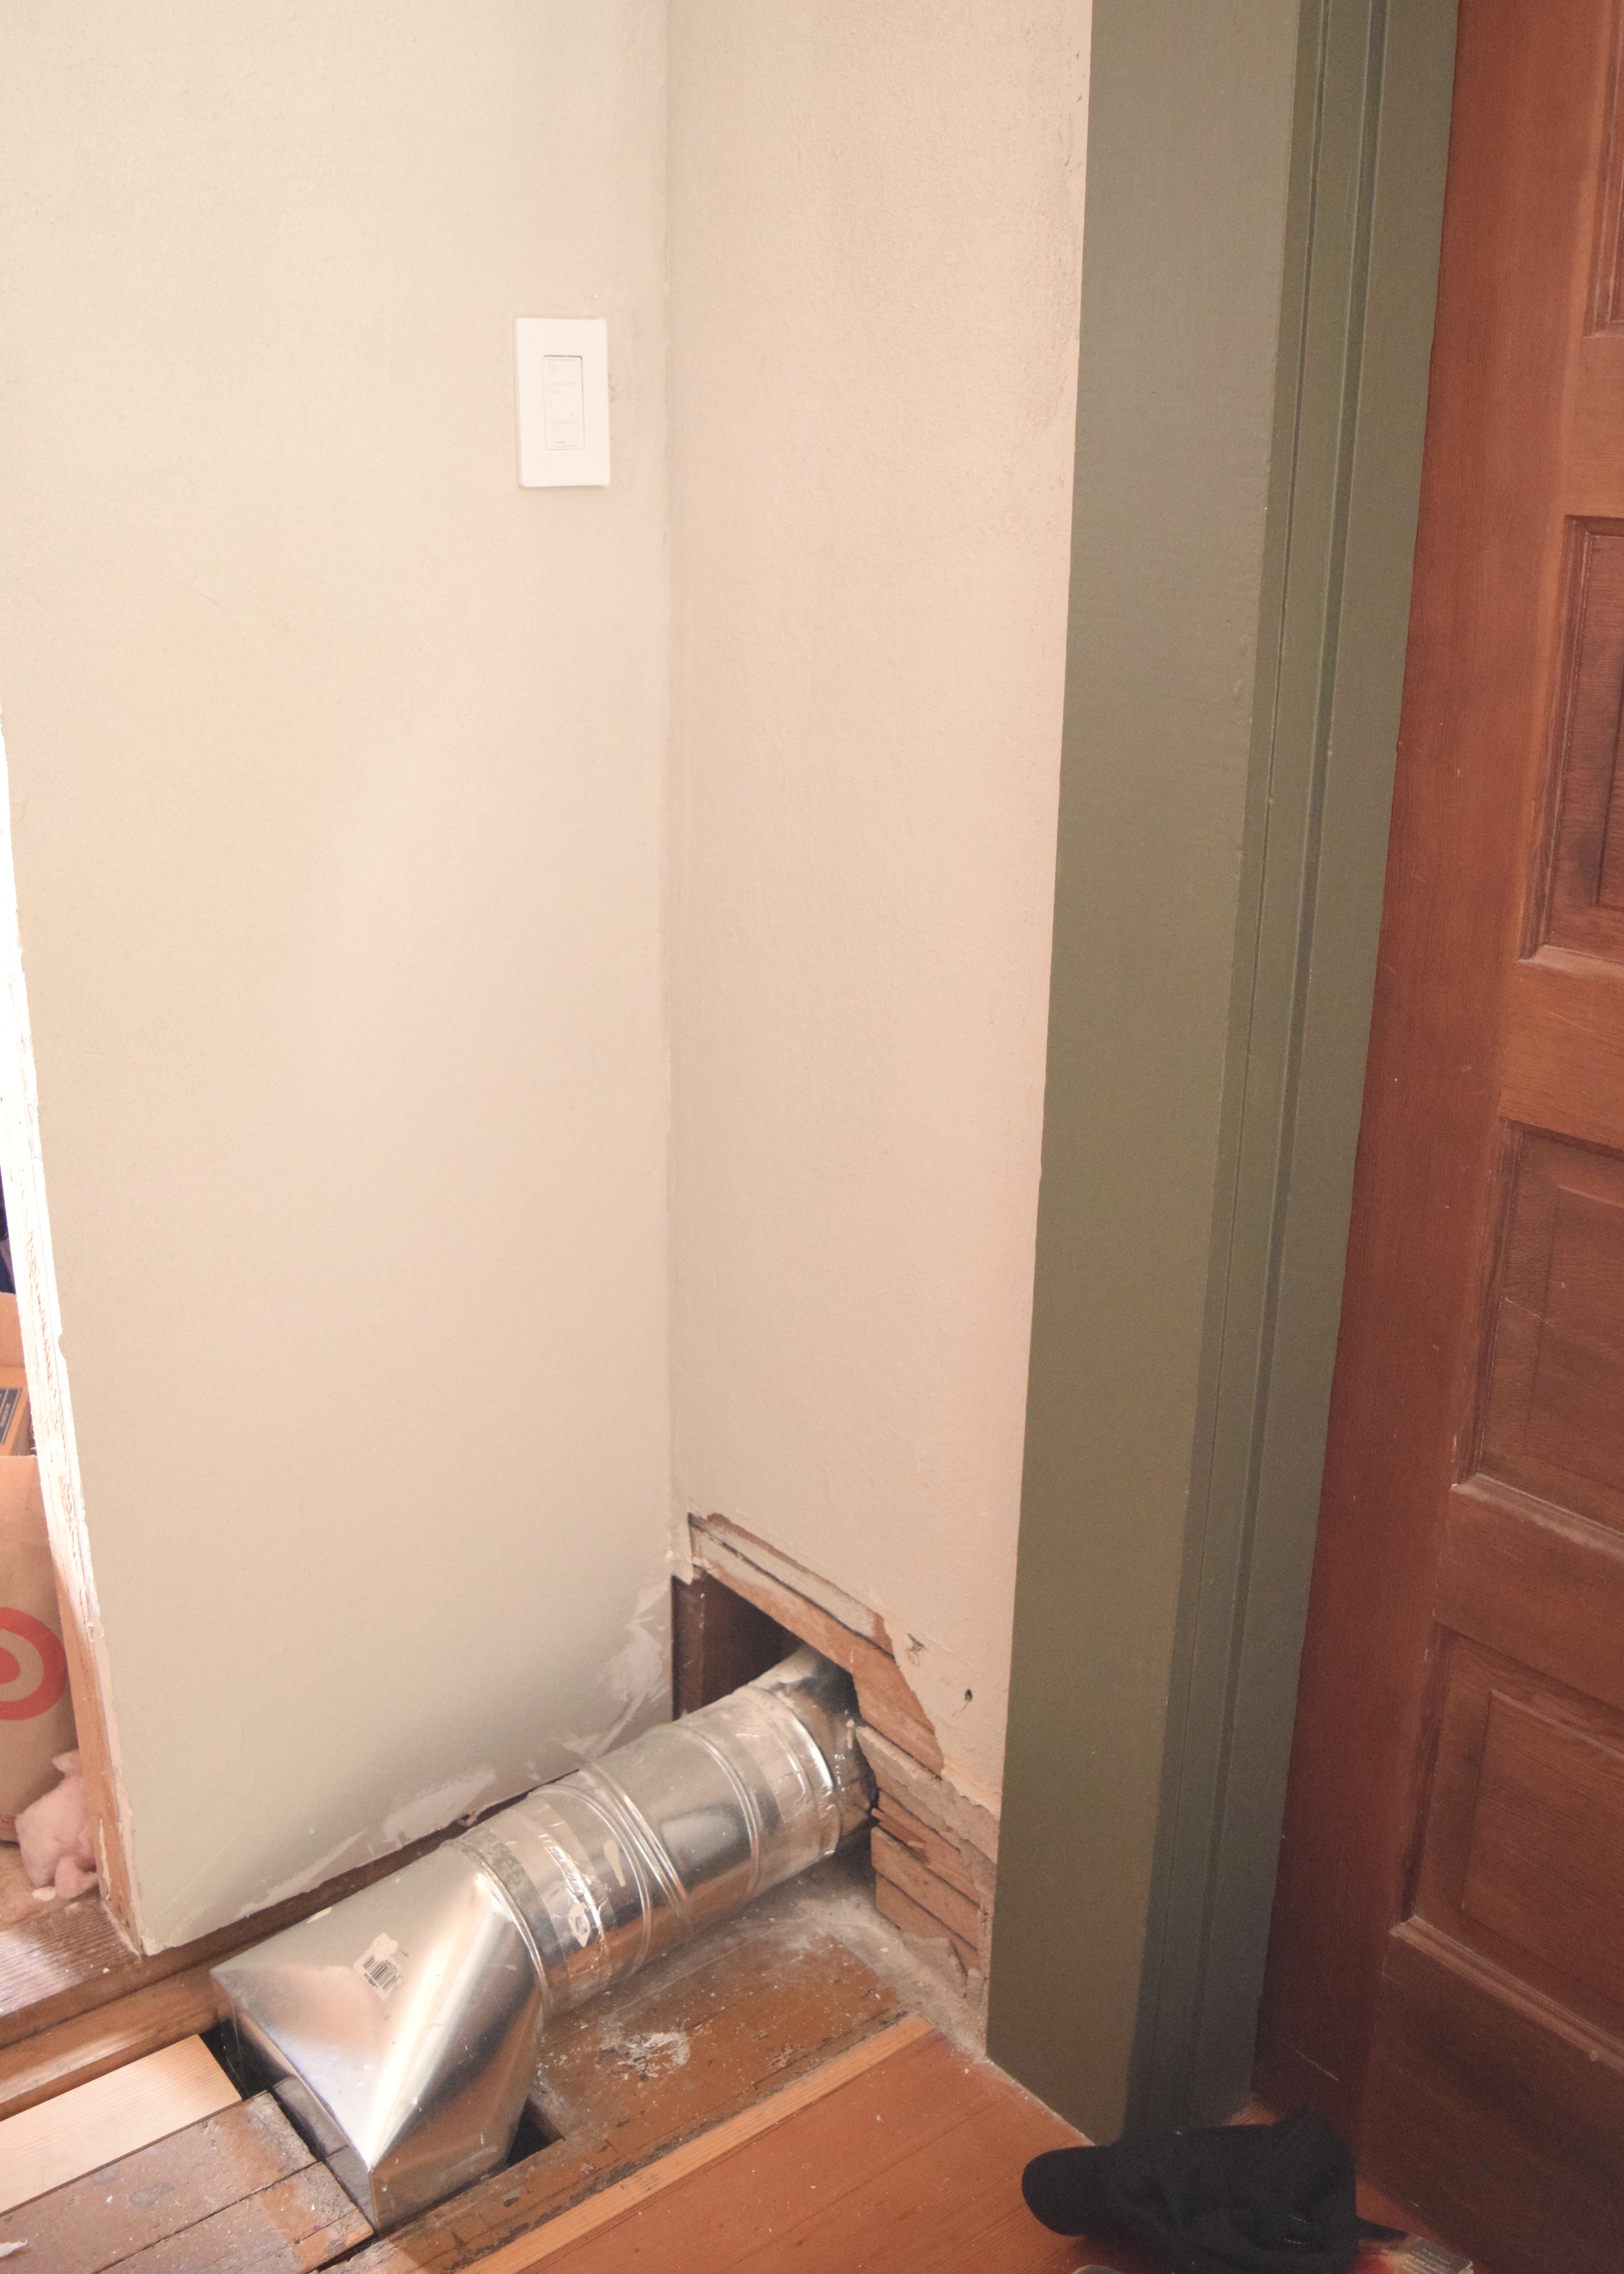
It wasn’t just paint that needed to be worked on up here either. Remember that box that was on the wall by the old crawl space door before the dormer was added? Well it contained the ducting for the space. Just a MINOR detail neither I or our contractor bothered to think about before demo.
Well it had to be changed for obvious reasons. Bronwyn was in the front bedroom and still needed a heat source and I wanted to be able to walk into my future upstairs bathroom without tripping over ducting and falling on my face. I pulled an HVAC permit online and got ready.
To prepare for a project like this (one where I have absolutely no idea what I’m actually doing) I followed a series of important steps. Step One: spend a vast amount of time sitting on the floor of the Home Depot ducting aisle and googling videos of HVAC work and diagrams of ducting. It’s a great use of data. Not! Step Two is to buy supplies to complete the ducting in two different ways in two different sizes of duct diameter. Step Three: repeat steps one and two until you’ve spent countless hours and at least $500 on supplies at Home Depot. Step Four: stare at the problem for a least 20 minutes. If you don’t blink first, your project will resolve itself, right? Step Five: go next door and find your neighbor, make them weigh in on the best way to about fixing your ducting issue. Step Six: ignore your neighbor’s advice, what do contractor’s know anyways? Step Seven: procrastinate. Step Eight: suck it up and try something.
Once I finally completed step eight, I put on my big girl panties and demoed the T, leaving just the duct coming up vertically from the floor.
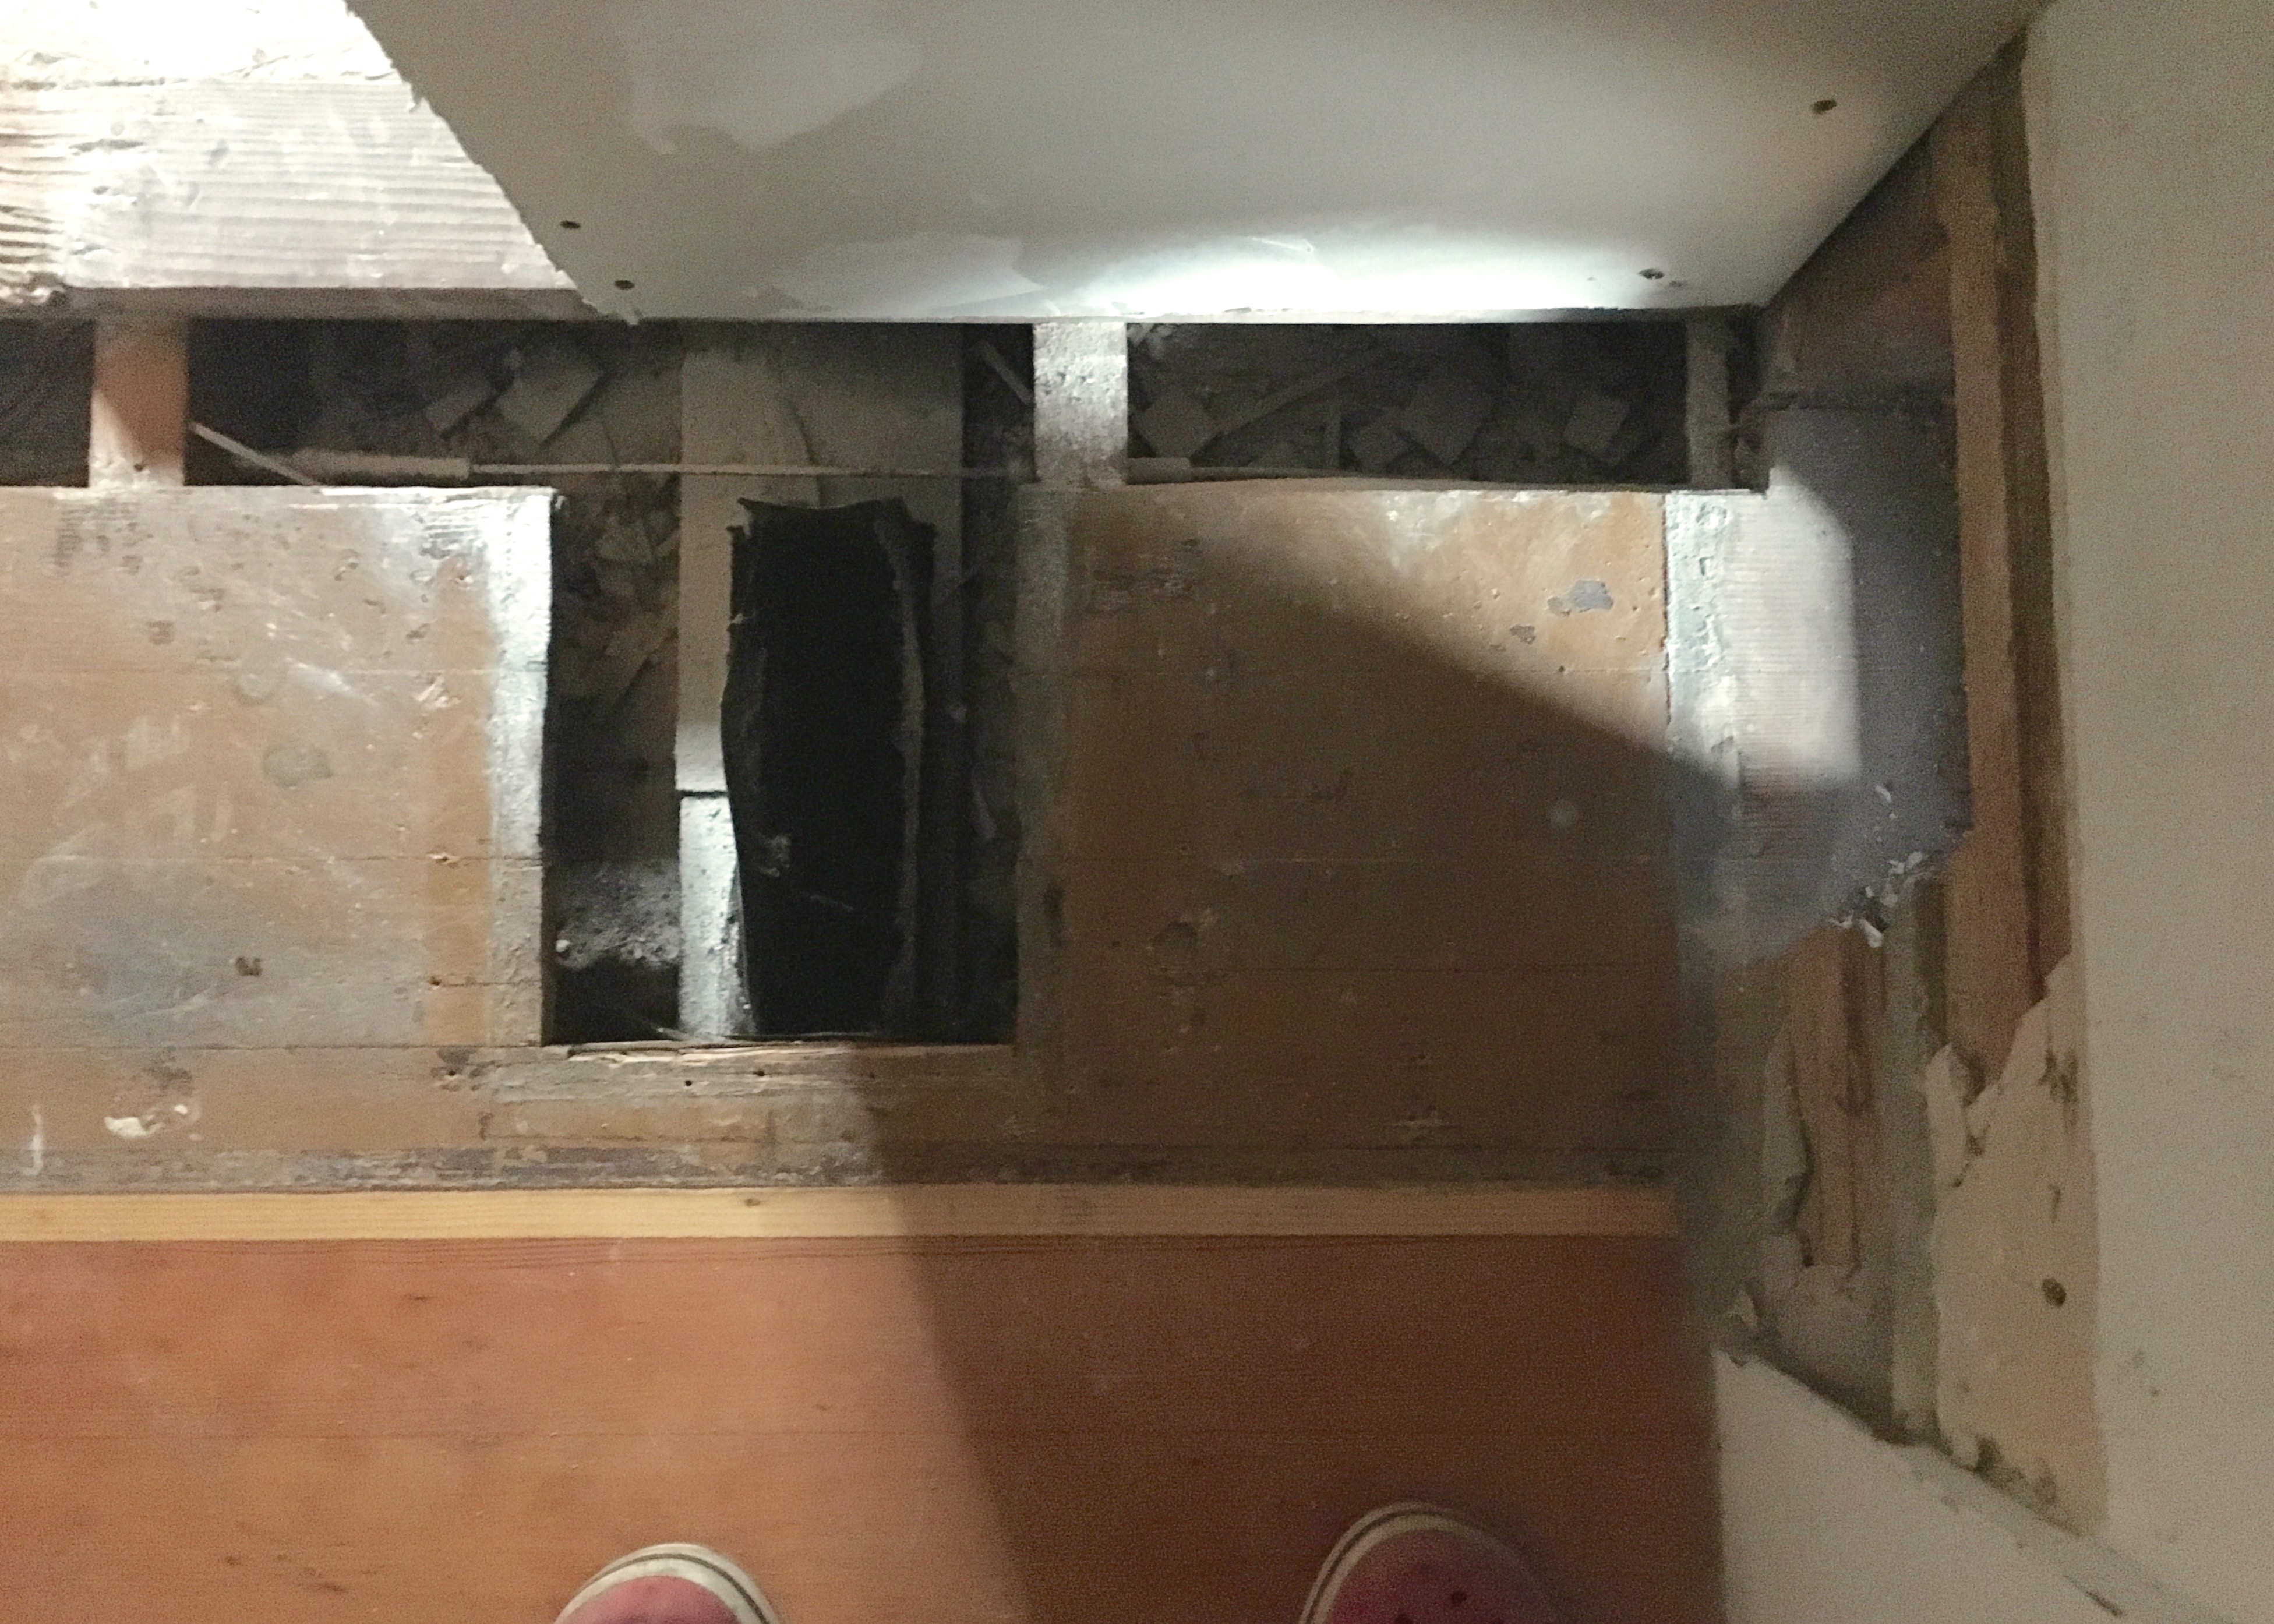
I needed to connect the ducting that came up in the wall between my first floor bedroom and my closet to the front bedroom vent and then to connect the duct coming out of the second level floor to the back bedroom vent. The roofers / dormer builders had cut a hole at the top of the wall of my closet to allow access to the vent I needed to connect over to the front bedroom and it looked great. Just kidding! It looked terrrrrrible. Here is a very close up picture I took lying upside down in the closet hanging out like a crazy person half balanced on ladder.
I then used this 12 foot of insulated 4″ flexible ducting to connect the ducting in the the wall of my closet on the floor below, span over the width of the closet underneath the ceiling, and come up through a hole between the ceiling joists to connect in the wall to the vent of the front bedroom.
Ya’ll, I used so much ducting tape, it’s not even funny. And I stapled things and caulked and I realllly hope it was effective.
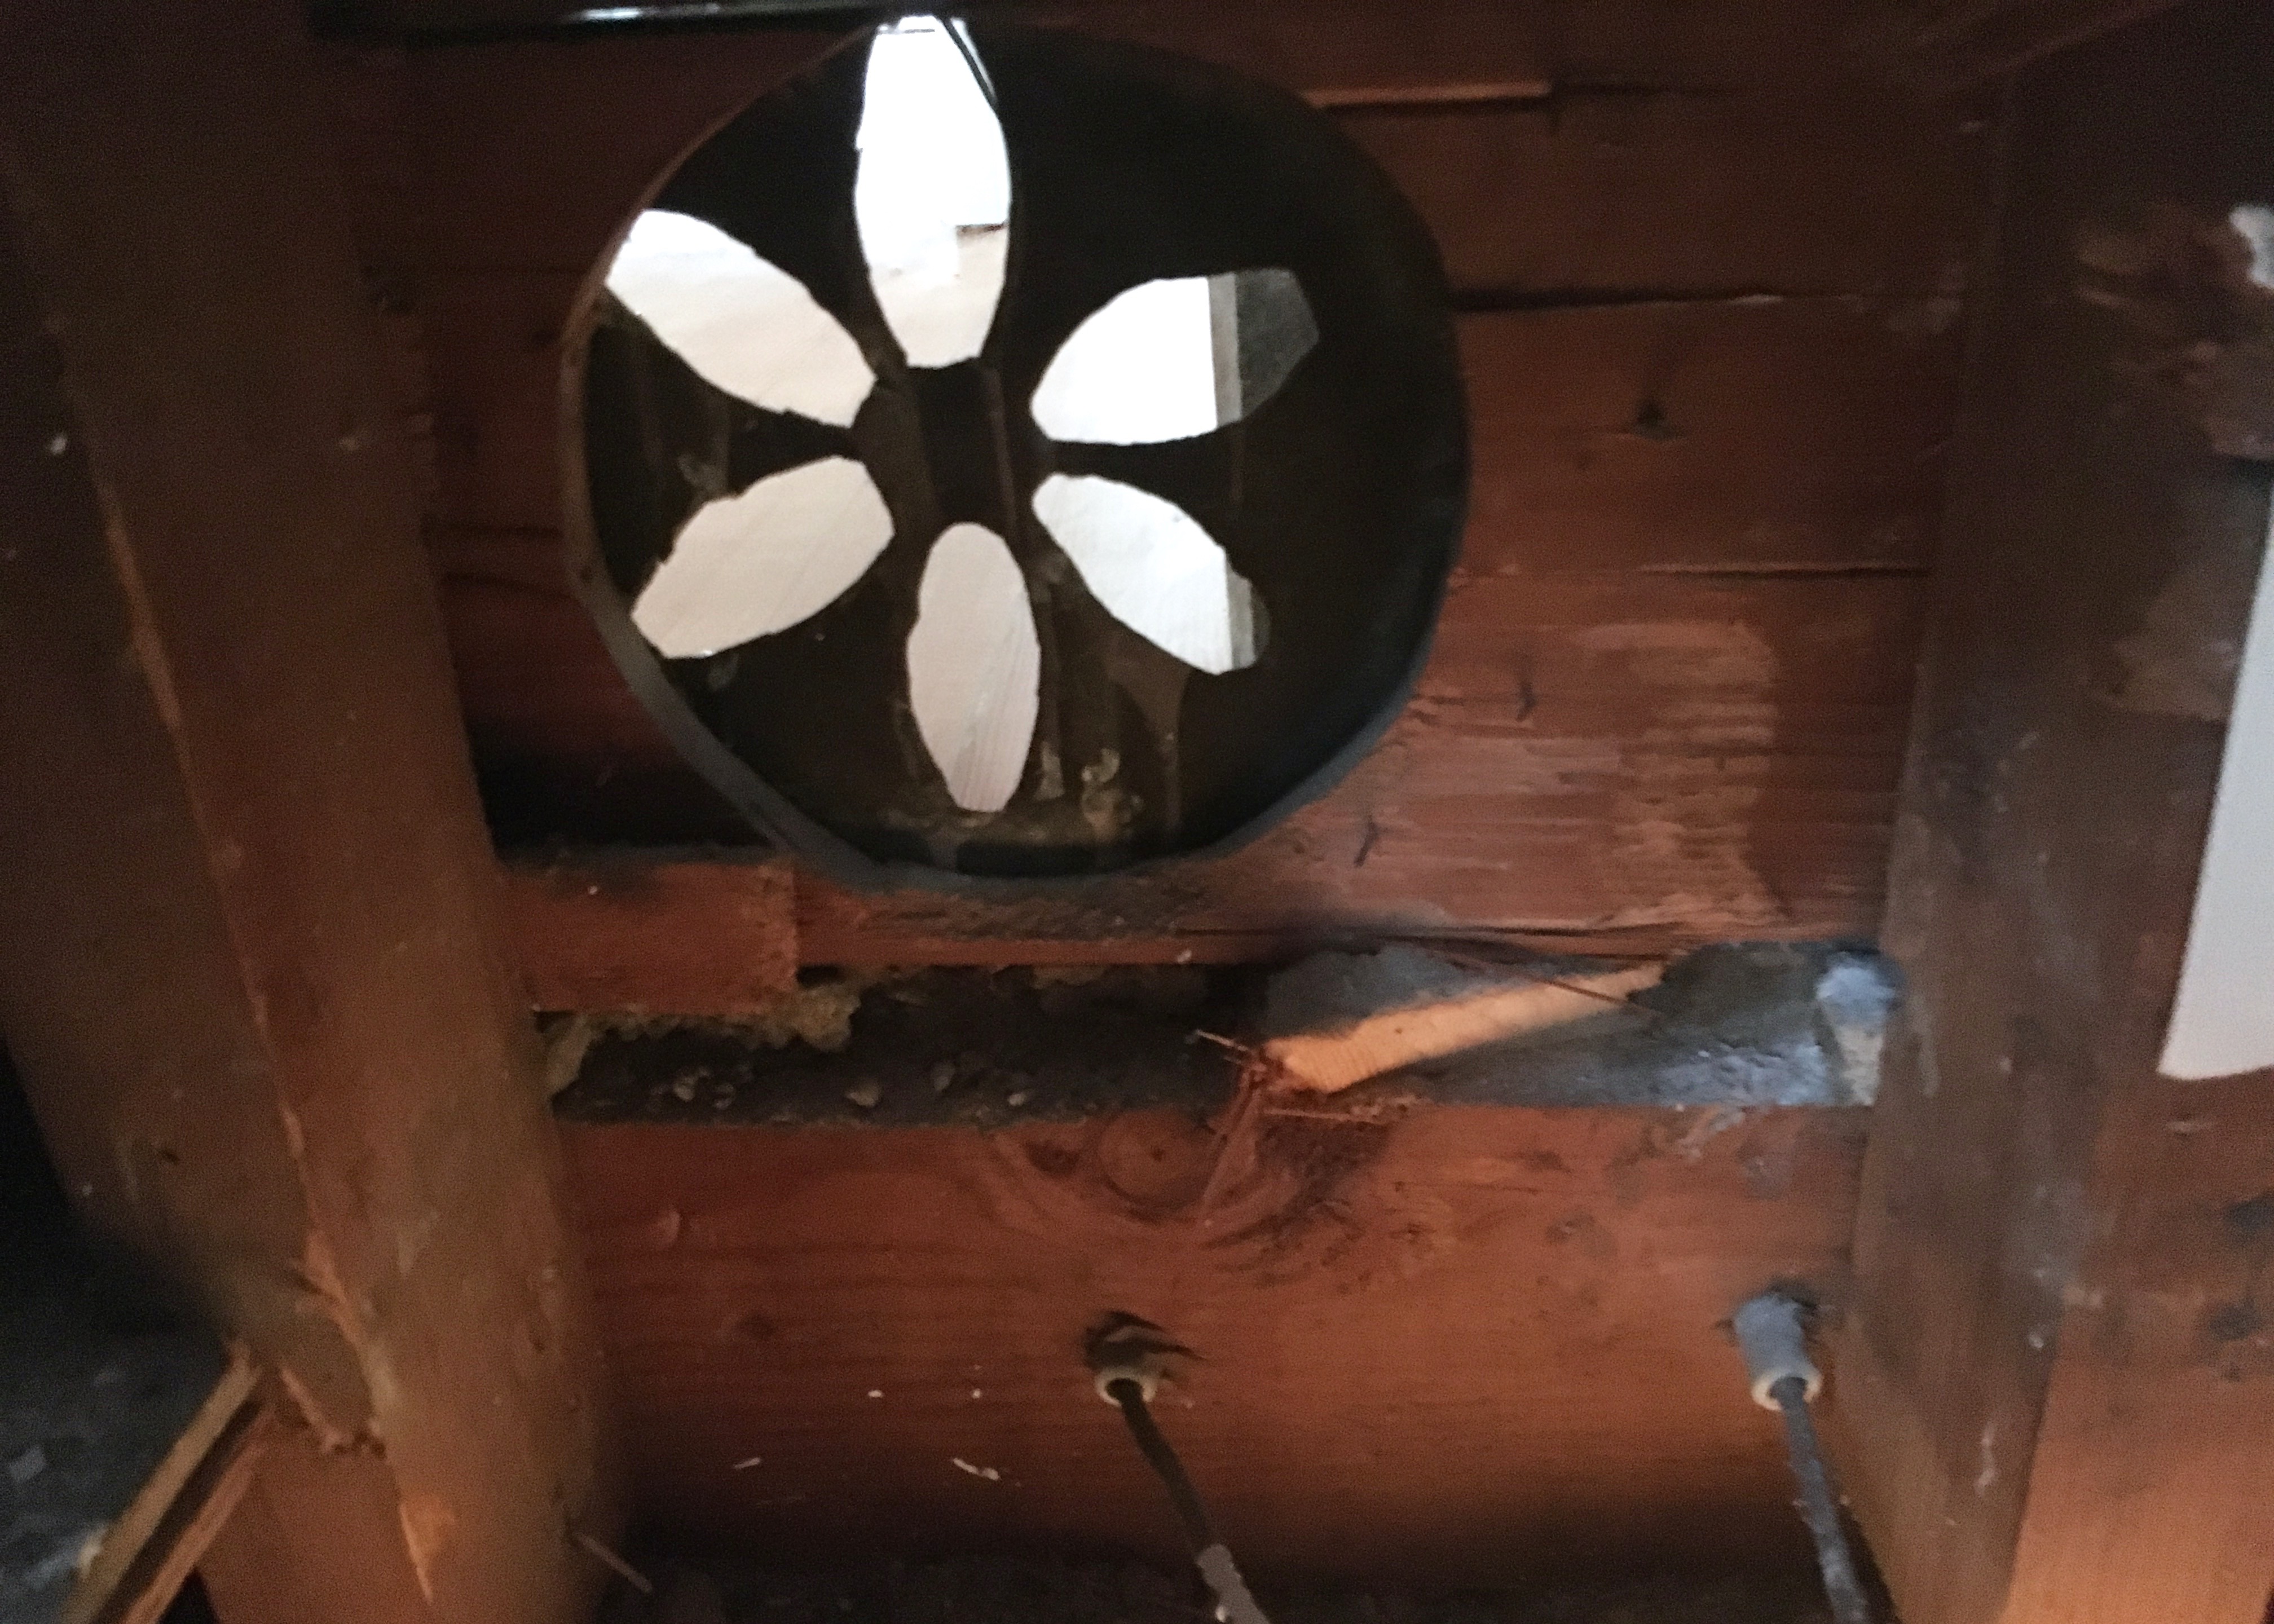
I then used a couple of these 6″ duct elbows to connect the duct that was coming out of the floor already to the back bedroom. I secured evvverything with a butt-ton of silver foil ducting tape and then went and returned about $450 worth of HVAC ducting to Home Depot from the 49 trips I made in a desperation.
It all worked out in the end, but I still need to get around to patching the baseboards and covering up the rest of it. For now, at least this is providing heat though!

And now…
that’s where things stand today! Not completely done, but not completely a mess either. There’s still a ton on my list for this space though:
- Add a stair railing back in
- Find an awesome vintage wood door with three raised panels below a half-lite. Paint and install said door.
- Trim out door.
- Build-in small linen cabinet / bookshelf in space to right of door over ducting.
- Figure out transition to bathroom (see steps above) and patch-in flooring.
Once that’s all done, the space will be complete! Well, until I do a true gut reno on the kitchen and open the stairs up to it, at least. For now, though, this half completed space is working out pretty well and has been doing just fine for the last year!
I love this transformation so much. It’s one of those things that got done before so many of the other big things around the house and really set the tone for the whole design. This little stairwell guinea pig really did me right!
I just can’t believe this dormer wasn’t always here, either. It just feels right. And thank god, because at this stage of the renovation so many things were not feeling this way! That dormer is a mess, so excuse the insanity and just imagine black subway tile wainscoting and moody merlot paint, okay?
One thing I’m stuck on is art for this space! What am I supposed to put on the walls?
I almost never go upstairs so I don’t want it to be too personal, but also don’t want to leave it blank! Give me some ideas in the comments below!

How about historical photos of relatives and older landscapes of the era of house.
Oh that’s a fun idea too! Love the idea of incorporating things from the era of the house.
Thanks for the continuing saga. Yes – paint color stress for we scientist/non-designer types is a real thing! As for what to put on the walls up the stairs? How about nature pics, maybe some from TS, interspersed with framed, preserved leaves or something like that?
Ohhh I do like that idea! A gallery of TS pictures and found objects from nature would be so fun. I LOVE this idea! And it would hide some of those differing wall textures too.
Greeat read thank you