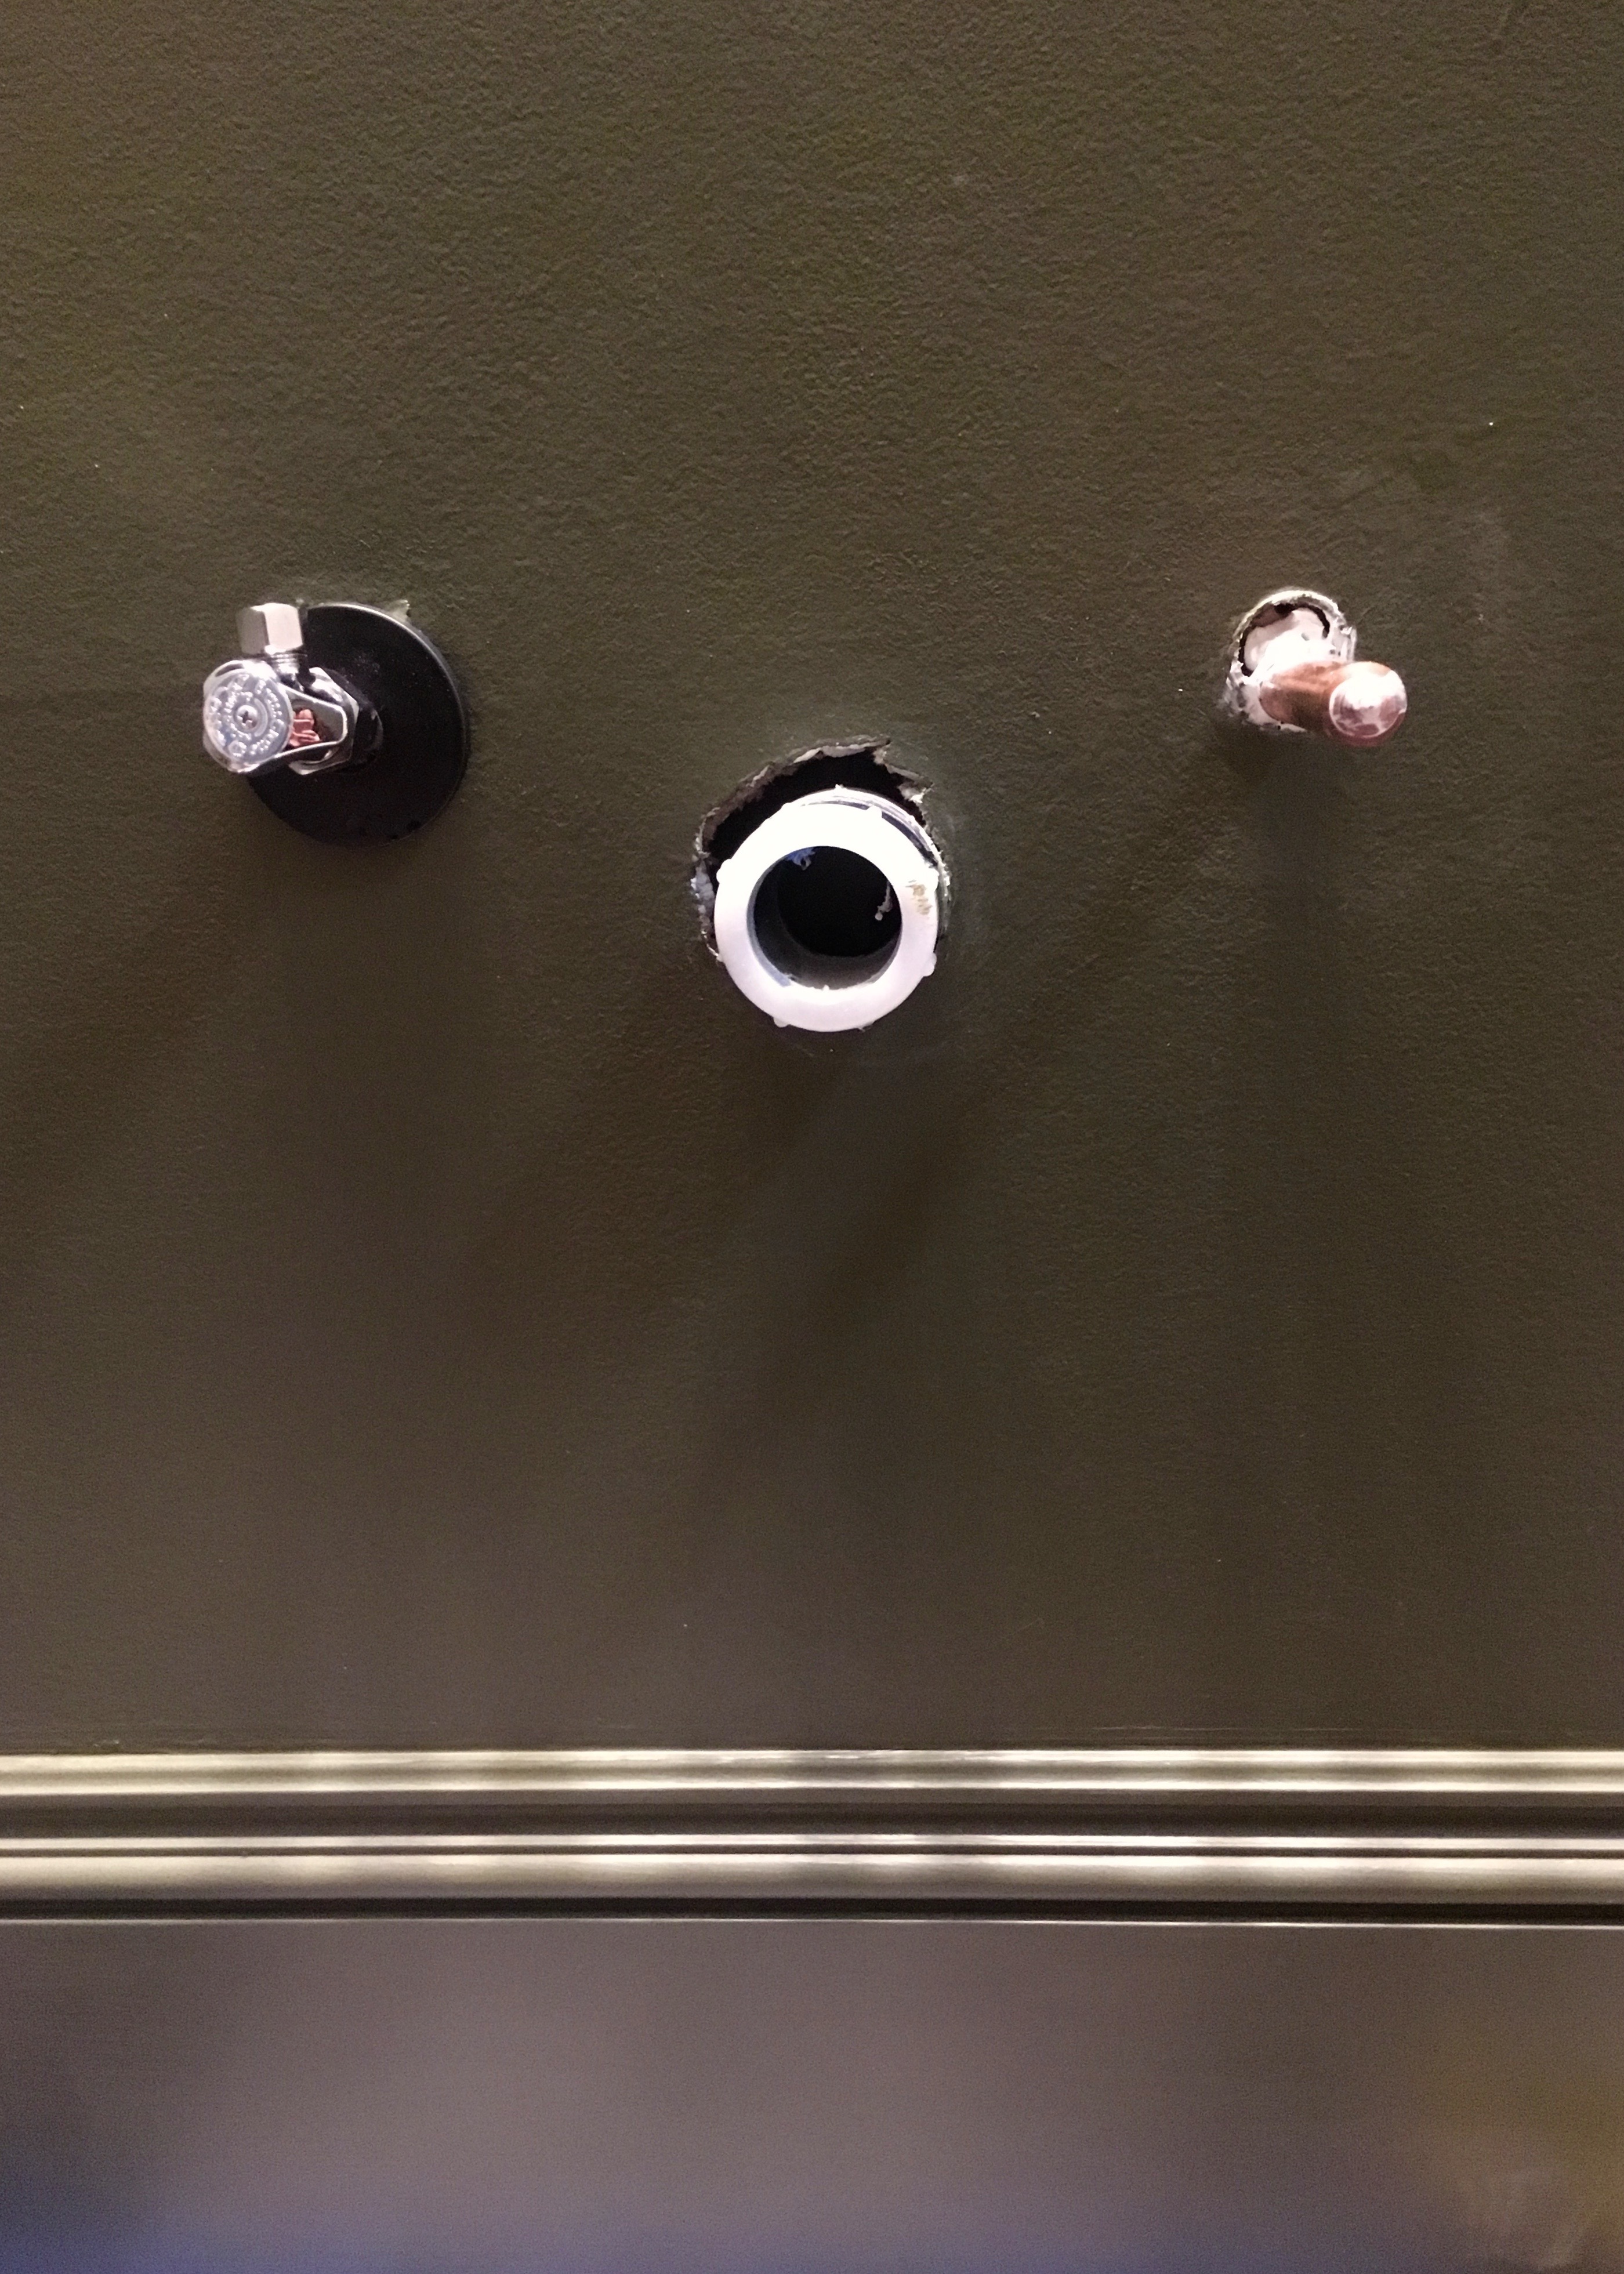
So after the bathroom was painted I was pretty excited to be at the stage where things were really looking good. I was dying to get the toilet and sink installed and finally have a full working bathroom! To do that, I first needed to install some shut-off valves. When I first contracted my plumber to do the rough in plumbing, I definitely thought that would include water shut off valves and then I’d just hook in the fixtures. I don’t know why I thought that…. because what I actually got was copper stubs sticking out of the walls. It was a bit daunting, but I watched this youtube video where a very reassuring lady told me I’d be able to do this just fine. I took one last look at this room with it’s copper stubby left wall and headed to Home Depot for supplies.

I bought the following things for this project and gathered a few items I already had in my home too.
- small pipe cutter for $13
- 3 quarterturn compression water shut off valves for about $10 each
- 3 pipe escutcheons / flanges for $2 bucks each
- towels
- bucket
- pipe wrench
- wrench
- Rustoleum Matte Black Enamel spray paint $4
This actually wasn’t as hard as I anticipated, what a delightful and unusual DIY surprise! First, I turned off the water. A very important step. Please don’t forget to do that. Then I put some towels down on the floor and put my bucket under the first stub. The pipe cutter was super easy to use too. Just put it on the pipe, spin, tighten, spin, tighten and so on! Totally easy and then boom! The end of the pipe popped off into my bucket within just a minute or two. I was overly cautious about cutting the pipe since I didn’t want to cut off too much, but I probably left more pipe than I needed on the wall. I decided to proceed anyways.
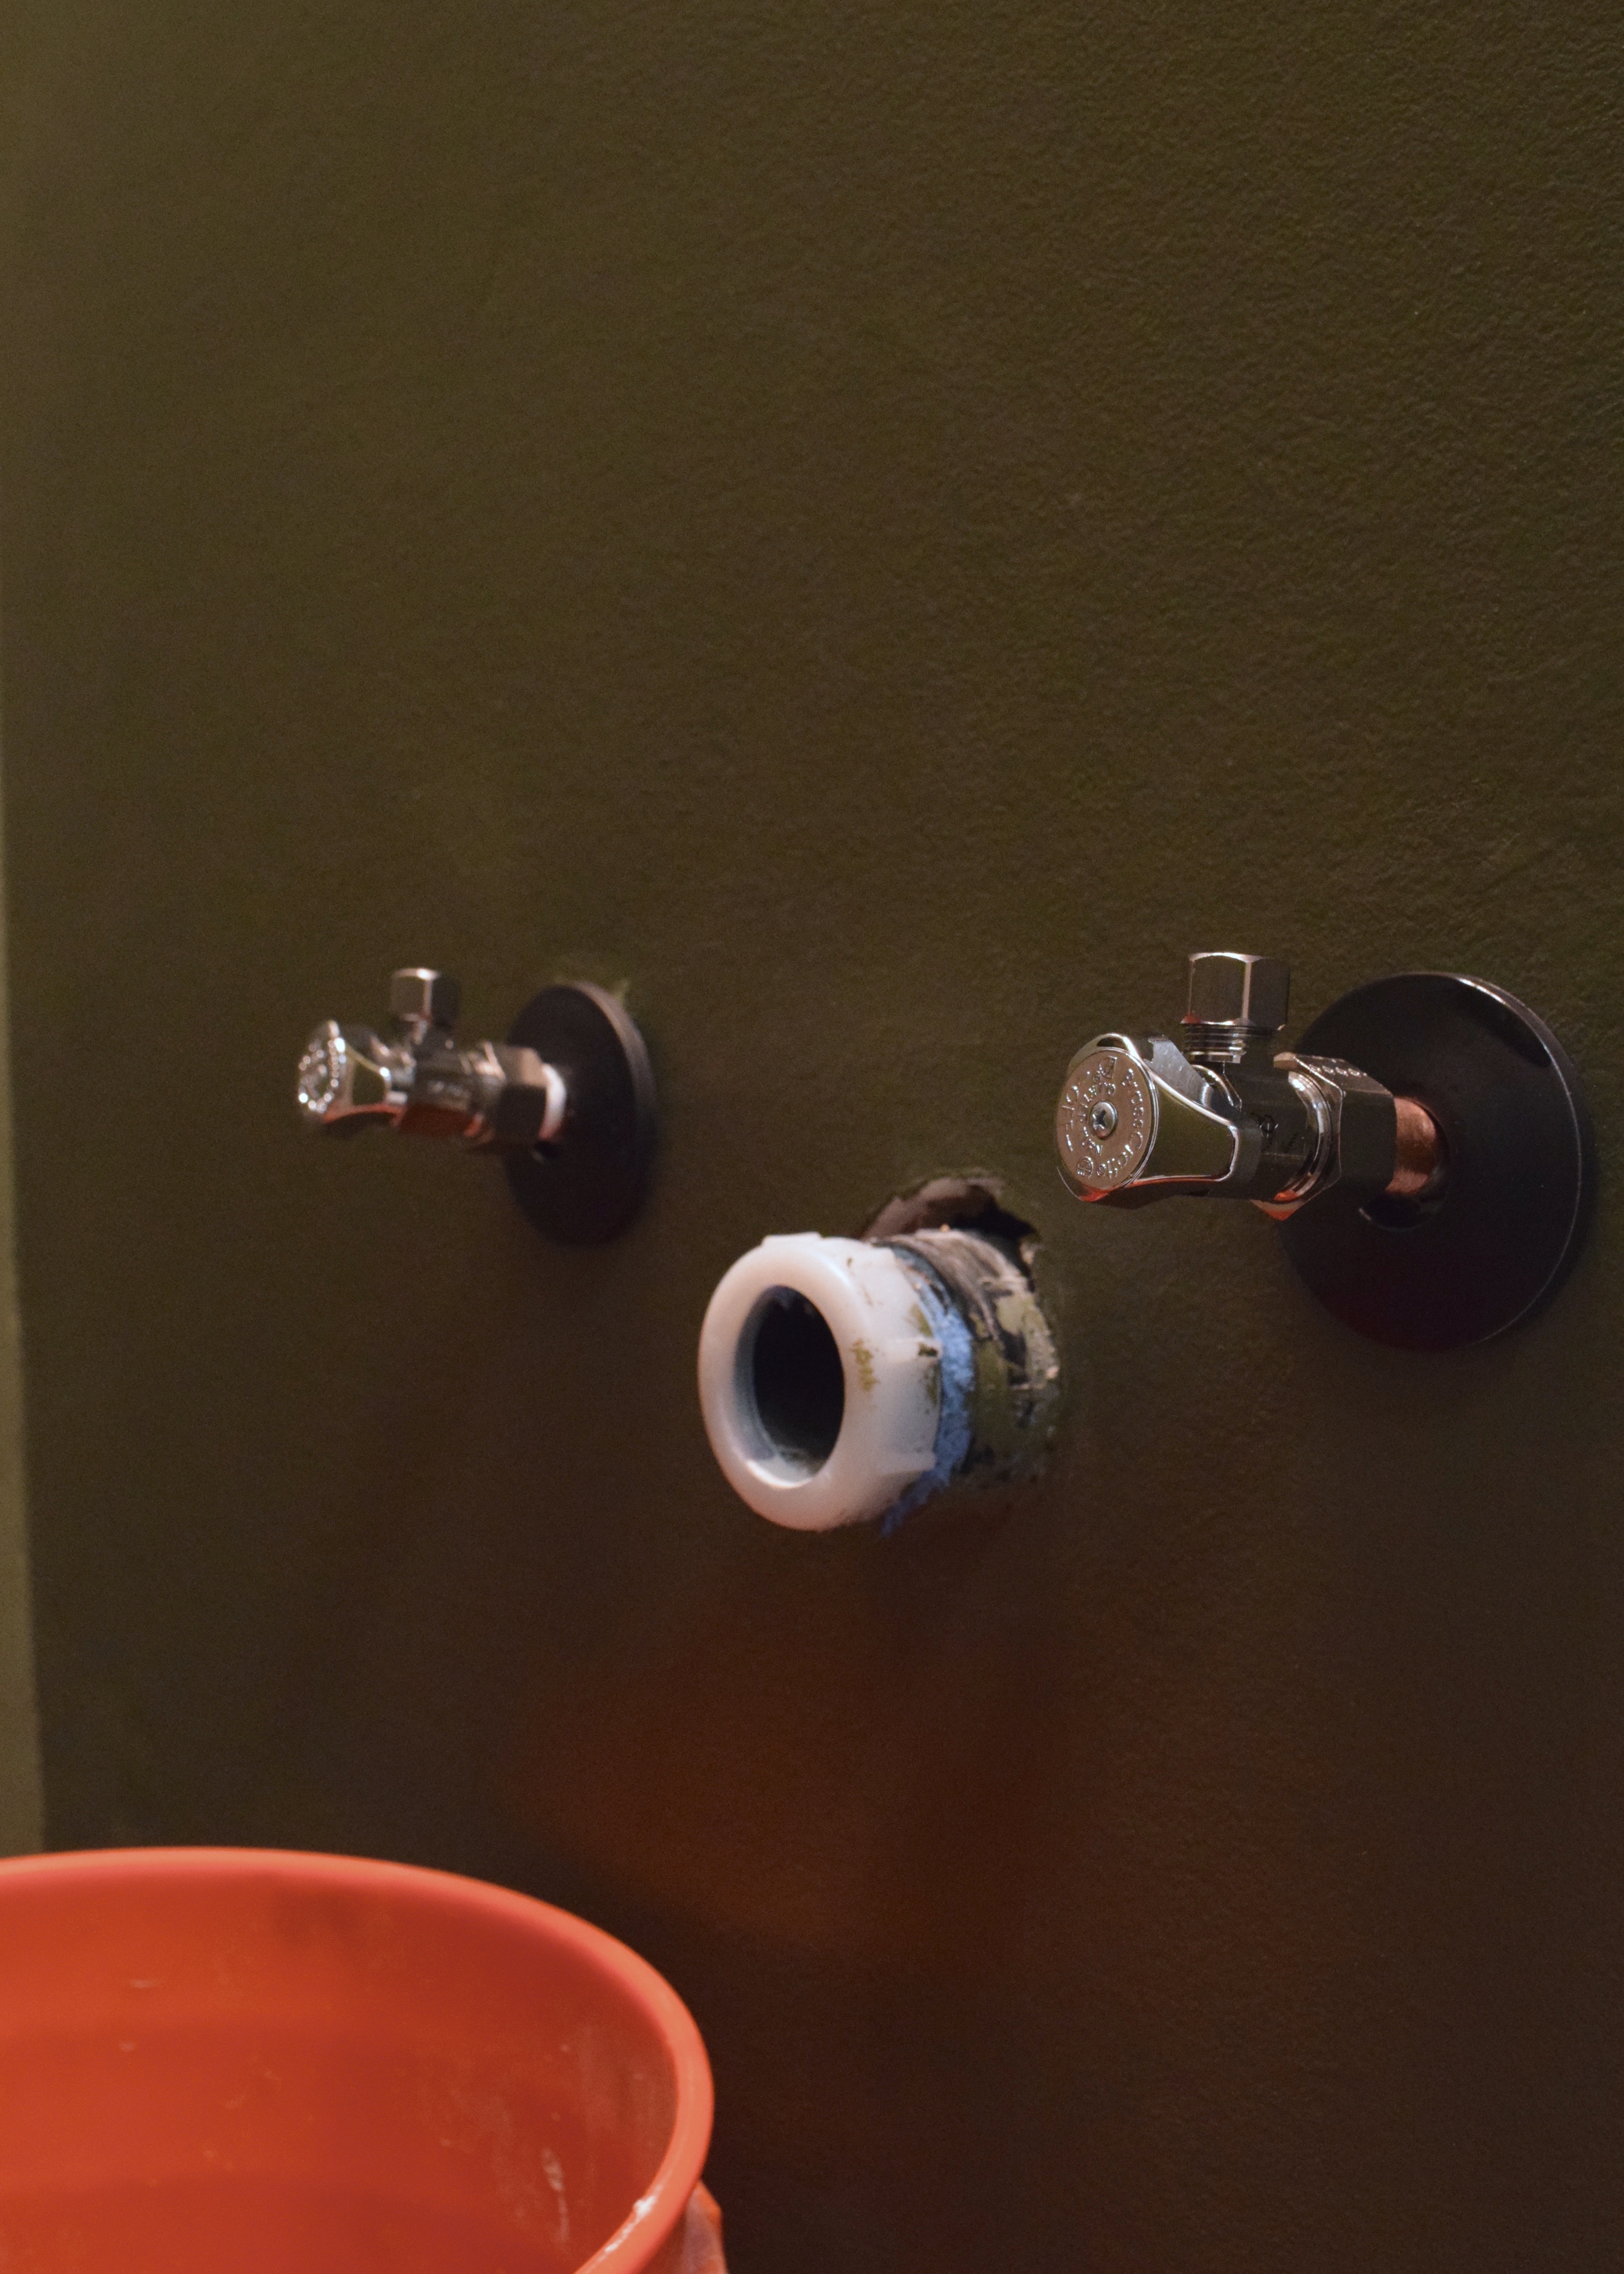
I bought cheap chrome pipe flanges and spray painted them with matte black Rustoleum enamel paint because I thought they’d blend in more with the dark green walls. I was too afraid to paint the actual shut off valves though because I thought it might affect their performance.
I slipped the newly black flange over the pipe, threw the compression ring and nut over the pipe and then stuck the valve over the end of the pipe and gripped it with my pipe wrench. In my other hand I used a wrench to twist the compression ring and nut over the shut off valve and tighten. Tighten. Tighten. But not too tight, don’t want to break anything. The video told me to be cautious about over-tightening. Eventually it seemed tight enough though…

You’ll see above too that I threw a bunch of caulk into the oversized pipe holes. The flanges would cover the holes, but I wanted to block any airflow. Once it looked good, I stuck the bucket right up under it and ran down into the basement to turn the water back on and then ran back up the stairs to see how it looked.
AHHHH!!!! Water was shooting everywhere! I sprinted back down to the basement and shut the water back off. Got out the wrench and and the pipe wrench again and tightened more. I was a lot less tentative about tightening it this time. Try two with the water turned on went muuuch better! Just a slight drip this time.
Back into the basement, water off, back up stairs, grab wrench, tighten, tighten, tighten, into the basement again, water back on, run back upstairs and…. WAHLA! No drips or leaks or showers, just a water shut off with the water shut off! One valve down, two more to go! No need to be cautious about over-tightening apparently…
I did the second sink valve next. It went much smoother. I was aggressive in my tightening and got it done on round one this time. It helped that I remembered I have the arm strength of a new born infant so the likely hood of me over-tightening anything is slim to none.
This slightly scary project ended up being way easier than I’d originally thought. Just goes to show you, even intimidating things can be easily conquered with a little internet research and a willingness to try! The sink valves were now ready for the sink which basically meant the bathroom was done right? Right?!
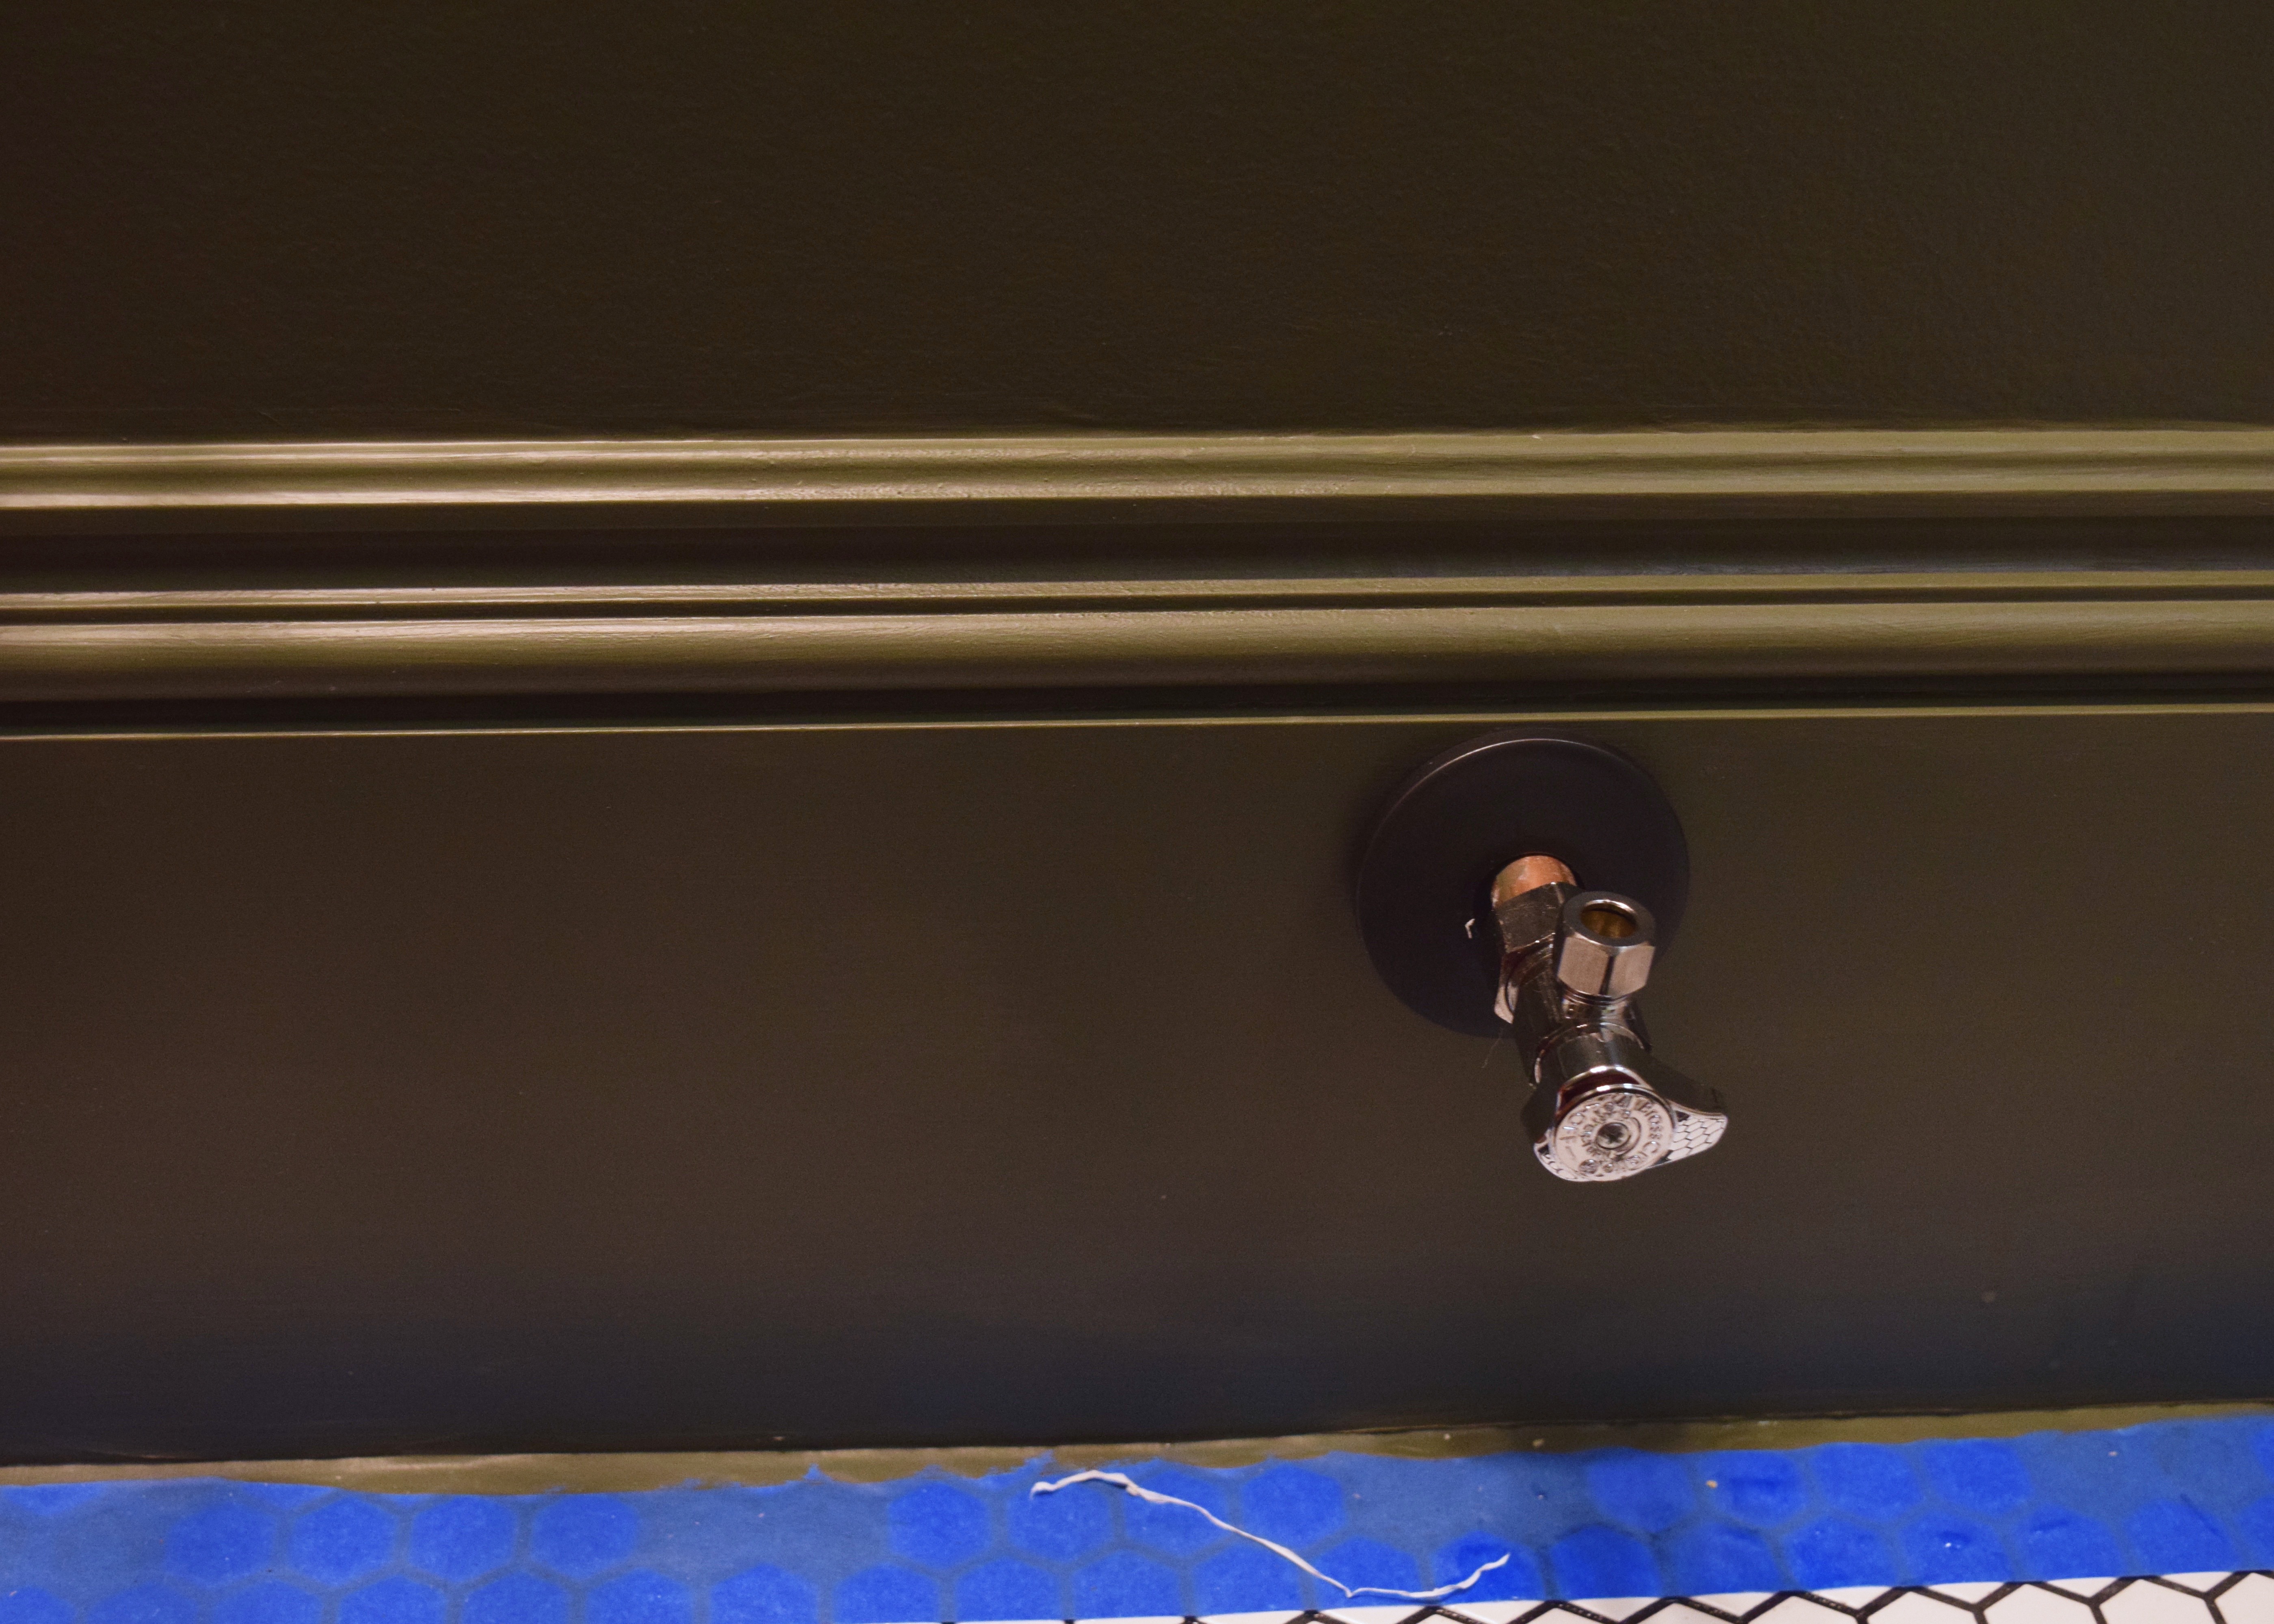
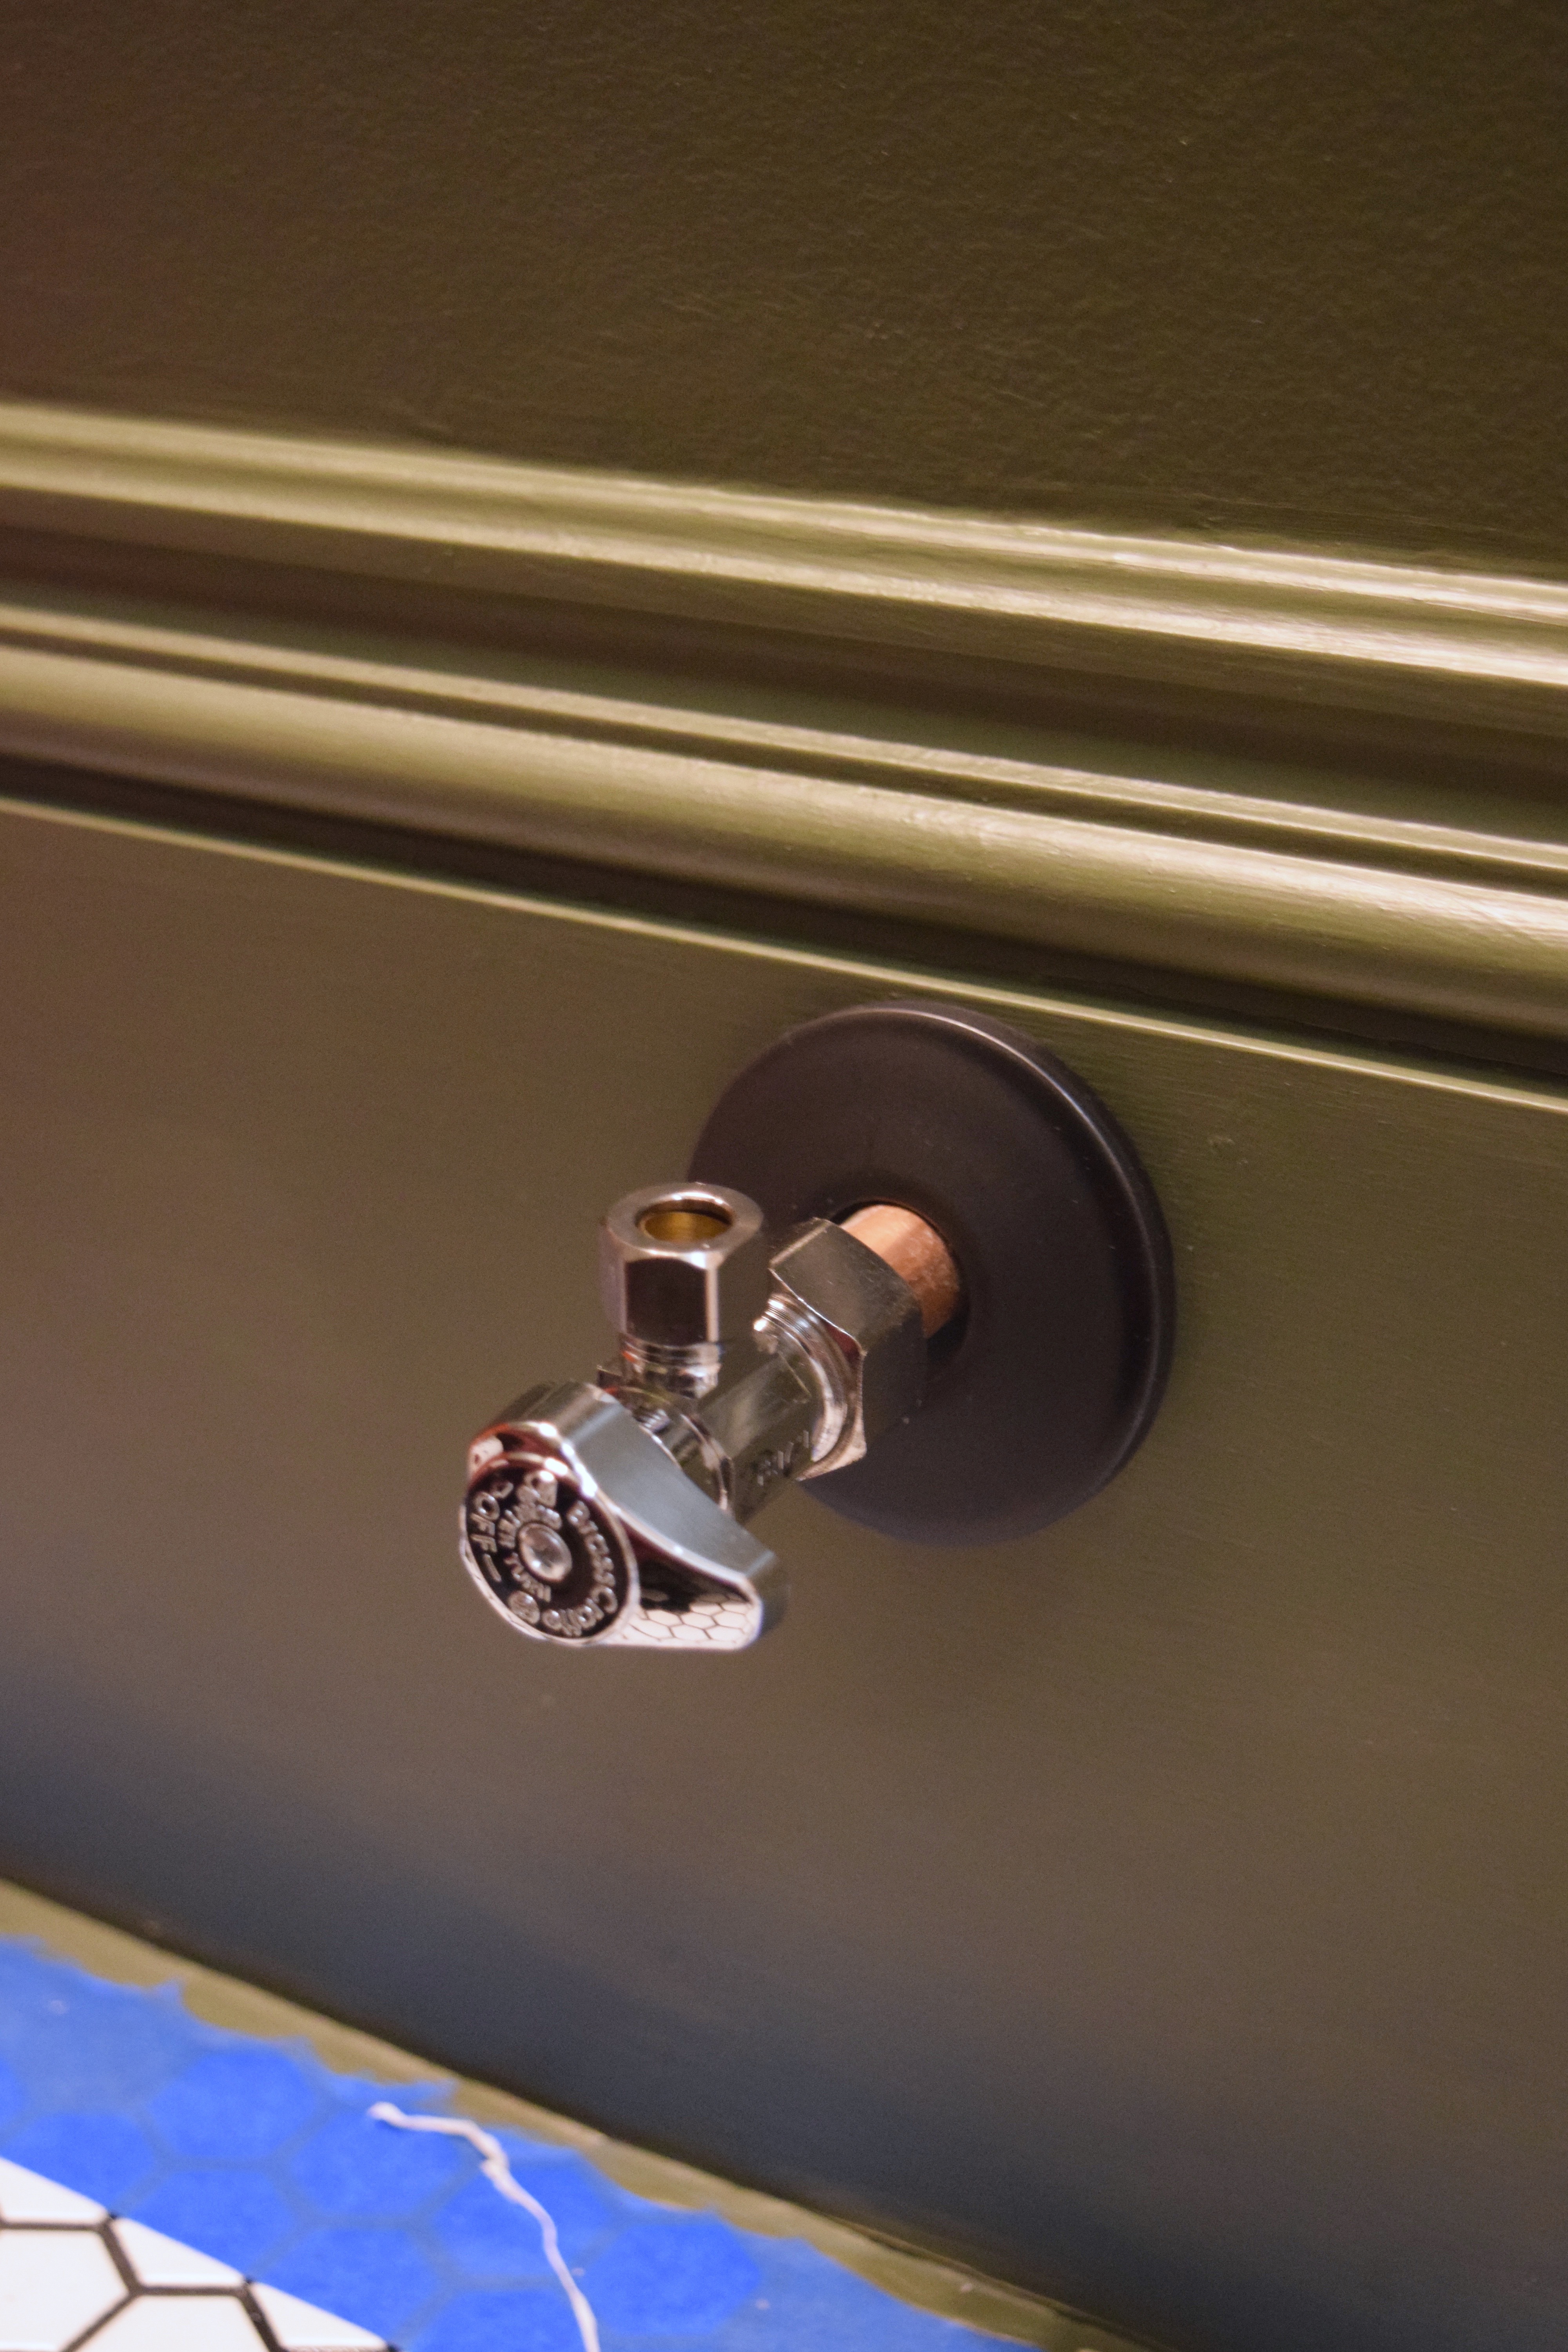
Just kidding. DIY projects are never done. I needed to do the toilet water shut off valve. This one is my favorite, because it sticks out of the baseboard which I find strangely pretty. I’m weird okay? I did leave WAY more pipe on this one than necessary though. Shoulda cut that baby about an inch shorter. But eh, I’m lazy and don’t want to alter it now that it’s done. I got this one done on the first try too, so I must be an expert in this right?
Ha! Nope. The next time I had a project involving installation of water shut off valves I shot water onto the ceiling…
But at least I got these done with minor issues! Just in time to leave for the holidays too. Thank goodness!
And now, on to plumbing fixtures!! Who wants to install a sink? Or better yet a toilet? Now that’s where the real fun is at… right?!
