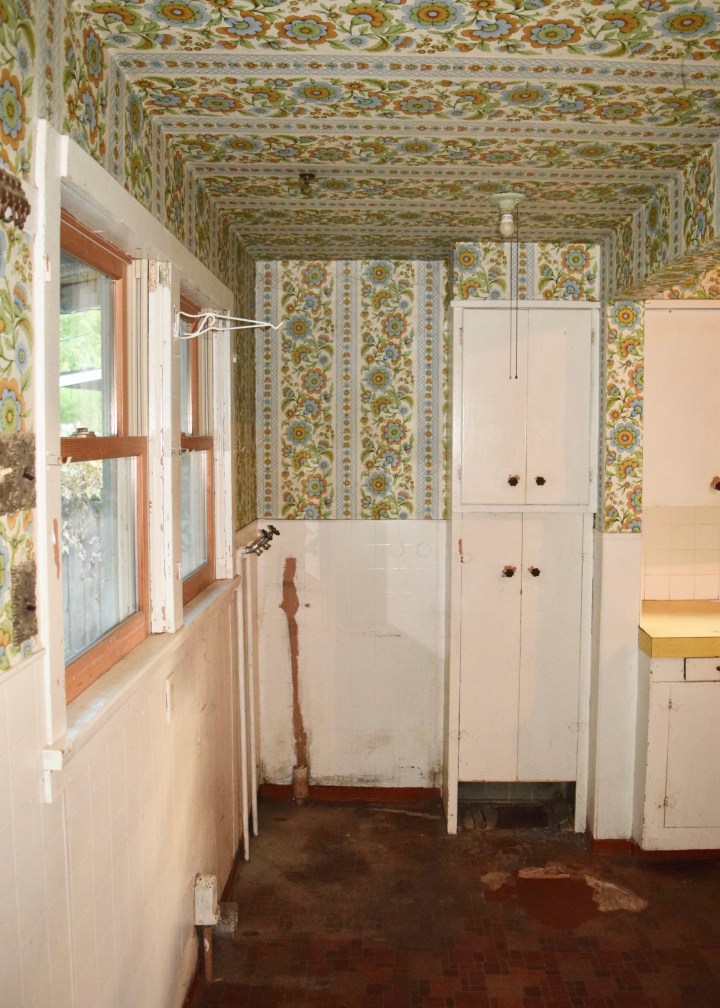
One of my favorite corners of my newly refreshed kitchen is this awkward little one in the corner! Before my kitchen renovation the corner was looking really rough with chaotic 70’s wallpaper, a musty cabinet, and flaking vinyl floors. The stove needed to go below the windows in the appliance outlet and I planned to add cabinets on either side. But you know this already!
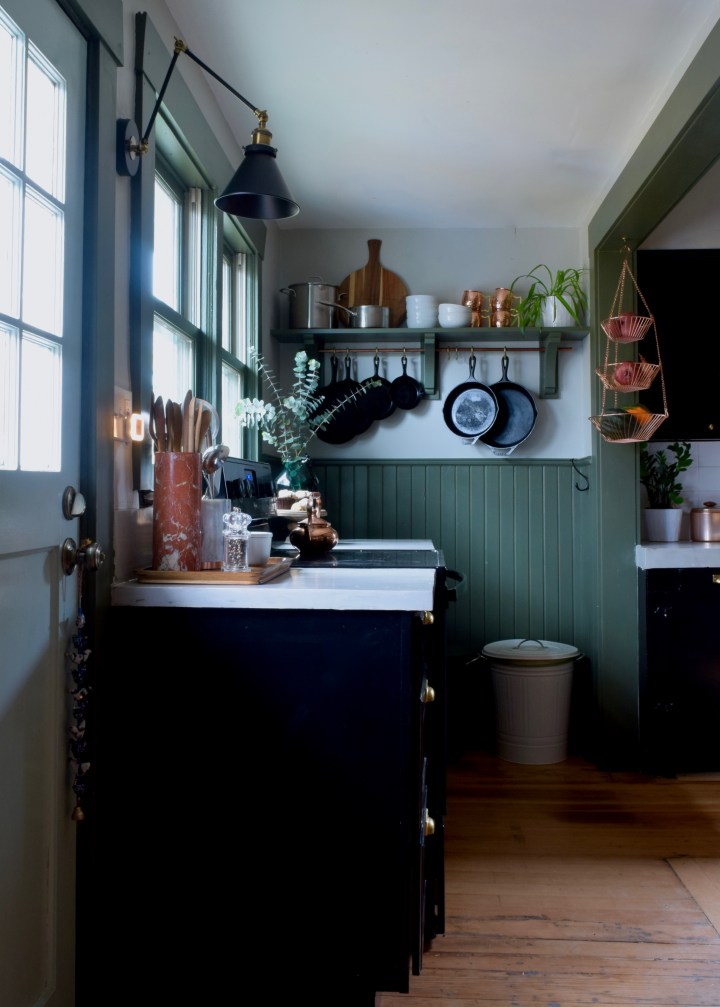
This is how things shook out after the renovation. The stove and cabinets created a ton of function on the exterior wall, but the little corner in the back needed to pack in some storage as well. I wanted something to hold all my pots and pans that would be easy to put things away on.
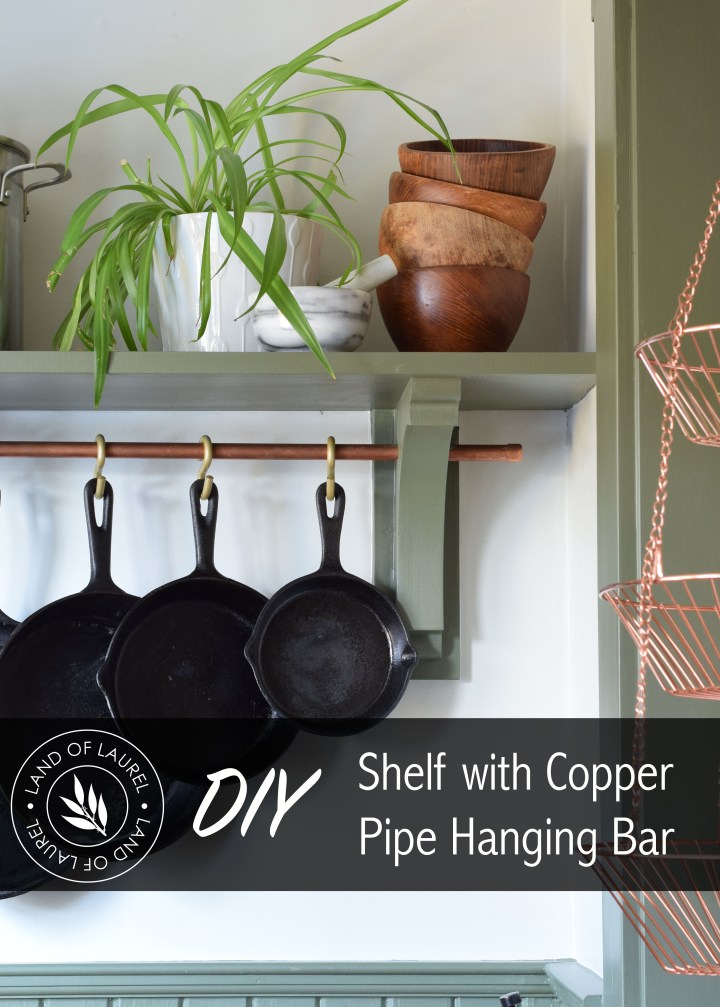
And since I could never find something that would suit my space exactly, I decided to build it! I wanted it to hold pots on top and have a hanging bar for pans below. Since there are copper and brass accents around the room, I decided to incorporate them once more.
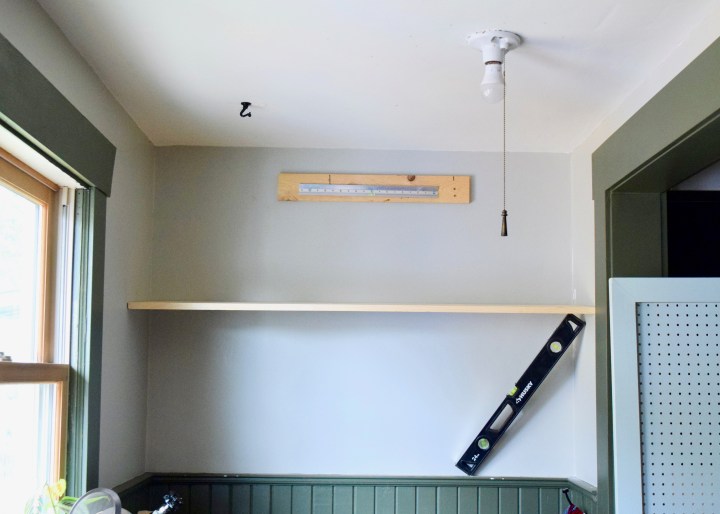
Step 1: Cut the shelf
I knew I wanted a deeper shelf, so I bought a 1×12 at my local lumber yard. I cut it to size and propped it up in place. You can see the pegboard here that I used previously in this spot. It covered up so much of the wainscotting and wasn’t functioning well with multiple people utilizing (and forgetting where things laid out on the pegboard).
Step 2: Build out the brackets
I knew I wanted some beefy brackets that would have a more traditional look to match the architecture of Berrybrier, so I found these at Home Depot. I wanted them to have a larger presence and a wider backplate for the shelf to rest on though, so I decided to use the excess from my 1×12 to add one. I cut a board 3/4″ wider than the bracket on 3 sides (skipping the top).

It was a quick calculation and after measuring the first, I cut three more.

I ended up using my circular saw over my chop saw for this since my chop saw can only cut 8″. Because it has more control, I switched back to the chop saw for all the short bits though!

Then once everything was cut, I measured out the hole for the copper pipe, marking the center carefully on each bracket.
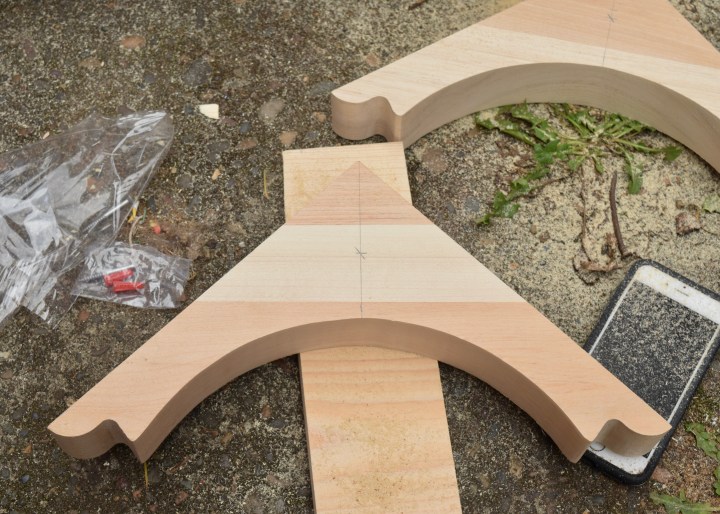
Then using my drill and a 1/2″ bit I carefully drilled a hole straight through each bracket.

I dry laid it on the backplate to see how it looked – and loved it!

I attached the bracket to the backplate from behind, first pre-drilling holes for each of my 3 screws.

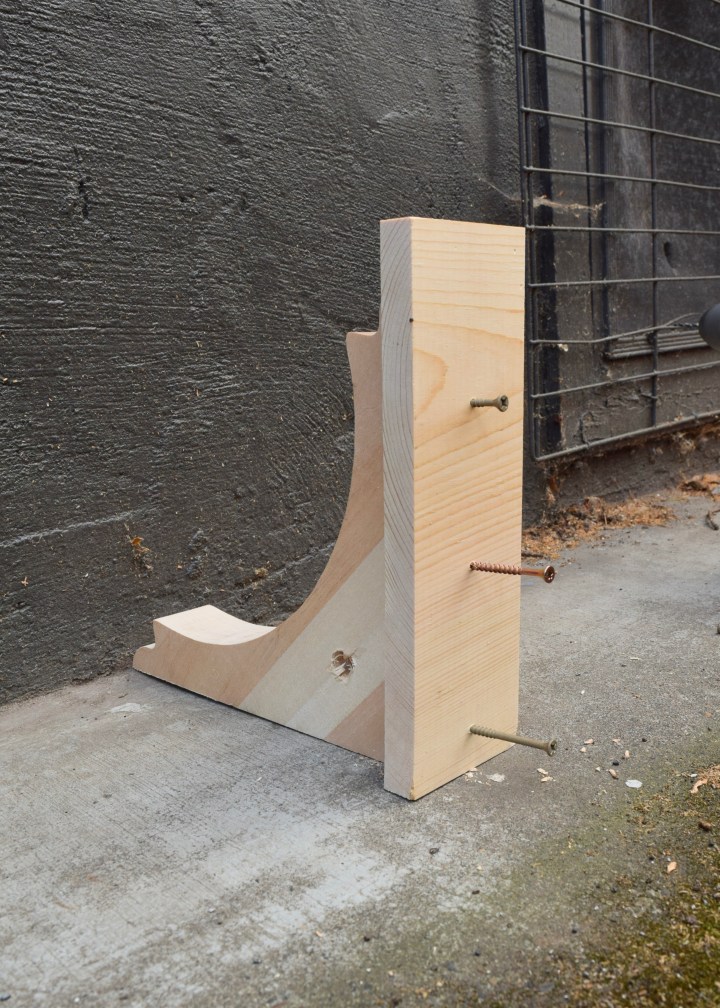
Then I simply lined up my predrilled holes and sunk some wood screws through the backplate and into the bracket, carefully making sure I wasn’t drilling too far.
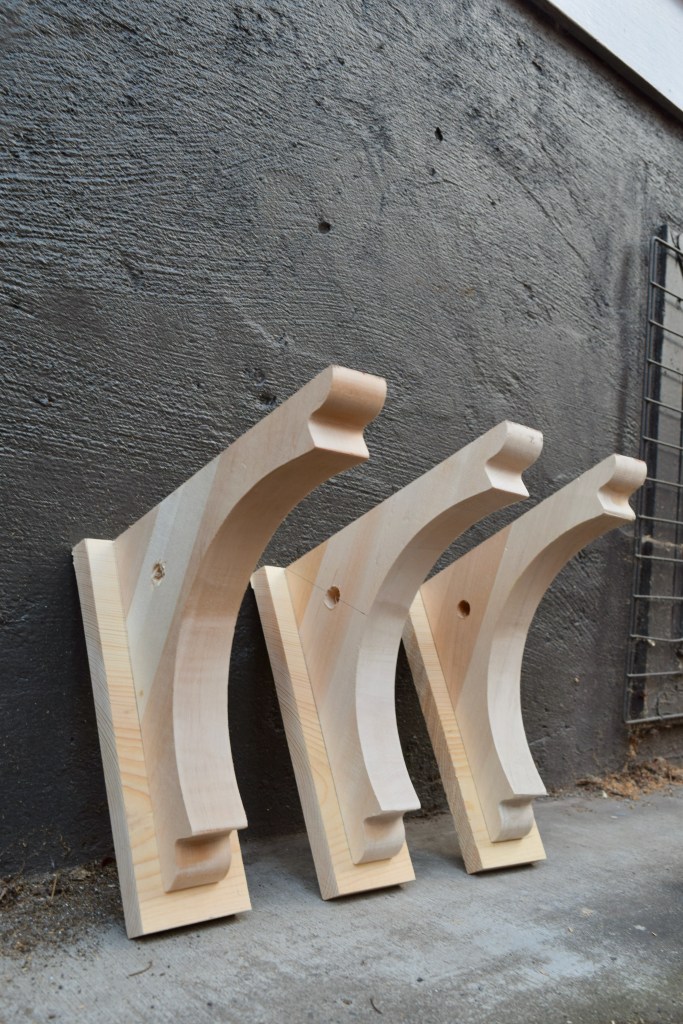
Once I had three backplates, I was ready to go back inside!
Step 3: Adding the copper hanging bar and s-hooks
I bought this five foot 1/2″ copper pipe at Home Depot for the hanging bar. I trimmed it to size with my pipe cutter (similar here). Then I slid on the brackets and s-hooks. The spacing of the s-hook openings was such that they can only be threaded on to the pipe from the ends. This will be nice when I’m taking pots and pans on and off, since the hooks won’t come with them by accident! Once everything was threaded on the pipe, I added a 1/2″ copper cap to each end.

I pre-drilled some holes for screwing the brackets into the walls studs too.

Step 4: Hang the shelf
Not going to lie, hanging this shelf was not as easy as I’d hoped. I had to use a number of drywall anchors as well as screws into the studs, because the studs on this wall were all in very strange places. It was frustrating, but it worked out! My right and center bracket were secured deeply into wood behind the drywall, but the left was all drywall anchors. I made sure to weight test the brackets before adding the shelf on top.
I secured the shelf to the brackets with 2″ nails from my cordless brad nail gun.

Step 5: Caulk and paint
Finally, time to make the shelf truly shine! You should probably not follow my example here. I’d definitely recommend painting the entire thing before installing on to your wall. But I decided to do it afterwards, since you will still need to caulk around the shelf where it meets the wall and touch that up too.
But once that’s done — your hanging shelf is instantly ready to be used!
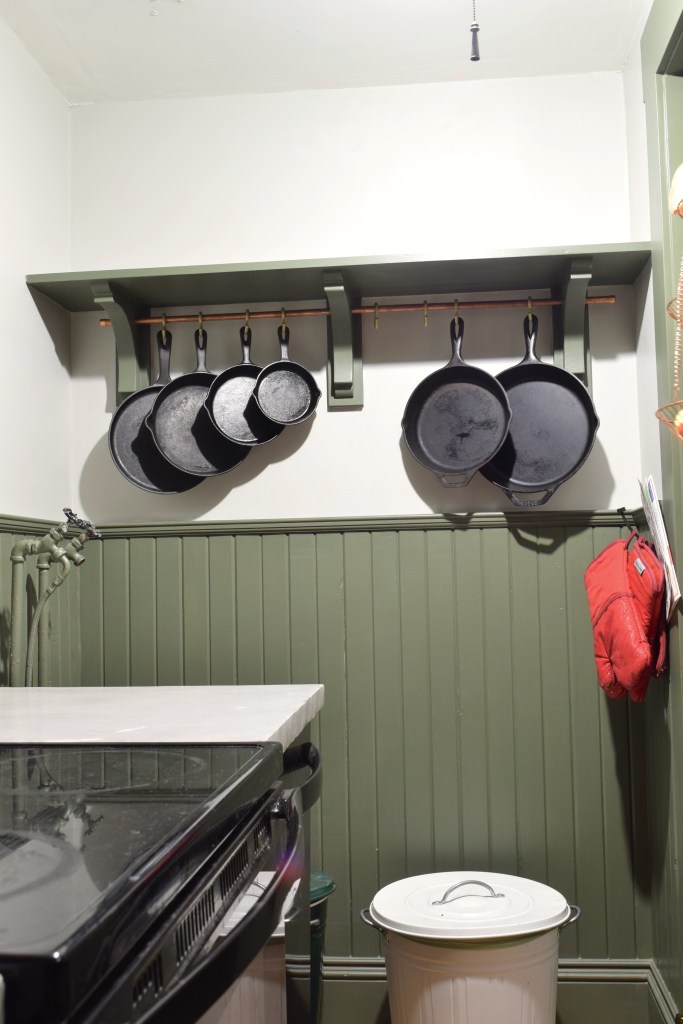
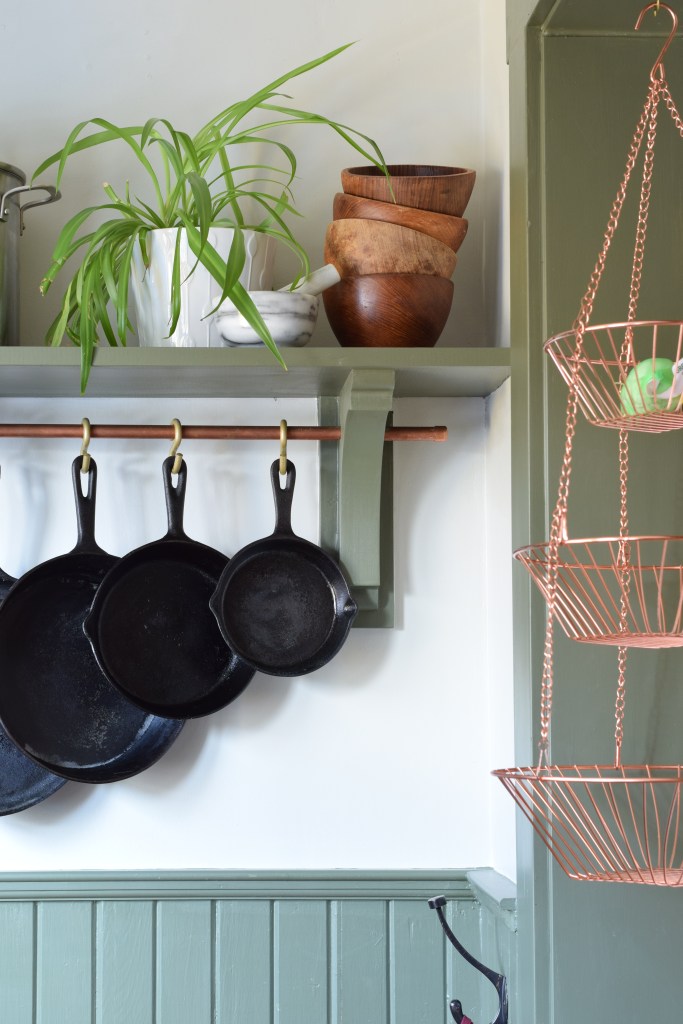
And boy does it feel good to breath more life into this corner! I’ve styled the shelves a couple of different ways now. I do love a functional surface I can also make pretty. It’s so nice to be able to store my most used pans and pots right within easy reach of the stove in such an accessible manner.

The copper pipe doesn’t read “pipe” at all, but rather looks like a much more luxe material. I spray painted my s-hooks with a gold paint I hand on hand, but I’m tempted to try some copper rub ‘n’ buff on them soon.

This corner is looking so much better and functioning so much more smoothly these days.
This whole project could easily be completed in a single afternoon — so maybe that’s the best part? I’m a sucker for a quick project that makes a big impact!
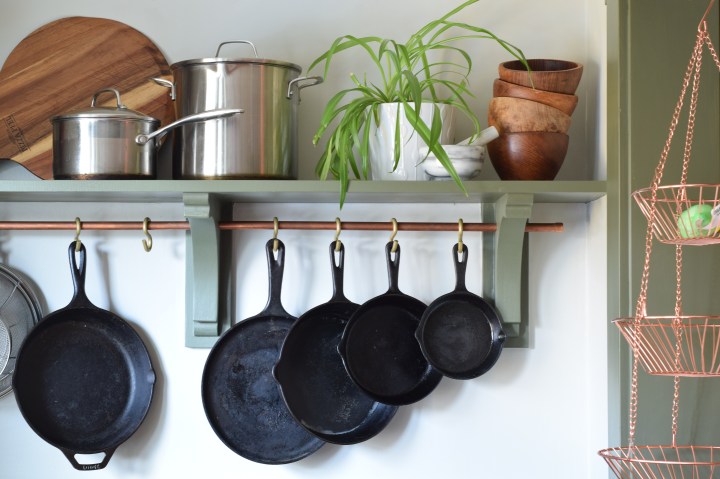
Plus, now it’s easier than ever to make my morning omelette in my favorite cast iron pan! What’s your favorite project you’ve completed in an afternoon?