Gosh, when you’re trying to DIY twenty million things around your house it’s certainly difficult to find time to actually live your life, let alone blog about all your projects. Terribly bleated, but let’s get into what I was working on last fall, shall we? I started writing this last October, when this was all fresh in my brain…
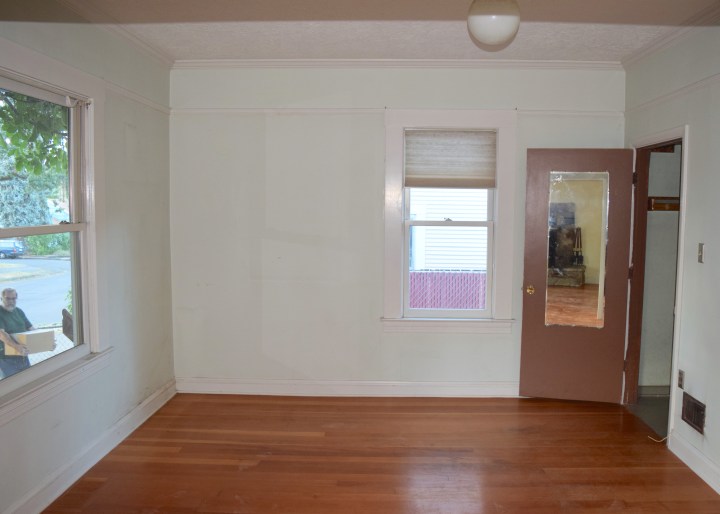
So, do you remember what my floors looked like when I moved into the house? Most of the house is the beautiful old fir that’s held up well and looks amazing. It was a huge selling point for me when I first toured Berrybrier. The living and dining rooms showcased some of the best floors I’d seen when touring houses.
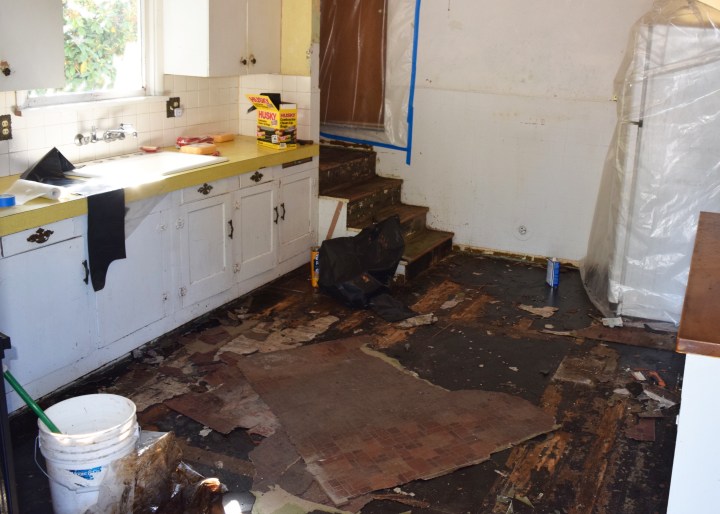
The kitchen and bathrooms however at Berrybrier though? Sheet vinyl.
And old decaying sheet vinyl at that! See how it’s all torn up in the corner? Here’s a picture a few weeks after I moved in once my mom and cousin Carla had spent an hour tearing off the wallpaper.
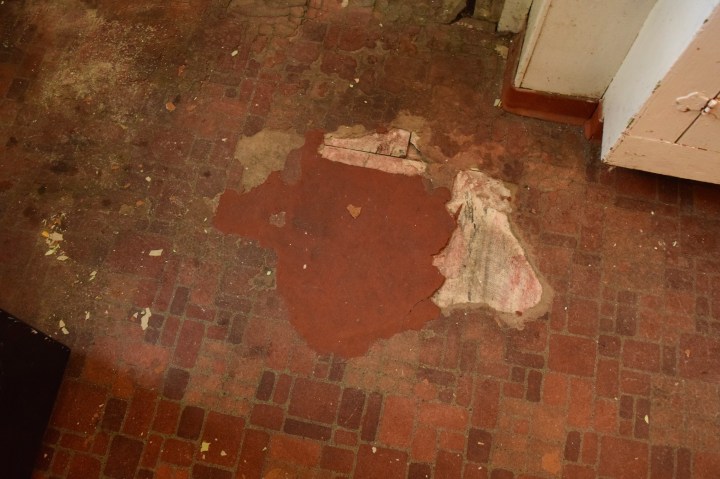
The floors get even worse if you take a closer look. Flaking in places and worn away in others, this clearly had to go. This was clearly a health hazard. Luckily, I was pretty sure these floors weren’t asbestos which would have been a whole different ball game to tackle. By looking at the floors I could tell the first layer of flooring had gone in in the 40s or 50s and the second layer on top of the first looked like 1980s. My educated guess that I’d missed the asbestos era (1960s-1970s) was later confirmed by professional testing at a laboratory. If you’re starting a project like this of your own, start with the testing.
 The first couple of weeks I had the house I debated what to do. Install sheet linoleum over the sheet vinyl? Install linoleum click flooring over the sheet vinyl? Some people were even rooting heavily for peel and stick vinyl tiles. I try to minimize my exposure to vinyl as it’s a fairly toxic product during all life stages: production, installed, and recycled/trashed. Plus vinyl has some nasty off gassing issues. Basically, I really wanted to avoid vinyl. Linoleum can be expensive, however, and I personally find it difficult to clean vinyl and linoleum since they are softer surfaces. Would linoleum be a good alternative in someone else’s home? Absolutely. I just wanted something else in this kitchen. I wanted tile or… wood. I wanted the transition between the kitchen and living room (below) to be less awkward!
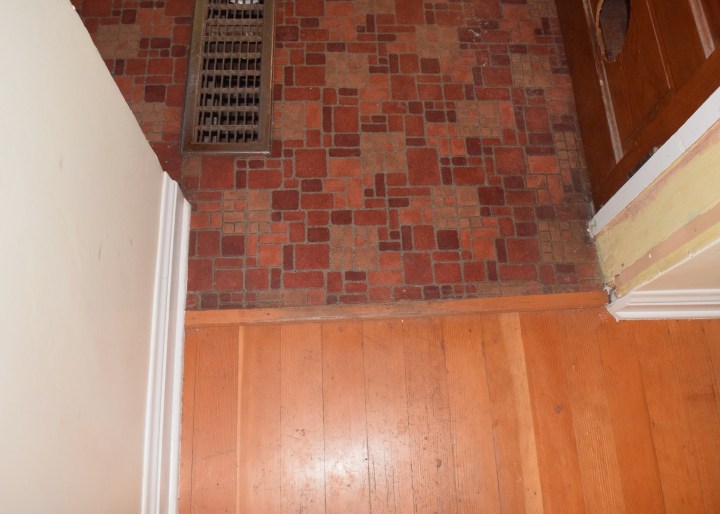
I turned to the air intake vent above. Under inspection, this vent when lifted showed wood floors running beneath the vinyl. Wood floors that looked to match the ones throughout the rest of the house… was this too good to be true?!
Being absolutely insane, my natural reaction to discovering original fir floors under layers of vinyl was to feel deeply in my soul that I had to rescue these wood floors. No matter what. They had to be saved; it was what was right for this house. Berrybrier deserved to be restored and I really wanted wood floors. Plus, I figured using existing wood floors had to be cheaper right? I started “planning” my project to save the floors. Let’s just say I went into this project completely naively. Like almost idiotically so. I was running on pure determination and a dream of rustic wood kitchen floors. I thought I’d have the project complete in a weekend. I thought I’d be moving on to the next project in just a few days. Boy, was I so very wrong.
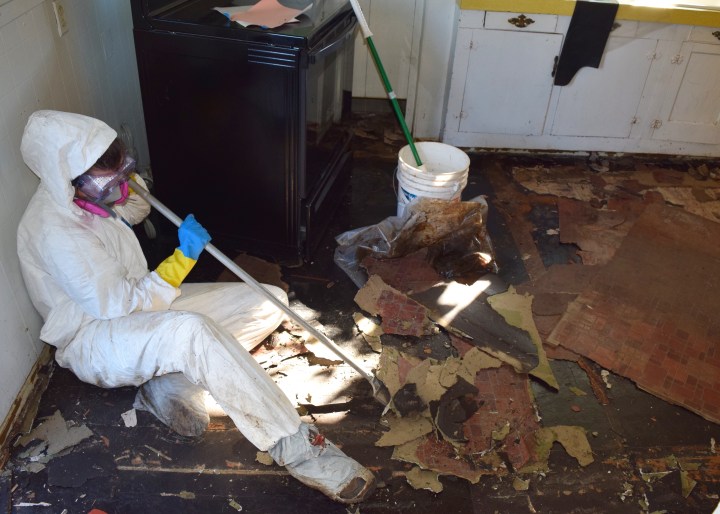
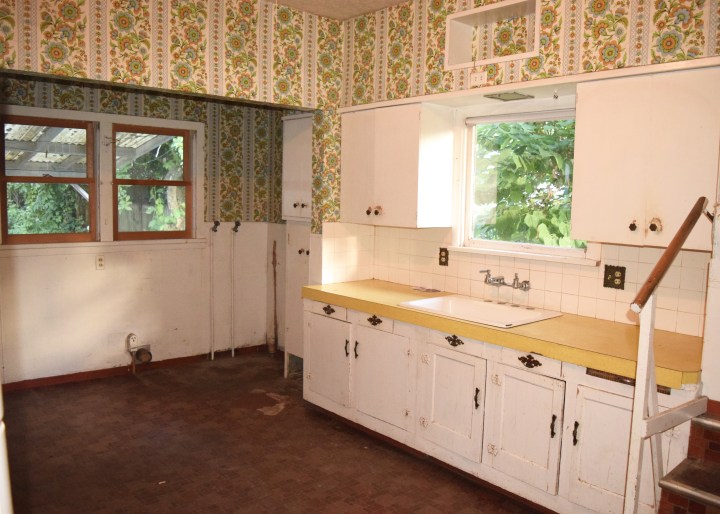
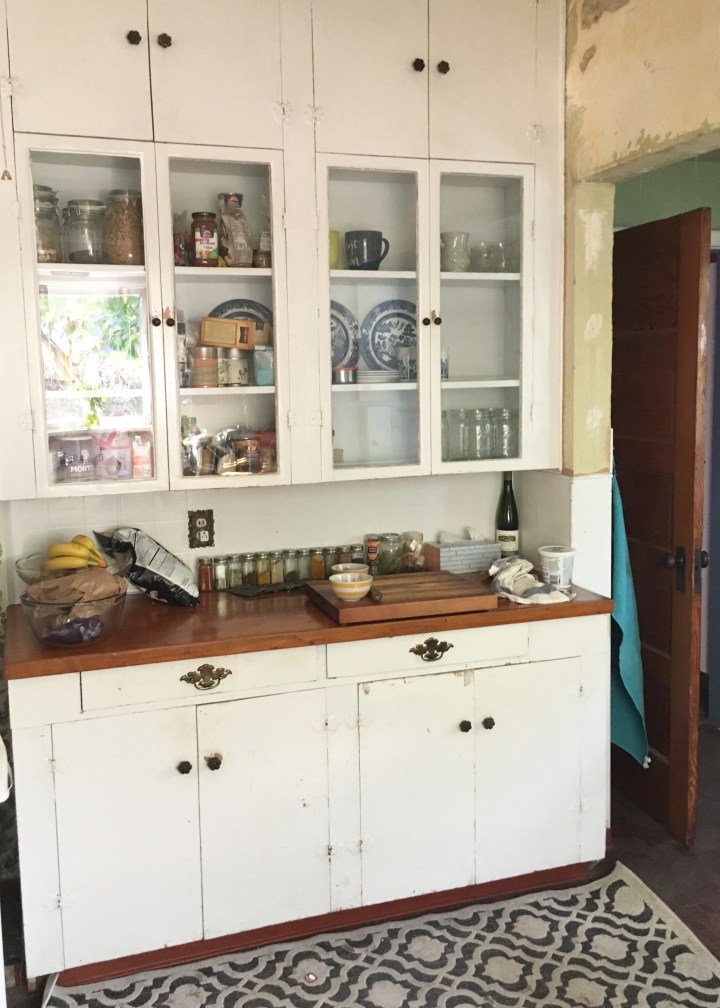
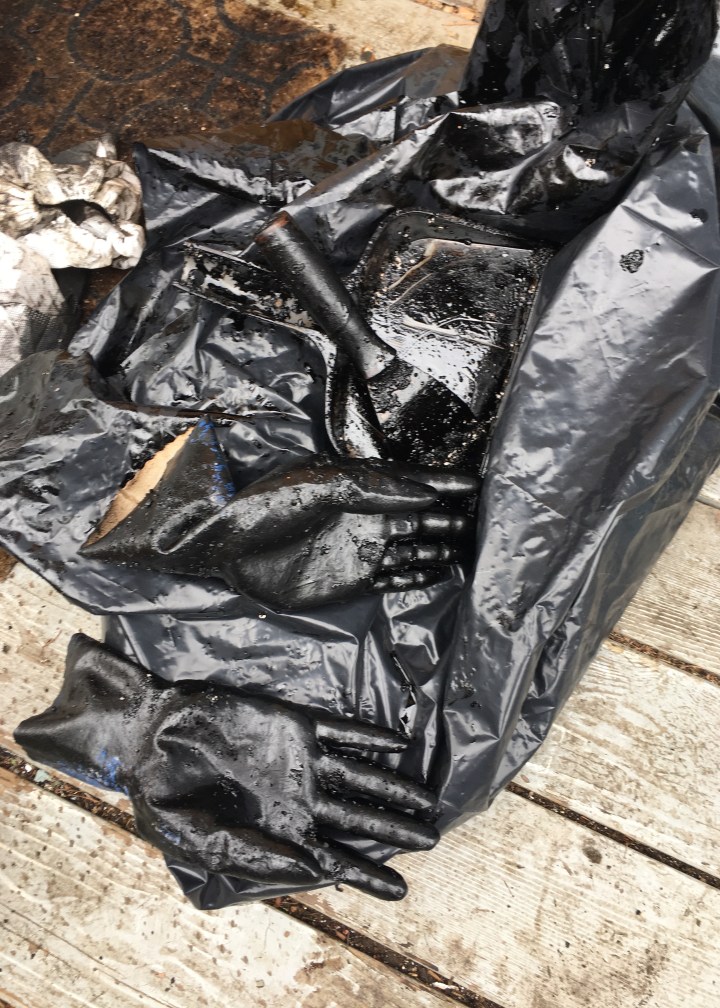
My kitchen was functional and decent-ish looking before this project. I’d dressed up one side of the kitchen and I’d bought a used stove for $50 buck from my next door neighbor, Erik. I went out and bought supplies for the first weekend of the kitchen floors mission on a Saturday morning: hazmat suits (such a sexy look), gloves, goggles, air respirators, two hand scrapers in varying sizes, and a lot of plastic to tape off the various doors leading to and from the kitchen. Even though the vinyl wasn’t asbestos, I planned on treating it that way. It was time to transform the kitchen and it had to get uglier before it could get nice.
My mom was in town to help and we spent the first part of the day taping off the many doors: bedroom door, bathroom door, basement door, stairs door, and the living room opening. That took at least an hour, so it was already past noon when we truly got started, but we had a kill-room worthy of Dexter ready for our plan of attack!

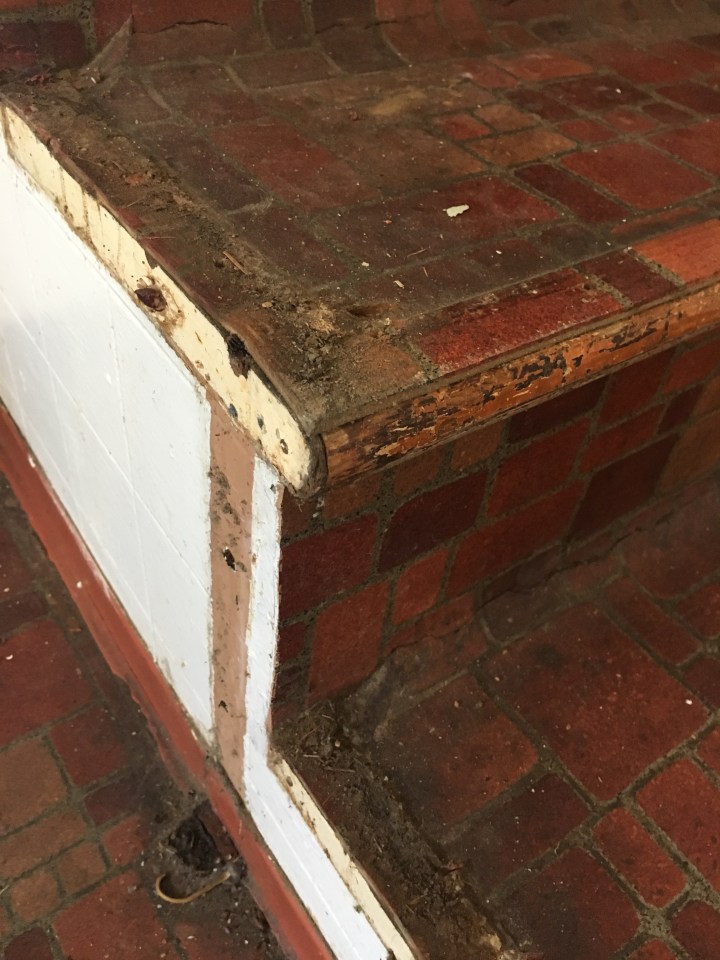
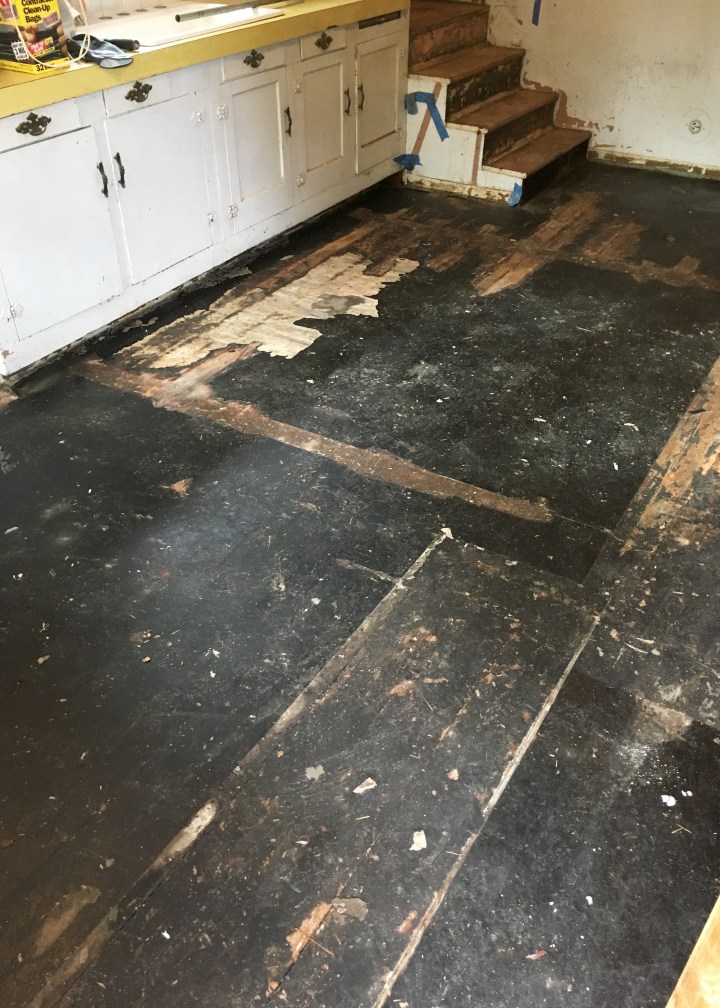
We began at the stairs, knocking down that pathetic little banister first (see second picture) and then removing the metal bracing at the stair noses. That was all extremely positive and went very quickly. I was happily surprised to discover there were actual wood stair treads with proper rounded nosing beneath the sheet vinyl! I had been expecting unfinished plywood with flat edges and nosing… That was probably the last happy moment for the next five weeks. But dang, did the site below excite me!
Yes, I said five weeks. Five very long and painful weeks. The floors certainly took longer than a quick weekend. After exposing the stair nosing we spent the rest of that day working slowly with the hand scrapers on the stairs. Progress was extremely slow. Luckily for me, I live next door to another fixer upper! The house next to mine is owned by a contractor working hard on his own big project (and doing a much better and more informed job that I). Erik is kind enough to come over and help me figure out what to do. He must think I am a complete idiot since I always a mess, but still he’s patient enough to lend a hand and point me in the direction of the right tool, which is what he did that first evening.
You guys, there is such a thing as a floor scraper. Somehow, I did not know this. This was a major idiot moment and I am dying a bit inside just remembering it. Erik came over and saw the disaster we’d created and lent me his floor scraper and of course it worked a million times faster than what we were previously doing.
The next day we woke up, fixed our plastic which we’d had to remove to use the bathroom and go to bed, ate a quick breakfast in the dining room turned kitchen, and got to work. Using the floor scraper I was quickly able to remove the entire top layer of sheet vinyl from the floors. Yes, I said top layer. Yes, there was a second layer beneath it. Yes, am cringing as I write this.
The second layer of sheet vinyl was much more difficult to remove. The top layer had a thin (and, as we discovered, water based) layer of glue holding it to the lower layer. You could fairly easily pull off this upper layer in strips and sheets. The bottom layer of sheet vinyl was a bitch. A thick layer of black tar based adhesive was holding it to my glorious, original, fir wood floors. In many areas of the kitchen I was able to get the both layers of sheet vinyl off but not the tar adhesive. The floor was still taunting me though, because in a few spots I could get both off exposing the hardwood floors beneath! But, in some I couldn’t remove the bottom layer of sheet vinyl or the adhesive at all.
 We picked up the loose bits of vinyl and put it into contractors trash bags in the driveway, taped down huge sheets of black plastic over the still partially tar/vinyl covered floors, and went to bed. Boy, I thought, we made great progress! We’ll be done next weekend for sure! Wrong again!
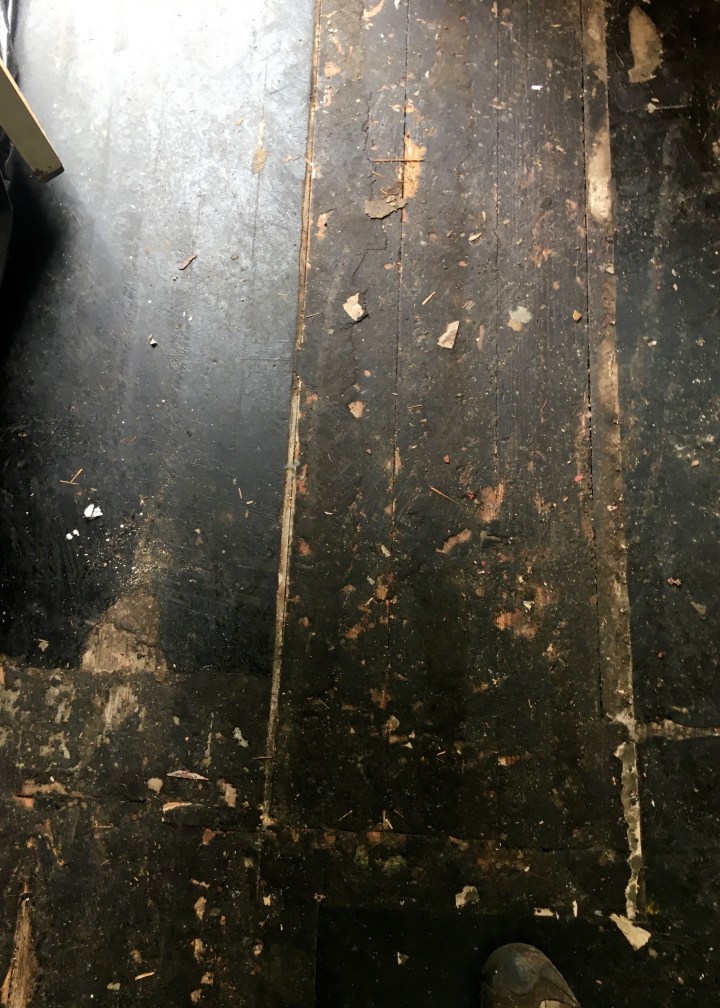
The next weekend dawned and I woke up at 7 am determined to finish the kitchen. I decided to focus on the area by the bedroom door where I figured I’d be able to get up the sheet vinyl in a few hours. I was wrong… (seeing a trend here?). I worked on that nearly all day and then spent the next day at the tool rental store asking for help with a machine. The tool rental store told me to forget it though. They had nothing that would help remove sheet vinyl and tar based adhesive without destroying the wood floor beneath. In fact, they recommended straight acetone to take up the stubborn tar and remaining vinyl (see that stubborn bit by the sink?).
So, I went to Home Depot and bought acetone. Poured it on the tar and tried scraping and watched it evaporate while doing absolutely nothing to the tar. I’m going to be honest here and let you know how incredibly discouraging this was. I was trying to think of alternate solutions and how I could possibly do something else in the kitchen. Tile? Painted plywood? Something had to be better than this heartbreaking view of tar mastic.
In my heart though, I knew the original wood floors were the best solution – not the easiest solution, no, but the best one for me, for this house, and for the direction I want to take it. I was determined and ready for the next plan of action. I spent some time googling and found this product at Home Depot. 747 Plus – according to the reviews – basically liquifies tar cutback to the point where you can squeegee it into one spot in the room and scoop it up using absorbent kitty litter. The many reviews were mainly positive. The packaging explicitly stated it was designed to remove tar adhesives. It sounded like a godsend. Like there was light at the end of this tunnel! A wood floor under all this black tar! Spoiler alert: it did not work as advertised. But you’re not surprised are you?
The next weekend (my third in a row dedicated to the kitchen floors). I pulled off all the black plastic covering the floors. This was going to work! I told myself. This is finally the solution! Many of the reviews stated to spray on the 747 Plus and leave for 4-6 hours before trying to scrape. I decided to try this first. I sprayed everything down and left the house to run some errands.
When I returned the tar didn’t look like liquid, but it was shinier on top, almost melted looking. By spreading cat litter and using a handheld scraper I could scrape the shiny, melty layer of the tar off. It was not squeegee type work, it did not come off easily. It was incredibly messy, leaking through the hazmat suit and staining my knees, butt, and arms with tar. Sounds safe right? But the worst part of this? It stunk. It smelled so freaking bad. It was such a strong scent of tar it gave me a powerful headache and the entire house reeked. I left all the windows and doors open to try to air it out.
Unfortunately, after hours of scraping at the slightly liquidy tar, the floors now looked even worse than when I’d begun that day. The tar had spread over some of the exposed wood so now everything looked black and depressing. But I wanted to give the 747 Plus another chance. I opened another bottle and followed the directions perfectly, waiting the recommended time between steps. This worked no better. It was a sticky, black, horrific mess. My headache got worse. I made the floors worse! See here how on the picture on the left (from the previous weekend) you can see the wood of the floors but in the picture on the right (after the 747 Plus) the tar actually covers up that whole area too?


I finished what I could and threw in the towel. The tar was everywhere now and I’d gotten it all over the place. I took a bath that night and called my mom on the verge of tears. Luckily, my mom’s response was, “I’ll be back next weekend and we’ll try something else and tackle it together!” Otherwise I would have probably given up completely right then and there. The next weekend, my mom came up and Erik from next door came to the rescue! He brought over two machines: a big round buffer with scraper blades and a drum sander. One of these, he assured me, would save the day.
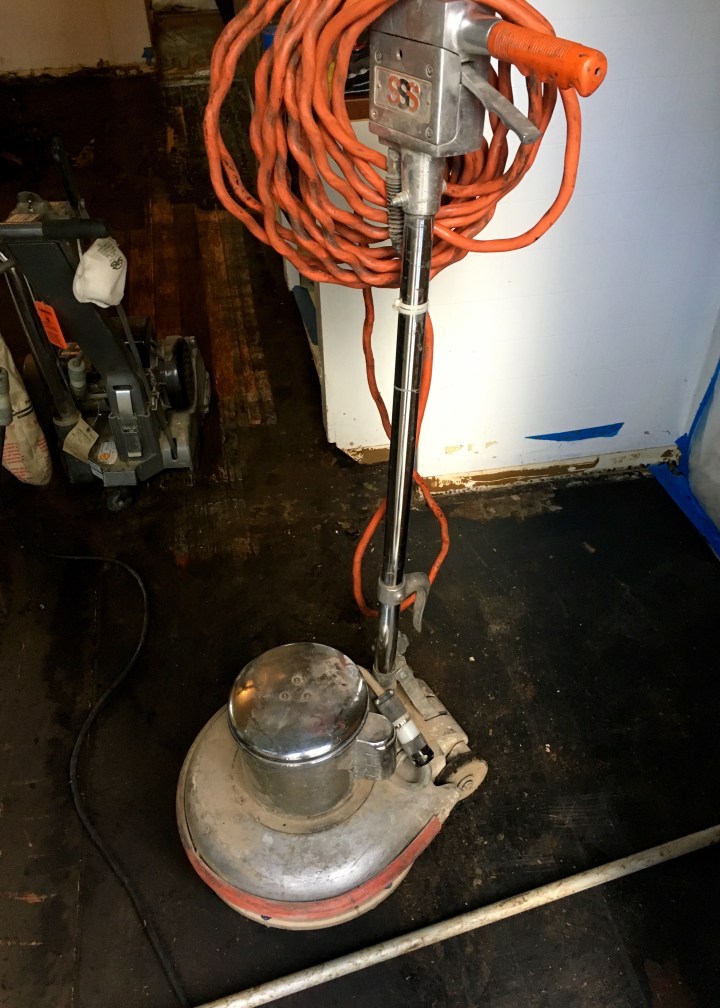
First up: the buffer machine. We plugged this guy in and Erik gave me a few minutes tutorial on how to use it. It seemed like with continued pressure in small areas it would scraped up the tar and it looked very, very easy to use. Plus not bending over and scraping would save our backs! Erik left to go work on his own many house projects and I began using the buffer machine. Or should I say, began trying to use the buffer machine. What Erik had made look easy, was in fact, really fucking hard. I literally was not strong enough to use this machine. I would turn it on and the thing would take off across the room, basically dragging me helplessly behind it. It was scary and dangerous and I immediately knew I had no business using that machine.
Not that there was really even much of an option to continue using the machine, because within a few minutes the machine blew a fuse. Yup, the shoddy electrical on the house (which was supposed to be replaced just a few weeks later on the 24th of October) could not handle the load of the buffer machine. My mom and I started trying to figure out if we could go buy and install plywood over the kitchen floors this same weekend.
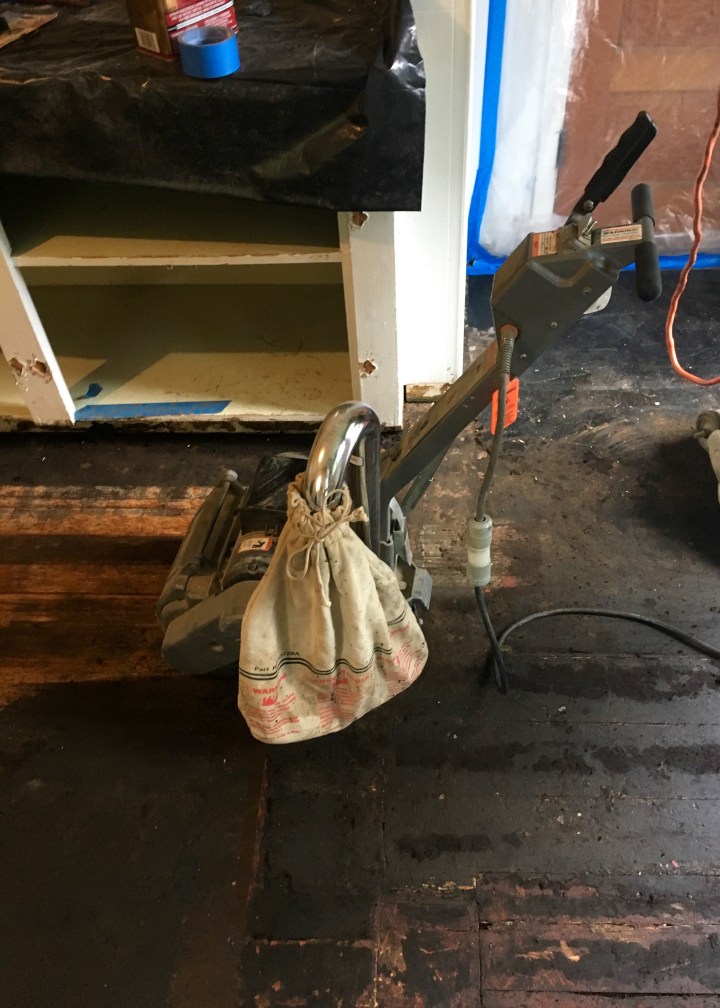
Erik came back over. Erik saves the day. Again. He decides to run an extension cord from his garage, across his yard, over the fence, past my garage and into my kitchen. “Don’t give up,” he tells us. Erik decides we should try the drum sander on a part of the floor that is less covered in tar. He plugs it in and runs it over a small section a few times. Holy hedgehogs in Hades! IT ACTUALLY EXPOSED WOOD FLOORS!!!
At this point, I was basically jumping up and down clapping my hands with glee and my mother was ready to sell me to Erik for a couple of horses and a trading agreement. We found hope! Four weeks of working on the kitchen and there was hope!
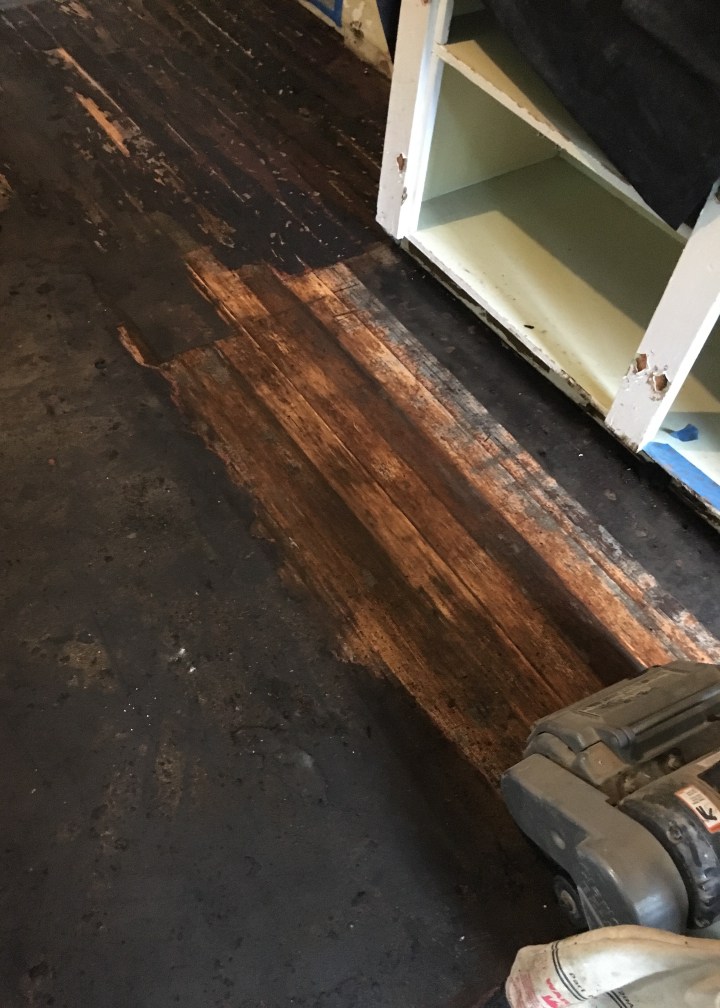
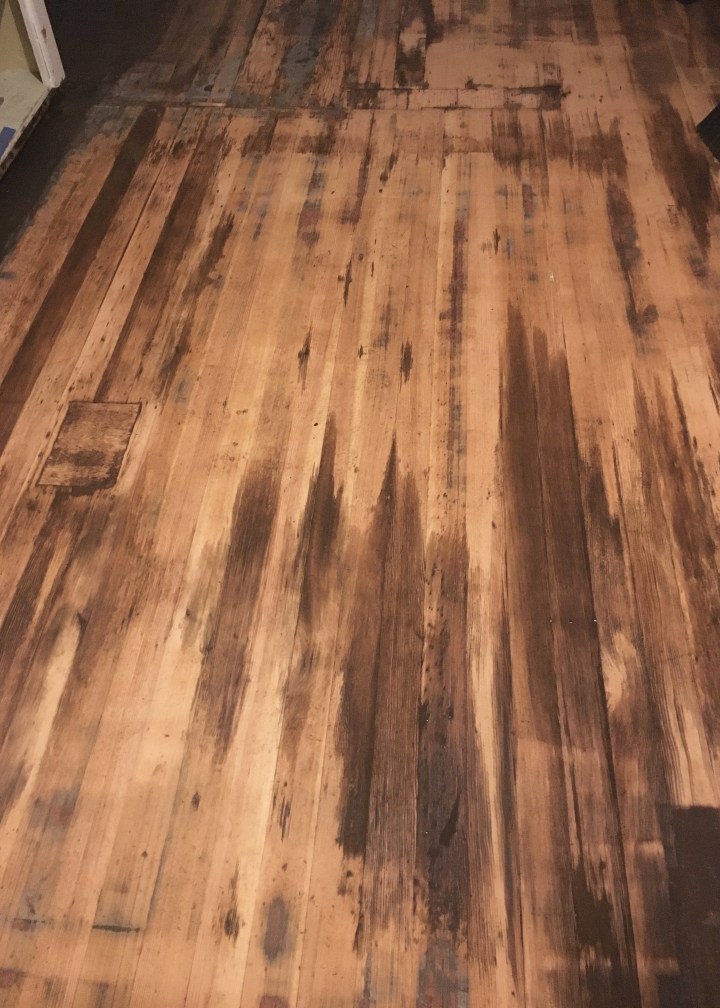
Now Erik cautioned against using the drum sander on the super built up areas of tar so we returned to hand scraping what we could and pulling up rogue nails. Luckily it seemed the 747 Plus helped to soften the tar in most areas making it slightly easier to scrape. We worked at it the rest of the day and made decent, but not amazing progress. You can see here the areas I sanded with the drum sander, the areas we scraped, and the areas that were still tar covered.
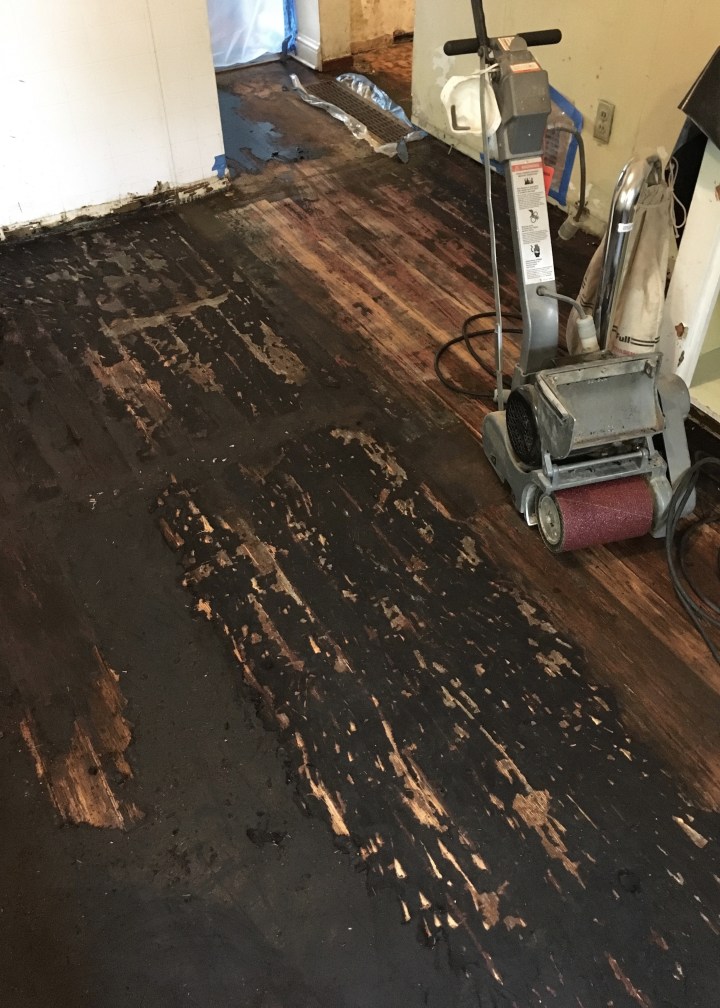
Luckily, Erik returned on Sunday and told us to just screw it and use the drum sander on the more built up areas of tar too. We happily accepted his proposal and by the end of Sunday we had this lovely and promising view!!
Then Monday night after I got off work we sanded a little harder on some of the corners and ran the sander over the center again. I am absolutely obsessed with this drum sander by the way. It is SUPER easy to use, really fun, and not super loud or obnoxious. It’s easy to control and gets a hell of a lot done. It’s my new favorite power tool and has a hefty lead over all the other power tools I have had love affairs with.
Anyways, after our second pass things we’re looking even better. It was at this point I realized these floors could look way better than I’d originally thought. A little more work on them and I thought I’d be able to get a pretty stinkin’ close match to the floors in the rest of the house. That makes me unbelievably excited!
Left to do the next weekend (note: this was now the 5th weekend in a row I’d working on these floors) was edging the room and moving to higher grit sandpaper. Erik suggested we purchase a cheap belt sander from Harbor and Freight for this job. I now do everything he says, so of course I did exactly that. The belt sander is smaller and able to get the edges of the rooms, farther beneath the cabinets, and into the corners the belt sander can’t make it. But because there are no perfect endings, this belt sander did not work so well and the tar still wouldn’t come up and grrrr… let’s just all pull our hair out together, okay?
And all of a sudden… I was out of time to work on the floors. It was time for the bathroom to be demo’ed so the electricians could come do their work. The floors were put on pause and left in this mostly okay state… until the end of February. Yes, that’s right folks, I did not have a kitchen from early September 2017 through the first week of March 2018. So before we get back to the bathroom and before I return to this kitchen saga, let me fill you in with all the other things I had on my plate last fall… stay tuned!
Update: check out Part II of this saga here!
