Little Bathroom Jungle

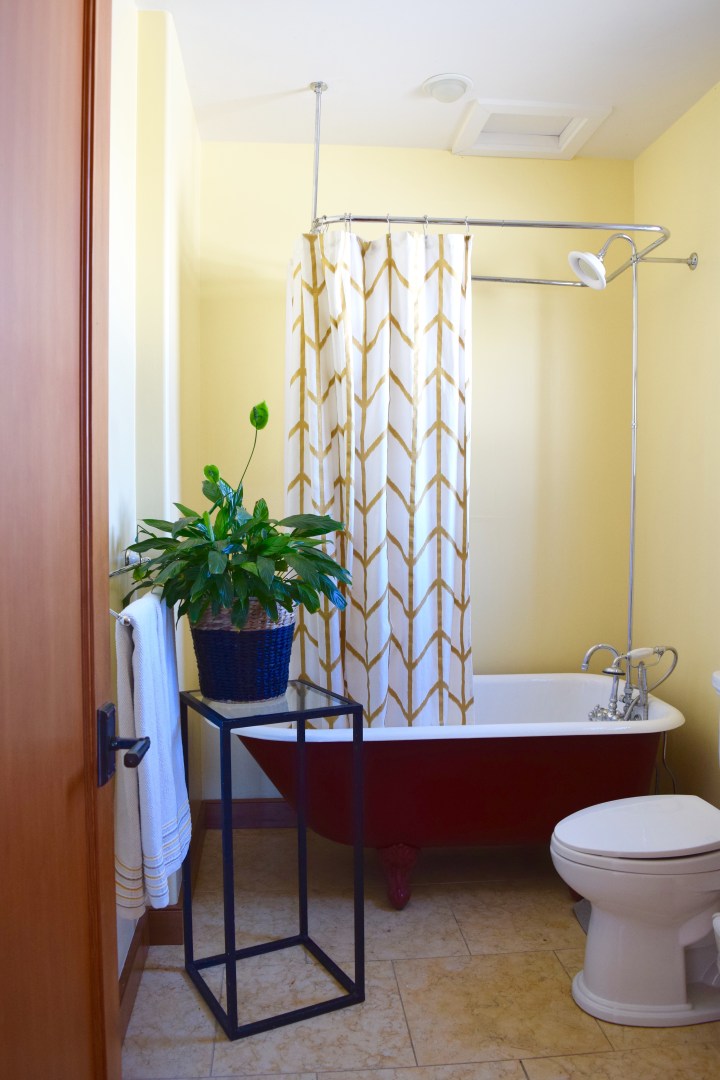
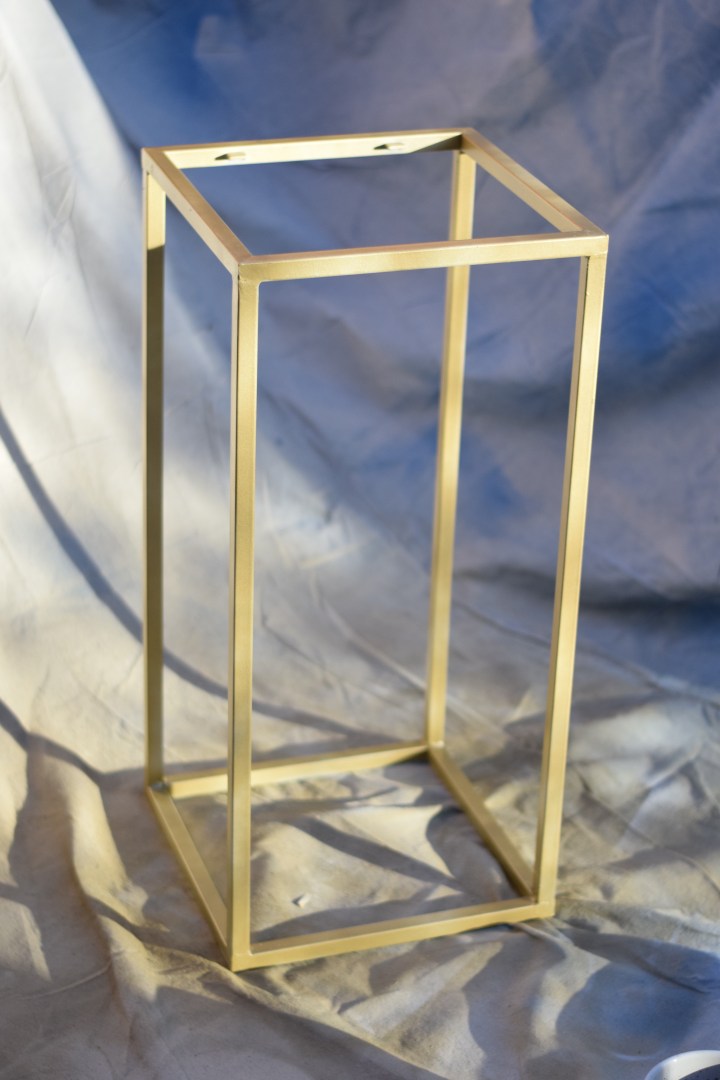
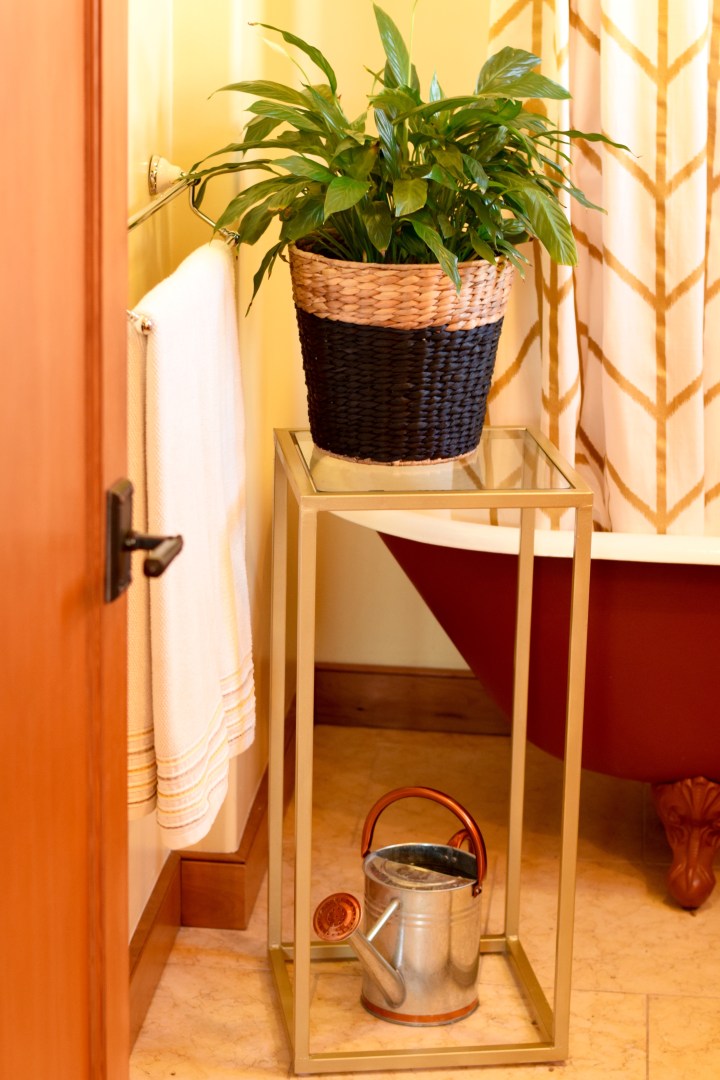
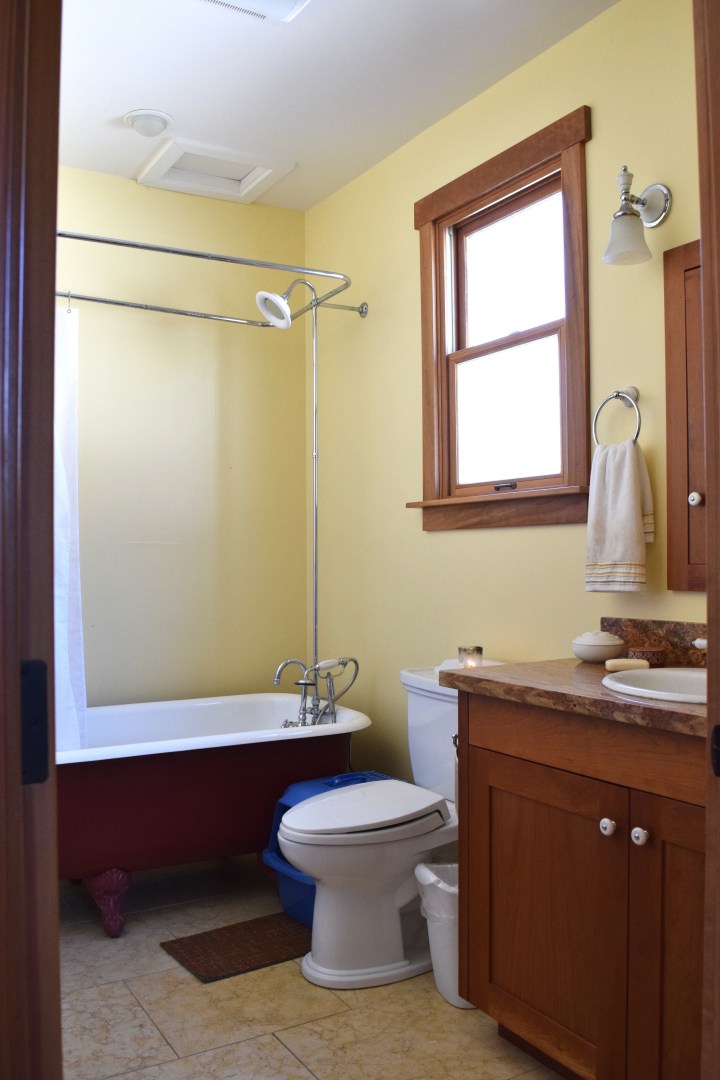
When I first moved in, my bathroom (okay, okay, the downstairs bathroom) had great bones, but not much going on. I added a new shower curtain, some storage containers, and a painted gold plant stand.  I wanted the room to be full of life though, and as those of you who know about my addiction have already guessed, I wanted some plants! I wanted a bathroom jungle! I’ve been so inspired by pictures like this and this. I admire their bohemian flair, but mostly the liveliness the plants add to the space. Black and white rooms can so often be stark, but the addition of plants makes them feel much more natural. Since I always hit up the garden section of IKEA,  I had lots of things on hand. I picked up several of my favorite containers and a few plants on one of my last IKEA trips. I brought them home and decided to see what I could do to start my own little bathroom jungle. After all, one of my Oma’s plants was already living on the plant stand in there!


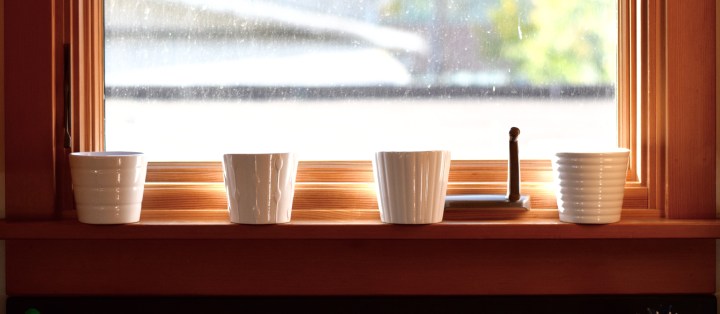
Because I bought so many, I stuck four of the small IKEA containers in the kitchen window. Now I need plants for here too!


Kitchen Window Plants | Land of Laurel


Then I went into the bathroom (the original purpose for the pots!) and stuck four more on the back of the toilet. I had plants for these ones! I instantly loved it. Look at all that life! All that greenery! Think of their ability to regulate indoor air-quality! Sold. Now I wanted even more plants.


Mini-Bathroom Jungle | Land of Laurel


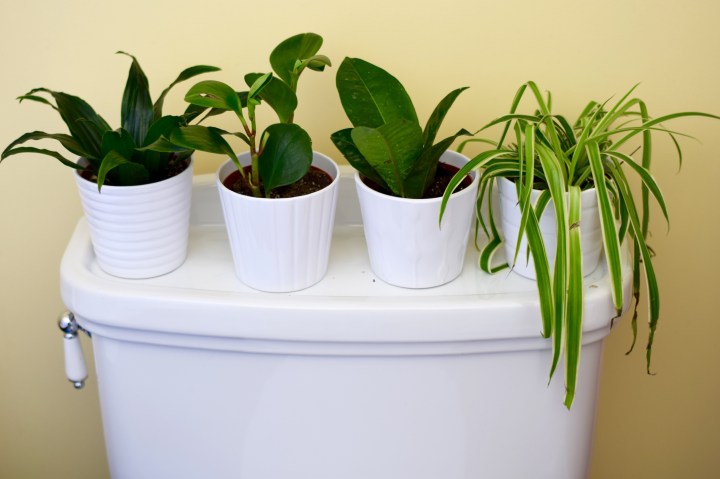
I had just plopped the plants in their little plastic containers into the pots at this point. They looked pretty great there on the back of the toilet, definitely more exciting than a lot of the things I’ve store on here in the past!


Plants in the Bathroom | Land of Laurel


While I loved the plants themselves, the white pots on the white toilet was a little blah for me. The look was clean, totally fine for some people, but I wanted more contrast, more excitement. You know me, never one for simple! And since I’ve recently embraced gold on an extreme level, I went for it once again.


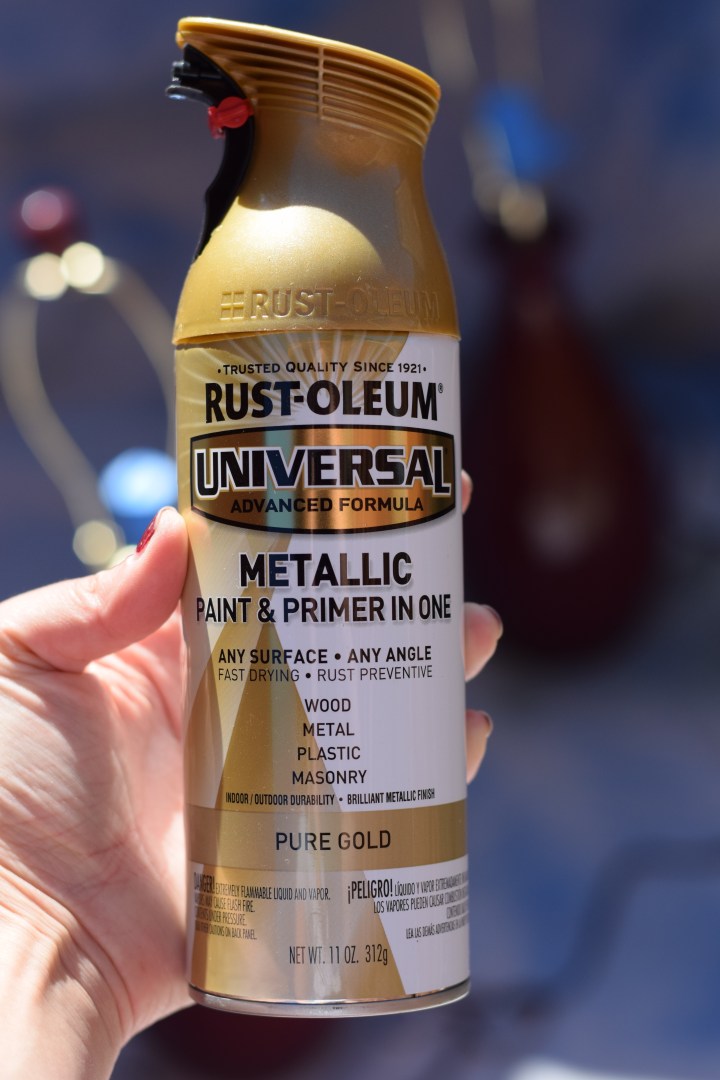
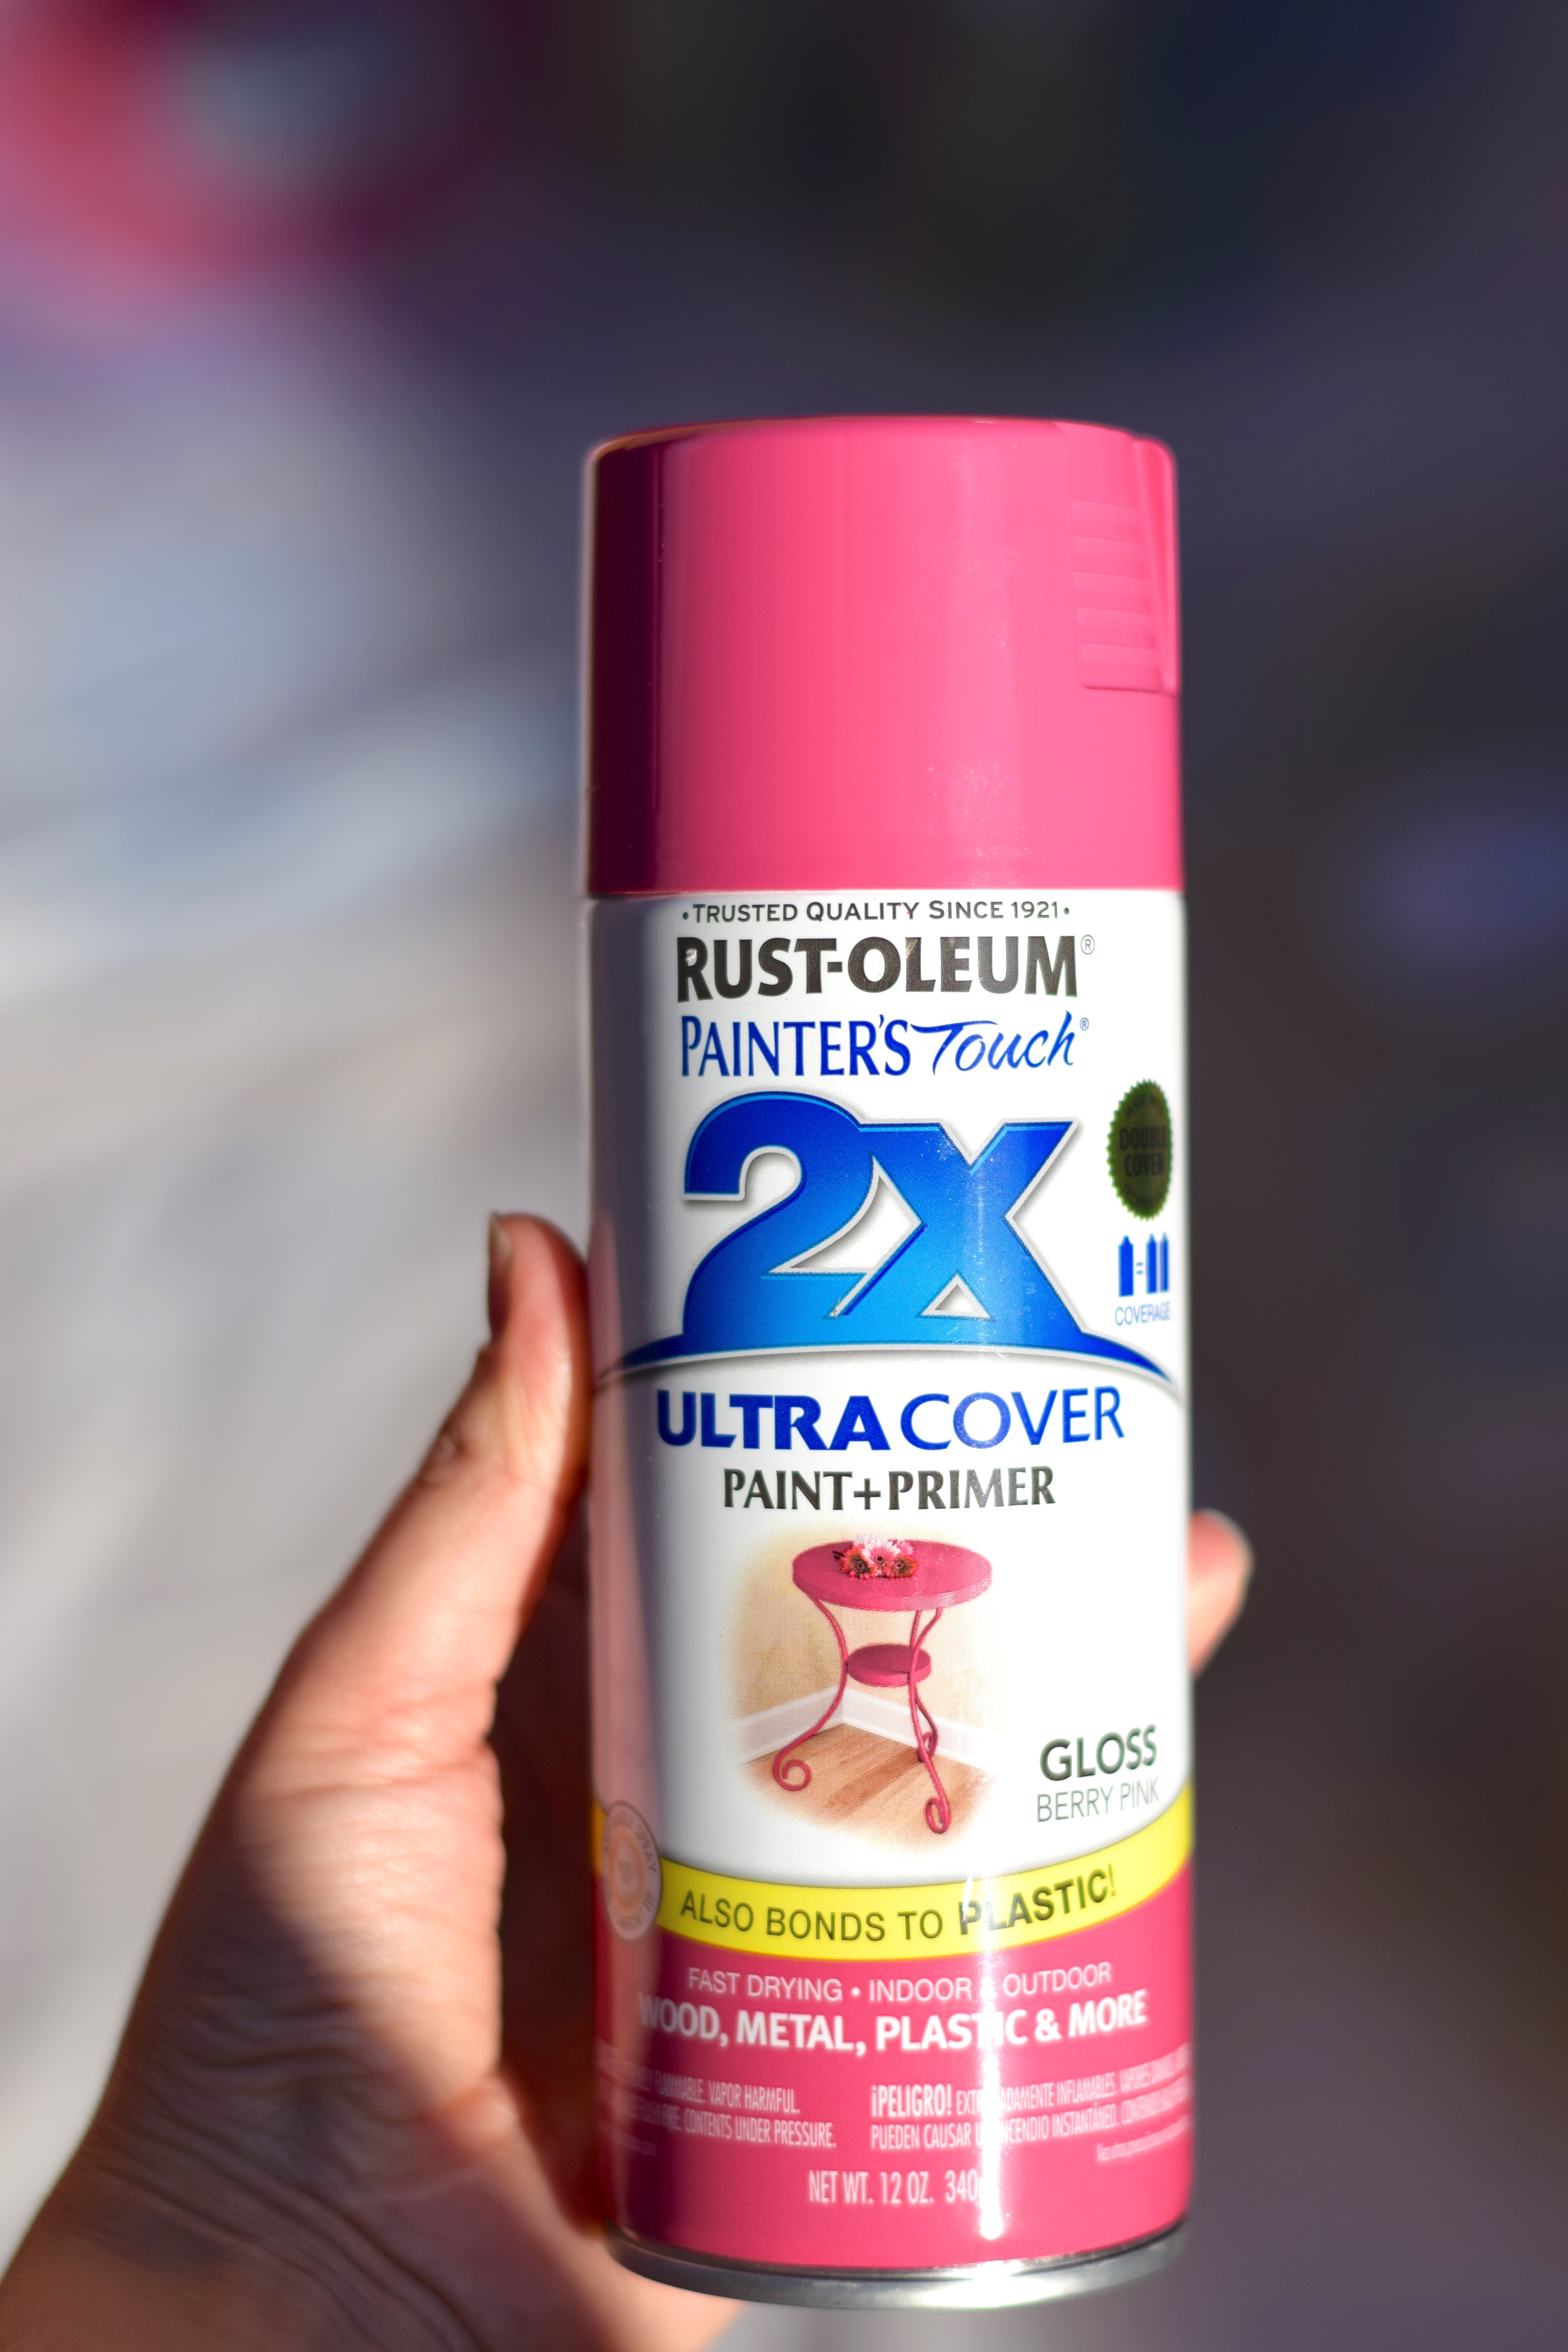
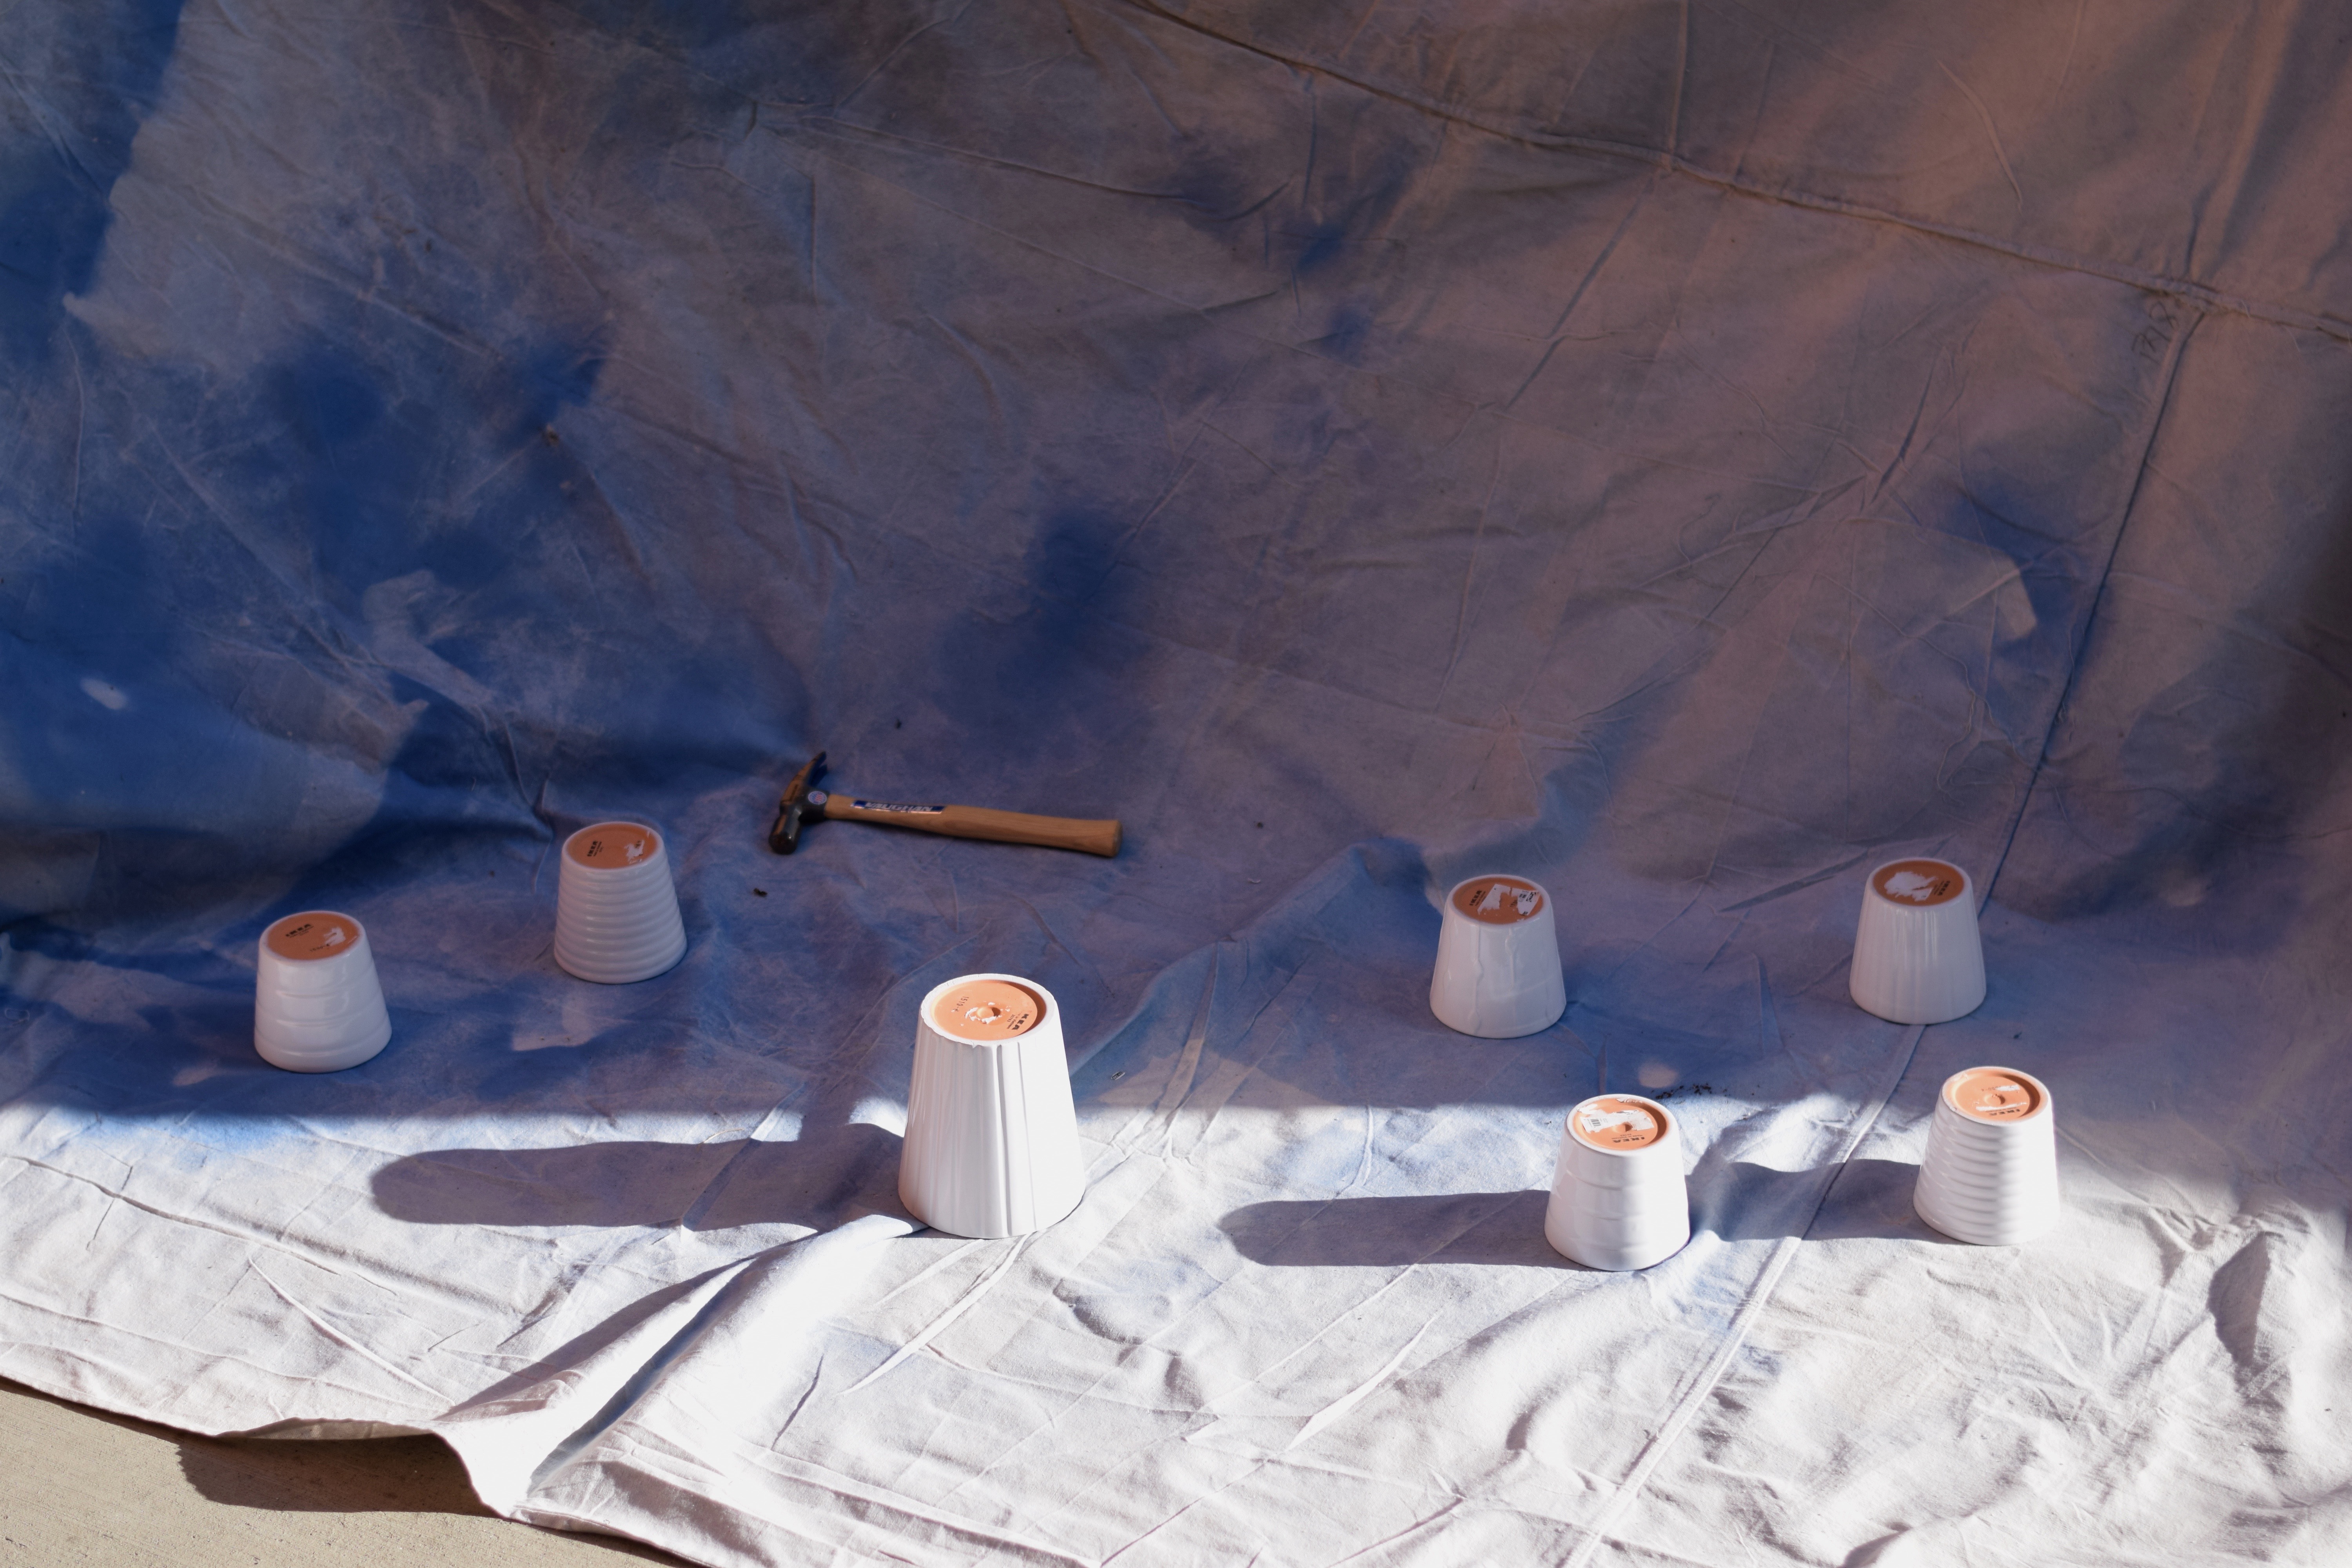
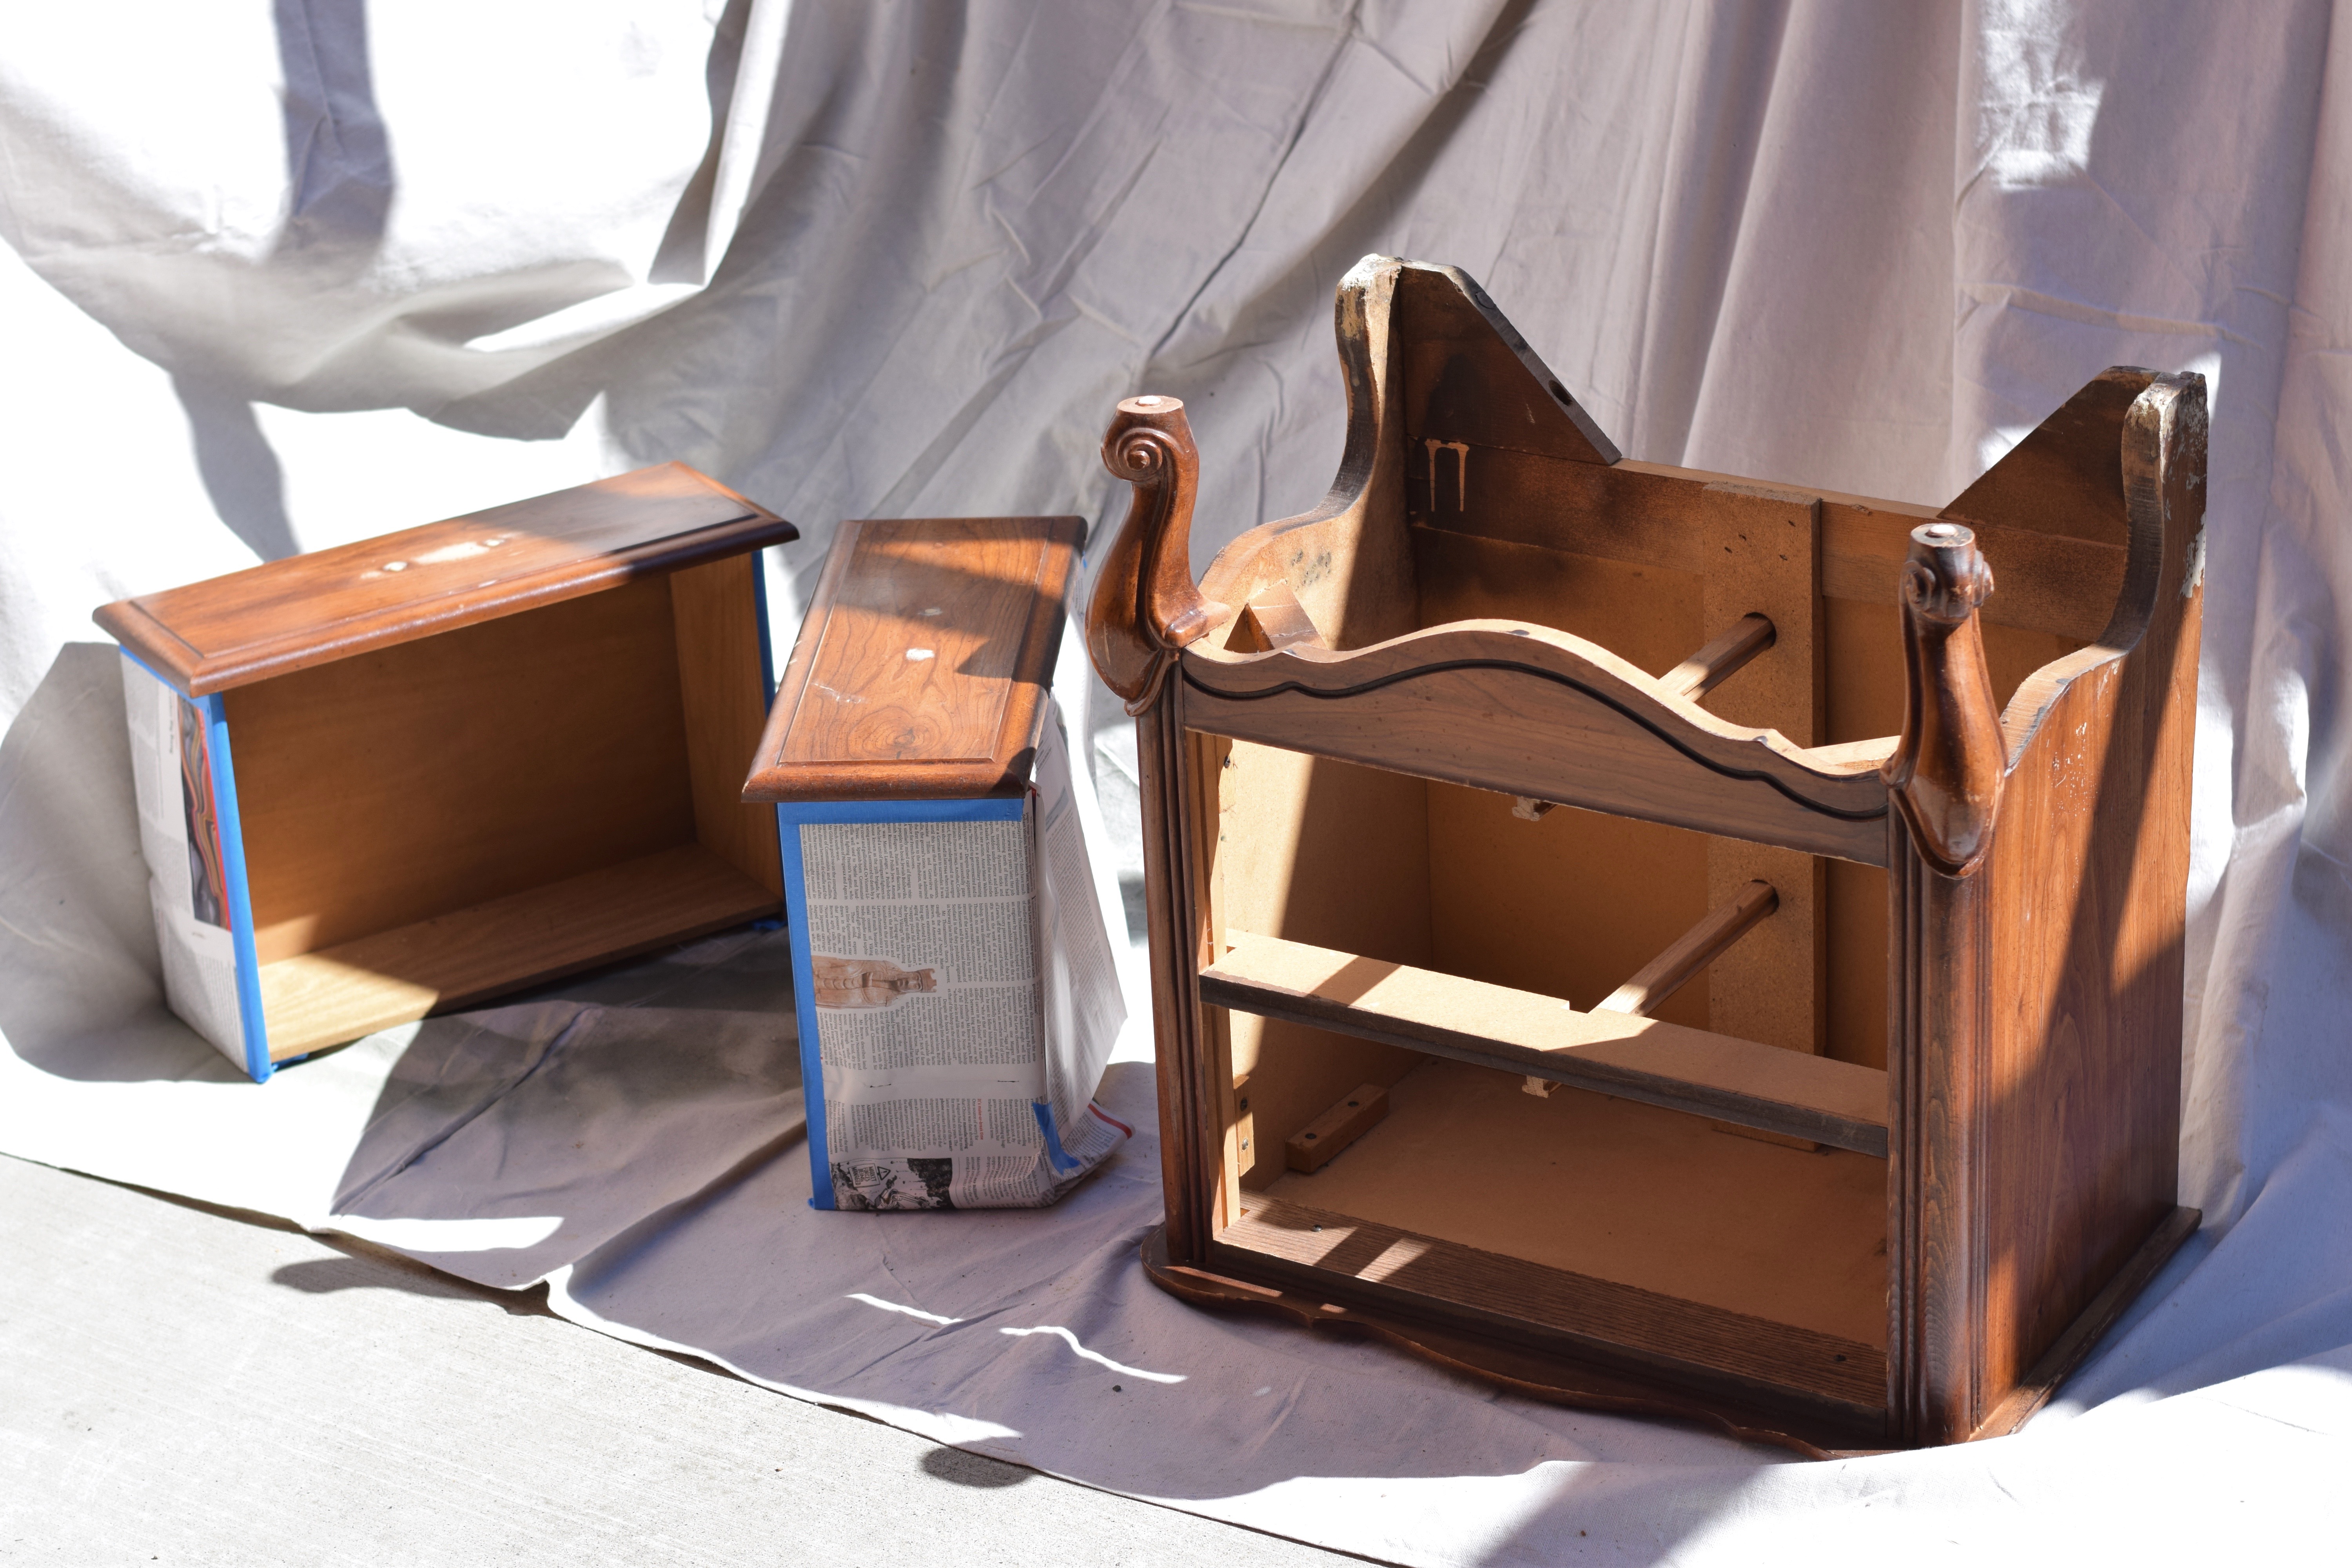
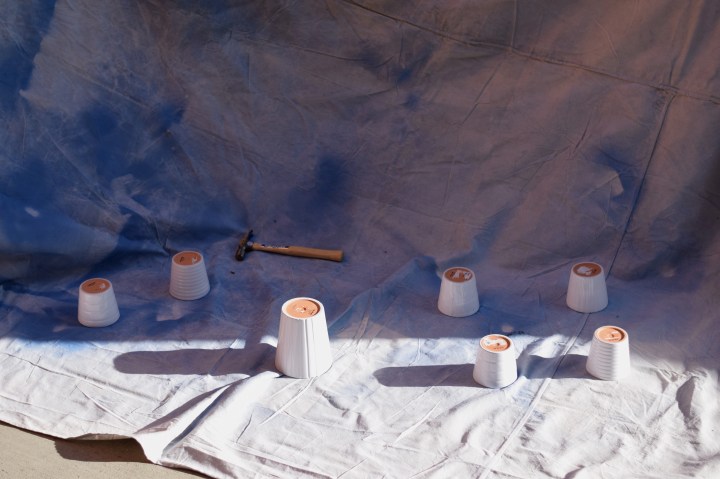
I painted these guys way back when I worked on the Paint it Pink Challenge. It’s easy to spray paint things all at once. Here they are, upside down, in their original state (I decided to paint two of the kitchen pots too!).


Spray Painting All the Pots


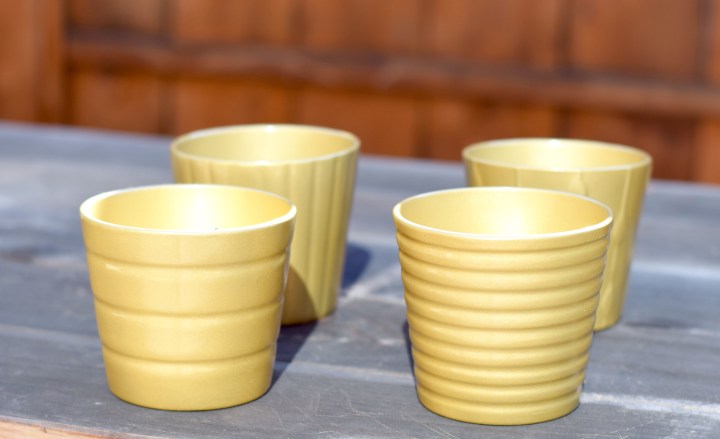
And, after absolutely no prep and my favorite gold spray paint, they started looking much more fun!


Painting IKEA Pots Gold | Land of Laurel


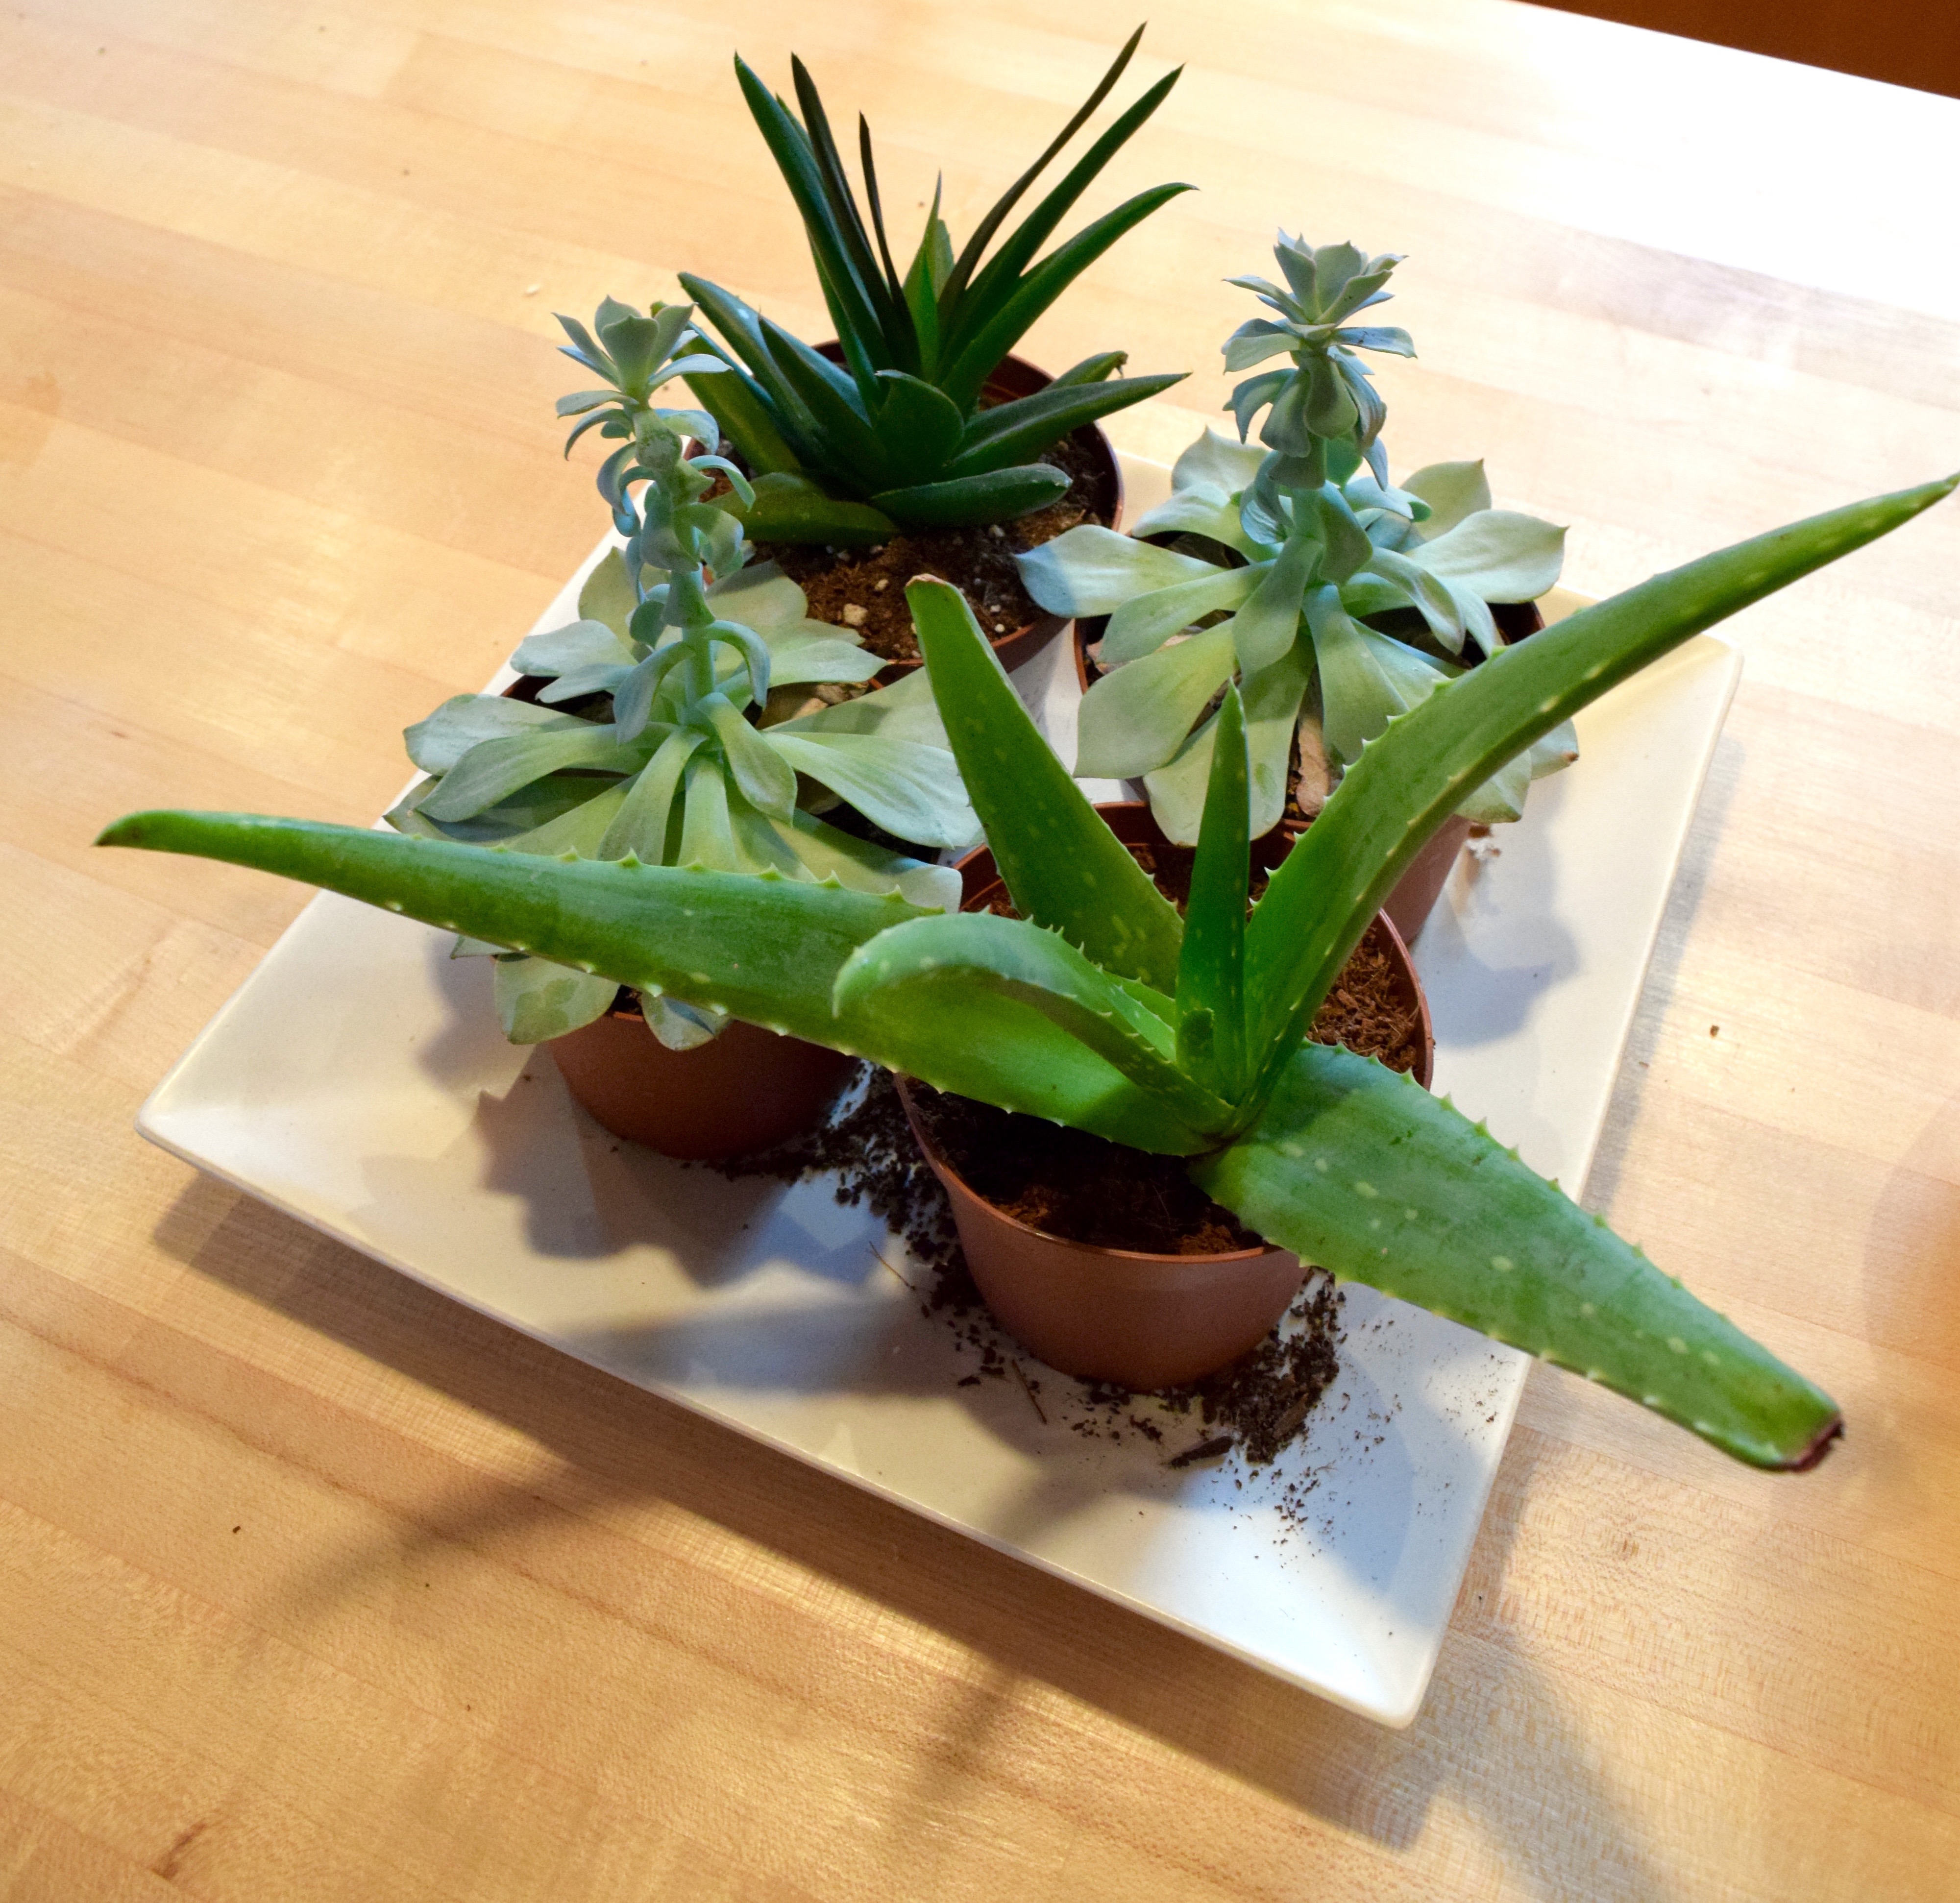
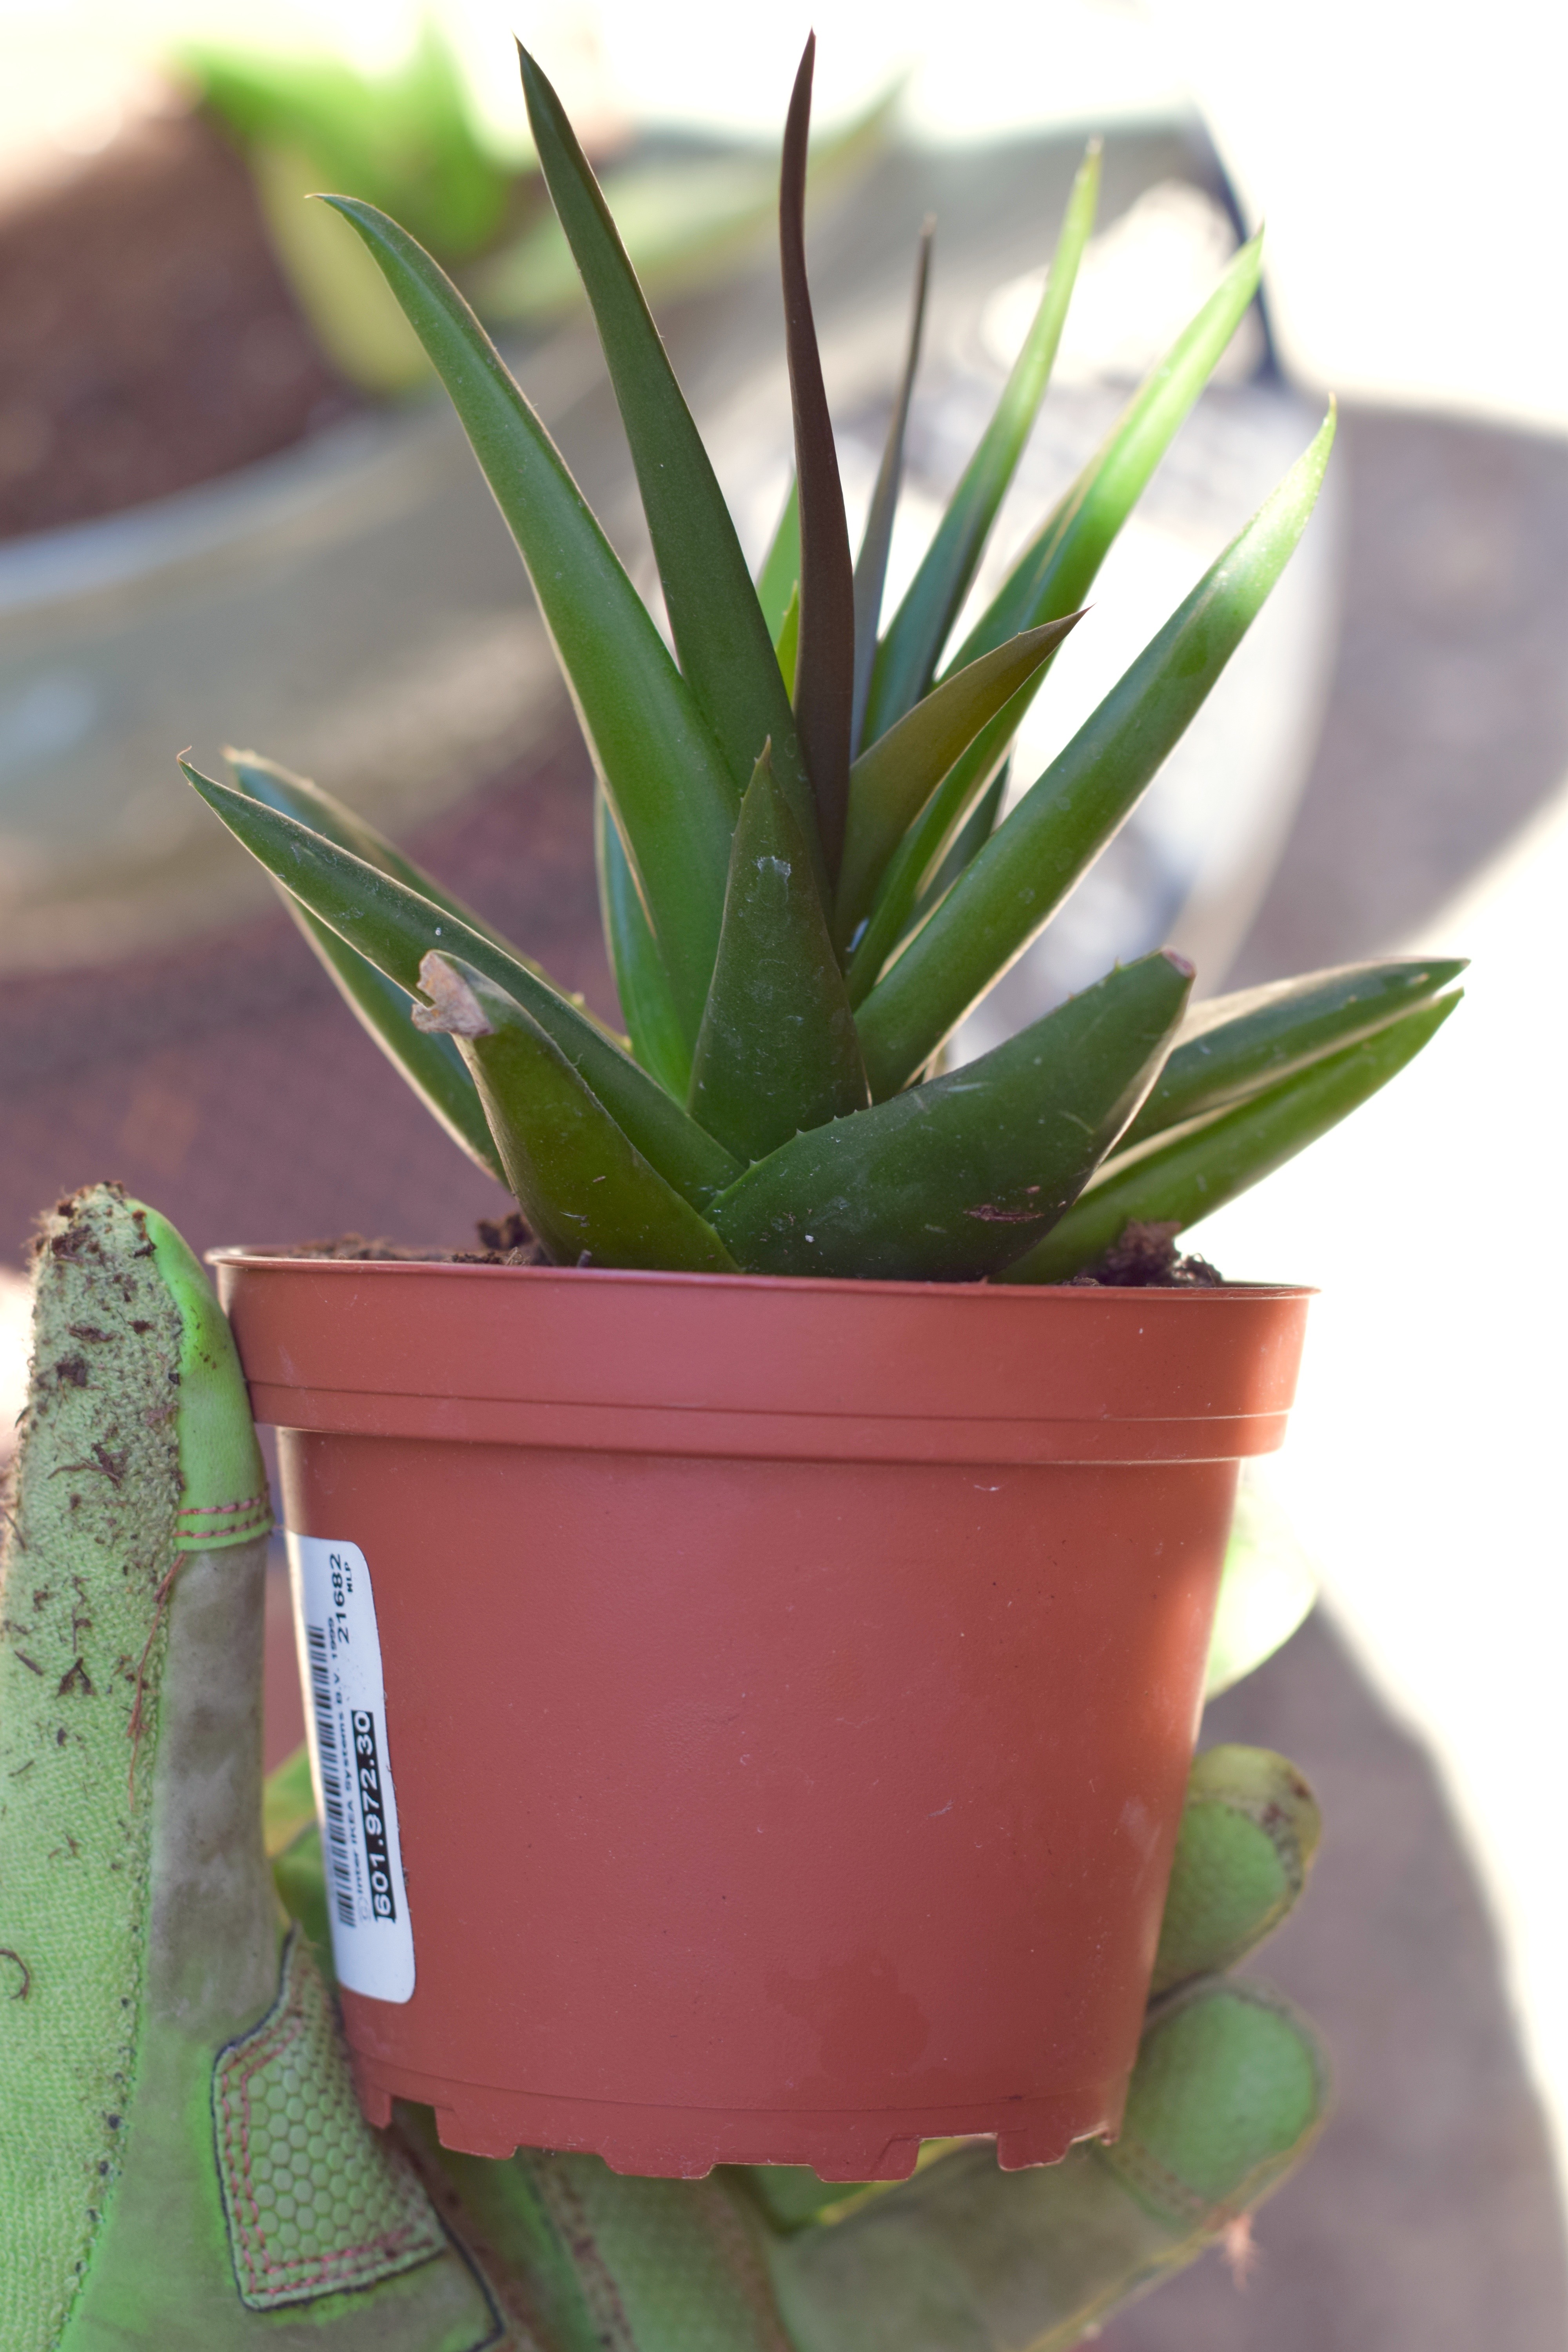
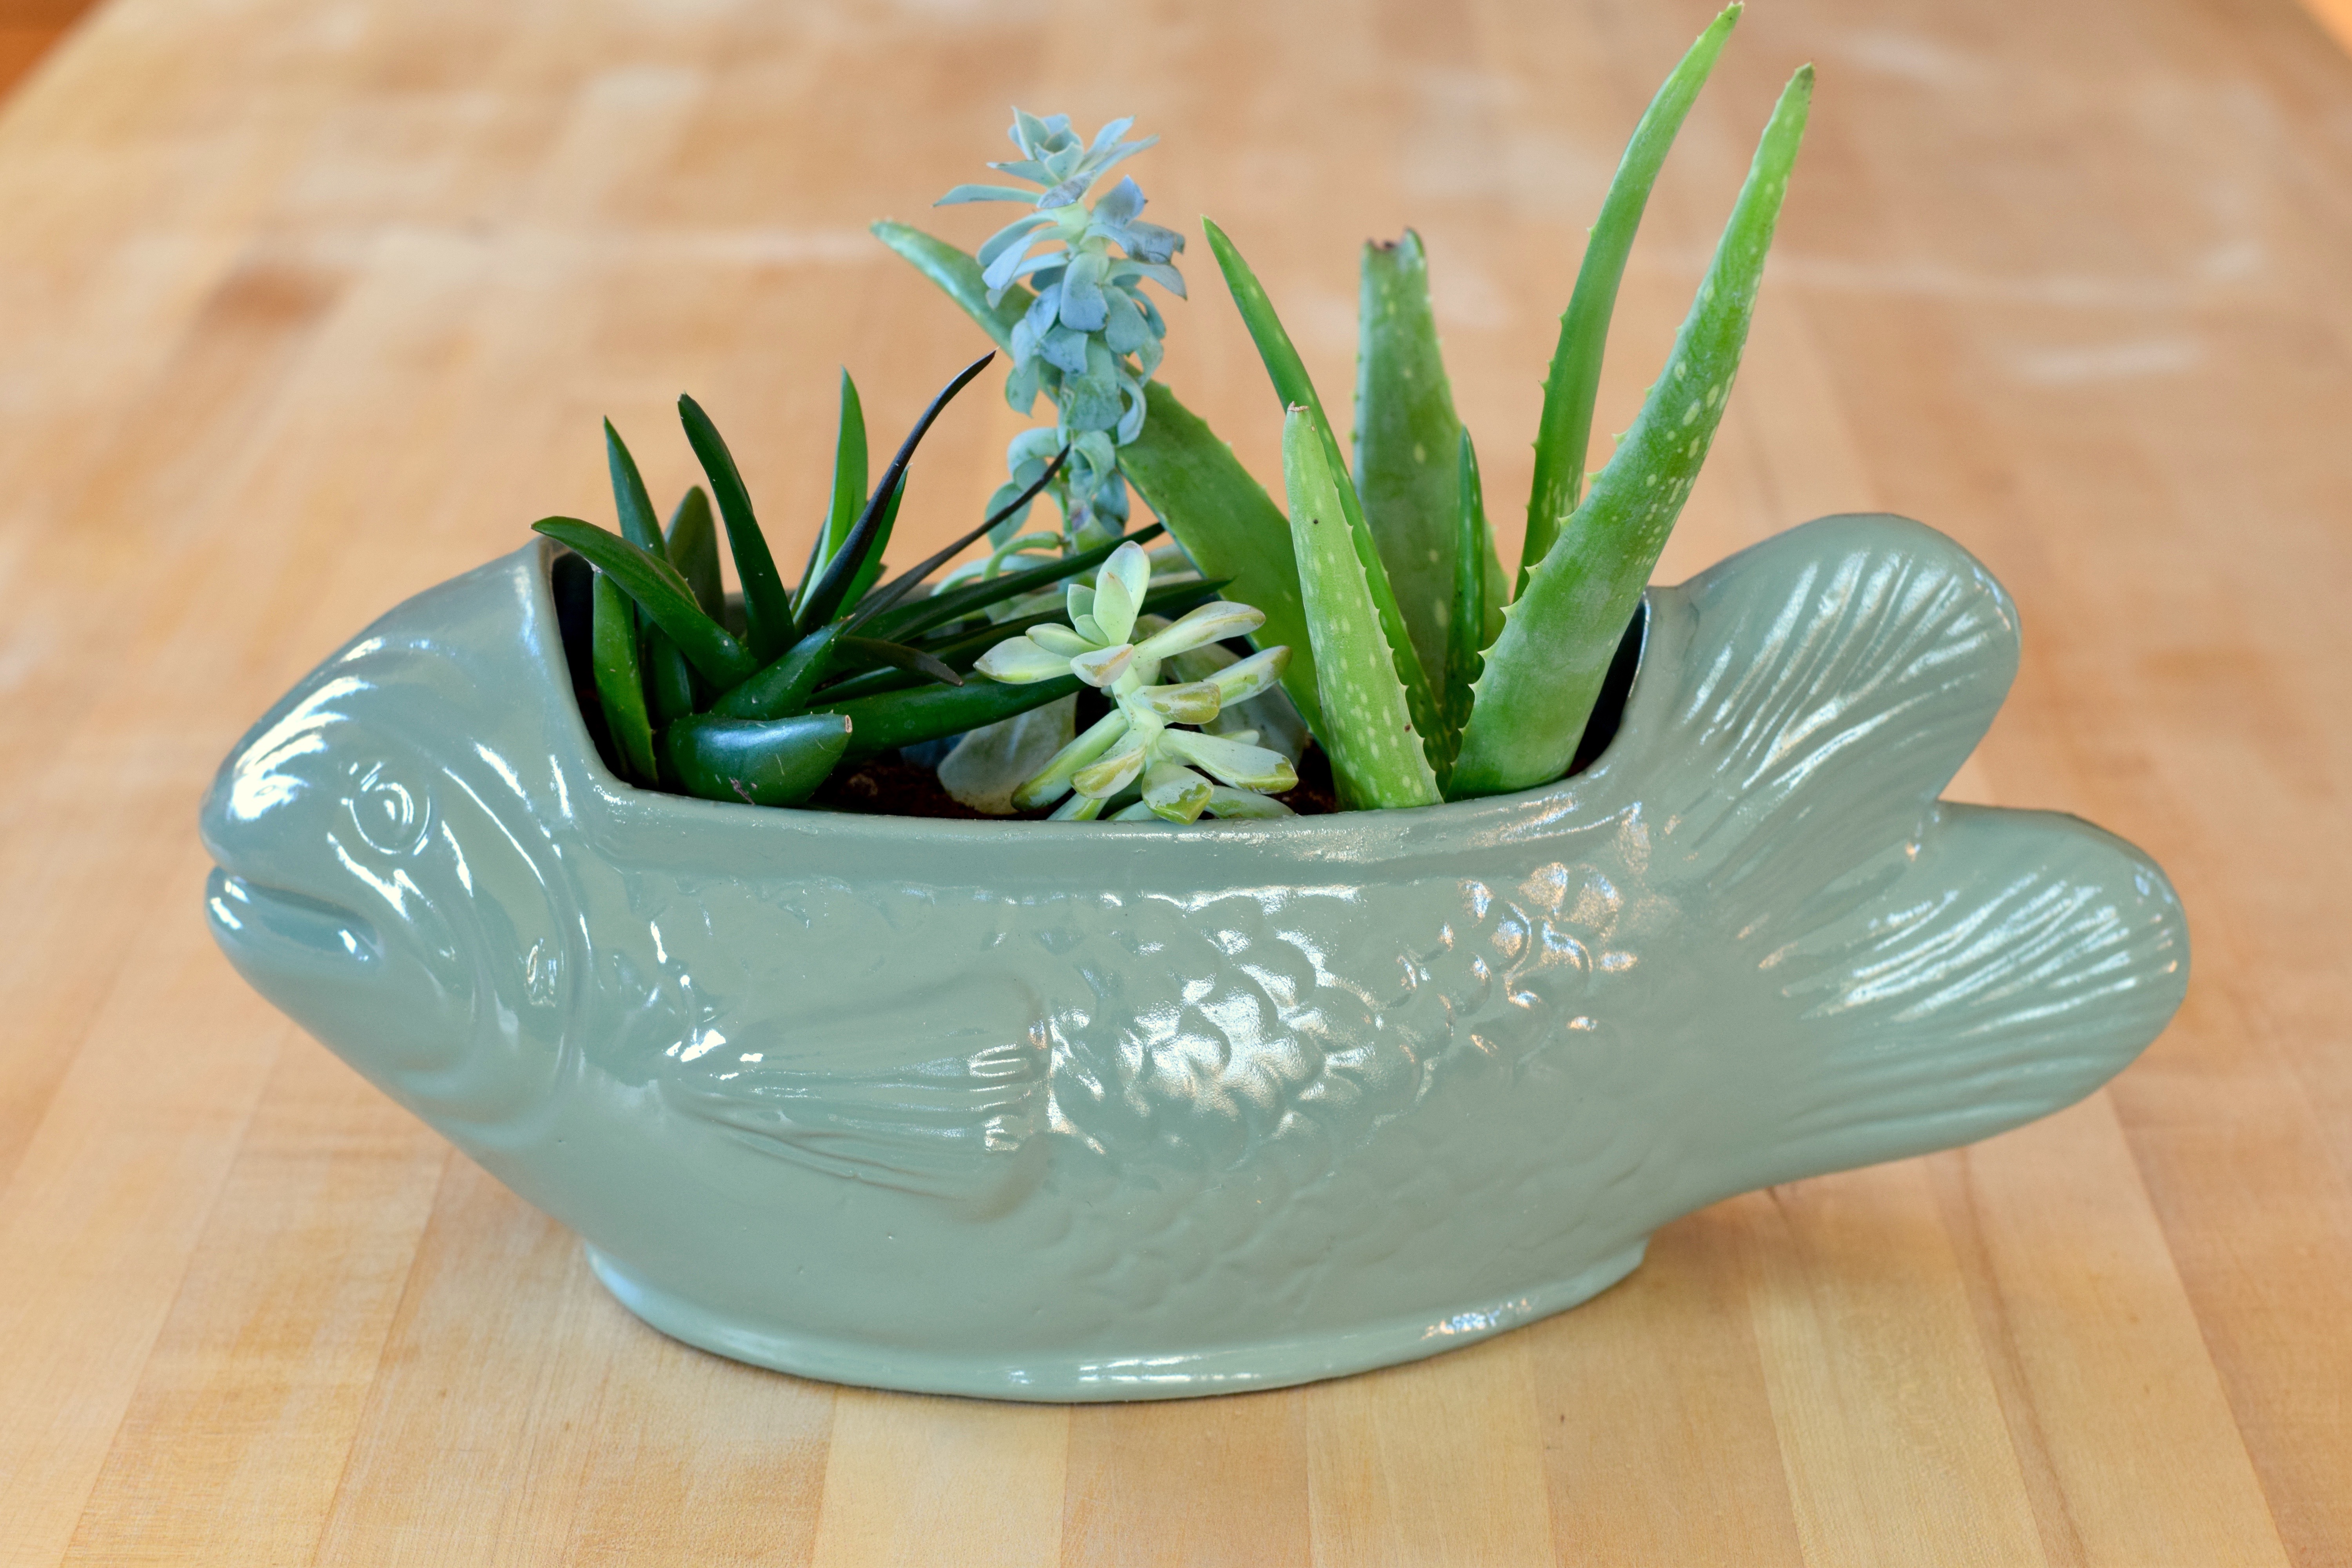
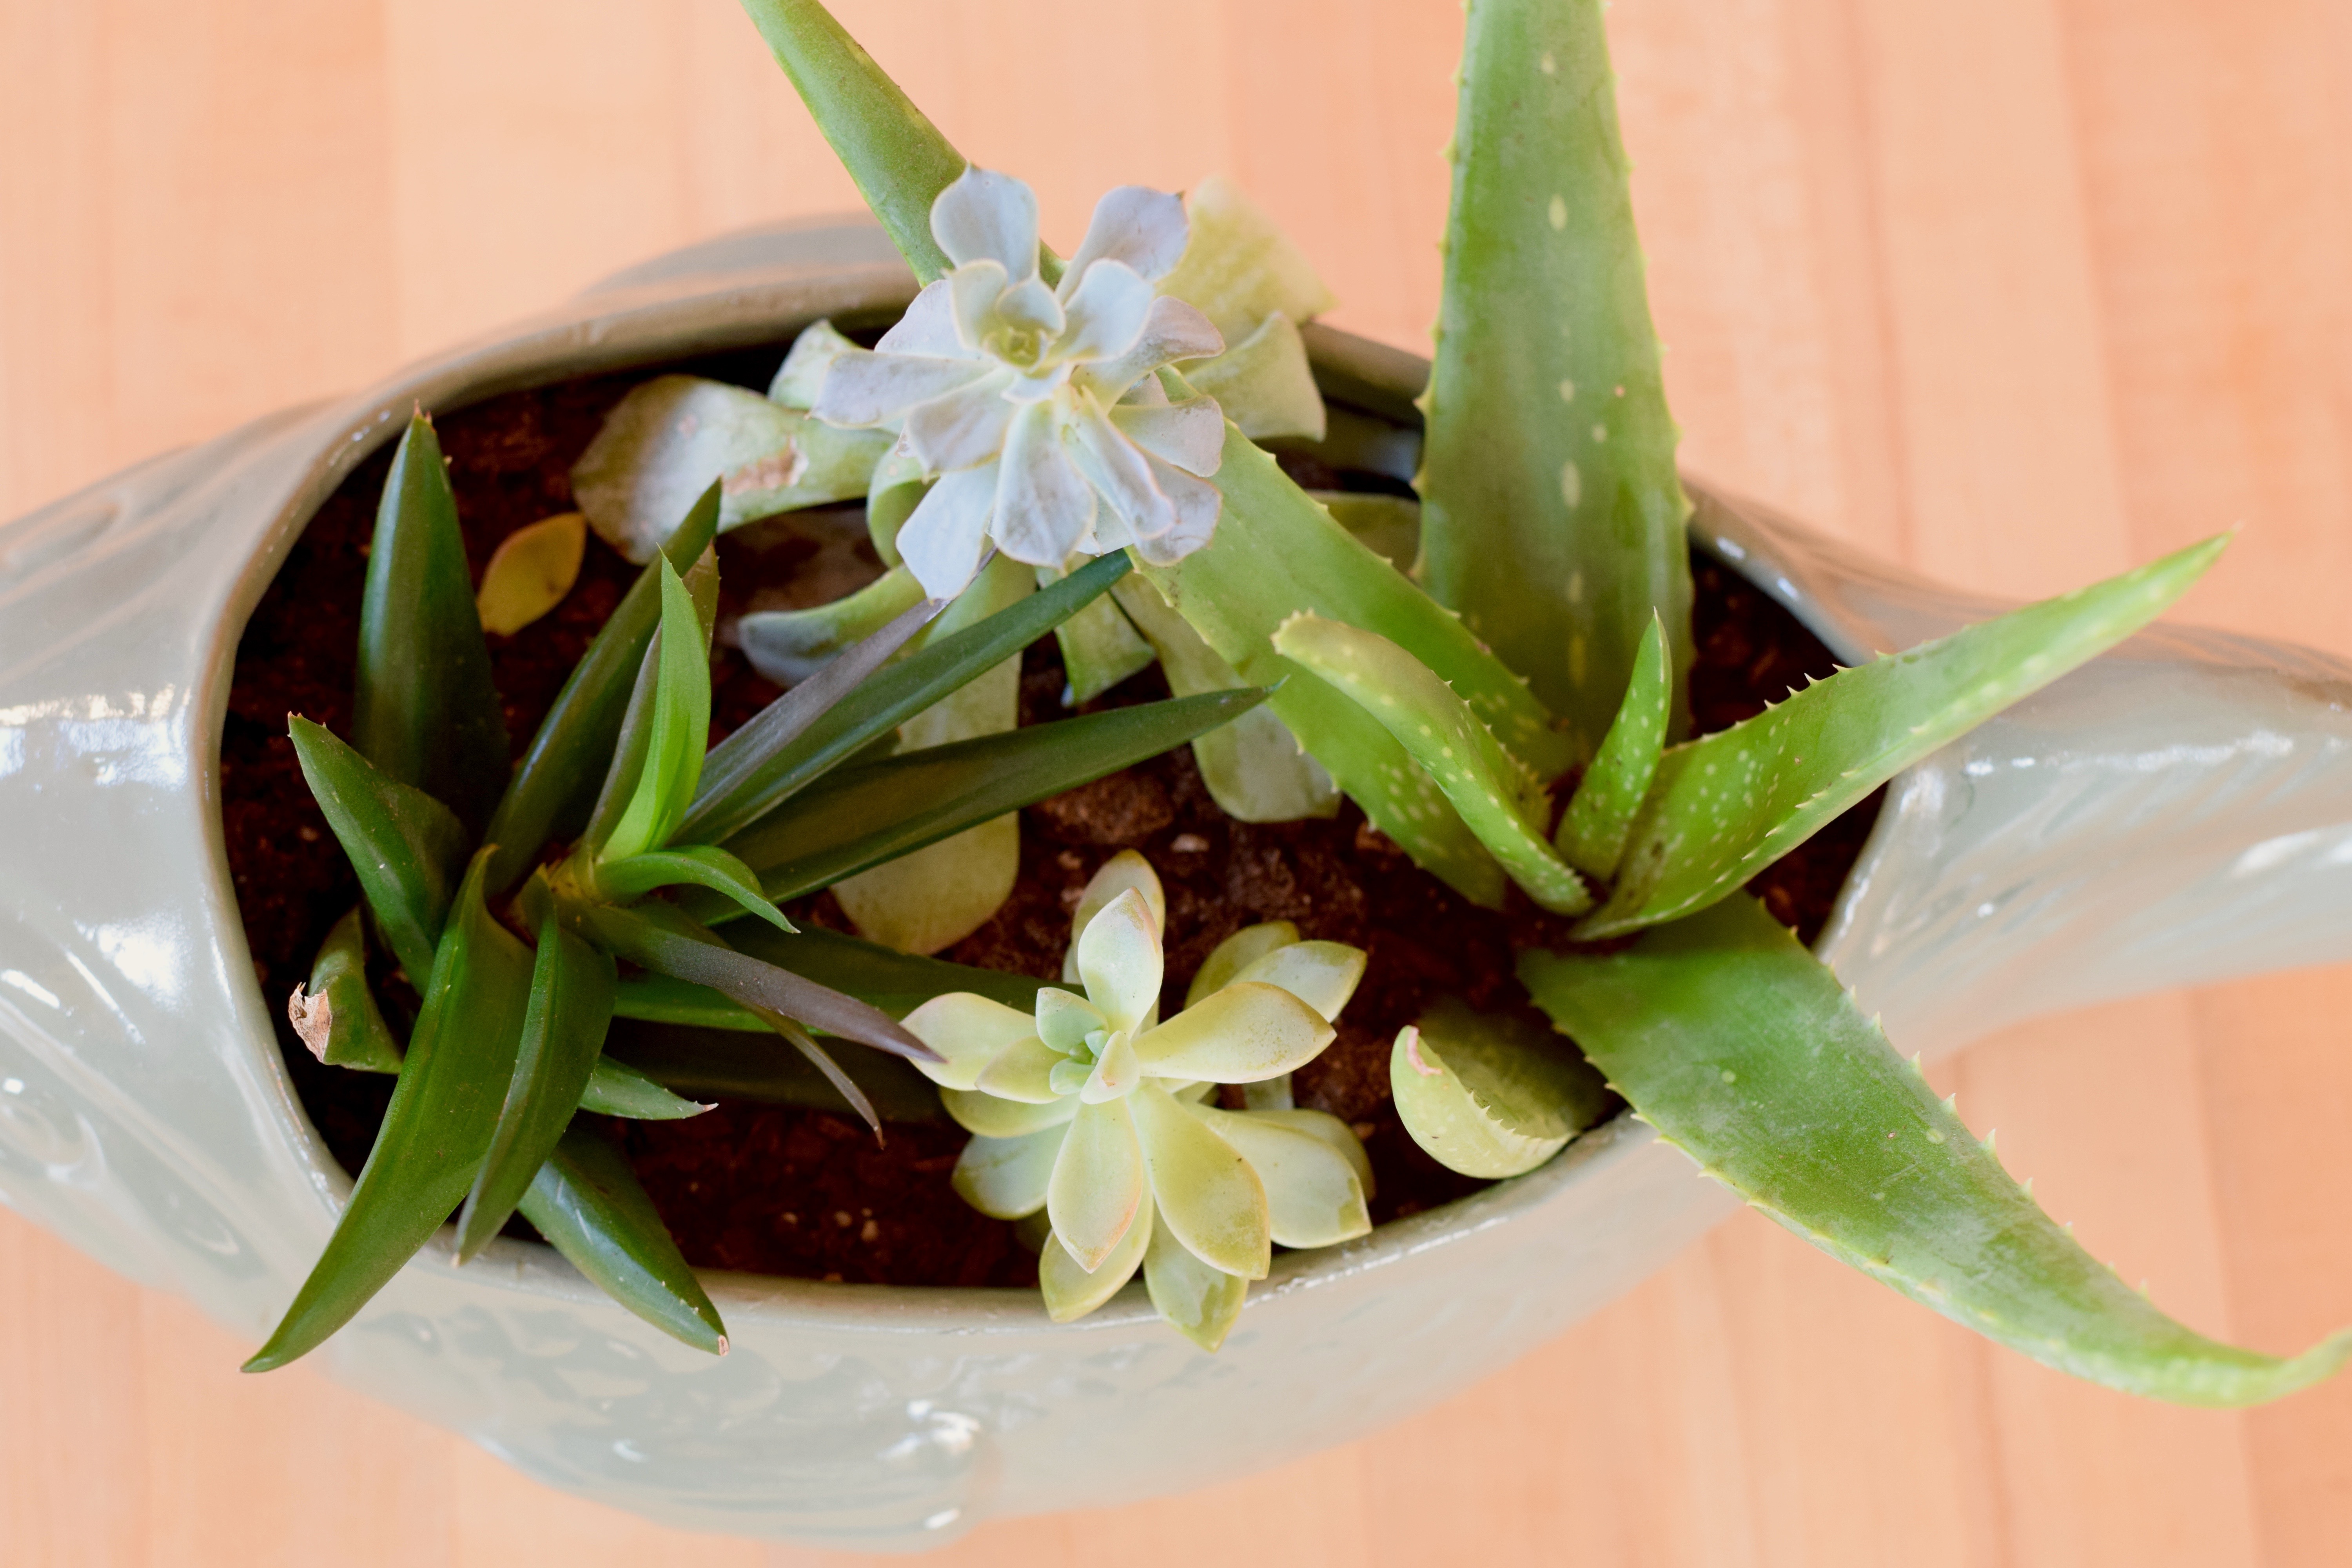
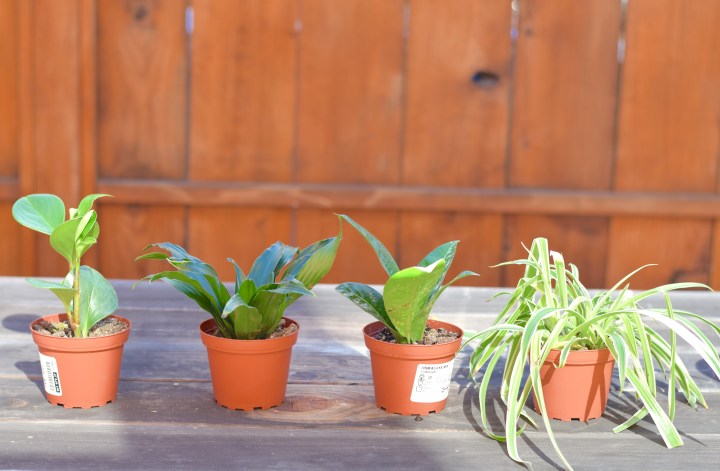
The plants were still dashing even in their plastic containers! I’m no gardner, so I can’t tell you their exact types, but I chose them because they were all different. The long spider plant on the far right with it’s droopy leaves was perfectly different from the tall round leaved plant on the far left. I made sure it mix it up when I picked these guys out.


Picking Plants | Land of Laurel


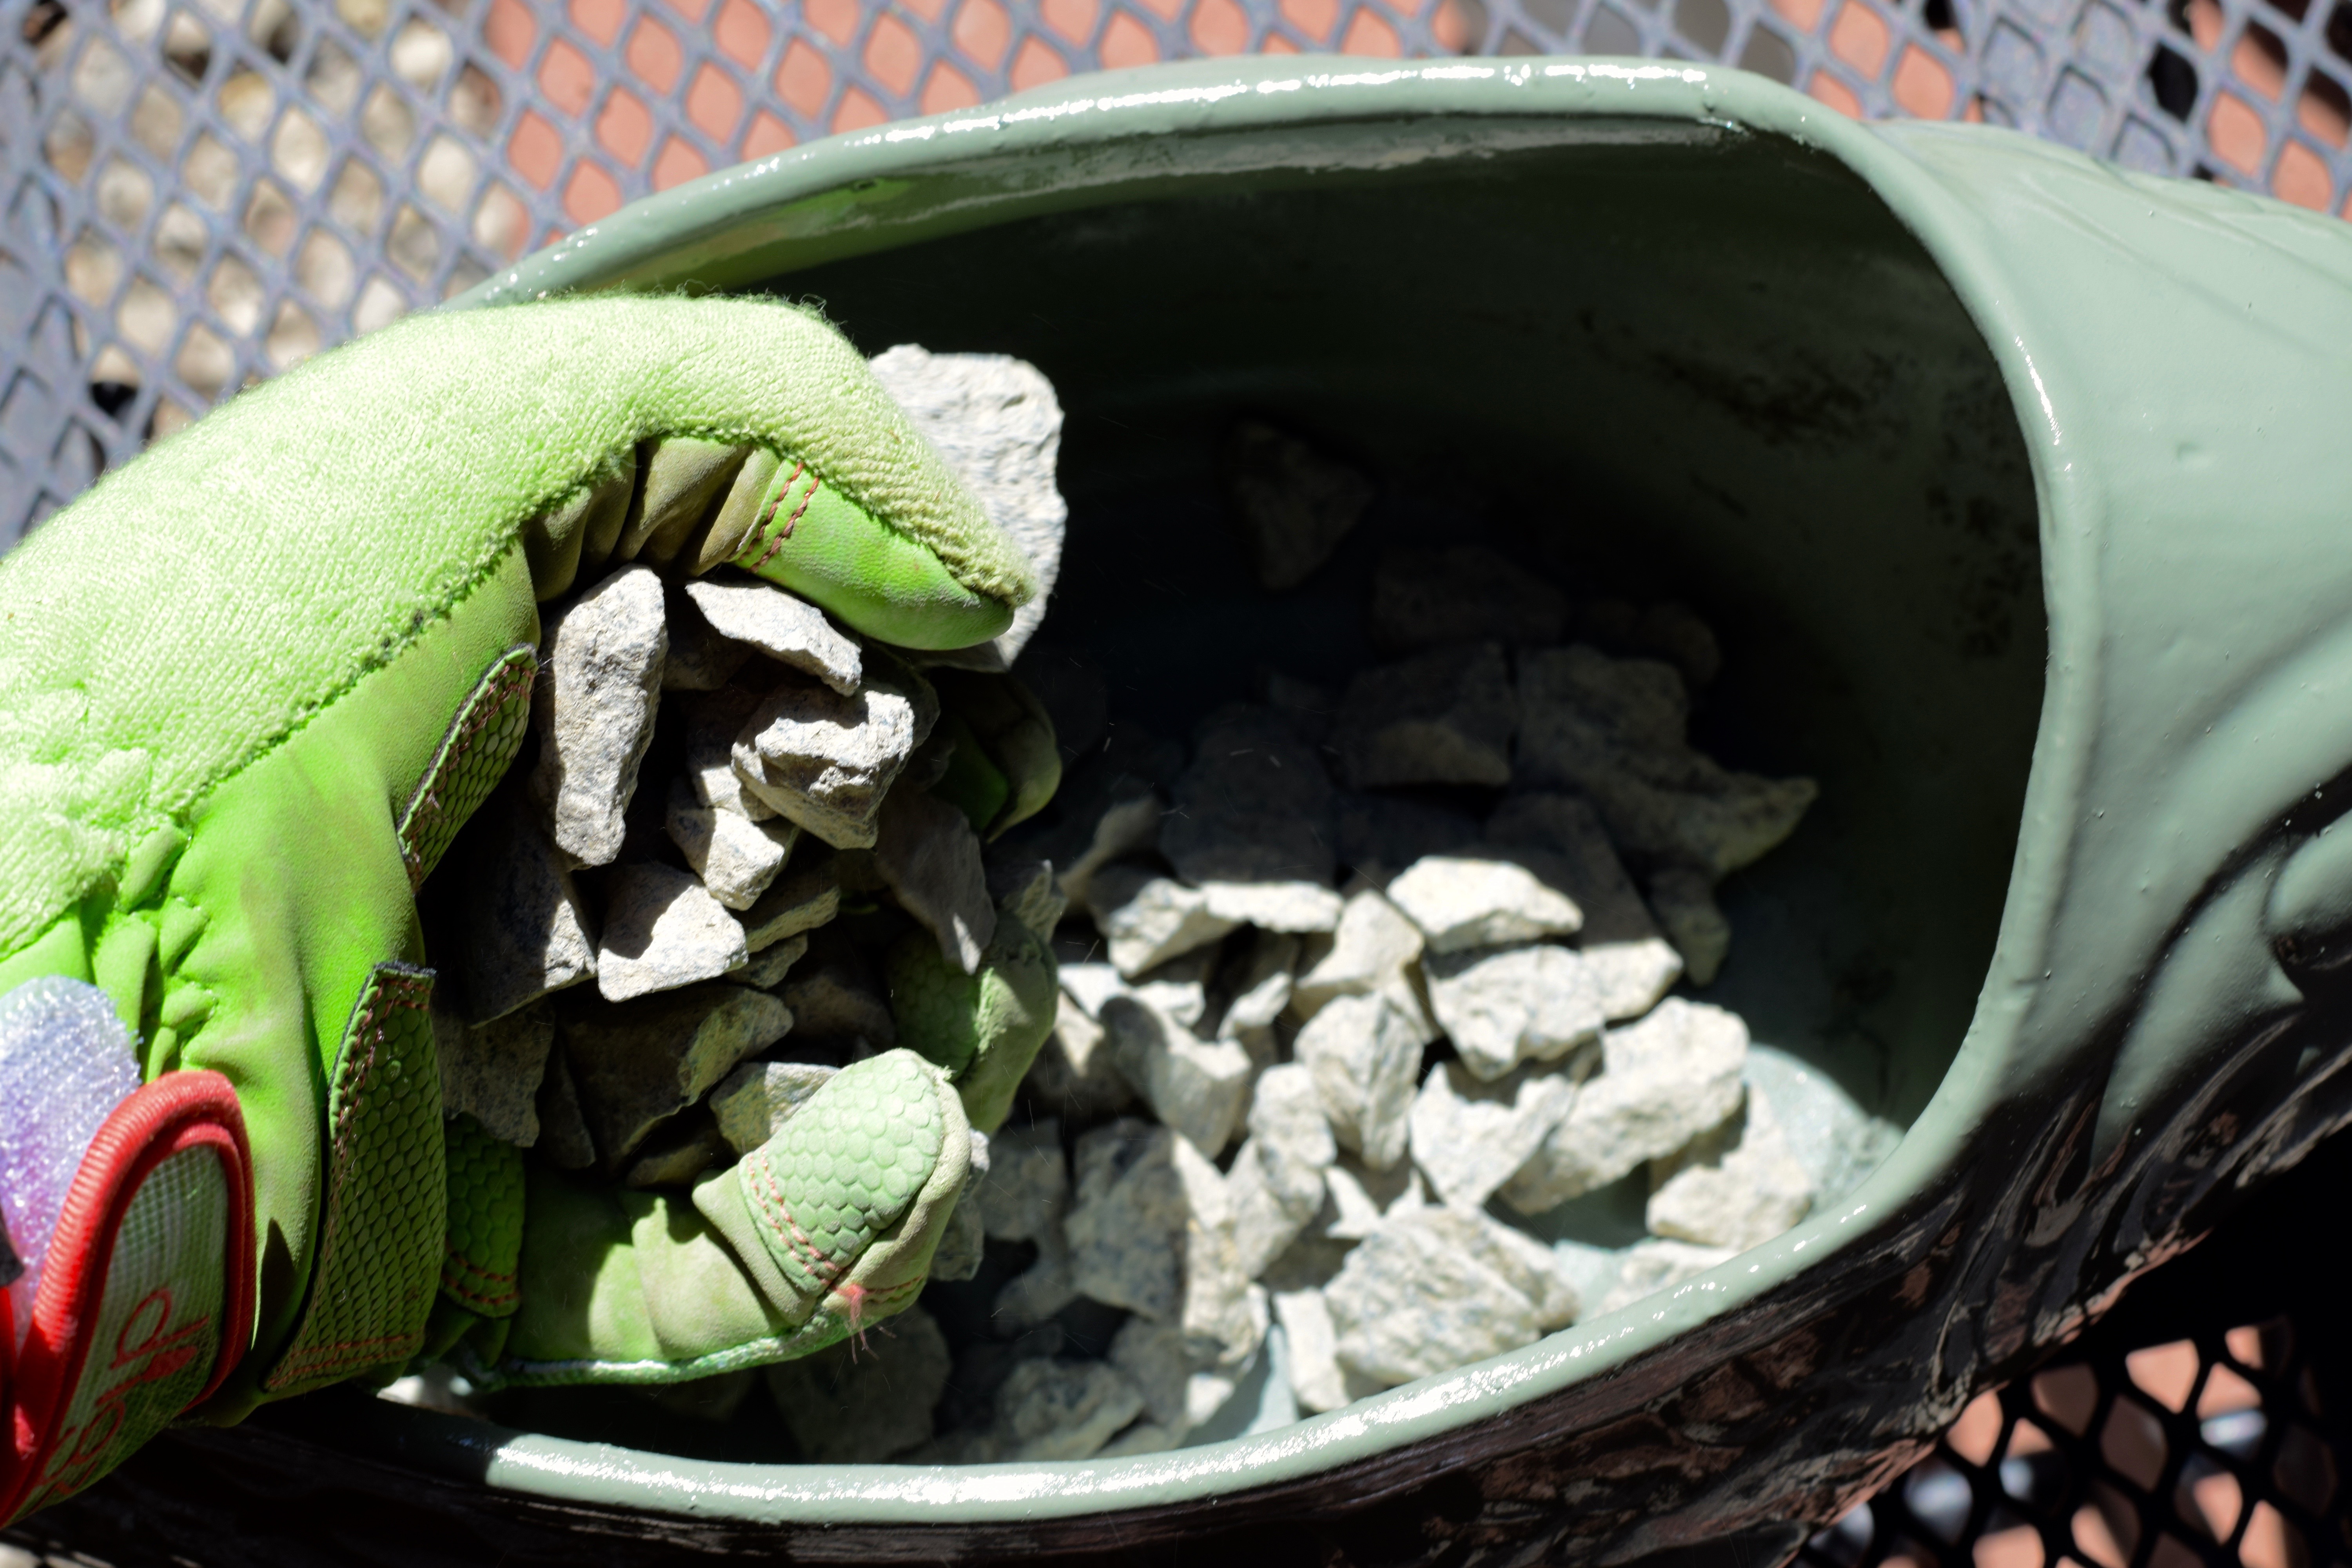
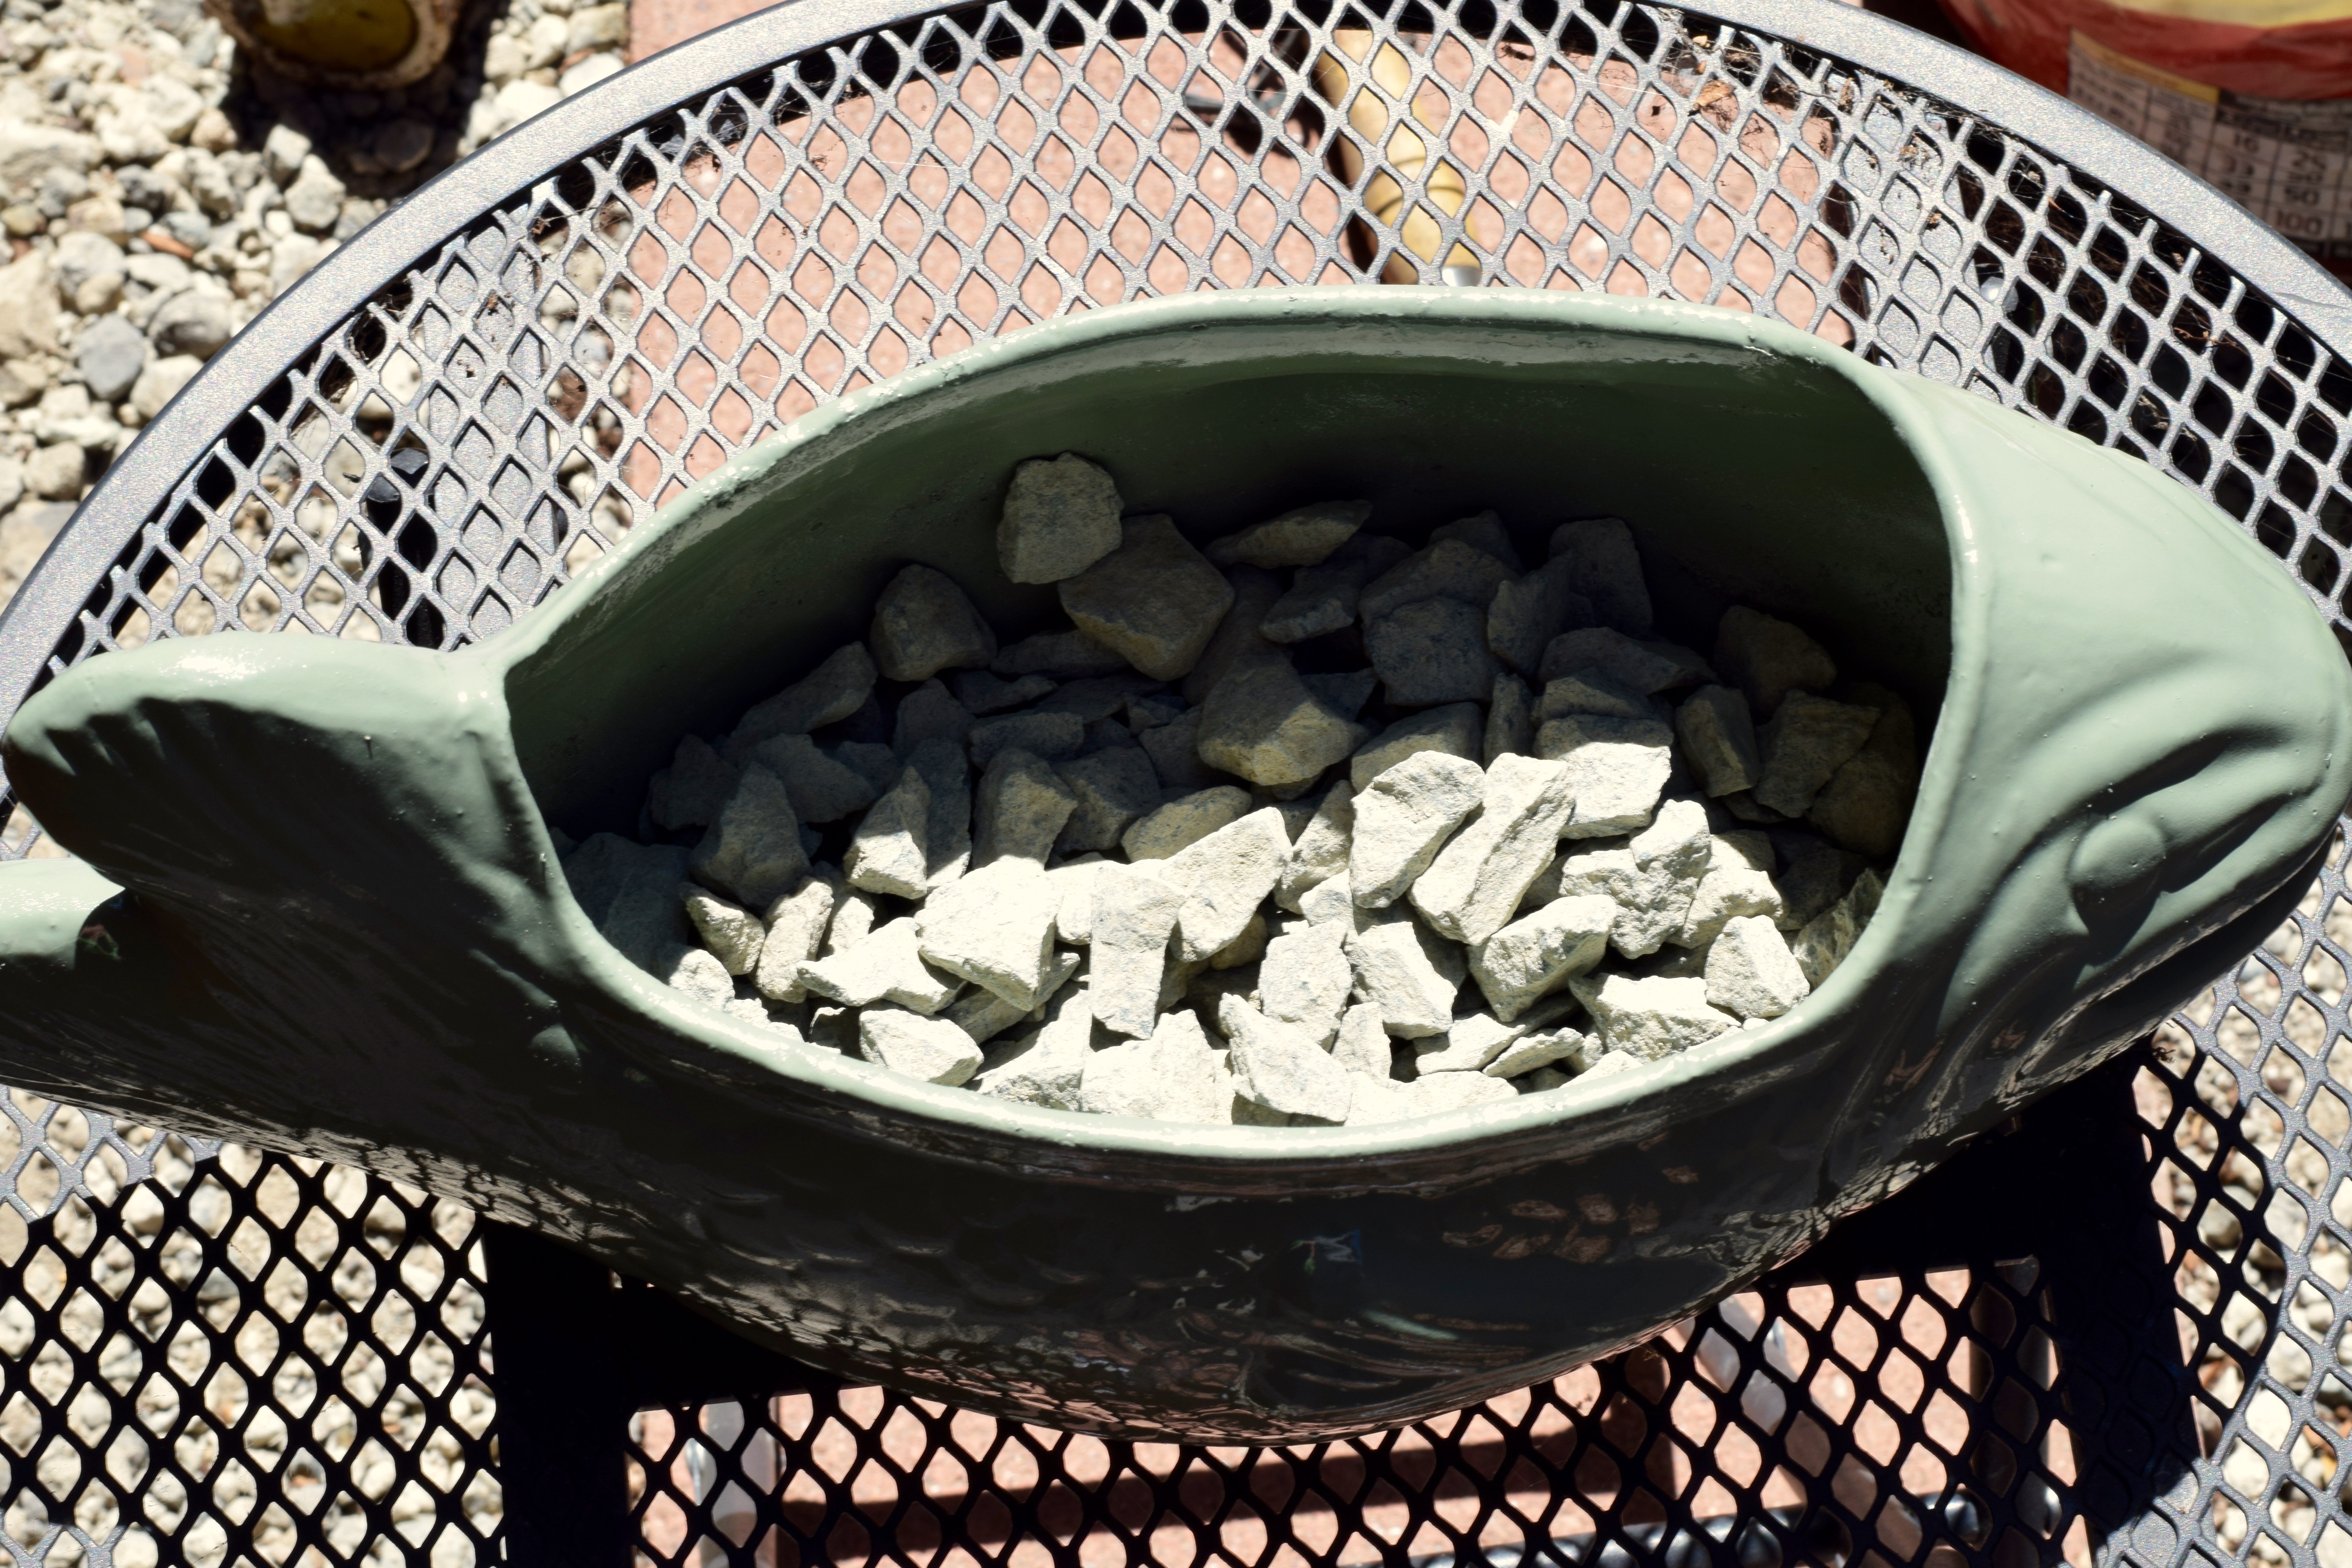
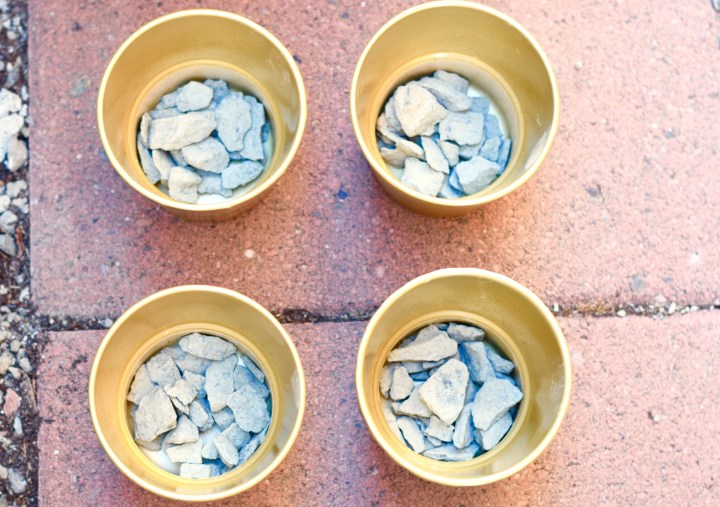
I added gravel to the bottom of the newly golden containers for drainage. Because bathrooms are so moist, I wanted be sure the plant roots would never be soaking.


Gravel as Drainage | Land of Laurel


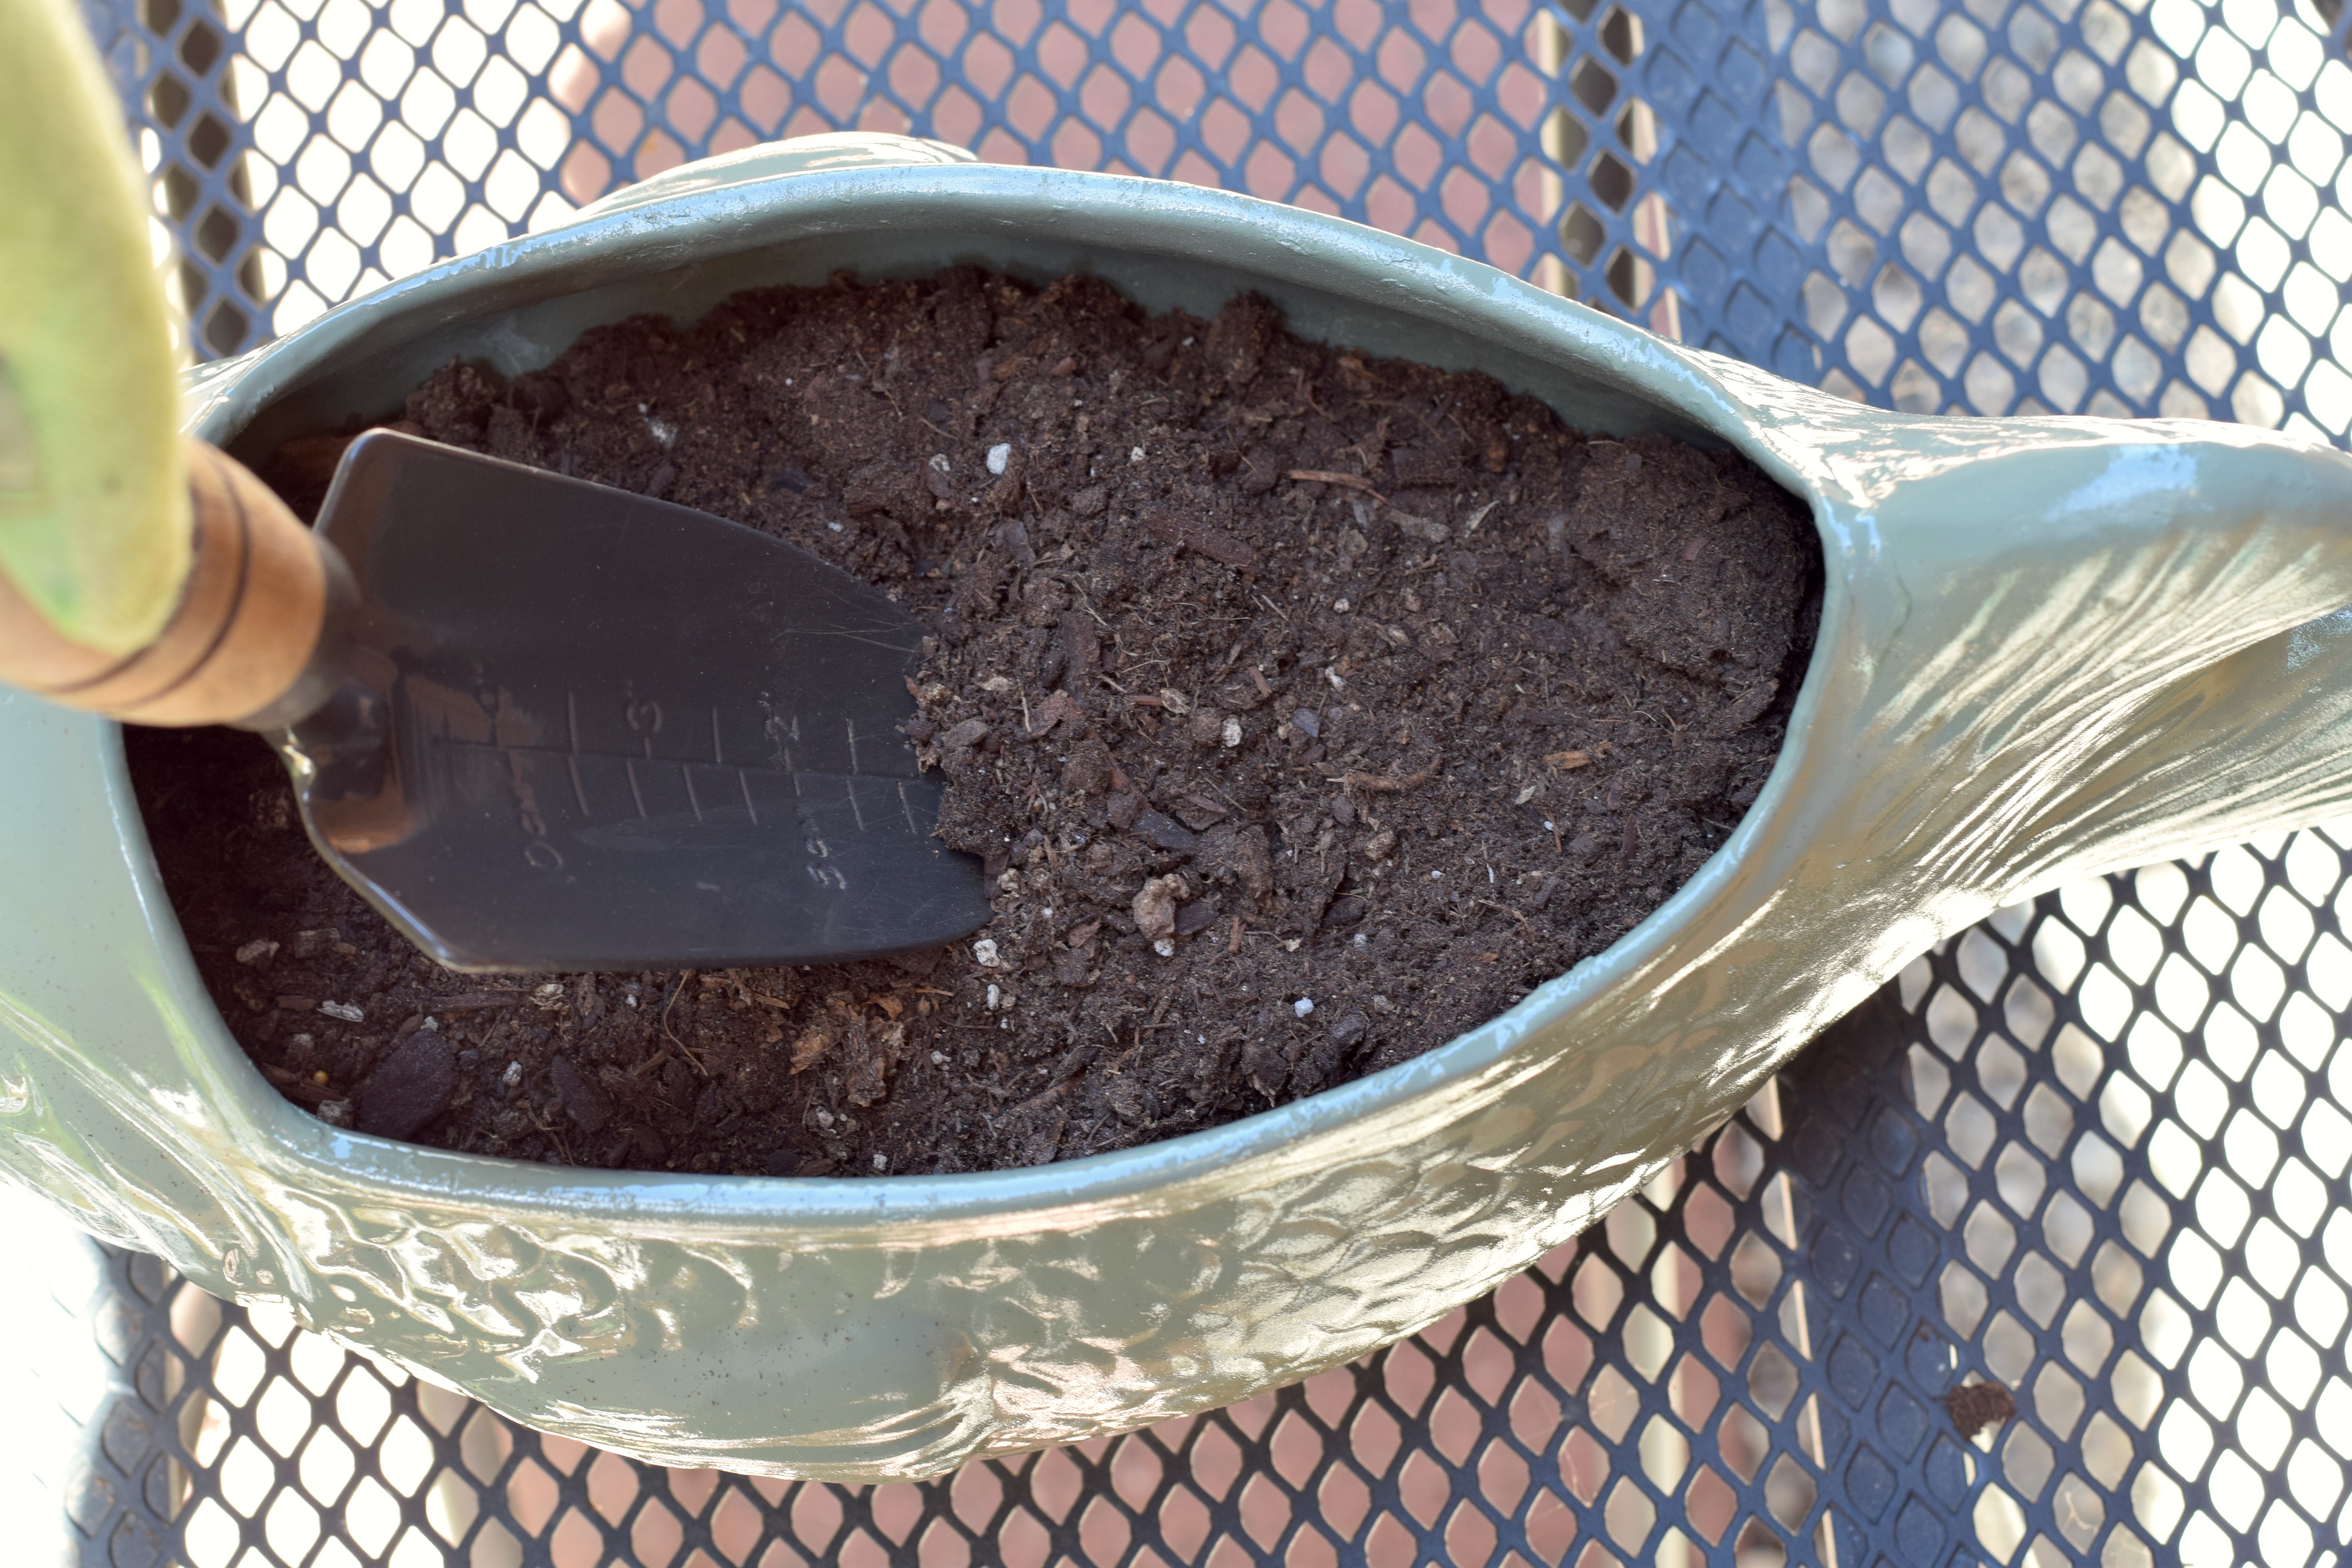
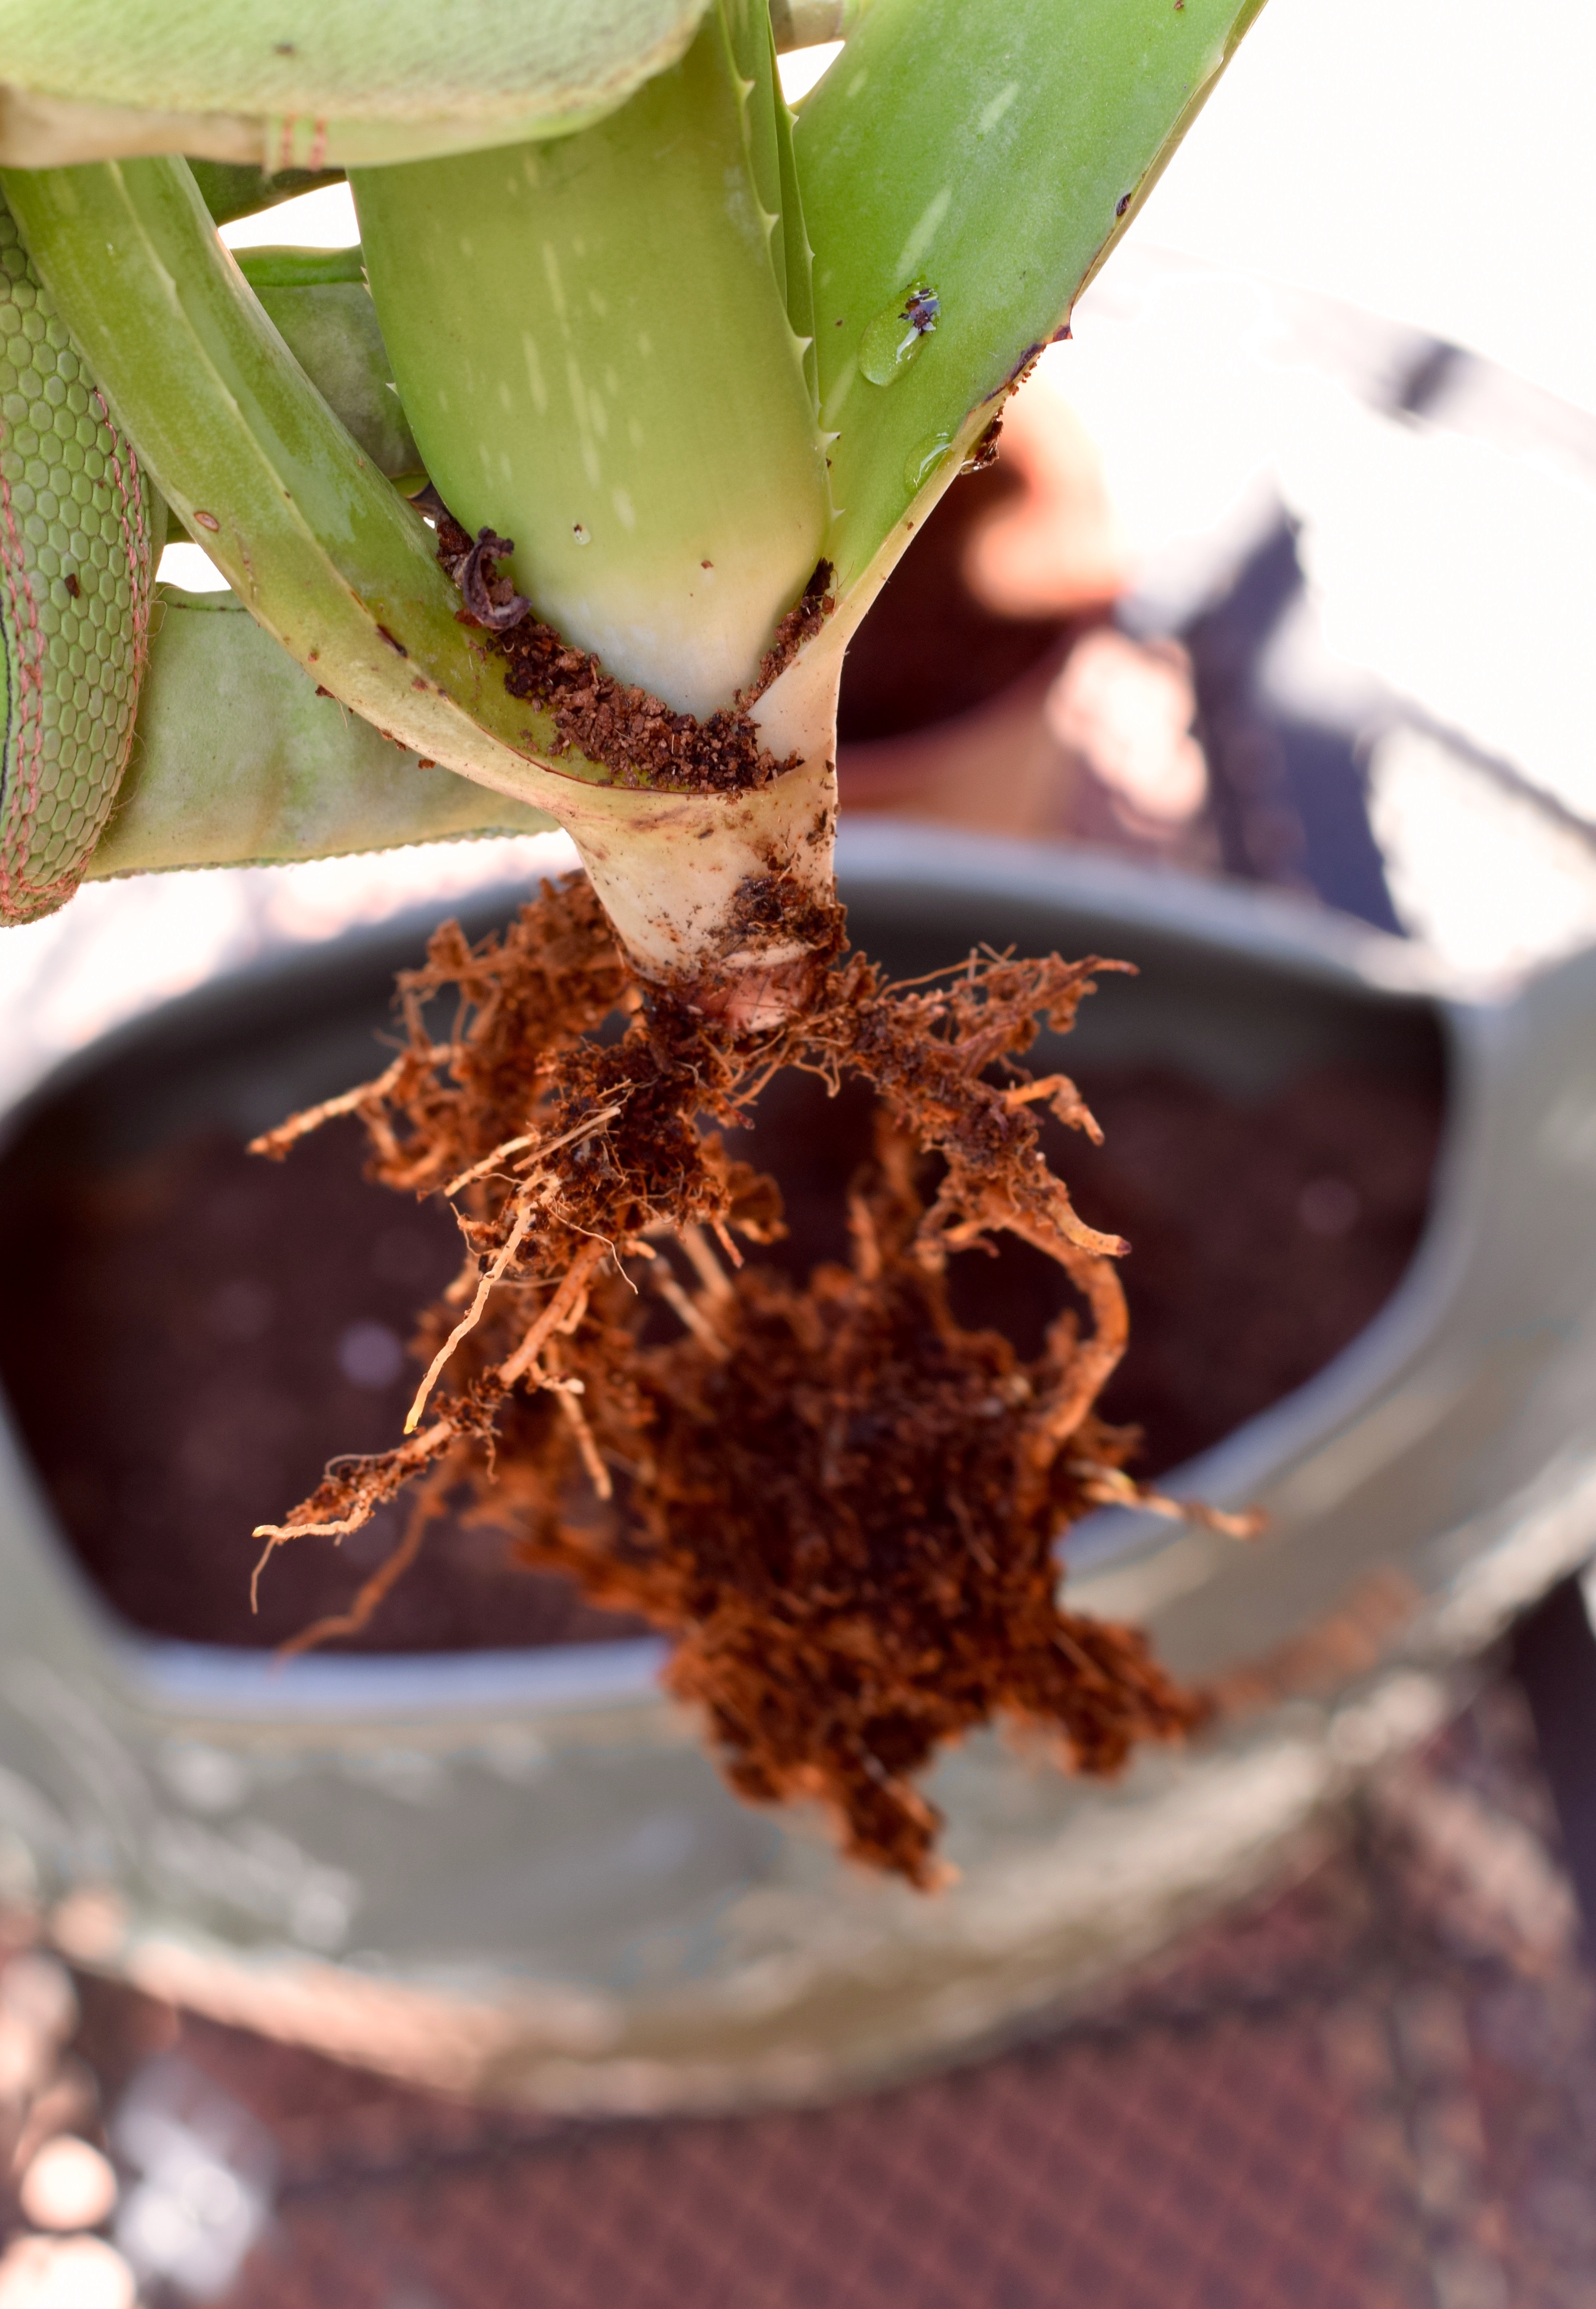
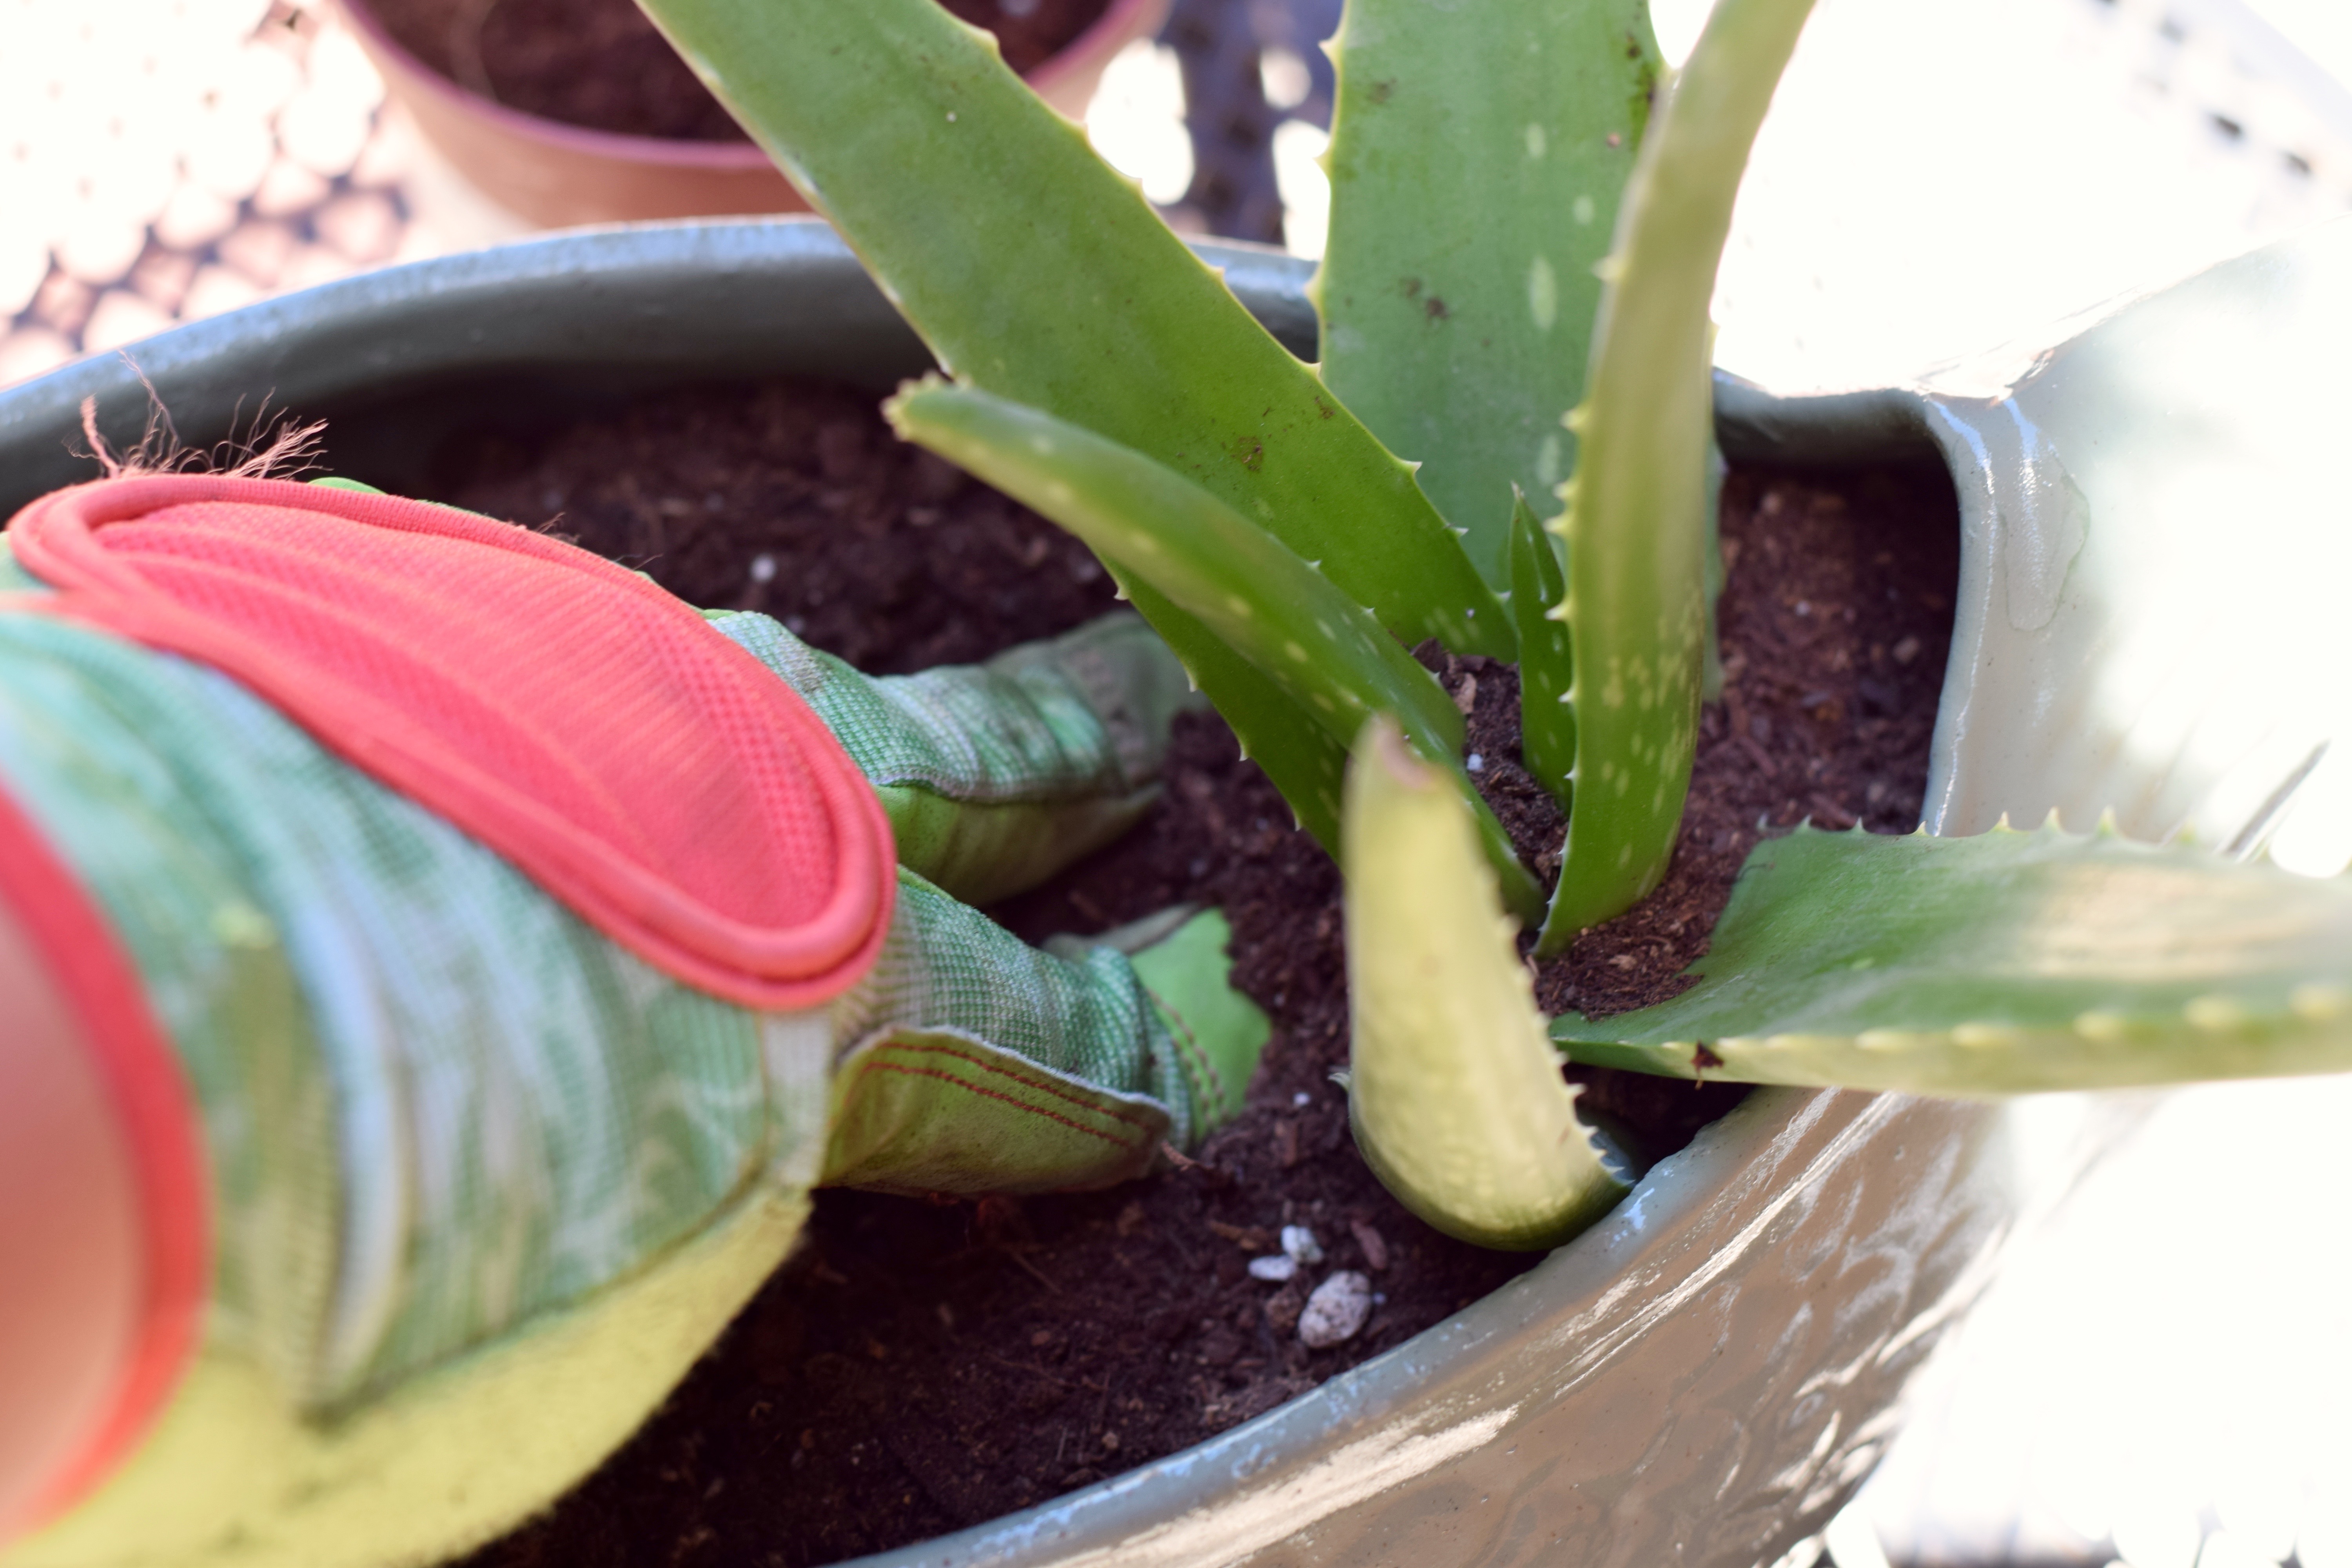
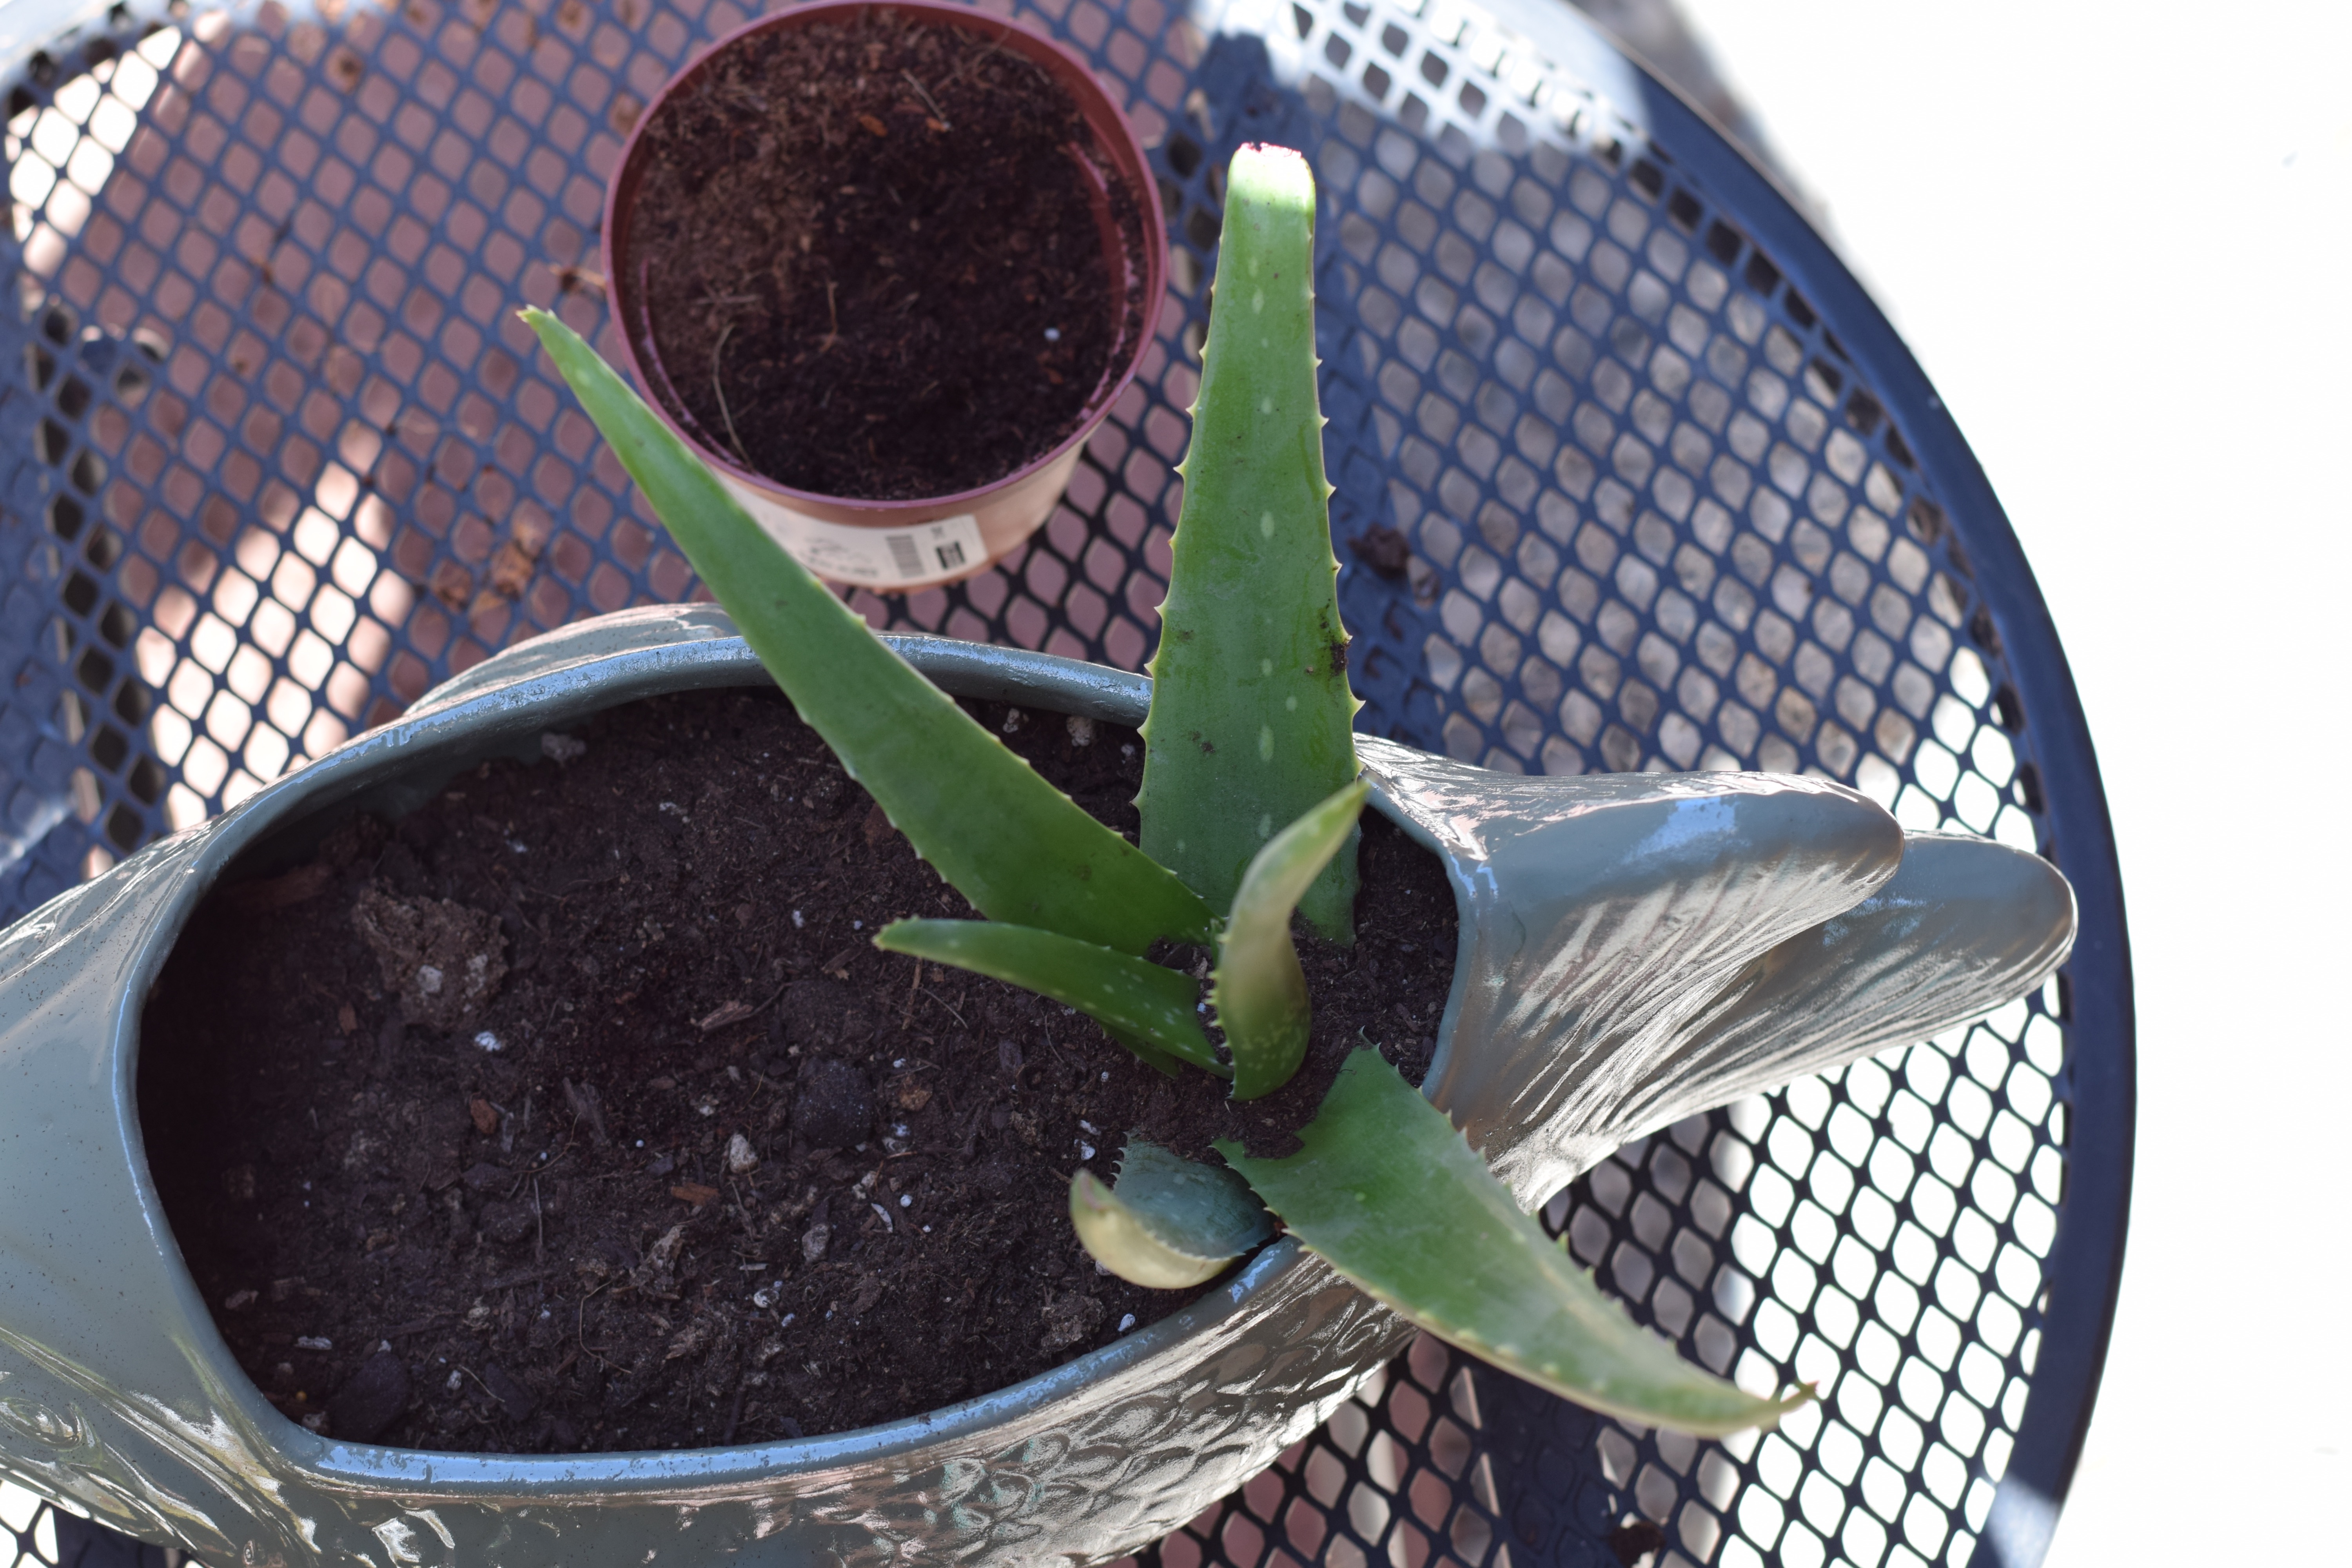
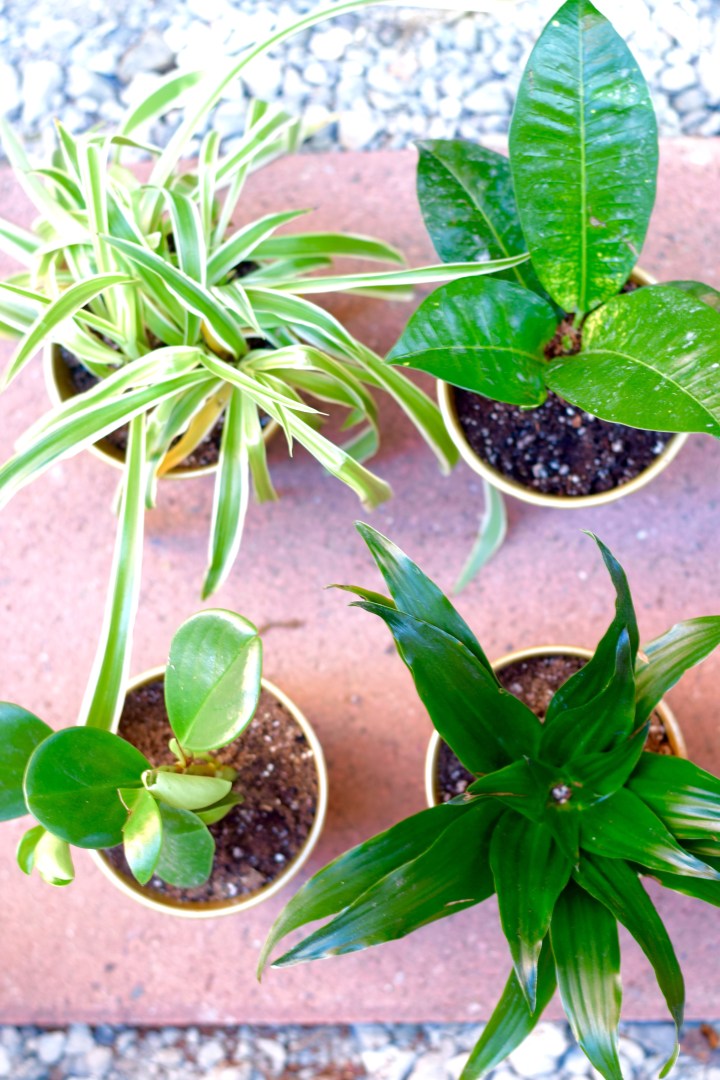
Then I just pulled the plants from their plastic containers and plopped them into the pots. Simple, easy, quick.


Plants Potted Gold | Land of Laurel


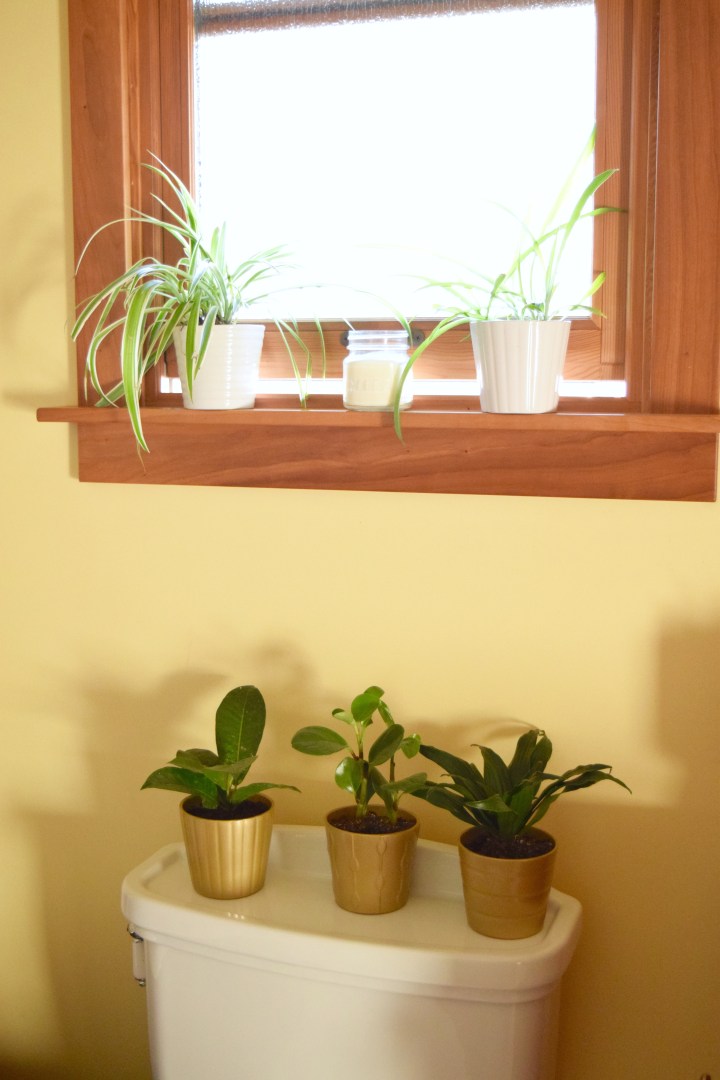
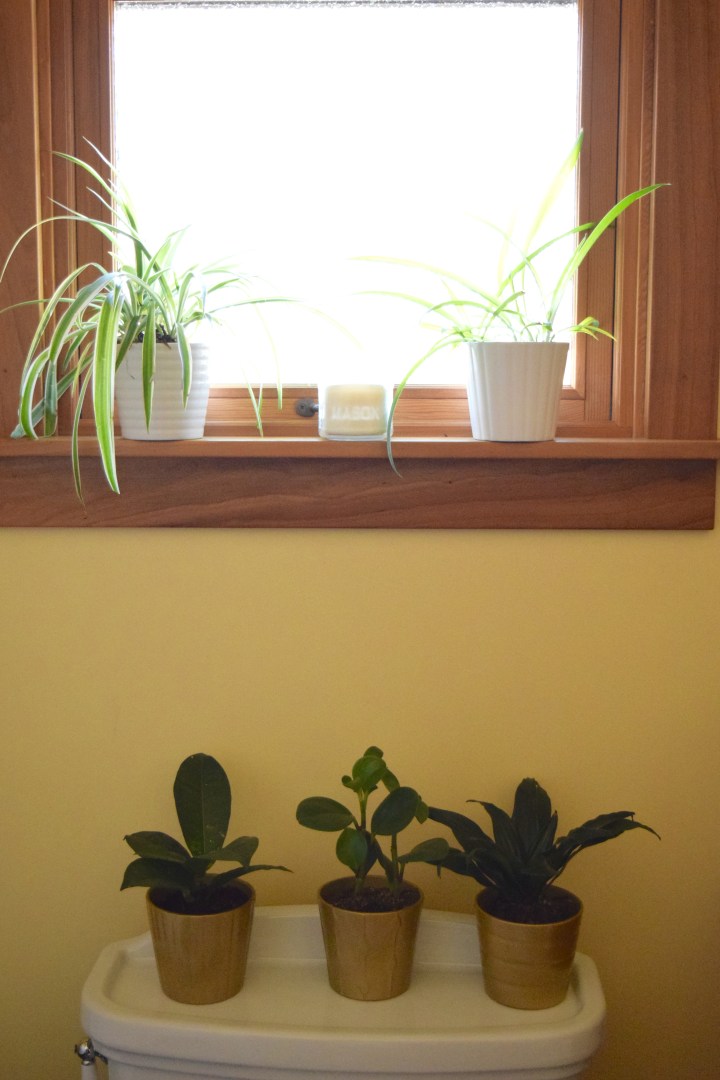
I brought them back into the bathroom and put them on the toilet. But four gold pots suddenly looked too stuffed on top of the toilet. So I ended up just using three there and stuck the Spider on the window ledge. Then I faced another problem. While I liked the gold on the toilet top, the gold blended into the window ledge too much for me. Plus, I didn’t like the look of the single plant up there. It looked lonely!


Three Pots | Land of Laurel


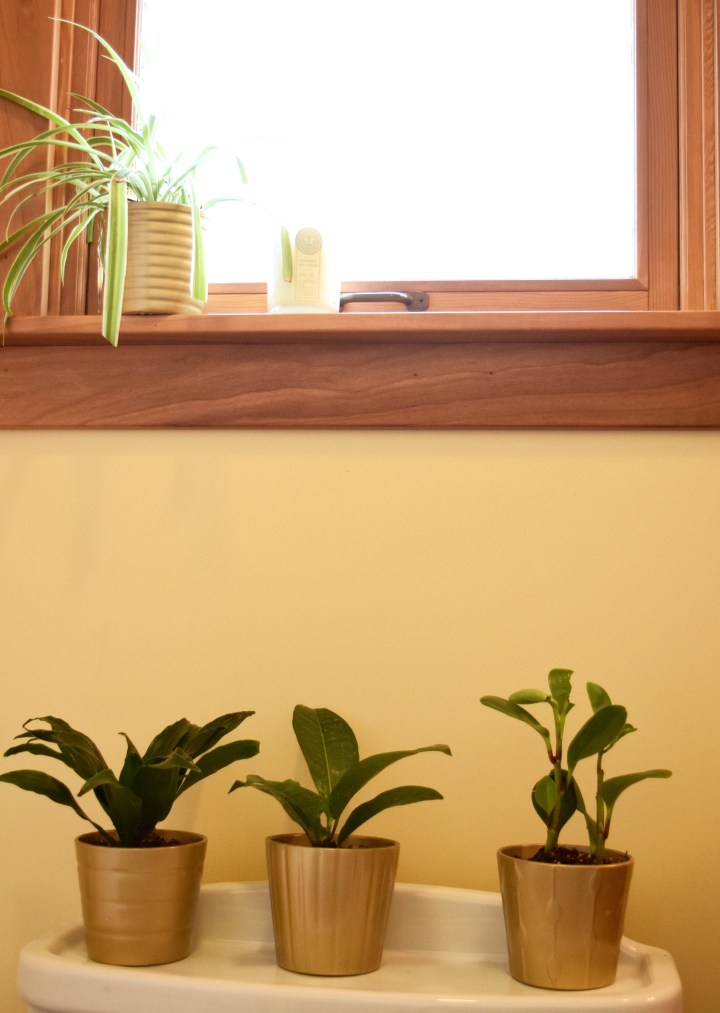
That’s how I ended up repotting the white stripey spider plant, stealing  the white pots I planned on using in the kitchen, and propagating one of the spider plant offshoots from my grandmother’s spider plant.  There. That’s much more balanced looking, don’t you think? I got that little candle from my cousin over the holidays and it made friends with the spider plants, so I think he’s going to live there now too.


Repotted Spider Plant | Land of Laurel


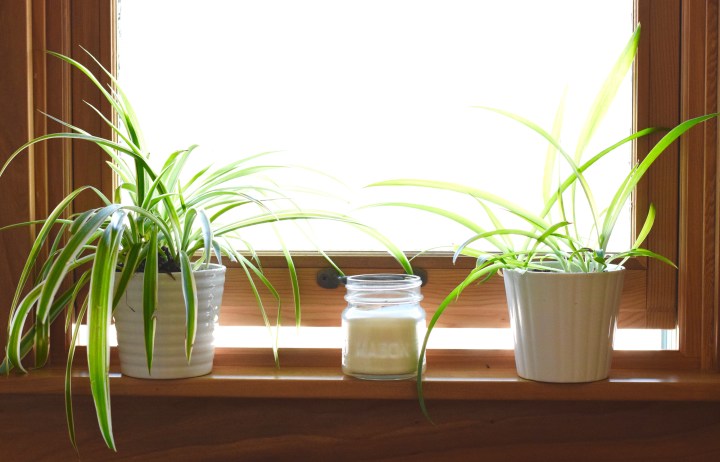
It’s difficult to photograph the plants on the toilet and the plants on the window sill together because of the crazy light that pours in the window, but below is my best attempt. At least you can see that it’s an improvement from no plants, right?


Plants in the Bathroom | Land of Laurel


Here is where the bathroom started, no plants, no love. Now, at least it’s starting to get somewhere, cat box and all.


Move in Bathroom


A bit grainy from the crazy lighting, but moving slowly in the direction of bathroom jungle… One step at a time, people, one step at a time. Now I just need more plants. Or help with my addiction. Is there a twelve step program for plant addictions? I should enroll…


Happy Bathroom Plants | Land of Laurel


So here I am, making strides in my bathroom jungle. Up next? Plants for the vanity counter! Plants hanging from the ceiling! Plants growing in the bathtub! Just kidding, I need the bathtub to shower… 🙂 These guys here are still alive, but I managed to kill the happy Paint it Pink plant… overwatering? Sad Laurel.What do you think of plants in the bathroom? Do you have any in your bathrooms? Or do you have a black thumb?

Going for the gold!

Sorry for the long absence! I got the cold of death right before Thanksgiving and barely survived! Or at least that how it felt… The cold is mostly gone though I’m still fighting off a nasty post-nasal drip. Aren’t you glad I told you? I ended up taking a few days off work and lying in bed all day and as much as I wanted to be productive here on the blog, watching re-runs of Grey’s Anatomy on Netflix was pretty much all I was capable of! And then it was Thanksgiving! My goodness how fast November went by! December should be a good month though. I have some fun things planned and have been getting crafty with my family! Get ready for colorful garlands and festive Christmas trees! Until then, let’s get back to my bathroom.


So when I first moved into this house there were a few things I immediately bought: sheets, towels, contact solution, a shower curtain. You know, the essentials. Standing in the aisle at Target that night there weren’t many options. And it was 9:30pm. And I’d spent the entire day moving boxes of books into the house and putting furniture pieces back together with nuts and bolts. I was exhausted. I grabbed the first shower curtain that looked decent to me. It was white and yellow and had a bold chevron pattern. Yellow would look good, I thought, the walls are yellow after all, and the countertop is yellow, and mustard-y yellow looks good with burgundy red. You remember my shower curtain right?


DSC_0241

Well, it’s not mustard. Or yellow. When I got home I realized that the florescent lights of Target in Emeryville had hidden a key item. The metallic sheen. My shower curtain was gold. I was upset for all of five seconds before I realized I’d made a fantastic mistake! You know the saying “There are no mistakes, only changes in plan”? It’s dead on the nose correct. My plan changed and the space is better for it.


Gold. That was what I decided. Gold accents in the bathroom. Sure, the door knobs are oil rubbed bronze and the bathroom fixtures are chrome. Whatever. Metallics are in. And this is the season of gold. Suddenly gold is everywhere! Aged brass, brushed bronze, unlaquered brass, call it what you will. The 80’s fave is trending again. Bring on the gold! Look at a design magazine, they’re starting to pop up more and more. People are embracing gold! Gold is warm! Gold is friendly! Gold is new(?)! Or at least new again… Ha!


I embraced my happy accident. I decided to go for it. And no, I’m not changing out my beautiful fixtures or painting them or anything crazy that will prevent me from getting my security deposit back. I am going for mixed metals and giving gold a big ol’ welcoming hug complete with back rubs and a gentle squeeze. Heelllloooo gold!


First things first, that black plant stand? Going for the gold! The plant stand is the perfect place for stashing my watch or my hair ties when I shower or my book when I’m getting into the bath. It’s super convenient and I love it. Err… Correction: I love the functionality of it. The actual stand itself? Hideous! I got it for free from work when we cleared out the warehouse last summer. It’s chipped and rough and not fantastic in anyway. Guess what? I changed that. I switched things up! I went for the gold! Here’s how it was looking the other day when I pulled the plant off the stand and carried the stand outside.


Land of Laurel


After looking at it’s sad, sad state, I gave the entire thing a good sanding with some rough grit sand paper. I wanted to be very careful to get off anything looking rusty and anything that looked like chipping paint. I spent quite a bit of time sanding this actually. I wanted to be sure that the gold with stick! After a good while it was looking more like this and ready for some paint.


Plant stand sanded | Land of Laurel


Once it was sanded I was especially careful to wipe the entire thing down and dust off the area it was standing in. I wanted to be sure there wasn’t a single spec of sanding dust on that stand. Spray paint is durable, but it needs to be properly applied. In a wet environment like my bathroom? Worth the extra effort to get this right. Dampness can definitely affect a coat of paint. Once I was sure the stand was good and clean, I took out my primer and went to town!Plant Stand Primed | Land of Laurel


Primer does wonders for holding on to a coat of paint, so I gave the stand a few coats. Unfortunately, painting something as thin as this is a bit wasteful. The stream of paint goes on wider than the tiny bars of steel. I needed a second coat for sure. Plus, after the first coat I looked it over and realized I’d forgotten to paint entire sides of the bars. You guys, there are so many sides on this stand! I was sitting and crouching and peering over the top at it trying to get a coat of paint on every surface! So. Many. Surfaces. No wonder geometry is so difficult!


Once I was done with the primer, I moved on to paint. Guess what color? Just kidding, you already know I went for the gold! This Rust-Oleum color is such a nice gold. It’s not too yellow-gold if you know what I mean. It’s a tad more neutral and has just the right amount of metallic sheen. It’s a very modern take on gold. I luuurve it!


Gold Paint | Land of Laurel


Ooops, there’s a surprise project hiding in the back of that photo too. It snuck it! Promise I’ll share the deets soon.


Anyways, the gold looked good! But boy did I use a lot of paint. SO. MANY. SURFACES. Did I mention that??


Plant Stand Gold! | Land of Laurel


And that’s just after the first coat! See how it’s a bit patchy in places? I needed to work to get good coverage on all. those. surfaces! So many sides, people! So many!!


I love the stand in gold! It just gleams! It’s like a gold medal platform for my plant. Just perfect. It’s great for stashing last minute items before I hop into the shower or for keeping things dry, but in reach when I take a bath. It’s pretty convenient. And now it looks great too! I stuck rubber furniture pads on the bottom of it to lift it slightly off the floor in case things get a little wet. Better safe than sorry! Hopefully that helps keep the paint looking fresh down the line!


Plant Stand Gone Gold | Land of Laurel


I turn the stand at an angle in the bathroom — following the curve of the bathtub actually — so the shower curtain slides behind it more easily.A simple, quick fix, but it feels so much nicer! I popped that plant on top and stuck my watering can beneath it. I stick the watering can in the shower when the water is getting hot, so I like to keep it close by. This seems to be the perfect spot! Plus Malary likes to sip out of it. Gotta stay hydrated right?

The stand is a bit more of a neutral gold than the slightly more yellow-y shower curtain gold, but they work fine together in my opinion and I prefer the more neutral color.

I’m slowing checking off the boxes of the to-do list in here. Closing in on having this space almost complete! Just need a bit more time. I’m excited to have one room done, done, done!

Color Pop, Pow!

You may have heard that Rust-Oluem is donating $10 to Bright Pink for every project with the tag #paintitpink for Breast Cancer awareness this month! Bright Pink is an organization that aims to save women from Breast and Ovarian cancer. Breast Cancer is close to my heart since one of my namesakes has battled it in the recent past.  Since I’m always up for a spray paint project I jumped on this challenge!

Print
– via –

Now, I wouldn’t say pink is one of my go-to colors. I wear it infrequently and don’t really want a lot of pink in my home. However, pink can be one of those awesome bright, happy colors that creates an awesome pop! when used well in a space. I decided I wanted just that kind of pop. During a recent IKEA trip I picked up some of their pots. (I seriously cannot leave IKEA without a few of these in one size or another, I have a problem! #addicted!) I wanted to put a few on top of my toilet to add some greenery to the bathroom and I wanted some for the kitchen windowsill above the sink for succulents. I love plants, they make me feel so happy an alive. When you add them to a room, it really brings a space together! Plus, they take in CO2, put off oxygen, and promote better indoor air quality! I grabbed this planter pot for the Paint it Pink challenge while I was at IKEA, I figured it would look good as a color pop! on a shelf.

Paint it Pink Pop

Because I am addicted though, I also bought eight of the smallest version of these pots too. For another project. That I decided to start simultaneously. Call me crazy and you’s be right! The next time I was at Home Depot (okay, okay, it was the same day, because I’m always there!), I picked up Rust-Oleum’s Berry Pink spray paint in Gloss.

Rustoluem Berry Pink

Then it was actually time to get painting!! I set out all my pots on my canvas tarp, put on my elaborate painting mask, and got to work!

Spray Painting All the Pots

Five minutes of work and two quick coats later and my pot was bright pink! Such a happy color!

Paint It Pink Pot

I popped in this bright pink plant, I thought the pink of the plant tied into the pink of the pot quite well! And look how the pinks brought out that awesome stripe-y green leaf! How amazing in nature? SO AMAZING!

Paint it Pink Plant

I love the way this looks! It is such a great pop! of color. It’s more than a pop! It’s like a straight POW! to the face!

Paint it Pink Plant Pot

And just like that the #paintitpink challenge was complete with my Paint it Pink Plant Pot! Sorry, I just couldn’t resist all the ‘p’s! Wait, now, I’m thinking of a different bad joke about ‘p’ with a few ‘e’s tacked on at the end… Okay, I’ll stop with the jokes while I’m ahead! (At least give me points for that? Oh you didn’t realize there were points?! Life’s a competition good sir!) Yup, okay, now I’ll remove the foot from my mouth. 🙂

Did you participate in the Paint it Pink Challenge?? What was your project? I thought Katie Bower’s growth chart for her niece was just too cute!!

Little Guy for a Long-Time Friend

There is a thrift store pretty close to my house. It’s about a half-block out of my way when I’m walking home from BART after work. I won’t say what it’s called, because, to be perfectly honest, it’s not all that great of a thrift store. (Seriously where are the best furniture/accessory thrift stores in the Bay Area? Do you know??? TELL ME!!) Every now and then I’ll stop by though and see what’s there. I whole-heartedly agree with Katie from Bower Power that all thrift stores have a strength zone. This thrift store’s strength is clothes and toys. Neither of which I need much of. But, sometimes, walking home from work, a girl’s gotta see what’s what.

A few weeks ago, I’d strolled through the entire store and saw a pretty cool lamp. I liked its shape quite a lot– simple, rounded, contemporary– but I didn’t really have a place for a single lamp. I returned to browsing, and then, standing across the room, I noticed there was a second, matching lamp! The first lamp had a brother!  They were marked at $10 each and they were a hideous brown color. HIDEOUS. Now, $10 isn’t exactly pocket change for a lamp that probably doesn’t even work, but I thought, “Hey, why not?” I needed lamps for our living room which has some horrible (sorry roommates!) glass side tables, but nothing on them to give them more presence. So I hopped on those lamps like a tiger on a steak!

As I was walking to the check out — gripping my lamps by their necks like strangled chickens (is that simile graphic enough?!), I happened upon a small nightstand with fun curvy lines. What was this?? About a month before this, I’d actually spent the day thrifting (and donut snacking!) with my friend Hannah looking for a nightstand to make-over for her bedroom. Hannah wanted something with good lines, some fun turned elements that she could paint a fun color. We had gone to several places (remind me to write about how to spend an entire way thrifting and snacking through Berkeley and Oakland!), but hadn’t found anything that suited her needs. I set my lamps down on the nightstand, guarding these treasures like a dog, and pulled out my phone to text Hannah this picture.

Thrift Store Lamps and Nightstand

Hannah, of course, loved it, and for $10 dollars, she’d take it. I happily danced the rest of my way to the checkout and bought all three finds. At this point, I actually walked the rest of the way home carrying my new strangled chickens lamps. I then grabbed my car and headed back to the thrift store, because as much as I like to test my upper body strength, there was no way I was going to try carrying the nightstand home!

As I was loading the nightstand into the car, I cursed myself for my rookie mistake. I had not thoroughly looked at the nightstand before I bought it. The little guy wasn’t solid wood like I’d assumed. It was a mix of plywood, cheap pine, and MDF. Ugh. Plus, there was pretty bad moisture damage to the plywood back legs. Why hadn’t I taken a closer look?! Grrrr. I cursed myself. But, I had already bought it and the store didn’t take returns, so I decided to pretend to be an optimist and make the best out of the situation.

When I got a chance to work on the nightstand, I accessed the state of the piece, and concluded that I and the world of DIY could save this little guy. From the front, he actually looked pretty dang good!

Nightstand front view

From the side you could start to see some of the moisture damage…

Nightstand Side View

And from behind, you could completely access the damage. 😦 He definitely wasn’t a looker, this little guy!

La Chanelle

P.S. I tried to look up La Chenelle, but when it wasn’t immediately obvious, I gave up. I’m lazy like that. Let me know if you’ve heard of them?

When I zoom in, you can see that these back legs did NOT look good. I was worried…

Moisture Damage Legs

But back to the little guy’s DIY: first I wiped him completely down with an old wet projects sponge I keep around for this express purpose. Then I grabbed a pair of slip joint pliers and tightened the bolts that hold the pretty legs on. The front legs are by far my favorite piece of this dresser and I was happy they were so easily attached and not damaged like the back ones!

Tightening the legs

Oddly, once I turned him over the little guy had staples everywhere. I assume they once held something on, but at this point they were worthless and annoying.

Staples

I removed the staples in a quick minute with a pair of needle-nose pliers.

Needle Nose Pliers Staples

And yes, my pliers are pink. My father bought them for me. Apparently he thought I’d prefer that… Crazy old people! Just kidding. 😛

After that, I gave the little guy a decent sanding where needed. The sides were a bit bumpy towards the bottom from the moisture. A little sanding cleaned them up though. Once he was sanded, I got out my wood glue. Elmer’s = life long adhesive ❤

Wood Glue

Because I am not known for my poise and restraint, I just squeezed a ton of wood glue on the crappy looking parts.

Wood Glue on Leg

I’d picked up these small clamps the last time I was at Home Depot, so I decided to put them to use. Where the plywood had expanded and split from the moisture damage, I glued and clamped.

Wood Glue and Clamp

This held the plywood together in a position more similar to what it’d originally been. Since plywood is really just strips / pieces of wood glued together, I figured this really wasn’t any different. Plus, what did I have to lose? I left nightstand upside down and clamped like this overnight.

In the meantime, I turned my limited attention span to the drawers. That hardware was coming off! Hannah wanted to replace the pulls with some fun knobs from Anthropologie or World Market.

Nightstand Drawers

I placed the drawer fronts towards the ground and unscrewed the hardware. This is a really easy fix if you ever want to update a piece of furniture. New knobs add so much personality! Removing the hardware from these drawers took less than five minutes.

Unscrewing Nightstand Pulls

Once the hardware was unscrewed, the pulls popped right off. Super easy! There was some guck on the drawer fronts though, so I wiped that right off with a sponge. After that, except for the wholes, you couldn’t even tell there were once pulls on these drawers!

Guck under Hardware

I left everything and pretended I have a life outside of DIY for  a bit. The next day, I pulled the clamps off back legs of the little guy. They looked SO MUCH BETTER you guys! They looked almost totally normal and I knew with a coat of paint, you’d hardly notice at all. Except for the gaping holes! But whatever! I’d regenerated plywood! This was too exciting / such a freakin’ relief for me to worry about the gaping holes!

Reglued Plywood

Remember what they looked like before?!

Moisture Damage Legs

SO MUCH BETTER!!! Once I’d finished my twirling my happy dance around the courtyard, I decided to do something about those minor huge gaping holes in the little guy’s back legs. With that in mind, I tossed open my big canvas painter’s cloth and pinned it up to protect the courtyard area. I grabbed my wood filler and started filling in the scratches and gaps on the nightstand.

Wood Filler

I wear gloves and a mask when I do that because wood filler smells like cancer Seriously. it stinks stinks stinks!

Applying Wood Glue

While I was at it, I filled the holes from the drawer hardware as well.

Wood Filler on Hardware Holes

Make sure you lump a whole bunch of wood filler in holes like these. You want it to be bumpy now so you can sand it down to smooth later. Once I’d filled the biggest scratches and gaps I waited for the wood filler to dry, then sanded the entire dresser again, making sure the spots I’d wood filled were nice and smooth.

Sanding Wood Filler

Then I wiped the nightstand down again, but this time I used liquid deglosser. Since the little guy wasn’t solid wood I hadn’t wanted to sand him too hard and I thought this would be good in the nooks and crannies of the nightstand’s details that are always so hard to sand down!

Liquid Deglosser

After that, he was looking pretty good and I was ready to paint!!! I’m actually always ready to paint. I love painting! Before I could get anywhere near the little guy, I needed to tape off some areas. I didn’t want to paint the sides of the drawers, because this can mess with the opening and closing glide. I taped the edges of the drawers and used one of my roommates’s old issue of The Economist to cover the larger areas.

Prepping to Paint Nightstand

The little guy was looking pretty decent actually. I was so relieved that I’d managed to save the moisture damaged nightstand. Now, with a bit of primer and paint, I didn’t expect to notice the little guy’s humble beginnings at all!

Have you ever saved plywood from moisture damage? Did it work? Are you as excited as I am about saving this nightstand from a watery grave?!

Planting Fred the Fish

I planted succulents in Fred the Fish!! He looks amazing!! I am so excited to share this with you today. Fred has finally become his true self. His awesome self. Oh, Fred, how I love thee!!! I might be a little too excited about this!

As you might remember I got Fred from a pile of my grandmother’s belongings after she passed away in April of 2014. He was a dirty brown fish complete with chips in his cheeks and an ivy plant that had outgrown his capacity. Once I’d repotted the ivy and cleaned him up he was looking like this. Brown, ugly, chipped, dirty, sad. It was time to let his true potential shine through!

FredCleanedUp

I turned to Rust-oleum’s Sage Green Gloss spray paint to help me turn him around. Now the ivy is gone, the chips are disguised, and he glistens with a glossy coat of sage green paint. Beautiful!

PaintedFred

He was by no means done though. Months ago, I mean, seriously, months ago, I was wondering through IKEA and saw their succulents which we only a couple of dollars each. I bought four with Fred in mind. Then I left them in my bathroom and ignored them completely except for the occasional watering. Now that Fred was looking all spiffy, it was time to plant them!!

PrePlantedSucculents

I took Fred to the five foot wide stretch of space between our house and our fence and set up my make-shift potting area. First, I stole the little round side table from our courtyard and plopped Fred down on that. Then I got out my gardening gloves and spade.

FredtobePotted

Before I could break out the succulents, I needed to add good drainage. I grabbed a handful of course gravel and dropped it into Fred’s basin.

DSC_0463

Because succulents hate standing water (as do most plants…) I made sure to layer in quite a bit of gravel. This way if I accidentally overwater, I won’t kill them. Hopefully! 🙂 You can see here, I certainly wasn’t shy with the gravel. He’s about 3/8 full of gravel. Not a ton of room for soil, but succulents do o.k. in shallow areas.

FredFilledWithGravel

I then layered in the dirt! Which makes me happy, because suddenly Fred went from sad and empty to full of promise! Dirt means growth! Growth means plants! Hopefully plants would survive! You can see there was about 2 inches of dirt over the gravel. Enough to poke into a bit for the succulents, but still enough room for me to add more after placing them.

DirtyFred

Also sidenote — I LOVE these pink and green gardening gloves I got at Home Depot. So happy! So bright!

Now that it was finally time to plant (can you tell I am pretty much the least patient person in the world?!), I decided to start with the largest succulent first. I took the succulent and gently squeezed it out of it’s container. Then I crumbled off the dirt into my potting soil bag until I could see the roots. This one I can actually name. It’s Aloe Vera, friend to all who burn easily. Don’t you dare try breaking off some of this guy for your sunburn though!!

FirstSucculent

I was actually surprised that the root balls of these succulents were so small. It explained why they weren’t looking particularly fantastic. This taller one had been pretty flimsy in the plastic temporary pot. I’m assuming it wasn’t very healthy. Anyone know why succulents would do this?

Rootball

I placed the succulent into Fred’s basin, carefully spooning more dirt in around him, and gently pressing it down around the succulent with two fingers.

Planting Aloe Vera

At this point, there was too much soil in between the arms of the aloe vera. I later scooped most of it it out with a finger. Fred was pretty cool with the Aloe sticky out of his lower back. This is totally a new look. I’m going to make something similar out of cardboard for myself and copy that trendsetter!

DSC_0490

The next guy was also spiky like the aloe plant, but shorter. I decided this prickly little lady needed to stand opposite her taller friend.

PricklyLittleLady

Two plants in, Fred the Fish was looking good!! Gah! It makes me so joyous! I’m such a plant nerd.

two in Fred

The next plant — another succulent about whose name I have not clue– started out really short, but several months in my bathroom later, had grown into a long skinny thing. I’m assuming this was due to the lack of natural light in my bathroom? Maybe they are supposed to look this way… Who is good with plants out there??

SuccyTwo

Its rootball looked a bit bigger though! Thank goodness.

SuccyTwoRoots

Still not great though right? This is the one that looks the worst these days. I mean, it certainly doesn’t look bad, but when I get my Sherlock Holmes on and look a little closer, I notice some not so nice spots. Survive little succulent! Survive!!! I can only hope and pray…

Finally, the last succulent was one I’d actually saved from the driveway. We have hens & chicks (the plants not the animals) lining our driveway and every now and then they get a little beat up. This one I saw sitting out there on the concrete all by his lonesome self. He must have come off the larger plant when it got brushed with a car wheel or something. I planted him, with the help of my good friend Hannah, into this salsa jar someone brought to our housewarming party.

DSC_0510

He sat in my kitchen window for the next couple of months, getting lots of sun. This guy was the smallest by far, but definitely healthier than the IKEA ones. He epitomized small but mighty!

smallbutmighty

And look at that root ball!! Such a baller! Hahahaha. At least I make myself laugh. 🙂

Baller

After I planted this fourth guy, Fred was pretty full. I topped the Mr. Fish off with more potting soil, again pressing gently, but firmly down around each succulents. Fred was looking good, guys! A little dirty due to the planting, but getting there!

Fredwith4Succulents

You can totally tell how super bright it was the day I planted everybody in Fred. I think it was about 90 degrees that weekend. Yay September in California! To clean things up, I gave Fred a good dowsing with water lovingly admired him glistening in the sun like a new mother looking at her tiny babe before bringing him inside.

Wet Fred

I brought Fred the Fish inside and let him sit in the kitchen for a couple weeks before I took the rest of these pictures. I wanted the succulents to get a chance to root and root they did! They look so good! Fred the Fish looks fantastic! I am so not biased at all. I just love how he looks in the kitchen!

FredFinished

Remember what he looked like before?!

FredCleanedUp

And look at him now! The green is such a nice color. It’s really the perfect sage-y grey-green. It looks fantastic with the butcher block on our island. Such a nice change from the brown!

FredFromtheSide

From above the succulents are just shining! They have rooted more firmly and no longer give when I tug on them gently. I hope they grow out a bit. I’d love to have time pooling over the side just a little bit more. Luckily the shapes of the succulents and their varying sizes gives a lot of texture. They aren’t falling over the edges, but the definitely stick out over them from above!

DSC_0270

Oh my god, you guys, have I mentioned that I LOVE HIM? Just look at that glossy face! Look at the glint in his eye! He’s so beautiful!!

GlintinHisEye

I get to walk into my house every day and look that beautiful face! I am so happy with how he turned out. It’s wonderful to have this piece of my grandmother in my life every single day. It’s the first thing I see when I walk into my house. I couldn’t be more pleased. It’s so bright and happy. I love that the succulents show off the shape of the fish more. It looks so inviting! You can actually tell he’s a fish. I envisioned him pretty much exactly like this and he turned out so well. This is definitely an accomplishment for me, because everything I design in my brain is so perfect, reality can sometimes be a little disappointing. Frequently when I’m crafting or cooking. Hahaha. 🙂 Not with Fred though! Fred the Fish, I could marry that guy. Maybe I’ll just give him a smooch and see if he turns into my prince. Oh wait — that was a frog wasn’t it? Oops!

Do you have something of your grandparent’s that you’ve revitalized and use everyday? Do you have Fred the Fish’s twin? Let me know what you think.

Fred the Fish

This is it. This is the first real blog project post at Land of Laurel. Are you excited? I am excited! Maybe a little too excited. It might be the pint of Three Twins Organic ice cream I just finished, but I’d like to think these butterflies in my stomach are from blogging excitement! Let’s just keep our fingers crossed I don’t have food poisoning. Again… 🙂

Before I dive in and talk about Fred the Fish, let’s put him in a little context. Fred is not just any Fish. Fred is a very special Fish. To me, at least. And here at Land of Laurel that’s what matters. 🙂 When I was growing up, I lived on the eastern side of the Caldecott Tunnel, but my grandmother– who we called Oma– lived in Berkeley, CA, the same town I live in now. I have many dear memories of Oma; she had a huge presence in my life. Oma was born in Germany in the 1928. She survived the war and its aftermath, eventually immigrating to the United States in the mid-1950s. She lived with distant relatives in Indiana and soon met the man who would become my Opa! She settled down, had four daughters in quick succession, moved her family to Long Island, put four kids through college, then followed those four kids to California. The Oma I remember growing up was an impeccably dressed and mannered woman who read the New Yorker, New York Times, and toy catalogs with no discernment of difference in quality. Oma would babysit my sister and I after school on Wednesdays; she would host sleepover weekends; she taught me how to make Käsespätzle. It is from her I inherited my skills in organization & punctuality, appreciation for a great view & a good park, and drive for perfection. My Oma passed away in April of 2014 after suffering from Parkinson’s Disease for several years. Although it was hard on me and my family, it was the right time.

LaurelsOma

Now, this post is not supposed to be a sad story! My Oma lived an amazing, exciting life and enjoyed every minute of it. She loved her family, her daughters and eight grandchildren especially. She meant so much to us and everything in her life and home was full of meaning. After she died, her things were passed on to my mother and her sisters, but after they’d gone through everything, I got the chance to pick a few things for myself before everything was donated. One of those things was Fred the Fish.

FredinOmasTime

Continue reading “Fred the Fish”