When I wake up, well I know I’m gonna be…

When I wake up, well I know I’m gonna be…

…I’m gonna be the man who wakes up next to you one who’s still exhausted. Or at least I used to be, today, I’m sharing the change that has made my mornings so much better, happier, and most of all, brighter!! It’s a simple switch that’s made me feel so much better rested.

Also thank you to the Proclaimers for lending me some lyrics to butcher. Who doesn’t love this song? Some of the funniest How I Met Your Mother episodes featured this song as the only one that plays on the stuck tape in Marshall’s college car stereo. Anyone else remember that hilarity?

Back to waking up in the mornings though: I’ve really been struggling in the last few years to get out of bed in winters when it’s still dark and cold out. This is a stark contrast, a big change for me, because previously, I would jump out of bed the second my alarm went off. I despised snoozers and prided myself on my “skill” of waking up immediately. Then something changed. I am now a snoozer. I’m a wake-up-and-reset-alarm-er. I’m a dragged-myself-out-of-bed-and-barely-made-it-to-the-bus-in-time-er. It’s unfortunate and it needed to change. I’m not sure how or when I first heard of the wake-up-light alarm clocks, but I knew about them somehow and about 2 months ago I started looking into purchasing one.

I ended up finding this one from Philips, which at almost $90 isn’t exactly inexpensive. I hate spending that kind of cash on purchases where I’m not certain of the results, so instead of clicking “buy” myself, I forwarded the link to my mother with the not so subtle hint that this would make a perfect Christmas present. She took the hint and this was the first gift I opened on Christmas morning. Well, the pictures on Amazon don’t do it justice! This alarm clock is actually quite stylish!

Phillips Wake Up Light Alarm Clock | Land of Laurel

So how has it changed my life? In so many ways! Let me break it down for you. This type of alarm clock is really cool! And no, this isn’t a sponsered post, I’m just excited to tell you about it! Seriously, I really can’t shut up about this alarm clock. I’ve been telling all my friends and co-workers all about it!

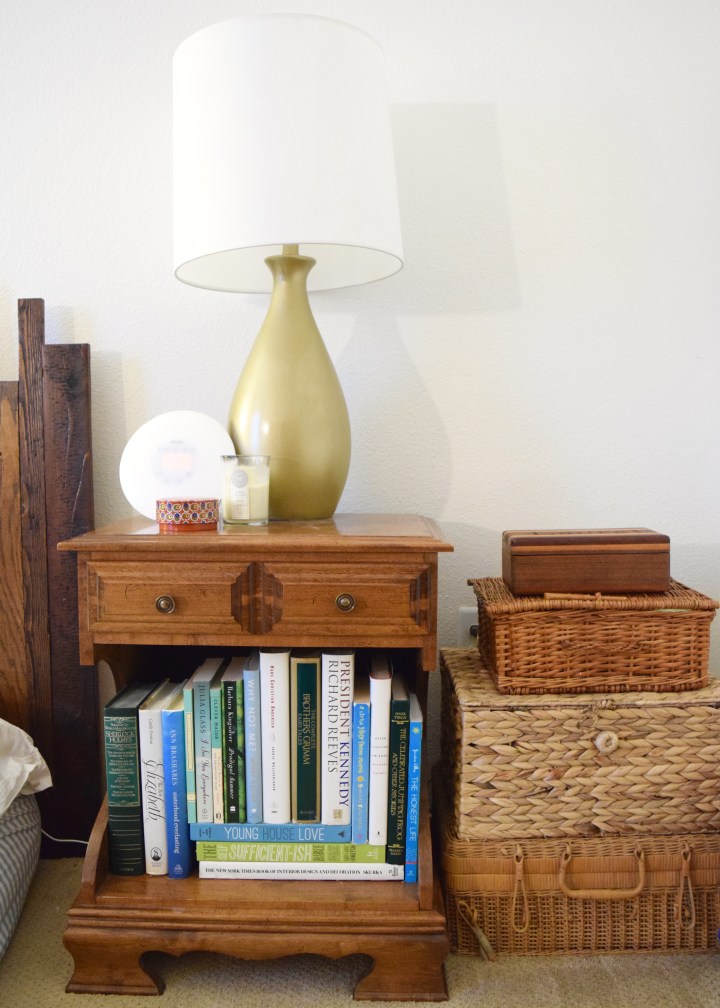
It’s super easy to use and highly customizable. You set you alarm for the next morning and then 30 mins before the alarm goes off, the light inside turns on to a dim setting and slowly gets brighter and brighter over the next half hour. This is supposed to help simulate a sunrise which can tell your body’s circadian rhythm it’s time to get up! Then the alarm itself has a couple of different settings. You can wake up to an am/fm radio station or to one of the two pre-set alarms: bird song or jungle noises. I’ve been waking up to the bird song and it is amazing! This alarm clock is life changing. In the mornings, I tend to hover in a semi-conscious state for a minute and I can hear the bird song. Without fail, each morning, I think to myself how nice it is that the birds are singing. A minute later, my brain registers that this is my alarm and I open my eyes. The light really helps remind my body that it is indeed time to wake up each morning. I am never jolted out of REM cycle like I was previously. Instead, I feel like my body slowly wakes up over that half hour allowing me to feel much more awake when the alarm truly does go off.

Phillips Wake Up Alarm Clock | Land of Laurel

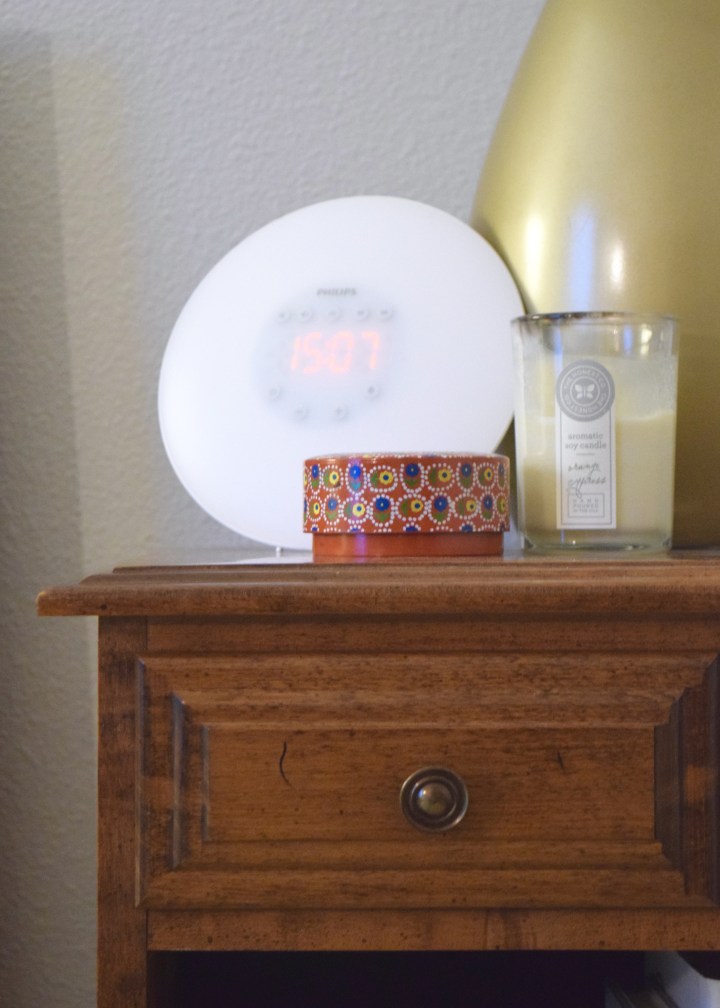
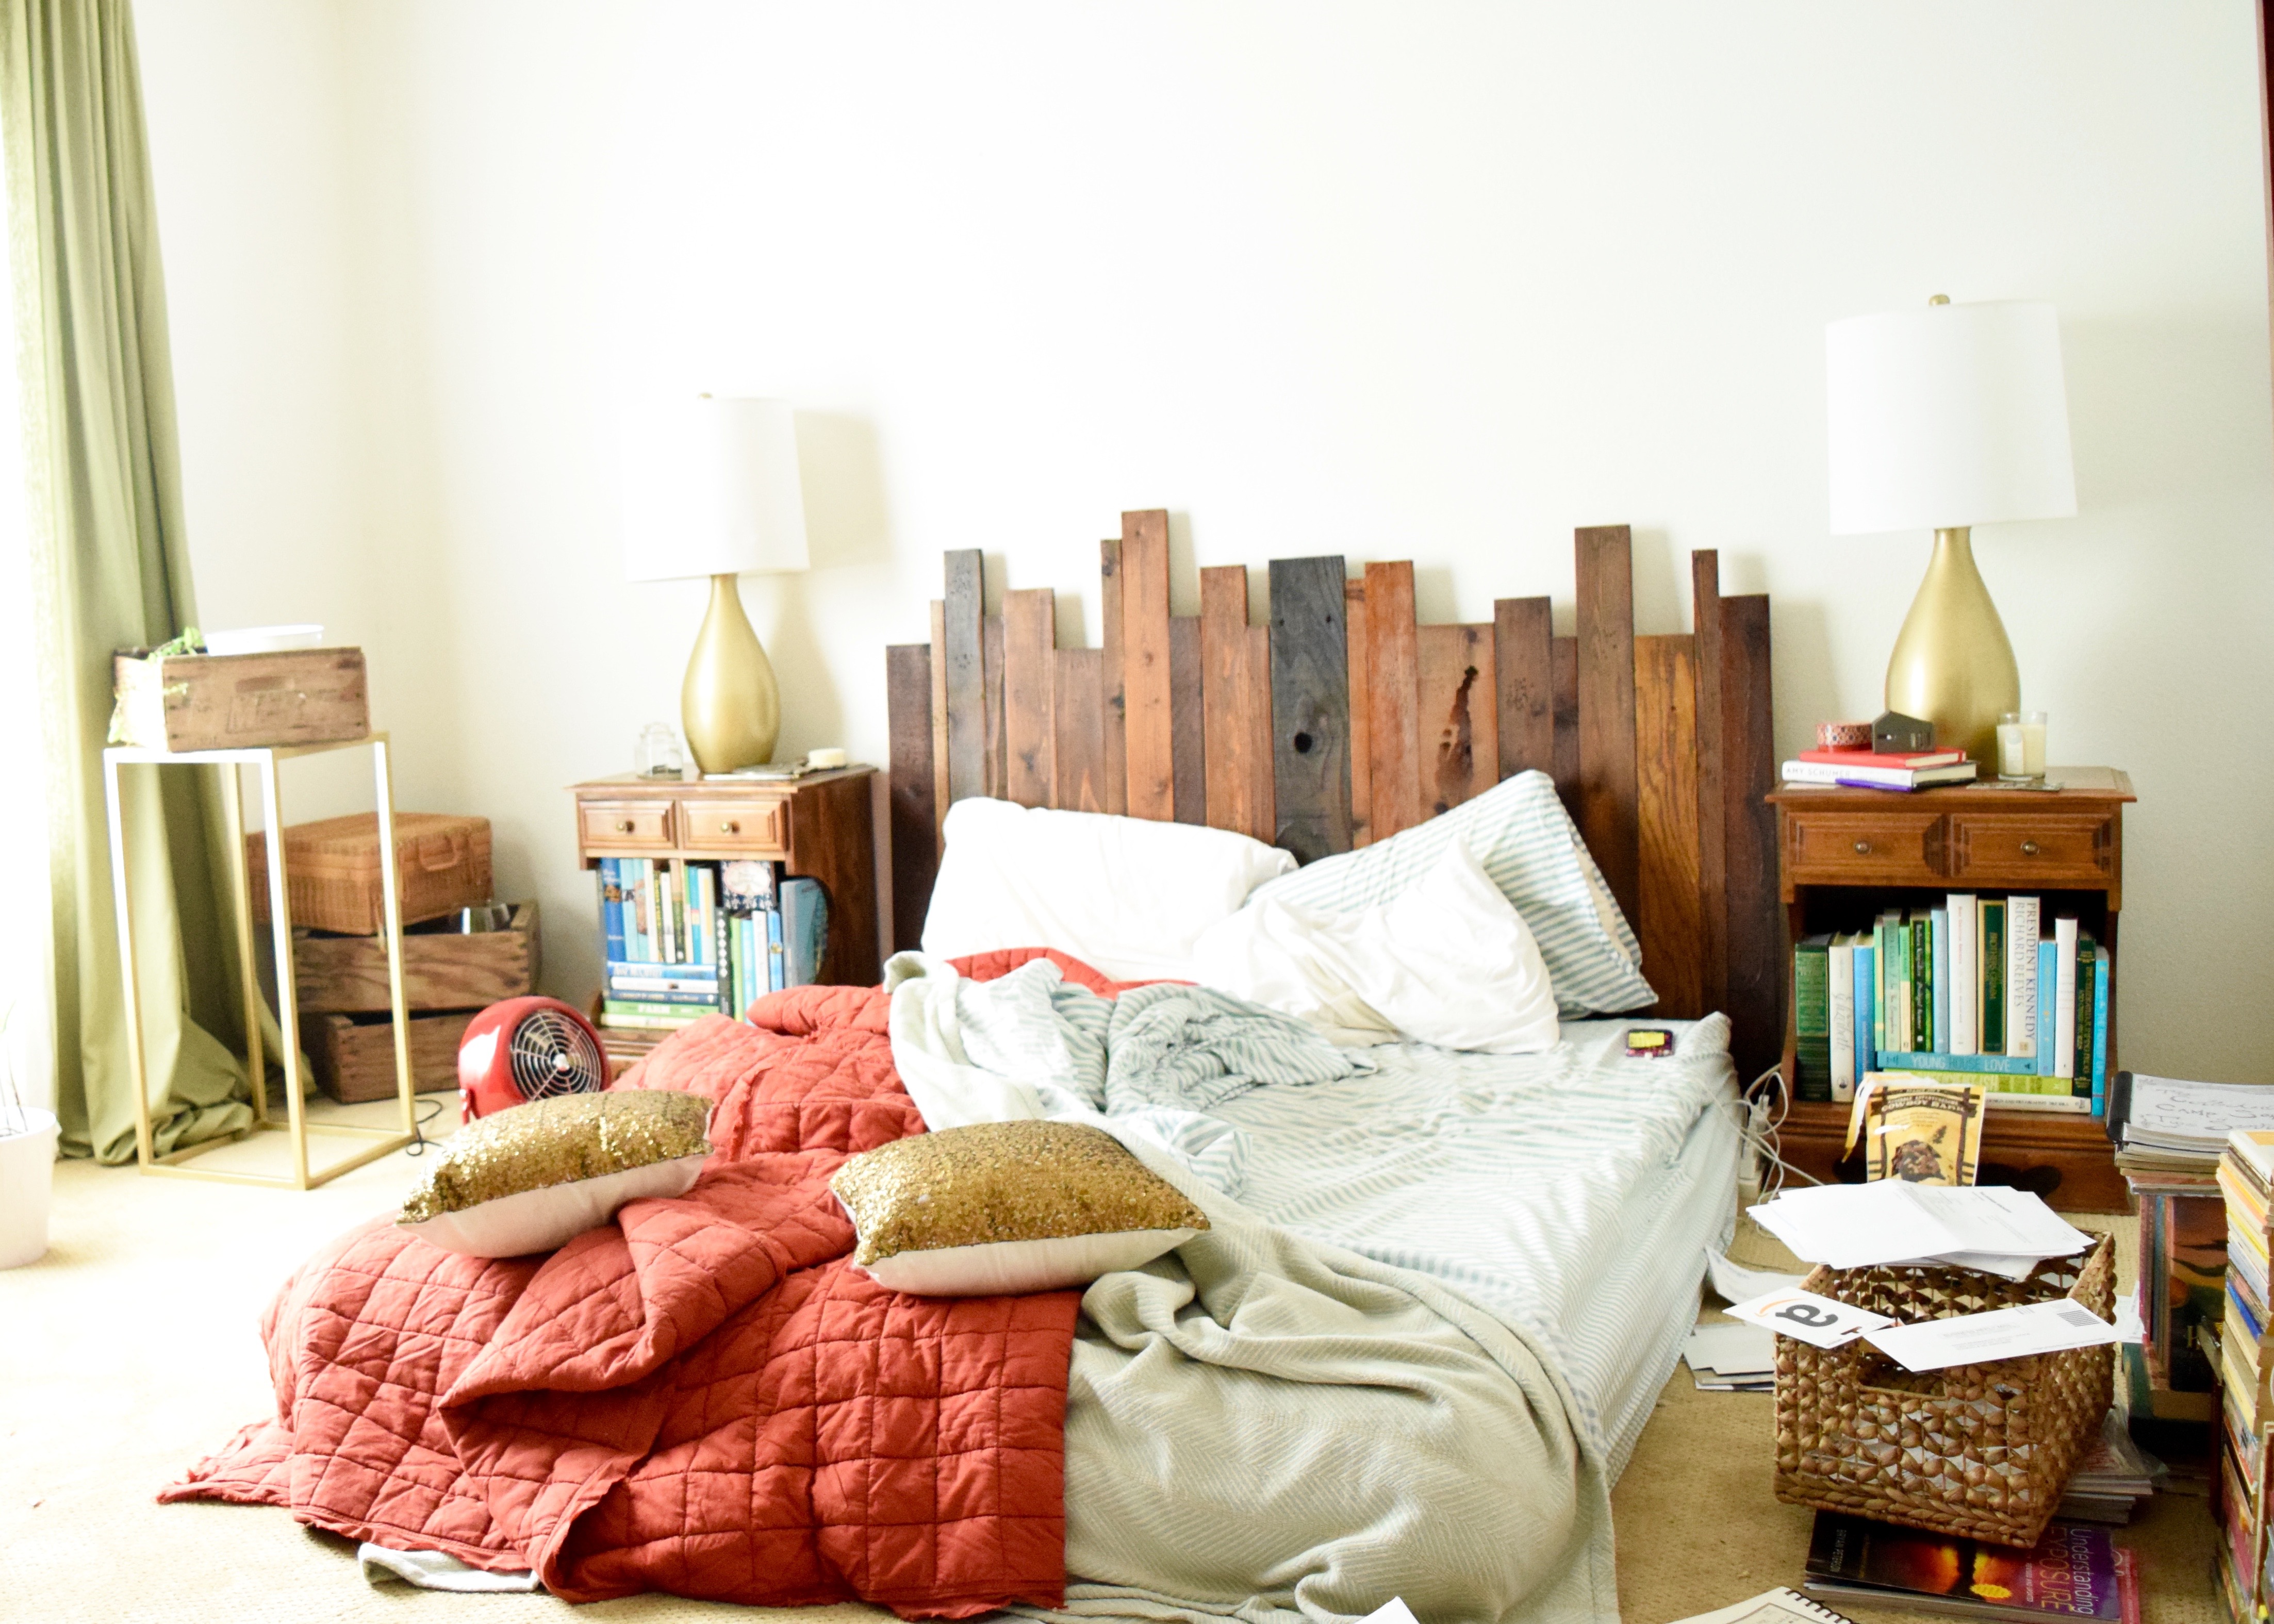
The alarm itself is pretty simple and well designed. It’s definitely not an ugly bedside alarm clock. It feels just about as stylish as an electronic devise can be. It’s light weight and clean lined. You can adjust the settings on the alarm to make the time show brighter or dimmer. I have chosen a dimmer setting so it doesn’t glare at me while I sleep. The light on the alarm itself can also be dimmer or brighter and you can decide the volume of the alarm as well. It’s these little adjustments which make it so easy to personalize. For instance, I have the light on my alarm maxed out so it is as bright as possible when it’s time for me to wake up, but since I’m more sensitive to sounds, I keep my sound setting pretty low. You can also chose to use the light just by itself, which I do on occasion since my new bed hasn’t been built yet (gotta get on that already!), and the alarm is easier to reach that the higher up lamp switch.

Philips Wake Up Alarm Clock | Land of Laurel

Over all, this alarm, I can truly say, has been life-changing. I feel a million times better in the mornings when it’s time for me to get out of bed. I know longer feel the need to push snooze, nor do I feel like I’ve been jolted from my sleep. Having an alarm clock again after eight years of using my phone as an alarm also has the added bonus of preventing me from picking up my phone first thing in the morning. This means it’s a lot easier to resist scrolling through Instagram or Facebook or reading the news and gets me into my morning routine sooner so I’m not in a rush!

This may seem like a small thing, but the more I realize how deeply addicted I am to my phone and all the social media platforms it holds, the more I’d like to take time away from that technology. It’s one of the reasons I love to camp and get away from my phone. Somehow, it’s miraculously freeing to step away from technology and all the entrapments it holds. Not being connected is an amazing thing in this wi-fi enabled world and getting out of the routine of checking in on Facebook, Instagram, and Apple News first thing each morning is a relief. Now I peruse these things on the bus to work, when I’m not in a rush to get out of the house. It’s a minor difference in terms of timing, but a significant difference in how I wake up and start my day.

So to anyone out there who struggles to get out of bed or loves their snooze button, I highly recommend the Philips Wake-Up Light with Sunrise Simulation. It is going to significantly impact the start of your day in the most positive of ways! Starting off the New Year with this new way to start my days has been a great game changer for me and my life.

Do you have one of these, from Philips or another brand, at home already? Let me know your thoughts! Do you love it as much as I do? Because I think I might just marry this alarm clock I love it so much!

*This post contains affiliate links*


The Downstairs Bookshelf

The Downstairs Bookshelf

Happy New Year everyone! I hope you had a great holiday and got a chance to relax and spend time with family and friends! I spent my break at my parents house eating way too many waffles and drinking hot buttered rum. Lots of hot buttered rum! While I was down in the Bay Area, I also installed a project for a private client of mine. We’re about 95% done with their home and once we finish I can’t wait to go down and photograph the project to share here on the blog. It’s always such fun seeing things come to life from idea to specs to reality! Back home I’ve just been sorting through things trying to purge some of my belongings and trying to find a place for the too many books I accidentally bought at the local used bookstore in my parents’ town.

Speaking of bookshelves, back when I shared how I style my bookshelves full of books I mentioned I’d share my downstairs bookshelf, which, though it has many books, definitely holds a lot more “things” too! This bookshelf is a hand-me-down from my parents which my mother surprised me with when I moved to Berkeley. It needs refinishing and I’ll probably paint it black when I finally get around to painting all the things I want to paint black like my china-cabinet-turned-pantry and dining table. For now though, the bookshelf is a rusty brown shade that I rather dislike. Styled full of pretty things, however, it’s not so bad!

Bookshelf | Land of Laurel

The bookshelf sits tucked in the corner of the main living area next to the dining table and slider door. It fits this spot pretty perfectly and gives this spot some definition and meaning!

Dining Room | Land of Laurel

These days, Finley the Fig Tree hangs out in front of the slider about 3 feet in front of the bookshelf. She tends to hide the bookshelf from view a little bit, but it was the only place to put her!

Living Room | Land of Laurel

Anyways, this bookshelf is more styled than my stuffed-with-books shelf upstairs. This shelf holds all my pretty vintage books, too many of which I bought only because they looked nice (Shhh! Let me have my addiction!). It also holds my collection of German steins (somewhat touristy in taste) as well as a few plants (see above about addictions) and knick knacks.

Bookshelf | Land of Laurel

I can rarely let a surface stay empty so I nabbed a picnic basket I had to sit on top of the shelf and flanked it with two plants. I’d rather these plants live in a different color container, but these were already planted, so I stuck with what I had. Below that, a vintage collection of children’s stories is propped up with inexpensive candlesticks. On the eye level shelf is my collection of steins which I frequently pick up a flea markets and garage sales. I’ve always got an eye out for them. They usually have some sort of interesting pastoral or forrest scene both painted and embossed on them so they’re textural as well as colorful! Below the collection is a shelf with a few stacks of books, a heavy goat bookend I got from my Oma and a Burros Tail succulent I picked up on my birthday last year at a greenhouse in Half Moon Bay.

You’ll notice that these objects are all fairly symmetrical and centered on the shelves. This is very me. I love symmetry! If this shelf was located somewhere else I’d probably use less symmetry to keep things more interesting. Because this is a one-off bookshelf off-centered in a corner, a little lot of symmetry keeps things more orderly.

Bookshelf Upper | Land of Laurel

A lot of my viney plants ended up on this bookshelf. I’ve helped them grow in and around the things on the shelves and they don’t seem to mind sprucing things up a bit! This shelf below is my favorite. The plant really took off and loves that I’ve wound it around the items on the several shelves! Plus I love the stacks of red and blue books with little car on one stack and small box on the other. The car is actually a Christmas ornament my mother gave me, it’s a little truck of fruit though so I keep it out all year round. The box is also from my Oma and is full of little labeled rocks she picked up around Europe in the 1980s.

Lower Bookshelf | Land of Laurel

Below this shelf are just rows of books – tall ones on the bottom, short ones on the shelf above that. This photo made me realize that last shelf was put on crooked and has been crooked for nearly seven months. Whoops!

Bottom Shelves | Land of Laurel

So that is how this bookshelf is looking! Still holds a lot of books, more so than a lot of styled shelves on the internet, but holds a lot of less practical things as well! Hope that inspires you to straighten up your shelves and make them look nice too.

Happy New Year! Also, shout out to Steve!


Rug Terminology 101:Uncovering What’s Underfoot

Rug Terminology 101:Uncovering What’s Underfoot

So recently I’ve become obsessed with rugs. I think I’ve always had a bit of a thing for area rugs, but now it’s becoming a full blown crush. I’ve saved pretty rugs as my desktop background, I’ve been caught petting them in local stores. Is that the bell ringing? Because  I’m gushing like a pre-teen in middle school. They say love’s a disease, so how did this recent affliction start? Well, a few months ago I designed a stair runner at work, a beautiful, custom, wool and silk stair runner. And that was it. I was in love. I designed another custom rug and fell a little harder. I started looking for inspiration for rugs for other projects and that’s when I knew I wasn’t going to recover any time soon.

I bought the rug for the bonus room that then moved into the living room. Boy do I love that rug. It’s this one from West Elm and it’s very popular. I bought it on sale and it looks like they’re continuing to mark it down, so perhaps it’s being phased out. Why did I pick this rug though? What should people look for in a rug? What types of rugs hold up the longest? Well, you can hire a designer to help you with that or I can give you a few of my own thoughts. Rugs aren’t complicated to understand and well made ones can last many lifetimes. Good area rugs are heirloom pieces. Not that every rug needs to be an heirloom piece, but in a world where so much of our everyday items end up in the landfill for centuries after only a few minutes of use, I like the idea of something that will last multiple lifetimes in our homes.

First, why I picked the particular rug I have in my living room. Aesthetically I liked the way this rug looked. I thought the simple two tone color palette would easily transition from this home to my next one. In fact, I bought this rug with the thought that it would eventually end up in my bedroom down the line! A rug paired with my colorful bedding needs to be neutral and take on the role of second fiddle, which this calm rug does. Not only that, but this particular rug is a shag! The extra long fibers make it oh so soft and cozy underfoot. I love it in the living room, but I can’t wait to sink my feet into this when I first get out of bed. This is the kind of rug you just want to lay down on and rub your face on it. But seriously, multiple people have come over and done that. It’s just so plush you want to feel it with something other than your feet!

The rug I bought is a 100% wool rug and that was important to me. Silk rugs are way out of my budget and I wanted a natural fiber rug. Natural fibers tend to hold up longer over time and they decompose more easily after their usefulness runs out. Natural fibers also have inherent anti-stain properties. Wool doesn’t stain unless something is worked into its fibers or sits on it for a long period of time. Which means I only minorly panic when anyone is near my rug with red wine!

Living Room | Land of Laurel

This rug is also a Fair Trade Certified product which means I know those who worked hard to create it were paid a living wage in a decent work environment and that matters. I feel better knowing that’s the case. West Elm lists this rug only as “handmade” but having it in my home I can look and feel and touch it. Upon examination it’s not only handmade, but hand-tufted with a cotton backing. In terms of manufacture, there are lot’s of terms associated with rugs: handwoven, hand-tufted, machine made, etc etc. What does that even mean and what are the differences?

Types of Rug Manufacture

Hand-Knotted Rugs

Hand-knotted rugs are the highest in quality. Each fiber of a hand-knotted rug is – quite literally – hand knotted. Thousands and thousands of filaments are knotted by the maker forming the design of the rug. This leaves room for one of the delights of high quality rugs: small variations, or mistakes, in the pattern. These unique differences are one of my favorite things about rugs. After the knots of the rug are all tied, hand-knotted must be cut down to the particular pile height as the knotted fibers are all in different lengths. Hand-knotted rugs have a pattern that you can easily see from the back, in fact the backs look nearly as good as the fronts and feel nice too! On rugs with fringe, the fringe is integrated into the fibers of the rest of the hand-knotted rug and not a separate made piece. Hand-knotted rugs take months to complete and are made of thousands to millions of knotted fibers! That is why they can last for several life times.

Hand-Tufted Rugs

Hand-tufted rugs are still of good quality, but less so than hand-knotted. These rugs are formed on a backing – frequently latex covered with cotton – and the fibers are attached with a type of gun. Although there is a person attaching individual fibers, they’re able to work more quickly using the tool and the design of the rug is usually printed on the backing so there is less “user error.” You can easily tell if a rug is hand-tufted because cotton backings will frequently be a different color (the one on my living room rug is a dark grey-black). They still have a pile and have varying degrees of plushness. Because the fibers are attached more loosely to the backing, the rug cannot be washed as thoroughly as a hand-knotted rug can be and thus they shed. A higher quality hand-tufted rug will shed for only a few months, a lower quality one may shed throughout its lifetime. The fringe on hand tufted rugs is usually an entirely separate entity from the rest of the rug and is sewn on. Liquids can severely damage hand-tufted rugs as it destroys the latex and results in a dusting of powder on the floor. These rugs can last between 3-15 years.

Hand-Woven Rugs

Hand-Woven rugs are of great quality, but are difficult to compare to the two above, as they are mostly flat weave rugs with no pile. These rugs are made on looms by individuals using long fibers. Many hand-woven rugs are made of plant fibers such as sisal and or jute, but there are also wool and cotton hand-woven rugs. Some handwoven rugs have a pile, but the flat-woven rugs are common too. Flat-woven rugs – like kilims – are reversible!

Machine-Made Rugs

Machine-made rugs range wildly in quality and are the most common today. They are frequently made with synthetic fibers. They are mass produced all over the world. Most machine-made rugs have a harsh, hard, plastic-like backing which can damage your floors if a proper rug pad is not protecting them. These rugs always have an edge binding as well. There are many high quality machine made rugs (some made in the USA), but the vast majority are cheaply made and last only a few years at best.

Types of Rug Fibers

The manufacture of your rug is not the only factor in quality. The type of fiber is also important!

Wool

Wool is the most durable, long lasting fiber. It can be very very soft or more scratchy depending on the way it is processed. Wool is naturally stain resistant and can be cleaned. It holds up well over time and in high traffic areas.

Silk

Silk is also very durable, but less so than wool. It can be stain resistant as well. Silk is shiny and also slippery! Silk is durable, but probably not best suited for high traffic areas.

Viscose, Bamboo Fiber, and Faux Silk

Viscose, Bamboo Fiber, and Faux Silk are all synonym for the same or very similar product. They are man made fibers designed to look and feel like silk, but they tend to be less durable than silk or wool and shouldn’t be used in high traffic areas.

Synthetic Fibers

Synthetic Fibers are man made fibers and this term covers a whole manner of them. They range in durability, but generally are less durable than wool. They are frequently treated with a special coating to keep them stain resistant and this coating often off-gases.

Jute, Sisal, and Seagrass

Jute, Sisal, and Seagrass are natural fibers with a very different feel from wool or cotton or silk. They tend to be a bit rougher and less “cozy,” but are inexpensive fibers. Although they will wear down with time, these fibers are made from rapidly renewable resources. They have a beachy, coastal flair, but can totally work in more in-land settings as well.

There are ten million more things to be said about rugs, but it’s getting late and I need to get to bed. Hopefully, something in this post helps you pick out your next rug! I leave you with my latest inspiration picture: this amazing pictorial Khotan rug featured in Traditional Home Magazine. I AM OBSESSED.

Pictorial Khotan | Land of Laurel

Don’t mind me, since I’ll never be able to afford an antique version, I’ll just be saving up over the next few years to custom make a rug like this (but in green of course) through one of my favorite local rug companies, Kush Handmade Rugs. Now until I can get around to that, I’ll simply have to keep daydreaming about my latest love interest: rugs.

Bringing the Living Room To Life

Bringing the Living Room To Life

Happy Monday! I cannot believe it’s December! How did this happen? It’s insane. December means I’ve officially lived in Portland for four months. It definitely feels like I moved yesterday! However, four months seems to be about the amount of time it takes me to bring a room together because the living room is finally in a good place. It’s been all over the place since we moved here, but has always seemed un-finished slightly sad, now things are beginning to look more permanent!

Do you remember when I moved in and it looked like this? A pile of boxes, some old IKEA furniture, and my plants scattered over every surface. It was right as we were moving in and the space was in the midst of being cleaned, cleaned, cleaned!

The Duplex Moving In Tour | Land of Laurel

Eventually it began to slowly transform as we settled into the Duplex and started to get more organized. The room became a place holder for mix-matched furniture  and art we already owned.

Living Room | Land of Laurel

But it still didn’t feel quite right. Things needed adjustments. We didn’t have a sofa (because I couldn’t quite find the perfect one at the perfect price), the faux cowhide rug wasn’t very cozy, and the furniture arrangement needed tweaking to create a more conversation oriented layout. Still, it wasn’t bad, just temporary. Things were looking so much better than when we first moved in!

Living Room | Land of Laurel

Well things have continued to move around and now this space actually feels like a comfortable place to hang out! The biggest change, however, came from another room in the house! Remember the rug I bought right after ripping out the carpet and painting the subfloor in the bonus room? It’s a great Moroccan Inspired white and charcoal 8’x10′ rug that’s oh so soft and cozy! We loved it in here, but it was a tad large for the space (which I knew when I bought it) and it seemed sad to waste such a lovely rug on a space we hardly used.

Furniture in the Bonus Room | Land of Laurel

It lived up there for about a week and a half until I decided we needed to really rearrange. The next Saturday I rolled up the rug and dragged it downstairs (literally). That day I also finally decided I wasn’t going to buy a sofa for the Duplex. This place is a transitionary home and I’d rather buy a sofa for the Portland home I decide to live in more permanently when my lease here is up in June. Since I am not going to buy a sofa, it made sense for my roommate’s futon to take on that roll downstairs. So that needed to change locations as well! Down the stairs it went (I moved this by myself and nearly died when it decided to try to take me with it when I was sliding it down the staircase). I continued moving furniture around. The bench that served as primary seating before? Poof! Up into the bonus room it went. I tried the rug a couple of ways before sliding it into it’s final position and plopping the furniture back down. I also grabbed a canvas drop cloth I had in the garage and draped it over the purple futon to brighten it up. The black mud cloth stayed and popped more against it’s new white backdrop! The rest of the furniture in the room stayed and just got moved around a little bit. The entire space feels so much brighter and cleaner now! Don’t get me wrong, there’s still plenty to do, but this finally feels like a good space!

Living Room | Land of Laurel

Moving the rug and the futon downstairs was a huge change for the better! The room feels so much cozier and put together and a million other things. The only thing I really want to switch out now is the TV console, which I’d love to replace with an old dresser. Other than that, everything is here to stay! Luckily, even though I bought the rug for upstairs, it fits perfectly down in here! I laid it about 10″ from the window wall (to clear space for the heater vent that’s behind the sofa) and it ends with just enough room for the stools to slide out when you’re sitting at the counter. Jackson has taken over the old cherry-crate-turned-cat-bed I made Malary back in Berkeley. I placed it over in this corner to help fill in the space by the snake plant and pantry cabinet and it has become his new favorite place to sleep.

dsc_0464

I promise he’s not as crosseyed as this photo makes him look. He’s quickly become part of our home and absolutely dotes on Malary – following her around constantly – which annoys her to no end!

Most everything in the room is repurposed from before, but I did buy a few things in the last few weeks. The fiddle leaf fig tree came home after my last Home Depot trip. It’s hanging out in front of the fixed panel on the slider door for now and I’m hoping to give it a nice long life. We only have eastern and northern light in this house, which I’m hoping is enough for it to thrive. I’ve decided it’s large enough to deserve a name, so I’m calling her Finley. This spot is bright in the morning through early afternoon, but doesn’t get any of the hot evening sun. In fact after 2pm or so this room is a little dim. Anyone else have a fiddle leaf fig? Let me know your tricks for keeping it alive! I’ve wanted one for ages and when I stumbled upon this nice tall one, I jumped on her! The deer head is also new – an impulse buy from Cost Plus World Market. I kind of love it! It’s green and red and gold; my favorite colors!

Living Room | Land of Laurel

This room feels so much nicer these days and we’re using it so much more. Before it was definitely a transitionary space both in look and use. We mostly passed through here on the way to our bedrooms. We’d rarely hang out down here since there was no where cozy to lounge. Now with the futon and the comfy rug, it’s just as likely you’ll find us laying on one as the other! I swear this rug is so fluffy underfoot you just want to stick your face on it!

Living Room | Land of Laurel

It’s a far cry from where we started right?

The Duplex Moving In Tour | Land of Laurel

The space is transformed and now it’s perfect for board game nights and curling up with popcorn to watch a movie. It’s cozy for winter and winters last a long time in Portland! Plus I just can’t get enough of that deer head.

Living Room | Land of Laurel

Have you switched up a room with the simple addition of a new rug lately? It’s such a quick change and yet it can make the whole space feel completely different! I’ve been designing lots of custom rugs lately and they’ve been on my mind! I want to get around to writing a “what to look for in a rug” post soon. For now, you’ll find me curled up with a blanket and two sleepy cats on the futon (as I am right now). 🙂


Styling a Bookshelf with Actual Books

Styling a Bookshelf with Actual Books

So we’ve all seen them, the “How to Style a Bookshelf” posts, they’re everywhere! But have you ever noticed what’s most lacking in these bookshelves? Books! Almost ever tutorial, every blog post, every instruction manual I’ve ever read on styling a bookshelf maintains that you need many knickknacks and very few books. Well, for all my fellow bibliophiles, let’s take a minute to acknowledge how little that makes sense. If you’re anything like me, you have tons of books. You may reread them, they may be on your to-read list, they may sit untouched just looking gorgeous on your shelves, but doggone it, there’s tons of them! The joy of having too many books and not enough book storage has haunted me ever since I memorized the words to the Velveteen Rabbit and told everyone who would listen that I knew how to read. It has never been uncommon for me to have stacks of books sitting all over my home. After college, I stacked books 3 and a half feet high in my bedroom on my childhood dresser. Miraculously they withstood the 2014 Napa Earthquake.

Stacks of Books | Land of Laurel

Every time I see another “How to Style a Bookshelf” tutorial, I sigh, think, hmmm that’s pretty, and move on, because for me, that’s completely impractical. My bookshelves are groaning under the weight of years of reading material. They’re packed to the brim with thousands of pages of paper, trillions of words, hundreds of stories. And that’s how I like them: full of books. The bibliophile in me wants more and more, collects them even. The romantic in me dreams of home libraries packed to the brim and smelling of paper and ink. The designer in me pauses a minute and thinks, how can I make this collection attractive?

This past weekend I moved around the furniture in my room and this bookshelf got booted out and into the bonus room upstairs. I packed it full of as many books as I could, styled the top, and it’s beginning to set the tone for this whole room.

Without further ado, how to style your bookshelf with actual books! If you follow these guidelines, not only will you have an attractive bookcase filled with books, but you will also be able to store more books than you would normally. Booklovers rejoice! You can use any books for this, hardcover, paperback, falling apart, old, new, used! Is this the only way to style a bookshelf full of books? Definitely not. But this method is fun, fresh, and brimming with books!

First start with an empty bookshelf. The small hole drilled in the back for your childhood stereo is essential. Just kidding! Pretend it’s not there…

Styling a Bookshelf with Actual Books | Land of Laurel

Gather a stack of books in the same color family, you want the stack to be about as tall as your shelf when laid horizontally. Place that on one of the shelves.

Styling a Bookshelf with Actual Books | Land of Laurel

Gather another stack of similarly colored book spines. Place that next to the horizontally stacked books.

Styling a Bookshelf with Books | Land of Laurel

Add more books in this spine color to finish out this half of the shelf. Begin gathering books of other spine colors. At this point you might want to pop in a special books you have. For me, this means a collection of dilapidated books on top of the bookshelf and a three volume series on a shelf below.

Styling a Bookshelf with Books | Land of Laurel

Now things began to move quickly. Continue adding stacks of books vertically and horizontally until your shelves begin to fill up. Things will move around a bit as you adjust for different spine colors. Don’t be afraid to mix hard- and soft-cover books together! At this point your goal to to pack the shelves and keep your horizontal stacks misaligned for a more collected look.

Styling a Bookshelf with Books | Land of Laurel

As you continue on past the first few shelves, you may vary between one horizontal book stack and two per shelf. This helps keep you eyes moving around the shelves.

dsc_0542Styling a Bookshelf with Books | Land of Laurel

As you get further down your varying colored books help give the shelves blocks of color, creating a more appeasing and “styled” look over all.

Styling a Bookshelf with Books | Land of Laurel

At this point, your shelves are full, but don’t stop there! Add an arrangement to the top of your bookshelf to tie the entire thing together. I used an old printed wooden box I have which mimics the blocks of colors formed by the books in the shelves below. The plant adds some organic shape and life; it’s long tendril down the side of the shelf visually binds it to the books on shelves below. A candle, a little metal house, a silver stein, and a happy painted armadillo fill in the remainder of the space.

Styling a Bookshelf with Books | Land of Laurel

And that, is a bookshelf styled full of books! I love this because not only can I fit way more books on this shelf, but it looks clean, collected and modern rather than cluttered. There are many ways to style shelves, I don’t have anything against most of them. But for me, it’s important that my styled shelves are packed with the books I need them to store, and not just interesting objects!

I made a gif so you can follow along with this step by step as well!

How to Style Your Bookshelf with Actual Books | Land of Laurel

I’ll share the bookshelf I have downstairs later, to show you how I style shelves with fewer books too. And guess what? I need more bookshelves… I’m out of room and there are stacks of books everywhere around my house, eek!

Do you run into the problem of not having enough book storage? Have you styled your shelves full of books in a different way? Let me know your secrets!

The Long Weekend

The Long Weekend

Before we moved in, I walked the Duplex with my landlord and she pointed out several issues. One of those issues was the poorly laid LVT tiles downstairs, the other was the gross, old, stained carpet in the bonus room. She mentioned during this tour that she was considering replacing it with laminate. I heartily agreed. In my opinion, hard surface flooring is the way to go in rentals. Carpet simply doesn’t last and gets gross quickly. For anyone who has allergies to dust or dander, carpet traps dirt and dust and even the strongest of vacuums can’t get it out. It’s affordable in the short term, but over time, the cost of ripping up and replacing carpet adds up quickly.

Fast forward two and a half months. I reached out to our landlord via email and asked about her timeline for replacing the flooring on the stairs and in the bonus room. The carpet was nasty and a little smelly. I’d gone to Home Depot and gotten a quote on the installation and labor for a laminate floor. Home Depot estimated $250 in costs to remove the existing carpet and $850 in labor and materials to replace everything with an inexpensive laminate. The bulk of that cost was in the expensive laminate stair treads.

Unfortunately, life happens, and due to some unforeseeable personal matters, replacing the flooring was no longer in her plan or budget. So I suggested something else. What if I ripped out all the carpeting and painted the subfloor? A quick look around the internet told me I could do this for under $250. I proposed this solution as a way to make me happy in the short run, and allow her to spend on new flooring when she was ready. With her approval (yay! Happy dance!) I planned my attack. It was less than 200 SF so I figured I could knock everything out in a weekend. Little did I know how back breaking that would be.

My weekend commenced and proceeded to look a little something like this:

Friday

5:50pm – arrive home from work

6:00pm – quickly eat left overs from fridge, change clothes

Bonus Room | Land of Laurel

6:15pm – move all the furniture out of the bonus room

Empty Bonus Room | Land of Laurel

6:30pm – begin ripping up all the carpet

7:30pm – finish ripping all the carpet out

Carpet Gone! | Land of Laurel

7:45pm – finish ripping all the carpet pad out, try not to gag looking at the amount of dirt that’s been hidden under the carpet for going on 20 years (see brown smears in picture, much more obvious in person!)

Dust Under Carpet | Land of Laurel

8:00pm – finish carting all the carpet and pad into the car (laying it on top of a tarp to protect the van)

Stairs Carpet Pad | Land of Laurel

9:30pm – finish pulling up all the tack strips, add these to the pile of stuff in the car

9:45pm – sweep floors

10:00pm – vacuum flooring

10:15pm – begin pulling the 253 billion staples out of the stair treads/risers with a pair of needle nosed pliers

10:30pm – my roommate comes home and helps pull out staples from the bonus room

11:30pm – roommate goes to bed

1:00am – finish removing all the staples I can find (approximately 589 trillion)

1:30am – fall into bed, showered, but sore

Saturday

8:00am – alarm goes off

8:45am – finish breakfast and dress in project clothes

9:00am – sweep floors

9:15am – vacuum floors, assess supplies, realize I don’t own a spackling knife, hope the tinted primer works well with the paint selection

Supplies | Land of Laurel

9:30am – wipe down floors with wet cloth, remove the 33 million more staples I find while doing this

Ready for Paint | Land of Laurel

10:00am – run to Home Depot for spackling knife

10:30am begin filling screw holes, saw cuts, and spaces between particle board panels, day dream about how much easier than paint prep, painting will be

Wood Filler | Land of Laurel

1:00pm – eat quick lunch of something you just pop into the oven from Trader Joes

2:00pm – hop into car

2:30pm – buy Benjamin Moore Natura Semi-Gloss paint in Waynesboro Taupe at Powell’s Paint. Color selected quickly as the swatch  isn’t yellow-brown, but doesn’t clash with the trim and is light enough to help reflect light around this dark windowless room

3:00pm – arrive at Environmentally Conscious Recycling and weigh van

3:30pm – finish unloading car at ECR, weigh car again, pay minimum $25 fee

3:45pm – stop by Home Depot again for more wood filler and wood transition strips

4:00pm – fill remaining holes and cut marks

5:00pm – hop into shower

6:00pm – wash ibuprofen down with wine (not recommended) at Nikki’s, eat authentic homemade Japanese curry, try not to fall asleep on her sofa

10:00pm – fall into bed, more sore than before

Sunday

7:30am – alarm goes off, groan in pain, take more ibuprofen

8:00am – finish breakfast and get dressed in work clothes

8:15am – beginning cutting in Kilz Max Stain and Odor Blocker water based primer (highly recommend! Not too smelly – though I wore a mask – and had excellent coverage)

11:30am – finish cutting in primer, begin rolling primer

12:30pm – finish rolling in primer, eat lunch, take break while primer dries, realize I’ve missed tons of screw holes/cuts that will need to be filled

2:00pm – start second coat of primer in certain areas (like those that now have exposed wood filler)

3:00pm – wash brush and roller, eat snack, take break

6:30pm – install wood transition strips at entries to bedrooms and bathroom

7:00pm – start cutting in paint, realize wet paint is nearly the exact same color as dry primer and it is basically impossible to tell where you’ve painted or just primed, discover the paint (luckily) dries much darker. Primer is the main field color below with cut in dry paint on the right and cut in wet paint on the left!

Primer vs Paint | Land of Laurel

10:00pm – finish cutting in paint, start rolling

Cut in Paint | Land of Laurel

11:00pm – finish rolling, eat dinner,  shower


Painted Particle Board Subfloor | Land of Laurel

11:30pm – fall into bed more tired than ever, dreading work the next morning.

Whew! I’m exhausted just remembering all this! Yup, that was my weekend. My exhausting, back breaking, someone please feed me, weekend. And I am 100% glad I did it and 100% not willing to do it again any time soon. Especially since the next weekend I went back in, touched up a few spots I missed with paint (got to love Benjamin Moore paints that only required 1 coat!), and then sealed the floors with Safecoat Acrylic. I let that dry for another week before bringing the furniture back in.

We still have the futon in here for guests and all of the electronics on the built-in counter I want to drill a few holes and add some grommets to tame that mess. I did buy a nice big West Elm rug which I’m hoping will cozy up the space!

Furniture in the Bonus Room | Land of Laurel

You can see here how the window in the stairwell sits low, below the half-wall railing in the bonus room, preventing much light from illuminating this room. Even in the middle of the afternoon, this room is pretty dim. A light colored paint on the floor was a must for brightening up the space!

Bonus Room | Land of Laurel

Our yellow brown trim will always stand out pretty starkly, but that’s the nature of it. If the room was brighter, I would have painted the floors a nice deep black. The trim would still have popped against the black, but the room would have been dark dark dark! In person the color is the perfect blah tone that fades away on the floor, letting everything else speak for itself. I don’t mean that in a bad way at all! It’s a nice safe background. This picture below shows it very close to how it looks in person.

Painted Particle Board Subfloor | Land of Laurel

And this post wouldn’t be complete without a kitten photobombing, so here we go, model pose!

dsc_0405

How much did it all cost?

Supplies and a Gallon of Primer cost about $60

Benjamin Moore Natura Paint Gallon also $60

Recycling Fee for the carpet $25

Safecoat Acrylic Sealer $95

Which left me spending about $240 which my landlord happily reimbursed me for. Although the labor was quite demanding, I’m pleased with the result and couldn’t be happier for the change! It’s mush nicer walking on the painted and sealed subfloor. I don’t miss that gross carpet one bit!

Have you ever painted subfloor? How has it held up for you over time? Although painting didn’t take long, I was a bit shocked at the number of staples that needed to be pulled up. My hand had the imprint of the pliers for a week afterwards!


Hanging in there!

Hanging in there!

Woah. Did you guys watch the Walking Dead last Sunday? Because, I need to talk to somebody about that punch-you-in-the-face, heart- wrenching, knock-you-dead season premiere! So violent. So psychotic. So depressing. Wowza! Let me know your thoughts. I need to talk about it with somebody or I’ll go crazy.

In other news, I am no longer living with all my pots and pans sitting on the counter! Nice segue, right? Remember when I filled up my china hutch-turned-pantry and started pulling this kitchen together? I shared this shot:

China Cabinet Pantry | Land of Laurel

Well, take a look at this and see if you can spot the difference:

China Hutch Pantry and Pegboard | Land of Laurel

No the dead plant is still the same dead plant (really need to get my s*** together and share a shot of the lovely new snake plant which now lives in that pot!). And no the random lamp on the floor isn’t anything new (you should remember that lamp from long ago). It’s the pegboard over in the kitchen! That’s right! Vertical storage wins again!

Now rather than moving 15 million pots and pans around every time I need to use the counter space, I can actually use the counter space! It’s the little things, people! The back wall of our kitchen was so under utilized before. A big blank wall with nothing but some mismatched trash/recycling receptacles was not an ideal situation in a kitchen lacking storage.

Kitchen Before | Land of Laurel

There just is no reason for this wall to have so little purpose. And no reason for all those pots to sit on the counter. Now? Much better.

Kitchen Pegboard | Land of Laurel

Matching trash and recycling containers from IKEA (I spray painted the recycling bin green) plus a pegboard adds up to a much nicer view. Most of the pots and pans are my roommate’s, but the center column holds my cast iron pans and the one pot I’ve had since college. My Staub dutch oven and pie pans live in the china hutch. Having all the pots and pans within such easy reach is absolutely wonderful. I just reach over any time I need any thing, I much prefer it to digging through the lower cabinets. Putting together the pegboard was super easy. Anyone can do it as long as you have the right tools.

I picked up the actual pegboard at Home Depot and had them cut down the 4’x8′ size to the dimension I wanted: 3′ x 6′. They offer this service free, so take them up on it if you don’t have the correct cutting tools. While I was there I grabbed a couple of 8′ long 1x2s to pop the board off the wall (allowing the hangers to slip in) and some 1x3s to trim the board out.

At home, two quick cuts later and I had the boards ready for the back of pegboard. Excuse the dark garage photos. There are worse pictures yet to come. Cutting the 8 foot boards down to just under 6′ allowed me to have boards along the lengths of the pegboard and the top and bottom. They didn’t need to be perfect since they were purely for function and wouldn’t be visible. I screwed them in from the back so they were completely invisible (like ninjas) from the front.

Pegboard | Land of Laurel

The trim pieces were almost as simple: set saw to 45 degree angle and cut.  But of course I started right off with a mistake. Luckily I was able to reuse the board for the top and bottom trim pieces and didn’t waste much.

Cutting Error | Land of Laurel

Once I turned my brain on, I quickly made the rest of the cuts. Each length was an inch longer than my pegboard so the trim would stick out from it on all sides. I then screwed all of these boards into the pegboard and things started taking shape. It looked so good, Malary decided to pose with the pegboard. It’s so nice to have such a supportive pet.

Pegboard | Land of Laurel

Since edges never match up entirely perfectly, I filled the mitered corners with wood filler and gave the same treatment to the more prominent knots.

Pegboard | Land of Laurel

Then I did some minor sanding (I get super lazy about sanding, but it’s a requirement so I tried to tough it out). After that, I filled the gaps where the trim meets the pegboard with some paintable caulk wiping up the excess with a wet finger. I like this little container because it stays good for a long time, rather than drying out immediately like the caulk guns.

Caulk | Land of Laurel

Once everything was caulked the board was functional, it just needed a coat of paint to spruce things up!

Pegboard | Land of Laurel

Two coats of primer later, it was ready for some paint.

Pegboard | Land of Laurel

I chose Benjamin Moore’s Palladian Blue (HC-144) in their Natura line (zero-VOC) for the board. It’s a really light aqua tone that is subtle, but still stands out from white. It has quite a bit of grey in in and the swatch seems to be almost white, but once it’s up on the wall, BOOM! COLOR! Plus, I love Julia Child and she had teal-blue pegboards all over her kitchen, so I’m in good company! After two coats of paint, I did three coats of Safecoat Acrylic sealer in high-gloss. I wanted the board to be extra protected from water and oils. Once that was all done, it was time to bring it inside.

Pegboard | Land of Laurel

I hung the board on the wall with a few heavy duty D-rings hooked on hangers screwed into wall studs and it is fairly sturdy. I picked up this pegboard hardware kit at Home Depot too, which was way more than enough to hang the pots and pans. I have enough left over I might take the pegboard scraps and make another for the garage!

Pegboard | Land of Laurel

Covered in pots, it really does make things look happy, colorful, and organized. I’m ready to sauté those carrots at a moments notice now.

Pegboard | Land of Laurel

Having our counters back and free for their original purpose (prep space) is delightful. Not looking at a pile of pots and pans every time I walk into the kitchen is pretty great too! The trash and recycling containers are just the right size for us too. I love the matching size and though not everyone would like the different colored recycling, it’s nice to easily be able to identify it as “the green one” when people come over.

Pegboard | Land of Laurel

Plus I get to lovingly stare at my cast iron pans now. Definite bonus.

Pegboard | Land of Laurel

I love those pans… though I wouldn’t mind upgrading them to Lodge pans down the line. I’ve got these guys seasoned just perfectly now with just over a year of use. Cast iron is my favorite!

So if you have a blank wall – put it to use! Don’t fuss around with birds, put a pegboard on it! (I’m so Portland now).

Have you guys ever come up with creative storage solutions in your rental kitchens? I’d love some good ideas!


3 Months In and What’s Next

3 Months In and What’s Next

So we’ve been here in the Portland Duplex for a little while now and I wanted to show you all an update on how things stand. We’re starting to make progress in a few areas and anything is better than the chaos when we first moved in! Also this is a nice place to list the twenty million ideas I have, Young Houser Love’s “Listy McListerson” style! Since I know this house is not long term – I have no plans on being her longer than my year lease – there are many things I am very cautious about putting money toward. Basically, anything I can take with me? Sure, spend the green, anything more permanent? Not happening this year. Hopefully, my next home will be a much more permanent living situation! There are tons of updates anyone can accomplish in a rental though, so that’s what I’d set out to do!

– THE ENTRY –

Before/Current

A whole lot of nothing going on in here! I really haven’t started.

To Do:

  • Get seating for putting on/taking off shoes
  • console or buffet for mail/purses
  • Hang art and accessorize
  • Paint back wall to hide electrical box better?
  • Organize closet
  • Shoe storage!

– The Long Hallway –

Before/Current

The Long Hallway | Land of Laurel

Also untouched!

To Do:

  • Hang Art
  • Add runner?

– The Powder Room –

Before/Current:

Untouched as well since this room is currently playing host to the house’s newest member! Six month old kitten Jackson is using this room as his safehouse until his stitches heal from his neutering and he and Malary learn to settle their differences.

To Do:

  • Buy bath mat/rug
  • Replace toilet seat
  • Hang art
  • Add plants
  • Find nice hand towel
  • Remove curtains and hardware

Soon there will be two cats photobombing all my pictures! Check out his little face in the meantime!

Jackson | Land of Laurel

– The Kitchen –

Before:

dsc_0033

Current:

Kitchen | Land of Laurel

China Cabinet Pantry | Land of Laurel

Not a ton has changed in here. Those floors are impossible to keep clean so I’m looking into a runner which will hide some of the dirt I hope. We’ve still got all our pots and pans on the counter! Luckily the lovely china cabinet is helping store a lot of my things and frees up cabinet space! The stools were up for grabs when my new office moved from east to west Portland and I nabbed five for $20 beans each.

To Do:

  • Buy rug/runner
  • Make use of back wall with vertical storage (I’ve been working on this guy and can’t wait to share)
  • Get stools for bar area
  • Re plant something in that pot

– The Dining Room –

Before:

dsc_0030

Current:

Dining Room | Land of Laurel

Things are looking a lot more lively in here now that I’ve added my furniture! The table is from my grandmother’s home, but it actually belonged to one of her tenants so there isn’t any sentimental value. The bookshelf was a surprise hand-me-down from my parents.

To Do:

  • Remove curtains and hardware
  • Paint/stain/refinish table (the top isn’t sealed properly, and I’d love to update it, this looks like a fun option, but they also look really elegant stained if styled correctly)
  • Paint bookshelf black to coordinate with china hutch

– The Living Room –

Before:

The Duplex Moving In Tour | Land of Laurel

Current:

Living Room | Land of Laurel

Living Room | Land of Laurel

Things have kind of landed in here for now. I’m using my old trunk which used to live at the bottom of my bed as a coffee table in the living room at the moment. We don’t have a couch yet and when we do get one I’m not sure the scale of the trunk will work with it. We’re using the bench I got as a hand-me-down from my parents and these two chairs as seating in here for now and it’s working pretty well. The larger chair is my roommates over which I draped a large wall hanging I got at the Berlin flea market. The wood arm’ed one is something I got from work in Oakland about 8 months back. The vintage suitcases were my Oma’s, I’ve stacked them and stuck a tray on top which is working really well as a cute side table! The other side table is some of my cherry crates stacked together with another tray. Fred is living on the coffee table at this house right now. The floor lamp is a recent IKEA purchase (my roommate’s). The faux cowhide is free from work.

To Do:

  • Buy sofa
  • Buy rug to layer beneath the faux-cow hide
  • build larger coffee table?
  • rewire green lamps for use on side tables
  • rearrange entire area to work with the sofa?
  • Hang art

– The Bonus Room –

Before:

The Duplex Moving In Tour | Land of Laurel

Current:

Bonus Room | Land of Laurel

This room has also pretty much just gotten a few pieces of furniture plopped down. The rug in here is awful truly awful. It might be original to the house. It’s covered in stains (some of them marker red) and sometimes smells a little bit! Our landlord said she wants to replace it with laminate flooring, but it hasn’t happened yet. The white drawer units were another item I picked up when my office moved. They were free and I napped 8 (they still sell them at IKEA for $79 each if you’re interested). I’ve got a couple in the garage, a couple in my bedroom closet, and these three in here are holding crafts supplies! It’s so nice to have them all sorted nicely. I’d love to bring a desk up here and make it a real craft room! The futon is also my roommates, I threw a couple of IKEA sheepskin pillows on top as well as a mudcloth I got at the Alameda Flea Market in the Bay Area before I moved.

To Do:

  • New flooring!
  • Build shelves for over the weird counter
  • Buy a nice plush rug
  • Hang art
  • Add desk

– My Bedroom –

Before:

dsc_0014

Progress:

Bedroom | Land of Laurel

Current:

Bedroom | Land of Laurel

Nothing great in here! My bed broke during the move so even though I’m on my own mattress and not the futon mattress, it’s still a mattress on the floor! Pieces from my old place all came with me, everything in here is still chaos! It took me way to long to go from the progress shot to the current shot too.

To Do:

  • Remove curtains and hardware
  • Hang new curtains (I’ll share this soon!)
  • Build bed
  • Style room
  • Rearrange furniture
  • Organize closets
  • Layer a rug on top?

– The Bathroom –

Before/Current: Bathroom | Land of Laurel

Nothing really done it here.

To Do:

  • Style counter
  • Add bathmats or runner
  • Get Malary to use downstairs litter box


So there it is guys! Plans for the entire house. Very feasible plans and totally rental-friendly! I’m diving in, can’t wait for you to all follow along.