Throwing Some Green At the Bathroom

Throwing Some Green At the Bathroom

When I first toured Berrybrier with my realtor back in the beginning of July I was convinced the bathroom just needed a quick coat of paint and some cleaning. What’s a kind way to say that was really freaking idiotic? However you decide to phrase it, I was stupid and the bathroom needs to be gutted. Doesn’t everyone love an unanticipated multi-thousand dollar side project? Oh joy!

DSC_0280

But let’s be real, this bathroom is BAD. It’s gross and there is a rot problem as things are not properly water proofed. Now I was hoping this was just dirty. It’s not. Enjoy this blurry picture of the wood tub surround. Doesn’t that just make you want to take a leisurely bath? Mmmm mmm good!

img_9040

The bathroom is right off the kitchen and is the primary bathroom not only for all three bedrooms to bathe in, but also for visitors to use. Storage in this bathroom is a bit questionable. The previous owners added this IKEA cabinet to the corner here, but it overlaps the door trim and is not really the right style. The bathroom vanity cabinet is a beautiful antiqued mirror, but it’s beat up and gross inside. There is an extension cord running from the light fixture to power two little plugs on either side of the mirror, which seams super safe. Not! Oh! And the best part? The little floating vanity covered in the same sheet vinyl as the floor! On the bright side, this bathroom does have a  wired light fixture and switch!

DSC_0284

So as you can see, pretty much every finish in the space needs to be changed, but more importantly, the layout needs to be changed. See the toilet? To get to that you have to turn sideways and scootch past 12″ of space between the sink and tub. It’s great! The tub – while exceedingly comfortable – is way too big for the small room. The bathroom is only 54″ wide and about 8 feet long. It was actually elongated by about 12″ in order to fit that tub in at some point. Which is why you see the soffit in the first picture above the mirror. The tub is so large you can basically take a poop while showering things are so crammed together!

img_9039

So, everything needs to be changed. Let’s start with the layout. The soffit is like that because when they moved the wall, they just cut off the wall. Which doesn’t really work structurally. The wall needs to be reframed at it’s original location reducing the depth of the bathroom by about one foot, but the half bath on the other side will get just a bit wider. The bathing part needs to be rotated 90° and put against the back wall. Because the bathroom is only about 54″ wide, a tub won’t really fit, so I will be putting in a 48″wide shower. If I’m lucky, I’ll be able to steal a little bit of the extra room besides the shower for little cubbies to hold rolled towels. The sink and the toilet will be relocated on the same wall as the sink closer to the entry to the room. That will provide a nice circulation path along the exterior wall with the window. I’ll add wood shelves above the toilet for additional storage. Can you envision that? Here, let me help. Excuse the dimensions, I had to get it all on plan to show my plumber.

New Bathroom Layout | Land of Laurel

Now that I’m committed to moving forward, I’ve decided to dive in head and heart. Which means I’m now really excited! What’s a designer’s dream? Getting to do everything they want without any one holding them back. Now, I can’t go crazy, since I do not have unlimited funds. My funds are incredibly limited, but I can use these limited funds to have some fun. I wanted the bathroom to be classic, yet dynamic. In character with the early 1900s house, yet with modern conveniences and style.

If you know me, you know I love green. It’s classic, yet very in right now. Green is a wonderful color that speaks to the nature of the lush surroundings of the Pacific Northwest. My bedding is green and floral, I often wear green, and I’m pretty much planning on painting everything in this house green. So prepare yourselves! Dark green looks amazing with gold and we all know that’s one of my favorite materials too. What can I say? I’m predictable.  Plus, you know I’m going to try to create another bathroom jungle, right?

I was very inspired by Dana’s bathroom and loved the 2″ black hex floor tile. I spent a lot of time thinking that’s what I should do at Berrybrier with black grout that would hide grime. But, my dear cousin Mary very kindly pointed out that black shows soap scum and dirt easily. I started to rethink this plan, though I still think it looks amazing.

main-bathroom-after-18

source

I still wanted to do a hex mosaic though since it’s classic and looks amazing! I found inspiration everywhere I went, like random apartment stoops.

Hex Inspo | Land of Laurel

And then I thought, well, I’m a designer, I should do something ultra designer-y, like this:

img_9737

source

or this:

d3407f75ab36e15ba73b483a1fac2ba5

source

Or this:

9814aed0d944b932514f9df4726b742b

source

Then I realized I have to get this bathroom done before 2020 and I really don’t have a lot of time to wait for custom colored tile nor the time to hand-lay a complicated pattern. So I did some soul searching and decided to go more classic. I found this at Home Depot and placed my order. Simple, classic, black and white daisy.

For the bath fixtures, a coworker let me know we get a lip smacking good designer deal from Delta. I picked out their Cassidy collection for a vintage inspired, modern look in their Champagne Bronze finish (which is gold). A modern white toilet and pedestal sink will be a nice change from the pink throne too! Dark green walls in Benjamin Moore’s 1498 Forest Floor will add drama. Vintage picture frames and dark stained shelves with black brackets will look classic. Pretty soon, my design palette came together and I was ready to go!

Demo starts this weekend and the electrician and plumber come next week! I’ll be showering at my cousin Kristen’s next week. Thank god for local family! The only sad part of the renovation is the bathroom walls will no longer match my toothpaste! 😂

Have you ever renovated a bathroom by yourself? Am I crazy to hope to get it completed in just a couple of weeks?! Wish me luuuck! I will need it!

Let there be light!

Let there be light!

Happy autumn, ya’ll! The recent turning of weather is making me nauseous as I try to figure out how to schedule the exterior painting of my house and finishing up the dormer. So much to do! So little time! Seriously, I’m not ready for winter! I’m still hoping to break out those breezy summer dresses and dig up bricks to lay out a patio in my backyard. BUT, reality sinks in and I realize a lot will need to wait until next spring. The exterior paint, however, needs to get a move on!

While I’m waiting on things the professionals have to take on, I have to keep busy myself. I’ve been working trying to refinish my kitchen floors which is taking about 53 times longer than I anticipated. So this past weekend I looked for a new project. Something quick and dirty I could knock out and actually finish. I turned again to the back of the house but didn’t make it quite so far as the yard.

That horrific deck and the roof covering it? It was coming down! Remember how bad it was? It was a deathtrap waiting to happen! Those stairs ended 4″ from the corner of the garage. Now, luckily, the actual deck roof (can we even classify that monstrosity as a roof?) had come down during the first two weeks I owned Berrybrier. It was a wonderful surprise when I came home from work to see my cousins, John and Carla, and my parents, John and Kate happy in the backyard having spend a couple hours that afternoon demoing the deck roof. They’d knocked it out and boy was it a huge change! It not only looked a thousand times better, but the amount of light that suddenly flooded the kitchen was the best part!


Yes that is a new-to-me stove as well (bought it from the neighbors who are also renovating!). Before the kitchen was so dark since the two windows were under the makeshift roof! Plus that wallpaper doesn’t help. Good thing that’s gone now too! (Add re-drywalling the kitchen to my to-do list as well…)


So when this past weekend came around, I said to my mother, “You know what would be super fun? Taking down the deck!” My mother had her doubts, she was nervous we wouldn’t like what we found. But I had a good feeling about this one. The home inspection report had called out the presence of concrete steps under the deck and a few sessions with a good flashlight and a long stick had given me the impression the steps were in good shape. Plus anything would be better than this, right?

I even convinced my mother a few weeks earlier to sawzall off a board on one side to get better access to the steps in order to take a closer look and sweep a bit with a broom. This proved the steps were in great shape to me, but my mother still had her doubts. I finally convinced her I could just pull off one board from the top and we could get a good look at things there.

Once you pull off one, what’s the harm in another? Or so I convinced my mother… and slowly, but surely we got all the deck boards pried off that first day. Now it would have been a lot easier if we could have used  power tools like a sawzall, but the roofers were over and the electrical on this house isn’t a fan of power tools, let alone multiple power tools. So we worked by hand using hammers and crowbars. (And luckily the electrical is getting updated at the end of the month!) Slowly, but surely, we made progress!

Whew! Easier said than done. The work wasn’t that hard, but between the roofers air compressor and staple/nail guns and the sounds of our own hammers hitting the metal of the crowbars I got a powerful headache and my ears wouldn’t stop ringing. We took a break and I picked up some protective ear muffs at Ace Hardware before heading home. Hallelujah! They are my new favorite protective gear, even beating out hazmat suits!

Boy was it looking a million times better that first day and boy did we learn a lot! That deck, as it turns out, was not in as good of shape as I thought. Sitting on the concrete steps, moisture had filled the wood and when we pressed into it, water would actually squeeze out. It had caused the wood to rot significantly more than I anticipated. Beneath the steps, years of walking over and dust and debris had created mounds of compost that covered the concrete. Actual, really nice compost. We tossed it straight into the garden!

The next morning, my mom broke out her favorite tool: the sawzall and took off the sides of the deck. A few quick bangs with a sledgehammer and everything else was loose. Then it saw just back to the crowbar to remove a few pieces off the house and there they were: the original concrete steps!

The cute star gate used to be in function here, blocking off the backyard from the driveway. You can see the hole in the concrete next to it where the fence post used to be. I am in love with how much better this looks! The kitchen is flooded with light and now you can actually walk between the garage and the house! The best thing though? Not being directed down the stairs and into the corner of the garage! Now the flow from the house is so much more open! It allows you to walk into the garden easily and walk into the house from any side. Truly, it’s a small change, but feels transformative! I mean, the house still looks like crap since it needs paint, but it’s still a big change!

Before this view was crazy! Now it at least makes more sense. A good coat of paint will be the true life saver though.

Plus, the whole project took less than 8 hours. So thank god for that! I need more projects like that and less like my endless kitchen floor rescucitation project. This project leaves me satisfied and happy! Now they stairs will definitely need some tweaking – I’m thinking of painting next spring and trying to skim coat the top stair that’s in a bit rougher shape.

But for now, hopefully the weather will hold out long enough for this house to get painted and then I can stick my red pots on these steps and then they’ll really be popping! It’s one baby step in the right direction!

Winter is Coming

Winter is Coming

Oh my goodnesss! My brain is doing cartwheels, you guys. There is SO MUCH to do and SO MANY things to plan. It’s hectic and insane and oh so much fun. So what’s going on at the moment? Just a few things:

  • A new roof is going on and so is a dormer!
  • The exterior of the house is being prepped for painting.
  • We’re redoing the kitchen floors… slowly, but surely!
  • I’m designing the bathroom and getting ready for demo.
  • The garden is being worked on, weeded, and seeded with clover!
  • Electricians are scheduled and I’m selecting new light fixtures where needed.

Whew! I’m exhausted just recounting this. Each of these things has taken a whole bunch of time and planning, thinking and rethinking. I’m just a tad stressed and just a tad tired and just a tad sore, but most importantly I’m happy. The major stress lately, however, has been getting the exterior of the house in shape as soon as I can. Because winter is coming. And although Portland winters are not nearly as bad or as long as those in Westeros, you may have heard the rumor that it rains here.

Well, the rumors are true my friends, it rains here in Portland! Which means the roof issue needed to be addressed first. I spent weeks thinking up a plan and drawing up construction documents in CAD. Luckily the City of Portland has a Homeowner’s Permit Night where you can bring drawings to review with their structural engineers for tips and information as well as get permits during non-business hours. I spent two consecutive Thursdays in those offices the first talking with a structural engineer about how to best support the dormer and the second evening actually getting the permit. In between those two Thursdays I spent many, many hours working in CAD to get my drawings ready for approval. It was a huge relief when they passed and I was able to get my permit! The most frustrating part of the process was the long hours on the computer when I really wanted to be at Berrybrier sledge hammering something.

After my drawings were done and the permit procured, I had to select a roof color so the roofers could begin, but how to select a color for the roof without selecting a color for the house? Well, let’s go back to the pictures of Berrybrier. It’s a bit difficult to see in pictures, but the windows of the house are dark green. On the plus side, a previous owner updated all the windows to double-paned, vinyl-exterior, wood-interior windows which is *almost* what I would have selected myself. If it was me, I’d have selected wood interior and exterior windows. But, alas, what’s done is done and I don’t have to do it! The decision for dark green, vinyl-exterior windows though is a pretty permanent one. As these windows can not be painted, I had to pick a paint color for the siding that would coordinate with dark green.

Berrybrier Before | Land of Laurel

What goes well with dark green windows? White? Hmm… an all white home with green windows would be classic. White siding paired with white trim is also very popular right now. I found this inspiration photo which shows a house with white trim and siding, the windows are dark brown here, but you can easily imagine them as green. You can barely see the roof here, but it looks to be a dark charcoal.

White house and Trim | Land of Laurel

source

As classic and lovely as this is, it is very popular. Would I recommend it to a client? Absolutely. But, for myself, I wanted something a bit more exciting. I wanted something happy. A house that makes you smile just walking by it. What is colorful and happy that goes well with green? Coral! And coral is another name for salmon and salmonberries are delicious and the house is already called Berrybrier, so really, could there be anything more perfect? (Did you see how my brain works there?) So! A salmonberry colored house it was. Luckily, I had the perfect inspiration in mind.

Young House Love, my favorite blog, bought a beach house last year and they painted it coral! Their house is too cute and much more charming than Berrybrier, so it’s the perfect inspiration. Their home is in the final stages of a complete renovation (which is incredibly exciting to follow) and it’s just too cute!

Young House Love

source

Luckily, they documented their careful color selection process and I followed their journey from paint swatch to paint swatch. They landed on Sherwin Williams 6324 Mellow Coral. I was determined to take this into consideration, but select something different. I pulled a ton of samples from work. At first I thought I’d go much darker, but eventually I came around.

Coral Colors | Land of Laurel

Bold colors tend to look even brighter on larger surfaces, so it’s important to select ones that go much more grey than you’d originally think. I ended up landing on Sherwin Williams 6611 Jovial. I picked up a color test pot at Lowe’s and popped some swatches on the house. Instantly it was bright, happy, and colorful!

Jovial | Land of Laurel

It looked good by the door, bright and happy. It’s always shady here and since this is the main way you get into the house, it’s an important view. Of course, it would look even better if the trim wasn’t filthy dirty!

SW 6611 Jovial | Land of Laurel

Still, I wasn’t sure. What if it was just a tad too bright? I brought in a back up swatch: Young House Love’s Sherwin Williams 6324 Mellow Coral. You can see below it’s just a little duller and a little more grey/brown in tone.

Paint Swatches | Land of Laurel

So although I had a color selected, I did not have the exact color finalized. I’m still debating endlessly. Mellow Coral is safer, it will clearly look bold on the home. Young House Love’s beach house is happy and absolutely colorful. Jovial is happy, just subtly different from Mellow Coral, and just a tad brighter. But is it too bright? What do you think? Which do you prefer? Which would you choose?

Luckily, although I’m stumped on the color for the siding, the color selection for the trim is easy: SW 7012 Creamy. It’s a happy white with a warmer undertone which will brighten nicely against Portland’s often cool grey skies.

And the roof? Also a quick decision! I’m going with a 40 year roof by Owens Corning in the Sierra Grey colorway.

Sierra Grey | Land of Laurel

source

This is a nice light grey shingle with plenty of color variation. As Berrybrier has no air conditioning (and as someone who’s never lived in a house with air conditioning I have no plans to add it) I wanted something lighter that would reflect more heat in the summer. Dark colors absorb heat. It’s a basic scientific fact that almost everyone knows. So although dark roofs look fantastic and are extremely popular, I knew it wouldn’t be for me. Something light, bright, with significantly less heat retention would be most important. This picture also from Owen’s Corning shows a look similar to what I’m hoping for with the Sierra Grey. It’s light, but it’s not white and it has plenty of color variation. Decision made!

Sierra Grey | Land of Laurel

Now if only I could be one hundred percent sure about the siding color! Help! What would you pick? Random strangers walking by my house are being accosted for their opinions on paint color and I need yours too!

Paint Swatches | Land of Laurel

Brighter or more subdued?


To-do Von Listerstein

To-do Von Listerstein

So now that I’ve been at Berrybrier almost a month (oh my god, how?!), I’ve got a pretty good plan of what I’m going to do for the next several years! Boy, is there plenty of work to do, but I am only excited. Before I can do the fun stuff, there’s some big stuff that needs to be done by the professionals. Whoop! There goes my savings! Luckily, once these things are complete, I’ll be able to rent out the two upper bedrooms and start saving up for more fun projects.

Right now I kind of have a hand in every pot of honey around this house, trying to do a million things at once. There are tons of little things that needed to be updated around here before it’s truly livable. Once these more behind-the-scenes items are complete, I’ll get to dive into more of the showy stuff. But I thought I’d break things down for you – and for myself! – to see what’s going on right now and where things are headed.

DSC_0187

Front Exterior:

Currently:

  • Trim back plants from street and sidewalk to allow passage of pedestrians and cars parking
  • Cut down bamboo
  • Trim walnut tree
  • Cut down palm tree
  • Turn soil
  • Plant clover as a cover crop
  • Cut back and remove berry bushes 
  • Move raised bed to side yard
  • Weeding!
  • Beef up front porch column
  • Replace lattice at porch with proper railing
  • Remove railing from side of house

Upcoming:

  • Paint house!
  • New roof and gutters
  • New house numbers
  • Line driveway with bricks
  • Remove chain link fence
  • Re-stain front door
  • Add new door knocker
  • Re-landscape front yard
  • Add white picket fence

Maybe Projects:

  • Add front porch along entire front of house
  • Turn existing porch into mud room
  • Turn existing front window into new french doors


DSC_0217

Entry:

Currently:

Upcoming:

  • Add coat rack
  • Add hooks
  • Add entry rug
  • Switch existing light fixture for new flush mount

Maybe Projects:

  • Center light fixture on entry
  • Add sconce?


DSC_0221

Living Room:

Currently:

  • Add furniture I have already
  • Cross fingers for roommates with furniture

Upcoming:

  • Paint!
  • Buy furnishings (loveseat, chairs, cocktail table, ottomans, rug etc…)
  • Remove stone from fireplace and build more traditional look
  • Trim out opening to kitchen
  • Build attractive wood storage
  • Switch light fixture for new
  • Center light fixture on fireplace

Maybe Projects:

  • Turn big window into french doors to new porch


Dining Room Before | Land of Laurel

Dining Room:

Currently:

  • Add existing furniture
  • Remove terrifying glass and concrete block shelving system from closet

Upcoming:

  • Paint!
  • Add functional storage to closet
  • Add panels to existing closet door in interim
  • Switch existing light fixture for new pendant over table
  • Line walls with bookcases to create library dining space!

Maybe Projects:

  • Re-work closets and lower floor bedroom entry?
  • Center light fixture


DSC_0268

Kitchen:

Currently:

  • Clean, clean, clean
  • Buy stove
  • Sand existing cabinets
  • Paint existing cabinets
  • Scrape existing flaking sheet vinyl up to expose original hardwood floors and stair treads
  • Purchase small butcher block table for next to stove
  • Remove small full height cabinet
  • Add my pantry china cabinet from the Duplex
  • Remove wallpaper

Upcoming:

  • Paint
  • Paint pantry china cabinet
  • Re-finish hardwood floors
  • New lighting (cans? pendants? semi-flush mounts?)
  • Remove cabinets on west side and replace with new
  • Wire for stove and vent hood at south side window
  • Plumb for sink beneath windows looking into backyard
  • Add new cabinets at new sink location
  • Remove door at stairs

Maybe Projects:

  • Add dormer on west side of house
  • Rework stairs with new railing using height from dormer to eliminate dual landing


DSC_0280

Main Bathroom:

Currently:

  • Replace toilet seat with new so it feels less disgusting in here
  • Clean and pray the germs away

Upcoming:

  • Complete demo!
  • New flooring!
  • New fixtures!
  • New layout!
  • New vanity cabinet!
  • New storage!
  • Paint

Maybe Projects:

  • Switch walls to make this bathroom the half bath and a full bath off the bedroom


DSC_0240

Lower Floor Bedroom:

Currently:

  • Add existing bedroom furniture
  • Add curtain rod and curtains

Upcoming:

  • Paint!
  • Clean and organize closet to make functional
  • New light fixture
  • Remove paper residue from wood floors

Maybe Projects:

  • Re-work entrance to room to be centered off dining room with his and hers closets


DSC_0252

Powder Room (Off Lower Floor Bedroom):

Currently:

  • Clean!

Upcoming:

  • New toilet
  • Secure sink to wall
  • Remove VCT flooring
  • Tile floors
  • Add wall paneling
  • Paint walls and ceiling

Maybe Projects:

  • Switch walls in bathrooms to make this a full bathroom and the one off the kitchen a powder room


DSC_0287

Stairwell:

Currently:

  • Clean

Upcoming:

  • Paint walls
  • Paint risers 
  • New hand rail 
  • New motion sensor or 3 way light switch
  • New light fixture

Maybe Projects:

  • Add sconces?
  • Add door where current eave access door is leading to north side dormer at top of stairs
  • Raise ceiling height at bottom of stairs / kitchen with south side dormer
  • Turn dual stair landing into single with extended ceiling height


DSC_0298

Upstairs Bedrooms:

Currently:

  • Clean

Upcoming:

  • New light fixture
  • Paint
  • Make closets more functional / attractive

Maybe Projects:

  • Add more outlets


Basement Before | Land of Laurel

Basement:

Currently:

  • Clean!
  • Strap hot water heater to concrete walls

Upcoming:

  • Vent dryer to exterior
  • Clean washer and dryer
  • Paint floors and walls
  • New 200 amp electrical box
  • Add storage
  • New front loading washer and dryer (stacking?)
  • Add laundry basket storage
  • New stainless steel utility sink
  • New lighting on single switch
  • Add rug and shelving at laundry

Maybe Projects:

  • Upgrade furnace and oil tank to new gas
  • Add outlets?


DSC_0159

Back Exterior:

Currently:

  • Turn soil
  • Plant clover as a cover crop
  • Move bricks from behind garage, evaluate if enough for patio
  • Cut back and remove some berry bushes 
  • Cut back asparagus
  • Trim magnolia tree
  • Build a brick patio beneath magnolia tree
  • Weeding!
  • Demo existing falling down fence
  • Build new fence
  • Buy outdoor table and chairs
  • Demolish deck roof

Upcoming:

  • Paint outdoor table and chairs
  • Demolish deck
  • Demolish chicken coop
  • Build new chicken coop and run
  • Plant raised bed vegetable garden
  • Add shade garden beneath Magnolia
  • Cultivate existing herb garden
  • Add fire pit with adirondack chair seating
  • Landscape yard

Maybe Projects:

  • Demolish existing garage
  • Add large shed
  • Add outdoor shower / tub?


Garage Before | Land of Laurel

Garage:

Currently:

  • Clean!
  • Remove chemicals and toxic waste
  • Remove junk and toss
  • Organize existing nuts, bolts, screws, etc

Upcoming:

  • Organize with proper tool and wood storage

Maybe Projects:

  • Demolish garage, replace with large shed


Whew! That’s a lot I’m working on and a lot to do coming up! Somehow it feels like I haven’t done anything, yet I’ve been working my butt off. I think all the little things happen over time and most are still in progress so although I haven’t checked a lot off my list yet, there’s still a lot going on! Luckily, I have an amazing amount of help. My dad came up for two weeks, my mom has been here helping for a month, my cousins Mary and Ted have been incredibly kind, dedicating hours upon hours to slowly tame this garden! I am so thankful for all this help. I am just overwhelmed by the generosity of my family members. I am looking forward to whipping the main bathroom and kitchen into shape so I can finally feel moved-in. Right now I feel very guilty showing people into my bathroom. Somehow, I’ve grown accustomed to it, but boy, it is not hygienic! Luckily the big items will get ticked off the list in the next couple of months allowing me to go into the new year in a fresh, clean space! Can’t wait for y’all to come visit in 2018!

Welcome to Berrybrier!

Welcome to Berrybrier!

I bought a house! AHHHHHHHHH!! That is the sounds of my brain doing somersaults with my stomach. It’s a lovely feeling. But, truly, this is an incredibly exciting thing I’ve been wanting for a looong time. To have a place of my own feels fantastic! We closed on August 18th and I’ve been up to my ears in dirt, dust, and tools ever since. It’s the best thing ever. I finally feel settled in to my own home and you can bet that I’ll be tearing up DIYing the heck out of this place. In fact, I’ve already gotten started, but before I share that, I’ll give you a look around the place!

This moneypit house is a real fixer-upper and not in a cute Joanna Gains farmhouse-y style. As in, this house needs help. BIG HELP. And I’m here to lend a hand! Pretty much everything needs fixing on this place, and yes I do mean everything. Name something that could need to be repaired on a home and this house needs it. Although to some, that could be completely daunting, I’m just looking forward to many years of projects ahead! Which is excellent considering that’s all I’ll be doing for the next long while.

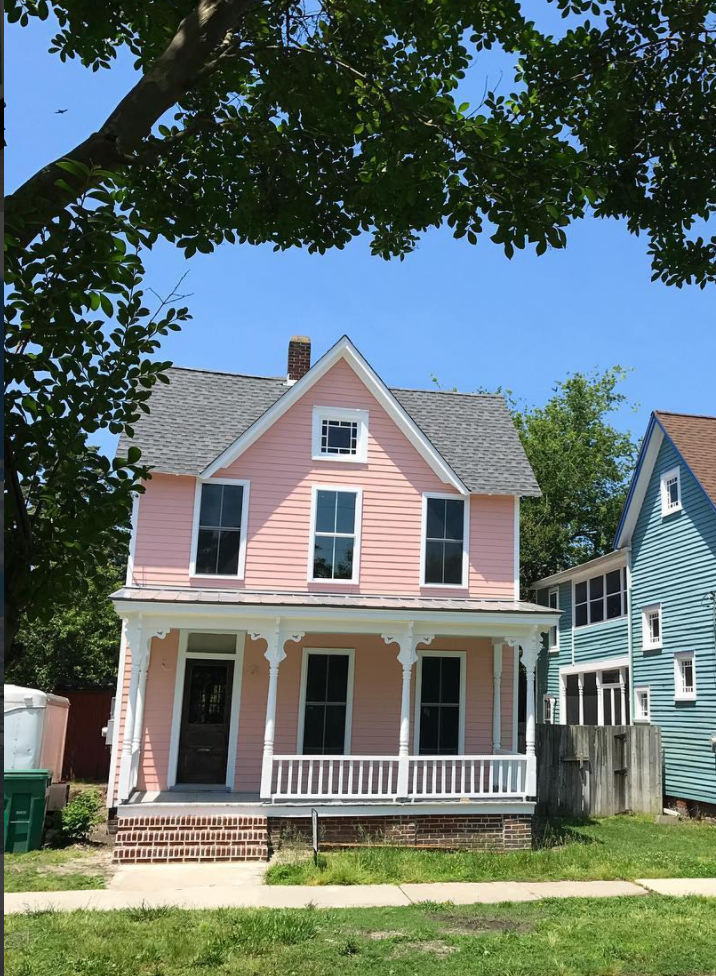
From the very first moment I saw the first pictures of this house on Redfin, I knew it was my house. I literally gasped aloud and got a strange feeling in my gut. THIS was my house. I knew it. After seven months of looking and putting in offer after offer, I had found the one. It checked all the boxes: pre-1940s, 2+ bedrooms, a big yard, room to grow, good location near shops and restaurants, easy commute, plenty of projects. Y’all are going to think I’m crazy when you get a look at these pictures, but something about this house is just so right. Enough preamble, though! Let’s dive in.

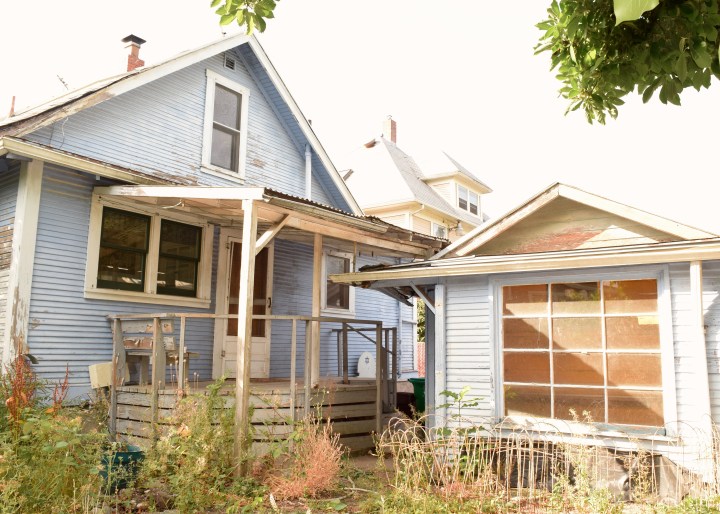
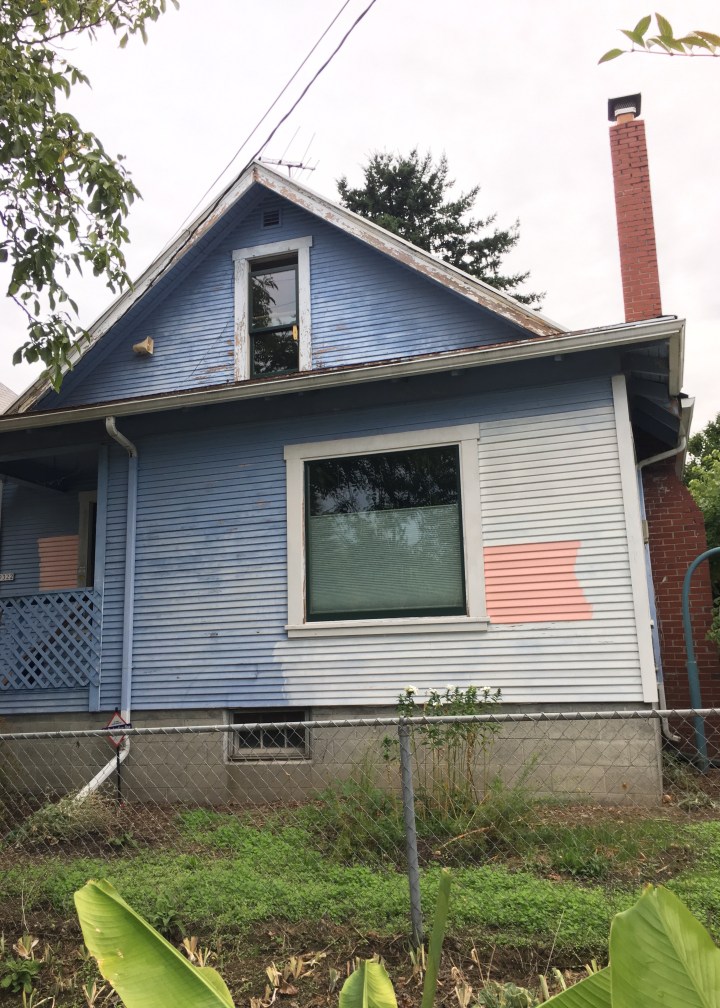
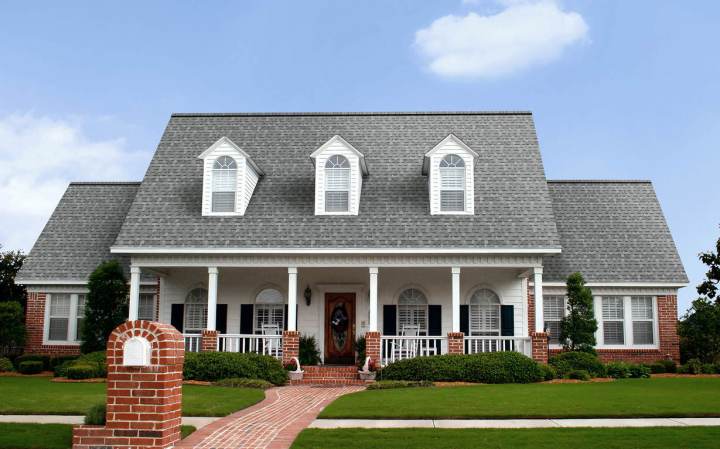
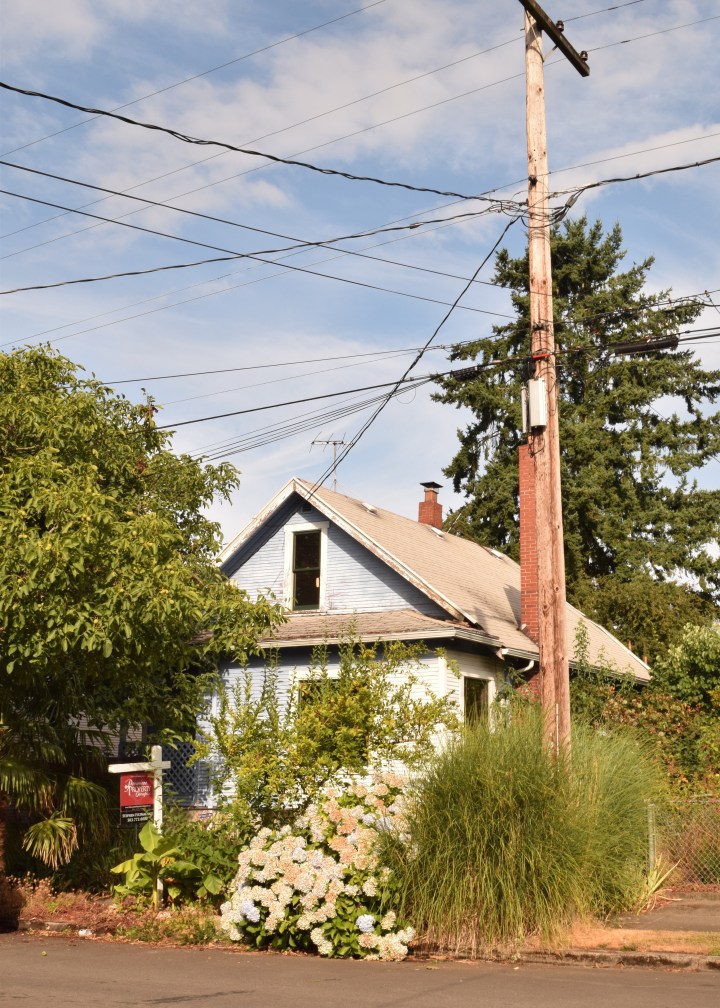
That very first image I ever saw of the house looked something like this one below. Basically, you could tell there was a house and that it was blue, but mostly all you saw was greenery!

DSC_0187

At some point, someone really loved this yard and planted tons of wonderful things like walnut trees, redbuds, hydrangeas, asparagus, mint, dill, parsley, fuschias, roses, etc etc etc. That person has not lived in this house for a loooong time though and in the last many years, this yards have become completely overgrown. It’s a mess! But a glorious mess full of glorious surpises like late blooming Magnolia trees and hidden troves of bricks!

You walk to the front door of the house through the driveway, which isn’t ideal, but I’m unlikely to be able to afford to change that any time soon. So everyone who comes over is greeted by the sight of my lovely garage. Don’t mind the doors. That’s just what they look like when they think they’re “closed.”

DSC_0175

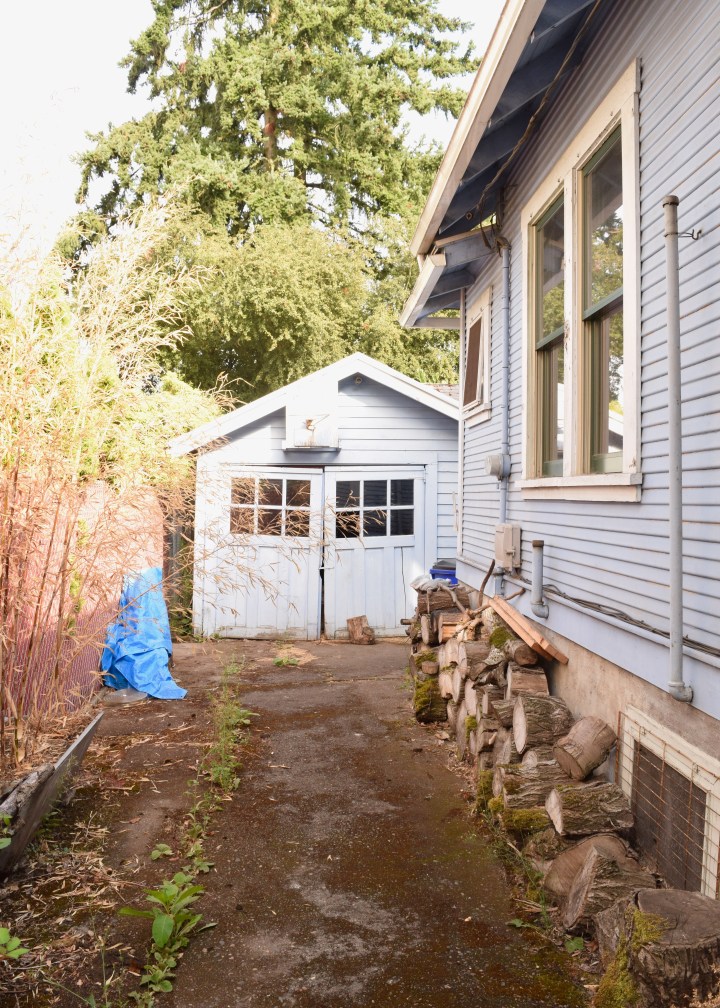
The garage is basically falling down. But don’t worry, it’s not the garage’s fault. The garage has a terrible parasite: poorly planned additions. Yup, that’s right folks, the garage has not one, not two, but three additions! Awww, bless it’s little heart, it is still  hanging in there.

If we walk down the driveway to the back of the house, you get to meet yet another fun add-on: an octagonal deck and it’s multi-material roof. Now this is beauty, ladies and gentleman. Oh and yes, it is also basically falling down.

DSC_0172

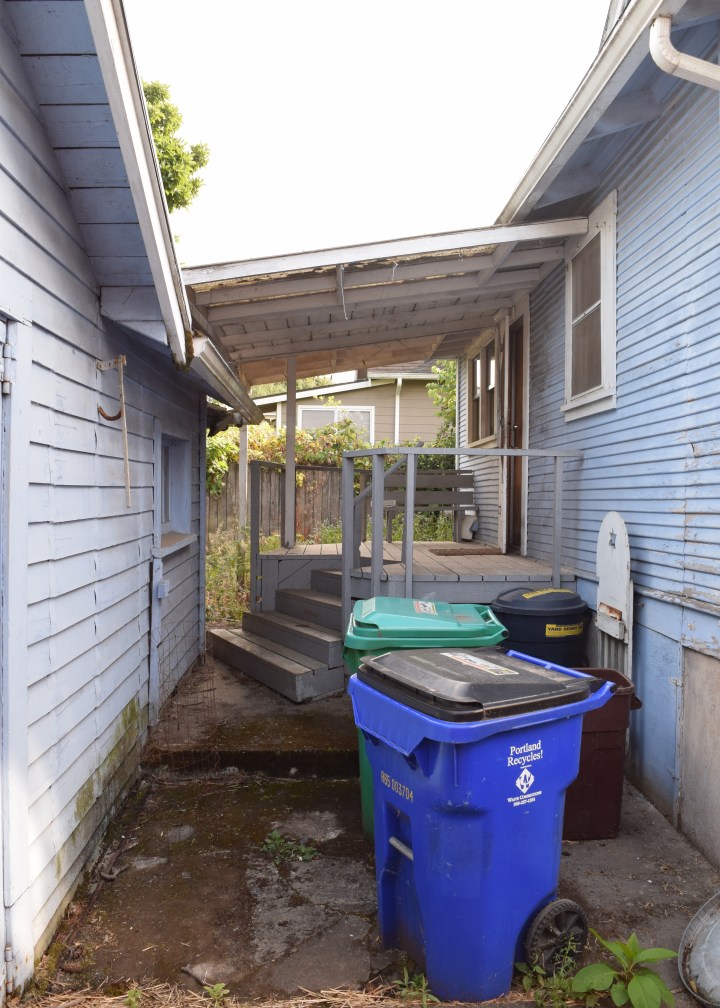
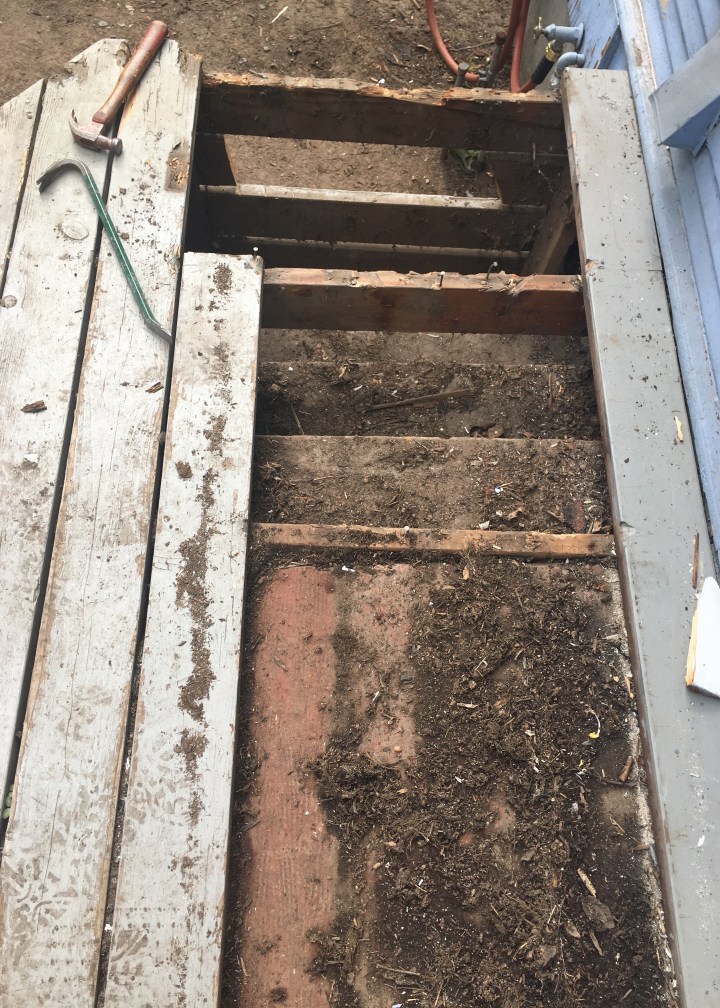
Does the above picture confuse  you a little bit? Here, let me help. This should explain things better…

DSC_0168

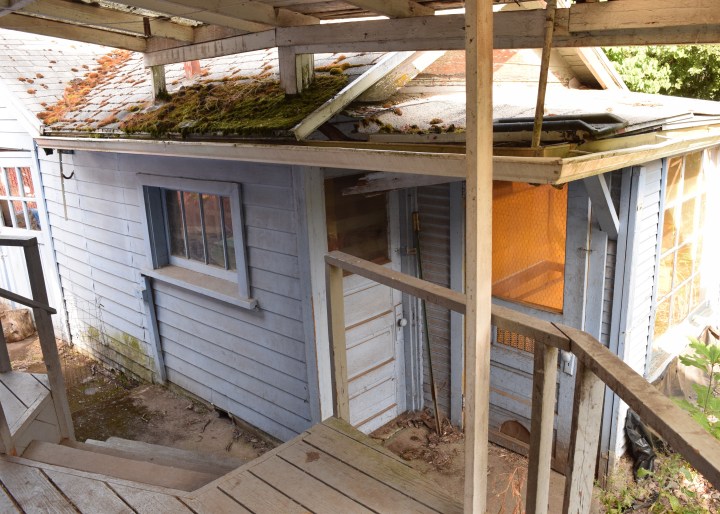
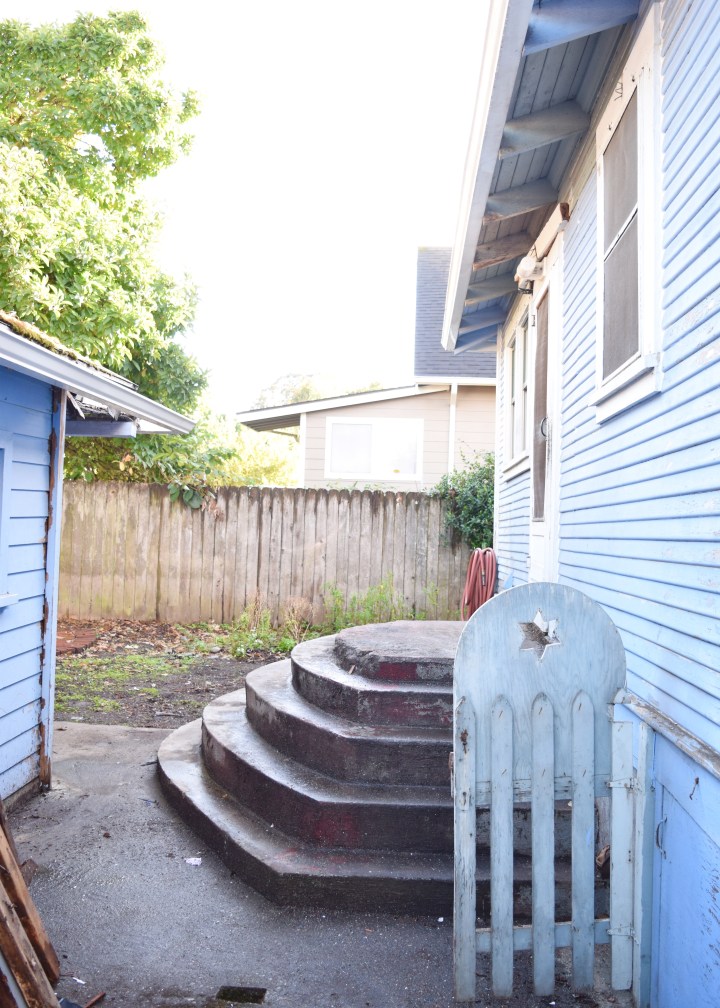
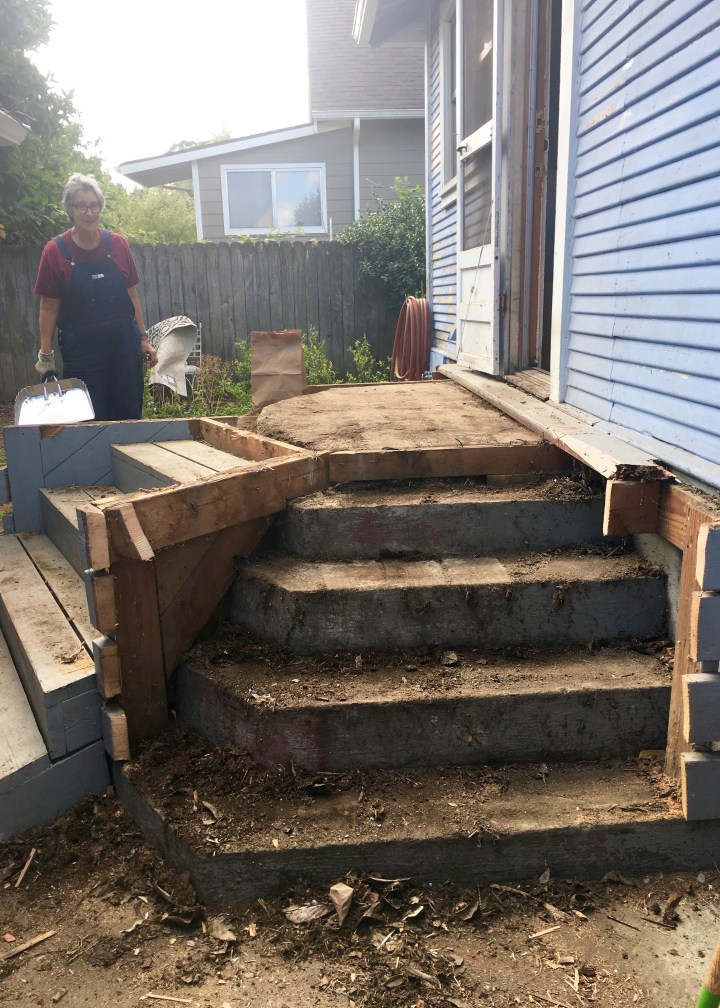
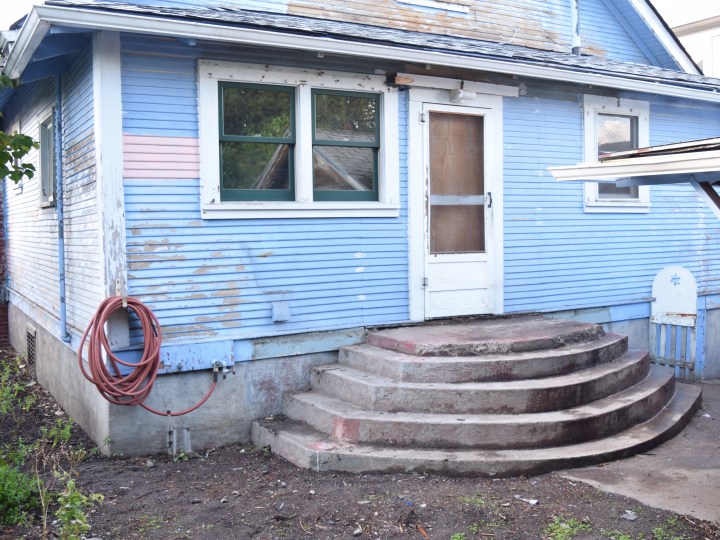
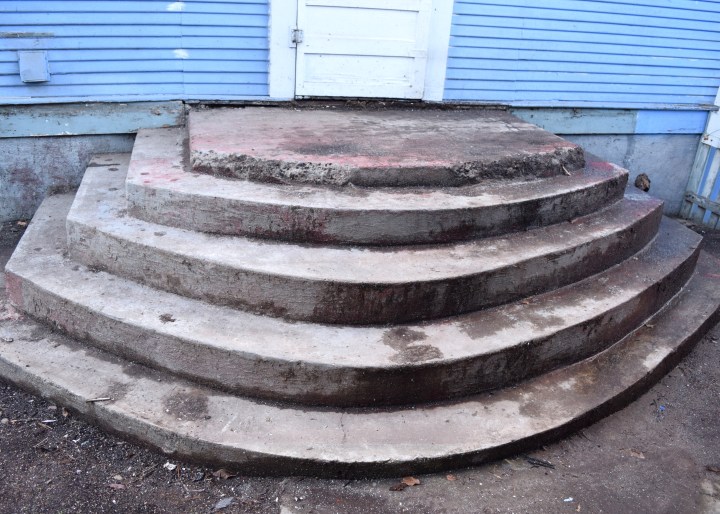
Still confused? Me too. Let me try to state a few facts to help clarify. The above picture shows two of the garage additions: a workshop and a chicken coop. The structure coming out of the garage is the roof that covers the deck. It’s made of corrugated fiberglass, plywood(??), and a whole lot of screws. The supports for this little DIY roof, descend into the garage and chicken coop roofs, essentially ensuring that all water will collect there and all the things will rot. It’s a fantastic design. Truly, I could not have thought of it myself. The octagonal deck is made of 8 sides of different lengths varying from 15′ to 2′, just because, why not? The stairs of the deck descend into the corner of the garage and end about 4″ from it. As far as I can tell, this is designed specifically so that when you fall down the stairs your skull will crack completely open. That’s just my interpretation though. Also, this deck? Covers seemingly perfect condition original concrete steps. God, I love this house.

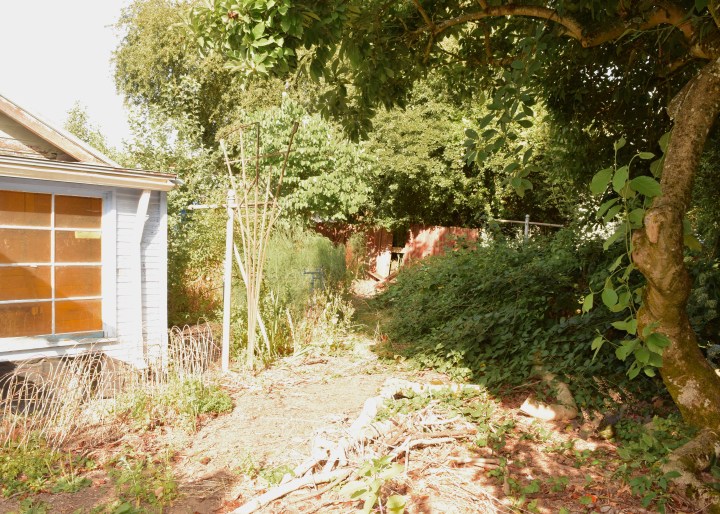
On to the backyard. This – and no sarcasm here – is what truly won my heart. This yard is bursting with potential. Potential and a whole lot of berries. On the far right is a huge magnolia tree that provides plenty of shade for a future table and chairs. Beyond that? All berries. Yup that huge mound of greenery is all RASPBERRIES!! AKA the best thing on earth except for chocolate. I spent my time touring this house eating raspberries from the backyard and it was heavenly. I cannot wait until next summer! You can also see a falling down fence, 1940s laundry line, and the huge chicken coop window in this picture. Why your chicken coop needs such a large window is a little beyond me, but I am assuming it’s so your chickens can torture Portland’s raccoons and coyotes.

DSC_0159

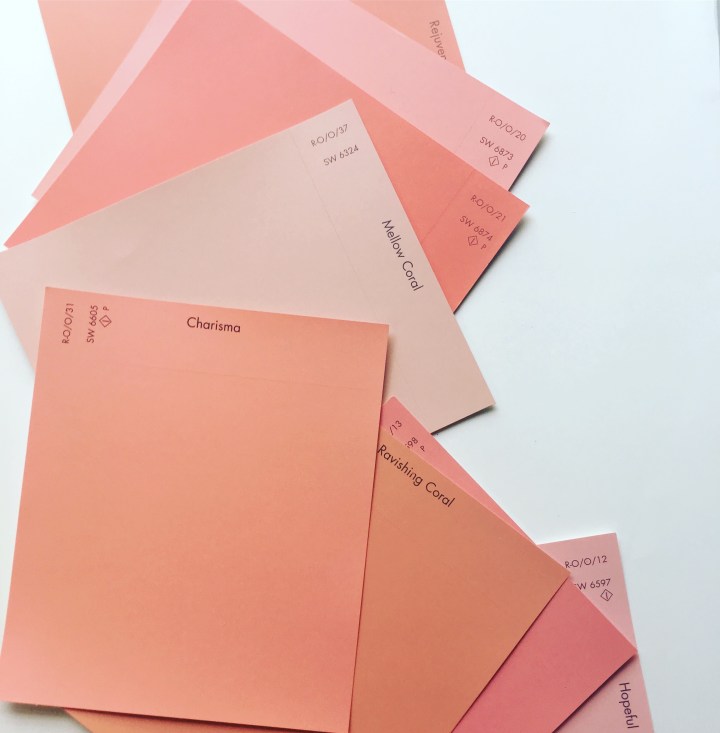
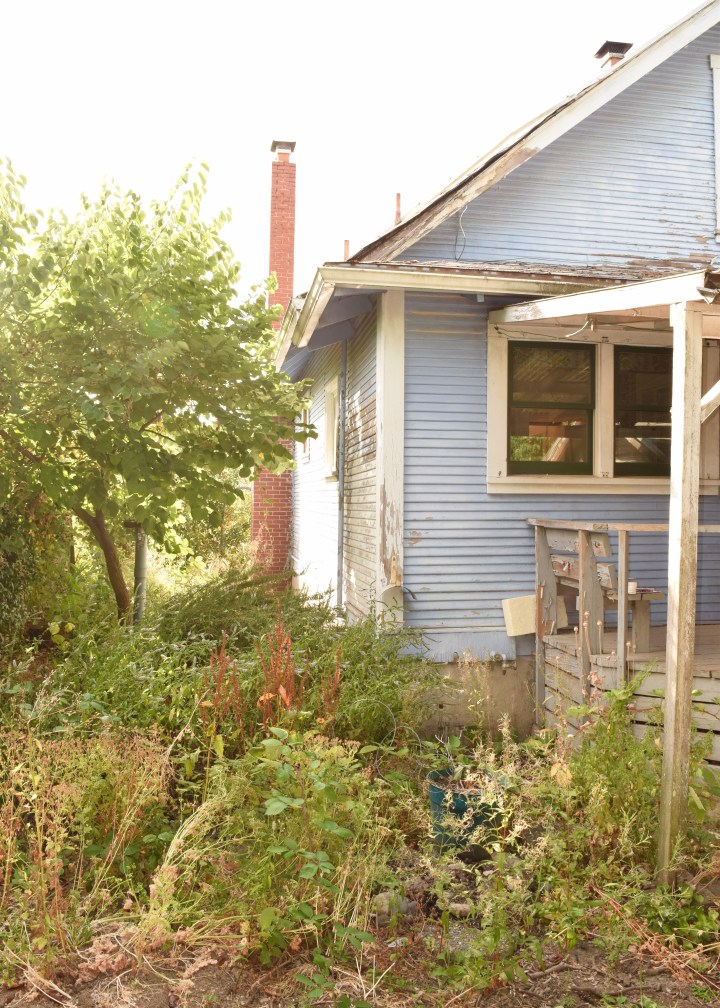
Here’s another view of the backyard looking towards the front. Here you see a huge rosemary bush, tons and tons of mint, a redbud tree, some parsley, and plenty of bees & butterflies. It’s really gorgeous if you can get past the flaking paint on the house. Yup the house needs painting. And a roof. Somehow I can afford this? I am surprised too. Luckily the windows are all updated! They’re double-paned which is pretty essential here in the Pacific Northwest. They are dark green vinyl exterior, wood interior windows which although it’s not my first choice, I’m pretty happy to have updated windows. I get to pick a really awesome paint color for the house’s siding to coordinate with the hunter green exterior windows and I can paint the inside any thing I want!

DSC_0164

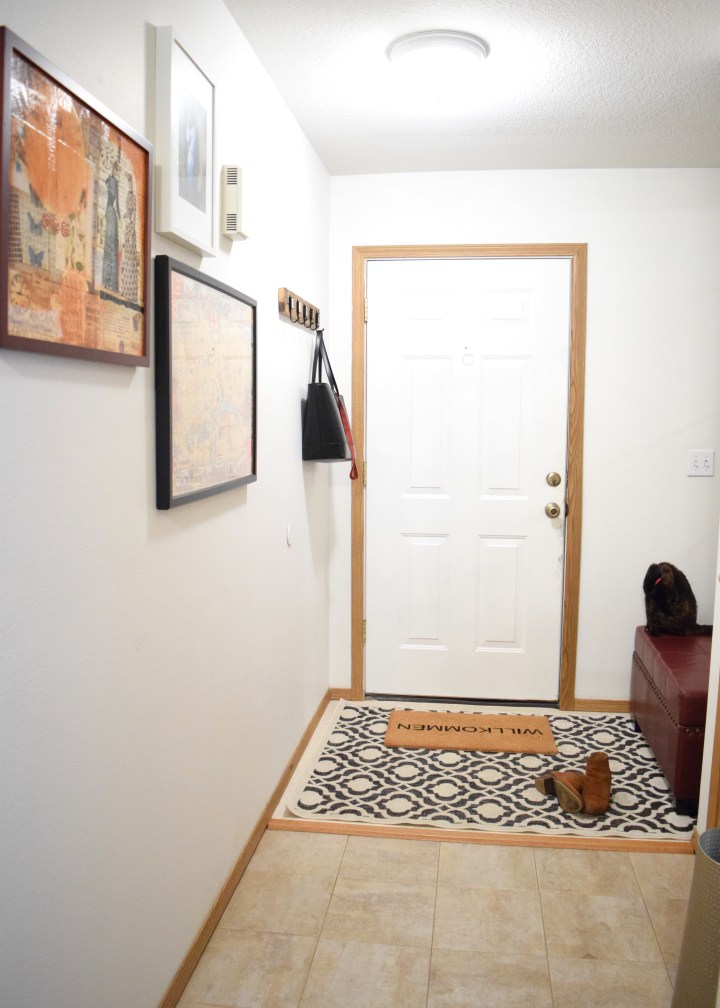
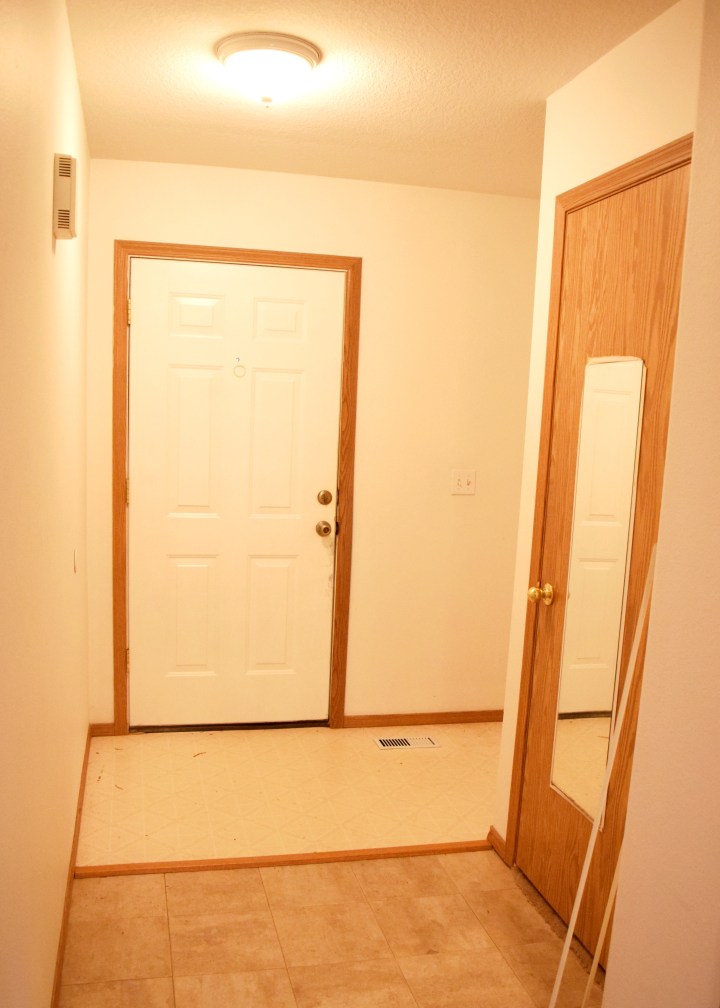
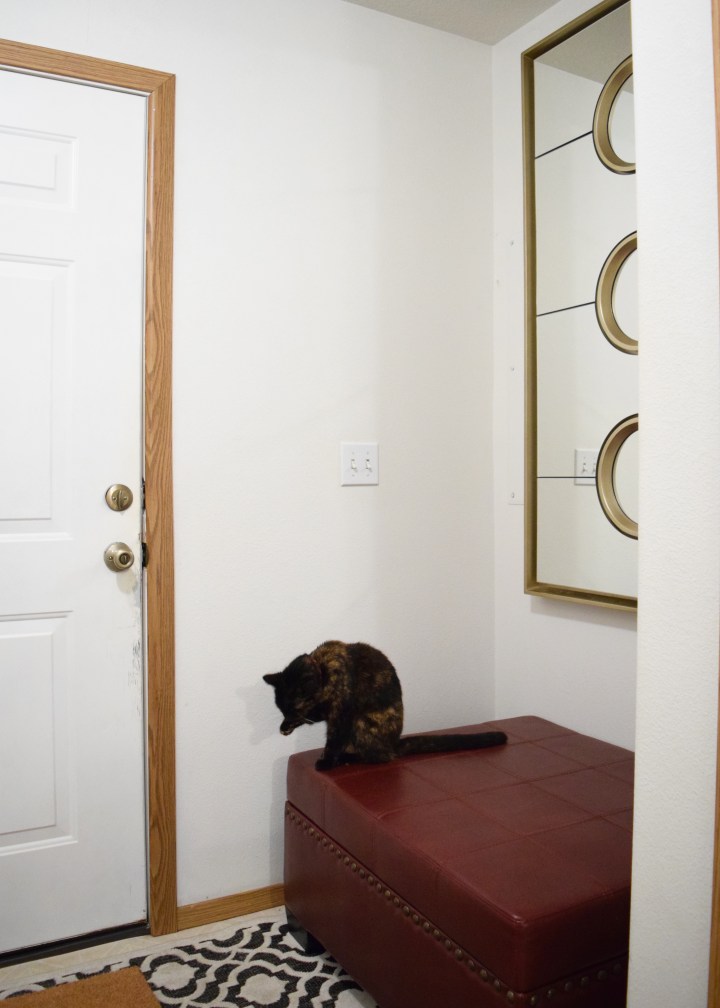
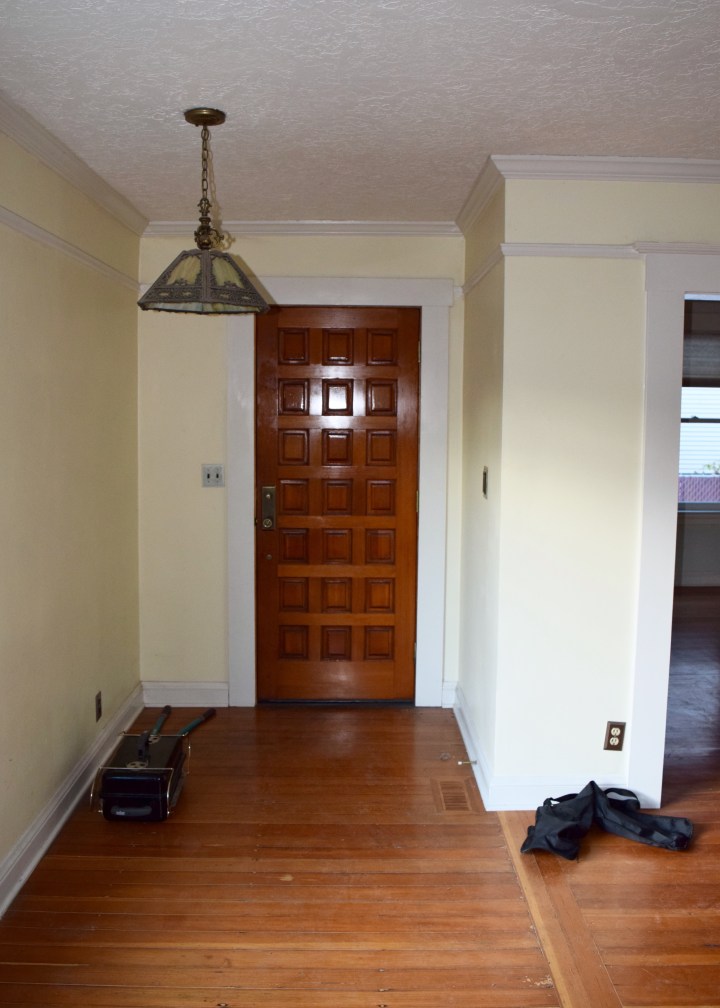
Let’s go inside shall we? Here is the foyer! I am obsessed with this multi-paneled door. I think it is absolutely gorgeous and just needs to be sanded down and re-stained a darker walnut tone. That will make it look far less orange and 1980s. The foyer is open to the living room. Originally, this part of the house was an exterior porch that was converted into living space in the earlier part of the century. You can see the transition of the flooring. When they enclosed the porch they decided to keep the downward slope of the floor (that all porches have for drainage). That, my friends, is called “character.” The light fixture is kind of hideous, but also weird and beautiful, so I’m keeping it. The opening on the right to the dining room.

DSC_0217

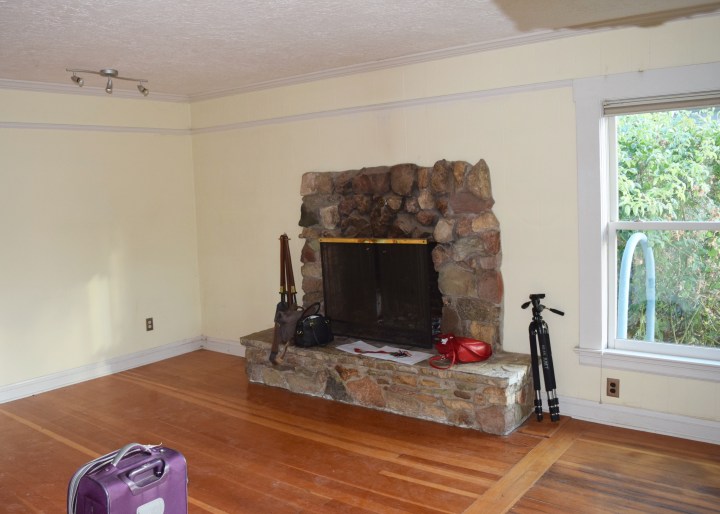
The floors in the house are softwood – fir. They’re gorgeous and miraculously in good shape! The living room is relatively spacious and gets great light through south and west facing windows. The fireplace is an “update” from the 1960s or maybe 1970s. I’ll be completely reworking it down the line, but for now, it’s a functional fireplace! Which means s’mores! And fire! The pyro in me is just too pleased.

DSC_0221

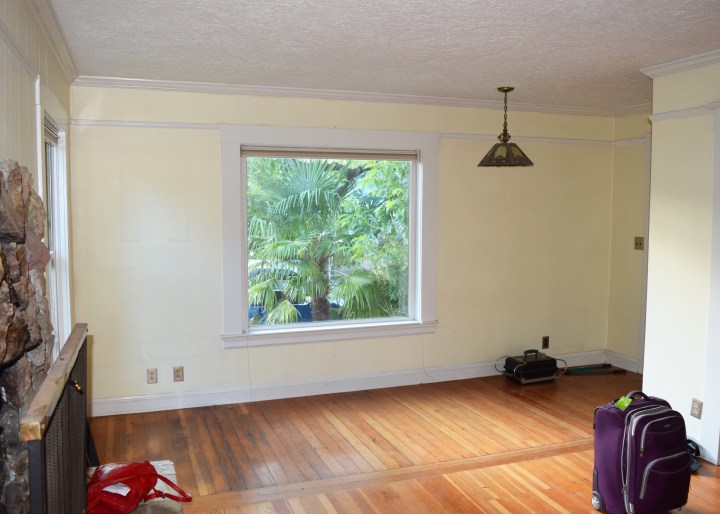
This picture explains some of the flow of the house too. Standing in the corner of the room by the fireplace you can look out of the big front window to the front jungle yard and almost see the front door tucked in the niche in the corner. The dining room opens to the living room and you can almost see it on the right.

DSC_0225

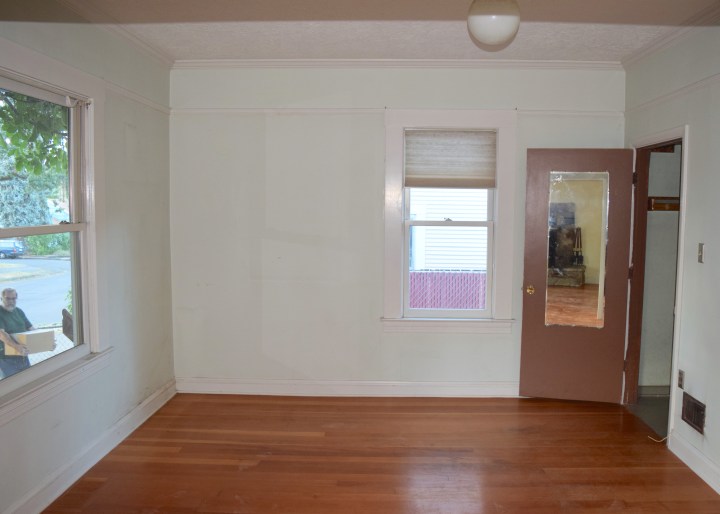
The dining room is a little less bright since it has more northern light, but it’s a great size and fits my round table with room to grow. There is also a closet which we can’t close the door to, because it gets stuck shut. Which it is right now. Stuck shut, I mean. Just add that to my to do list, mmkay, thanks! Shout out to my dad about to walk up the front steps carrying tools though!

DSC_0227

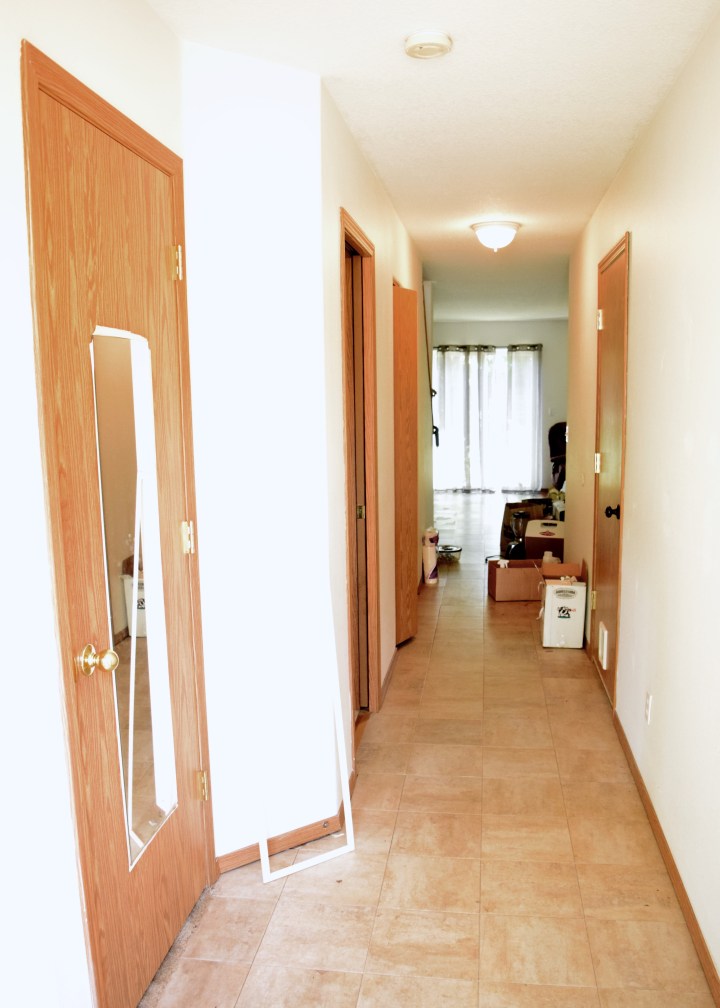
Next you go through this teeny hall that has the basement door on one side and this strange hall to the lower floor bedroom on the other side. This is from the end of the hall looking towards the living room. The ceiling in the hall here drops lower because of the stairs. This lovely accordion door could be closed if you wanted to hide the kitchen from view. But yeah, that door already bit the dust. No thanks, accordion door!

DSC_0236

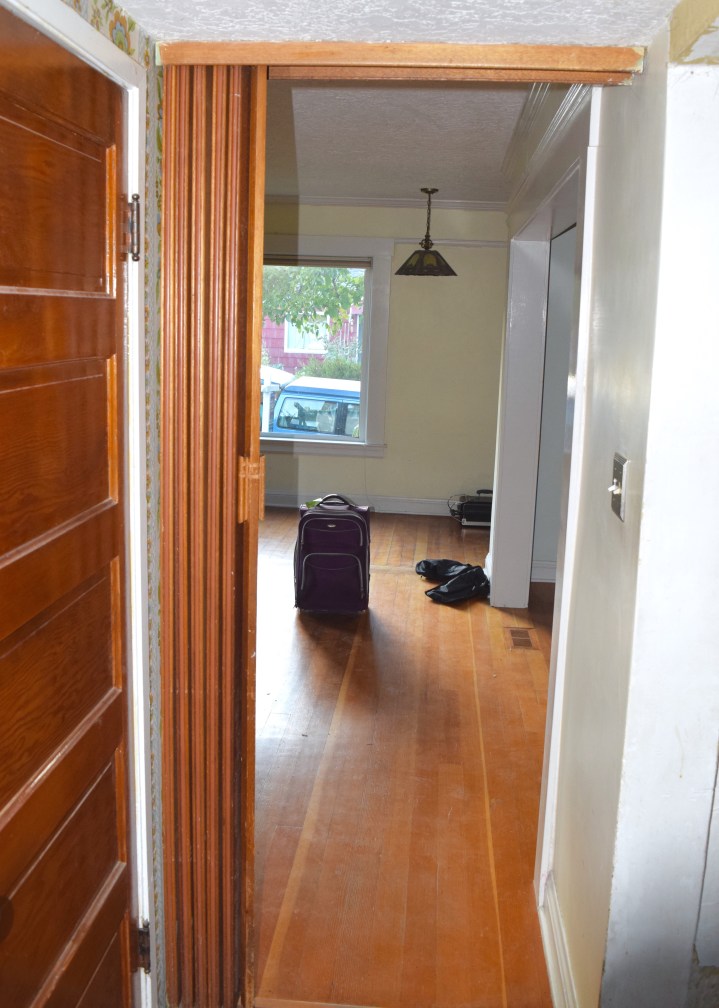
The weird little hall to the bedroom is kinda gross, but there’s a big closet at the end. This will end up being my closet because there isn’t actually a closet in the lower floor bedroom. PFffft. Closets. Whatever. So last year.

DSC_0258

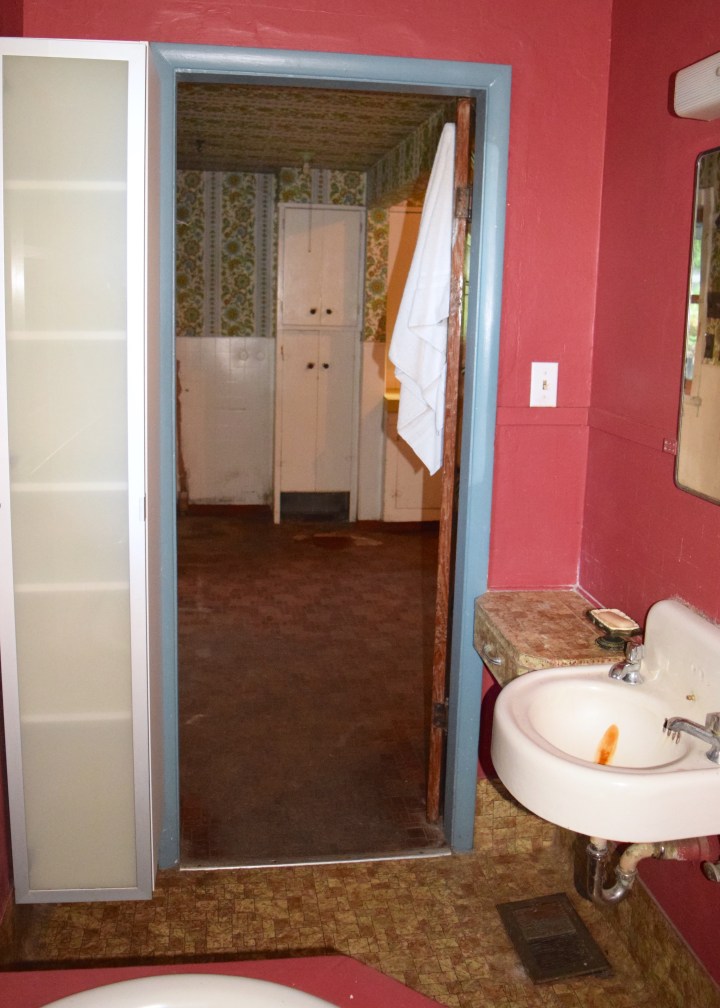
The lower floor bedroom will end up being my bedroom. The other two I will be renting out. This room has nice high ceilings, picture railing, and northern light (good for sleeping). It also has a 24″ wide door to Portland’s smallest powder room.

DSC_0240

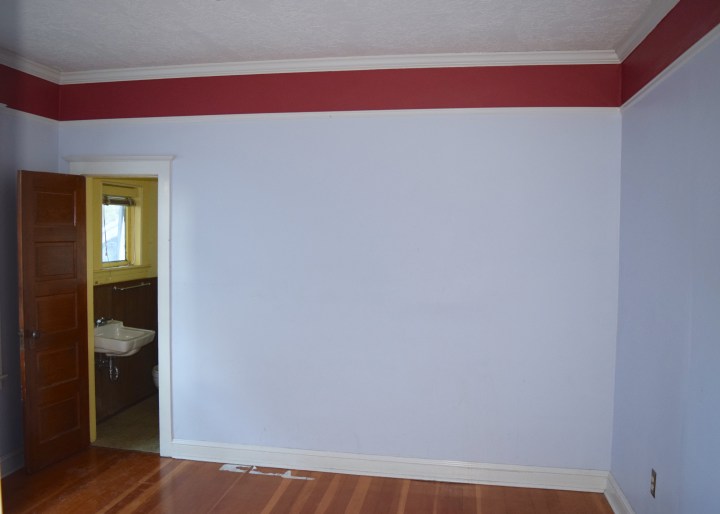
If you ever wanted to wash your hands while peeing, this bathroom is for you. Your knees literally tuck right under the wall mounted sink. In a bathroom this small, you’d better add 1970’s faux-paneling though. That’s the cherry on top. Truly, it’s precious, vct flooring and all. Plus look! The previous owner left us toilet paper.

DSC_0252

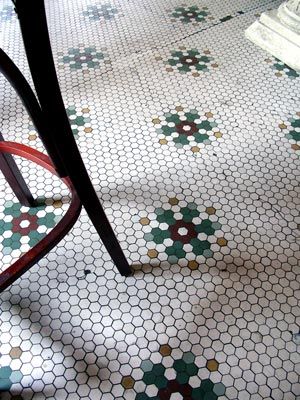
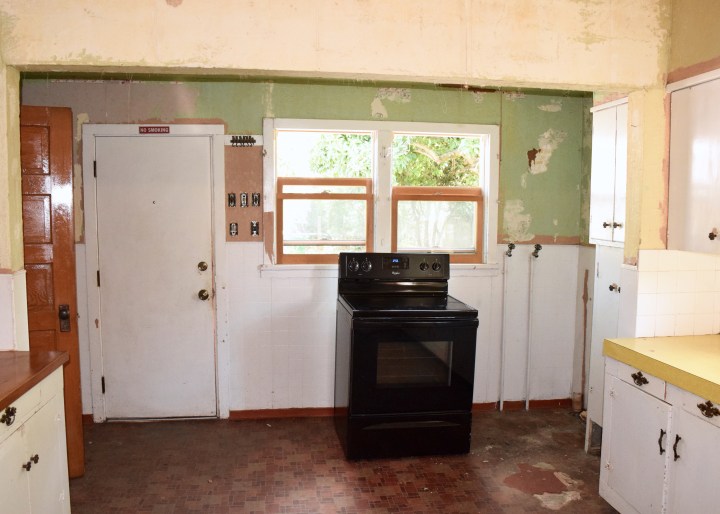
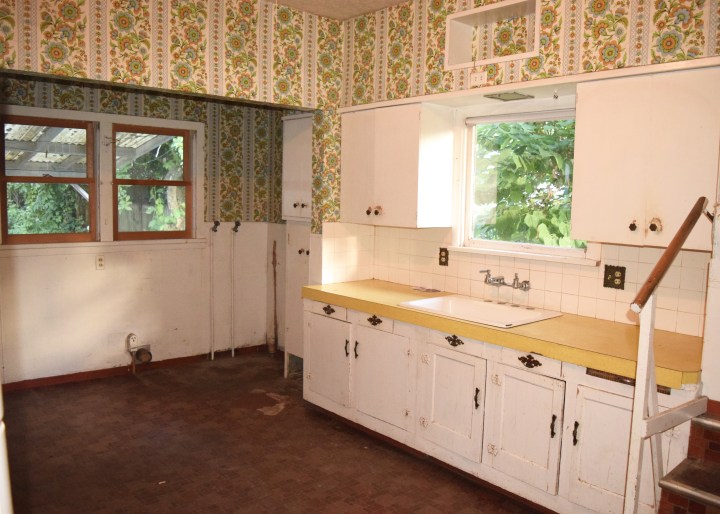
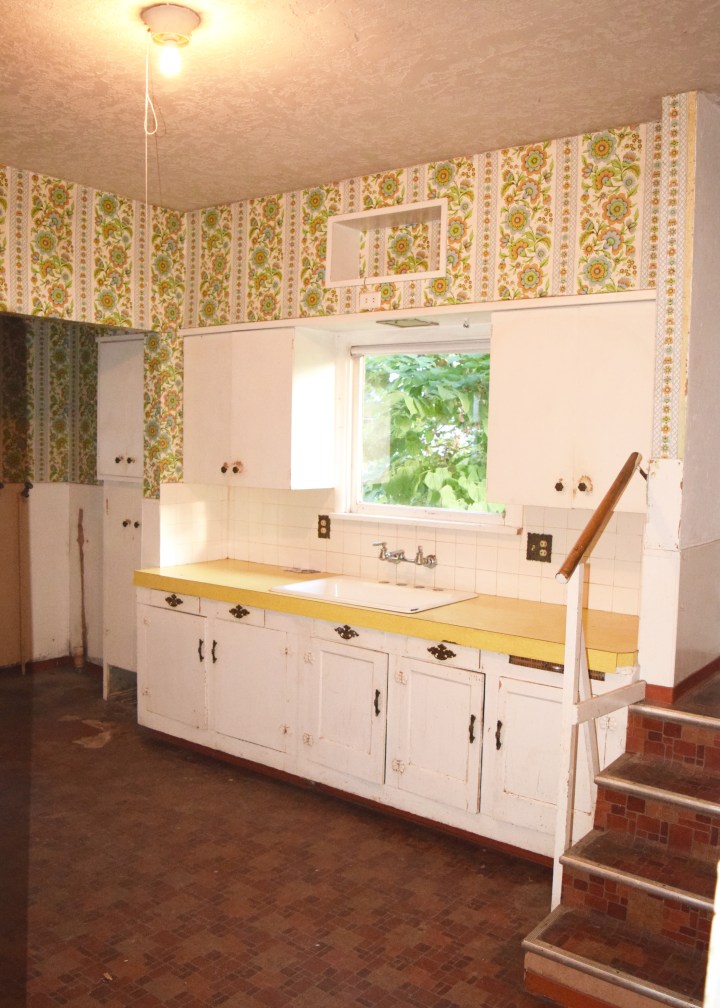
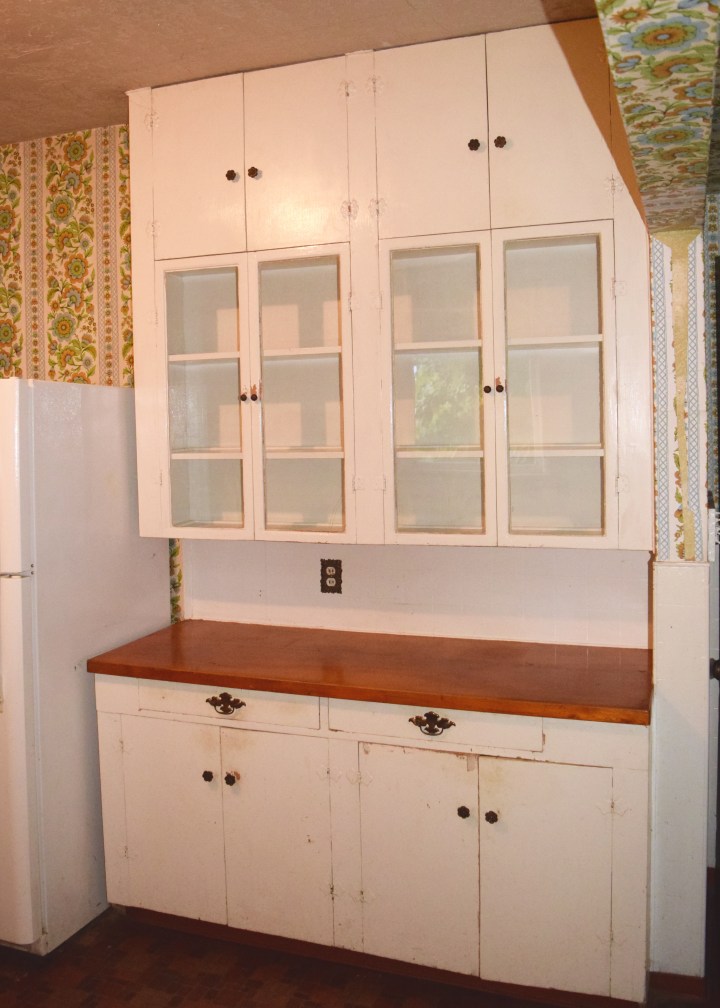
Let’s go into the kitchen. Look at these cabinets! The wallpaper! The old cast iron sink! This room is pretty dim from the roof that’s over the back deck, but I have a quick fix for that. It’s called demo. I wanted to try to keep these cabinets, they’re not in bad shape at all! Two weeks into the house, and I’m not positive they’re salvageable though. The flooring in this room though? The exact same as what my Oma had in her kitchen!

DSC_0264

Here’s a shot of the room that helps with layout. I took this standing on the landing of the stairs that lead to the upper level of the house. Look how cute the glass cabinets are though! SO MUCH POTENTIAL!

DSC_0268

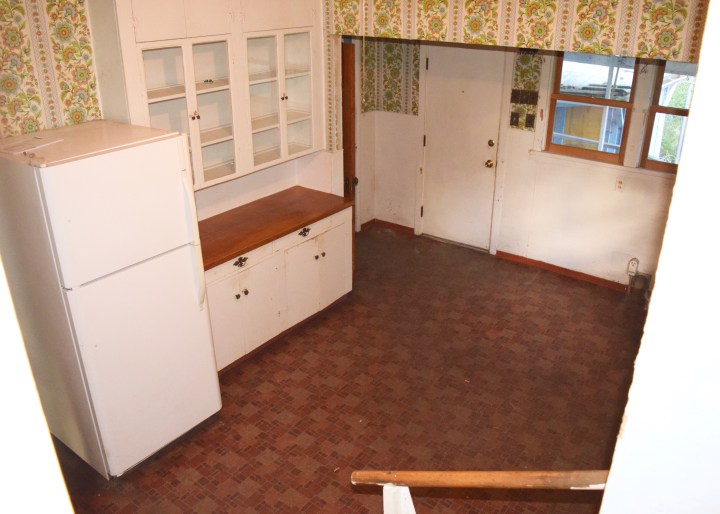
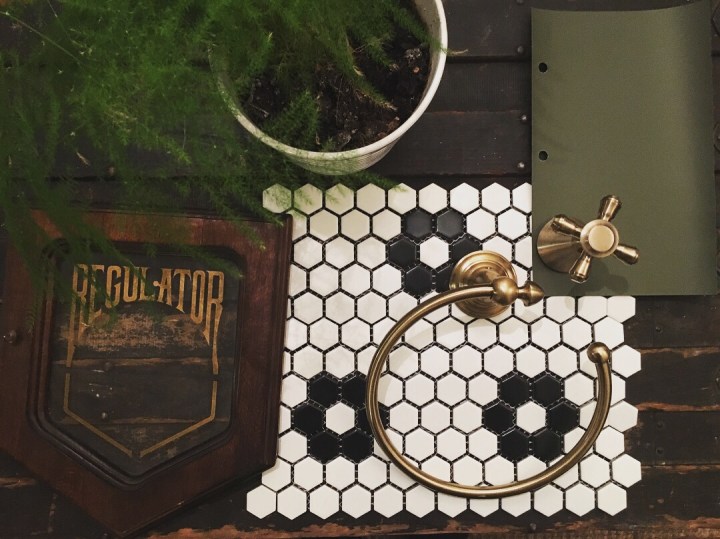
This is one of my favorite details of the house. a little paint, a little crown moulding, and these will be cute cute cute!

DSC_0279

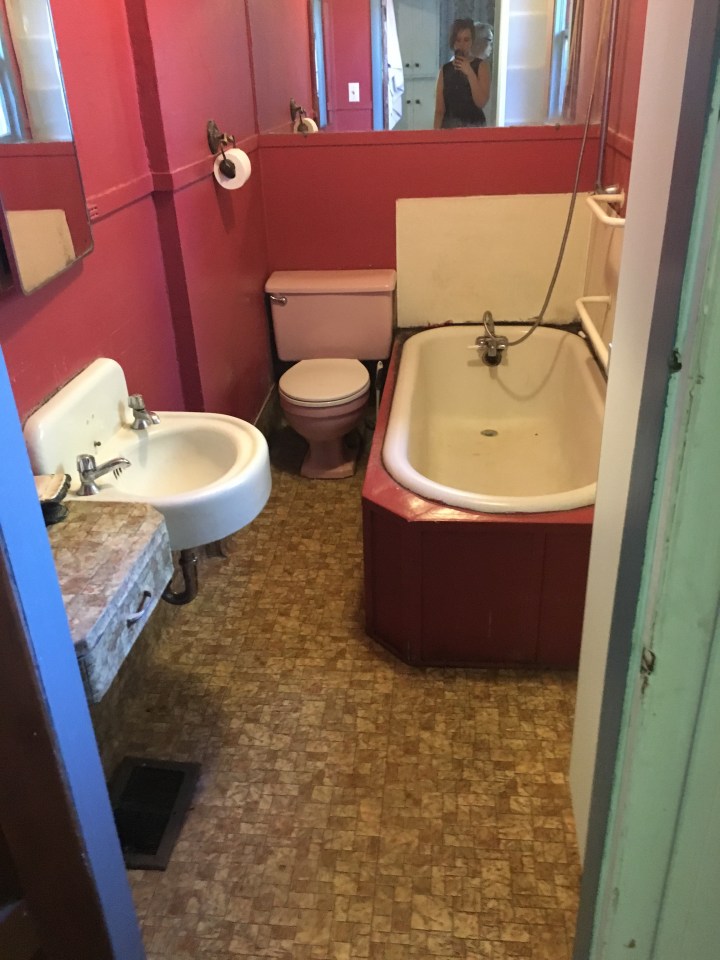
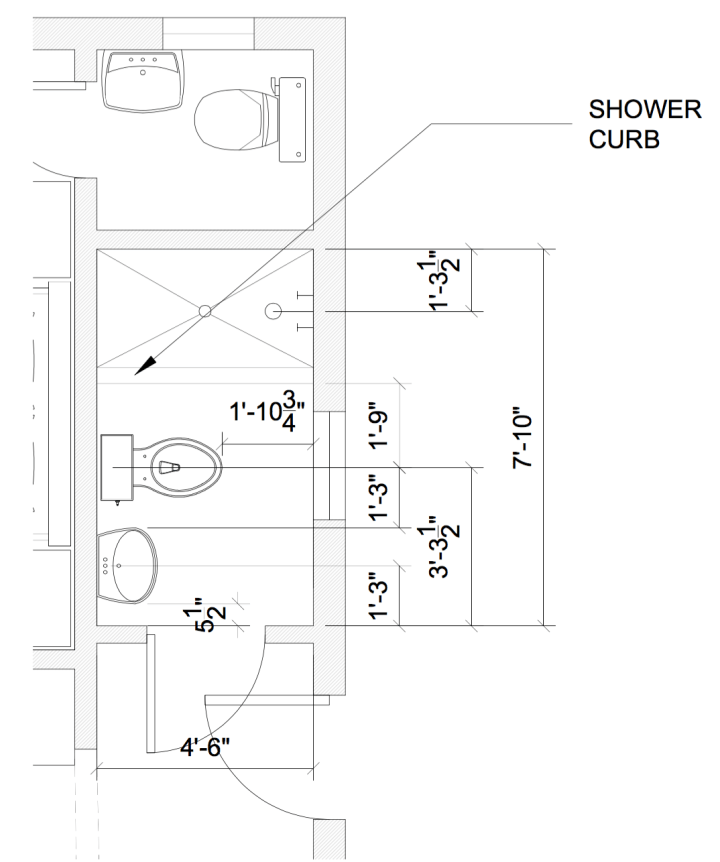
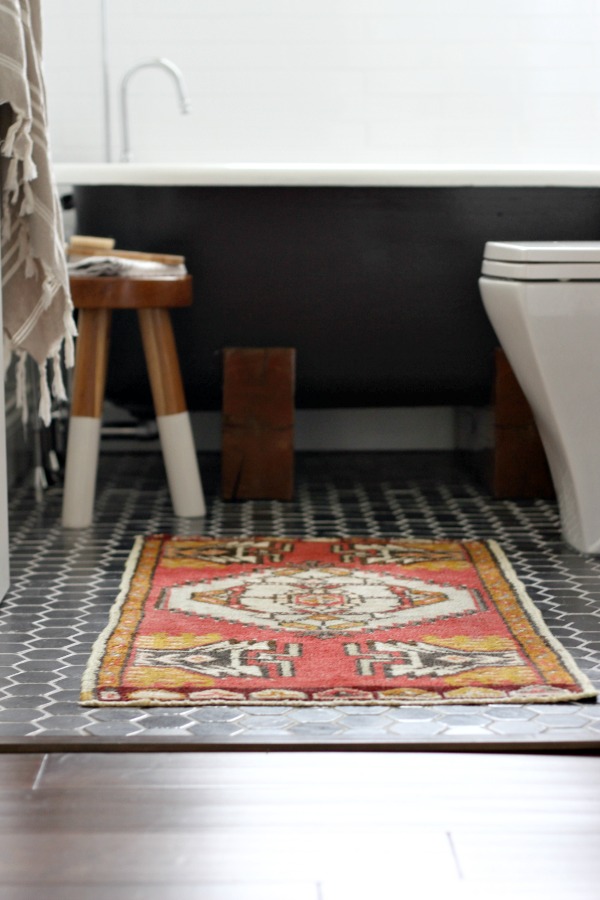
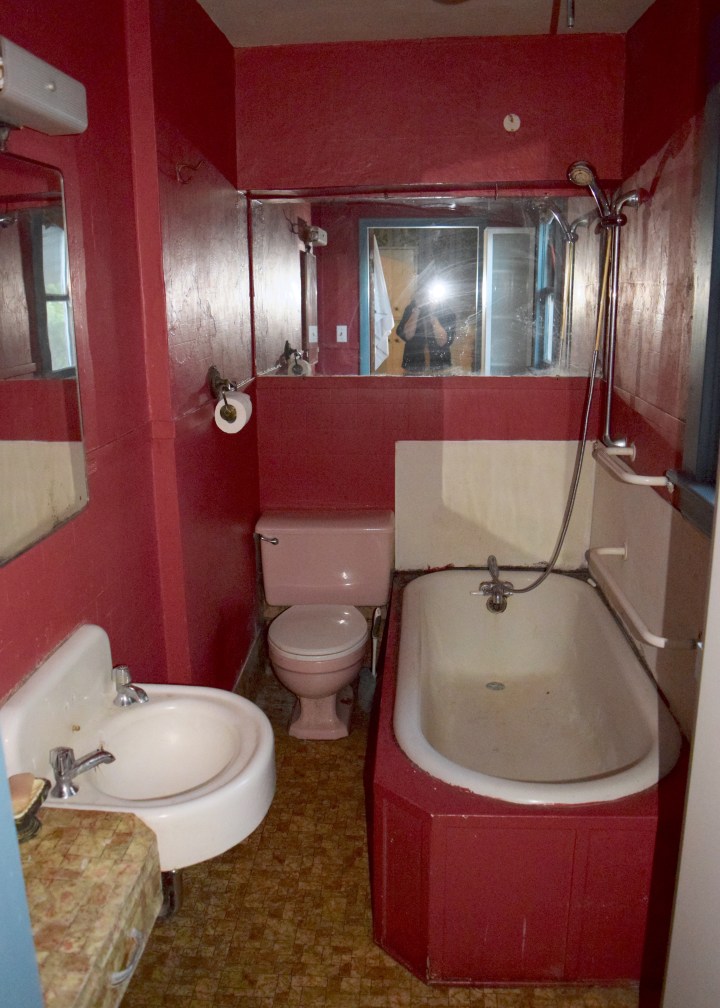
But why talk about the cute when we can talk about the ugly? Let’s go into the bathroom! Space planning these bathrooms was an issue. They’re also located in part of the house that was originally the back porch and it’s only about 54″ wide. So clearly you should put a ginormous bathtub in there, slap sheet vinyl on the floor AND the vanity, paint the walls dark magenta, and buy a pink toilet to match. It’s only right!

DSC_0280

Okay, let’s move on. The stairs! They’re not so bad! I mean the railing is black because it’s apparently NEVER been cleaned, but other than that, they’re quite pretty and not super narrow like most added to this era of home.

DSC_0287

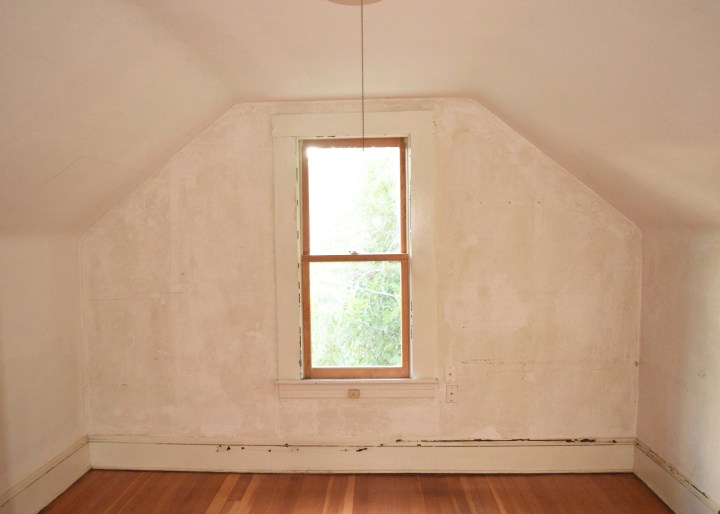
The bedrooms on the second level are both under the eaves and just so cute. They both get fantastic light and are super cozy. And by cozy, I mean hot as balls right now, but you get the picture. The plaster is looking not so great on that back wall because someone plastered over wallpaper, because… well I’ve already said it.

DSC_0298

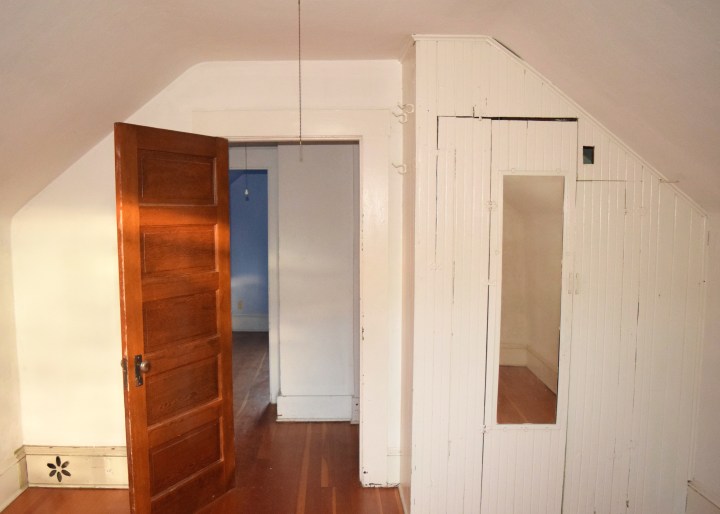
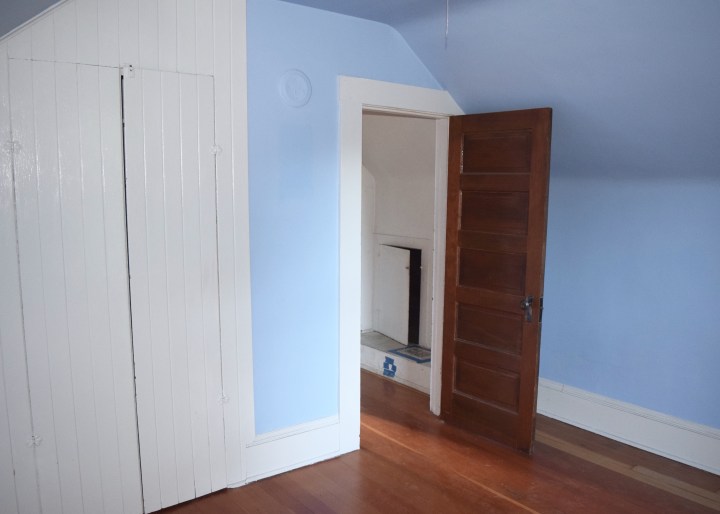
The closets in this room are a little funky, but that’s just vintage. A little rehab-ing and it will be completely adorable. Look at the gorgeous door though! Five panels!!!! I love it, love it, love it. Also the daisy flower heat register? THERE IS NOTHING MORE CHARMING.

DSC_0301

The other bedroom is where I am currently sweating sleeping, because I’ve given the lower floor bedroom to my parents who are helping me jump start the renovations on this place. Yay! Parents! The closet in here is a little more spacious and a little less funky. The room is a sweat sweet blue color that will be great in the fall or whenever Oregon decides to no longer be 100+ degrees. It’s just a tad hot at the moment. But my tried and true method of sleeping with a washcloth full of ice is doing the trick.

DSC_0316

And that’s it! That’s the house! I can’t wait to share all that I’ve been up to in the last few weeks and all that I’ve been dreaming about starting in the months to come. Get ready for oversharing and lots of learning experiences. Like this one for instance: I recently learned that I look like this after spending 3 hours moving bricks in 100° heat.

DSC_0333

I promise, give me a few months and this house will be almost as beautiful as that face. If that’s even possible. And if the spiders I keep finding EVERYWHERE don’t eat me first. Only time will tell!

Oh! And I named the house. Or I named the property. I am a total nerd, but I’ve always loved when people named their homes. This place is officially named Berrybrier. I’ll get into all the reasons later, but a good part of the origin starts with that out of control raspberry bush in the backyard!

So what do you think? Am I totally crazy, in over my head? Probably. Did you buy a fixer upper? Have tips for laying brick patios? What is your house called?


Dreaming of the Cabin Life

Dreaming of the Cabin Life

Lately I’ve had cabins on the mind. I’ve always loved camping and the outdoors and the idea of a little rustic cabin tucked away on some land really excites me! A few years ago my parents almost bought some property in the woods that opened up to a beautiful meadow with a small cabin. They ended up not going through with the sale, but boy, it was gorgeous. Ever since then I’ve had cabins in mind as a future destination for holidays and summer vacations. Some place I could curl up by the fireplace with a big mug of tea and a good book. Some place with lots of land for running around. Some place I could throw out a blanket for a picnic. Some place peaceful and surrounded by nature. In my mind, this cabin looks a little something like this…

The cabin would be nestled somewhere flat surrounded by woods, a bit like this:

Cabin in the Woods | Land of Laurel

But it might be in a wide open meadow surrounded by woods too. Regardless, there will definitely be a nice big porch. Preferably one that wraps around the entire house and has a covered outdoor fireplace, just like this:

Cabin with Porch Fireplace | Land of Laurel

When you came inside, there would be a great big living area with room for tons of family and friends to all hang out together. It would be light and bright with white walls and gorgeous, rustic, wood work, somewhat like this:

Stone Fireplace in Cabin | Land of Laurel

You’d want to curl up by the fireplace for sure! It would be the perfect spot to play a board game or sit and chat. The stone from the fireplace and rustic wood beams would be repeated through out the house. You’d also find them in the kitchen:

Stone with Rustic Wood in the Kitchen | Land of Laurel

The stove and hood would most definitely be carved out like the picture above for a dramatic and rustic look! Obviously a big island is a must! You need a place for big buffets at family dinners as well as a place to sit and much on appetizers while chatting with the chefs! Not to mention – where else would you breakfast?!

That same stone and rustic beams? We’re not done with them yet. They’d absolutely show up again in the bathrooms. Maybe behind a free standing tub for a picture perfect bath:

Stone Wall Behind Tub Bathroom | Land of Laurel

And perhaps in another bathroom, it would become the backsplash at the vanity.

Rustic Stone Backsplash | Land of Laurel

And speaking of bathrooms, there would have to be an outdoor tub for kids to splash in and adults to lounge in at night and look up at the stars.

Outdoor Bathtub | Land of Laurel

And with kids around, there’d have to be a bunk room for big family sleepovers! The room would be chock full of beds to sleep as many people as possible and there would be a great chair or window seat for reading. You’d see the same style of rustic wood work in here again.

Rustic Bunk Room | Land of Laurel

The bunk room would probably have a barn door that was almost always open so the kids could come in and out of the room with ease.

Rustic Barn Door | Land of Laurel

The other bedrooms would be darker and cozy with plenty of wood. At least one of them would have a rustic stone fireplace.

Rustic Wood and Stone Lodge Bedroom Fireplace | Land of Laurel

The other would incorporate more wood work and some Pendleton inspired rugs and blankets. Both rooms would be the perfect place to lay out for a mid-day nap or snuggle up for a long, cold night. The darker feel of the bedrooms would promote sleeping, but also encourage guests to head out into the lighter brighter parts of the house when they woke.

Rustic Bedroom | Land of Laurel

Overall, the entire cabin would be the perfect place to visit, a place for family and friends, a home to retire too. It would be comfortable and rustic, a great retreat, a place to relax. It would encourage slow activities like reading, cooking, board games, hiking, walking, gardening, long baths. The cabin would be a place to escape from modern technology and the stresses of everyday life. The cabin would be like an old wool blanket wrapped around your shoulders. At least that’s what I’m imagining. After all, right now this place only exists in my mind…

What are you daydreaming about? Do you design retreats in your head? Are they cabins? Do you have cabin? What is your favorite design element of cabins? The rustic beams? The stone work?

Sources: exterior, outdoor fireplace, indoor fireplace, kitchen, bathroom tub, bathroom vanity, outdoor tub, bunkroom, barndoor, fireplace bedroom, rustic bedroom 


Happy Galentine’s Day!

Happy Galentine’s Day!

Ah, can you smell that? Mmmm… that’s the scent of chocolate my friends. Tomorrow is 50% off chocolate day, so get ready for some shopping! Today however is Valentine’s Day, or as I prefer to celebrate it, Galentine’s Day!

Since I was about 10 years old I’ve almost always celebrated Valentine’s Day with a group of girls. For me Valentine’s is always about the people you love, not just a single significant other. Luckily, Parks and Rec helped popularize the Galentine’s Day movement! Woohoo! Ladies, gather around, I’ve got chocolate.

This past weekend I threw a Galentine’s Day Party. You may have seen my plate of leftover cookies on instagram! Mmmm. I made a bunch of sugar cookie hearts and whipped up some royal icing which I dyed red, two shades of pink, and a pretty teal blue. I kept plenty of white as well. I like to pop the icing in squeeze bottles like these for easy and less messy frosting. It makes it easier for kids to go at it as well!

Since I’m a pro at over-baking, I had so many cookies left after the party that I ended up spending about 2 hours streaming Netflix and decorating the excess cookies. It was a relaxing way to spend a late Saturday afternoon!

Valentine's Cookies | Land of Laurel

The party was fun and I managed to snap a few pics before everyone arrived. I made a bunch of cupcakes and some biscuits too. A big part of any Galentine’s Day party has got to be the food! I made tons of food – I always do – there was enough for thirty and I had a party of ten! Everyone got to take home leftover though and I even froze some for myself.

Galentine's Day Party | Land of Laurel

I mashed up some re-heated frozen raspberries and added them and their juice to my cream cheese frosting for an simple and natural pink color and a little extra favor. It was so delicious and incredibly easy to get that vibrant pink color! I have half a bag left in my fridge now, so I just might need to bake a cake!

Valentin's Day Cupcakes | Land of Laurel

The raspberry cream cheese frosting could have been a little thicker, but oh well, nobody cared, it was delicious! A bag of Valentine’s M&Ms adds a little party atmosphere. As much as I love fancy chocolate, I have to admit, there is something about M&Ms at a party that is just so right! I cut my biscuit dough into heart shapes as well, because I like to roll with a theme. I whipped some chives, salt, and pepper with some cream cheese for a savory biscuit topping, but I also put out raspberry jam and lemon curd for those with a sweet tooth.

Galentine's Day Party | Land of Laurel

Over all, it was a lovely party and I can’t wait for next year. In the meantime, I’ll just be home drinking hot buttered rum because I over-made the mix for that as well. No harm, no foul there though! There’s nothing I enjoy more than a hot, alcoholic beverage. Mmmm mmmm good!

How do you celebrate Valentine’s Day? What about Galentine’s Day? I can’t get enough of spreading the love to all my lady friends! The move to Portland has been so wonderful because of all the women I’ve met here. I really couldn’t feel more lucky!

Entryway Action

Entryway Action

I have a goal and a plan and I’m ready for action! This is the final push to get the entry whipped into shape! I have a Galentine’s Day Party planned for all the ladies in my life the weekend of the 11th. My goal is to finally complete the entry way so I can decorate it up for the party! I have some cute heart ornaments that just need a place to be hung.

So, why is it the final push? Because I’ve been secretly working on this for months, slowly chipping away at the mess that this area was when we moved in! If you recall, it looked like this to start:

The Duplex Moving In Tour | Land of Laurel

And when you first opened the front door you looked in at this:

The Duplex Moving In Tour | Land of Laurel

Whew! What a hot mess it was when we arrived! The entry’s one redeeming feature (besides the coat closet) is the little nook right next to the door. This is a great place for us to stash all our shoes and jackets when we first come home. Of course… is started out as a whole lot of nothing!

dsc_0051

Well, nothing, but an electrical panel, a light switch, and a heating vent. Lot’s of mechanical stuff going on in this spot! You may remember my original plan for this area. It included the following items, some of which are now complete:

  • Get seating for putting on/taking off shoes
  • console or buffet for mail/purses
  • Hang art/mirror and accessorize
  • Paint back wall to hide electrical box better?
  • Organize closet
  • Shoe storage!

Since October – when I came up with this plan of attack – I’ve been slowly getting ‘er done! First I got to work hanging a big old heavy mirror I got for free from work several years ago when it was delivered with a hefty scratch. I bought this 50 lb drywall anchor set from Home Depot for a few beans.

Hanging a Heavy Mirror | Land of Laurel

Once I marked my location (I was hanging the mirror high with the plan to eventually put a console table beneath it), hanging the mirror was really easy. I simply tapped the plastic anchor in with a nail first, then screwed it the remainder of the way into the wall.

dsc_0375

The two other pieces in the kit – a screw and a picture holder, fit into one another, and were then screwed into the plastic piece. Easy as pie.

50 lb Drywall Anchor | Land of Laurel

You know what was not easy? Lifting the heavy mirror up and hooking the wire onto the picture hook. Boy! That mirror was heavy! I enlisted the assistance of both my parents who happened to be visiting that weekend. By the time we hung the mirror, I’d also bought an ottoman! It was an impulse buy one morning on the bus. I only semi-regretted it after. And by semi-regretted I mean I realized it was definitely not my favorite option, but it was cheap. I looked it up to link to it in this post and found out it’s now available in cream! Ugh. Cream would have been a great option. Instead I ended up with the cherry red. When I bought it, the ottoman was only available in red or black leather. I have an intense dislike of black leather furniture unless it’s on task chairs, so I went with the red option. I may reupholster it with some extra fabric I got for free from work. We’ll see… For now, let’s concentrate on the positives of this ottoman. A) I got it for a heavily discounted price. B) It opens up and becomes a huge storage ottoman! C) It’s deep enough to provide seating space while still being tucked under a shallow table, so I don’t need to drag it out to open it.

Progress in the Entry | Land of Laurel

Being quite the spend-it-all-at-once-er I also bought an indoor/outdoor rug at about the same time. I picked one that was made of polypropylene because it would hide the dirt and I could take it in the backyard and hose it off if it got really dirty. The rug itself is also heavily textured with the heathered dark parts of the rug being flatwoven and about 1/8″ below the height of the light part of the rug design. I wanted something that would make the silly transition between the sheet vinyl and LVT floors less obvious. The sheet vinyl part of the entry is 4′ x 7′ and rug I bought was 3′-9″ by 5′-8″ so it covers almost the entire entry area. Then on an IKEA trip I stumbled upon some welcome mats. Most of the mats at the store said “Welcome” in English, but I spotted one that said “Willkommen” which is the German translation. Being the Germanophile I am, I snapped it up instantly and stood over my cart like a mama dog protecting her babies. I took it home and paired it with the larger black and white rug for a modern look. Having this mat inside helps keep things even cleaner, especially since we do not have any outdoor overhang! Jacks was so excited about the rug, he even posed with it for Instagram (yes this was 3 months ago).

Kitten Door Mat | Land of Laurel

With the hanging of the mirror and the purchase of the rugs and ottoman, this entry had a completely different look and feel. Thank goodness! It wasn’t done yet – no there was lots left to do – but, progress had been made and the space was starting to feel like home. Plus I finally had a place to store my shoes (the ottoman!) and a place to sit while putting on my shoes (the ottoman!). No more hopping around on one foot like a clumsy flamingo!

Entry Progress | Land of Laurel

Now that my clumsy flamingo days were over, I also wanted a place to hang my purse and any wet coats (have you heard that it rains here in Portland, OR?). I inherited some pretty reclaimed wood planks from a friend a while back. I pulled one out that looked to be about the right size; its gorgeously beat up and has some paint still staining it. I love old wood (wink wink! No, gross! Bad joke! I take it back.).  Then I picked up some of these painted square tile hooks from World Market.

DIY Coat Rack | Land of Laurel

I laid them out on top of the wood plank on my dining table and spaced them out until they were even to the eye, before marking their location with a pen. Then I drilled shallow holes in the wood to allow for the screws.

DIY Coatrack | Land of Laurel

I finished it off by screwing the hooks onto the board. (Is it just me or did that sound dirty too?)

DIY Coatrack | Land of Laurel

I finished it off (oh my god, why does this sound so bad?!) by drilling holes at the middle of each end of the board and taking two 2″ screws to fasten it into the studs in the entry. The coatrack looks cute and holds my purse quite nicely!

DIY Coatrack | Land of Laurel

Now, why stop there when there’s so much more to do in this room?! If you scroll all the way up to the first picture in this post, you’ll see a weird box on the wall. What is it? I have no idea. Why is it there? To annoy me. How do I fix it? Classic answer: a gallery wall.

Entry Gallery Wall | Land of Laurel

Boom! A few pieces of art and now that box isn’t quite so obvious. Here is my map of England, a fun and funky art piece my Aunt Pat found, and a print I bought at a Museum in Milan. This entry has so many walls, I still need to add art to several spots! This is a good start though. Overall, I’m feeling good, because this entry is looking so much nicer!

Entry Progress | Land of Laurel

A vast improvement over the before, I just have to say!

The Duplex Moving In Tour | Land of Laurel

Oh! That before picture makes me realize another couple of quick updates. See that ugly carpet sticking out under the door? Ripped out. Goodbye gross! The cheap mirror on the closet door didn’t even last through the first week in the Duplex. There are some things I can’t change – the yellow brown moldings, the door, etc, but in a rental, sometimes you gotta take what you can get! What’s on the horizon for this space? Lot’s of final touches, but first, a custom console. You may have seen this sneakpeek pic on Instagram a few weeks ago when I was test fitting my furniture build:

Console Prep | Land of Laurel

I’m still working on the final touches of that piece, but the goal is to knock that out this week and begin accessorizing and putting more art up next weekend. Wish me luck!

Do you have anything you’re working on that has a fast approaching deadline? Does that make you panic? Or work harder? Or both?! Let me know what you’ve been up to in the comments!