You may have recently seen in my Instastories, I’ve been trying to wrap up a lot of half-completed projects around the house. One of those projects was finally, finally hemming my living room curtains!
My absolute favorite budget curtains are the IKEA Ritva curtains. They’re 100% cotton — a natural fiber — which makes me happy and they have a great subtle weave to them. The best part? For 118″ long curtains it’s only $39 for a pair! So many curtains are sold as single panels for over $100, so this deal feels amazing.
For my living room I bought rods online from the now closed Country Curtains (come back I miss you!) over a year ago. They are great faux-brass rods with fun glass ball finials. Just enough for a maximalist like me!

Before I get into how to hem curtains, though, let me give you a little backstory. In April 2018, I had a housewarming party as many of my renovations were finishing up and in the hours before the event, I scrambled to get the curtains hung. My parents — who were visiting from California — offered to help. They hung the rods and took my curtains (I’d actually bought them for the Duplex!) and hung them up. Of course, my ceilings were only 8′ in the living room so the 118″ panels were ridiculously long. My mom — thinking quickly — hemmed the panels up with sewing pins. It was a great solution that made the room come together and look finished without all the effort of actually hemming. I figured I’d get around to hemming the curtains in the week or two following the party…
Fast forward to July 2018. I adopt a tiny kitten I name Auggie. He’s adorable and quickly becomes friends with my cat Jackson. He also brings ringworm home from the Oregon Humane Society. Have you ever dealt with ringworm in an animal? It is HELL. Actual HELL. Ringworm isn’t an actual worm, you see. It’s a fungus and it lives everywhere that it touches. You need to isolate the infected animal (sorry Auggie – 4 weeks of quarantine for a 8 week old kitten is hard!) and then bleach everything you own. Like – everything. All the linens, all the bedding, all the floors, walls, fireplace hearth, literally anything that kitten could touch.

So the not-yet-hemmed curtains came down and were bleached and folded and I figured I’d hem them and put them back up… but then I got busy so I just left them in a basket with the living room throw blankets. Fast forward again to October 2018. Jackson comes down with ringworm, which he clearly got from something in the house which wasn’t quite bleached well enough. Everything, everything, everything gets washed and bleached again. The house smells terrible, it turns out my sister is allergic to bleach, it’s a huge pain, everyone is grumpy, and the cats are quarantined together in the basement.

After 6 weeks, the cats come out of the basement, the ringworm seems to be gone. I’m nervous though so all my washed linens and pillows and every non-essential fabric item gets tucked away in closets and drawers — I don’t want to have to bleach all that again should the ringworm hit us a third time.
Fast forward one last time — it’s June 2019. It’s been 8 months since we’ve gotten ringworm. I trust that it’s possible that it’s actually gone. The linens and pillows all come out again. It’s finally time to actually hem the dang curtains, over a year after the housewarming party!
I wanted to keep the extra length of the curtains (if I’d bought my Ritva curtains for this house I would have actually bought the 98″ long ones) just in case I wanted to use them elsewhere at a later date. So the first step of hemming wasn’t the most entertaining…
Step One: Iron
If you haven’t washed your curtains before, that should be the first step in the process, since you want your curtains to do all their shrinking before you hem! Make sure to follow the wash instructions though!
In order to get a nice crisp hem, I needed to iron my curtains out. If they’d been hanging for the last year, I probably could have skipped this step, but these had been folded and stuffed in the corner of my close for the last 8 months and were very wrinkly! I borrowed my roommates iron and got to work.
Step Two: Measure Length
Once my curtain was ironed I actually hung it back on the curtain rings and looked at it in place. Then I used a sewing pin to “hem” up the curtain up to the length it needed to be – just about 1/4″ off the floor.

I pinned one side of the curtain creating a fold that was at the floor (and would dictate my final curtain length.

I did this for each curtain, rather than using the same length for all 4, as rod height and curtain lengths can vary slightly.
Step Three: Fold, Pin, and Iron Again!
Once I had knew the length, I brought the curtain down and over to the ironing board again. This was the longest part of the process: more ironing. I carefully pinned the whole curtain to the length – using a measuring tape to make sure the length of the excess was consistent all the way across the curtain.
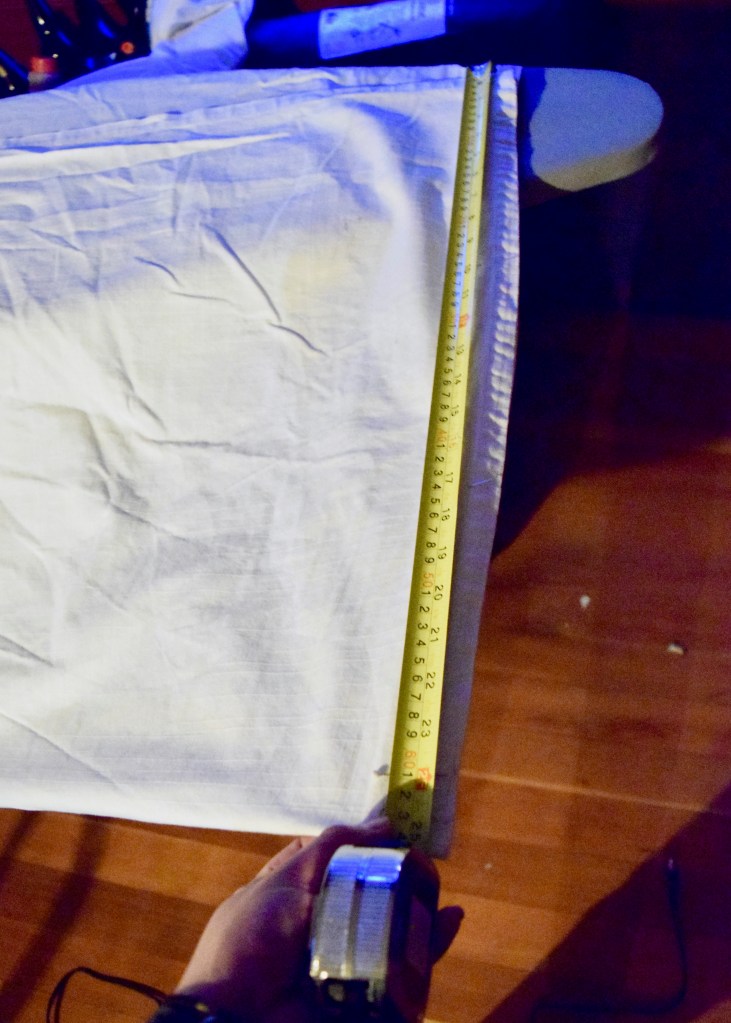
Once they were all pinned, I ironed the fold at the new bottom of the curtain until it was a nice, crisp crease.

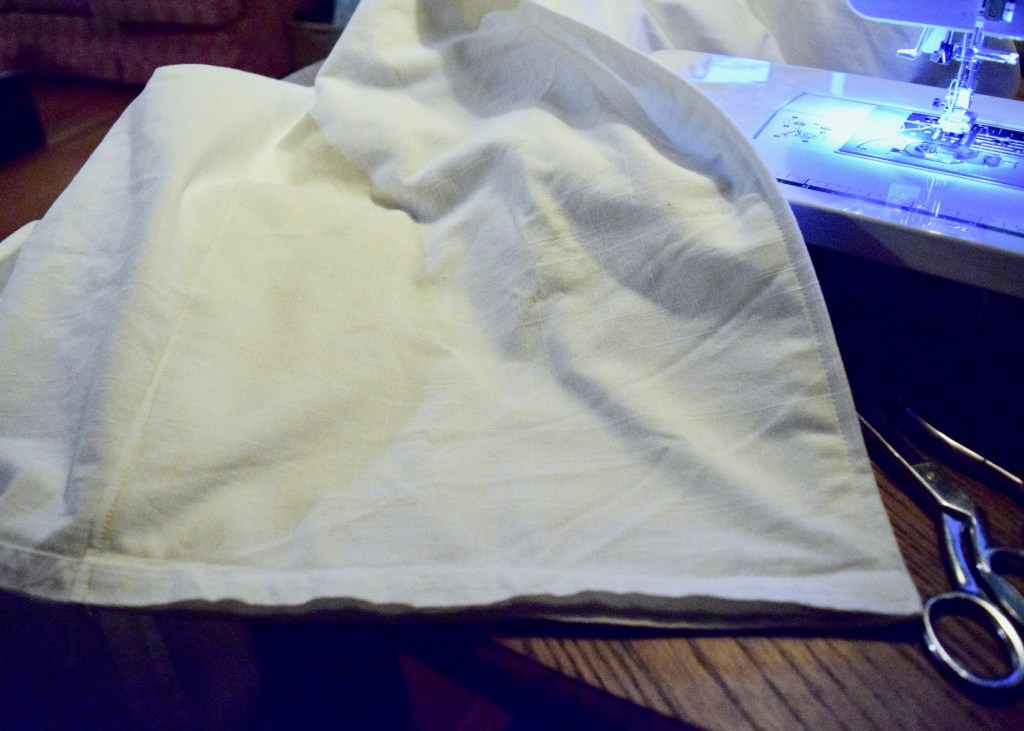
Then I removed all the pins and took the original bottom of the curtain and folded it into the crease I’d created. I pinned that in place and ironed a crisp crease again. This gave me two creases in the curtain, with the original bottom of the curtain, tucked against the top crease (which was also marking my measured curtain length).

I then folded the bottom crease up into the top crease and pinned everything a final time. This gave me 3 layers of fabric here at the bottom of my curtain. I ironed the layers one final time until everything was smooth and crisp. You could also cut off everything below the second fabric crease, but I wanted to keep the entire curtain length in case I moved this curtain into another room in the future.

This ironing step took about 1.5 hours per curtain to get those hems straight and smooth. It was the most time-consuming part of the process!
Step Four: Sew Your Hem
Finally it was time to sew! My curtains were solid white, so it was easy to find a matching thread. If you have multi-colored curtains you will want to figure out the dominant color and pick a thread to match that. Alternatively, you could have fun with a contrasting stitch color! I’m no sewing expert though and didn’t want to call attention to what I was sure would not be perfectly straight stitches! White blended in and was almost unnoticeable.
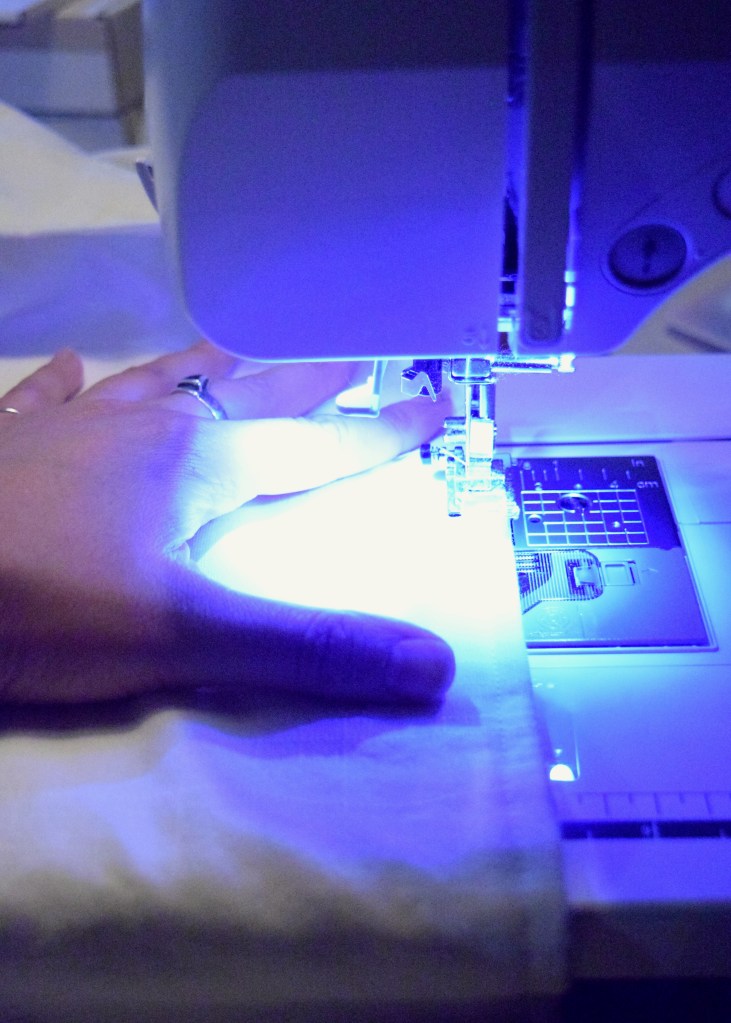
Note: before this I hadn’t used a sewing machine in about 15 years, so literally anyone can hem curtains. You do not need experience, just a machine!
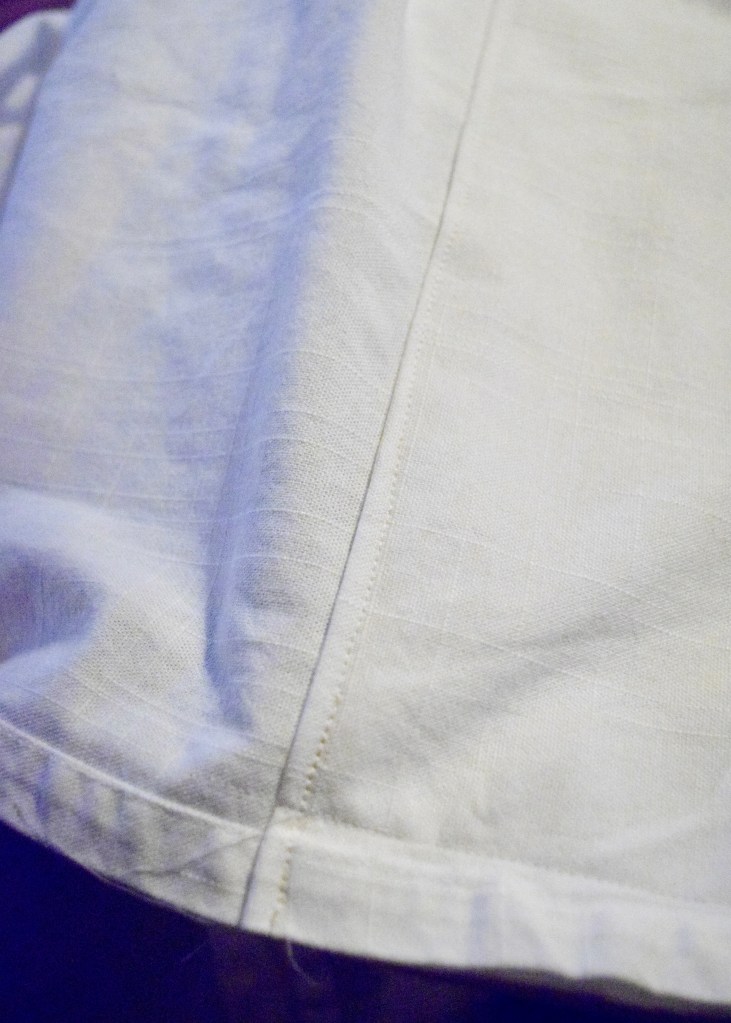
I selected the most basic straight stitch on my machine and went with the default stitch length. I then lined up my curtain panel and sewed along the curtain on all four sides of my hem, about 1/2″ from the edge. It only took about 20-30 mins to sew along the hem!
Step Five: Hang Your Curtain
Finally, it was time to hang the hemmed panel! It was exciting to see each one go up and incredibly satisfying to check off each one. I clipped my panel onto the curtain rings which were already hanging on the rod and when I dropped the base of the panel – it was the perfect height: just barely touching the ground!

Step Six: Repeat with Each Panel!
I had four panels to hem, so I repeated this entire process with each one and it took about one entire 8+ hour day. The ironing was by far the most intensive part so if your curtains are fresh from the dryer or less likely to wrinkle than 100% cotton, you might speed up the hold process. The actual sewing of the hem was so quick and fun in comparison to the ironing!
And soon enough… I was done! 14 months after hanging my rods, the curtains were officially hemmed and in place. It looks so, so good, you guys! Curtains always finish a space and make so much of an impact. Even basic white curtains go such a long way in a space. Now I could have used iron on tape, but I still would have had to do all that ironing and it would have taken only a few minutes off each curtain to iron the tape on. I’d rather have a solution that holds up longer over time (iron on tape I’ve used always failed after 2-3 years) and is completely reversible.
This is the new view from when you first walk into the house! Look at those curtains just making the room feel complete!

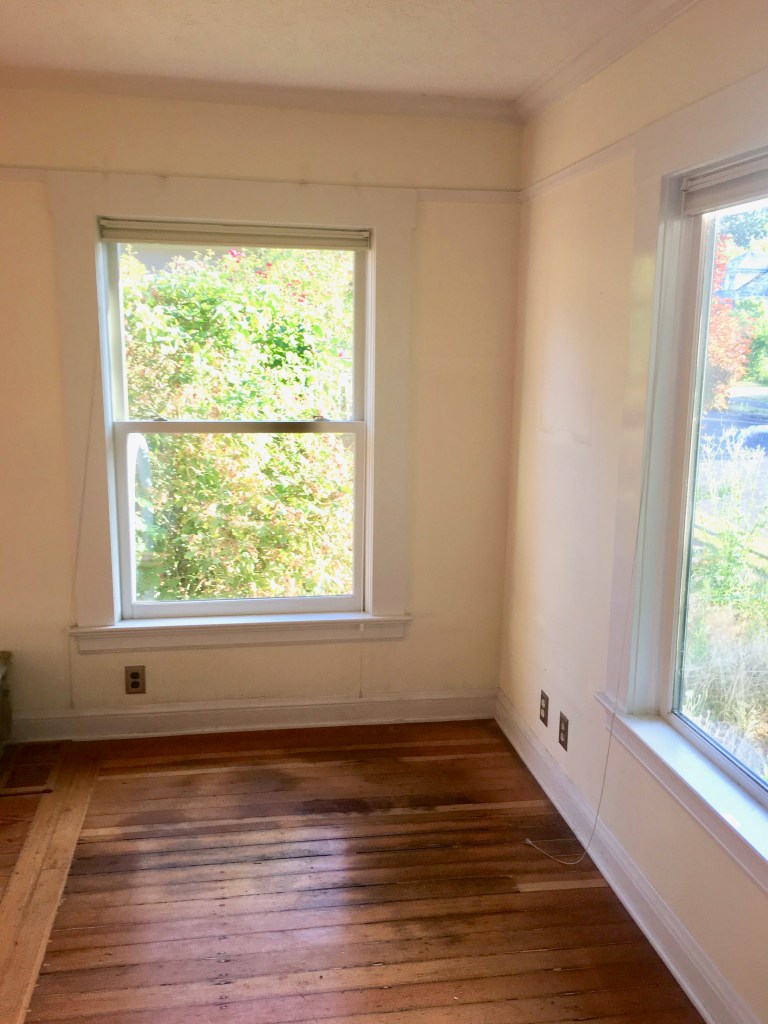
Remember what this space looked like before? Dingy and a little dated. Cleaning the floors did wonders and painting transformed the space.

Everybody loves a side-by-side before and after right? I just can’t get enough! And yes that fiddle leaf fig tree is the same one I bought three years ago at the duplex and named Finley. Still going strong! The chairs are thrifted and so is the antique trunk (which I bought about 4 years ago). It seems like it’s been so short and yet, hear I am talking about years ago!
Bonus! Tips on Hanging Curtains
I always hang rods just below the crown moulding, but if you don’t have crown hang them right below the ceiling. AS HIGH AS POSSIBLE! Never hang curtains on the window trim unless some architectural detail is forcing you to do so. Low rods make a window look smaller and squatty.
Make sure you get a rod length that is at least 2 feet longer than your window width. If your window is wider than 5 feet, you want 3 feet longer than your window width. You want that extra space so the curtain panels can hang on either side of the window without blocking the glass. Ideally the edge inside of the curtain panel is exposing about 1″ of window frame on either side of the glass. This makes your windows look wider!

Big and tall windows make your house look lighter, brighter, and just better. Trust me! 😉
Have you ever pinned curtains to hem them and then left them like that? How long did you let it go?! Are you ready to tackle your own curtains? Or are you on the market for some new curtains? Should I do a round up of all my favorite curtains currently on sale?

That’s a good point that matching thread can hide any imperfections in your stitching. I am thinking about hemming my living room curtains and adding fringe to the ends. I will try to find a closely matching thread for a more polished result.
Oooh fringe!! That sounds just lovely!