Bringing the Living Room To Life

Bringing the Living Room To Life

Happy Monday! I cannot believe it’s December! How did this happen? It’s insane. December means I’ve officially lived in Portland for four months. It definitely feels like I moved yesterday! However, four months seems to be about the amount of time it takes me to bring a room together because the living room is finally in a good place. It’s been all over the place since we moved here, but has always seemed un-finished slightly sad, now things are beginning to look more permanent!

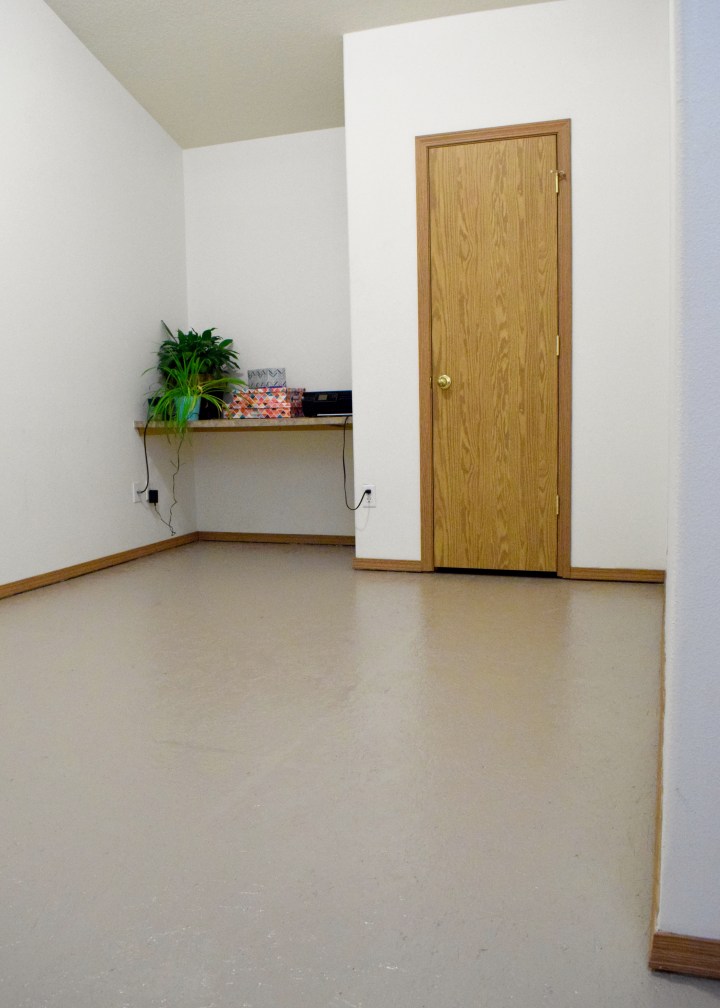
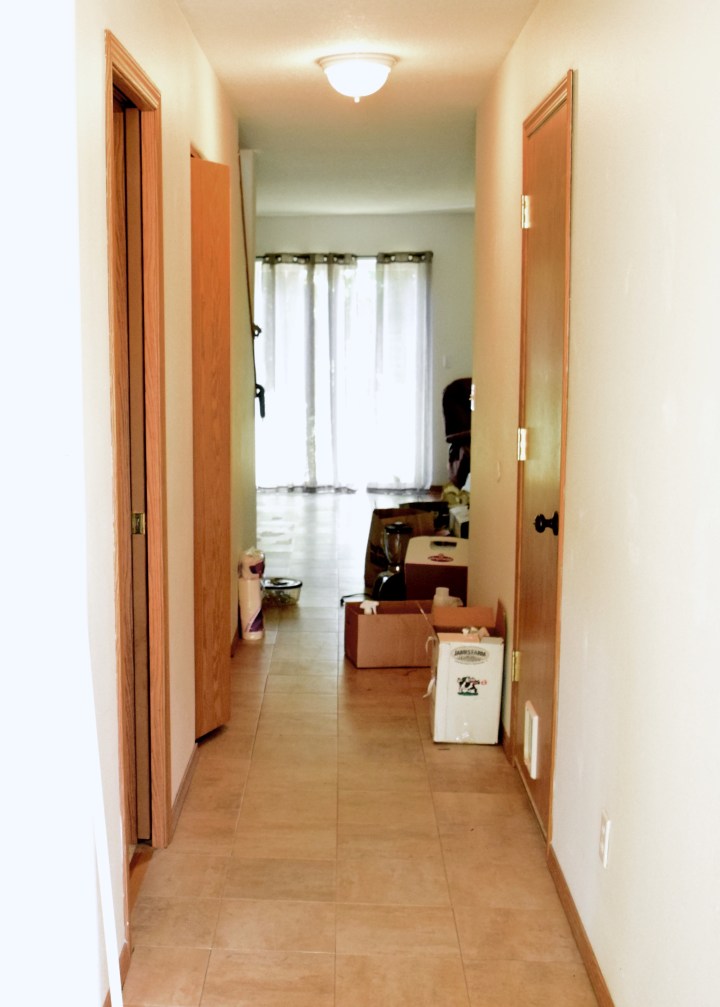
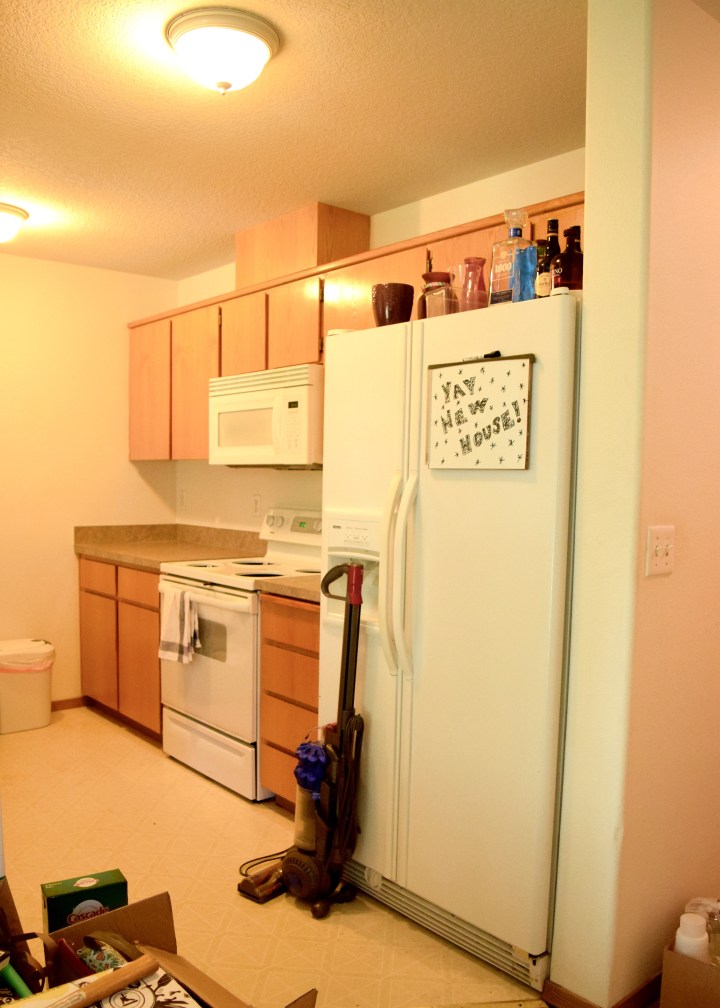
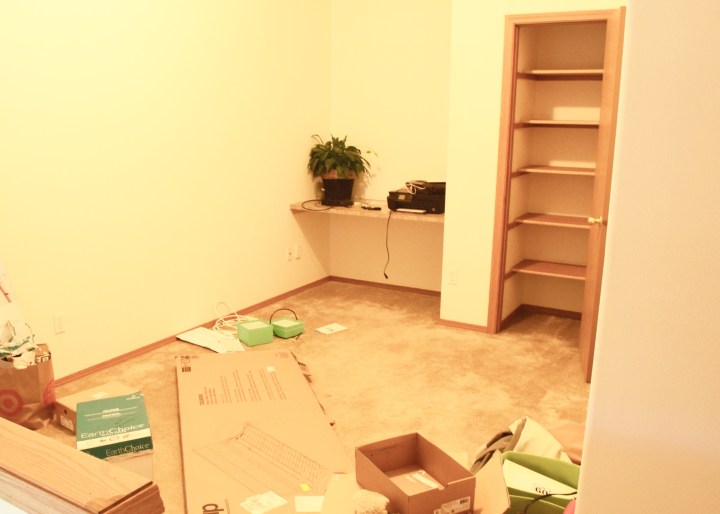
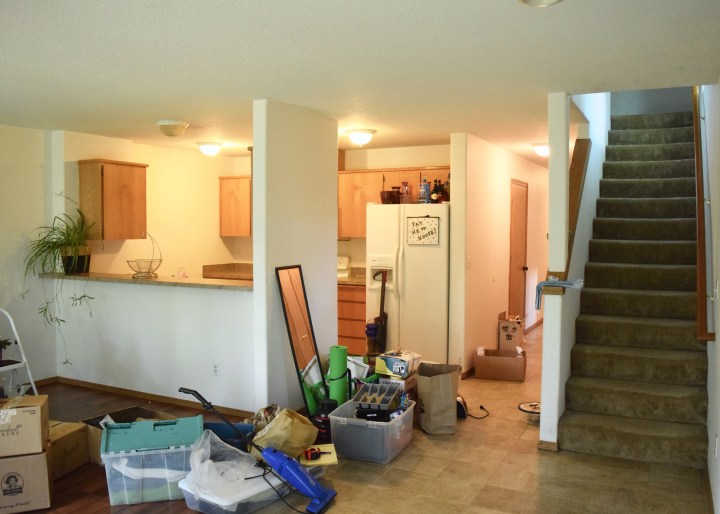
Do you remember when I moved in and it looked like this? A pile of boxes, some old IKEA furniture, and my plants scattered over every surface. It was right as we were moving in and the space was in the midst of being cleaned, cleaned, cleaned!

The Duplex Moving In Tour | Land of Laurel

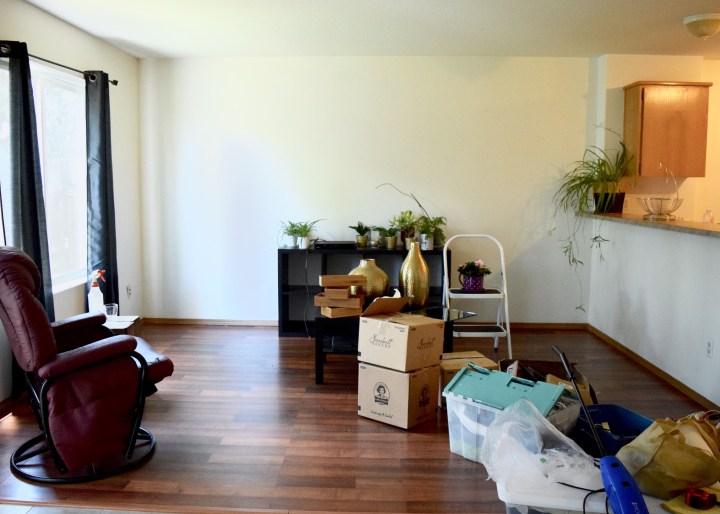
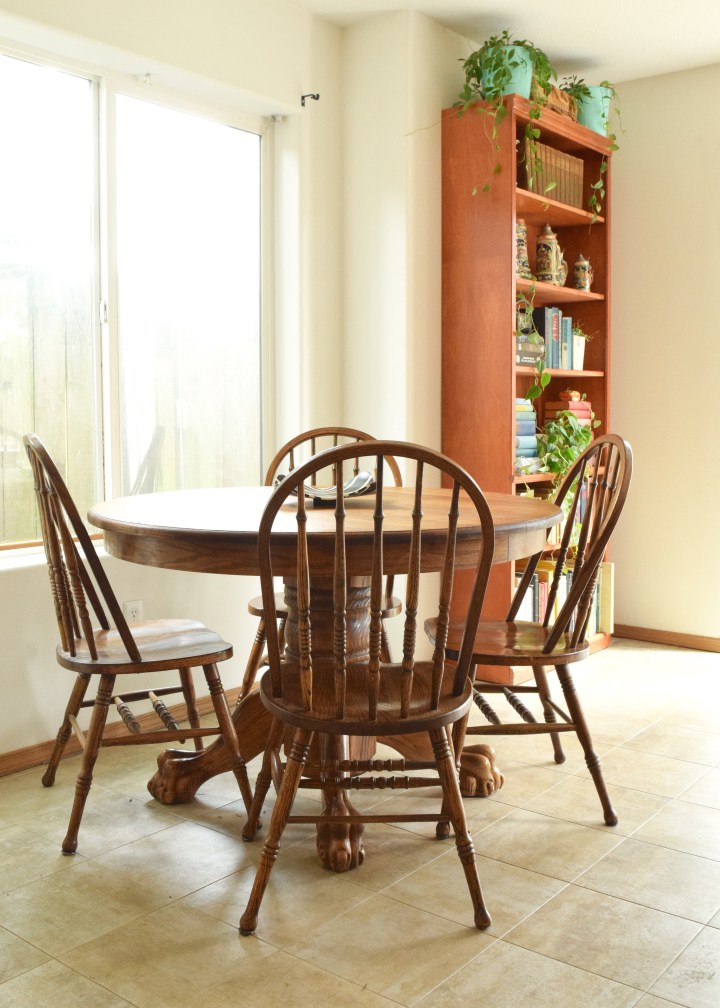
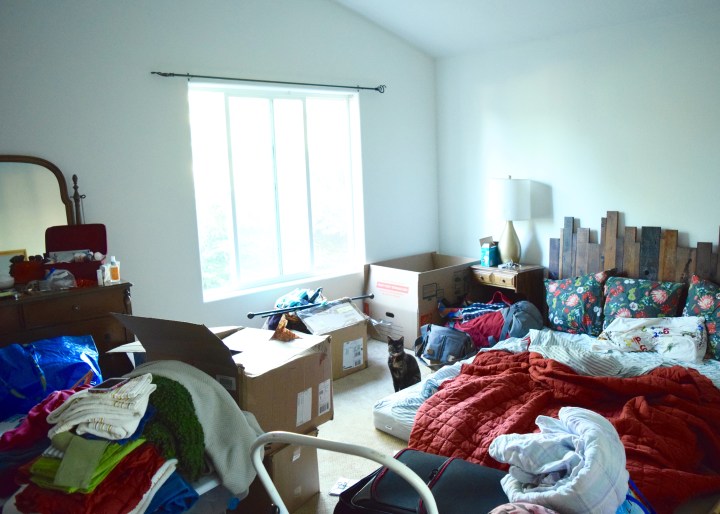
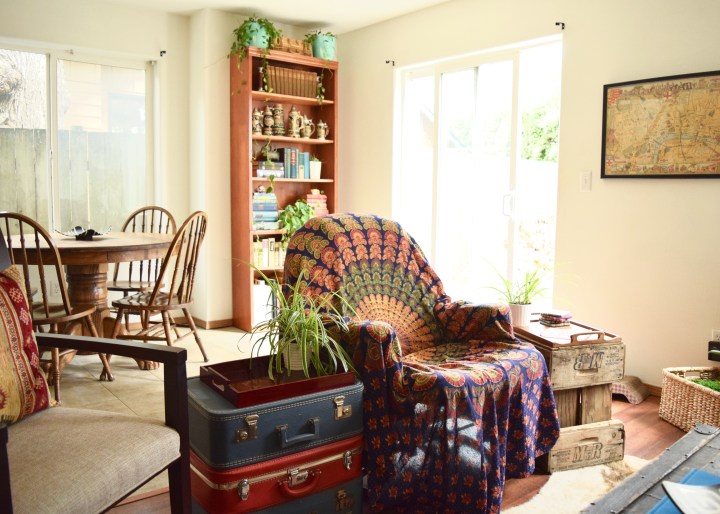
Eventually it began to slowly transform as we settled into the Duplex and started to get more organized. The room became a place holder for mix-matched furniture  and art we already owned.

Living Room | Land of Laurel

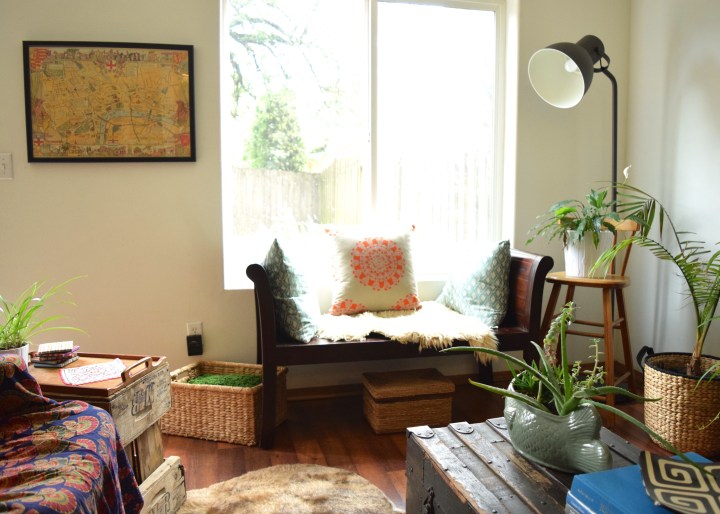
But it still didn’t feel quite right. Things needed adjustments. We didn’t have a sofa (because I couldn’t quite find the perfect one at the perfect price), the faux cowhide rug wasn’t very cozy, and the furniture arrangement needed tweaking to create a more conversation oriented layout. Still, it wasn’t bad, just temporary. Things were looking so much better than when we first moved in!

Living Room | Land of Laurel

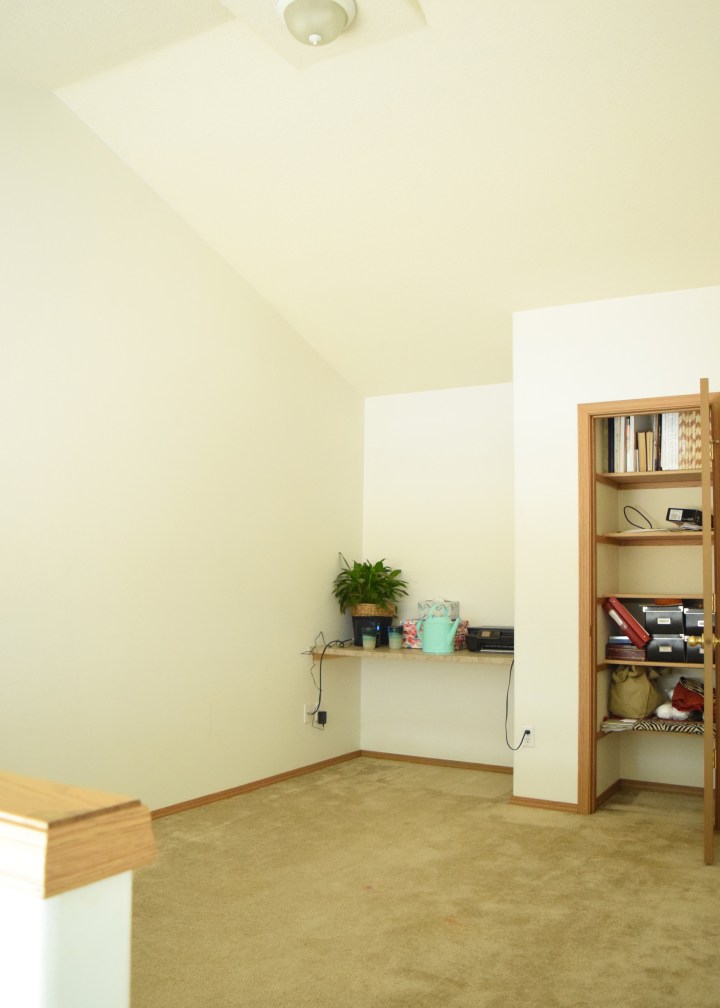
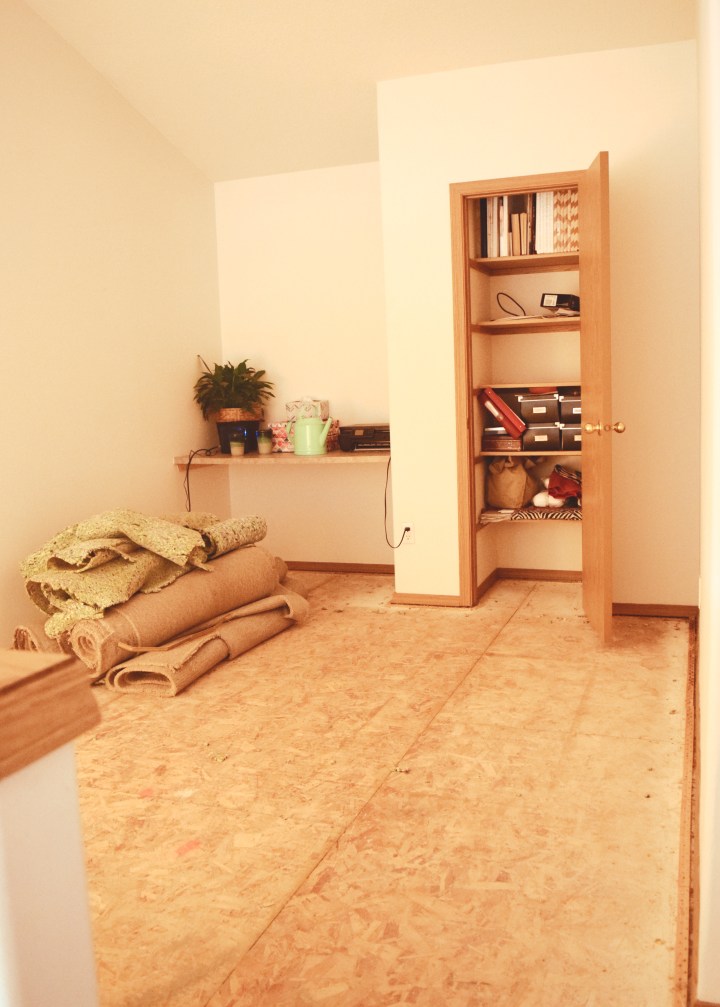
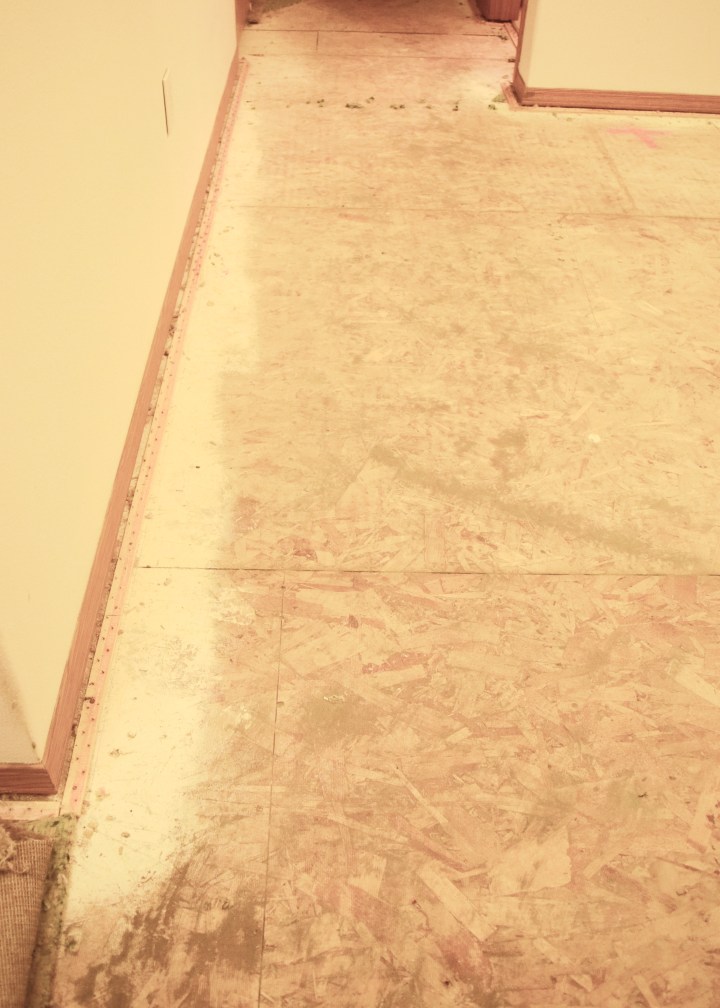
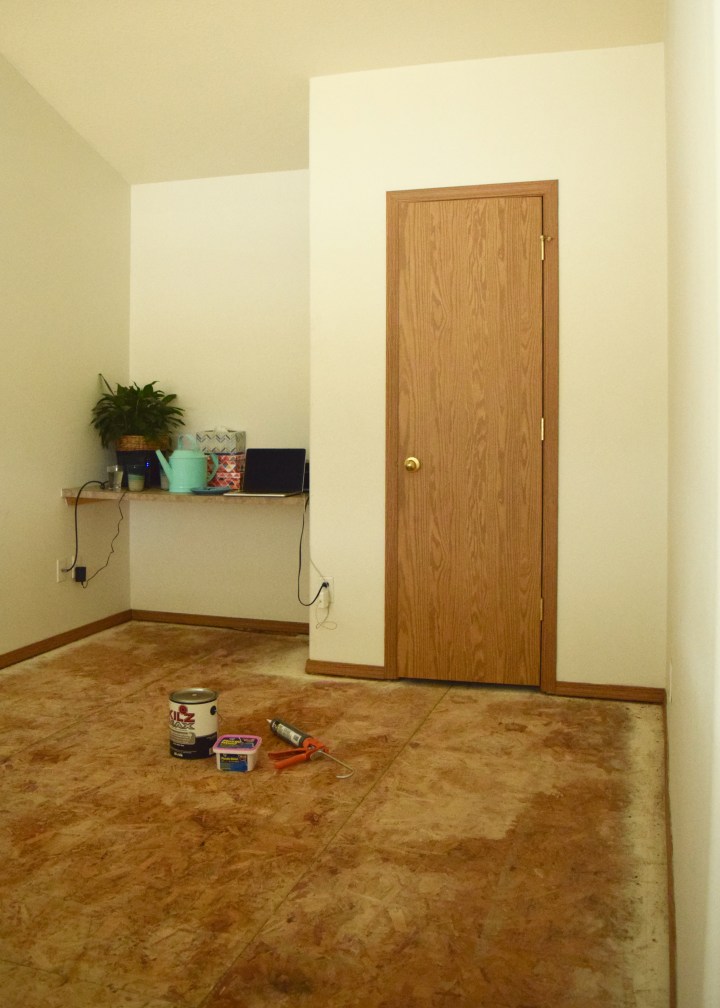
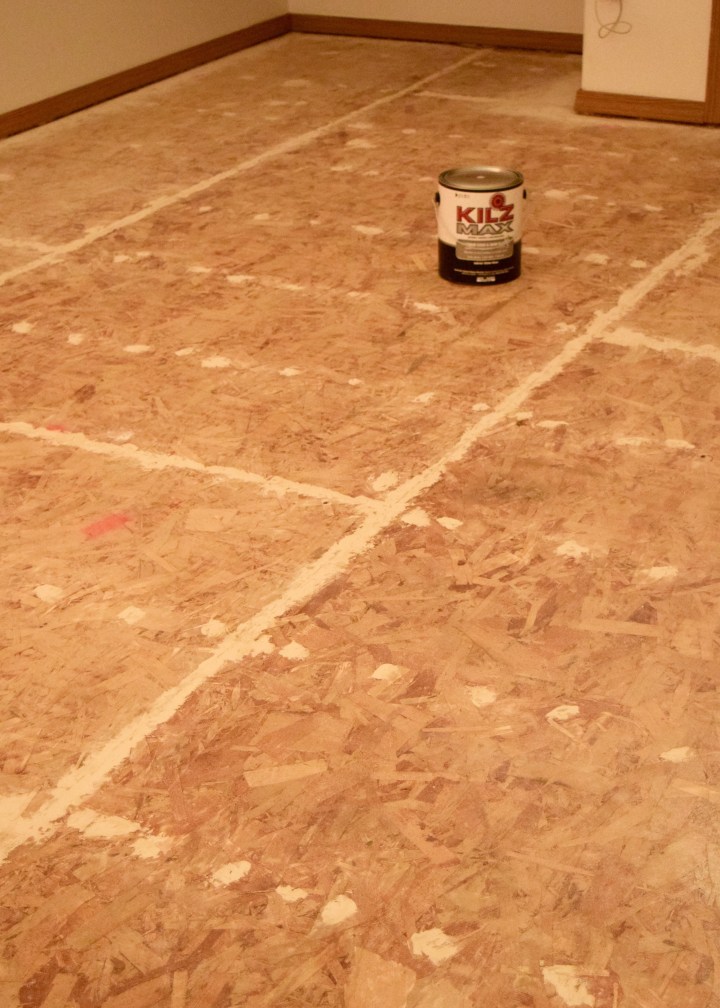
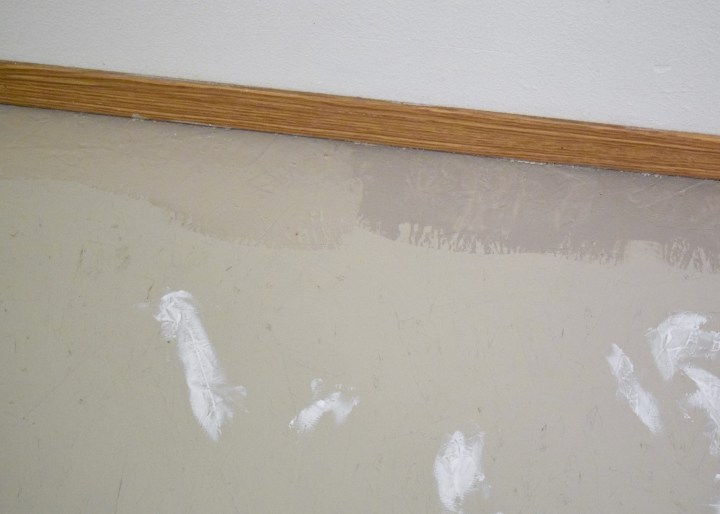
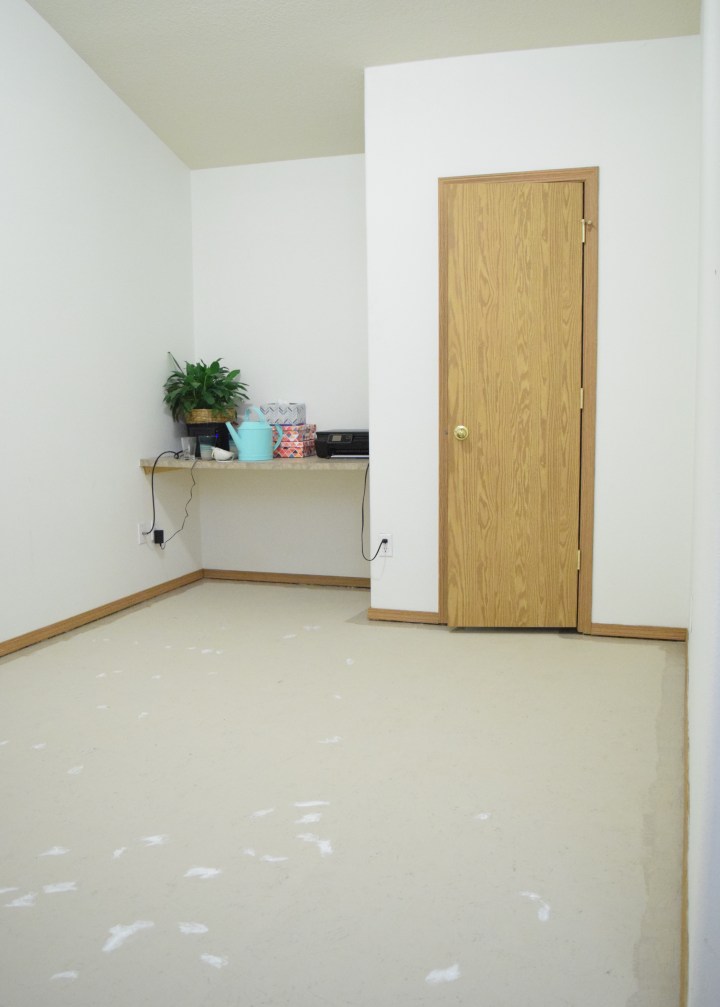
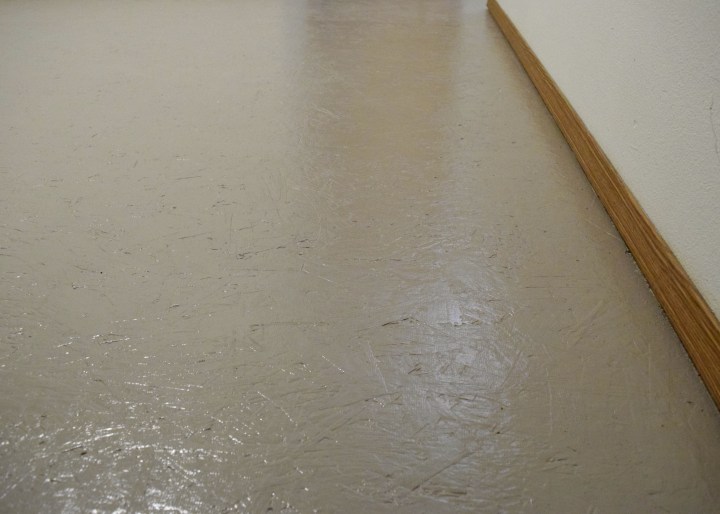
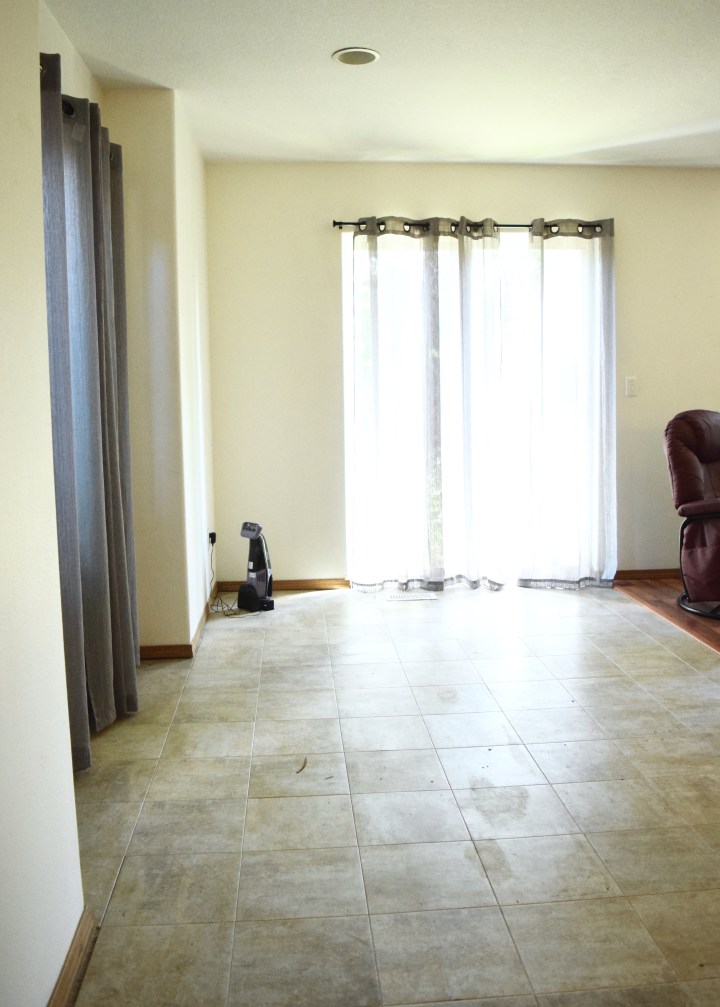
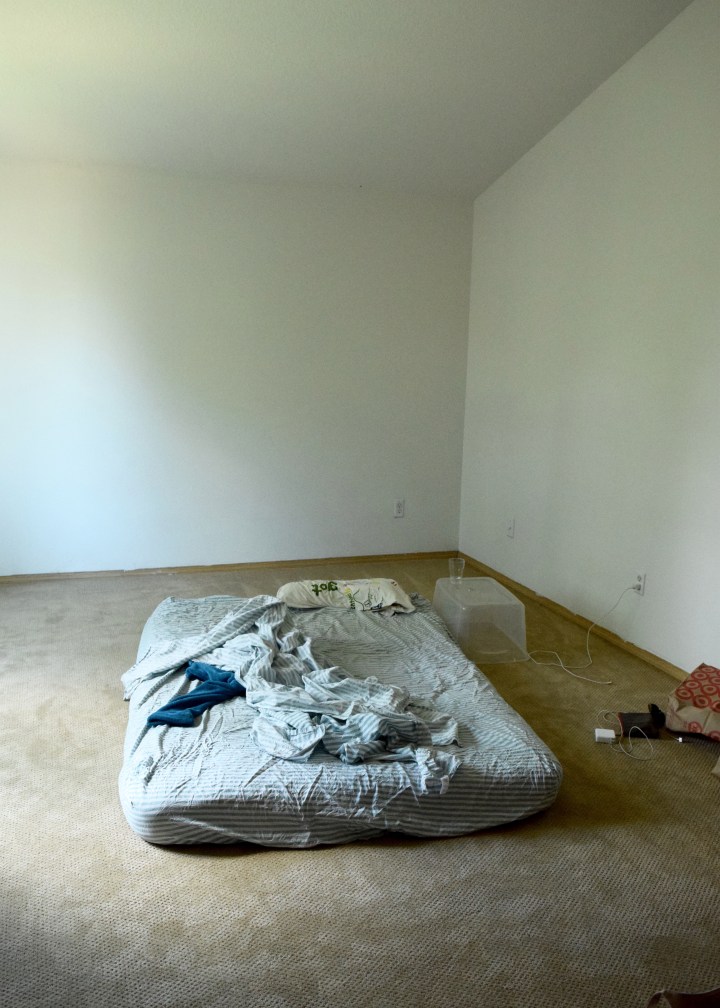
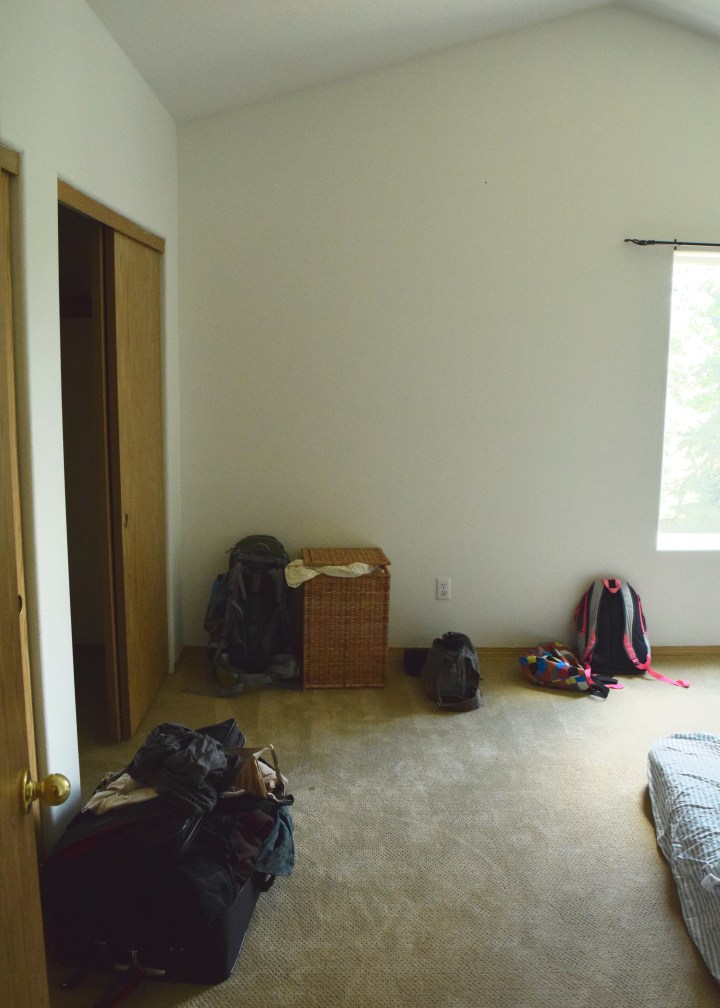
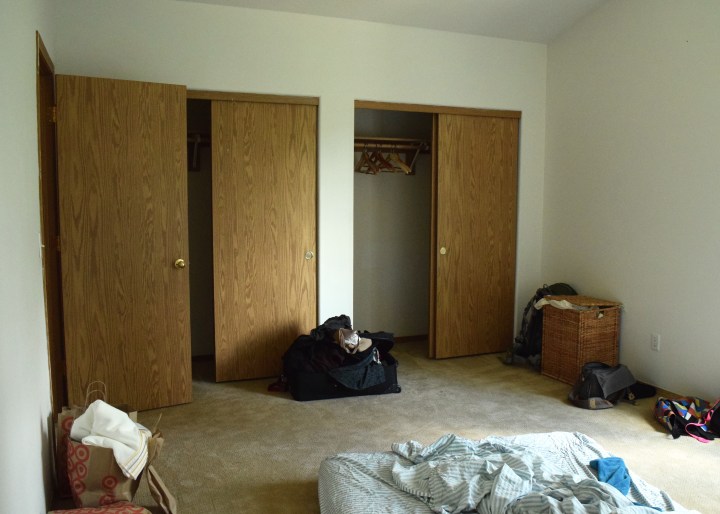
Well things have continued to move around and now this space actually feels like a comfortable place to hang out! The biggest change, however, came from another room in the house! Remember the rug I bought right after ripping out the carpet and painting the subfloor in the bonus room? It’s a great Moroccan Inspired white and charcoal 8’x10′ rug that’s oh so soft and cozy! We loved it in here, but it was a tad large for the space (which I knew when I bought it) and it seemed sad to waste such a lovely rug on a space we hardly used.

Furniture in the Bonus Room | Land of Laurel

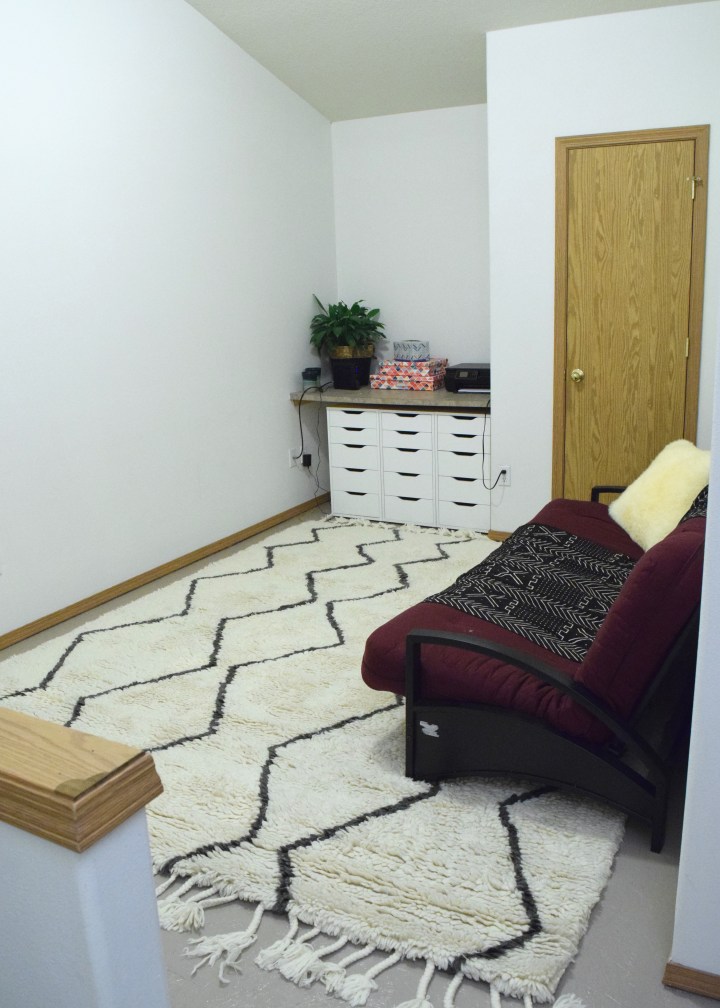
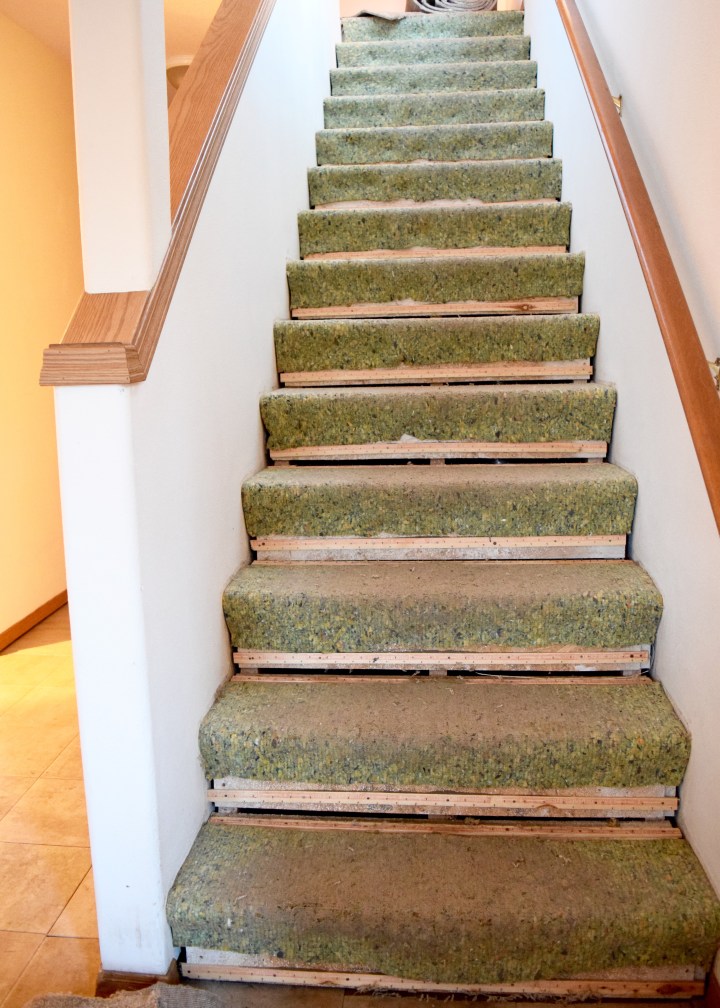
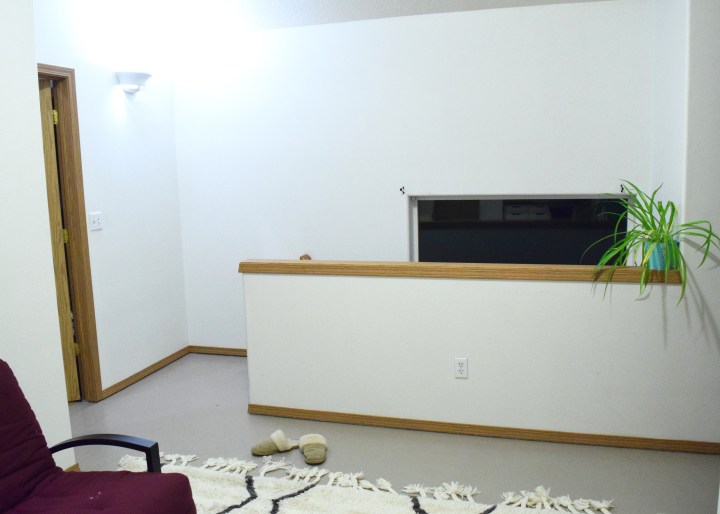
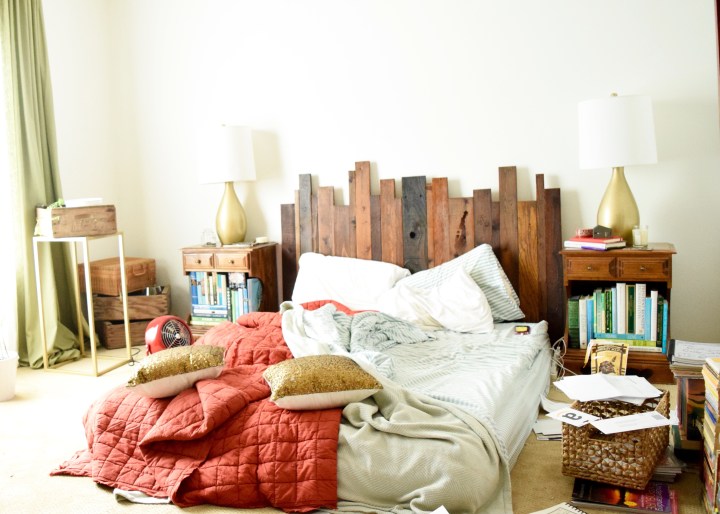
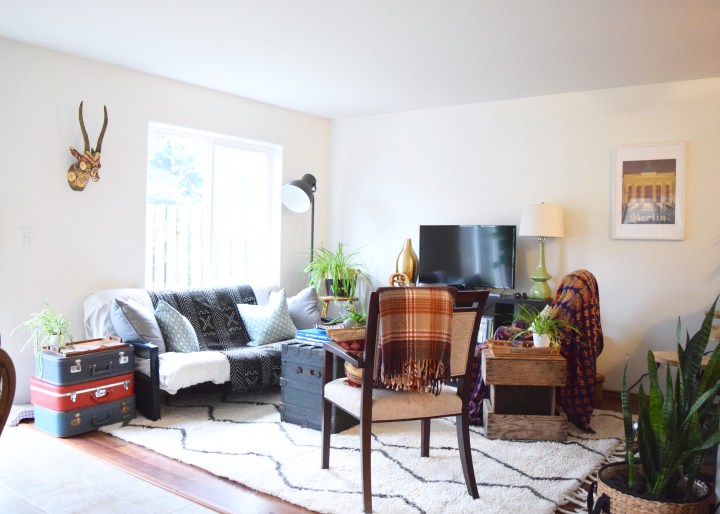
It lived up there for about a week and a half until I decided we needed to really rearrange. The next Saturday I rolled up the rug and dragged it downstairs (literally). That day I also finally decided I wasn’t going to buy a sofa for the Duplex. This place is a transitionary home and I’d rather buy a sofa for the Portland home I decide to live in more permanently when my lease here is up in June. Since I am not going to buy a sofa, it made sense for my roommate’s futon to take on that roll downstairs. So that needed to change locations as well! Down the stairs it went (I moved this by myself and nearly died when it decided to try to take me with it when I was sliding it down the staircase). I continued moving furniture around. The bench that served as primary seating before? Poof! Up into the bonus room it went. I tried the rug a couple of ways before sliding it into it’s final position and plopping the furniture back down. I also grabbed a canvas drop cloth I had in the garage and draped it over the purple futon to brighten it up. The black mud cloth stayed and popped more against it’s new white backdrop! The rest of the furniture in the room stayed and just got moved around a little bit. The entire space feels so much brighter and cleaner now! Don’t get me wrong, there’s still plenty to do, but this finally feels like a good space!

Living Room | Land of Laurel

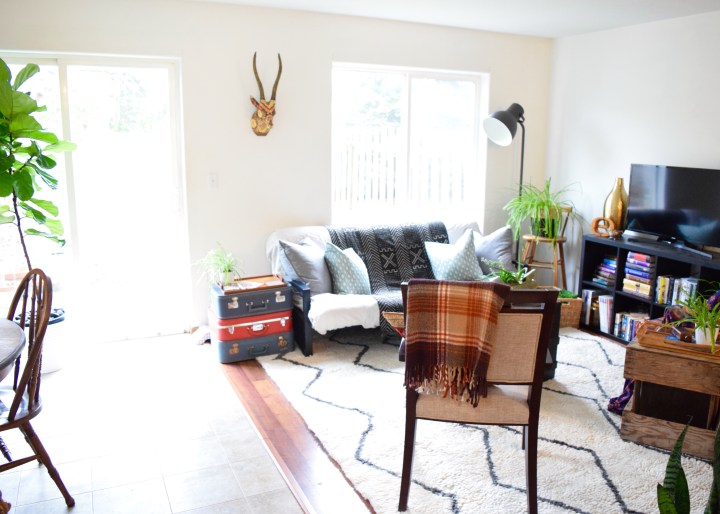
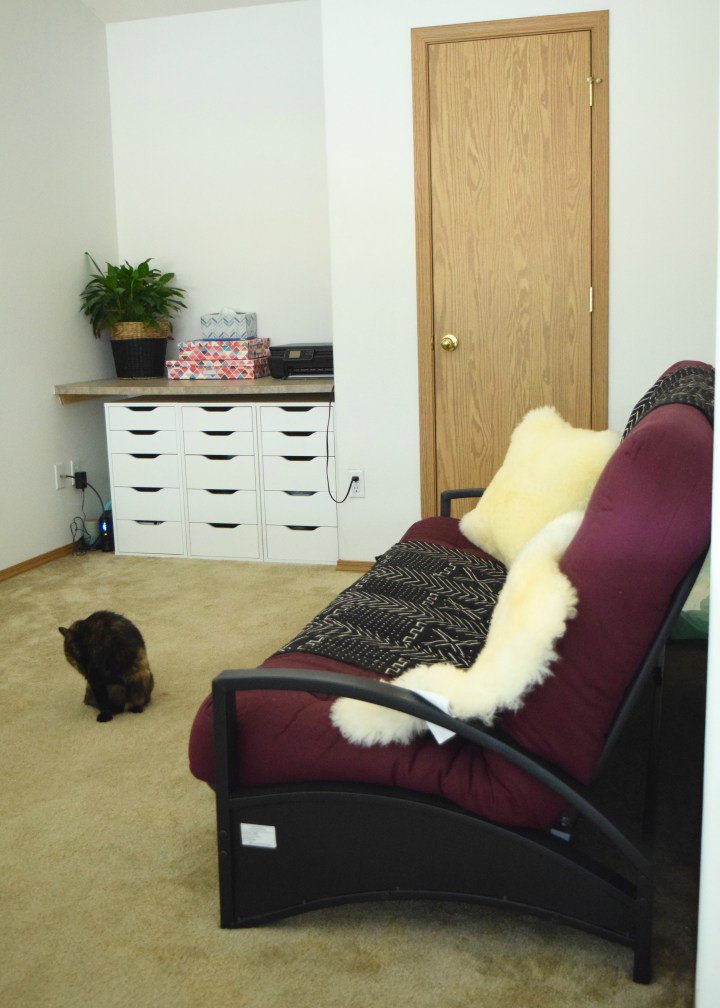
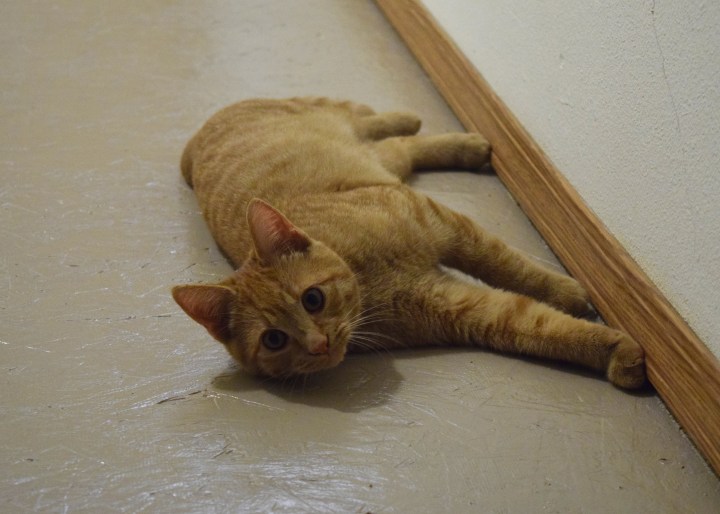
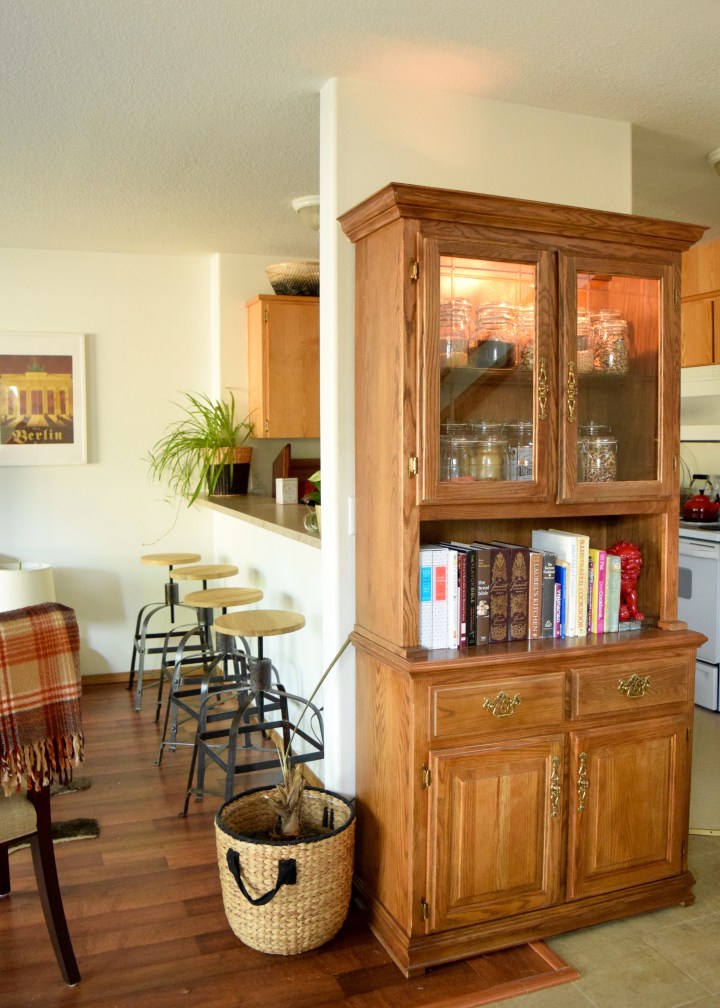
Moving the rug and the futon downstairs was a huge change for the better! The room feels so much cozier and put together and a million other things. The only thing I really want to switch out now is the TV console, which I’d love to replace with an old dresser. Other than that, everything is here to stay! Luckily, even though I bought the rug for upstairs, it fits perfectly down in here! I laid it about 10″ from the window wall (to clear space for the heater vent that’s behind the sofa) and it ends with just enough room for the stools to slide out when you’re sitting at the counter. Jackson has taken over the old cherry-crate-turned-cat-bed I made Malary back in Berkeley. I placed it over in this corner to help fill in the space by the snake plant and pantry cabinet and it has become his new favorite place to sleep.

dsc_0464

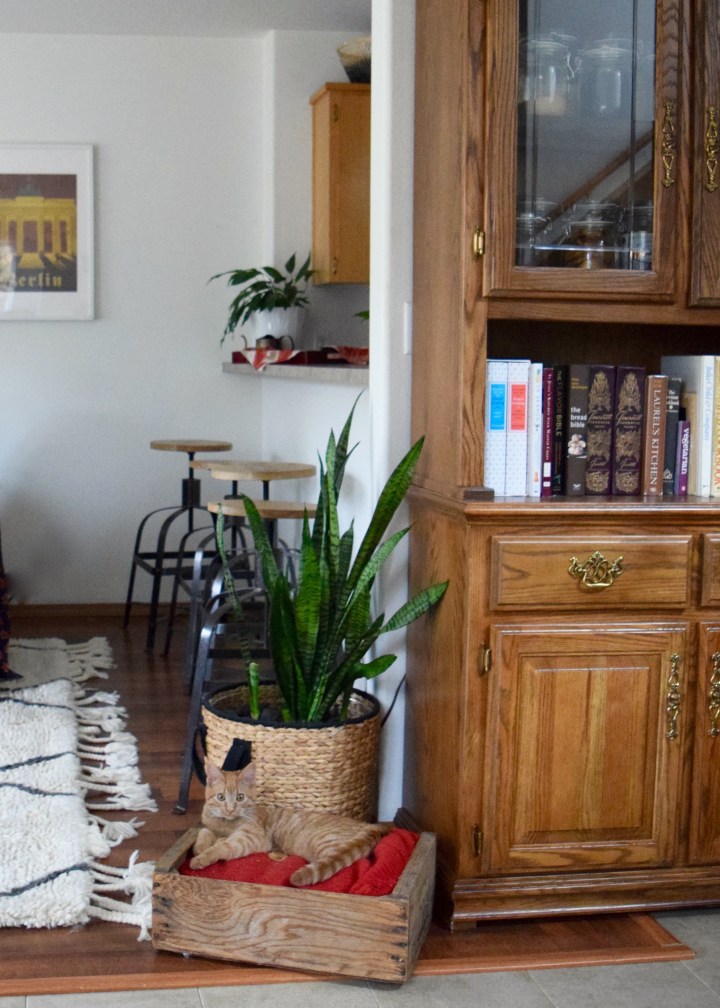
I promise he’s not as crosseyed as this photo makes him look. He’s quickly become part of our home and absolutely dotes on Malary – following her around constantly – which annoys her to no end!

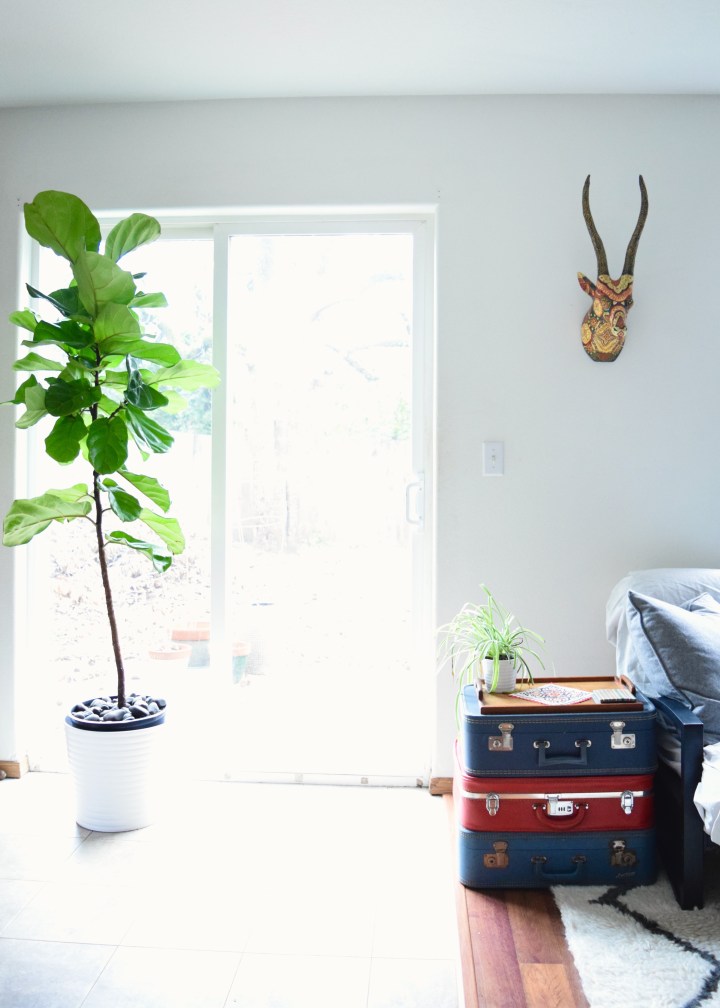
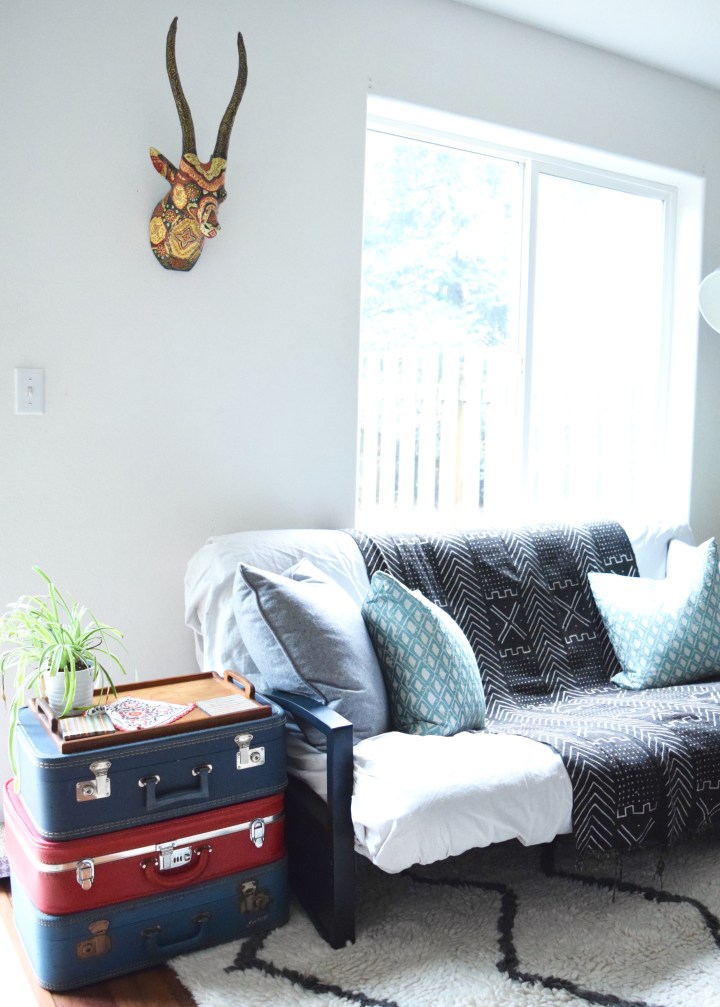
Most everything in the room is repurposed from before, but I did buy a few things in the last few weeks. The fiddle leaf fig tree came home after my last Home Depot trip. It’s hanging out in front of the fixed panel on the slider door for now and I’m hoping to give it a nice long life. We only have eastern and northern light in this house, which I’m hoping is enough for it to thrive. I’ve decided it’s large enough to deserve a name, so I’m calling her Finley. This spot is bright in the morning through early afternoon, but doesn’t get any of the hot evening sun. In fact after 2pm or so this room is a little dim. Anyone else have a fiddle leaf fig? Let me know your tricks for keeping it alive! I’ve wanted one for ages and when I stumbled upon this nice tall one, I jumped on her! The deer head is also new – an impulse buy from Cost Plus World Market. I kind of love it! It’s green and red and gold; my favorite colors!

Living Room | Land of Laurel

This room feels so much nicer these days and we’re using it so much more. Before it was definitely a transitionary space both in look and use. We mostly passed through here on the way to our bedrooms. We’d rarely hang out down here since there was no where cozy to lounge. Now with the futon and the comfy rug, it’s just as likely you’ll find us laying on one as the other! I swear this rug is so fluffy underfoot you just want to stick your face on it!

Living Room | Land of Laurel

It’s a far cry from where we started right?

The Duplex Moving In Tour | Land of Laurel

The space is transformed and now it’s perfect for board game nights and curling up with popcorn to watch a movie. It’s cozy for winter and winters last a long time in Portland! Plus I just can’t get enough of that deer head.

Living Room | Land of Laurel

Have you switched up a room with the simple addition of a new rug lately? It’s such a quick change and yet it can make the whole space feel completely different! I’ve been designing lots of custom rugs lately and they’ve been on my mind! I want to get around to writing a “what to look for in a rug” post soon. For now, you’ll find me curled up with a blanket and two sleepy cats on the futon (as I am right now). 🙂


The Long Weekend

The Long Weekend

Before we moved in, I walked the Duplex with my landlord and she pointed out several issues. One of those issues was the poorly laid LVT tiles downstairs, the other was the gross, old, stained carpet in the bonus room. She mentioned during this tour that she was considering replacing it with laminate. I heartily agreed. In my opinion, hard surface flooring is the way to go in rentals. Carpet simply doesn’t last and gets gross quickly. For anyone who has allergies to dust or dander, carpet traps dirt and dust and even the strongest of vacuums can’t get it out. It’s affordable in the short term, but over time, the cost of ripping up and replacing carpet adds up quickly.

Fast forward two and a half months. I reached out to our landlord via email and asked about her timeline for replacing the flooring on the stairs and in the bonus room. The carpet was nasty and a little smelly. I’d gone to Home Depot and gotten a quote on the installation and labor for a laminate floor. Home Depot estimated $250 in costs to remove the existing carpet and $850 in labor and materials to replace everything with an inexpensive laminate. The bulk of that cost was in the expensive laminate stair treads.

Unfortunately, life happens, and due to some unforeseeable personal matters, replacing the flooring was no longer in her plan or budget. So I suggested something else. What if I ripped out all the carpeting and painted the subfloor? A quick look around the internet told me I could do this for under $250. I proposed this solution as a way to make me happy in the short run, and allow her to spend on new flooring when she was ready. With her approval (yay! Happy dance!) I planned my attack. It was less than 200 SF so I figured I could knock everything out in a weekend. Little did I know how back breaking that would be.

My weekend commenced and proceeded to look a little something like this:

Friday

5:50pm – arrive home from work

6:00pm – quickly eat left overs from fridge, change clothes

Bonus Room | Land of Laurel

6:15pm – move all the furniture out of the bonus room

Empty Bonus Room | Land of Laurel

6:30pm – begin ripping up all the carpet

7:30pm – finish ripping all the carpet out

Carpet Gone! | Land of Laurel

7:45pm – finish ripping all the carpet pad out, try not to gag looking at the amount of dirt that’s been hidden under the carpet for going on 20 years (see brown smears in picture, much more obvious in person!)

Dust Under Carpet | Land of Laurel

8:00pm – finish carting all the carpet and pad into the car (laying it on top of a tarp to protect the van)

Stairs Carpet Pad | Land of Laurel

9:30pm – finish pulling up all the tack strips, add these to the pile of stuff in the car

9:45pm – sweep floors

10:00pm – vacuum flooring

10:15pm – begin pulling the 253 billion staples out of the stair treads/risers with a pair of needle nosed pliers

10:30pm – my roommate comes home and helps pull out staples from the bonus room

11:30pm – roommate goes to bed

1:00am – finish removing all the staples I can find (approximately 589 trillion)

1:30am – fall into bed, showered, but sore

Saturday

8:00am – alarm goes off

8:45am – finish breakfast and dress in project clothes

9:00am – sweep floors

9:15am – vacuum floors, assess supplies, realize I don’t own a spackling knife, hope the tinted primer works well with the paint selection

Supplies | Land of Laurel

9:30am – wipe down floors with wet cloth, remove the 33 million more staples I find while doing this

Ready for Paint | Land of Laurel

10:00am – run to Home Depot for spackling knife

10:30am begin filling screw holes, saw cuts, and spaces between particle board panels, day dream about how much easier than paint prep, painting will be

Wood Filler | Land of Laurel

1:00pm – eat quick lunch of something you just pop into the oven from Trader Joes

2:00pm – hop into car

2:30pm – buy Benjamin Moore Natura Semi-Gloss paint in Waynesboro Taupe at Powell’s Paint. Color selected quickly as the swatch  isn’t yellow-brown, but doesn’t clash with the trim and is light enough to help reflect light around this dark windowless room

3:00pm – arrive at Environmentally Conscious Recycling and weigh van

3:30pm – finish unloading car at ECR, weigh car again, pay minimum $25 fee

3:45pm – stop by Home Depot again for more wood filler and wood transition strips

4:00pm – fill remaining holes and cut marks

5:00pm – hop into shower

6:00pm – wash ibuprofen down with wine (not recommended) at Nikki’s, eat authentic homemade Japanese curry, try not to fall asleep on her sofa

10:00pm – fall into bed, more sore than before

Sunday

7:30am – alarm goes off, groan in pain, take more ibuprofen

8:00am – finish breakfast and get dressed in work clothes

8:15am – beginning cutting in Kilz Max Stain and Odor Blocker water based primer (highly recommend! Not too smelly – though I wore a mask – and had excellent coverage)

11:30am – finish cutting in primer, begin rolling primer

12:30pm – finish rolling in primer, eat lunch, take break while primer dries, realize I’ve missed tons of screw holes/cuts that will need to be filled

2:00pm – start second coat of primer in certain areas (like those that now have exposed wood filler)

3:00pm – wash brush and roller, eat snack, take break

6:30pm – install wood transition strips at entries to bedrooms and bathroom

7:00pm – start cutting in paint, realize wet paint is nearly the exact same color as dry primer and it is basically impossible to tell where you’ve painted or just primed, discover the paint (luckily) dries much darker. Primer is the main field color below with cut in dry paint on the right and cut in wet paint on the left!

Primer vs Paint | Land of Laurel

10:00pm – finish cutting in paint, start rolling

Cut in Paint | Land of Laurel

11:00pm – finish rolling, eat dinner,  shower


Painted Particle Board Subfloor | Land of Laurel

11:30pm – fall into bed more tired than ever, dreading work the next morning.

Whew! I’m exhausted just remembering all this! Yup, that was my weekend. My exhausting, back breaking, someone please feed me, weekend. And I am 100% glad I did it and 100% not willing to do it again any time soon. Especially since the next weekend I went back in, touched up a few spots I missed with paint (got to love Benjamin Moore paints that only required 1 coat!), and then sealed the floors with Safecoat Acrylic. I let that dry for another week before bringing the furniture back in.

We still have the futon in here for guests and all of the electronics on the built-in counter I want to drill a few holes and add some grommets to tame that mess. I did buy a nice big West Elm rug which I’m hoping will cozy up the space!

Furniture in the Bonus Room | Land of Laurel

You can see here how the window in the stairwell sits low, below the half-wall railing in the bonus room, preventing much light from illuminating this room. Even in the middle of the afternoon, this room is pretty dim. A light colored paint on the floor was a must for brightening up the space!

Bonus Room | Land of Laurel

Our yellow brown trim will always stand out pretty starkly, but that’s the nature of it. If the room was brighter, I would have painted the floors a nice deep black. The trim would still have popped against the black, but the room would have been dark dark dark! In person the color is the perfect blah tone that fades away on the floor, letting everything else speak for itself. I don’t mean that in a bad way at all! It’s a nice safe background. This picture below shows it very close to how it looks in person.

Painted Particle Board Subfloor | Land of Laurel

And this post wouldn’t be complete without a kitten photobombing, so here we go, model pose!

dsc_0405

How much did it all cost?

Supplies and a Gallon of Primer cost about $60

Benjamin Moore Natura Paint Gallon also $60

Recycling Fee for the carpet $25

Safecoat Acrylic Sealer $95

Which left me spending about $240 which my landlord happily reimbursed me for. Although the labor was quite demanding, I’m pleased with the result and couldn’t be happier for the change! It’s mush nicer walking on the painted and sealed subfloor. I don’t miss that gross carpet one bit!

Have you ever painted subfloor? How has it held up for you over time? Although painting didn’t take long, I was a bit shocked at the number of staples that needed to be pulled up. My hand had the imprint of the pliers for a week afterwards!


Hanging in there!

Hanging in there!

Woah. Did you guys watch the Walking Dead last Sunday? Because, I need to talk to somebody about that punch-you-in-the-face, heart- wrenching, knock-you-dead season premiere! So violent. So psychotic. So depressing. Wowza! Let me know your thoughts. I need to talk about it with somebody or I’ll go crazy.

In other news, I am no longer living with all my pots and pans sitting on the counter! Nice segue, right? Remember when I filled up my china hutch-turned-pantry and started pulling this kitchen together? I shared this shot:

China Cabinet Pantry | Land of Laurel

Well, take a look at this and see if you can spot the difference:

China Hutch Pantry and Pegboard | Land of Laurel

No the dead plant is still the same dead plant (really need to get my s*** together and share a shot of the lovely new snake plant which now lives in that pot!). And no the random lamp on the floor isn’t anything new (you should remember that lamp from long ago). It’s the pegboard over in the kitchen! That’s right! Vertical storage wins again!

Now rather than moving 15 million pots and pans around every time I need to use the counter space, I can actually use the counter space! It’s the little things, people! The back wall of our kitchen was so under utilized before. A big blank wall with nothing but some mismatched trash/recycling receptacles was not an ideal situation in a kitchen lacking storage.

Kitchen Before | Land of Laurel

There just is no reason for this wall to have so little purpose. And no reason for all those pots to sit on the counter. Now? Much better.

Kitchen Pegboard | Land of Laurel

Matching trash and recycling containers from IKEA (I spray painted the recycling bin green) plus a pegboard adds up to a much nicer view. Most of the pots and pans are my roommate’s, but the center column holds my cast iron pans and the one pot I’ve had since college. My Staub dutch oven and pie pans live in the china hutch. Having all the pots and pans within such easy reach is absolutely wonderful. I just reach over any time I need any thing, I much prefer it to digging through the lower cabinets. Putting together the pegboard was super easy. Anyone can do it as long as you have the right tools.

I picked up the actual pegboard at Home Depot and had them cut down the 4’x8′ size to the dimension I wanted: 3′ x 6′. They offer this service free, so take them up on it if you don’t have the correct cutting tools. While I was there I grabbed a couple of 8′ long 1x2s to pop the board off the wall (allowing the hangers to slip in) and some 1x3s to trim the board out.

At home, two quick cuts later and I had the boards ready for the back of pegboard. Excuse the dark garage photos. There are worse pictures yet to come. Cutting the 8 foot boards down to just under 6′ allowed me to have boards along the lengths of the pegboard and the top and bottom. They didn’t need to be perfect since they were purely for function and wouldn’t be visible. I screwed them in from the back so they were completely invisible (like ninjas) from the front.

Pegboard | Land of Laurel

The trim pieces were almost as simple: set saw to 45 degree angle and cut.  But of course I started right off with a mistake. Luckily I was able to reuse the board for the top and bottom trim pieces and didn’t waste much.

Cutting Error | Land of Laurel

Once I turned my brain on, I quickly made the rest of the cuts. Each length was an inch longer than my pegboard so the trim would stick out from it on all sides. I then screwed all of these boards into the pegboard and things started taking shape. It looked so good, Malary decided to pose with the pegboard. It’s so nice to have such a supportive pet.

Pegboard | Land of Laurel

Since edges never match up entirely perfectly, I filled the mitered corners with wood filler and gave the same treatment to the more prominent knots.

Pegboard | Land of Laurel

Then I did some minor sanding (I get super lazy about sanding, but it’s a requirement so I tried to tough it out). After that, I filled the gaps where the trim meets the pegboard with some paintable caulk wiping up the excess with a wet finger. I like this little container because it stays good for a long time, rather than drying out immediately like the caulk guns.

Caulk | Land of Laurel

Once everything was caulked the board was functional, it just needed a coat of paint to spruce things up!

Pegboard | Land of Laurel

Two coats of primer later, it was ready for some paint.

Pegboard | Land of Laurel

I chose Benjamin Moore’s Palladian Blue (HC-144) in their Natura line (zero-VOC) for the board. It’s a really light aqua tone that is subtle, but still stands out from white. It has quite a bit of grey in in and the swatch seems to be almost white, but once it’s up on the wall, BOOM! COLOR! Plus, I love Julia Child and she had teal-blue pegboards all over her kitchen, so I’m in good company! After two coats of paint, I did three coats of Safecoat Acrylic sealer in high-gloss. I wanted the board to be extra protected from water and oils. Once that was all done, it was time to bring it inside.

Pegboard | Land of Laurel

I hung the board on the wall with a few heavy duty D-rings hooked on hangers screwed into wall studs and it is fairly sturdy. I picked up this pegboard hardware kit at Home Depot too, which was way more than enough to hang the pots and pans. I have enough left over I might take the pegboard scraps and make another for the garage!

Pegboard | Land of Laurel

Covered in pots, it really does make things look happy, colorful, and organized. I’m ready to sauté those carrots at a moments notice now.

Pegboard | Land of Laurel

Having our counters back and free for their original purpose (prep space) is delightful. Not looking at a pile of pots and pans every time I walk into the kitchen is pretty great too! The trash and recycling containers are just the right size for us too. I love the matching size and though not everyone would like the different colored recycling, it’s nice to easily be able to identify it as “the green one” when people come over.

Pegboard | Land of Laurel

Plus I get to lovingly stare at my cast iron pans now. Definite bonus.

Pegboard | Land of Laurel

I love those pans… though I wouldn’t mind upgrading them to Lodge pans down the line. I’ve got these guys seasoned just perfectly now with just over a year of use. Cast iron is my favorite!

So if you have a blank wall – put it to use! Don’t fuss around with birds, put a pegboard on it! (I’m so Portland now).

Have you guys ever come up with creative storage solutions in your rental kitchens? I’d love some good ideas!


3 Months In and What’s Next

3 Months In and What’s Next

So we’ve been here in the Portland Duplex for a little while now and I wanted to show you all an update on how things stand. We’re starting to make progress in a few areas and anything is better than the chaos when we first moved in! Also this is a nice place to list the twenty million ideas I have, Young Houser Love’s “Listy McListerson” style! Since I know this house is not long term – I have no plans on being her longer than my year lease – there are many things I am very cautious about putting money toward. Basically, anything I can take with me? Sure, spend the green, anything more permanent? Not happening this year. Hopefully, my next home will be a much more permanent living situation! There are tons of updates anyone can accomplish in a rental though, so that’s what I’d set out to do!

– THE ENTRY –

Before/Current

A whole lot of nothing going on in here! I really haven’t started.

To Do:

  • Get seating for putting on/taking off shoes
  • console or buffet for mail/purses
  • Hang art and accessorize
  • Paint back wall to hide electrical box better?
  • Organize closet
  • Shoe storage!

– The Long Hallway –

Before/Current

The Long Hallway | Land of Laurel

Also untouched!

To Do:

  • Hang Art
  • Add runner?

– The Powder Room –

Before/Current:

Untouched as well since this room is currently playing host to the house’s newest member! Six month old kitten Jackson is using this room as his safehouse until his stitches heal from his neutering and he and Malary learn to settle their differences.

To Do:

  • Buy bath mat/rug
  • Replace toilet seat
  • Hang art
  • Add plants
  • Find nice hand towel
  • Remove curtains and hardware

Soon there will be two cats photobombing all my pictures! Check out his little face in the meantime!

Jackson | Land of Laurel

– The Kitchen –

Before:

dsc_0033

Current:

Kitchen | Land of Laurel

China Cabinet Pantry | Land of Laurel

Not a ton has changed in here. Those floors are impossible to keep clean so I’m looking into a runner which will hide some of the dirt I hope. We’ve still got all our pots and pans on the counter! Luckily the lovely china cabinet is helping store a lot of my things and frees up cabinet space! The stools were up for grabs when my new office moved from east to west Portland and I nabbed five for $20 beans each.

To Do:

  • Buy rug/runner
  • Make use of back wall with vertical storage (I’ve been working on this guy and can’t wait to share)
  • Get stools for bar area
  • Re plant something in that pot

– The Dining Room –

Before:

dsc_0030

Current:

Dining Room | Land of Laurel

Things are looking a lot more lively in here now that I’ve added my furniture! The table is from my grandmother’s home, but it actually belonged to one of her tenants so there isn’t any sentimental value. The bookshelf was a surprise hand-me-down from my parents.

To Do:

  • Remove curtains and hardware
  • Paint/stain/refinish table (the top isn’t sealed properly, and I’d love to update it, this looks like a fun option, but they also look really elegant stained if styled correctly)
  • Paint bookshelf black to coordinate with china hutch

– The Living Room –

Before:

The Duplex Moving In Tour | Land of Laurel

Current:

Living Room | Land of Laurel

Living Room | Land of Laurel

Things have kind of landed in here for now. I’m using my old trunk which used to live at the bottom of my bed as a coffee table in the living room at the moment. We don’t have a couch yet and when we do get one I’m not sure the scale of the trunk will work with it. We’re using the bench I got as a hand-me-down from my parents and these two chairs as seating in here for now and it’s working pretty well. The larger chair is my roommates over which I draped a large wall hanging I got at the Berlin flea market. The wood arm’ed one is something I got from work in Oakland about 8 months back. The vintage suitcases were my Oma’s, I’ve stacked them and stuck a tray on top which is working really well as a cute side table! The other side table is some of my cherry crates stacked together with another tray. Fred is living on the coffee table at this house right now. The floor lamp is a recent IKEA purchase (my roommate’s). The faux cowhide is free from work.

To Do:

  • Buy sofa
  • Buy rug to layer beneath the faux-cow hide
  • build larger coffee table?
  • rewire green lamps for use on side tables
  • rearrange entire area to work with the sofa?
  • Hang art

– The Bonus Room –

Before:

The Duplex Moving In Tour | Land of Laurel

Current:

Bonus Room | Land of Laurel

This room has also pretty much just gotten a few pieces of furniture plopped down. The rug in here is awful truly awful. It might be original to the house. It’s covered in stains (some of them marker red) and sometimes smells a little bit! Our landlord said she wants to replace it with laminate flooring, but it hasn’t happened yet. The white drawer units were another item I picked up when my office moved. They were free and I napped 8 (they still sell them at IKEA for $79 each if you’re interested). I’ve got a couple in the garage, a couple in my bedroom closet, and these three in here are holding crafts supplies! It’s so nice to have them all sorted nicely. I’d love to bring a desk up here and make it a real craft room! The futon is also my roommates, I threw a couple of IKEA sheepskin pillows on top as well as a mudcloth I got at the Alameda Flea Market in the Bay Area before I moved.

To Do:

  • New flooring!
  • Build shelves for over the weird counter
  • Buy a nice plush rug
  • Hang art
  • Add desk

– My Bedroom –

Before:

dsc_0014

Progress:

Bedroom | Land of Laurel

Current:

Bedroom | Land of Laurel

Nothing great in here! My bed broke during the move so even though I’m on my own mattress and not the futon mattress, it’s still a mattress on the floor! Pieces from my old place all came with me, everything in here is still chaos! It took me way to long to go from the progress shot to the current shot too.

To Do:

  • Remove curtains and hardware
  • Hang new curtains (I’ll share this soon!)
  • Build bed
  • Style room
  • Rearrange furniture
  • Organize closets
  • Layer a rug on top?

– The Bathroom –

Before/Current: Bathroom | Land of Laurel

Nothing really done it here.

To Do:

  • Style counter
  • Add bathmats or runner
  • Get Malary to use downstairs litter box


So there it is guys! Plans for the entire house. Very feasible plans and totally rental-friendly! I’m diving in, can’t wait for you to all follow along.

New Digs in Portland

New Digs in Portland

Get ready to dive in! I am really excited to jump into my new house in Portland. There are lots of budget and rental friendly upgrades to be made here. The layout of the space is great and allows lots of flexibility. You probably saw the beginnings last week in the video house tour I shared. Here are the first pictures of the space right when we moved in. I’m talking the day after the first night we slept here. Prepare for some crazy, for boxes, and cleaning supplies, and general dirtiness. Get pumped for a brain dump of ideas that may or may not manifest! Deep breath. Ready? Let’s go.

When you come into the house through the front door, there is a decent sized entry area. The space opens up into the hall with a small nook immediately to your left. This entry area gets no natural light unless the door is open. The door on the right in the below image is a coat closet. Which makes me feel fancy! Somewhere to hang coats that’s not my bedroom? How novel! You can see someone put a cheap, tape on mirror on the door. I had begun ripping that down before even snapping this pic. One of the weird things about the house is all of the flooring transitions. The entry is sheet vinyl, the hall is luxury vinyl tile and the closet is carpet. The sheet vinyl is original and a previous tenant decided to rip out the carpet that covered the rest of the main space about 5 years ago, replacing it with the LVT. Apparently he decided to leave carpet in the closet. And to leave the carpet sticking out about 1.5 inches from the closet. Picture me rubbing my temples and sighing. That I need to fix. I’d love to get a carpet to help disguise the sheet vinyl in the entry as well and smooth the flooring transition. There’s a boob light in here and I believe that box on the wall is the doorbell.

The Duplex Moving In Tour | Land of Laurel

The little nook is immediately to the left of the door and is recessed back just a couple of feet. The wall on the right is the wall with the entry door. The back wall of the nook unfortunately has an electrical panel on it. I’m considering a few ways to hide it. I have a large 36″wide mirror I’ll be hanging here which will cover half of the panel. Maybe I’ll paint the wall a deep shade of green or even black so the panel recedes into the darkness hiding it from view. Right now, I’d just love to have some sort of console table to stick the mail on and an ottoman to sit on when I put on my shoes. We don’t wear shoes throughout the rest of the house and I have no talent for balancing on one foot while slipping the other into a boot. So really the lack of an ottoman is a safety hazard. Multiple times I’ve slipped on shoes, walked the half-block to the bus and tied the shoes on my way into work. I’m just classy like that.

The Duplex Moving In Tour | Land of Laurel

Once you come inside the house you’re greeted by a long skinny hallway with lots and lots of doors. The first door on the left is the coat closet, the second door (the pocket door) on the left is a little half bath, and the third door on the left (the bifold doors) is the laundry. On the right is the entry to the garage which has helped to shape this funny architectural foot print. At the far end you can see the slider door to the backyard.

The Duplex Moving In Tour | Land of Laurel

The half bath is a pretty decent size. There’s a nice big window which provides plenty of natural light (something lacking in this home!). The toilet seat has got to go though. I can only take so much faux wood! The sheet vinyl floor has water damage stains which will hopefully disappear under a small rug. The blinds work great though.

The Duplex Moving In Tour | Land of Laurel

The other side of the powder room has a pretty big built-in vanity. Excuse the mop, again we were cleaning everything! The towel ring is well located and I don’t mind the Hollywood lights above the mirror. The vanity top is green laminate that I can definitely make work. A little art and a rug and this room will be pretty much complete.

The Duplex Moving In Tour | Land of Laurel

Further down the hall we have the laundry nook. Three cheers for on site laundry!! Lugging clothes around is not my favorite. The laundry came with a small shelf which I’ll probably replace with two more sturdy ones; this guy is bowing pretty badly at the center. The washing machine is being supported on one side by a stack of cardboard. I’m going to pretend I never noticed that because I don’t want to address that issue. No thank you! This room is convenient to the kitchen though so it’s become a great place to store cleaning supplies.

The Duplex Moving In Tour | Land of Laurel

The kitchen is pretty 1980’s builder basic. It works just fine. The appliances are newer and work great, a lovely benefit. You’ll notice the flooring switches back to sheet vinyl in here as well as in the laundry and powder rooms. It’s a bit crazy! The kitchen is kind of dark since there are no windows. We pretty much always have the lights on when we’re in here. Which is often true for any kitchen, I suppose, as you need lots of light to cook. There are three of the same white boob light in this room. This light repeats in our bedrooms, the bonus room, the hallways, etc. The builder clearly liked it (or it’s pricetag!) a lot.

The Duplex Moving In Tour | Land of Laurel

When you reach the end of the long hall from the front door you look over the dining area and straight out the back slider. Usually we don’t display our handheld vacuum like this, but we pretty much owed it a golden throne after all the cleaning it did on the week we moved it! Those curtains are gone now. They made the room seem a lot darker. Because the back of the house faces east and has a few large leafy trees, the house is pretty dark overall. Optimal natural light inside comes between 10 am and noon… right when I’m never home. Whomp, whomp, whomp. Taking down the dark curtains allowed a lot more light to stream in and really lightened up the space. I’m considering replacing the curtains with white ones on brass rods hung higher and wider than these are, but I’m not completely sold on the idea of white curtains on white walls yet. And yes, I think I’m leaving the walls white since painting once now and again when we move out would be so much work! The white isn’t bad, just… white.

The Duplex Moving In Tour | Land of Laurel

The main living space is actually pretty big, but unfortunately the same tenant who installed the LVT floors decided half of the living space should be a faux wood laminate (Are you drinking every time I mention faux wood laminate on this blog yet? You’ll be drunk soon, I promise!). It looks pretty decent, but it chops the space up. Boy, is the laminate easier to clean than that LVT though! Fewer cracks, smoother surface, my vacuum runs right over it. The living area has a big opening to the kitchen which allows us to chat with guests or each other while we cook. The bar height counter extends about 8 inches which would be barely enough to have people sitting there on stools. The window mirrors the slider doors and gives the space some symmetry.

The Duplex Moving In Tour | Land of Laurel

Once you turn towards the right you can see how all the spaces open up to each other. The closer wall at the end of the kitchen is recessed about 2 feet from the other wall, randomly, making the closer half of the kitchen shorter than the half with the refrigerator. The laminate ends just under half way along that wall, but 1.5 feet to the right of it… it’s very strange. We’ve decided to permanently leave all these boxes here to cover up the transition. Kidding! Kidding! Sort of… Anywho, the third type of flooring on this floor is the carpet on the stairs. It’s original I think… and gross. The landlord is talking about replacing it with laminate down the line.

The Duplex Moving In Tour | Land of Laurel

There’s a window in the stairwell. It faces north and is a bit lower than the half-wall that serves as a railing on the second floor. That half-wall (here on the right) thus blocks a lot of the light from streaming into the bonus room. Which is why the next few photos are so heavily edited!

The Duplex Moving In Tour | Land of Laurel

At the top of the stairs is the bonus room! We have a small counter and another closet! I’m dubbing this closet the craft closet. I can’t wait to fill it with all sorts of paints and canvases and sewing things. The room is pretty big, so – as I said in the video – we plan on putting a futon bed and a desk in here. That huge, flat box is the futon frame. The faux wood laminate wood work capping the half wall is chipped slightly in the corner. Any ideas for hiding that which don’t involve paint?

dsc_0002

If we turn towards the left, we get the little hall to my room. There’s another closet on the left which we’re using for linens and camping supplies; to the right is the door to the main bathroom. You can see old shower curtain rod in the foreground, which I removed pretty darn quickly and replaced with one from Target, whose box you can see in this same picture.

The Duplex Moving In Tour | Land of Laurel

The bathroom was pretty basic when we moved in and I immediately removed the rod and replaced it, hanging up the shower curtain from the Berkeley Bungalow in the process. I’m not positive it will get to stay in here though. The gold of the curtain clashes with the blue and red flecked (purple) laminate counters. I’ve also tucked a kitty box by the toilet.

Finally, there’s my bedroom! My room gets a bit more light than the living area since it’s on the second story. You walk in and there are closets to the left side and an off center window on the wall in front of you. Since you see this view from the bonus room and it’s the first thing you see when you walk in the room, I will have to find a new place for the hamper and make this view something yummy instead.

The Duplex Moving In Tour | Land of Laurel

When we first moved in, I slept on the futon mattress until the majority of my belongings came up from California. This part of the room is pretty blank. The vaulted ceiling makes the space seem much larger. It’s really a good sized space. Oh, and yes, that is an upside down clear storage box I used as a nightstand. And yes the futon is just in the middle of the room.

The Duplex Moving In Tour | Land of Laurel

The wall across from what will be the bed wall has all the closets! Yay for tons of closet space! Maybe the hamper will even fit in there if I reorganize a bit. It’s a lot of closet directly across from the bed though, which is not exactly an ideal view (especially considering I’m bad at closing the doors!). The alternative would be to have the bed face the window, with the headboard against the wall where my phone charger is plugged in above. But as much as that view would be great, I much prefer the symmetry underneath the ceiling vault.

The Duplex Moving In Tour | Land of Laurel

Because my roommate’s room is her private space and I won’t be sharing it on the blog, this concludes the house tour! Welcome to the Duplex! I can’t wait to share where we’re at now and all the little transformations I have planned for the future!