Flower Power

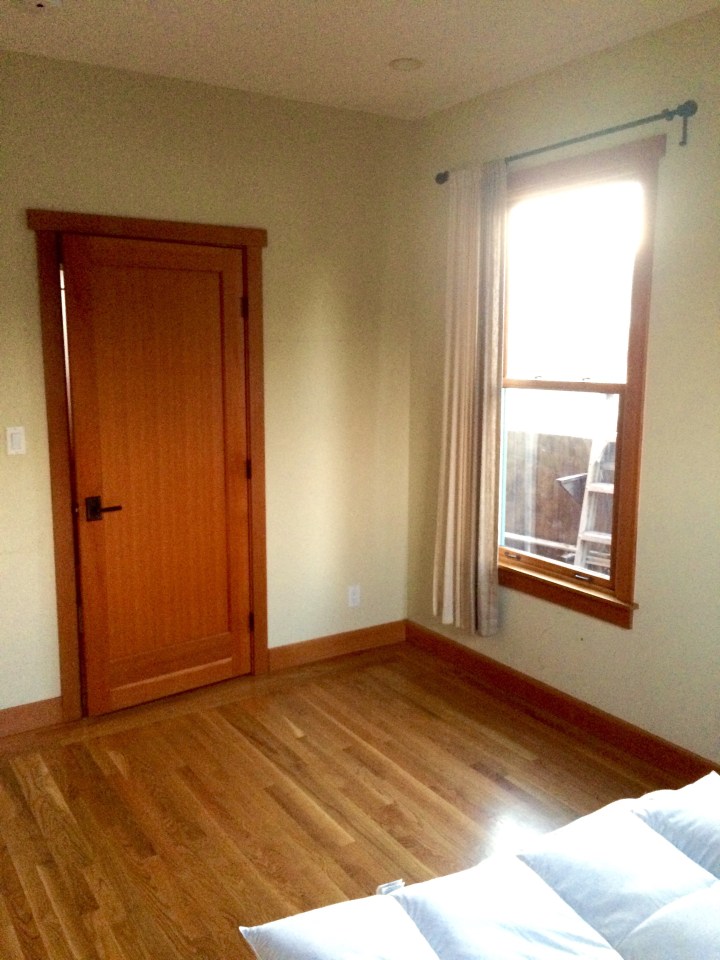
My new bedding arrived and is kicking it on my bed. That’s right. It’s here!! I spent a good, long time looking at this duvet cover on West Elm’s website before biting the bullet. Somethings I can buy on a whim, somethings I need to fully digest before I splurge. Bedding in my room would set the entire context for the space. It would be a huge design element. The design element in my room, actually. Because you walk into my room and stare straight at my bed, the linens covering said bed are the only thing you see. So not only did they need to make an impression, but they needed to strike the right balance between harmonizing with rest of my things and creating excitement. Because my walls are a warm, pale green I wanted to go darker. I feel like most blog pictures have white bedding and white walls and white curtains. That’s just not me. I love color, I love boldness, I love excitement!


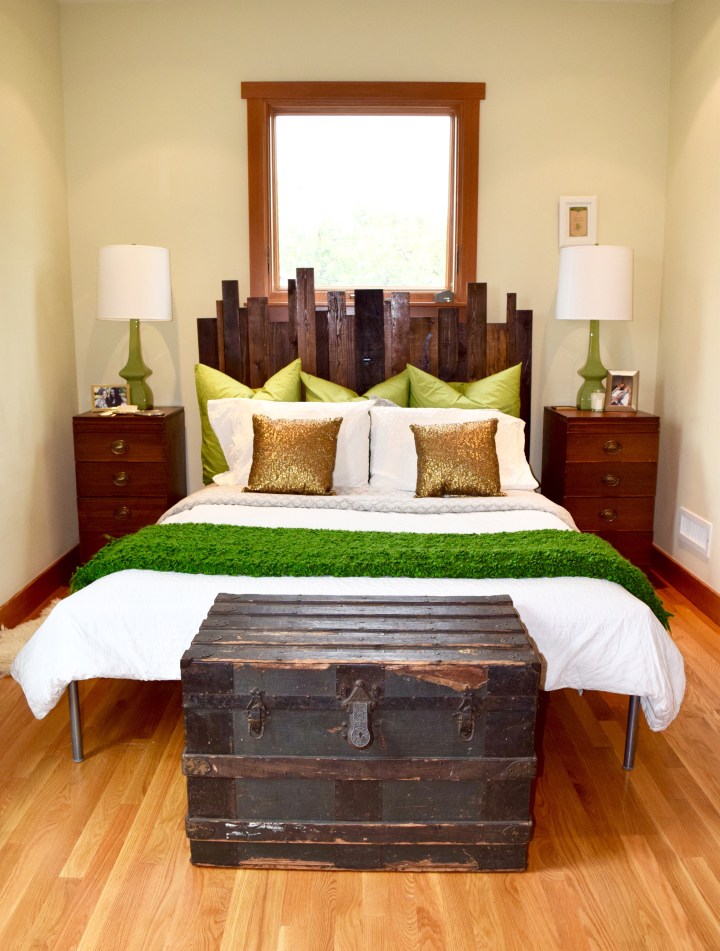
I bought the plain white bedding I have on my bed currently from IKEA when I was in college. I thought it would be light, clean, easy to wash. Little did I know that I am no good at keeping white, white. The bedding stayed on my bed in my parents house while I lived in Boston. When I got home it was covered in stains. Thanks, family. After I lived with it for a few weeks, I realized it just made me feel like a slob. I drink a lot of tea and I drink a lot of tea in bed. I also spill a lot of tea on things. Tea stains on my white bedding? You betcha. It just had to go. It didn’t look terrible. In fact, no one could actually notice it. But I new it was there. I knew that the duvet cover faced the direction it did so that little stain was down against the sheets, I knew the throw at the end of the bed was so folded to hide the chocolate stain from that ice cream sundae I ate in bed. I can hide these things from others, but not myself, and I was over it.


Gold Sequin Throw Pillows | Land of Laurel


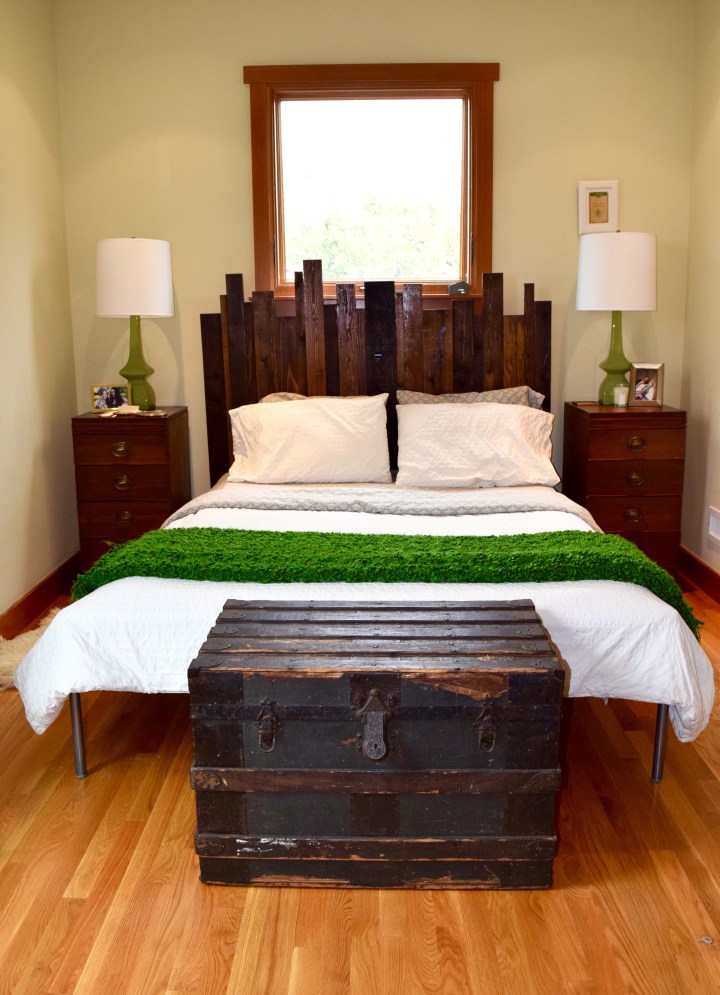
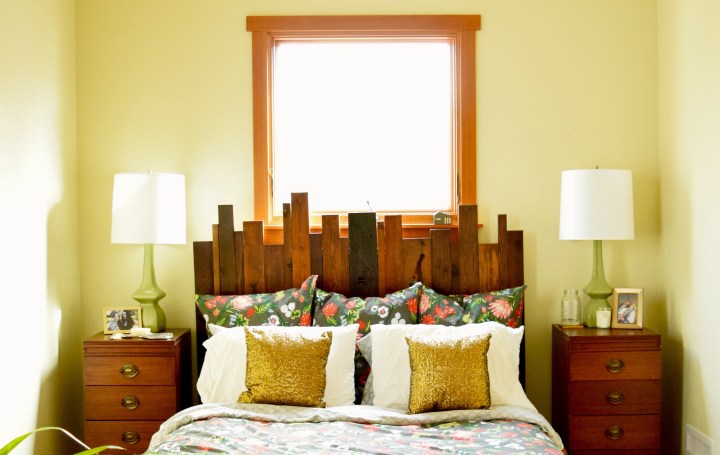
Having tried the whole white linens thing and had it fail for my personal lifestyle, I knew what my criteria for new bedding should look like. First, something dark in color. Second, something with pattern. I wanted something with green to go with my room and something that would mesh well with gold accents. In particular, I wanted something that had multiple shades of green, but incorporated a few other colors which would allow for more interest in the room. I don’t have any grey tones in my home, so it needed to be warm colors and not cool. My wooden headboard is pretty dark, so the bedding needed to be light enough to pop against the dark, wood tones. Lastly, I wanted to be excited about it! I wanted to look at my bed and think, “Wow!”


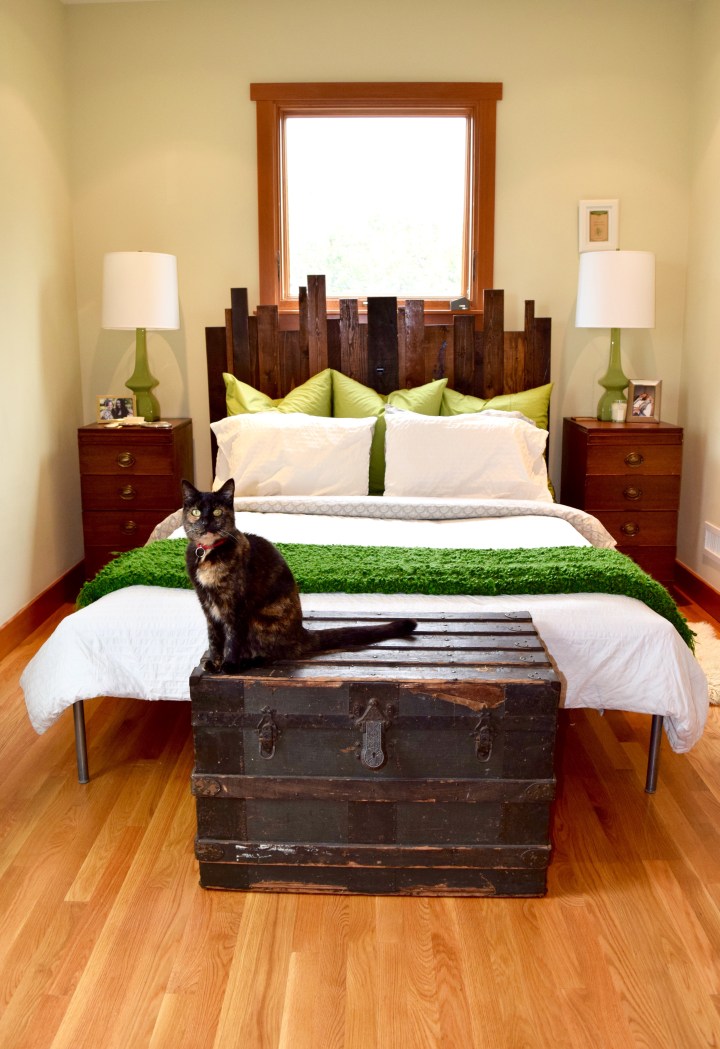
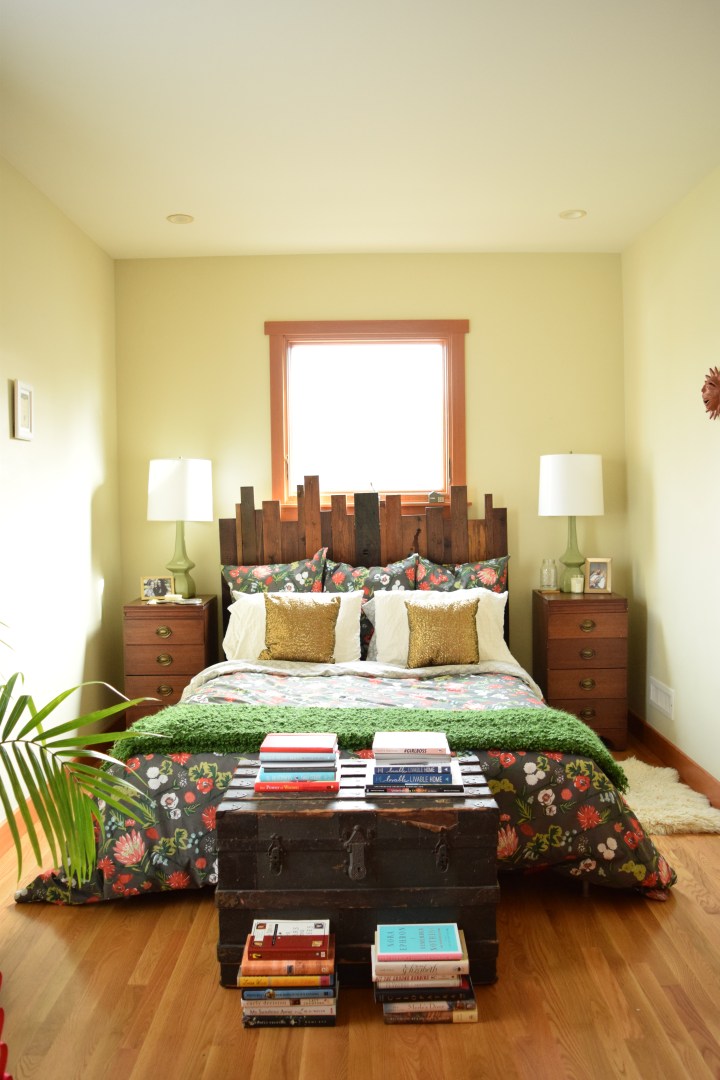
So after months of looking at the Garden Trellis bedding at West Elm, it went on sale, and I bit the bullet. I bought the duvet cover and three euro pillow cases. This bedding just fits all my categories. Dark enough to hide a tiny tea stain, but light enough to pop against my headboard. Colorful! The bedding uses three shades of green, so pretty much anything green I already had would it go with it. Plus, the bedding has liberal dashes of two different reds (my absolute favorite color!), bits of baby blue, and splashes of white. This allows me to branch out from my palette of greens with a good direction. I always recommend finding something to set the tone of a room — a painting, a scarf, bedding, a throw pillow– anything that allows you to pull colors from it and use it as a basis of color design. This bedding is my basis of design for this room. It’s exciting and fun and encourages me to bring in splashes of other colors. It’s red and green and doesn’t scream “Christmas!” that in and of itself is a small miracle! This bedding is backed by a really warm neutral tone that falls somewhere in between grey and brown. It might lean slightly more grey, but just barely. It is basically perfect and checked every item off my list. Plus, I kind of love the floral! It’s more feminine than I would normally go, but it’s kind of a spunky feminine with a sassy flair. It’s not your mother’s floral.


Garden Trellis Bedding | Land of Laurel


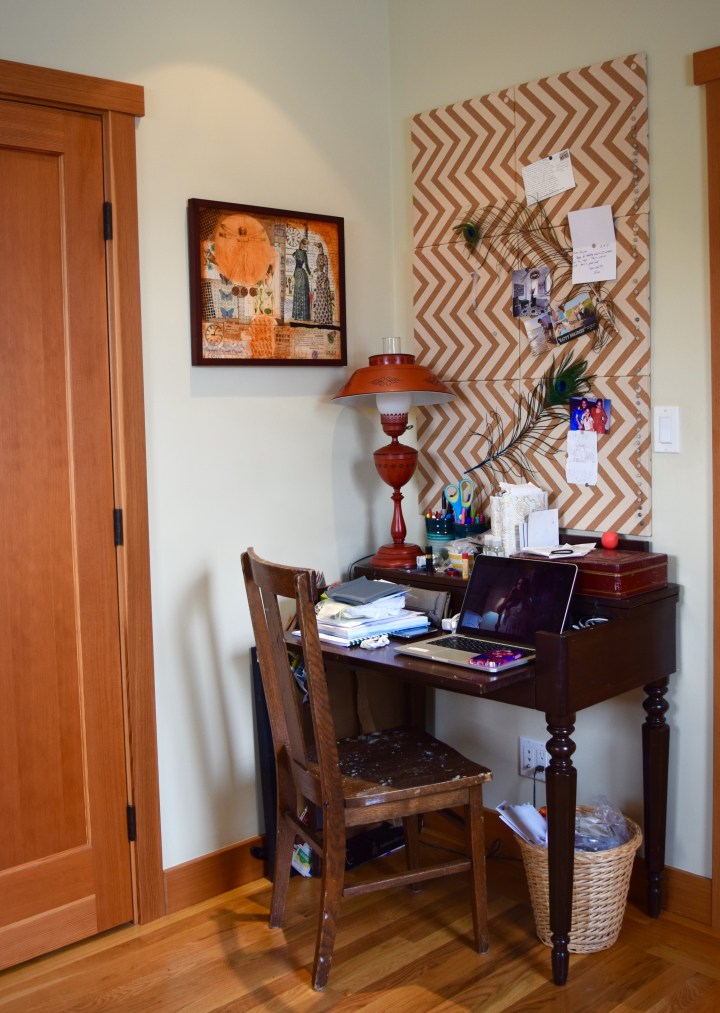
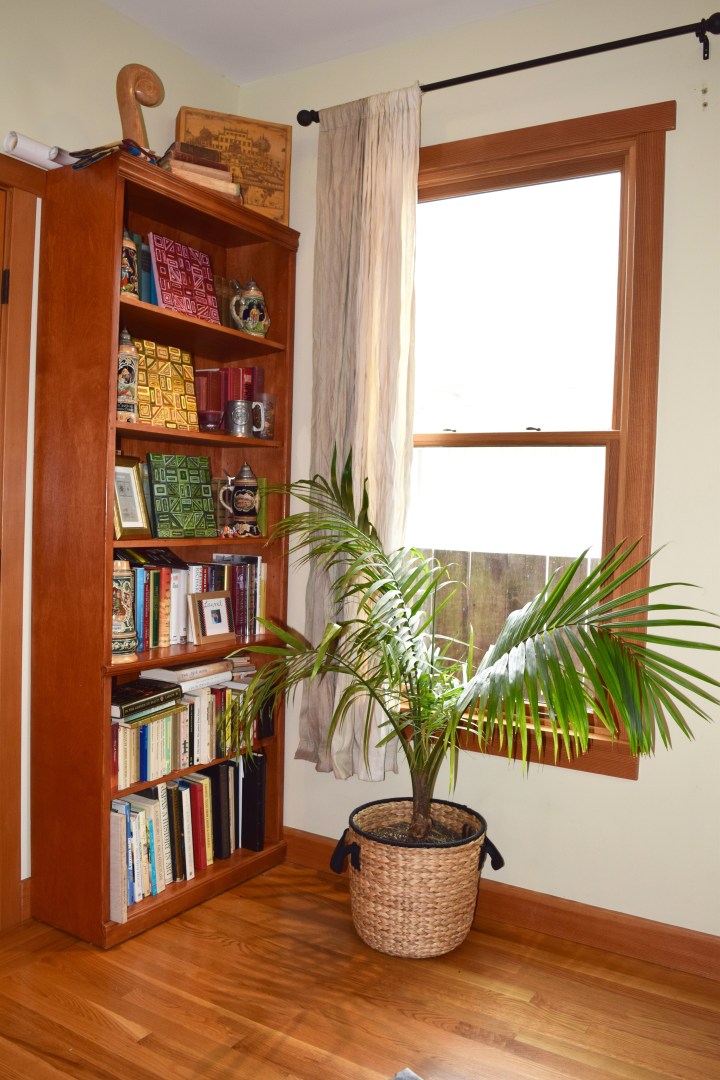
Isn’t it just smashing? I absolutely love it. I adore the splashes of red. I makes me what to incorporate more reds in the room. Yay! Now, I still need to get on and hang some real art on these walls and find some storage for my books, but It finally feels like I’m getting somewhere! Like this room is actually going places. Places I want to go! Did it take me six months? Yes. But who is counting? It’s the destination, not the journey right?


New Bedding | Land of Laurel


One other thing I did that was a little crazy? I bought the duvet cover in a king size. My bed is a queen. They still had queen size in stock when I ordered, but I decided to try something a little insane. My old white duvet didn’t cover the metal legs of the bed. Not that they were terrible or anything, but I wanted something longer. Something that would not only cover the metal legs of the bed frame I’m not crazy about. Plus, since my room is small, I take full advantage of that under-bed space for piles of random, unorganized crap storage. To take the photo above I had to move some of my things out from under the bed so it looked clean. In reality, there are things down there I don’t want to have to stuff into my closet every time someone comes to visit. So I did the unthinkable. I bought a king sized duvet for my queen bed. Which meant I also had to buy a new comforter. Oops. Look how it turned out, though! It’s perfect. It just barely touches the floor. It looks great. It hides all the things I have stored beneath the bed. You don’t even know they’re under there! It’s really fantastic. If you have similar under-bed storage issues, I highly recommend giving upsizing your comforter a try.


Garden Trellis Bedding | Land of Laurel


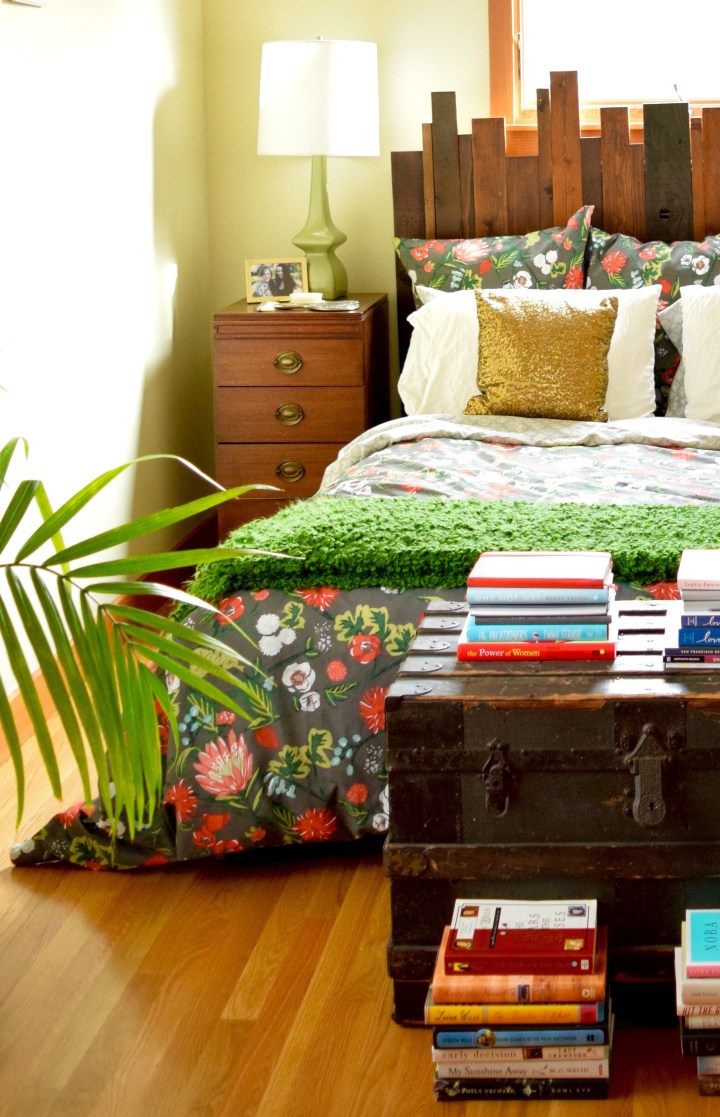
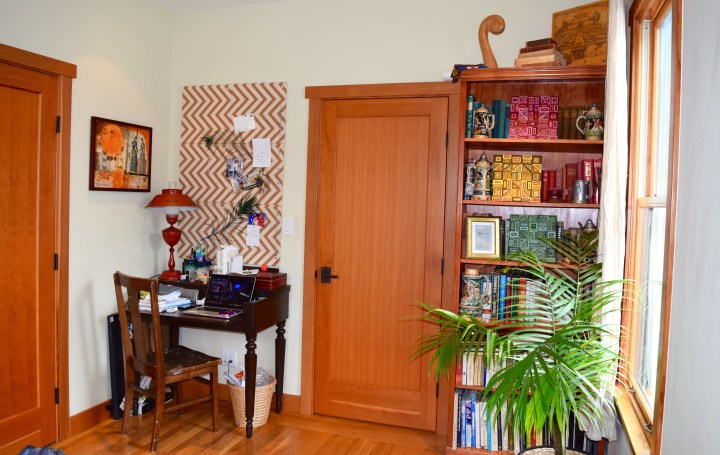
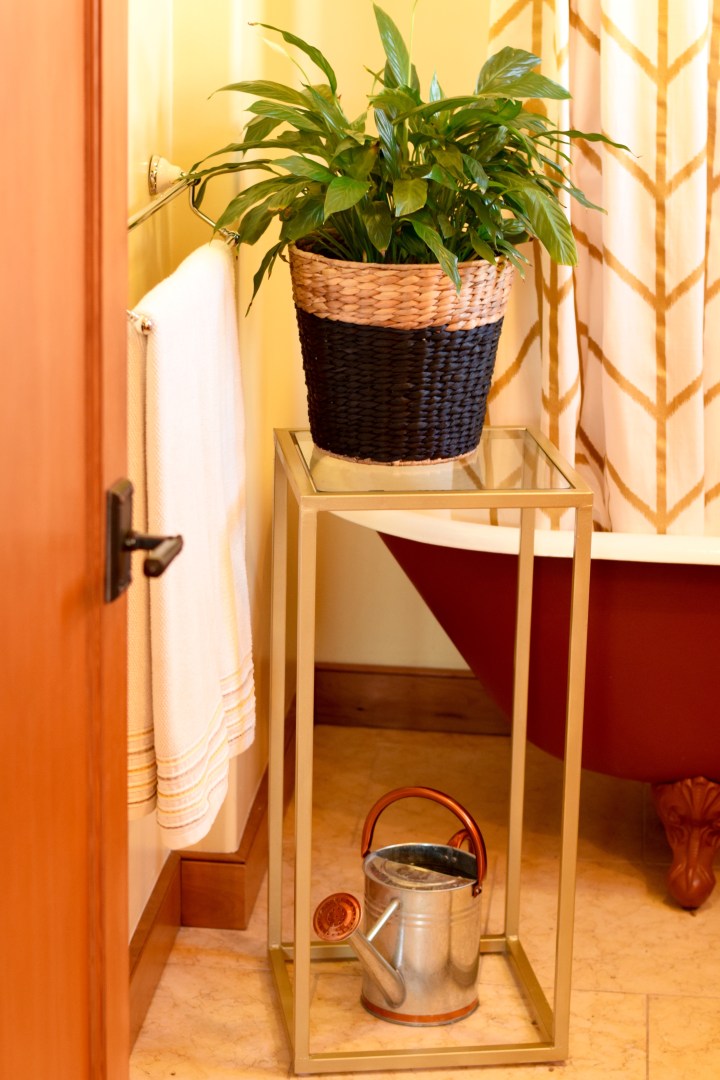
My room is starting to blossom! It’s making me excited and happy. This bedding is kicking my butt into gear. I’ve been brainstorming ideas on how to transform my room into a colorful garden oasis. The solution? Way more plants! I love how my parlor palm is sneaking its way into that shot above. Very jungle-y. My constant issue with book storage is, of course, still in the back of my mind. But, I’ve already made progress on #OperationNoMoreDecorativeLamps. Can’t wait to show you how that’s looking! Until then I’ll just keep staring at my bed like a love sick puppy, ok? Adding a little bit of flower power has totally spiced up this bedroom.


Perfect Porridge

Who out there eats the exact same thing for breakfast nearly every morning? Show of hands? I don’t know about you, but both of my hands are high in the sky. What do I eat? Only the yummiest, healthiest, delicious-ist porridge there was! Steel cut oatmeal.


Steel Cut Oats | Land of Laurel


Each morning, I wake up, put on the tea kettle, and bring a pot of milk to boil. Then I add my oats and let them cook while I get ready. When I’m completely ready to go, the oats are done! It’s fantastic timing really.


Why steel-cut oats as opposed to rolled oats? Well, I read somewhere that they were dramatically better for you and less processed. While this article confirms the latter, I’ve yet to see anything else supporting the former. In fact, this one states that they’re pretty much identical in nutritional and environmental impacts. Though steel-cut may have more fiber according to these guys. So really, who knows? What pretty much everyone can confirm though is that oatmeal is pretty dang good for you. So eat it. There.


I used to buy these steel-cut oats at Trader Joes before I started shopping in Berkeley Bowl’s bulk foods section where they are so much less expensive. Sometimes I will pick up the McCann’s tin at Trader Joes though, simply because I adore the can they come in. I’ve used several to house plants over the years. I’m a sucker for a pretty tin.


I stick to steel cut oats though because of their longer cook time. I know, sounds crazy, right? But really, it’s less time for me in the kitchen. How is that possible? Well when something needs to come to a boil, have grain added, and cook for a while longer and all of that happens in fifteen minutes? You have to be in the kitchen over the stove for that entire fifteen minutes. Right now, I wait for my milk to boil and then add my oats an leave. It’s a five minute process. Making my thirty-five oatmeal takes me less time than fifteen-minute oatmeal. Less time than frying a couple eggs. It sounds crazy, but it’s the truth. So before you judge steel cut oats on their long cook time, give it a try. It might just save you time.


I add chia seeds on top of mine for a little extra crunch and a banana for sweetness. That way I don’t add any sugar to my breakfast and get a little fruit too. If you do feel like you need a little honey in your life, a teaspoon will make this oatmeal completely delish.


Chia Seeds and Banana on Steel Cut Oats | Land of Laurel


Steel Cut Oats for One


Ingredients:

1/2 Cup Almond Milk

3 Tablespoons Steel Cut Oats

1/2 Teaspoon Cinnamon

1/4 Teaspoon Cloves

Dash of salt

1 Tablespoon Chia Seeds

1/2 Banana


First put your milk in a small pot over medium-high heat on the stove. Add your dash of salt. When the milk first begins to steam and forms tiny bubbles along the edges of the pan, add the steel cut oats, cinnamon, and cloves. Stir together and turn heat down to a simmer. Stir occasionally. Let cook for approximately twenty-five minutes. Oatmeal and milk should combine into a porridge. Remove from heat and add chia seeds and banana. Eat!


Do you have oatmeal every morning for breakfast? Love it? Hate it?

Bedding Basics

So when we left my bedroom a few days ago, we were at not terrible, but could use some improvement, no? The room was slowly climbing its way up the meh scale and I was fighting tooth and claw to bring it down off that scale and on to the glam/fabulous/happy/beautiful scale. The scale so exciting I couldn’t even pick an adjective. That scale. That’s the scale I wanted my bedroom on. I wanted to walk in my room and exclaim, “Oh my gosh! It’s so pretty/beautiful/fun/happy/ecstatic/glam/gold/colorful/rainbowsandunicorns!”


But before I get to that point, I have a little work cut out for me. Which, you know, I kind of love. So, whatever. Bring it!


This is where I was at when we left off. Sad, sad bedding, “decorative” lamps, my lovely trunk, my homemade wooden headboard, and failed experiments in hanging art from nails left over from the room’s previous resident. The whole thing was basically shouting, “Help us! Save us! Floop is a mad man! Help us! Save us! Floop is a mad man!” Except replace “Floop” with “Laurel.” And I’ll give you ten bucks if you know what that referenced. Just kidding. I don’t have any money to give away to the internet. It’s Spy Kids. That gem of a movie. Antonio Banderas at his finest. Yum. Yum. Yum… I’m sorry, was I supposed to be talking about my bedroom? Wait… I think I’m still on track… 😉


Bedroom Moved In | Land of Laurel


Look at that sad, sad bed, though. So sad, right? So, so so SAD. Makes you sad, just thinking about how sad that bed is? THAT’S HOW I FEEL TOO. What makes beds less sad? And maybe — if you get it right — even makes a bed happy? You know what would make it instantly better? An adorable tortoise shell kitty cat named Malary. And euro-size pillows. Both of them together you ask? I deliver.


Malary on the Trunk | Land of Laurel


The euros are from IKEA (I have an addiction and IKEA is only 15 minutes away, somebody save me!). I love that the euros give the bed some much needed height and boost the bedding into a snazzier realm, but that granny smith apple green? Nah uh. Not happening. I hate it! It’s similar in color to the lamps though, so I don’t think it looks terrible, I just want something in the bedding to coordinate with it too. For now though, they were on super-sale and it works. It’s a small change from the picture above, but it adds a lot, in my opinion. I’m all about the tiny tweaks!


The euros are IKEA’s down version and my goodness did they stink when I first bought them! Like a gross stink that smelled like dust and dead things and really, really old people and a non mildewy mildew. I washed them, dried them, and then hung them outside to get some sun and fresh air for a week, twice. Yes, that’s right, I washed them, dried them, and hung them outside for a week a second time. So basically I bought these pillows and then waited two and a half weeks before throwing them onto my bed. That is a form of torture for me. Having something so close, yet so stinky far. Plus euros are so soft to lean against, they make reading in bed ever so lovely!


If you don’t have euros (I’m talking to you, every single male out there), go buy some. Maybe not from IKEA, but buy some nice down euros because they make your bed look like it put on pants this morning. Which is good in the long run, since people are usually a bit weirded out by those who run around all day without any pants on. I mean, seriously, you do not want your bed to be that person inanimate object.


See what the cat does for the bed in the picture above though? Instantly adorable! Malary loves modeling for me, mice toys, and that bed. And the trunk too. It’s a good perch from which she can sit and stare at me. Not that she doesn’t already have about half a million places to sit while staring at things….


Malary at the Window | Land of Laurel


Such a fluffy kitty! I love her like the child I don’t plan on having for another ten years (Did you see that mom? Ten years! Just hold your horses, okay?). Moving on from my gorgeous fifteen year old cat, that I am mildly obsessed with and cuddle & spoon with all night long…


My room needs a bit more help in the bedding department. I used to buy bedding for model homes for a living so this is a concern I am quite accustomed to. The bedding can’t just be anything, though. It needs excitement and personality. You know what gives a space instant personality? Throw pillows, that’s what! Glorious, fantastic throw pillows. And guess what? Throw pillows are easy to find. Yay!


While strolling through Target — desperately attempting to not buy anything other than the socks I came for (yeah right, like that’s ever happened in the history of Target) —  I stumbled upon these gold sequin throw pillows and just about died! They’re gold! And sequined! Everything my bedazzling-obsessed thirteen year old self wanted in life! Plus, since I’m going for the gold and all, I knew they were basically required to come home with me. I bought only one at first (stupidly!), and went back the next week for another because the first was so lonely! Now they are sitting my bed, a pair of gorgeous twins, jazzing things up, and giving me the good ole “come hither” look that fits in just right in a bedroom. 😉 I always was a sucker for sequins!


Gold Sequin Throw Pillows | Land of Laurel


Doesn’t that elevate the space so much more? It’s all, “Helllooo! The party has arrived!” and I’m over here like, “I love you, gold sequin pillows! Stay with me for eternity! Never ever leave! Marry me and we can have gold, sequined babies!” We may or may not be having an affair. I may or may not want it to last forever.


The throw pillows make this bedding almost okay. But who wants to stop at “almost okay”? Not me! It is time for new bedding!!!! So desperately time. Luckily, my new duvet and euro covers came in the mail! They’re here and I’m going to tell you all the reasons I love them even more than the throw pillows (I’m such a cheater!) later next week. It’s so fantastically mind-blowingly beautiful. Did I mention I love it? I mean, there are still many things to do, but I have some good changes coming up. Like lamps that actually turn on. That would be nice, I think, yes?

Building a Bedroom

When you live with roommates your bedroom is an all-purpose everything space. It’s the room where you sleep, of course, but it’s also your (private) living space, your office, your studio, your library, your everything. It’s the one room where you can escape and be alone. Not that it’s something you need frequently, but if you’re anything like me, it’s just nice– upon occasion– to escape from everyone else. But also, sometimes you have to finish that email to your boss and your roommate is watching some sporting event on TV and throwing popcorn at you. And you need to get out of there. Sometimes that happens too! Hypothetically, of course! 😉


Regardless, one of the most difficult design challenges is a multi-purpose bedroom. And although I’ve talked about how my big bathroom and it’s lovely clawfoot tub sold me on this house, my bedroom was on the opposite end of the spectrum.


My bedroom is definitely on the smaller side. It’s much smaller than my childhood bedroom and pretty much every other bedroom I’ve ever had. The room comes in at about 9′ by 11′ which is, by no means, tiny. It only becomes slightly hard to work with when you have as many books as I do (ALL of the books!). Before I first moved in, I walked through the house with the boys and took a bunch of photos with my phone. I was looking at this empty slate:


First Look at the Bedroom | Land of Laurel


This iPhone shot was of the first thing you saw when you walked into what is now my room. My iPhone decided to make the walls a terrible yellow color in this picture when they are really painted a soft, celery green (my phone is a terrible artist, truly, it has no idea what it’s doing). The mattress on the floor was my roommate’s and he planned on getting rid of it. I was actually glad it was there, because it allowed me to get some perspective on how my own bed would fit into the room. You’ll see there is only about two feet on either side of the mattress. The mattress takes up about three-fifths to two-thirds of the length of the room. So just over the majority of it.

When you turn around and faced the direction you just came from you saw the door to the closet on the left and the door to the rest of the house on the right. The door into  the room opens to a mini-hallway, directly opposite to the bathroom door, the hall then opens up four feet later into the kitchen. It’s a perfect configuration, because you cannot see into my room or into the bathroom unless you are coming down the mini-hallway. And since the only things opening off the hallway are my bedroom, my bathroom, and the hall closet (which I’ve completely commandeered as my own), I can leave all the doors open and still have privacy. Being that Malary insists on having full access to wherever I am at all times, I pretty much always leave those doors wide open.


Bedroom at Move In | Land of Laurel


If you then turned once again, you got the same door to the rest of the house and the view out the second window in this room… which is of a ladder. Time for curtains!


View Out the Window | Land of Laurel


Now, this room has only one shortcoming: it’s size. There are so many great things about it, I didn’t even care about that tiny issue (hahahhahaha so pun-ny!). The closet is huge and stretches back along the length of the room, holding all of my clothes so I don’t even need a dresser. And thank goodness for that, since there is no way I could fit a dresser into this room without losing the bookshelf. And #priorities, because that bookshelf is all I love in life. The house has wonderful wood floors and craftsman-style trim. The woodwork in the house is just gorgeous. I believe it’s fir, though I’m not positive. So many great things!


After I looked over my pictures and told the guys I’d move in, I immediately started thinking about how I’d fit my things into the space. For instance, unless I want my queen sized bed pushed up against a wall (something I abhor!), the bed would need to be on the wall beneath the high window, directly across from the entry door to the bedroom. Not ideal, but not a tragedy. My nightstands would have to be tiny to fit into the remaining space. What about the rest of my things? I had to place a desk and a bookshelf into the room as well. Lucky for me, it ended up being a perfect fit!


I moved in with the bed I’ve had since I was twelve years old. It’s from IKEA and I thought it was so amazing when I was in middle school… now I kind of hate it, which is why I built a wooden headboard for it. Now, you don’t even know the IKEA bed frame exists and I kind of love it. But then again, I might be getting a little bored of it… I have ideas, people, and they won’t go away! Anyways, this bed, plus old nightstands on short-term loan from my parents (gah! They already want them back!), plus my new trunk created this view when I walked into my room. Helloooo bedroom, may I sleep here tonight?


Bedroom Moved In | Land of Laurel


It’s pretty decent, okay looking. Far from terrible you might even say, if you were feeling generous. The nightstands are a bit too tall for the bed (unless I add a boxspring). But since I need to return the them to my parents, I’m on the hunt for new ones anyways. The bedding is boring at best. But look at that lovely patina-ed trunk! I love him so much! Currently, he is still empty, but that will change just as soon as I get a chance to actually organize some of my things and stop getting sick every two weeks. Give me a break winter!!! There are some nasty colds going around my office. I get paranoid about it now, ever since I got obsessed with Fear the Walking Dead earlier this year. Help!


My lamps I got for free while at my old job, they don’t actually work… yes I am the person with “decorative” lamps. That’s why they were free! I have big plans on re-wiring them. I also have big plans to replace them with something else and then use these elsewhere. Regardless of what I do, I have BIG plans! I do like the shape of these lamps though, it’s fun and different. Plus, I was looking for lamps online for a project at work the other day and I found these exact guys! They are Robert Abbey and I found them on on the Lamps Plus website retailing for about $250. I’d link to it, but I couldn’t find them again. Maybe they’ve since been discontinued? Pretty sweet deal considering I got them for free! In fact, I’m thinking about contacting the manufacturer and seeing if they have a warranty. The only piece that seems to be an issue is the dimmer. I can get lightbulbs to work for just a second, then they go out. So close! Dealing with these is definitely on my to-do list. Ignore the picture frame on the wall. It’s for experimental purposes on an existing nail left over from the previous resident. I need to hang my actual art still… along with about ten billion other things.


So that’s the view, the pretty view, when you walk into the room. The not so pretty view? My desk of chaos and doom. It’s become a catch all for everything I drop when I come into the room. And it holds all my office supplies. And random clothes I don’t feel like putting away. It’s another furniture piece I got from my parents and is barely holding itself together. When I moved here, I found out the desk is actually not connected to itself any more. It’s literally just a bunch of pieces all balancing on each other waiting for me to place something breakable and valuable on it so it can fall to the ground and shatter everything. It’s out to get me! Vengeance for moving it. Or something equally poetic.


I hung up six square bulletin boards above the desk with grand plans to make something wonderful and thoughtful and inspiring and chock full of memories. Instead I have a big ole pile of bleh. I need to work on that! The art piece was a birthday gift from my Aunt Pat and the lamp came from the dump pile after my Oma passed away. I still haven’t decided if I love it.  It’s interesting, but it’s too big for that location. Maybe it should go live in the attic? But having task light when I’m working there is mighty helpful… Maybe something wall mounted? The desk could use some repair, organizing, a plant or two, and a ceramic animal. Oh, and a magic fairy to prevent me from every dropping random everythings on it each time I walk into the room. The desk fits this corner perfectly because you can sit at it and still have the closet door opened. Score! Somethings do work out in the end.


Desk of Doom | Land of Laurel


On the other side of the door to the room, some real magic happened. My bookshelf fit perfectly. Down to the quarter inch. Like the moving fairy came and blessed this space as the spot for storing books. It could not have been any tighter. I know design blogs have tried to convince the world that bookshelves are only supposed to have, like, three books per shelf and all, but you know what? That’s not my life. I LOVE books. I LOVE to read. I NEED ALL THE SHELVES. For books! Like they were intended to be used! In fact, some of those books are doubled up. The whole bookshelf does need some arranging. And I need to get the random pile of things to frame off the top of it, but at least I’m putting it to work! One definite item on the to-do list is getting that secured to the wall. Earthquake preparedness, y’all!


In front of it and the window sits one of my two parlor palms. The plant is pretty happy there. It looks nice and lush in real life. It makes me wiggle with happiness that I actually am able to keep something like this alive! Both the plant and the basket are from IKEA.


Very Full Bookshelf | Land of Laurel


Here’s a wider shot so you can see how both of the spaces work together on either side of the door into the room.


The Not So Nice Side | Land of Laurel


Mini-in-bedroom-office on one side, library on the other. Entry door in the middle. I need more room. Or just more closets. That would be great. Another three closets please! Can you order closets on Amazon? If only… Eek! That reminds me I need to do more Christmas shopping! Has anyone actually finished that?


So that’s the beginning and the now of my bedroom. It’s got places to go with this room. Far places. It needs to evolve further and look better. Luckily, I’ve got a plan. I always have a plan. What’s exactly is on the checklist for this room? Take a look:


The Bedroom:

  • New curtains
  • New nightstands… Gotta return the loaners from my parents and get something a bit wider.
  • New bedding  I ordered this from West Elm in all it’s colorful glory!
  • Rug? Maybe… I kind of love the sheep skin, maybe layer a sisal beneath it?
  • Straighten up and organize the desk area
  • New desk lighting? Something wall-mounted would save much needed desk space…
  • Create a fun, colorful, and inspiring bulletin board
  • Organize my bookshelf
  • Somehow fit even more book storage (Hi, my name is Laurel and I am book addict.)
  • Secure the bookshelf to the wall so I am not crushed by books in the eminent San Francisco area earthquake.
  • Integrate more plants! (Hi, my name is Laurel and I am also a house plant addict.)
  • Frame and hang art on the walls. Picture frame rail? Gallery wall? Simple, single frame?
  • Re-wire or replace lamps  I have new ones ready to go!
  • Add bench by bed? Again a big maybe…
  • Organize closet and laundry system
  • Find place to store as of yet un-framed art
  • Organize and store arts/crafts supplies better
  • Fill up the trunk in an organized and useful manner!


So! Lots to do! Lots of plans! Lots of excitement! Heck, I love a list just as much as Young House Love and mine is not even one-quarter of the length of theirs! Maybe that’s why I love it? Regardless, lots of ideas! Now, who wants to help me paint and glue things? That desk is killing me!


Do you have a to-do list for the design of your spaces? Have a bedroom that needs a little help? Have furniture on loan from family member who are now asking for it back? Ahhhh, new nightstands where in the world are you???


Perfect Pumpkin Pie

Yesterday, I shared my recipe for perfect pie crust, here is how I make my perfect pumpkin pie. Are you ready for amazing? Get pumped! I love pumpkin pie. It is the perfect fall dessert. Personally, I stock up on the good organic canned pumpkin during the fall and make pumpkin pie year round, whenever I feel like it. What can I say, I’m a rebel! I made the pie below a few years ago when I was getting excited about my crust and had yet to learn about the not so great affects of food dyes…


Pie with Leaves | Land of Laurel


So you’ve made your pie crust, you’ve rolled it out, you’re ready to go. You’re just missing the most important part. The filling! Mmm mmm mmmm mmm good! The yummy part. The creamy part. The spicy part. The #getinmybelly part. Nom nom nom.


Pie with Braided Crust | Land of Laurel


If you’re making pie from scratch for the first time, pumpkin is a good choice. It’s almost impossible to mess up. It’s easy to make with minimal clean up. And it’s absolutely, knock your socks off delicious! Time to start baking!

Here it is!


Perfect Pumpkin Pie | Land of Laurel


The Perfect Pumpkin Pie.


Ingredients:

1 pint organic whipping cream

1 can pure organic pumpkin puree

1 tsp salt

2 tsp organic cinnamon

2 tsp freshly grated organic ginger

1 tsp cloves

1/2 tsp Nutmeg

eggs

2 tsp organic pure vanilla extract

2/3 cup organic brown sugar


This is pretty much the easiest recipe. Pre-heat oven to 375. Combine all ingredients, in any order, in a medium sized bowl. Whisk until smooth. Pour into egg-glazed pie shell very carefully. Place pie in oven for approximately 45 minutes. Check it frequently by giving the pan a gentle shove. When the top is set and doesn’t jiggle like a liquid would, the pie is done! Remove immediately and leave on counter. Serve after allowing it to sit for at least 20 minutes. It’s hard to wait, especially since you know this pie isn’t going to last long!


Pumpkin Pie Mostly Gone | Land of Laurel


I like to top mine off with a little whipped cream to which I add a teaspoon of cinnamon, a teaspoon of vanilla, and a tablespoon of brown sugar. It’s even more delicious!

Perfect Pumpkin Pie | Land of Laurel


Mmm… so dang good! Now if I only had more room on my plate…


Full Pie Plate | Land of Laurel


Because in my family, Thanksgiving totally allows for multiple dessert plates.


Hanna's Dessert Plates


What about you? Do you adore pie in all its delicious forms? Did you try my Perfect Pumpkin Pie recipe? How did it turn out?

Perfect Pie Crust

I absolutely adore pie. Every aspect of it. From the making of the pie crust to the americana, homey feel to the fall atmosphere to the smell of baking pies to the beauty of pies lined up in a row ready to be served. I love pie. I love pie! Pie is glorious. I love making it, I love eating it. There is basically nothing I do not like about pie. Pie always beats cake (unless it’s a birthday, then you obviously have to have birthday cake, it’s in the name, people!). Pie is easier that cake to make look great, fantastic for all occasions (except birthdays, then you have cake, are we getting this?), and generally makes you seem like an awesome baker for something that isn’t difficult to make.

Pumpkin Pie in Staub Pan | Land of Laurel


I learned how to make pie from my father when I was very little. He learned how to make pie from cookbooks when my mother was pregnant with me. Why? My mother’s number one craving: homemade pie. Smart woman. My dad learned a great skill and my mother got to feed her cravings. A pregnant woman’s gotta eat what she wants! Growing up, my family focused mainly on pumpkin and apple pies. When I was old enough to have an opinion we branched out to decadent fudge pies. Yum. Pecan pies? Sure thing. Ice cream pies? Absolutely. Anything pie. Anytime. Anywhere. All occasions (except for birthdays, have I been clear about this?).


Apple Pie | Land of Laurel


Now if you want to learn how to make all sorts of pies I highly recommend getting yourself a good cookbook. This one by James McNair is my dad’s favorite. You can only buy it used now though… Tragic. It’s a great book! Once you find a good pie cookbook, whether it’s James McNair or one you pick up from your local bookshop, find some guinea pigs. Anyone will do as long as they will eat pie and give you feedback. Heck, they don’t even need to give you feedback, you can judge for yourself. You basically just need some people to eat a few slices of pie so you don’t eat the entire thing by yourself. Which I’m working on right now with my latest pumpkin pie…. Ooops!


Last year I asked for red pie pans for the holidays and was gifted with three beautiful pans. I love them all, they’re amazing! Each one is just a little different, which I adore. Plus, when I make pie, I rarely make fewer than than three. Heck, I’d take another pie pan too if someone was offering! I have a few glass pyrex ones as well, but I just love the red ones. They’re deeper and wider and gorgeous. A good pie pan is a fantastic thing to have, but you can bake a pie in almost anything, so don’t worry if you don’t have a special pie pan. A cake pan will work, a loaf pan will work, a casserole dish  will work. If it holds water, it will work!


Today I’m going to give you my recipe for pie crust. The essential part of the pie. A good starting point don’t you think? You have your recipe, you have your guinea pigs, now it’s time to start baking! Here is how I make my absolute favorite pie crust. It’s the perfect amount of healthy and sweet, flakey and floury. It’s fantastic. Tomorrow, I’ll share the pie filling itself.


Fudge Pie | Land of Laurel


Start with the crust. I always make crust for two or four pies and freeze the extra dough. You almost always make crust for two bottom crust pies (or one pie with top and bottom crust). It’s just how it’s done. And don’t cop out and buy store bought crust, it’s just not as good. Plus you miss all the fun part. Making crust is fun!


The ingredients: 

2-3/4 cups finely milled organic whole wheat flour ( try 1/4 cup less if your flour is not so finely milled)

1 tsp salt

2 sticks organic butter

1 cup ice water

egg


Add when appropriate:

Sweet pies-

2.5 Tbsp organic brown sugar

1 Tbsp organic cinnamon

1 tsp organic cloves

1 tsp nutmeg


Savory pies –

1 cup  grated parmesan cheese

1 tsp nutmeg

2 Tbsp rosemary or thyme


Since I am planning on pumpkin pie for my dough, I made mine with the sweet pie recipe. First get a big bowl with lots of extra room. This can get messy. Then combine the flour, salt, and spices in the bowl, mix well. Then add the sugar. Once these are well stirred together, cut the sticks of butter into slices 1/4″ thick. Add them to the mix a few add a time. Then get one of two things, a pair of forks or a handy pastry cutter like this one:


Pastry Cutter | Land of Laurel


A pastry cutter is ideal for the next part, a pair of forks will work. If want to do this entire process in a mixer, that will also work, but when you cut in the butter by hand (with the forks or pastry cutter) you get a better tasting, flakier crust. A machine just can’t duplicate this.


So! You cut in the butter. This is basically mashing the butter into the flour mix. You want there to be some pieces of butter in the mix, you don’t want to blend them to smooth. Make a rotating movement with your wrist to mash in the butter if you’re using a pastry cutter and it you’re using forks, give it everything you got, ’cause it’s probably going to hurt!


Once all the butter has been cut into the mixture, start sprinkling the ice water over it teaspoon by teaspoon. Be very careful you do not add too much water. You will most likely not need the entire cup of ice water, so go slowly. You really just need the dough to start clumping. Once the dough clumps a bit, hold off on the water and dig in with your hands. If you can shape the dough into the ball, you’re done! That’s all the water you need. Sometimes the dough at the bottom of the bowl doesn’t get quite as much moisture as the rest, but you can usually roll this into the middle of the dough ball.


Guess what? You just made pie dough! Yay! The not so great part? It’s not ready for rolling into a crust yet. Put it into the fridge for a few hours or into the freezer for twenty minutes or so. You need the dough to be cold and slightly hard to the touch before you can roll it out. Hard like the resistance of your thumb pushing into a muscle, there is some give, but it’s pretty firm to the touch.


Once your dough is cold and firm, you’re ready to roll! You will need a rolling pin, but if you don’t have a rolling pin, a wine bottle will work too. Can you tell I’ve made a pie in a dorm room before? I know all the tricks. Yes, fancy cooking tools help, but you can totally do this with or without them, it just takes a little more effort.


Sprinkle flour over a large flat surface, the bigger the better! 😉 Place your cold, firm dough in the middle of your flour. Sprinkle a bit more flour over the top. Then, using the part of your palm that meets your wrist, carefully push the ball of dough outward from the center in a gentle motion until the dough is not longer a bowl, but rather more flat and about 3/4″ to 1″ thick. Now it’s time for your rolling pin. Put about a tablespoon of flour in the middle of palm and run the rolling pin through it until it’s covered. Then place it in the center of the dough and, applying pressure, push outward. Move the pin back into the center and pull the rolling pin toward you. Continue starting from the center and rolling the dough outward, alternating the direction you are rolling. You may want to occasionally flip the dough over and sprinkle with more flour to prevent it from sticking. You will want the dough to be thin, about 1/8″ to 1/4″ thick.


When your dough is thin enough, get your pie pan and place it close to the dough. Then carefully roll the dough over the pin and use it to move the dough, centering over the pie pan. Then cut off the excess and bunch the dough edges to form your crust. Take your egg and scramble it with a fork and use a pastry brush (or your hands!) to brush over the crust edges and sides (not the bottom).

You’re done! Now time for the filling. Your pie is going to be delicious. Your crust is going to be flakey, golden brown, and wonderful, just like this guy below.

Pie Crust | Land of Laurel


Stay tuned for tomorrow when I share my recipe for the absolute best pumpkin pie ever! Do you have any pie secrets? Great recipes? Or are you the kind of person who would rather just buy a pie?


Going for the gold!

Sorry for the long absence! I got the cold of death right before Thanksgiving and barely survived! Or at least that how it felt… The cold is mostly gone though I’m still fighting off a nasty post-nasal drip. Aren’t you glad I told you? I ended up taking a few days off work and lying in bed all day and as much as I wanted to be productive here on the blog, watching re-runs of Grey’s Anatomy on Netflix was pretty much all I was capable of! And then it was Thanksgiving! My goodness how fast November went by! December should be a good month though. I have some fun things planned and have been getting crafty with my family! Get ready for colorful garlands and festive Christmas trees! Until then, let’s get back to my bathroom.


So when I first moved into this house there were a few things I immediately bought: sheets, towels, contact solution, a shower curtain. You know, the essentials. Standing in the aisle at Target that night there weren’t many options. And it was 9:30pm. And I’d spent the entire day moving boxes of books into the house and putting furniture pieces back together with nuts and bolts. I was exhausted. I grabbed the first shower curtain that looked decent to me. It was white and yellow and had a bold chevron pattern. Yellow would look good, I thought, the walls are yellow after all, and the countertop is yellow, and mustard-y yellow looks good with burgundy red. You remember my shower curtain right?


DSC_0241

Well, it’s not mustard. Or yellow. When I got home I realized that the florescent lights of Target in Emeryville had hidden a key item. The metallic sheen. My shower curtain was gold. I was upset for all of five seconds before I realized I’d made a fantastic mistake! You know the saying “There are no mistakes, only changes in plan”? It’s dead on the nose correct. My plan changed and the space is better for it.


Gold. That was what I decided. Gold accents in the bathroom. Sure, the door knobs are oil rubbed bronze and the bathroom fixtures are chrome. Whatever. Metallics are in. And this is the season of gold. Suddenly gold is everywhere! Aged brass, brushed bronze, unlaquered brass, call it what you will. The 80’s fave is trending again. Bring on the gold! Look at a design magazine, they’re starting to pop up more and more. People are embracing gold! Gold is warm! Gold is friendly! Gold is new(?)! Or at least new again… Ha!


I embraced my happy accident. I decided to go for it. And no, I’m not changing out my beautiful fixtures or painting them or anything crazy that will prevent me from getting my security deposit back. I am going for mixed metals and giving gold a big ol’ welcoming hug complete with back rubs and a gentle squeeze. Heelllloooo gold!


First things first, that black plant stand? Going for the gold! The plant stand is the perfect place for stashing my watch or my hair ties when I shower or my book when I’m getting into the bath. It’s super convenient and I love it. Err… Correction: I love the functionality of it. The actual stand itself? Hideous! I got it for free from work when we cleared out the warehouse last summer. It’s chipped and rough and not fantastic in anyway. Guess what? I changed that. I switched things up! I went for the gold! Here’s how it was looking the other day when I pulled the plant off the stand and carried the stand outside.


Land of Laurel


After looking at it’s sad, sad state, I gave the entire thing a good sanding with some rough grit sand paper. I wanted to be very careful to get off anything looking rusty and anything that looked like chipping paint. I spent quite a bit of time sanding this actually. I wanted to be sure that the gold with stick! After a good while it was looking more like this and ready for some paint.


Plant stand sanded | Land of Laurel


Once it was sanded I was especially careful to wipe the entire thing down and dust off the area it was standing in. I wanted to be sure there wasn’t a single spec of sanding dust on that stand. Spray paint is durable, but it needs to be properly applied. In a wet environment like my bathroom? Worth the extra effort to get this right. Dampness can definitely affect a coat of paint. Once I was sure the stand was good and clean, I took out my primer and went to town!Plant Stand Primed | Land of Laurel


Primer does wonders for holding on to a coat of paint, so I gave the stand a few coats. Unfortunately, painting something as thin as this is a bit wasteful. The stream of paint goes on wider than the tiny bars of steel. I needed a second coat for sure. Plus, after the first coat I looked it over and realized I’d forgotten to paint entire sides of the bars. You guys, there are so many sides on this stand! I was sitting and crouching and peering over the top at it trying to get a coat of paint on every surface! So. Many. Surfaces. No wonder geometry is so difficult!


Once I was done with the primer, I moved on to paint. Guess what color? Just kidding, you already know I went for the gold! This Rust-Oleum color is such a nice gold. It’s not too yellow-gold if you know what I mean. It’s a tad more neutral and has just the right amount of metallic sheen. It’s a very modern take on gold. I luuurve it!


Gold Paint | Land of Laurel


Ooops, there’s a surprise project hiding in the back of that photo too. It snuck it! Promise I’ll share the deets soon.


Anyways, the gold looked good! But boy did I use a lot of paint. SO. MANY. SURFACES. Did I mention that??


Plant Stand Gold! | Land of Laurel


And that’s just after the first coat! See how it’s a bit patchy in places? I needed to work to get good coverage on all. those. surfaces! So many sides, people! So many!!


I love the stand in gold! It just gleams! It’s like a gold medal platform for my plant. Just perfect. It’s great for stashing last minute items before I hop into the shower or for keeping things dry, but in reach when I take a bath. It’s pretty convenient. And now it looks great too! I stuck rubber furniture pads on the bottom of it to lift it slightly off the floor in case things get a little wet. Better safe than sorry! Hopefully that helps keep the paint looking fresh down the line!


Plant Stand Gone Gold | Land of Laurel


I turn the stand at an angle in the bathroom — following the curve of the bathtub actually — so the shower curtain slides behind it more easily.A simple, quick fix, but it feels so much nicer! I popped that plant on top and stuck my watering can beneath it. I stick the watering can in the shower when the water is getting hot, so I like to keep it close by. This seems to be the perfect spot! Plus Malary likes to sip out of it. Gotta stay hydrated right?

The stand is a bit more of a neutral gold than the slightly more yellow-y shower curtain gold, but they work fine together in my opinion and I prefer the more neutral color.

I’m slowing checking off the boxes of the to-do list in here. Closing in on having this space almost complete! Just need a bit more time. I’m excited to have one room done, done, done!

Junk in My Trunk

Oh my god, you guys, I scored something awesome!!! Definitely a #colddeadfingers moment! Mandi would be proud! I scored this beauty at a yard sale in my neighborhood and I am so excited about it!! Take a look:


Vintage Trunk


Now, I am obsessed with trunks — I have been for years and years– so when I saw this, I started wiggling like a happy puppy. Where did I get this gorgeous gentleman? A senior living community. That’s right, a seniors home! I was walking through a lovely little neighborhood in Berkeley when I started to see signs posted to every street post and wall possible. The multitude of them sparked my curiosity and I stopped to read one. “Biggest yard sale ever” it promised; “Bigger and better than last year!” it said. The senior community apparently hosted this huge sale every year! Dang! I thought, I have to check this out!


The following weekend, I drove over to the senior community with high expectations. Whomp, whomp, whomp. Maybe I got there too late, maybe not, I’ll never know, but by the time I got there around 10:00am, there was next to nothing for sale. A few books, some random furnishings, mismatched lamps. It certainly wasn’t huge, it certainly wasn’t a blow out. A wave of disappointment washed over me, but I’d driven over, so I decided to at least check out what was there. I found that beauty under a moving blanket about 10 minutes later. It was not priced, so I ran over to the lovely elderly women at the cash box. They seemed disapproving that I’d interrupted their conversation to inquire, but inquire I did! One of the women was actually the owner so she walked over to the chest with me.


“I paid $15 for this” she said.

“Oh…” I nodded.

“So I’m selling it for $15,” she explained.

“Hmmmm…” I hemmed.

“Well, how much would you pay for it?” she asked finally.

“Maybe ten, no more… yeah, seven?” I asked, hopeful, eyes bright with anticipation.

“I paid $15 for it,” she stated again.

“Well, I’d pay $10 or less,” I reiterated and started to back away, “Oh well…”

“Well what about $15?” she asked again, not getting my unwillingness to pay what she paid.

“I’d pay $10, not $15,” I explained yet again. “Maybe it’s not meant to be…” my voice trailed off dejected and I started to walk away.

“Fine! $10!” The woman called after me. I turned around, smile on my face!


And that, my friends, is how I convinced a poor old woman to sell me her old trunk for $10. Am I horrible? Eeek! She seemed fine with it in the end I swear… Usually I’m a horrible barginer so I was kind of proud of my ability to stick with my number. Plus, I really only wanted to spend $10. Trying not to spend every dime I have on DIY and design. 🙂 (it’s not working…)


I took my new best friend home and wiped him down with a damp sponge. He doesn’t need much to shine!! The trunk isn’t all that heavy, but it’s fairly well made and sturdy. And I love it’s patina! It’s fairly faded and aged, but I kind of adore it’s shabbiness! I’m still playing around with where to put it (or what to put in it!), but at the moment it’s at the foot of my bed (pictures soon I promise!). I might move it to underneath my other window, fill it with art supplies, and stack plants on top of it though… Because MORE plants is always the right answer!!


Seriously, I LOVE this trunk! And what a deal! I see these at flea markets going for anywhere from $60 – $250!! Crazy right? What a score!!! Got anything good lately? I need to keep hitting up yard sales! I’m on the hunt for some new (used) nightstands! I have pretty precise qualifications though.They can’t be more that 24″ wide and they must have a minimum of two drawers. It’s a little tough to find the perfect ones!! Ahh… patience… something so difficult for me… I guess I’ll just stare at this gorgey guy and dream.


Vintage Trunk


Yup. That’s a lot better. Feeling much more zen now!! Just look at the peeling cloth and layers of paint… happiness for design dorks like me! Almost as amazing as petting tile…